This post and photos may contain Amazon or other affiliate links. If you purchase something through any link, I may receive a small commission at no extra charge to you. Any supplies used may be given to me free of charge, however, all projects and opinions are my own.
I can’t believe it is day 14 already!! The Beach Bash runs from June 27 to July 20! The former contestants of One Month To Win It are here to rock your world with some great beach crafts!! Did you miss some of the posts?? Click here to read all of the Beach Bash posts!
Today we have Jess with Peanut to Princess!! She is here with a tutorial on how to make an adorable swimsuit cover!! Yes it is a Butterfly top!! Adorable!!
*~*~*~*~*~*~*~*~*~*~*~*~*~*
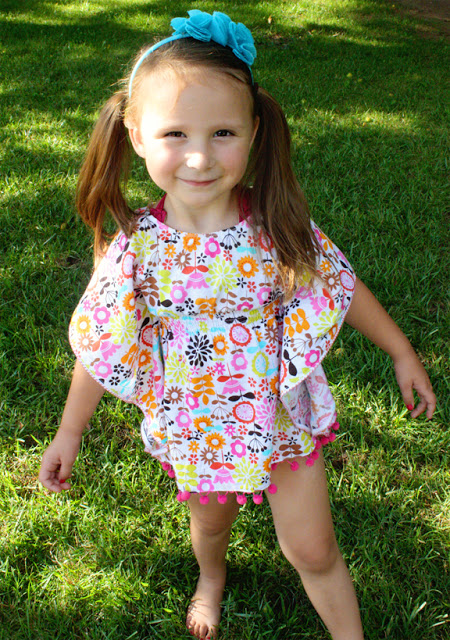
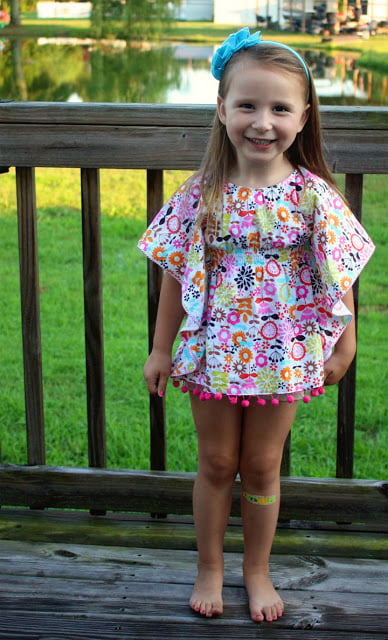
Hi everyone! I’m Jess from Peanut to Princess, and I’m so, so excited to be posting here at The Country Chic Cottage today! On my blog I enjoy sharing sewing tutorials and projects, and I had a blast coming up with this top I’m sharing with you today. Thanks so very much to Angie for inviting me to participate! I actually thought I was going to make another swimsuit to share, but that’s before my daughter ended up with 5…yes, 5! I couldn’t justify another swimsuit (though you can find a tutorial on my blog for the one hiding under my beach bash project), so I came up with something to go with it. The tutorial I have for you is the perfect beach top/dress/cover-up…the Breezy Butterfly Top (my 3.5 year old helped with the name…she said she feels like a butterfly when she wears it…see some flying pics below). It’s cool, provides some coverage, is super fun to wear (no other top I know makes my little one want to fly…lol), and can act as an adorable cover-up. What could be better? And, even better than it’s cuteness? It’s super quick and easy to make…promise! Now on with the tutorial…
Materials Needed:
– Fun fabric (about 3/4 yard for size 5ish)
– 1/4″ elastic
– elastic thread
– (optional) Pom-pom or other fun trim
– Regular sewing machine and basic supplies
Creating the Pattern:
This is probably one of the easiest patterns you will ever create in your life, and anyone can do it. You don’t really even have to have a shirt to model it by. I’ve provided a diagram below that pretty much walks you through the shape of the pattern and needed measurements, but I’ll break it down for you too 🙂 **We will be creating and cutting out this pattern on a DOUBLE FOLDED piece of fabric. Take a large piece of fabric, fold it from top to bottom to create a top fold, then fold the right side to left to create your right fold. This is how the fabric is aligned in the photo below (the folds are at the top and to the right in the picture below). If it helps you to visualize it, skip down a few pictures to see what the pattern piece looks like fully opened up.**
1. With your child’s arms straight out, measure your child from the middle of the neckline to where you want the sleeve to end. Add 1/2″ (or your preference) for hem/trim allowance. This is the measurement for the top of your pattern piece. **This is intended to be a little longer sleeve length top, as shown. Just remember, the shorter your sleeve the more narrow your top.**
2. Measure on your child (or use a well fitting garment as a guide) the length you want your top to be, add 3/4″ (or your desired hem allowance; I used pom-pom trim and it took off about 3/4″ on the bottom), and this will be your pattern length (the measurement on the fold).
3. Once you have those two measurements, double check that your width is enough for your child’s high waist plus some then plus PLENTY more for gathering (it will be gathered where shown below).
4. Cut out your rectangle with your width and length measurements as described above, then make a curve along the outside edge (NOT on the fold), as shown below. There’s no science to the curve, just make sure your width stays wide enough for the gathering and that your bottom width (will end up more narrow than the top) is still plenty wide enough to go over hips. I had no issues with this on my pattern at all. My first, on a whim, try worked perfect!
I promise that this is not an exact science! The top is so flowy and roomy that it would probably take much more effort to make a pattern that DOESN’T fit!
When unfolded, your pattern will look like this (still folded in half top to bottom – fold at top in picture below):
5. Fold your pattern piece in half widthwise again, and draw your neckline. I used a shirt I had on hand as a loose guide.
6. If you use a shirt with a button closure or a smaller opening (as I did), you will need to extend the width of your neckline, as shown with the yellow line below. I ended up cutting along that line. You always have the option of adding a button closure, but I wanted an easy elastic neckline that would just slip on.
When opened back up, your piece is completed! The folds at the top on either side of the neckline are still in tact and will be the top of the shoulders/sleeves:
When fully opened up, this is what your entire piece will look like:
Adding Trim:
1. Start with your shirt sides (I’m referring to the entire sides – front and back – like shown in the picture just above), and add your desired trim. Alternately you could hem or add bias tape to enclose the raw edge. I actually used a whipstitch piping, which is kind of unconventional, but I love how it turned out! If you are adding a trim like mine (or pom-pom, etc.)…pin your trim along one side as shown below, with the part you want showing pointed toward the inside of your top, matching up edges of fabric and trim:
2. Sew trim to the edge of your top. I used a zig-zag stitch so that I could attach the trim and finish the edges at the same time:
3. Flip your trim to the back, so that just the “decoration” part (the part you want showing) is showing on the right side. Topstitch right along the edge to lock it in place, using an 1/8″ seam allowance. Repeat for the other side of your top:
Here is what your finished sides will look like when the front and back are folded back together:
4. Now work with the bottom edges of your top (front and back), and attach your desired trim as described above. I used a different trim for the bottom…obviously 🙂
{Almost} Finishing Your Top:
To create the cute fit of your top (again, looks difficult, but is easy!), you will need to mark your sewing lines. My measurements for my size 5ish top are given below. Obviously, I marked my lines much straighter with a fabric marker and quilting ruler…but, they were too hard to see so I added these lovely yellow doodles in Picnik to show you where the lines are.
**The yellow lines below are your sewing lines and will affect the fit of your top. The diagonal lines from the bottom corners to the middle of the top are straight sewing lines. The 5 horizontal lines in the middle are shirring lines.**
1. (With top folded as it will be worn, we will be marking on the front only) Draw a diagonal line from the bottom corner of one side up to where you want the top to be gathered (I wanted mine gathered at my daughter’s high waist, but you could certainly gather lower if you wish). Draw an identical line on the other side, as shown below. The only measurement consideration you need to make here is to make sure that the area between the end of your diagonals (where the horizontal lines are below) is enough for your child’s waist measurement (really 1/2 waist measurement since we’re working with just the front) plus extra for gathering with elastic thread. For reference, my daughter’s waist is 21″, and the width of my horizontal lines is about 14.5″.
2. Between your diagonals at the top, mark 5 horizontal lines 1/4″ apart as shown.
Here are my actual marked lines, if you can even see them…
3. Sorry I didn’t take a picture, but this part is pretty straightforward! With your top wrong sides together (just as it will be worn), align all edges and pin well to prevent shifting. Starting at the bottom corner, sew along your diagonal line with a regular stitch, backstitching when you reach the end of your mark to secure. Repeat with your other side. Your front back will now be sewn together at the sides and you are ready to shir the middle!
4. Using your 5 marked lines as a guide, shir along those lines (only sewing between your already sewn diagonals) ON THE FRONT OF YOUR TOP ONLY…don’t sew your front and back together here :). I actually only shirred the front because the fit was perfect like that. If your shirt ends up a little more loose than mine, then you could always shir the back the same way. There are tons of shirring tutorials online, but it’s pretty simple. Hand wind elastic thread into your bobbin without pulling too tightly, keep regular thread in your needle, and sew a straight stitch like normal. After each line of shirring, be sure to pull your fabric taut as you sew the next line (I tried to show that below). You don’t want to keep it gathered up as you go because you’ll lose stretch and it won’t look uniform.
5. See how it’s starting to gather? The trick to make it gather really nicely? Spritz your shirring with water and steam. It will really shrink up!
6. See that cute, gathered waist? (Remember, I only gathered the front) Now you have your top {almost} finished! Just need to finish up the neckline!!
Finishing the Neckline:
1. Measure your neckline, and figure how much you want it to gather. The best way to determine is to put it on your child. If it’s not falling off their shoulders it probably doesn’t need to be gathered much. I decided to go with about 2″ less than the actual measurement. This is how long your elastic piece will need to be.
2. Cut your piece of elastic and sew ends together to make an elastic loop.
3. **Please note that I am providing the pictures below for your reference on how to match up your elastic and neckline. You will actually need to pin your elastic to the WRONG SIDE of your neckline. So sorry, but please DO WHAT I SAY, NOT WHAT I DO.** Mark your elastic loop and your neckline into fourths, match them up and pin on the WRONG SIDE of your fabric.
4. **I thought it would be too confusing to continue pictures of attaching the elastic (as I realized to late that I was attaching it incorrectly then forgot to take pictures of the correct way…I think I was frustrated at that point! LOL), so I’ll explain it. Easy peasy.**
Once your elastic is pinned to the WRONG SIDE of your neckline, attach to the neckline with a zig-zag stitch along the edge, gently stretching your elastic from the front and back as you sew to match up with your neckline.
5. Once the elastic is attached, fold it over again to the inside (to enclose the elastic), and topstitch in place. Again, be sure to gently stretch it taut as you sew so that you keep your stretch. I used a straight stitch, but a zig-zag would work great too. Then…all done! Put your Breezy Butterfly Top on your little one, and let them fly away! To the beach, to the pool, wherever…
*~*~*~*~*~*~*~*~*~*~*~*~*~*
Thanks Jess!! That is really a cute idea!!
The Beach Bash runs June 27 – July 20 — follow along with The Country Chic Cottage and don’t miss a day!! Grab a button if you want and help spread the word!!
~Thanks for stopping by!~
~Angie~
This is just fabulous! So cute and I just love the pom pom trim. I may have to steal this for my little girl.
I love this cover up! The pom pom trim is too cute.
adorable!! I will have to make one of these!!
Nice cover up, you made an easy to follow tutorial. And what a cute model! 😀
Hi, I’m trying to do this project but i’m just a little confused, can you please clarify ??
3. “Starting at the bottom corner, sew along your diagonal line with a regular stitch, backstitching when you reach the end of your mark to secure. ”
This part,am I sewing just between the 5 lines or is it the whole length to the bottom of the garment corner.
Thanks so much! I love the tutorial.
The whole length from the bottom of the garment to the corner.