I owe y’all a tutorial on how to make your own gift boxes. This original post was made completely by hand, but since then I’ve been able to make them with my Cricut!
So are y’all ready? Let’s make our own Cricut boxes that are perfect for gift giving.
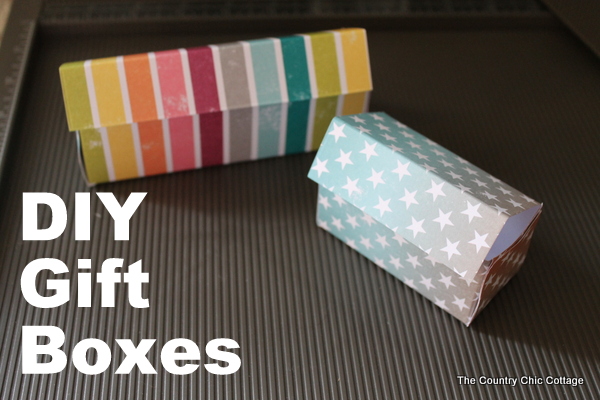
DIY Cricut Boxes for Gift Giving
These fun Cricut boxes have a lot of steps to create, but once you make your template in Cricut Design Space, you’ll be able to adjust it for different sizes as you need them. Just make sure you save your design so you can find it again!
Supplies Needed
- Cardstock (use code COUNTRY10 to get 10% off your paper order)
- Cricut Machine
- Scoring Stylus or Scoring Wheel (for Cricut Maker)
- Glue stick or double sided tape
- Ruler or other straight edge
Step 1 – Measure
Start by measuring the item that you want to place in the box. You’ll need need to add .5 inch to 1 inch larger than your item so your gift isn’t squished in the box.
Step 2 – Design
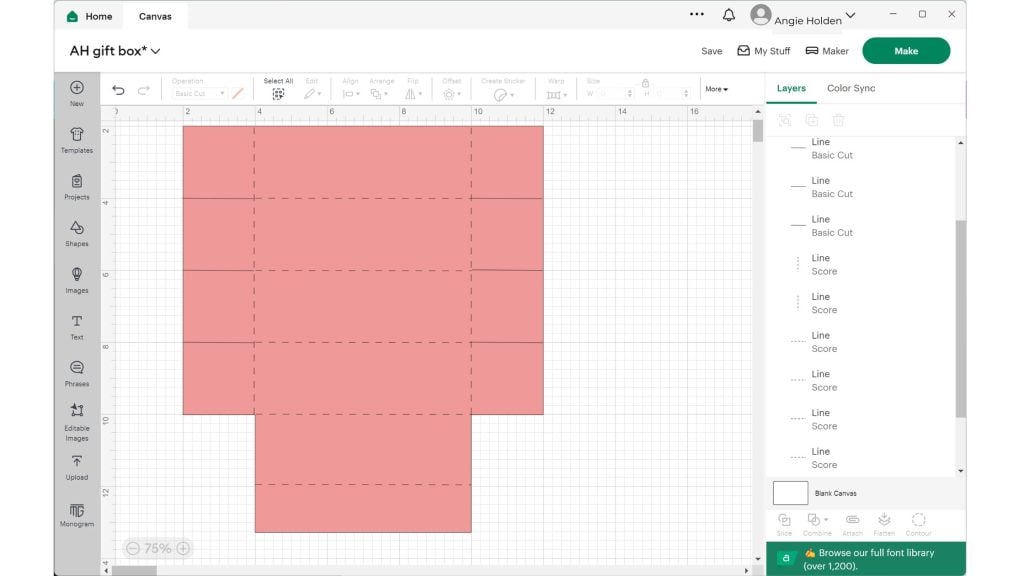
Open Cricut Design Space and draw a square at least the width of your item. Then draw a box that is 2-4″ wider than the first box and place it so the 2 boxes are centered and on top of each other.
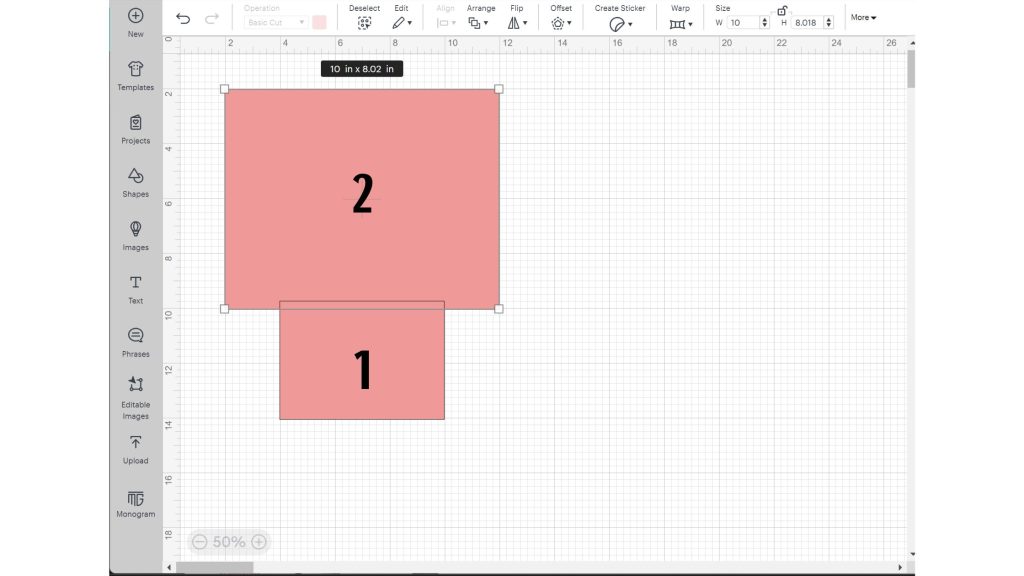
Step 3 – Add score lines
After uniting the two boxes, add score lines to create the sides. You can create a score line by picking a line from “Shapes” on the left side of the canvas. Then change the line to “Score” under the Operation menu. I placed my lines and then selected them all and used “distribute vertically” under the Align menu.
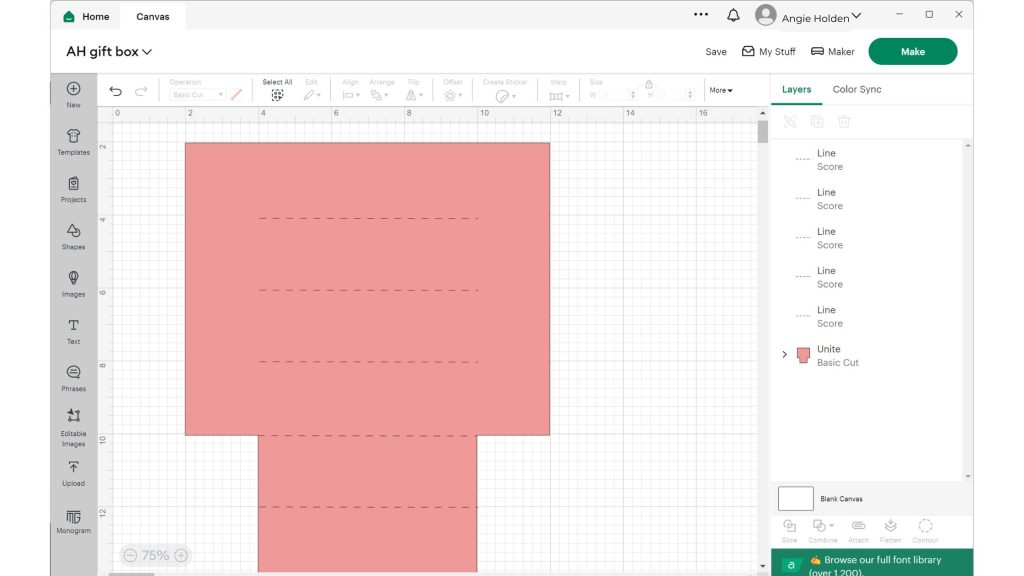
Step 4 – Add Vertical Score Lines
Now you want to add vertical score lines for your shorter sides that you’ll fold up.
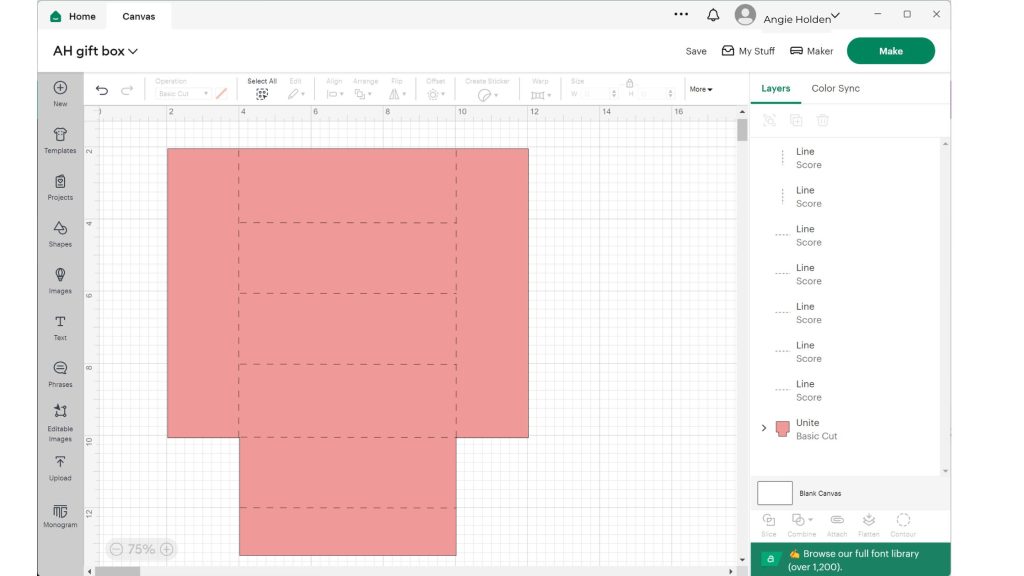
Step 5 – Add cut lines
To create the shorter sides of your Cricut box, add cut lines to continue your horizontal score lines. You do this the same way we added the score lines, just make sure you change the operation to Basic Cut instead of score.
Step 6 – Cut your Cricut box
Now you are ready to cut your box out. Place your cardstock on your mat and load your scoring stylus or scoring wheel as prompted to. Once done, you’ll have piece of cardstock that looks similar to the photo below.

Step 7 – Start folding
Using your ruler or straight edge, begin folding. I would recommend folding up your sides first.

Step 8 – Glue and gift
Then just fold up the remainder into a box and glue or tape your sides to secure. If you find that your flap is too long, you can cut it to fit in your box. That is it! You can tuck the flap in, tape it, or add a cute sticker to seal your box.
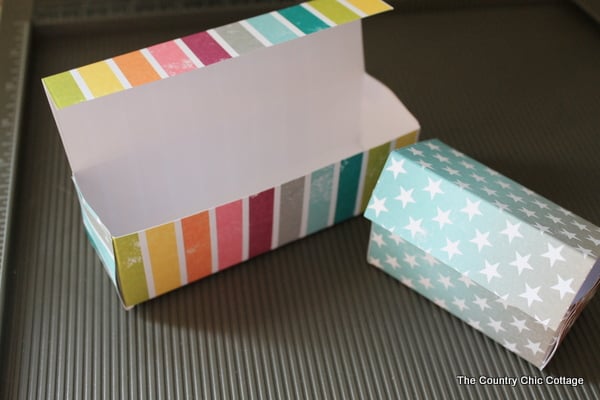
These Cricut boxes are so simple and cute! I love those types of projects!
FAQ’s for making Cricut Boxes
What type of cardstock should I use?
You can use any cardstock you’d like, but it should be on the heavier side. Just make sure you pick the right setting to make sure it cuts correctly.
Do I have to use a Cricut or other cutting machine?
No! You can use scissors and a ruler to make this without a cutting machine (but if you’re thinking of buying one, check out this guide). Use the photos above to help you get the right shape.
What if I need a box that is wider than my cutting mat?
If you have an Explore or Maker line of machines, you can try to use a 12×24 mat. If you’re fortunate enough to own a Cricut Venture, you can cut a much larger area, but you’ll need to find larger paper to use. You can probably tape some pieces of cardstock together, but I haven’t tried that. If you do, let me know in the comments!
So what are you going to use your Cricut boxes for? It’s really fun to make these, and you won’t have to scramble to find a gift box when you know you have cardstock in your crafting supplies!
More Paper Crafts
If you liked this project, here are some additional crafts you might enjoy:



Cookies or fudge would go great in these.
it is very easy ı will make this for the my president.Thanks….
This is such a great idea and so much easier than the origami boxes I was looking for! Thanks so much for sharing!
Where do you get the cardboard/paper used in this sample?
Karee — it is just heavy weight paper. You could get it at any craft store or even most big box stores.