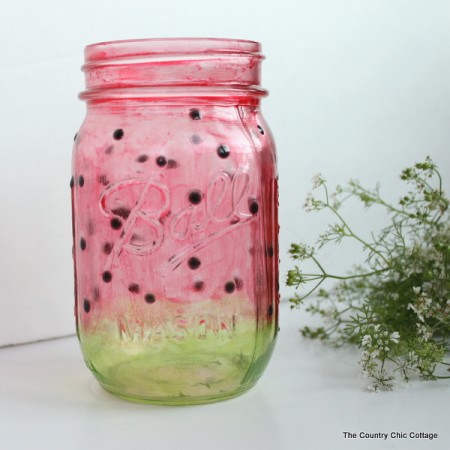
Have you ever tried painting a mason jar? Glass paint is a great way to decorate your mason jars and have fun crafting too. This tutorial shows how to make a watermelon mason jar just using glass paint.
Y’all know I can’t let a thrift store challenge pass without doing something with a mason jar, right?
I love doing mason jar makeovers because I can often find them at thrift stores near me for only 10 CENTS, which makes them very affordable crafts. Plus, there are SO many things you can do with mason jars that I love the creativity of coming up with something new!
Well, today I have a mason jar craft that takes only 10 minutes (or less!). In fact, my friend Carolina is joining me so that we can craft together! She’s making her own craft while I make mine.
So, are you ready to learn how to paint a watermelon mason jar craft today? I’m excited to show you how.
Note: If you love mason jar crafts as much as I do, check out some of my other popular projects, including my Fall Mason Jars, Mason Jar Tissue Holder, and Mason Jar Fairy Lights!
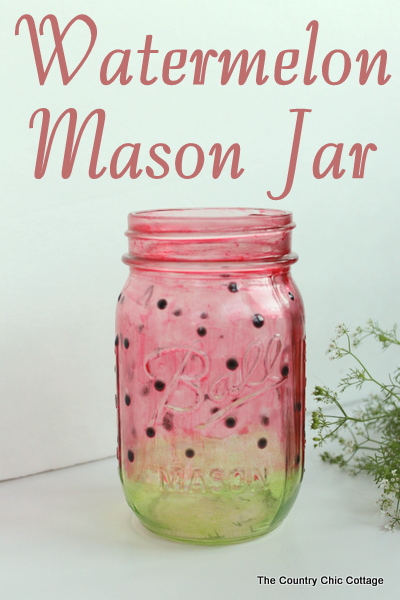
How To Paint Watermelon Mason Jars
This craft is super easy. Here’s everything you need to know, plus a video tutorial so you can see me do it live!
Supplies Needed
Gather up these simple supplies to transform your mason jars into watermelons:
- Mason jars – any size, depending on how you want to use them
- Isopropyl alcohol – to clean the mason jars
- DecoArt crystal gloss enamel glass paint – red, green, and black colors
- Cosmetic sponge – to use as your paintbrush so that the paint goes on smoothly and without streaks.
- Paint writer tips – to make the watermelon seeds without a paintbrush
DIY Video Tutorial
I am doing this one live with Carolina from 30 Minute Crafts. Join us below as we craft live together from opposite ends of the United States. Pretty cool, right?
You’ll get two crafts for the price of one as we show you how to make my watermelon mason jar and Carolina’s in 10 minutes or less.
Instructions
You know the process is simple if you have a completed project in just 10 minutes, right? Follow these step-by-step instructions.
Step 1
Clean your jar with alcohol and a cosmetic sponge. Then use a clean and dry cosmetic sponge to dry it off.
Step 2
Holding the mason jar with your hand inside it, use another cosmetic sponge to apply the red glass paint to the majority of the jar. Just like the red part of a watermelon is the bulk of the melon, you’ll use more red paint than green paint.
Note: Glass paint can look streaky if you use a paintbrush to apply it to the jar, but using a cosmetic sponge helps create an even and smooth coat of paint.
Step 3
Still holding the glass with your hand inside it, use a clean cosmetic sponge to apply the green paint to the bottom of the jar.
Step 4
If you don’t already have a writer tip screwed onto the top of the black paint, go ahead and add that.
Then add black dots on the red paint all around the jar to look like watermelon seeds.
Note: My dots started running just a little bit, so once they were partly dry, I flipped the jar over to let gravity help pull them back, so they look like I wanted them to.
That’s it! Once your paint is dry, your jars are done.
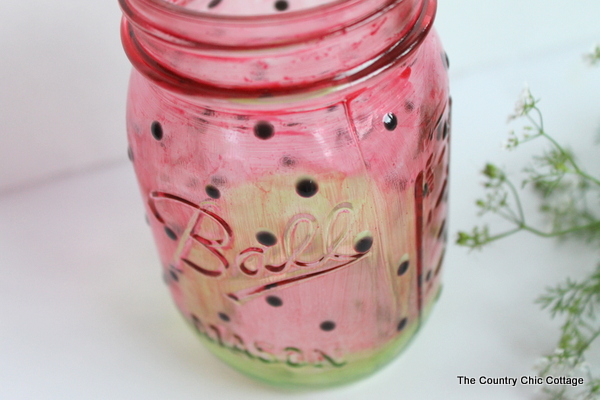
Notice how the glass paint tints the mason jar, but it’s transparent enough that you can still see through to the inside.
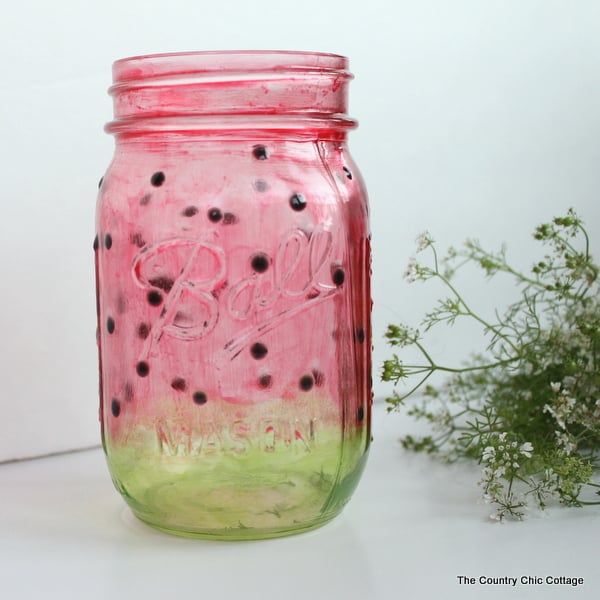
Add flowers for a vase, candles for a centerpiece, or maybe even add something to the inside as a gift for someone. This watermelon mason jar craft is a blast during the summer and can be enjoyed all year round.
Before you go, make sure to check out Carolina’s Woven Ribbon Mason Jar that she made in the video!
FAQs
I know people have questions about painting watermelon mason jars. Here are some that I see readers ask repeatedly.
Is it better to paint the inside or the outside of the jar?
I’ll paint either one, depending on the project. However, for this project, I decided to paint the outside of the jar because I think it could be a beautiful vase. If you want to put water into the jar, it’s best to paint the outside.
The glass paints are dishwasher safe if you cure the paint onto the glass, but they aren’t food safe.
How many coats of paint do I need to use?
I used two coats of the red and green paint because a single coat didn’t provide enough color. These colors dried very quickly, so by the time I was done painting the color onto the glass, I could go ahead and start adding the next coat.
The black dots take longer to dry and aren’t spread as thin, so I didn’t need to add a second coat on top of the first dot.
Can I use spray paint to make watermelon mason jars?
There is spray paint for glass that you can buy. However, I wouldn’t recommend using it for this project because you won’t get that random, natural look that you get when hand painting. Also, you may end up with too much overlap of the colors by accident.
Do I need to cure the paint on the jar?
No, you don’t need to. If you don’t, make sure to handwash the jar instead of putting it into the dishwasher. However, if you do cure the paint, you can put your jar into the dishwasher.
If you do want to cure the paint, here’s how:
- Heat your oven to 350°F.
- Bake at 350°F for 30 minutes.
- Turn the oven off but leave the glass jars in the oven until they are completely cooled.
- Allow them to cure for an additional 72 hours before washing.
More Mason Jar Crafting Inspiration
If you love this watermelon mason jar craft project and want more mason jar ideas, check out the links below!
Supplies
- Mason jar
- Isopropyl alcohol
- DecoArt gloss enamel glass paint
- Cosmetic sponges
- Paint writer tips
Instructions
- Clean your jar with alcohol. Then use a clean cosmetic sponge to dry it off.
- Use a cosmetic sponge to apply the red glass paint to the majority of the jar, starting at the top.
- Next, use a clean cosmetic sponge to apply the green paint to the bottom of the jar.
- Screw a writer's tip on top of the black paint bottle.Then add black dots on the red paint all around the jar to look like watermelon seeds.Let dry completely.
A Year of Jar Crafts

Sign up for our email list to get a FREE book with an entire year of jar crafts! 12 months, 12 crafts, tons of fun!


I’ve seen lot mason jar idea’s but this one stand out as one best we have family picnics & this be adorable on tables..Thank’s ,Cookie17
enyoyed viewing and pinned items to share on pinterest. Very nice items.. thanks for sharing
Hello, I was just watching you video and was wondering if you could tell me what the name is on those frog lids from ball. I have been trying to find them and can not seem to find them anywhere! You can e-mail me the answer @ raykristinavisser@yahoo.com
I’m trying to find the DecoArt crystal glass enamel with no luck.
What is the name of the sheer paint you’re using, please and where might I buy it? I couldn’t hear what you were saying very well.
Sure Dee! Try the Crystal Gloss Enamels from Decoart. Here is the link: http://www.decoart.com/glasspaint/gloss-enamels#transparent
Could you please send me instructions on how to do the watermelon mason ball? I couldn’t hear you and the camera was ALWAYS on your face so we could really see what you were doing. Thanks
That should be “we COULDN’T really see what you were doing.
Sure Gail! Just paint the red on first leaving a bit at the bottom. Allow to dry a few minutes. Paint the green on in the area you left. Then add on black dots with the writer. Look for Americana Crystal Gloss Enamels for that translucent look. The writer is also Americana and will come in a bottle with a writing tip and say “3D”.
Hi! I just wanted to tell you that those “watermelon seeds” look like mold on your jar….