Take your gift-wrapping skills to a new level by making DIY bows. Use this tutorial to learn how to use the Bowdabra to make gorgeous handmade bows.
Do you love giving pretty packages for the holidays? Me too!
For a long time, I would wrap gifts and use store-bought bows. The packages looked lovely, but I wanted the freedom and ability to customize my bows. Does that sound familiar to you?
If so, I’m here with a quick and easy solution to that problem. DIY handmade bows with the Bowdabra are the perfect accessory to all of your wrapped gifts.
In the past, I’ve made Make Mini Paper Bows with the Cricut, but these are full-fledged bows with ribbons and everything!
Note: If you want more gift-wrapping inspiration, check out Christmas Gift Wrap, Easy Gift Wrapping Tips and Free Printable Gift Tags, and 6 Creative Gift Wrapping Ideas You Can Copy.
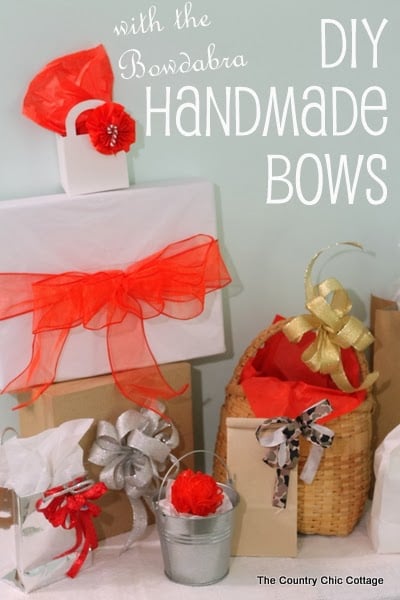
How To Use A Bowdabra To Make Handmade Bows
Making bows is so much easier than most people realize. Here’s everything you need to know – be sure to catch the video down below if you prefer to watch the process. Now let’s make some bows!
Supplies Needed
Here’s what you’ll need for this craft. I’ve even included a few handy links to help you find some items faster and more easily.
- Bowdabra Bow Maker
- Bow wire (about 20″)
- Bow of your choice
- Embellishments of your choice
Video Tutorial
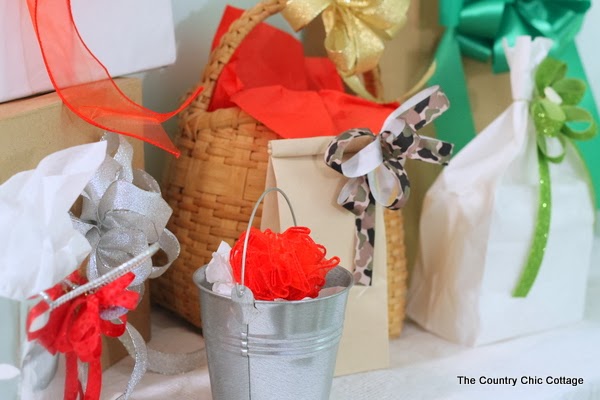
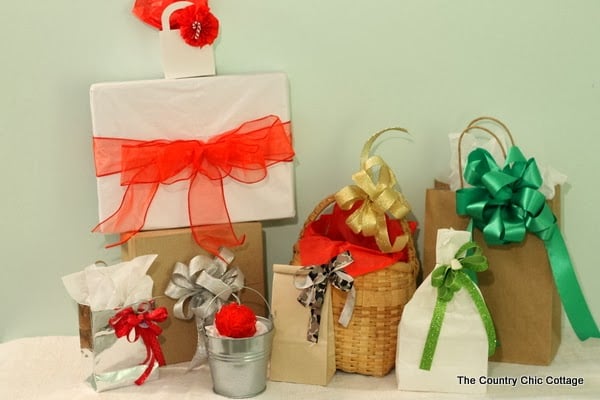
Now let’s get started with a demo of the Bowdabra and the mini Bowdabra, plus get a look at all of the handmade bows I made for these wrapped presents.
I demonstrated the bows seen here in the video, and I can’t wait to hear which is your favorite.
Handmade Bow Instructions
Can’t watch the video or missed some of the steps? Check out our step-by-step instructions to guide you through the process of how to use the Bowdabra to make homemade bows.
Step 1
First things first. We need to cut about 20″ of bow wire. Fold it in half and insert it into the bottom of the Bowdabra. This will be your first layer, so you can use the wire later to tie your bow and finish it off.
Step 2
Now begin adding your ribbon to the Bowdabra perpendicular to the way you added the wire. When you first insert it, leave a ribbon tail several inches long.
Step 3
Begin making loops with your ribbon. To complete each loop, insert the ribbon into the center of the Bowdabra.
Note: You can make loops on both sides of the Bowdabra to achieve that balanced look that bows have.
Step 4
Once you reach the point where you have enough loops for your bow, cut the ribbon (ideally, you’ll have a tail on both sides of the Bowdabra for balance).
Step 5
Now, take a separate piece of the Bowdabra (it looks a little like a ruler) and insert it on top of your ribbon. Push down to compress the ribbon in your bow.
Step 6
Next, pull both sides of the bow wire up and tie the ends to secure the middle of the bow. Then pull the bow out of the Bowdabra, hold the wire in one hand, and twist the handmade bow in the other hand.
Step 7
Add a bow embellishment to the center of the bow if you want. It just gives the bow a clean, polished look. Trim the ribbon tails.
That’s it!
Awesome right? Literally, within 15 minutes, you can make tons of handmade bows for your holiday gift-giving. I love to add personalized embellishments to my packages, so this is perfect for me.
FAQs
Here are a few questions that I see readers ask about making handmade bows. If you have a question, please check to see if I’ve already answered it below. Don’t see your question? Leave it for me in the comments!
Where can I find a Bowdabra?
You can buy the Bowdabra and accessories at most craft retailers, such as Jo-Ann Fabric and Craft Stores, Michaels, AC Moore, etc. You can always purchase a Bowdabra online.
What should I do if I forget to add the bow wire before making my bow?
Good question! I do the same thing more often than not, so I’ve had lots of practice at what to do. What I have found works the best is to lift your bow slightly (but keep it in the Bowdabra) and slide the bow wire into the Bowdabra under the bow.
Since it’s wire, it will be stiff enough to slide through. Then follow the normal bow-making process by pulling the ends of the wire up and tying them around the middle of your bow.
Does the mini Bowdabra work differently than the regular-size version?
No, it’s literally just a mini version to use for making smaller mini handmade bows! The process is the exact same (including using bow wire).
Because of the size, I don’t recommend using a very large (wide) ribbon in the mini Bowdabra. It’s just too much material, and it’s usually too heavy-looking for the size of the bow.
Can I make different styles of handmade bows with the Bowdabra?
Yes! I show off a few different styles in the video. The instruction booklet that comes with the Bowdabra gives directions on making several different types of handmade bows. There’s plenty of room for personalization and experimentation, too!
Will you be making DIY handmade bows for your packages this holiday season? Grab the Bowdabra. You’ll thank me later! You can use these bows on your holiday gifts, gifts through the rest of the year, and on any wreaths or other decor that you craft.
If you want to learn more about bow-making in general, check out How To Make Wreaths.
More Holiday Crafting Inspiration
If you love these handmade bows and want more craft ideas for the holidays, check out these ideas!

Supplies
- Bowdabra Bow Maker
- Bow wire
- Ribbon of your choice
- Embellishments of your choice
Instructions
- Cut about 20″ of bow wire then fold it in half and insert it into the bottom of the Bowdabra through the wide slits across the top of the bow maker.
- Begin adding your ribbon to the Bowdabra perpendicular to the way you added the wire, leaving a ribbon tail several inches long.
- Start making loops with your ribbon on both sides of the Bowdabra. To complete each loop, insert the ribbon into the center of the bow maker.
- Once your bow is as large as you want it to be, cut the ribbon.
- Take a separate ruler-looking piece of the Bowdabra and insert it on top of your ribbon. Push down to compress the ribbon.
- Pull up both sides of the bow wire and tie the ends to secure the middle of the bow as you pull the bow out of the Bowdabra. Hold the wire in one hand, and twist the bow in the other hand to tighten it.
- Finally, attach a bow embellishment to the center of the bow if you want to give it a finished look. Trim the bow tails, and your bow is ready to attach to a gift!


We love your bows! How fun and such a variety! Thanks for doing a great job on your Mini Bowdabra Review! We can’t wait to see who wins your giveaway, too! We are promoting your giveaway all over the place and just shared it on our blog – http://bowdabrablog.com/2013/11/18/10-bowdabra-prize-pack-giveaways-and-crafty-projects/
Have a great day!
Susie @Bowdabra
I would definitely make some bows for Christmas gifts I’m making and then make hair bows for my grandbaby!
This would be perfect for Christmas gifts!
-Erin @ DIY on the Cheap
i have never used a Bowdabra but they look handy!
I love adding bows to my cake pop holders and would probably make one for that.
Would love to make some hairbows with it.
This would be great… maybe I’ll actually be able to make a decent looking bow for once!
Wrap gifts!
Great post. I can’t wait to make some hair bows for Christmas gifts for my daughter and her friends and bows for my tree.
I will admit, I’ve been using a bowdabra for YEARS!! For flower arrangements. But I rarely think to get it out for gift bows! I would probably make some Christmas gift bows if I won!
Okay – I’ve seen this Bowdabra before, and now I’m convinced that I want one! They look so awesome!
I have never seen this Bowdabra before but I always struggle making my own for gifts. This looks like it could take tons of time off my plate and free up some more shopping time for the holidays! 🙂
I would definitely use it on gifts!
I saw seven bows and loved the variety of uses you showed. Thanks.
I struggle so badly making beautiful bows. I’m going to have to try this. Definitely! Thank you!
I would use the Bowdabra for gifts and crafts. It is hard for me to make bows now with the arthritis in my thumb.