
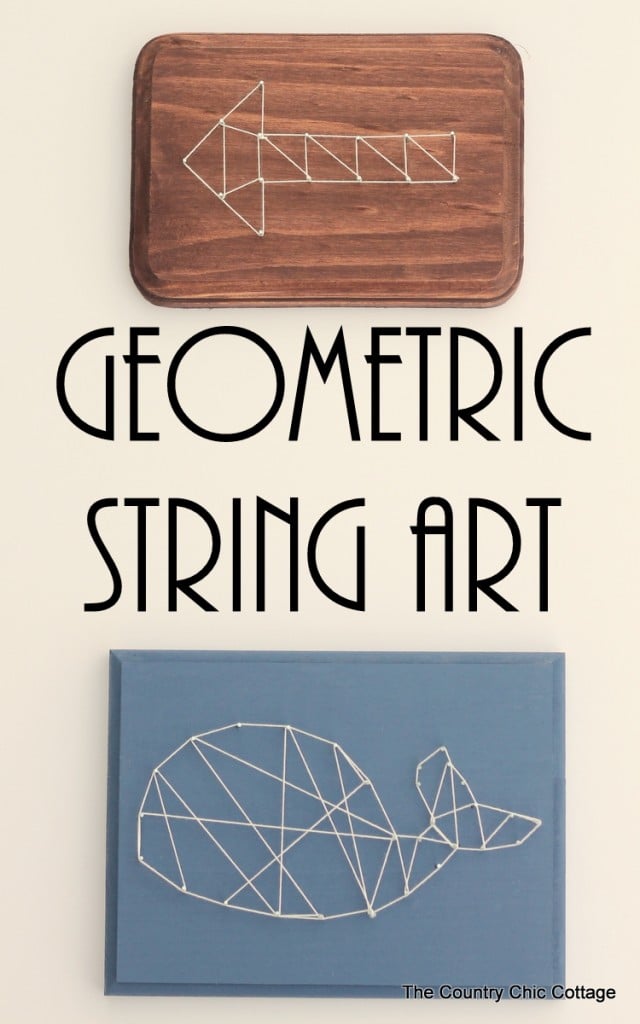
Turn any shape into geometric string art for your home! This is a super simple craft that anyone can make. You can even get older kids involved in making their own fun string art projects!
How To Make Geometric String Art
If you are new to the blog, then you may not know that I love creating string art! This is because string art is fun, doesn’t require a ton of supplies, and can be customized in so many ways!
For example, I have made String Art For Kids and even DIY Christmas String Art Ornaments!
In both cases, creating the string art was super easy and kid-friendly. So, with those projects under my crafty belt, I wanted to try my hand at geometric string art!
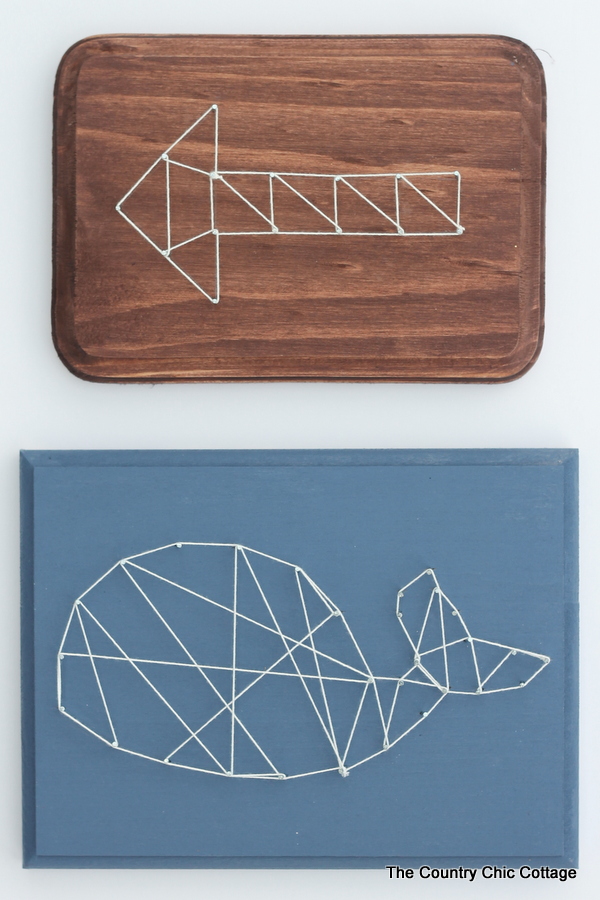
Geometric string art has a more ”elevated look” which makes it great for home decor. I picked a few simple shapes, used white string, and made some gorgeous home decor pieces. You can do the same, and I’m going to show you how in today’s tutorial!
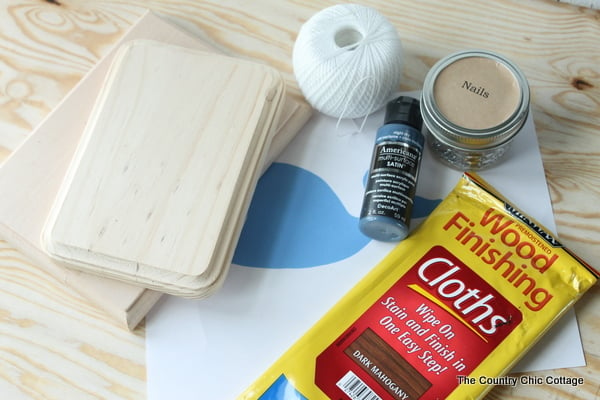
Supplies Needed To Make Geometric String Art
- Wood plaques
- String
- Nails
- Printer
- Copy Paper
- Printed shape of your choice
- Tracing paper
- Pencil
- Paint or stain
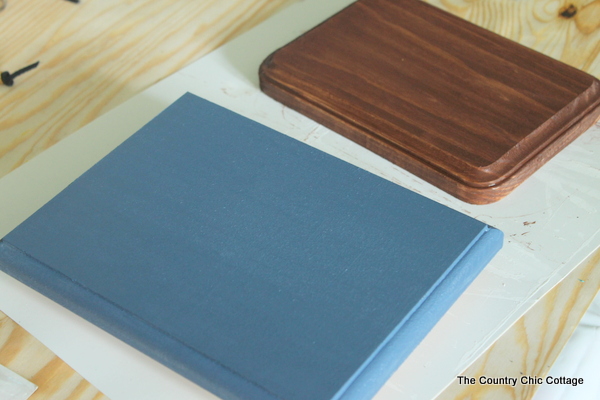
Step 1: Paint Or Stain Wood Plaque
Start by painting or staining the wood plaque of your choice. Pick colors that will go with your home decor. It may take more than one coat to get the coverage and color you desire.
Step 2: Print Image For String Art Design
Print the image that you have decided to use for your string art. You can literally print any image or even a letter from your computer (if you want to make a geometric initial).
The only thing to remember is that you want your design to be simple (not overly complicated) and you want it to fit on your wood plaque.
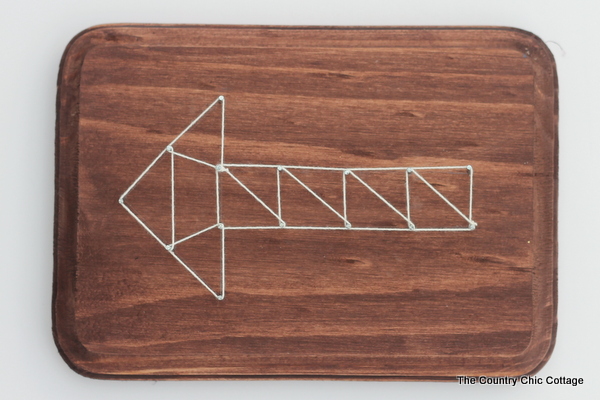
NOTE: If you Google ”Geometric String Art” you will see a lot of detailed designs. – Which is fine if that is the route you want to go. However, for this method, all you need is a simple shape (like an arrow) because we are going to be placing nails on the inside of that shape to create geometric shapes (like triangles). So, in short, don’t overthink your design, just have fun!
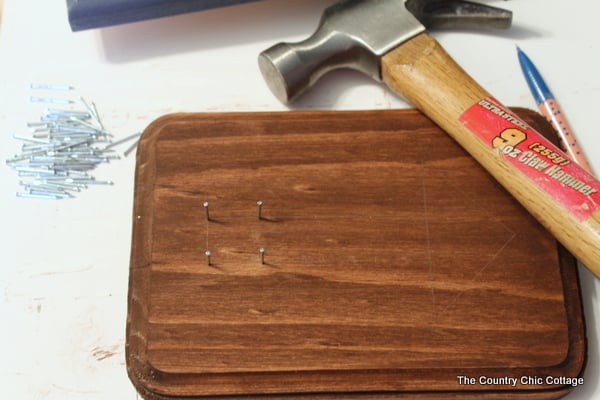
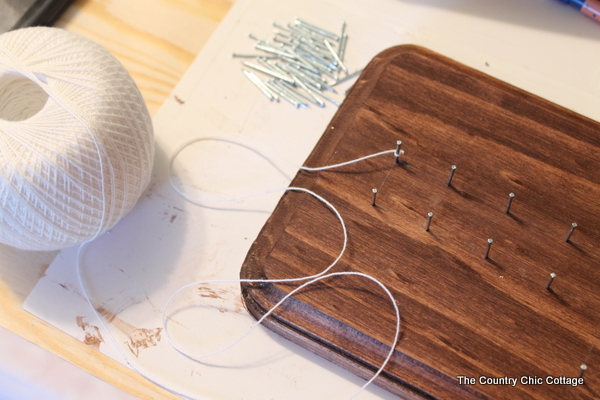
Step 3: Hammer Nails Into Your Wood Plaque
Next trace or sketch your shape onto the plaque with a pencil. Start adding nails around the edges of your shape. Hammer to where the nails are all sticking up about the same amount. Map out your nail placement before you start adding the nails. You want the placement to be approximately equal all the way around the shape.
NOTE: If you want to see another method for creating your pattern from nails, check out step 3 of my String Art For Kids blog post!
Step 4: Tie A Knot On The First Nail
Knot the string onto the first nail. I am using just plain white string but you can great creative with baker’s twine, yarn, and more.
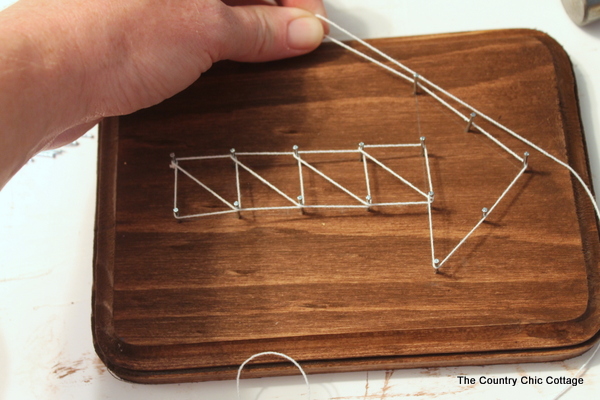
Step 5: Create Pattern With String
Start winding your string around your shape and across the shape in a geometric-like pattern. You can start over as many times as it takes. Just keep playing with it until you love your little creation. Knot off the end on the last nail to complete your project.
Hang your geometric string art in any room of your home. What shape will you add to a wood plaque?
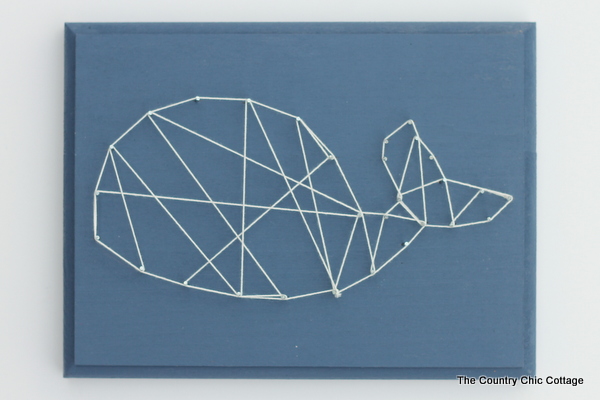
I thought a whale would be fun! Plus this proves that you can make ANY shape look geometric with this craft idea!
Grab the supplies to make this geometric string art for yourself! This is one project that literally ANYONE can make in just minutes. It is such a fun project and will look great in your home as well.
Tips and Tricks for Geometric String Art
Now that you’ve seen this geometric string art, are you ready to make your own? Here are a few tips and tricks to ensure your project goes as smoothly as possible!
- Safety First – If you have younger children who are making this project, please do the nailing for them and allow them to work on the string!
- Adjust The Size – For this project, we used a small unfished wood plaque, but you can use a wood plaque that is smaller or bigger. However, if you do change the size of this project, you may need a smaller size nail (if you go smaller) or a larger amount of nails (if you go bigger).
- Pick A Simple Design – When choosing a design for your string art, make sure you pick something that is simple and doesn’t have too much detail. You can Google ”string art designs” to get more pattern options or you can use the ideas below as a jumping-off point for your project!
- Shapes: Heart, Star
- Plants: Flower, Leaf, Cactus,
- Animals: Whale, Butterfly, Pawprint
- Food: Donut, Cupcake, Pineapple
- Objects: Rocket, Boat, Tractor
- Change Up The String – For this project, we used white string, but you could also use baker’s twine, yarn, or embroidery floss!
5 More Quick Crafts
Did you love this geometric string art and are looking for more quick crafts? Then check out the projects below!


