Here’s a quick and easy gift idea to give to teachers and students at the beginning of a new school year. Learn how to make a DIY pencil bag and help everyone feel a little more prepared for the adventures ahead.
Back to school is such a busy time of the year for families. It’s also a time that’s filled with a range of emotions, from excitement and happiness to fear and sadness.
No matter what my kids were feeling during the back-to-school season (it seemed like it was different every year), I found it helpful for all of us to do some back-to-school activities. Projects like DIY pencil bags helped calm nerves and let everyone feel more excited and prepared for the challenge of a new school year.
I’m also a teacher super fan because I know how hard they work! So, I make an effort to create small but thoughtful gifts throughout the year for my kids’ teachers. I always figure that back-to-school is the perfect excuse for a little teacher appreciation gift!
For this project, we were inspired by going back-to-school shopping. As we walked down the aisles, grabbing boxes of markers, erasers, glue sticks, and pencil cases, the thought struck me to make a simple DIY pencil bag for the kids in my daughter’s class and her teacher. Classrooms and students always need more pencils, right?
Note: If you’re looking for more back-to-school teacher gift ideas, check out our ‘The Berry Best!’ Gift Basket and Pineapple Coconut Sugar Scrub Back To School Teacher Gift.
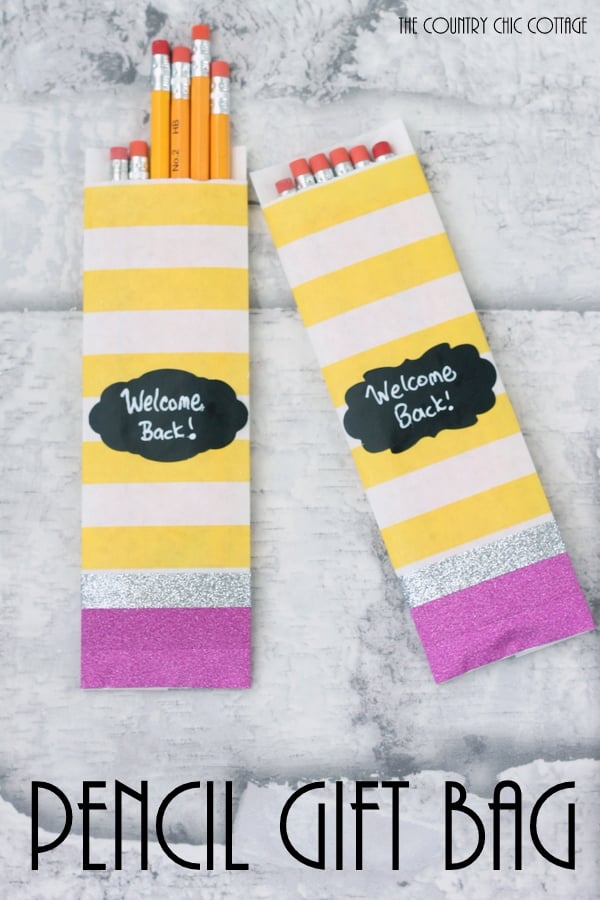
How To Make A DIY Pencil Bag
I’m ready to dive right in and start crafting! Here’s everything you need to know to make this simple project.
Supplies Needed
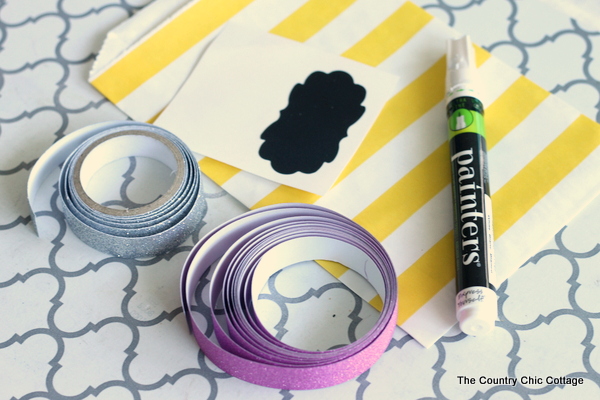
Here’s everything you’ll need to make this DIY school pencil bag! I’ve included some handy links to make finding certain items a little easier and faster.
- Yellow and white striped treat bags (mine were sent free of charge from Baker’s Party Shop)
- Pink glitter tape
- Silver glitter tape
- Chalkboard labels
- Fine tip white paint marker
Instructions
You can make a pencil bag in just a couple of minutes. This fun project is even simple enough that kids can make them (or at least help make them!).
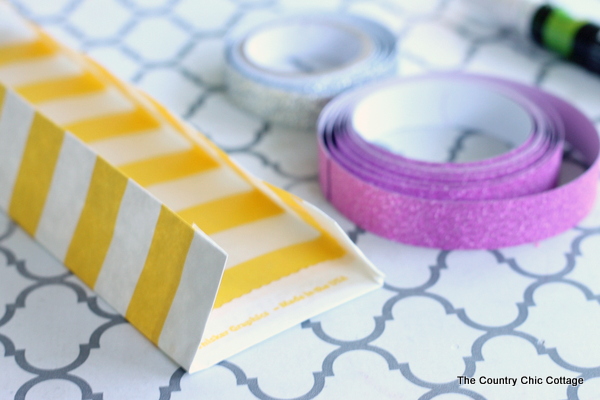
Step 1
Fold the treat bag as shown in the image below.
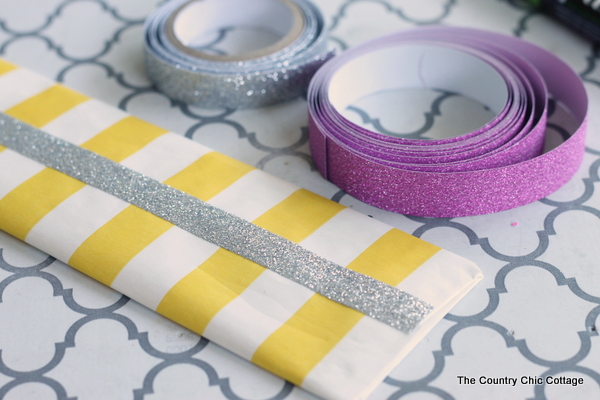
Step 2
Add a piece of silver glitter tape down the seam in the back.
Step 3
Add pink glitter tape around the entire bag with the seam meeting in the back.
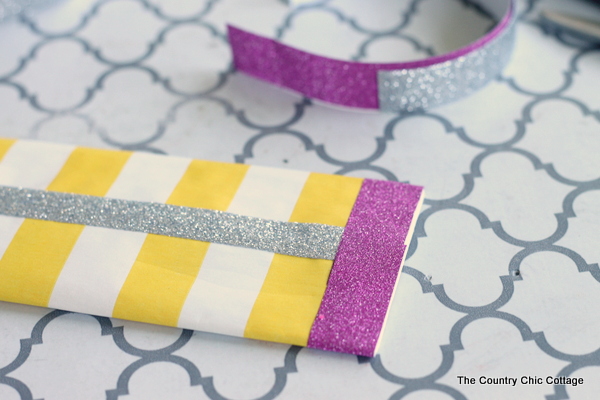
The front should be seamless.
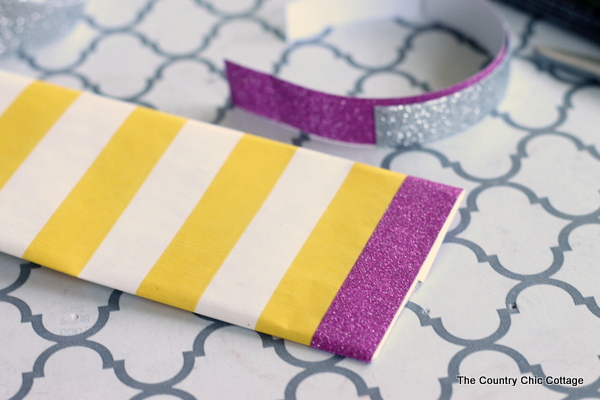
Step 4
Add an additional line of pink glitter tape as well as a line of silver. Then add a chalkboard label to the front.
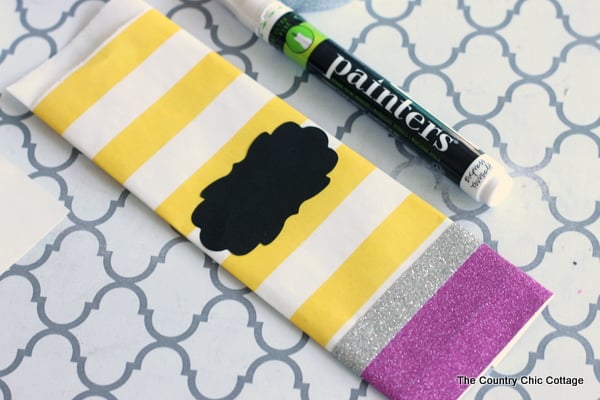
Step 5
Write the message of your choice onto the label with the paint marker.
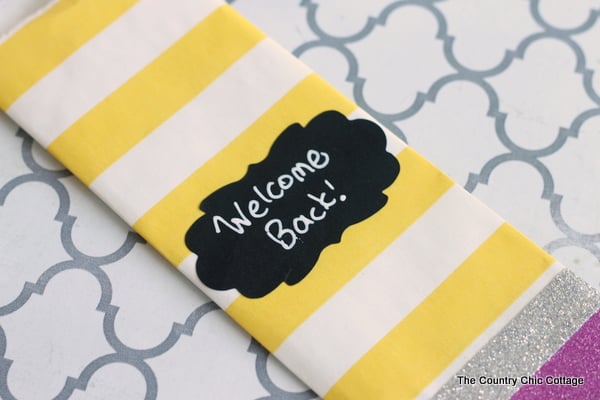
Step 6
Add in your gift, and this pencil gift bag is ready for giving!
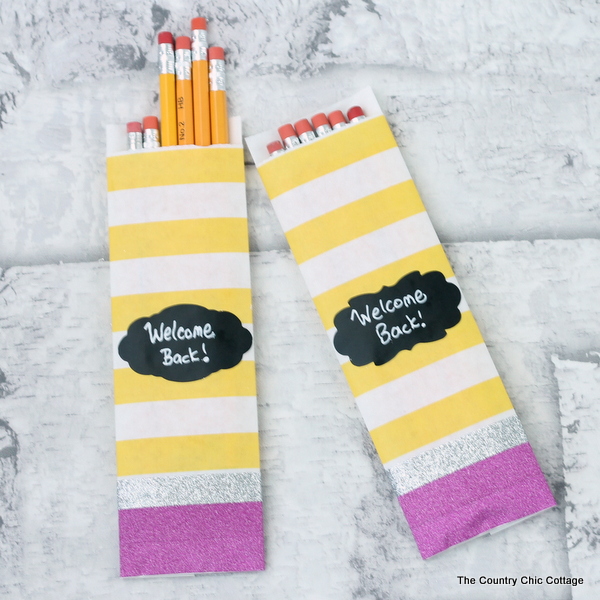
This quick and easy pencil gift bag is perfect to give to teachers or students or even for teachers to give to students. However you choose to use this cute little treat bag, they will only take you minutes to put together.
FAQs
Here are a couple of questions that I see readers ask about making this pencil bag. If you have a question, please check to see if I’ve already answered it below. Don’t see your question? Leave it for me in the comments!
Can I make a pencil bag without using a treat bag?
Yes! I had the treat bags on hand, so they made an easy and convenient base to start the project. However, if you don’t have treat bags, you could use any type of colorful paper.
Note that you will have a little bit of extra work if you use different paper because you’ll need to make sure that the bottom of the “bag” is closed completely so that items don’t fall out.
Can I fill this bag with items other than pencils?
Definitely! Whether you use basic treat bags as I did, or you begin with a sheet of patterned paper, you can adjust the size to fit different items. A cute bag like this could hold fun erasers, bookmarks, colored pencils, or any other items that you want to gift.
More Back To School Crafting Inspiration
If you love this simple idea, please check out these other amazing back-to-school and teacher appreciation ideas from me and some of my crafty friends!
- DIY Fabric Folders from Tikkido
- Custom Desk Name Plates with Sublimation
- Quick and Easy Dry Erase Board from Artistic Endeavors 101
- 15-Minute Teacher Lanyard from 365 Days of Crafts
- DIY EOS Lip Balm Teacher Gift Idea
- Free Teacher SVG Plus 15 More Free School SVG Files
Supplies
- Yellow and white striped treat bags
- Washi tape pink glitter
- Washi tape silver glitter
- Chalkboard labels
- Fine tip white paint marker
Instructions
- Fold the treat bag to the size you want.
- Add a piece of silver washi tape down the back to hold the edges in place.
- Add a strip of pink washi tape around the bottom of the back, with the seam in the back.
- Wrap two more strips of washi tape around the bottom of the bag (I used one more pink and a silver strip).
- Attach the chalkboard label to the front of the bag.
- Write a welcome message on the label with the white paint marker.
- Fill your pencil bag with pencils (or treats of your choice).


Angie, I LOVE your pencil gift bag along with all the other quick crafting inspirations! Happy Back to School!
Such a cute way to package such a simple but very useful gift. I know my girls and their friends would love this. And their moms too!
Thank you, as always, for hosting Craft Lightning!