Want to learn how to refinish wood? Here is the basic process plus all my tips and tricks to help you learn how to refinish wood furniture so that you love the final product!
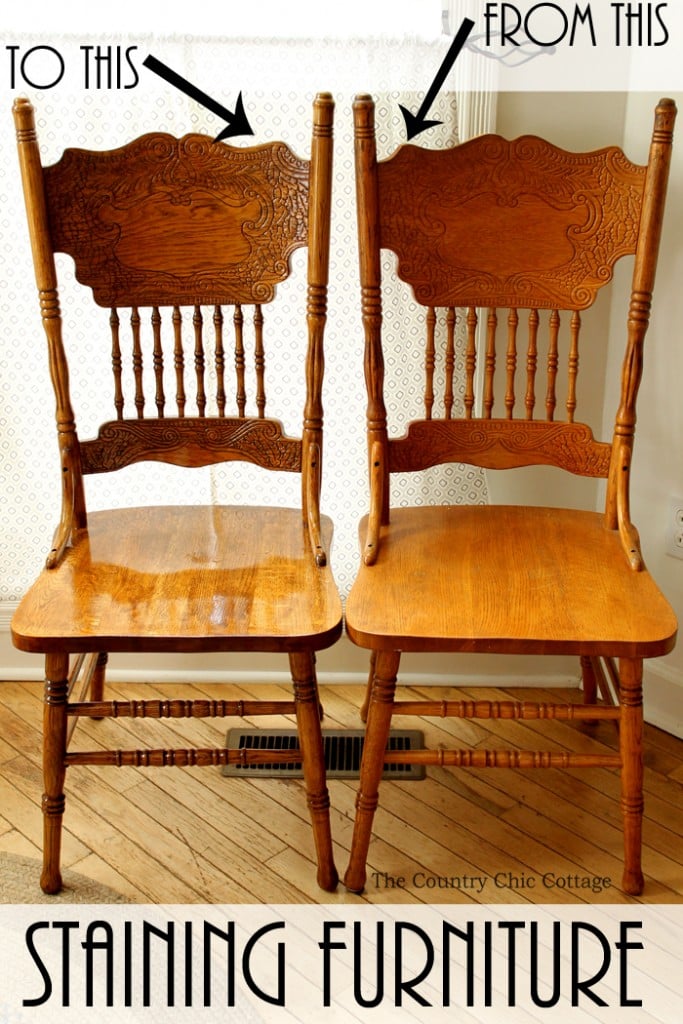
I’ve been working on a project for a while now: refinishing a wooden kitchen table and chairs. The chairs are old and a little weathered, and it was just time to give them a little TLC and a “facelift!”
This is the first time I’ve tackled a project quite like this, and I can say that without a doubt, I’ve learned a lot in the process! Although I’ve worked with wood plenty of times (including staining wood for projects), none of them were this involved. I’m excited to say that learning how to refinish wood furniture took my skills to a new level!
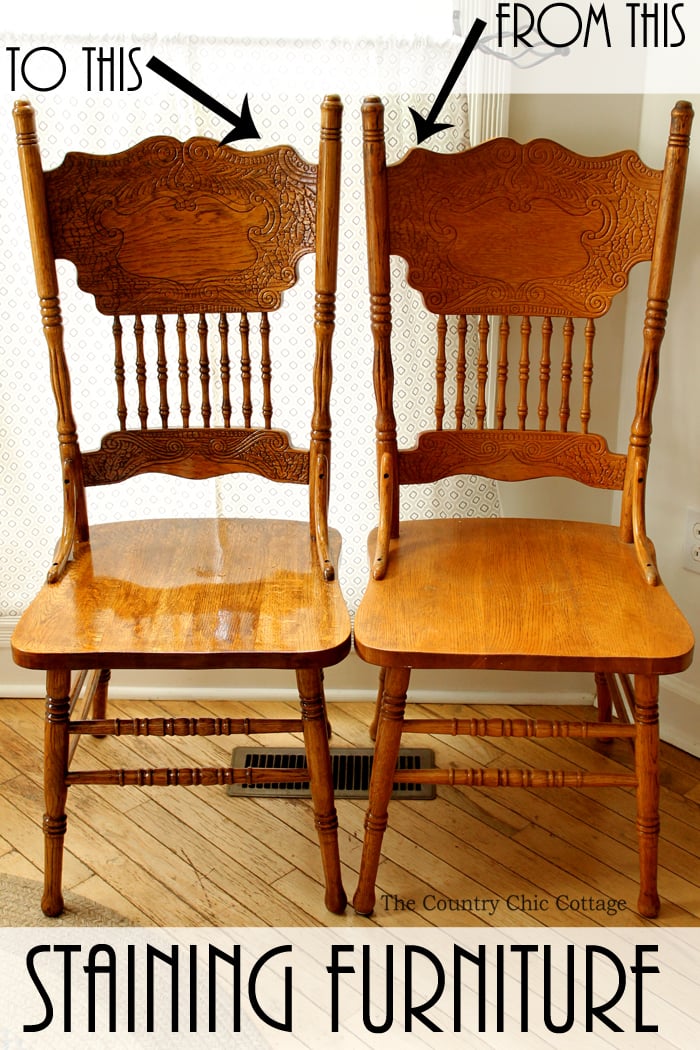
How To Refinish Wood Furniture
I thought I would share how to refinish wood furniture today because I’ve learned a lot about the process that I didn’t know before. The tips and tricks I have to share with you today will help make the process easier when you do it.
Gather These Supplies
- Citri-Strip Gel (I recommend the gel as I had the most success with it.)
- Protective gloves and eye wear
- Rags
- Steel wool (super fine is my choice)
- Mineral spirits
- Stripping brush (this is a lifesaver in those nooks and crannies!)
- Plastic putty knife
- Sandpaper (150, 220, and 320 grit)
- Tack cloths
- Minwax Stain (I used English Chestnut)
- Minwax Polyurethane (I used Clear Gloss)
- Foam brushes
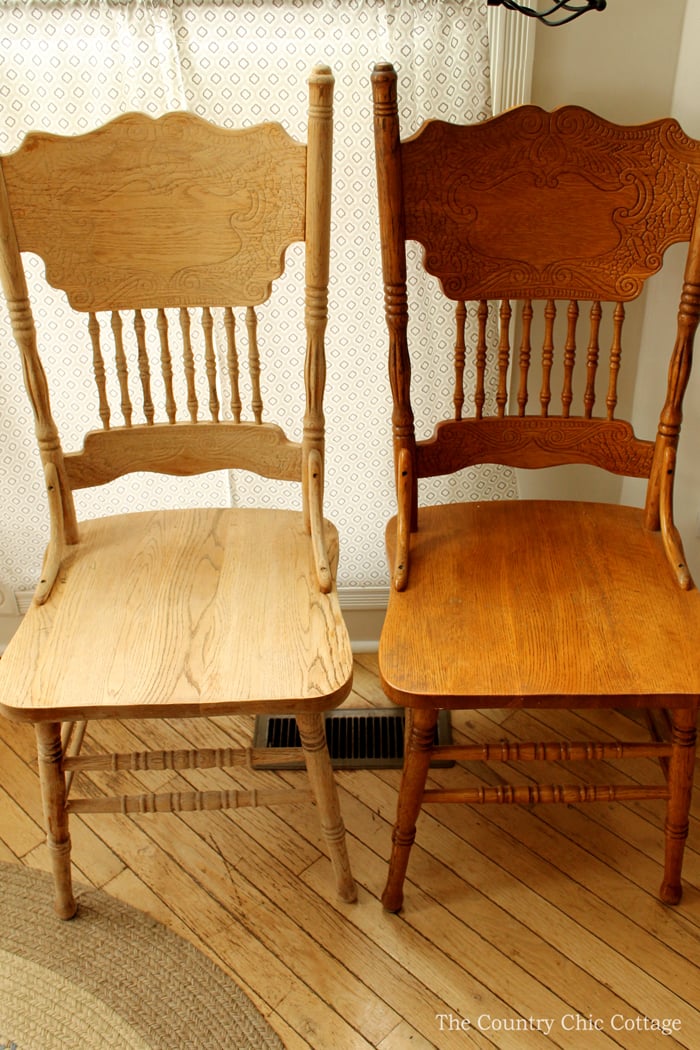
Process To Refinish Wood Furniture
Here’s the exact process I used to go from start to finish. FYI, I know the process looks long. It isn’t hard, but it is time-consuming, so plan to do it in bits in pieces or at a time when you can just focus on this.
Step 1
Start by removing the old finish and stain from your furniture. I recommend doing this step outside because it’s messy! In full transparency, it will kill the grass. But it will be worth it, right?
Spread your CitriStrip Gel on thick and leave for an hour or more.
I have also seen techniques that say to wrap with plastic wrap but I didn’t try doing that. Don’t leave it too long or it will dry out too much. I found around an hour worked best for me.
Step 2
Use your plastic putty knife to start removing most of the gel. Then, use your stripper brush in the nooks and crannies and any details your furniture has.
This is where you will want to wear protective eyewear.
Step 3
Next, dip steel wool in mineral spirits and go over the entire surface. The combination will help remove any stain that is still left on the surface.
Use mineral spirits and a rag to clean up the surface and remove anything that is left. Allow the surface to dry.
Step 4
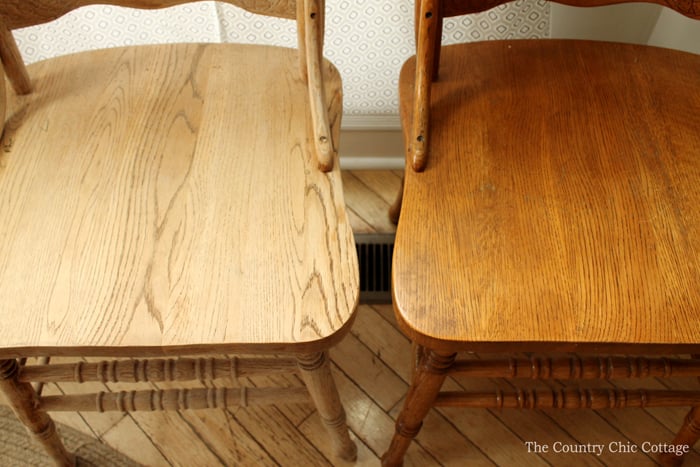
Now comes the sanding portion of this project.
Start with a 150 grit sandpaper and go over the entire surface. Come back with a 220 grit paper and go over the entire surface.
Use a tack cloth at the end to remove all sanding dust and dirt from your surface. You will have a very clean and natural surface that is stripped of all finish!
Step 5
Now we need to turn that stripped-down surface into something gorgeous!
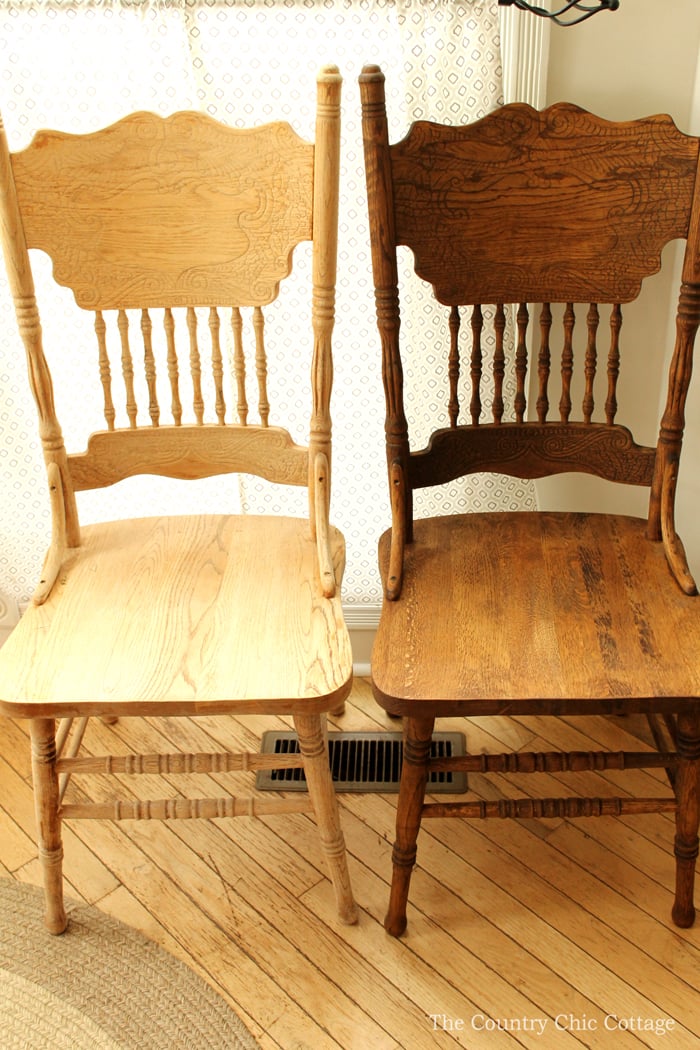
I used the Minwax Stain in English Chestnut on my chairs. Spread on your stain with a foam brush.
Allow it to set for about 5 minutes then rub off with a clean rag. Be sure to apply along the grain of the wood and remove with the rag (also going with the grain). Allow it to dry completely.
Seriously, that drying time is important. I did mine over several days so I left each chair to dry for about a day.
Step 6
To finish your chairs and protect them from everyday wear and tear, you will then need to apply some Minwax Polyurethane in Clear Gloss. I applied 3 to 4 coats to each chair.
Use a foam brush and apply as you go with the grain of the wood in even coats over the entire surface.
Let each coat dry overnight before adding another coat.
NOTE: Lightly sand with 320 grit sandpaper in between coats to rough up the surface so the next coat will stick. Then run a tack cloth over the surface to remove any dust before adding the additional coats.
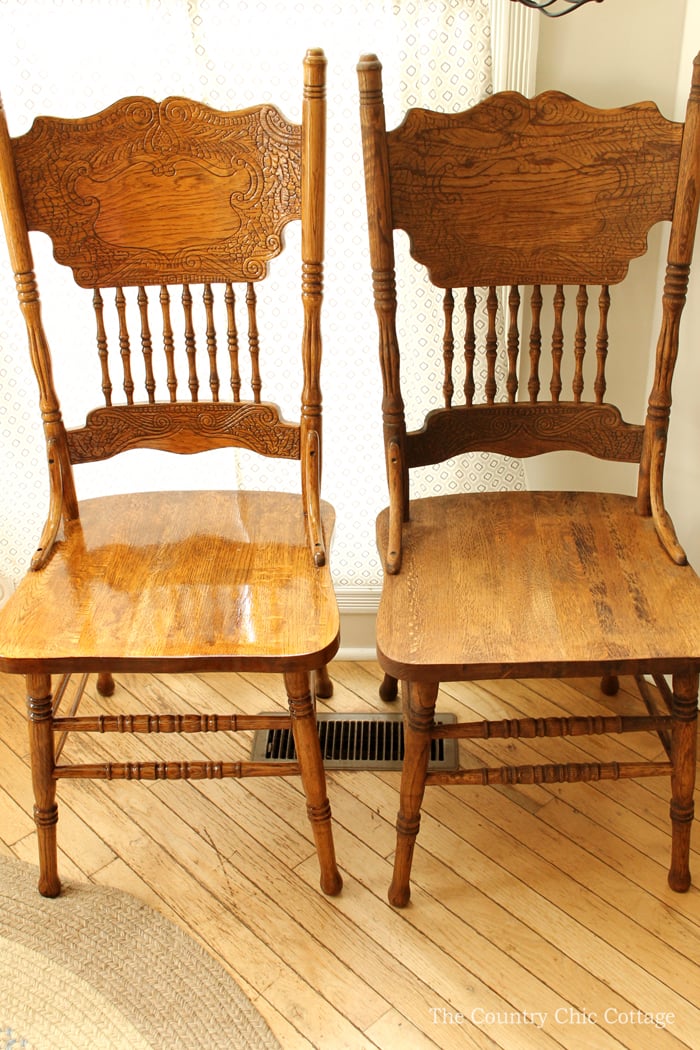
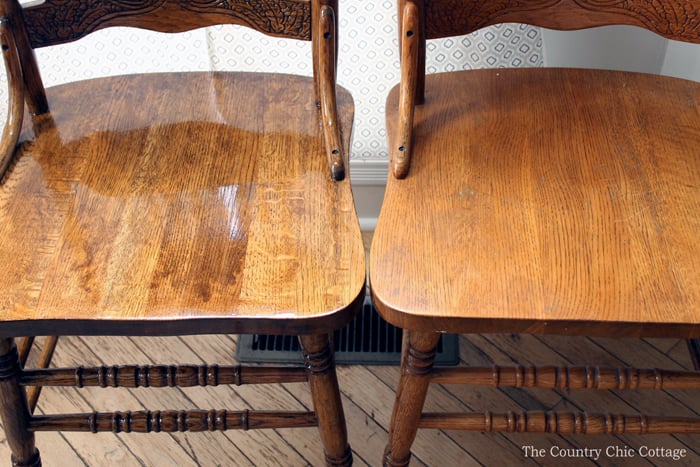
Once you finish your last coat of poly, your project is complete!
Project & Safety Notes
- Y’all, this entire process takes a while but it makes such a huge difference. The more intricate the designs in the wood, the longer this process will take. A simple table with clean lines would be a great way to start while you become familiar with the process. My chairs had a ton of detail so they took a REALLY long time to complete each one.
- When I was stripping off the old stain, I had the best results with the Citri-Strip Gel.
- Remember to wear protective gloves and clothes throughout the entire project so that these materials don’t land on your skin. They can get really sticky, and in some cases even cause burns or stains.
- I did all of my steps outside to keep the odors and mess out of the house. If you also choose to do that, make sure you are not working in direct sunlight. The light and heat from the sun will create bubbles in your finished surface and the coats will not dry evenly.
FAQs
Here are a couple of questions that I have seen readers ask about how to refinish wood furniture. If you have a question, please check to see if it’s already answered below. Don’t see your question? Leave it in the comments so I can answer it!
What is the best clear coat for wood?
Polyurethane wood finish is a synthetic coatings that’s water resistant and very durable, which is why I chose to use it to provide beautiful and lasting protection for my wood furniture.
How many coats of polyurethane do I need?
For best results on heavily-used items like wood tables, chairs, other furniture, and floors, I recommend applying at least three coats to give those items enough protection. I used 3-4 coats on each chair, depending on the wear each chair already had.
How long after staining can I apply polyurethane?
According to the package directions, you should wait between 24-48 hours to allow the stain to completely dry before applying polyurethane. For most of my chairs, I let them dry for 24 hours, but I thoroughly checked them before moving on to the next step.
If you live in a humid climate or just don’t want to take any chances that the stain might not be dry enough, wait an extra day before moving to the next step to apply polyurethane. It’s better to be safe than sorry!
If you’ve been wanting to learn how to refinish wood furniture but have been dragging your feet, I hope this post simplified the process for you! It isn’t hard to do so just dive in and learn how to refinish wood furniture.
Turn the furniture in your home into something you absolutely love!
More Wood Projects You’ll Love
- 40 DIY Scrap Wood Projects You Can Make
- How To Make Wood Burned Coasters (+ Extra Wood Burning Ideas)
- How to Make a Barn Wood Shelf
- Wood Quilt Square Knock Off
- Rustic American Flag From Wood Scraps
- DIY Round Wood Door Hanger with a Cricut Machine
- Making a Barn Wood Frame
Supplies
- Citri-Strip Gel
- Protective gloves
- Protective eyewear
- Rags
- Steel wool
- Mineral spirits
- Stripping brush
- Plastic putty knife
- Sandpaper 150, 220, and 320 grit
- Tack cloths
- Minwax Stain I used English Chestnut
- Minwax Polyurethane I used Clear Gloss
- Foam brushes
Instructions
- Start by removing the old finish and stain from your furniture. Spread your CitriStrip Gel on thick and leave for an hour or more.
- Wearing protective eyewear, use a plastic putty knife to remove most of the gel. Then use the stripper brush in the nooks and crannies and any details your furniture has.
- Dip the steel wool in mineral spirits and go over the entire surface to remove any stain that is still left. Next, add mineral spirits to a rag and use it to remove anything left on the surface.Allow the surface to dry.
- Let's start sanding! First, go over the entire surface with 150 grit sandpaper. Then repeat the process 220 grit paper.After sanding, go over the surface with a tack cloth to remove all sanding dust and dirt. Your surface will be very clean and natural without any finish on it!
- Add your stain with a foam brush, going with the grain of the wood.Let it sit for about 5 minutes then rub it off with a clean rag as you go along the grain of the wood. Allow it to dry completely.
- Now it's time to protect your furniture with polyurethane. You'll want to add 3-4 coats per chair.Use a foam brush and apply, going with the grain of the wood in even coats over the entire surface.Let each coat fully dry and give it a light sanding before adding the next coat.
- After you apply your last coat, your wood furniture is fully refinished!



You did such awesome job on your chairs, the chestnut stain is so pretty after the orangey oak. Did you also do your table? You are quite the ambitious young lady.
Always enjoy seeing your projects and reading your posts, ,you have wonderful blog. Lots of hard work for you to keep up. Hope you had relaxing holiday weekend, have great week
I actually have not gotten to the table! I am going to give the entire thing to my daughter. I think she is going to finish up the table. It is an ambitious project!!
Trying to strip 6 kitchen chairs- one with arms on it. I believe it is oak. Already tried to strip one chair. Noticed it has a lot of blotched of different colors on it. Do I bleach these areas. or what. They are very nicely designed back spindle chairs & I intend to leather the top of the chairs as they had some kind of plastic covering. Not nice. I love the challenge of this project & am going to give them to my daughter & son-in-law. They purchased the chairs from a garage sale & loved the design. Not sure if I should stain them after stripping them or just use minwax stains. It comes in different stains already tog. with the shine & stain. Wish me luck.
I don’t think I would try to bleach them. Probably different types of wood.