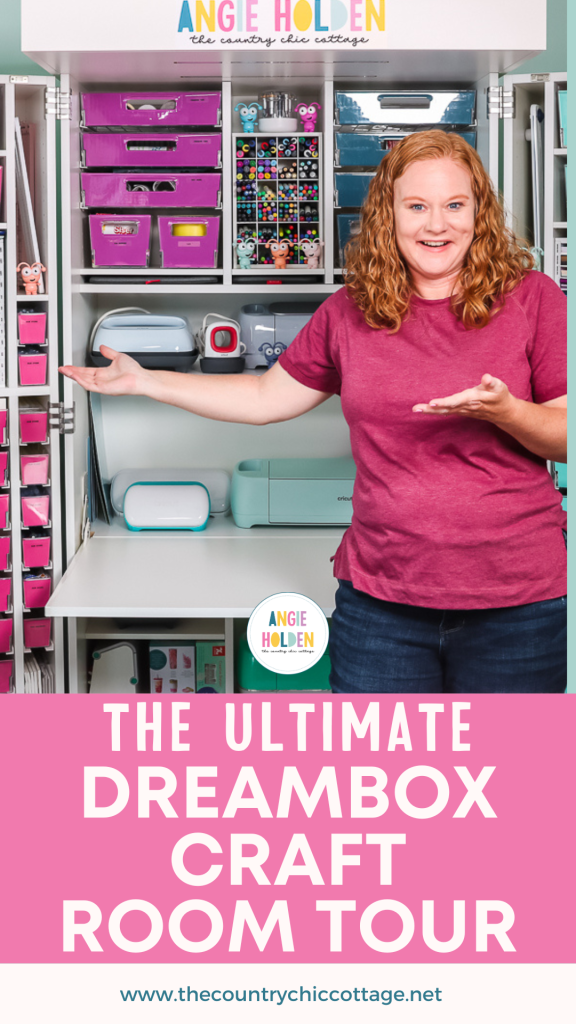
Are you thinking the Create Room DreamBox may be the solution for your craft space? I recently added this craft room furniture to my space and I must say that I am impressed. It stores SO MUCH STUFF and is super versatile. Take a tour of my new Cricut and sublimation crafting space below to get ideas for your own craft room organization needs.
See the before of my space in this Cricut craft room tour!
I was gifted the DreamBox 2 from Create Room for use in this space, however, all projects and opinions are my own.
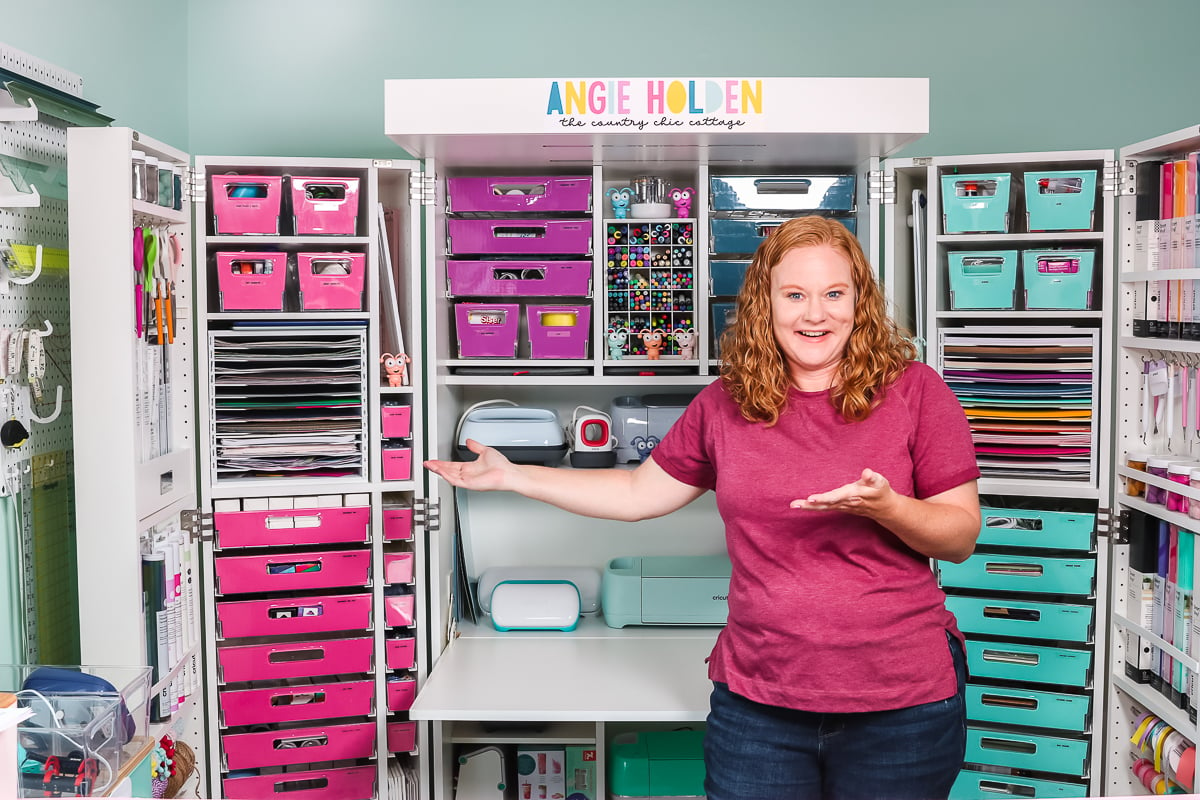
Create Room DreamBox 2
Want to watch me assemble and fill up the DreamBox? Click play on the video below! The video also has a full tour of my space that you can use for ideas for your own crafting area.
This piece of craft room furniture was formally known as The Original Scrapbox but it changed names several years ago.
Create Room DreamBox 2
You can see my entire space below but I thought I would answer some common questions about the Create Room DreamBox first.
NOTE: I have the DreamBox 2. The original DreamBox is no longer sold and there were some differences in it and the version that I have.
Click here to purchase the DreamBox 2. Use code ANGIEHOLDEN for the best pricing!
What is it?
The DreamBox is a large crafting station that helps to organize your crafting supplies as well as keep them handy while you create. It includes shelves, totes, and a work surface. You can see more images below as well as some of the options for customizing your DreamBox to fit your needs.
How big is it?
You can download the dimensions on their website here to see exactly how large it is. Remember that the doors do not have to be completely open to be functional. I keep my side doors slightly closed and that way it takes up less width when open.
Be sure to measure well for both the open DreamBox as well as the piece when it is closed.
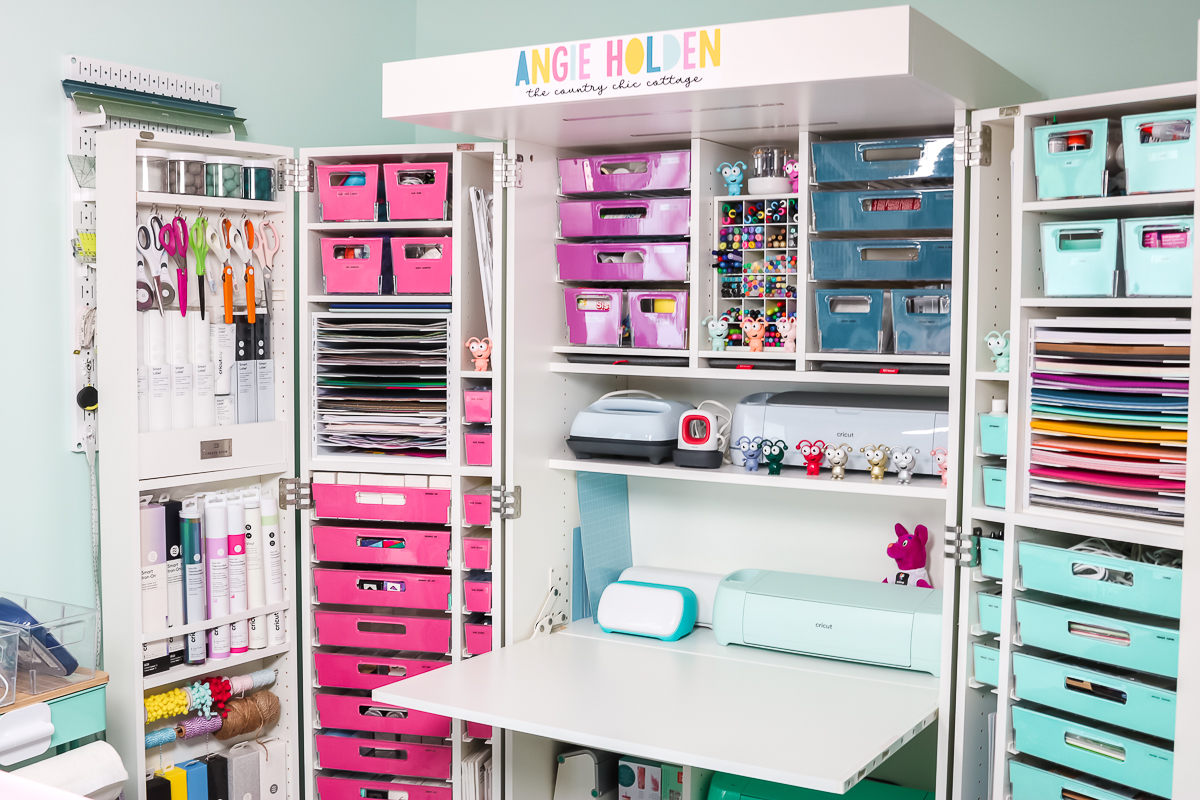
Ordering Options
There are several ways to customize the DreamBox when you order. I am briefly describing a few of those below. The options are on the website here.
Ergo vs. Shaker
First, you will pick a door style. This is more personal preference and about the look you want in your home. I opted for the Shaker-style doors.
Half Set vs. Full Set of Totes
Next, you will pick either a half or full set of totes. I will note that you can buy more totes later so a half set is adequate. I was under a time crunch to get my setup completed as I use my space for my business. For that reason, I got a full set of totes so I would have them.
NOTE: Medium and small totes come with dividers so you can use those to divide the totes into sections.
Pre-Built Option
You can have Create Room pre-build some of the pieces for you. This is NOT a fully assembled option. You will still have to do some assembly when it comes to you but this option does save time and maybe even your sanity.
The pre-built option means that your DreamBox will come in 5 large pieces. You will then add the hinges and attach everything together. You will also need to add all of the internal components to the DreamBox.
NOTE: The center piece would not fit up our stairs as we have a weird angle. You may want to double-check everything before paying extra for this option. We had to disassemble the center and reassemble it upstairs.
Deluxe Crown
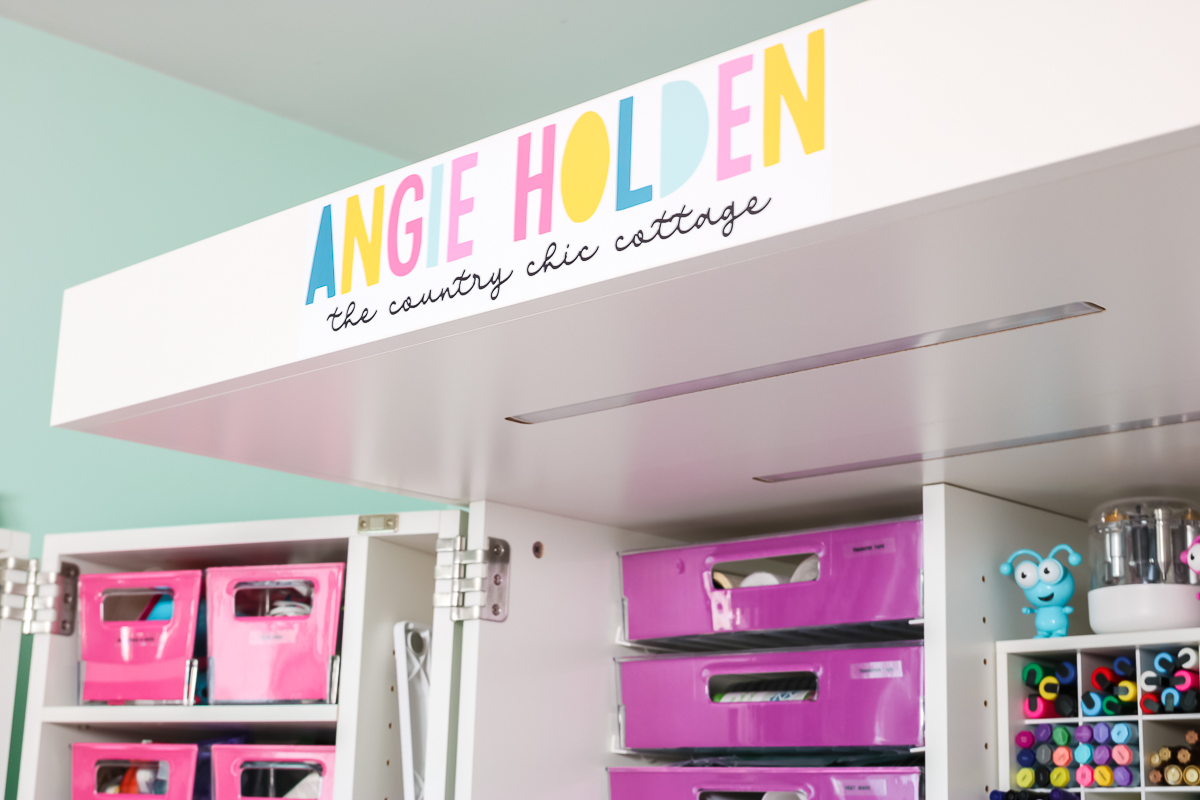
The deluxe crown serves two purposes. The first is that you will have two lights in your DreamBox instead of just one. Secondly, I feel like it makes for a more finished appearance. I like the look of the crown when the box is both open and closed.
I even added my logo to the front of my crown to add a personal touch to my set up. The crown is NOT for storage and will not hold any weight.
Long vs. Short Divider
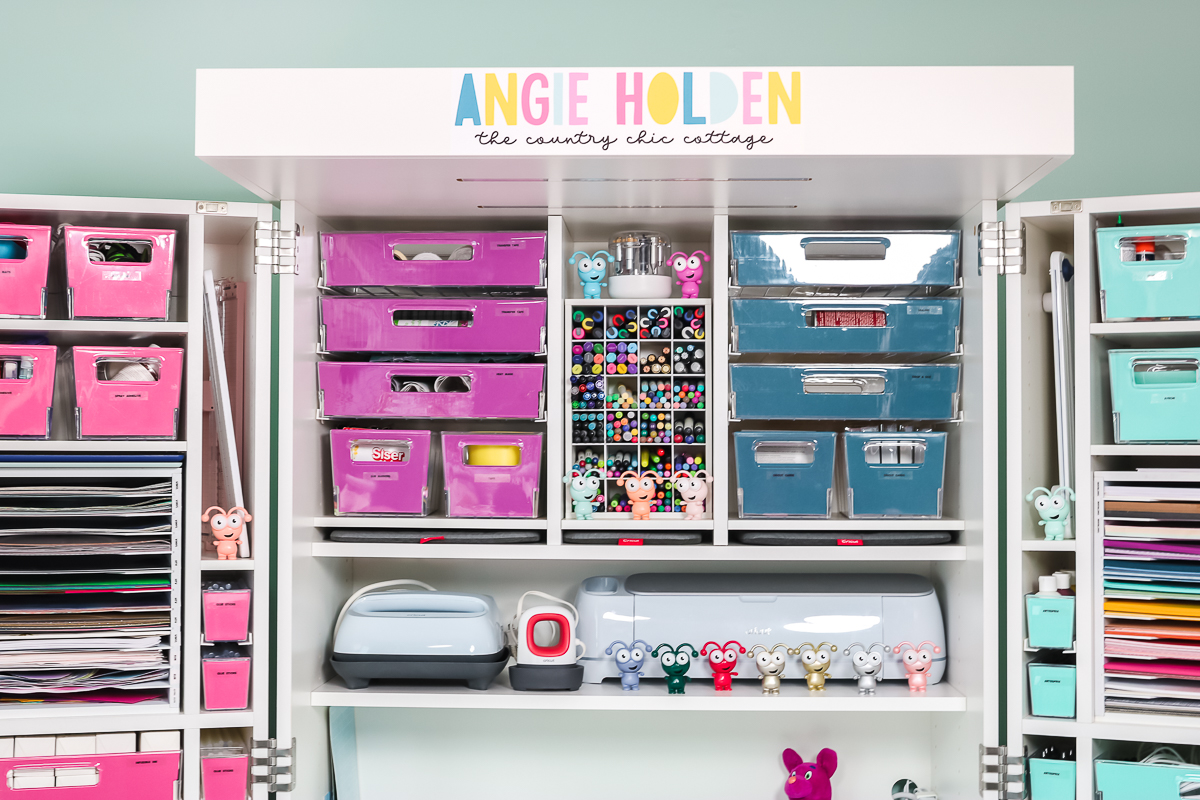
This option is best explained in this download. I opted for a short divider so I could add a machine shelf and have more machine storage. A longer divider gives you more areas to put totes. Both are super functional. I would determine what you will store in your DreamBox then decide which of these options works for you.
More Options
I mentioned the ability to customize your DreamBox above. You can pick and choose from a variety of options and add-ons to really make this piece of craft room furniture your own. Here are a few of those:
- Built-in drawers – add drawers to the center when ordering for enclosed storage that is fixed.
- Side tables – need more space to work? Add side tables to your DreamBox 2.
- Shallow Inview totes – add if you want storage that is not as deep.
- Inview tote lids – an option for closed storage.
- Tool cubby – add this divided storage for things like pens and markers.
- Paper organizer – if you have a lot of 12×12 sheets, this storage may work for you.
- Wallpaper – add some colorful fun to your DreamBox!
What comes with it?
The amount of things that come with your DreamBox varies depending on the options above. But you can expect to get the following:
- Inview totes (half or full set as indicated above)
- Hooks and rods (for doors)
- Jars (comes with deluxe package or sold separately)
- Acrylic guards (to hold things on the outer doors)
- Tracks and shelves (used to customize your layout and you can purchase more later)
- Fold-out table (the table on the DreamBox 2 does not have legs. Just fold out and start crafting!)
Where to Buy
You can use code ANGIEHOLDEN to get the best price possible and click here to shop.
I realize this piece of furniture is a large investment. So I made an email list you can opt into to get the latest sales updates directly from me. That way, if you add this to your wishlist, you can stay informed of any deals that may happen in the future. Sign up for that list here!
Delivery and Setup
Let’s chat a bit about the delivery and setup if you choose to purchase. A HUGE box will be delivered to you via a large truck. We are lucky enough to have a tractor with forks and unloaded it ourselves. Otherwise, the truck has a lift gate and they will deliver curbside. Be sure to have people with you at home that day to help get everything inside.
Then the setup begins! The box comes with instructions and I found them easy to follow. Again, I got the pre-built option so the boxes can assembled. I still had to add hinges, shelves, tracks, totes, and more. You can watch a bit of the process below.
Things like the paper organizer and tool cubby come in a separate box and will need to be assembled then added to the DreamBox in location.
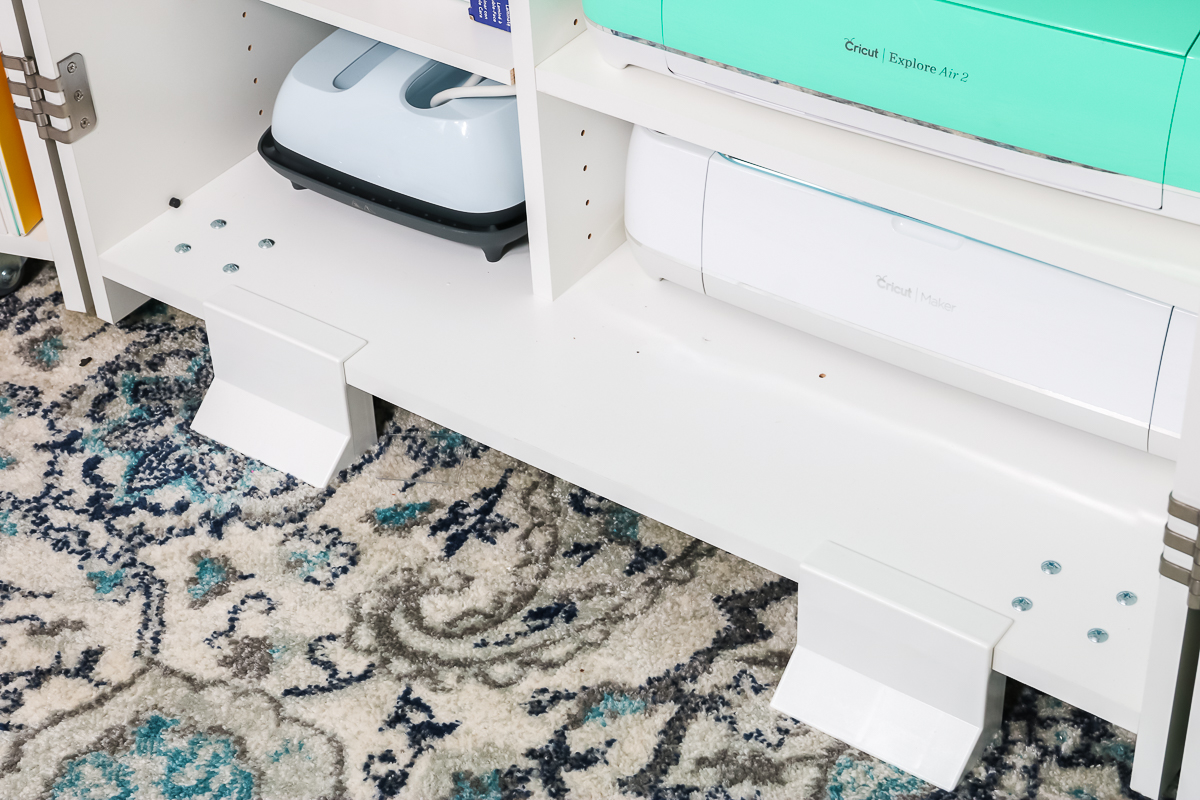
SAFETY NOTES: Always follow all safety instructions. That includes securing your DreamBox to the wall and using the feet that are included in the DreamBox to ensure it does not tip over if someone climbs or hangs on it.
I keep the feet on my center section at all times as it will close with those feet in place. There are also feet for the doors and I keep those on whenever the DreamBox is open.
Filling Your DreamBox 2
After the setup, it is time to add in all of your craft supplies. I did find this a bit overwhelming so I ended up using post-it notes to roughly layout where I wanted everything to go. That made filling it up a bit easier.
How to Customize
The instructions from Create Room come with example layouts for your totes and shelves. You can start with one of those but the placement is completely up to you. You can customize the inside of your box however you would like.
I found it helpful to look online at others who have a DreamBox for inspiration. Look at the way they have theirs set up and you may be inspired to change yours.
It is also VERY easy to change placement. So I would go with what I thought would work then change it up as I filled with my craft supplies.
Adding Covers to Tote Fronts
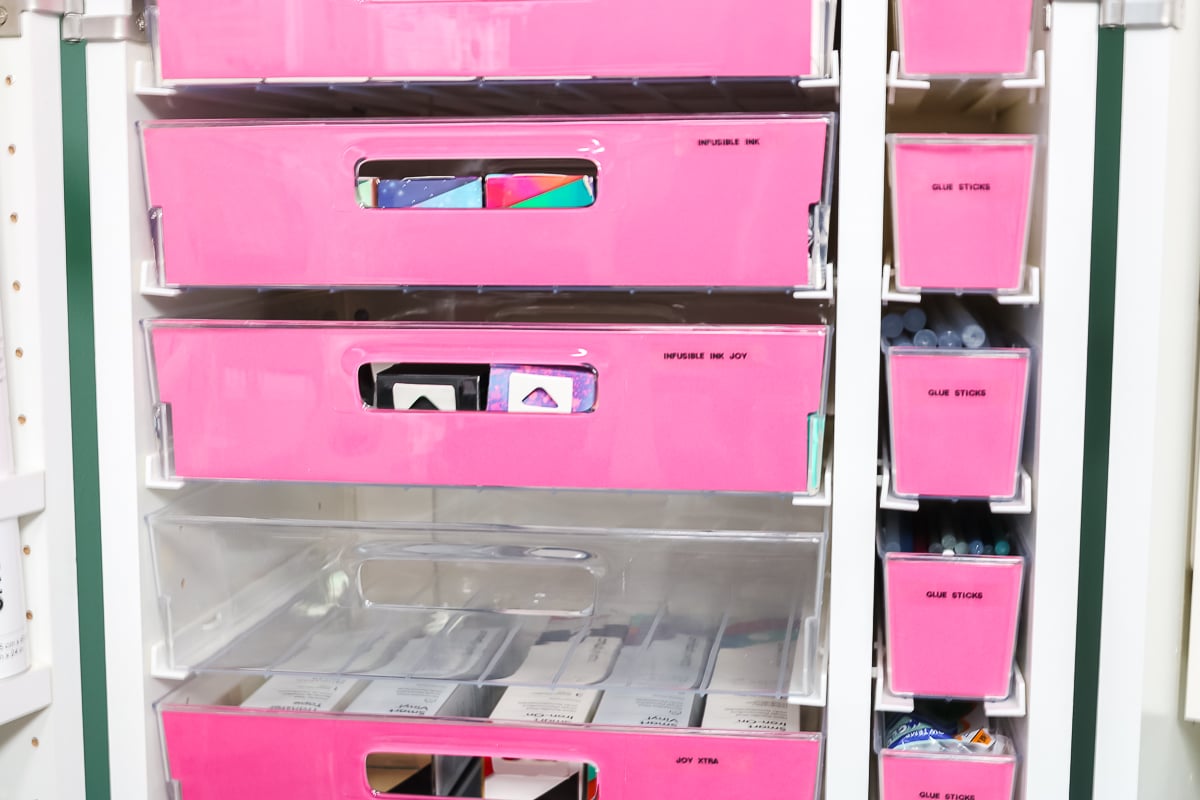
I will note that you can leave the totes alone once you fill them. If you do, you will be able to see the contents inside. I personally did NOT like this.
So, I downloaded the tote liners from Jennifer Maker here and cut them with my Cricut machine. Then I added labels to the cut cardstock and slid them into the front of the totes. You may need some dry adhesive to hold them into place.
You can see below the difference between a clear tote and one with a liner. I love that you can change out the liners whenever you like and get a whole new look to your DreamBox.
Tour of My DreamBox 2
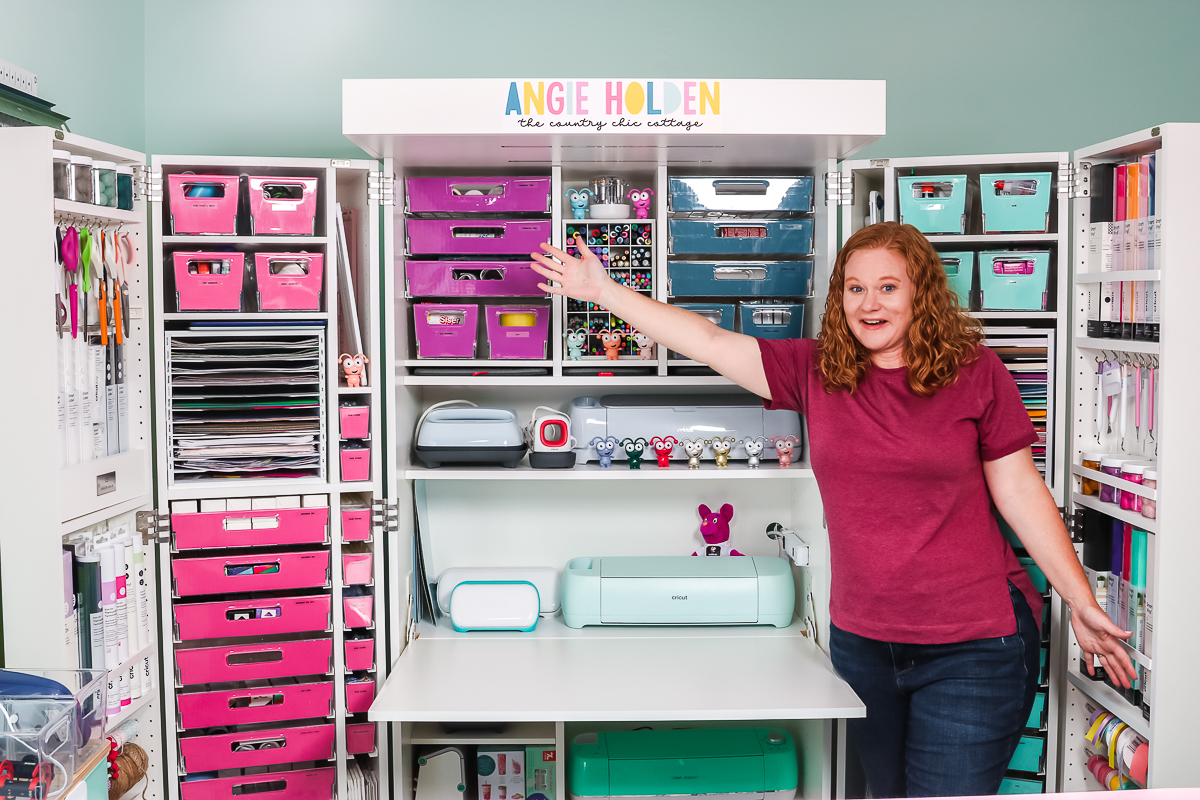
Now that you know a bit about how I got my Create Room DreamBox 2 and set it up, let’s take a look at the finished project and how I ended up customizing my layout.
If you want more details on what is in each space in the DreamBox, scroll back up and watch the full video!
DreamBox 2 Doors
I am starting with the doors because they are my favorite part! Seriously they hold so much and the organization is pretty as well as functional. I played with the layout on these until I got it just right for my needs.
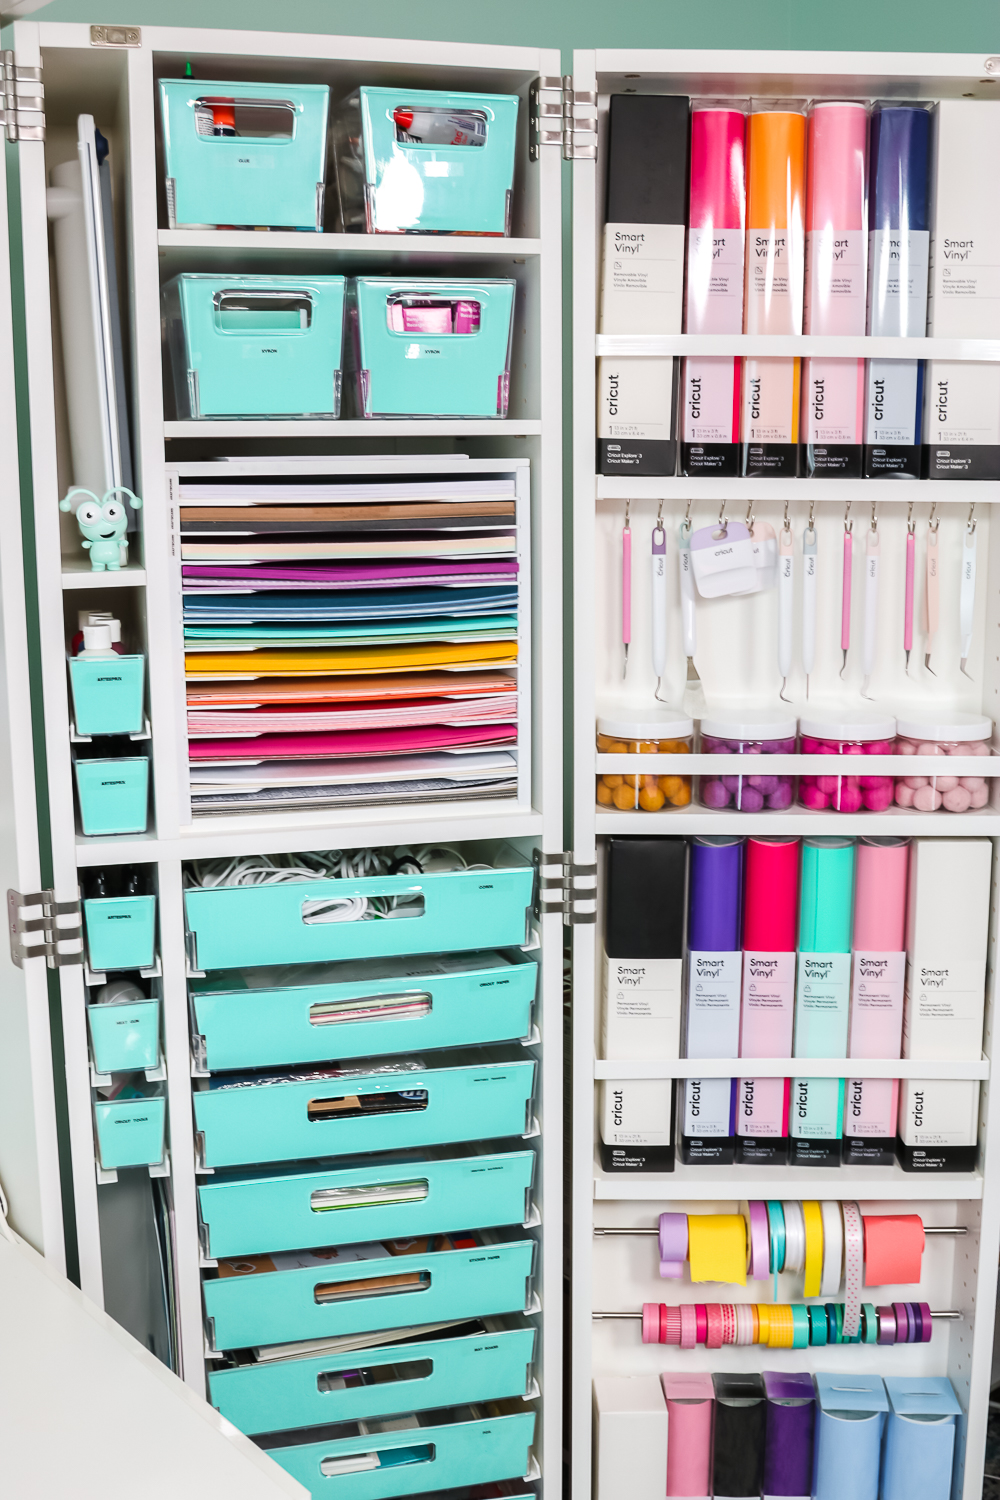
I used all three sizes of totes: small, medium, and large in the door sections. There are so many craft supplies stored in the doors alone!
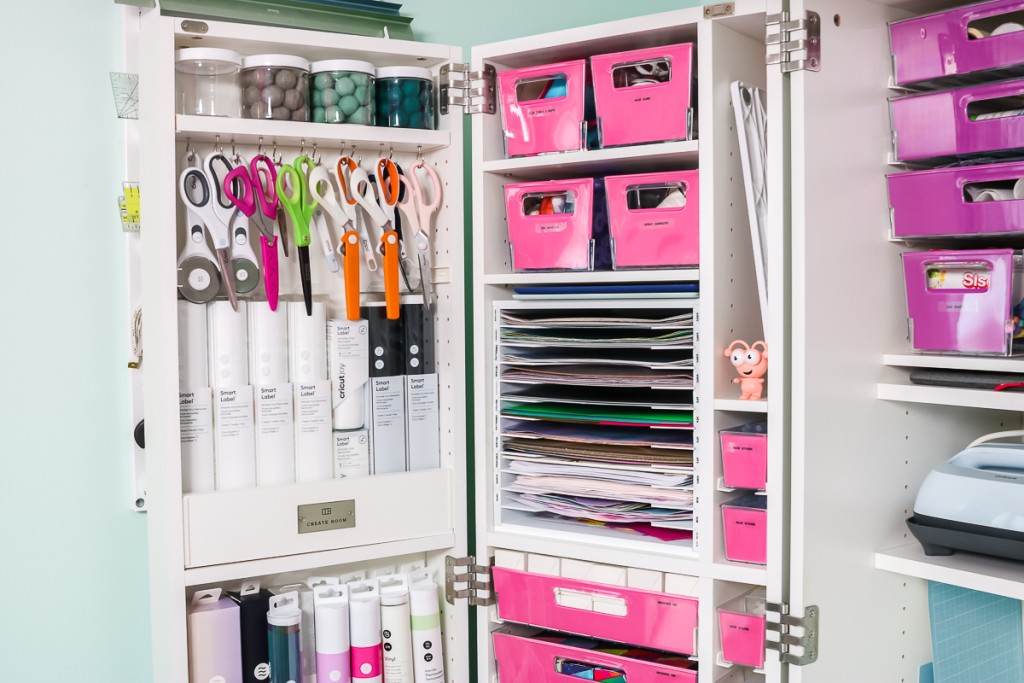
You will see mostly Smart Materials in my doors. These materials are too large to fit in the large totes so you either need to add them to the doors or directly on a shelf. This goes for the rolls of vinyl like the color-changing version that has a plastic lid.
I love the hook shelves for hanging things like Cricut tools as well as the jar storage upgrade that allows me to store small things as well as large. I feel like the Create Room DreamBox 2 is able to hold craft supplies of all sizes which makes it a winner!
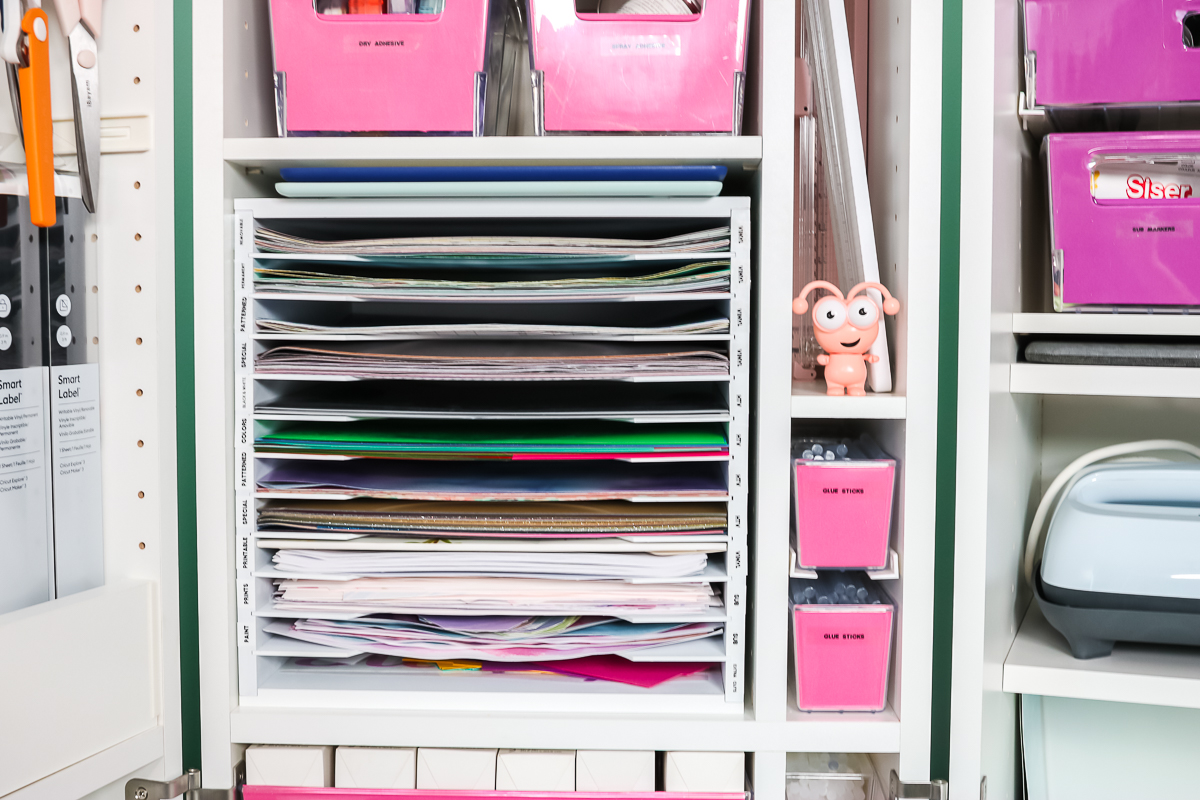
You will also notice that I opted for two of the paper organizers (one on each side). I have one of these for HTV and the other for cardstock. I like separating my paper and HTV sheets into categories so this worked well for me.
DreamBox 2 Center Section
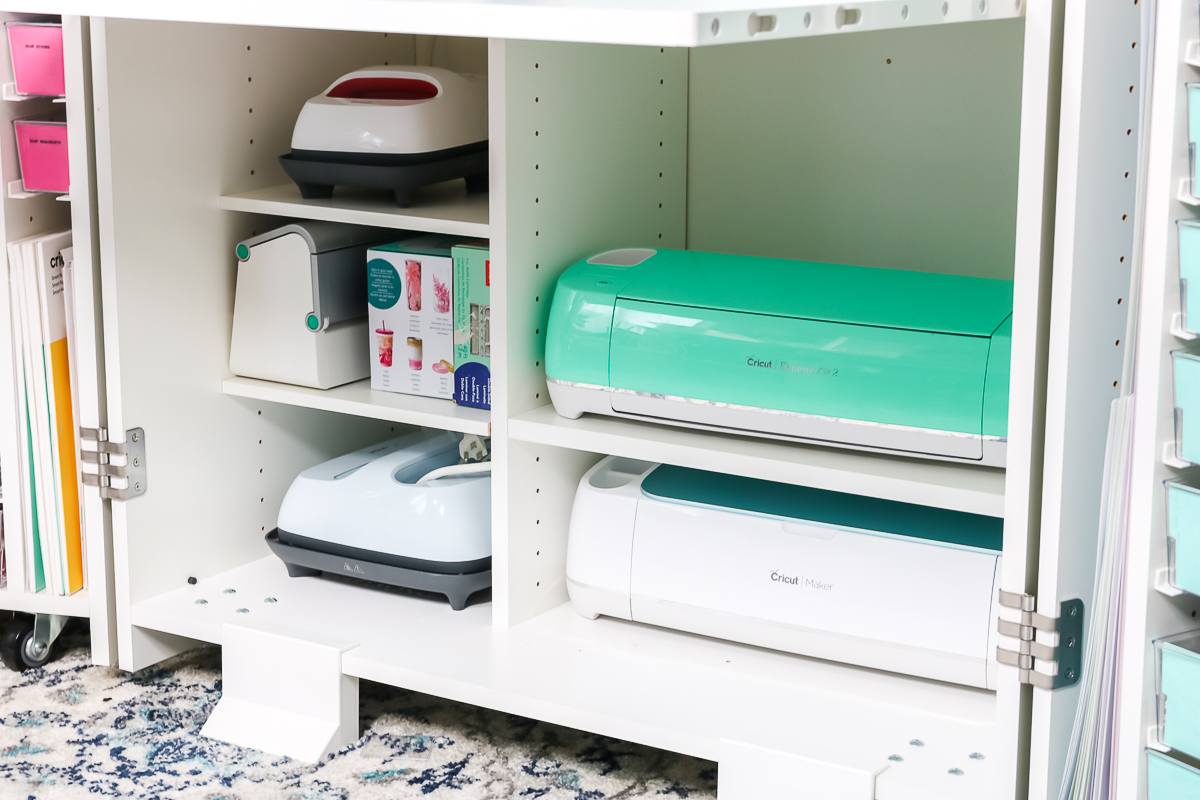
The center section has even more storage and, of course, that fold-out work surface. As stated above, I chose the short divider and added a machine shelf. I have 6 Cricut machines and 3 EasyPresses in this DreamBox. Yes, that even includes the new Cricut Joy Xtra!
Machine storage was important to me but you can customize your DreamBox to fit your needs. You will also notice that I made my storage symmetrical on both sides. It does not have to be that way! I just REALLY love something that has some symmetry!
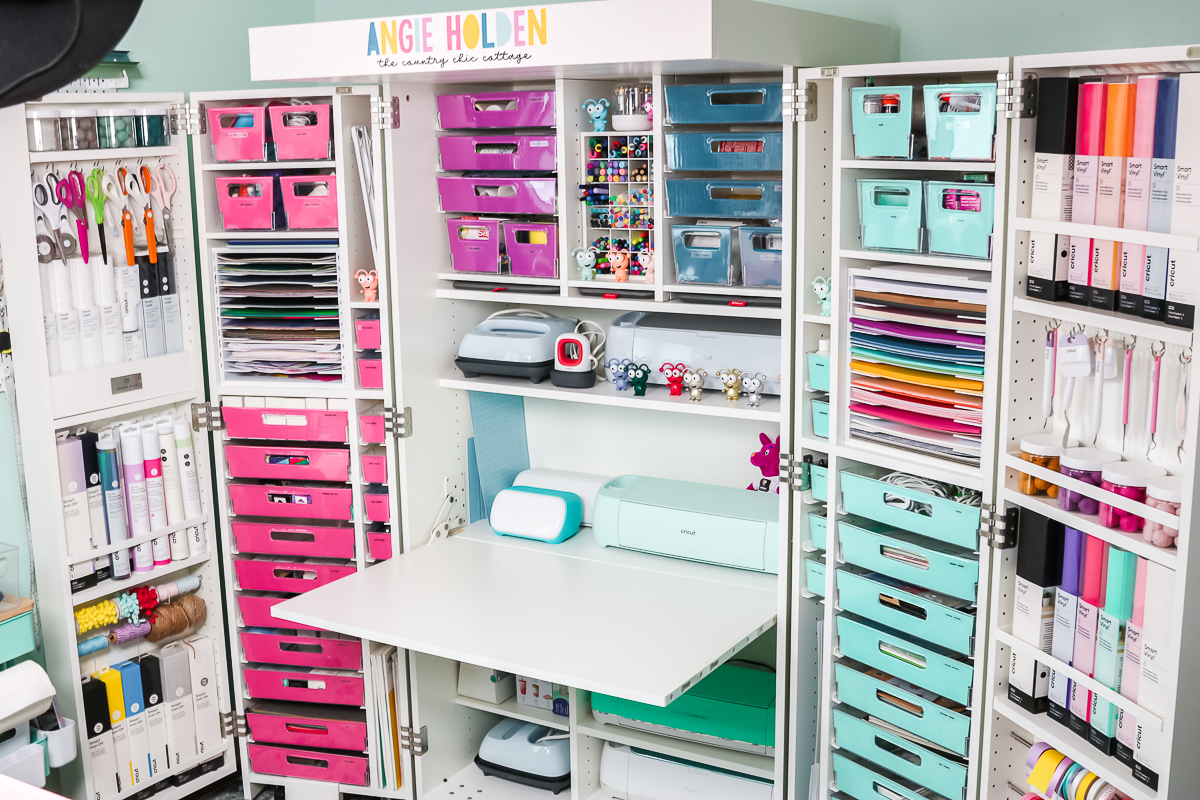
I added large and medium totes to my center section along with a tool cubby for pens. This holds SO MANY PENS! It is great for organizing those smaller items in the DreamBox.
I put a set of shelves right above my divider and slid my EasyPress mats into this location. I tried these a few different places and that seems to be what worked best for me.
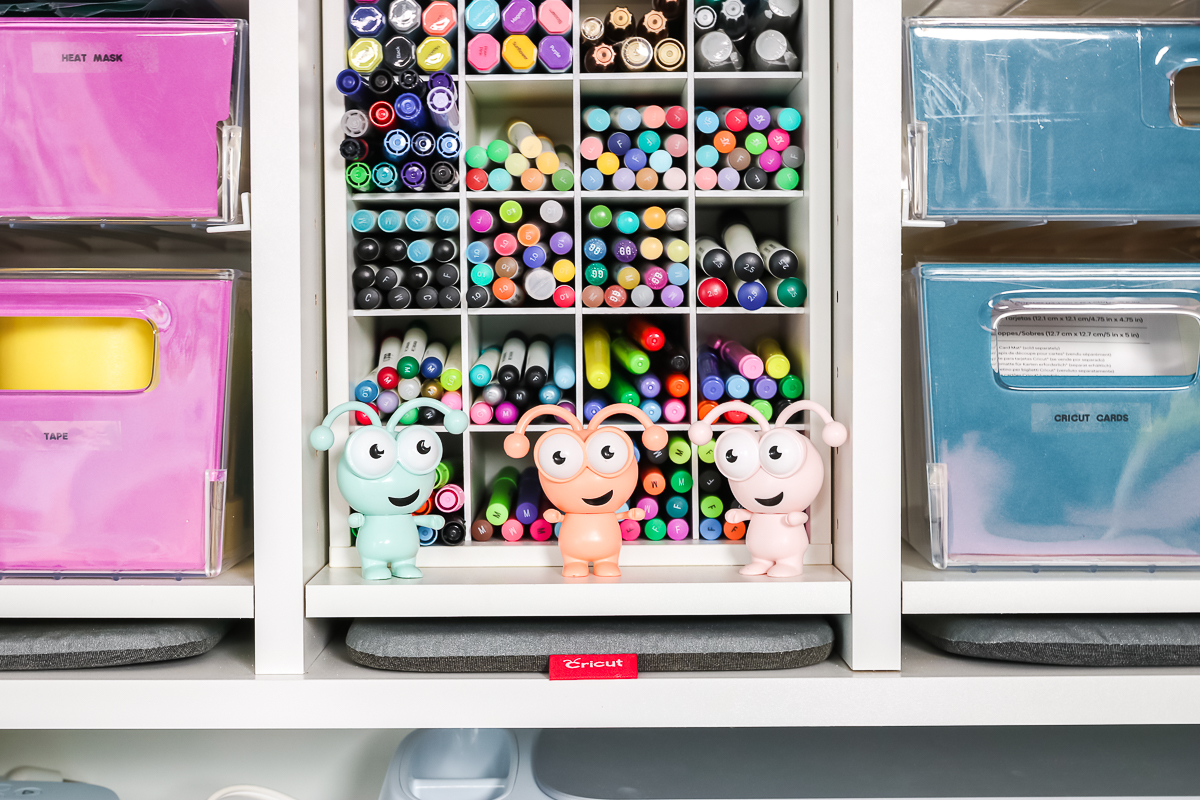
You will also notice I have several Cricut cuties around my DreamBox. I love my cuties so they need to be wherever I craft!
The center section also has holes in the back for power cords. I have a power strip running from the back along with the switches for the lights in my crown. The view below is with the table folded out for use.
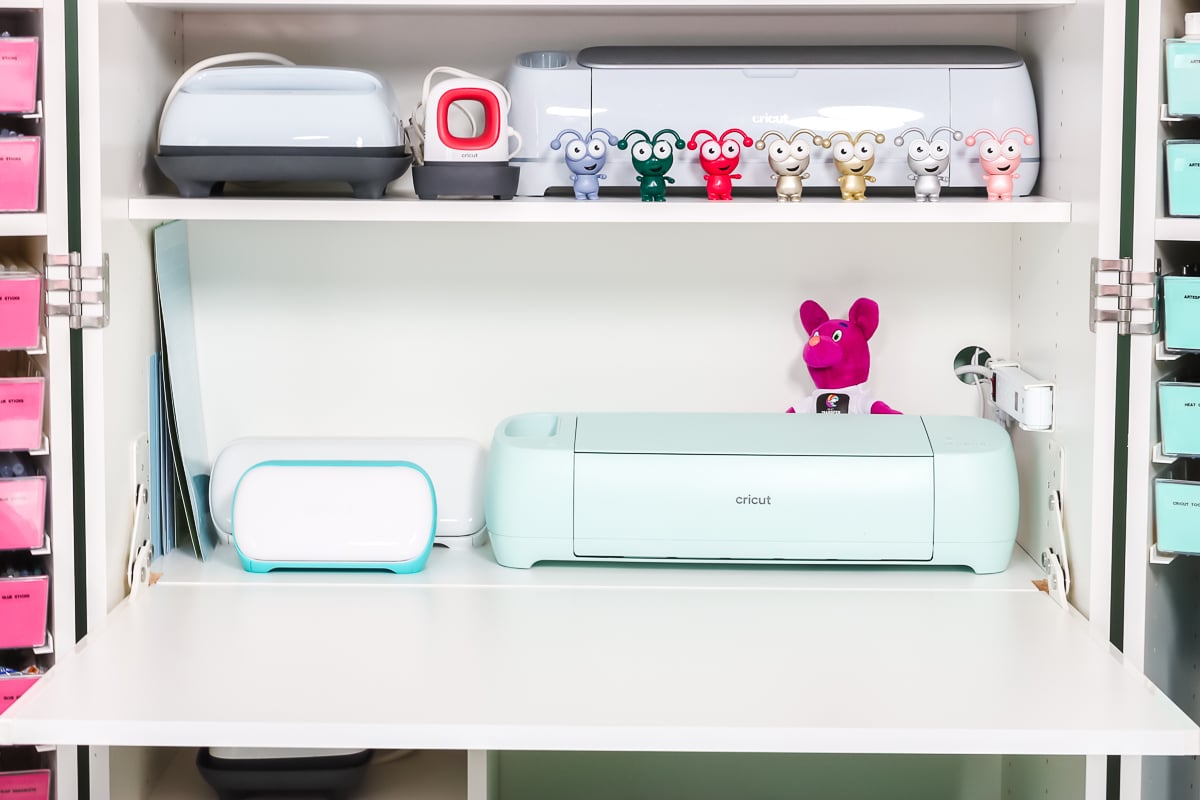
When you want the table out of the way or if you are closing the DreamBox, you will fold up the table just by pushing it up. It is seriously very easy to fold out and put away.
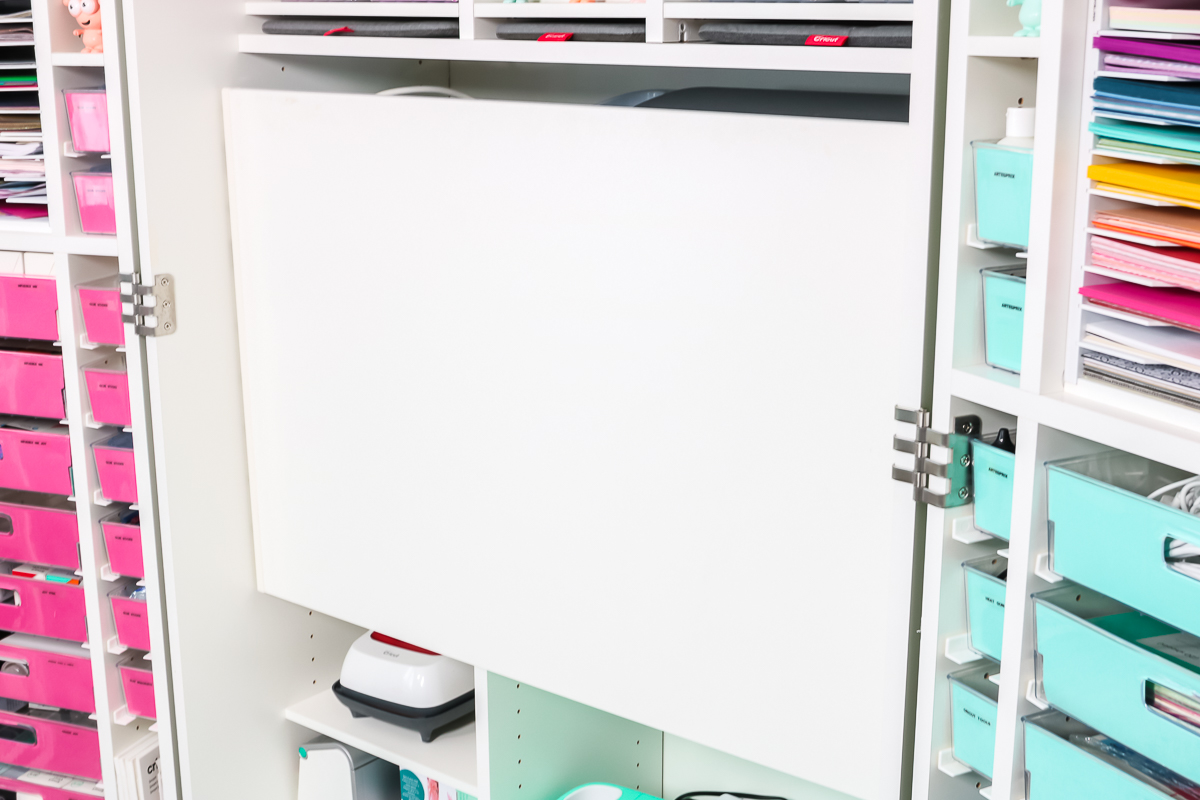
Under the table there is more storage. I opted for more machines in this area but you can configure this with totes as well if you would like.
Tour of My Craft Room
Now that you have seen the Create Room DreamBox 2 and how it fits in my space, what about the rest of my craft supplies? The remainder of the room got a refresh as well so let’s take a look!
Storage Behind DreamBox
My room is about 10 x 14 feet so I need to utilize every inch of space. That includes behind the doors of the DreamBox which each has a basket for storage of paper rolls. The left-hand side also has a Wall Control pegboard for rulers.
I found that not all of my rulers had a hole for hanging and I would have needed a 36-inch slot to add them all to the DreamBox. This alternate seems to work well and they had accessories that worked perfectly for holding rulers and t-shirt guides.
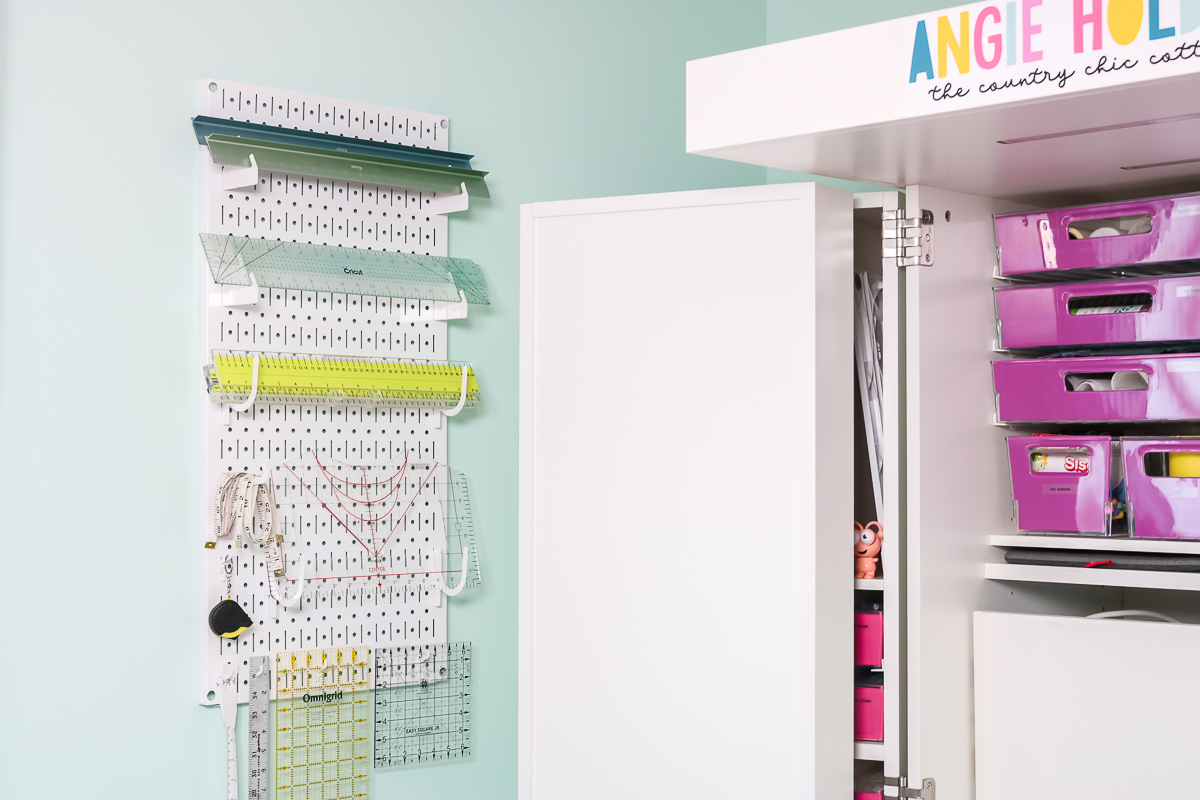
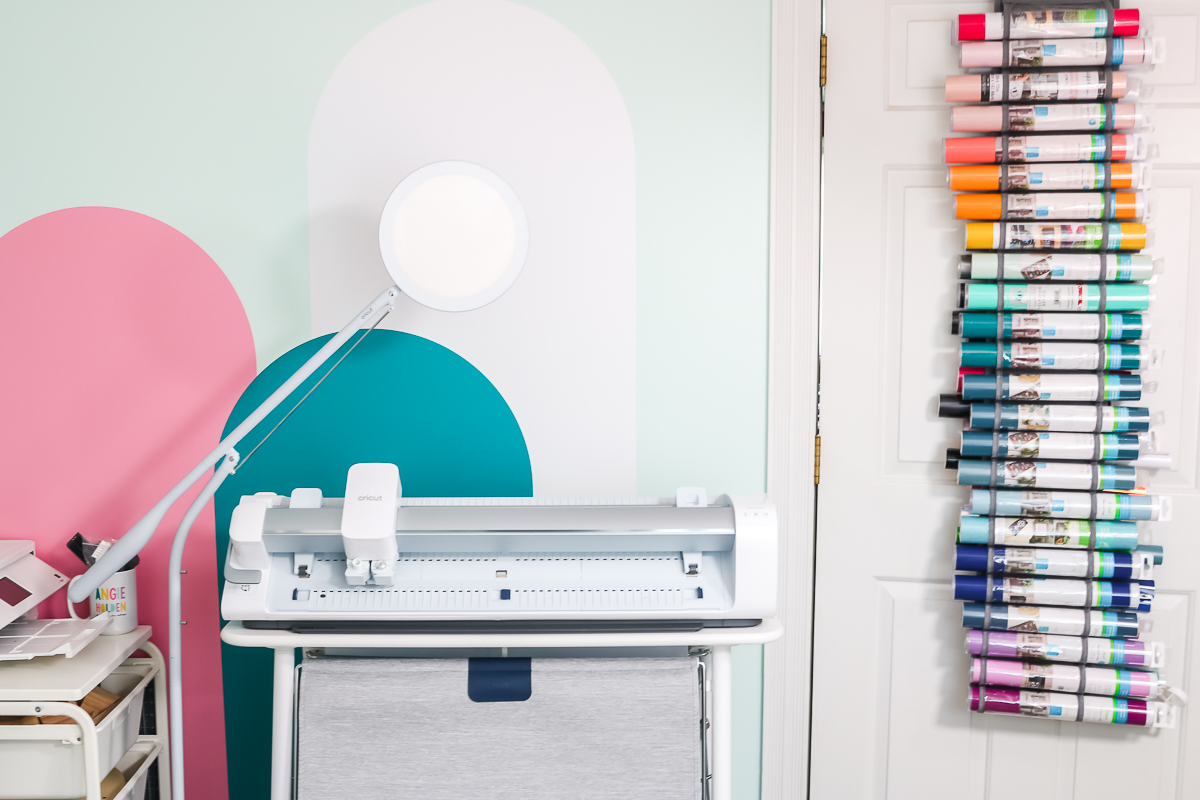
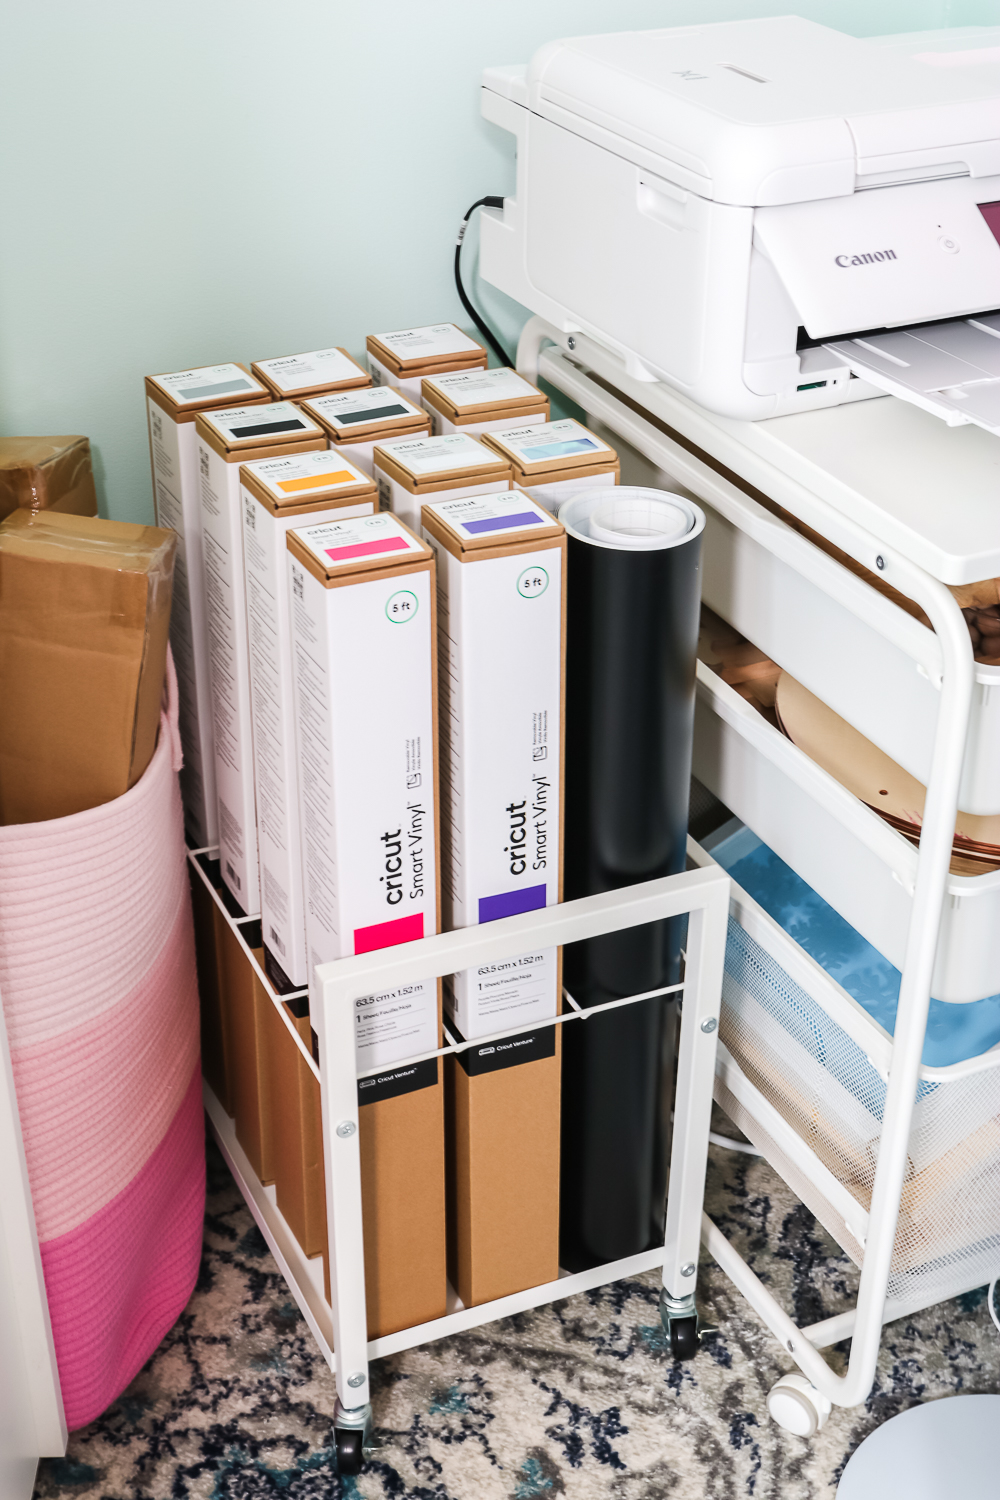
Because there is a door on one side, the DreamBox is more to one side of the room than the other. That means on the other side I was able to put my Cricut Venture and a printer cart with wood blank storage.
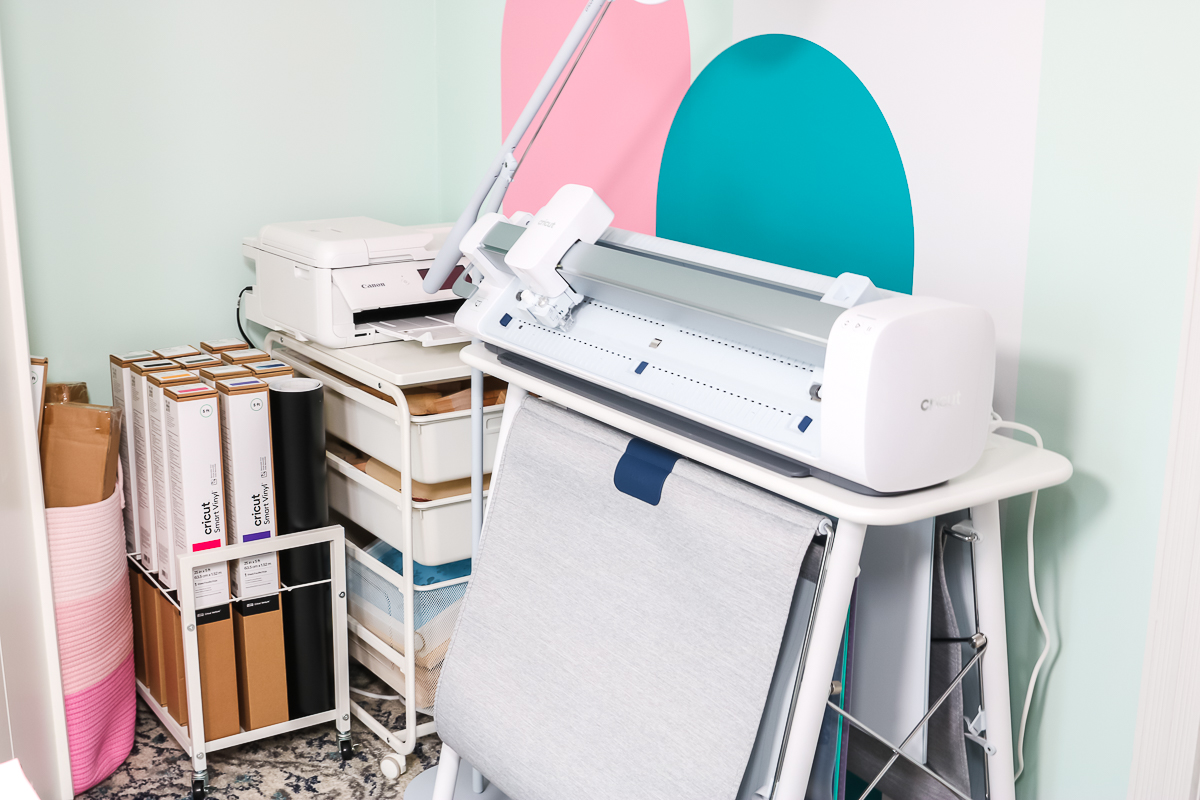
You can see more about the mural on this wall here as well as vinyl storage options here.
I mentioned that I put Smart Materials in the door of my DreamBox. The exception to that is the large rolls for the Cricut Venture. Those are mainly stored in this blueprint cart that is on wheels. I have the very large rolls in a pink basket behind the DreamBox door on this side.
Craft Table and Lighting
In the center of the room, I have a custom-built craft table. My husband built this many years ago specifically for this space. I keep it covered in vinyl backdrops and change those out when they get dirty.
On top, I keep a cord organizer box as well as a lazy Susan organizer. I also always keep a small metal cart on wheels beside the table with frequently used items.
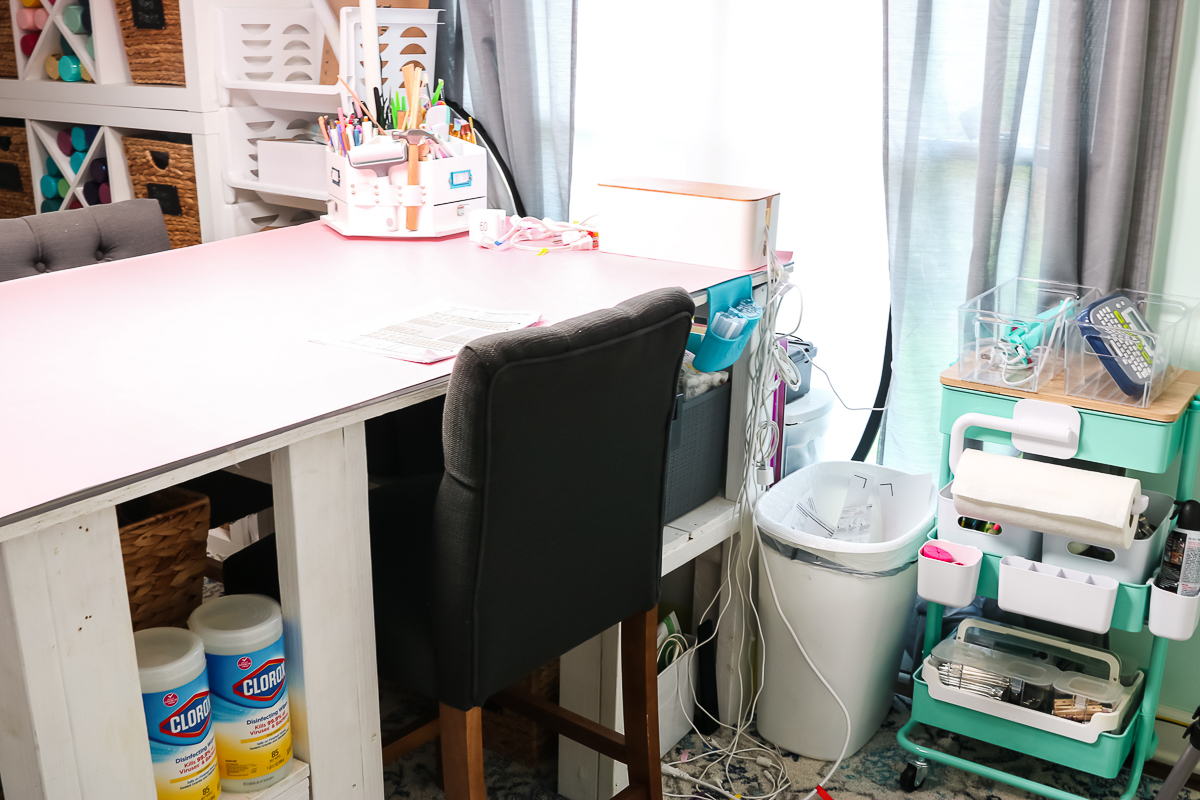
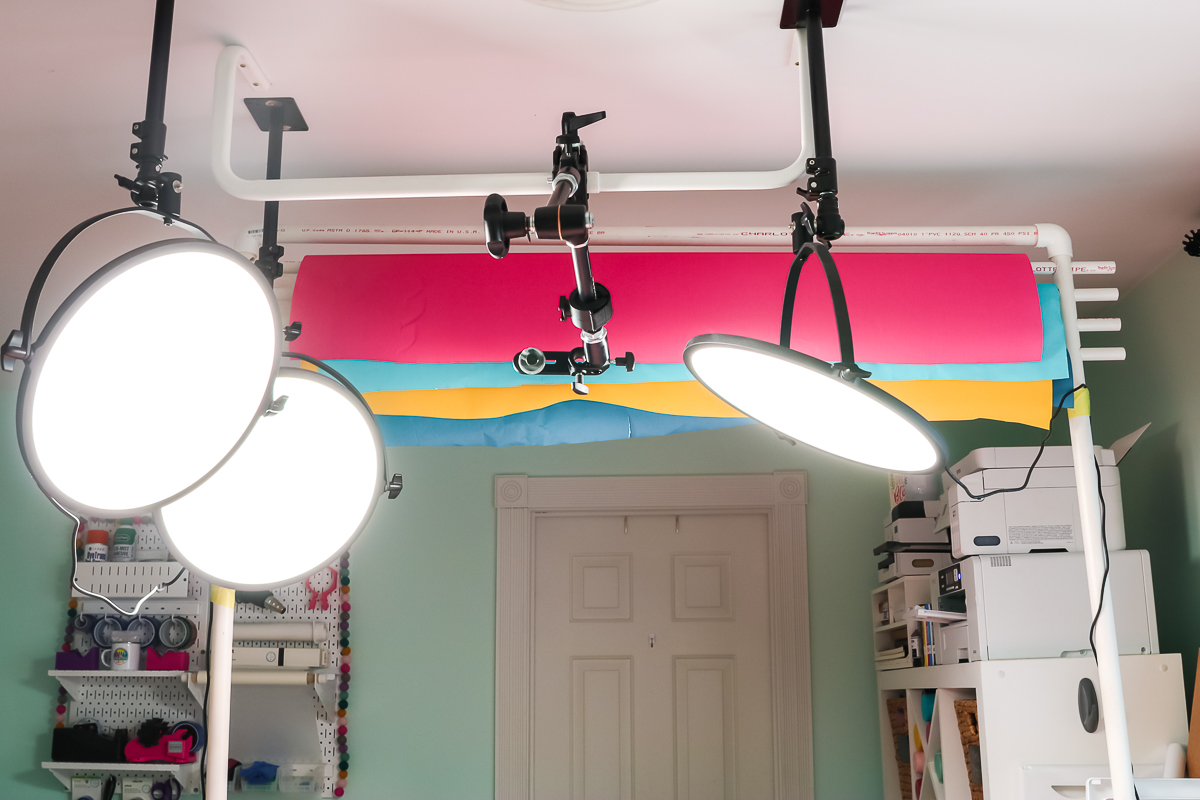
A look behind the scenes and you can see my lighting and setup above the table. It includes a PVC pipe backdrop holder that my husband installed for me several years ago. I use these to take photographs of my projects.
NOTE: This is the door that was in my videos previously so this room completely flipped sides!
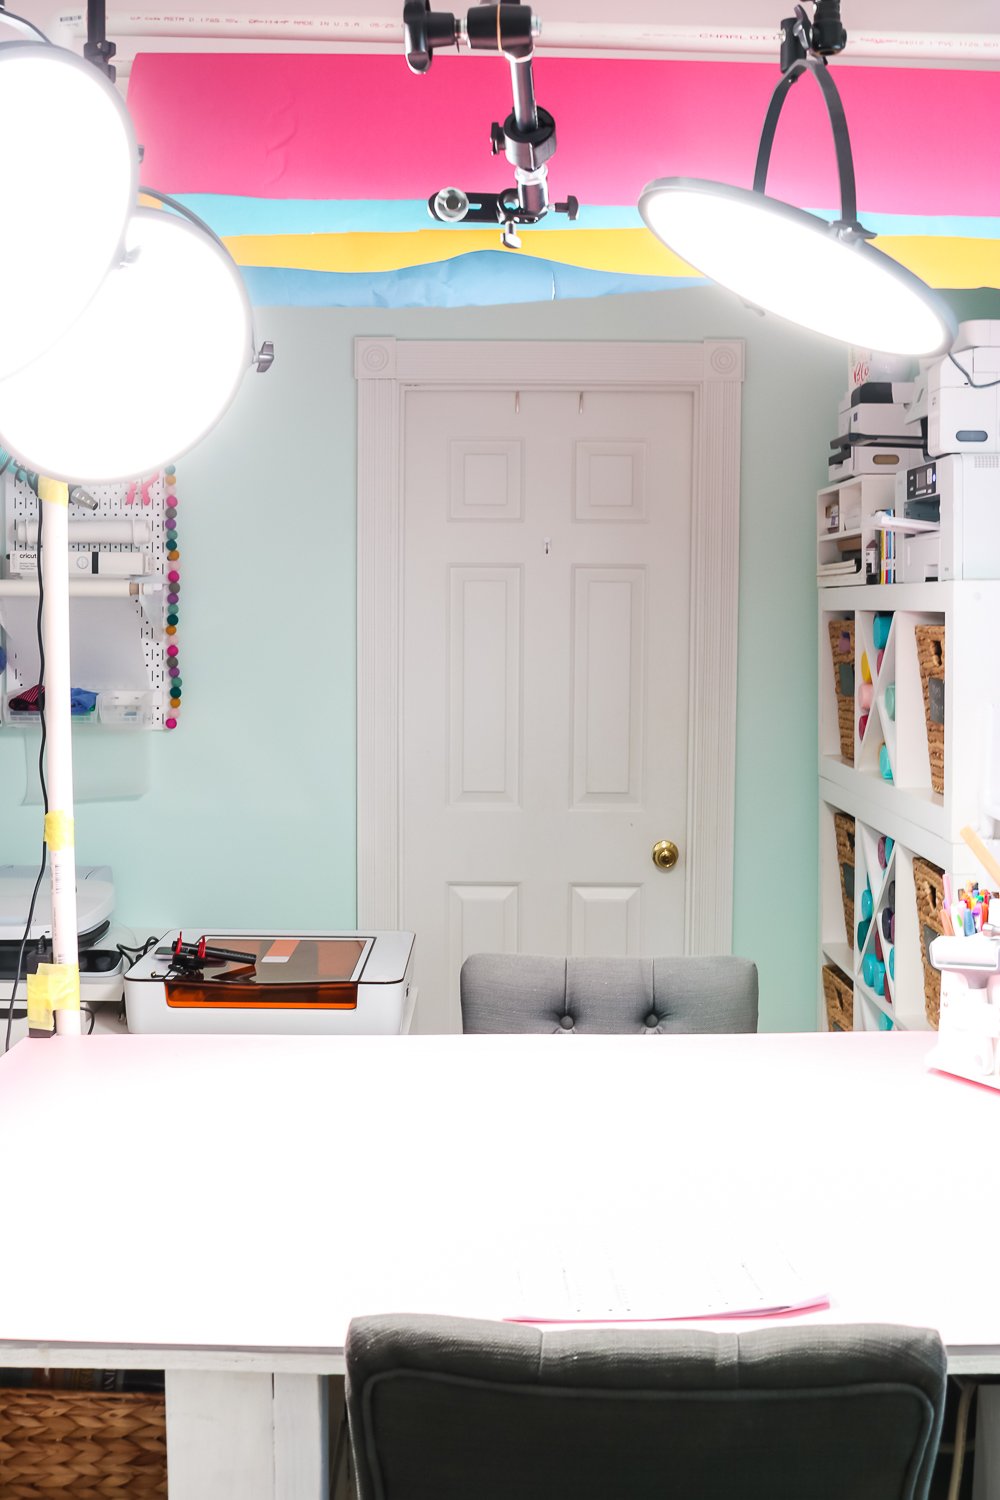
I have the lighting for my videos ceiling mounted along with a camera mount for overhead shots.
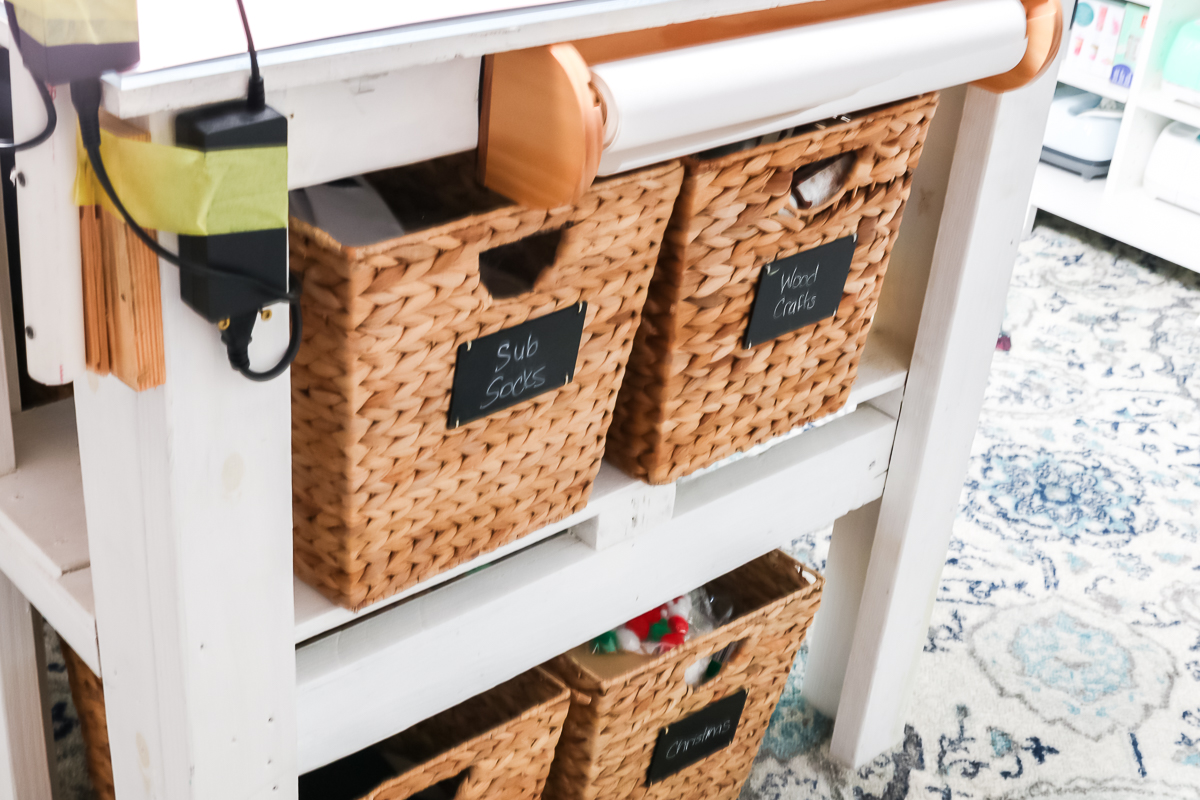
When I say every inch of space is used, I really mean it! The table has storage on both ends and I have a variety of baskets with supplies. I also keep a roll of butcher paper on a wood holder on this table.
Sublimation Crafting Storage
The DreamBox is primarily Cricut supplies so my sublimation supplies had to go somewhere. The other side of the room has a ton of sublimation storage.
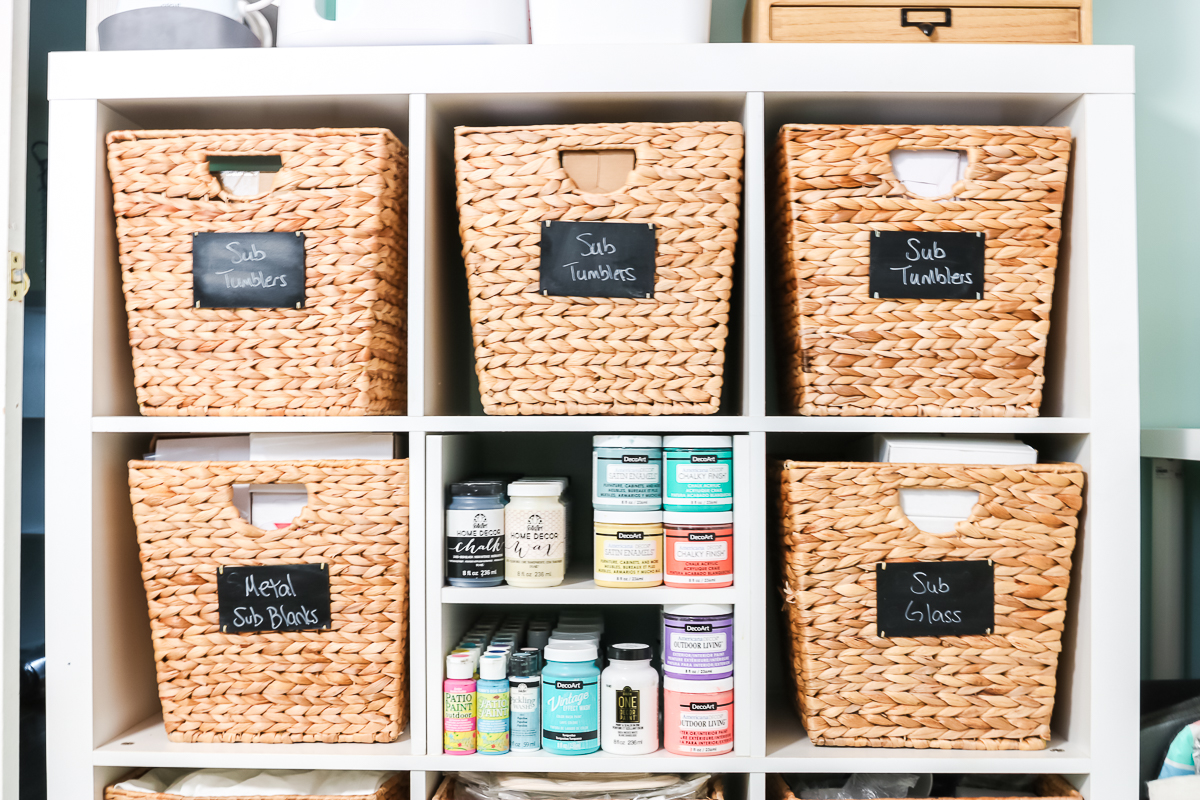
The cube shelves and baskets that I am using in this area were from WalMart several years ago and have been discontinued. There are similar versions at IKEA and Michaels.
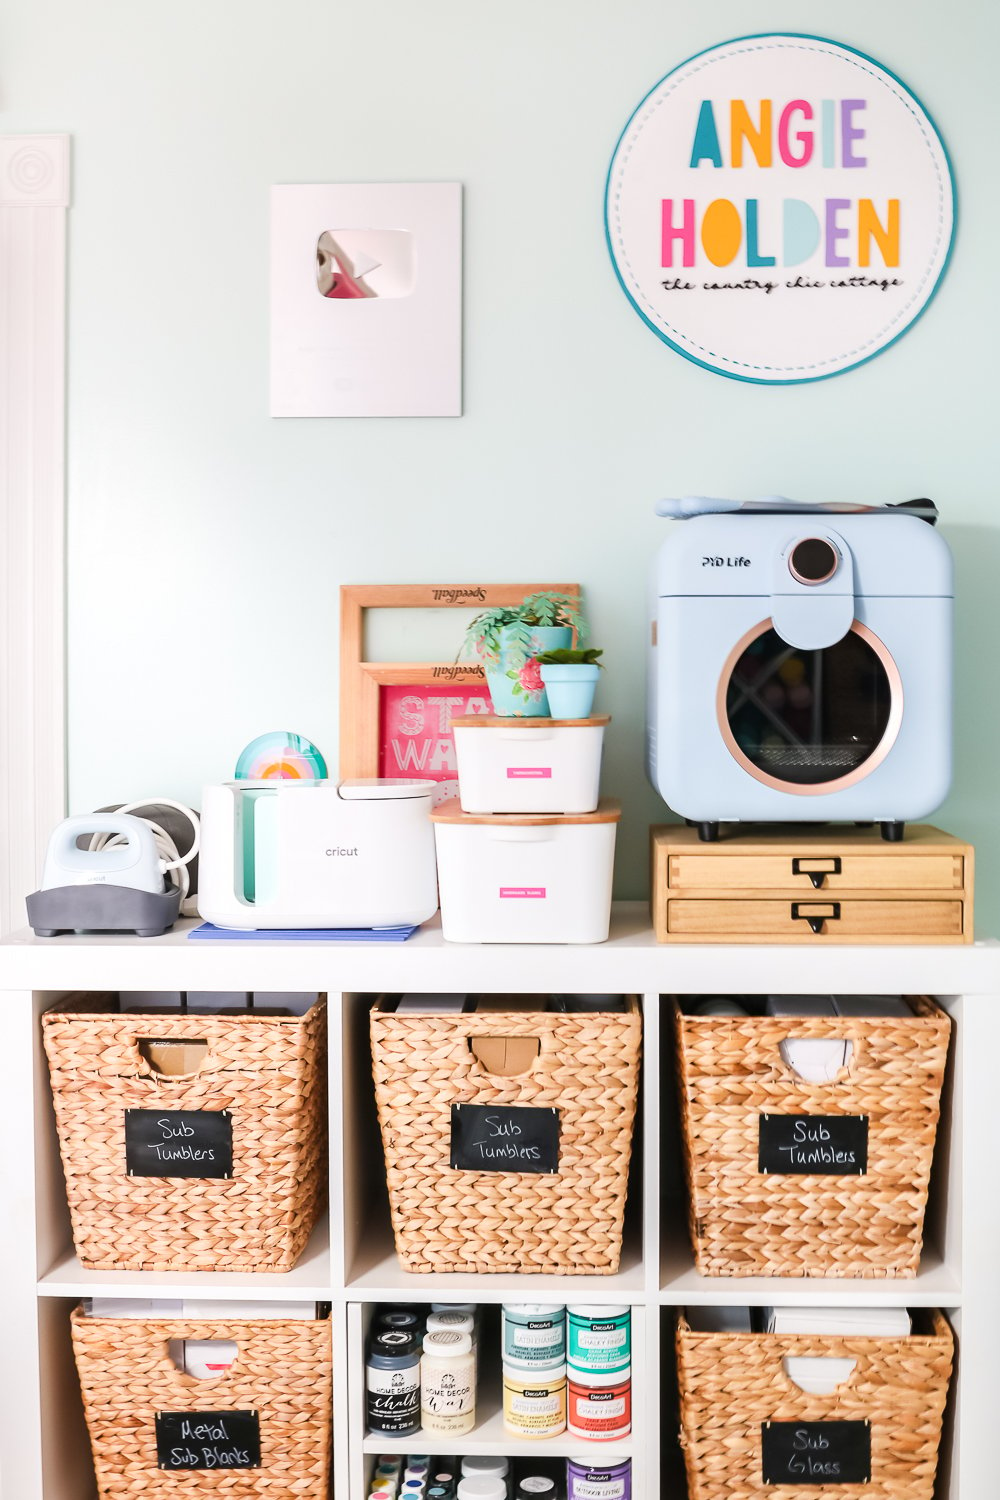
This shelf holds a variety of sublimation supplies in baskets. The top has my Cricut Hat Press, Mug Press, and PYD Life Sublimation Oven. Under the oven is storage for shrink sleeves.
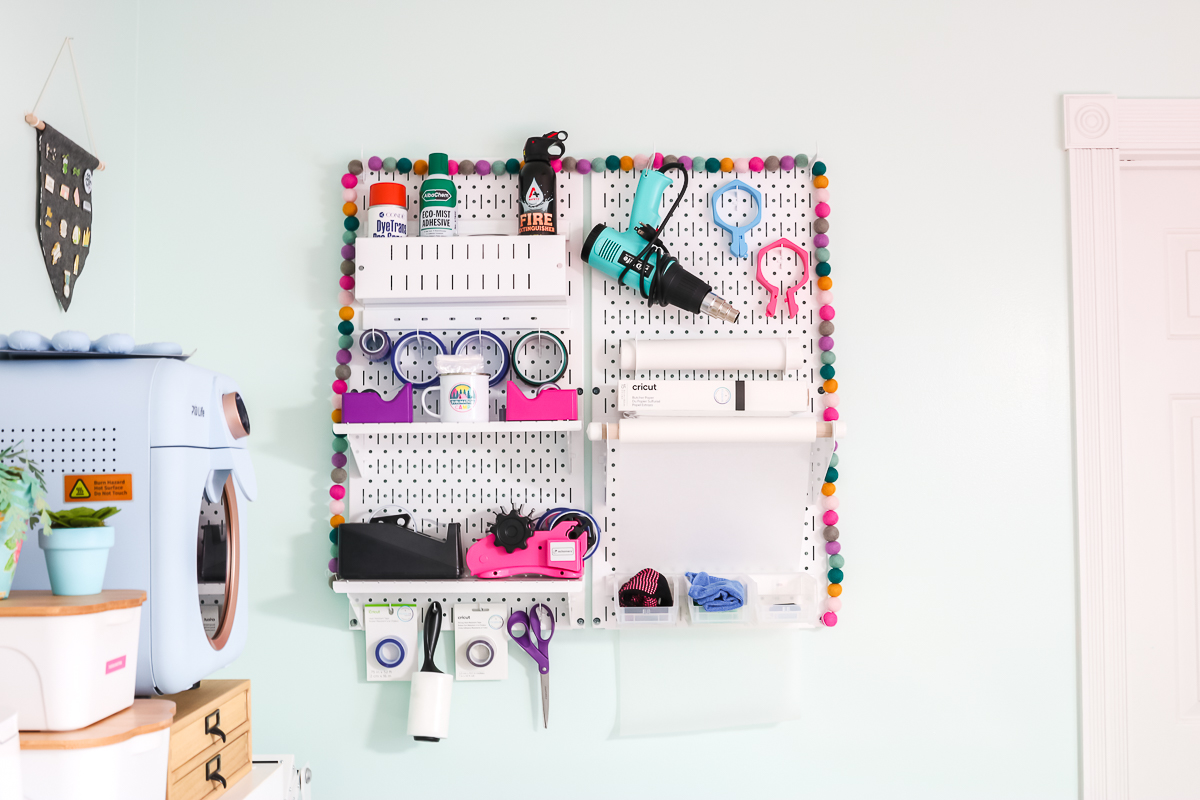
Beside that shelf is a table with my heat presses. Above that, I put two more of the Wall Control pegboards. I love the way these turned out! They are perfect for keeping sublimation supplies handy.
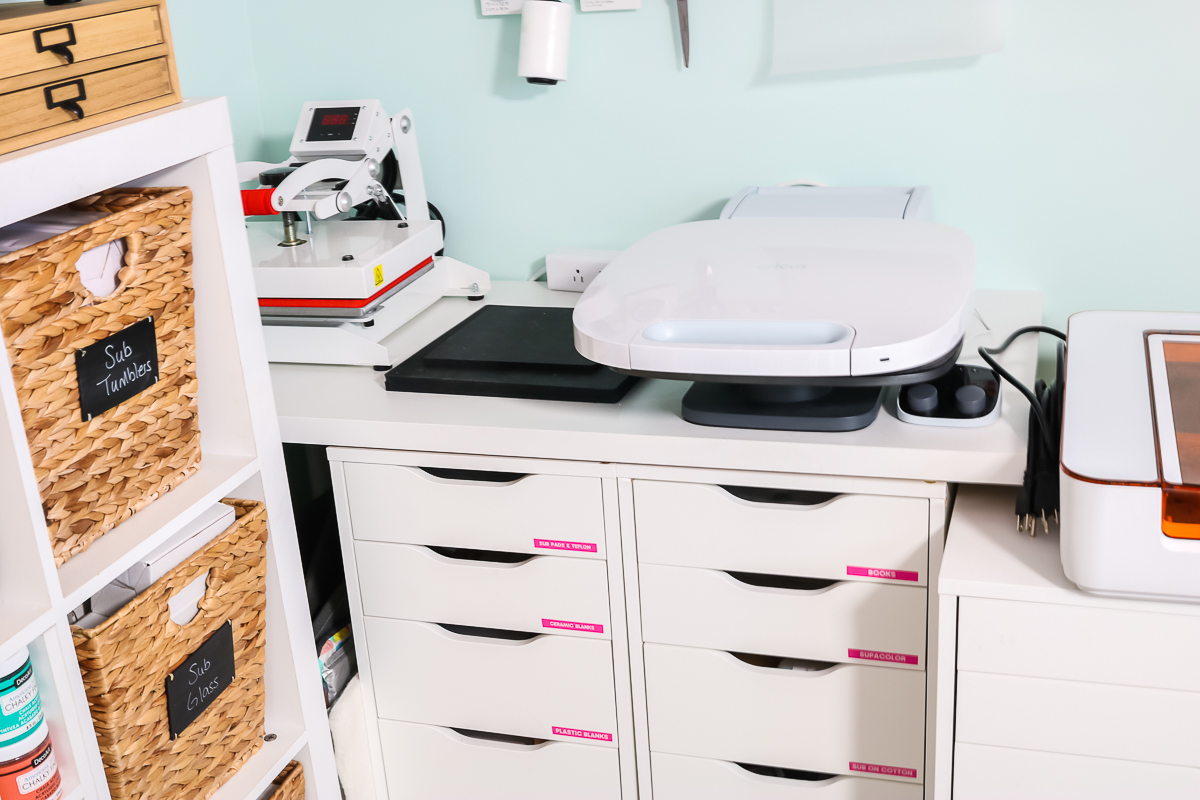
On the table, I have two heat presses. I will note that I have overflow storage in another area of my home so this is not all of the heat presses I own. I rotate them based on what I am using. The drawers under the table have more sublimation blanks and supplies.
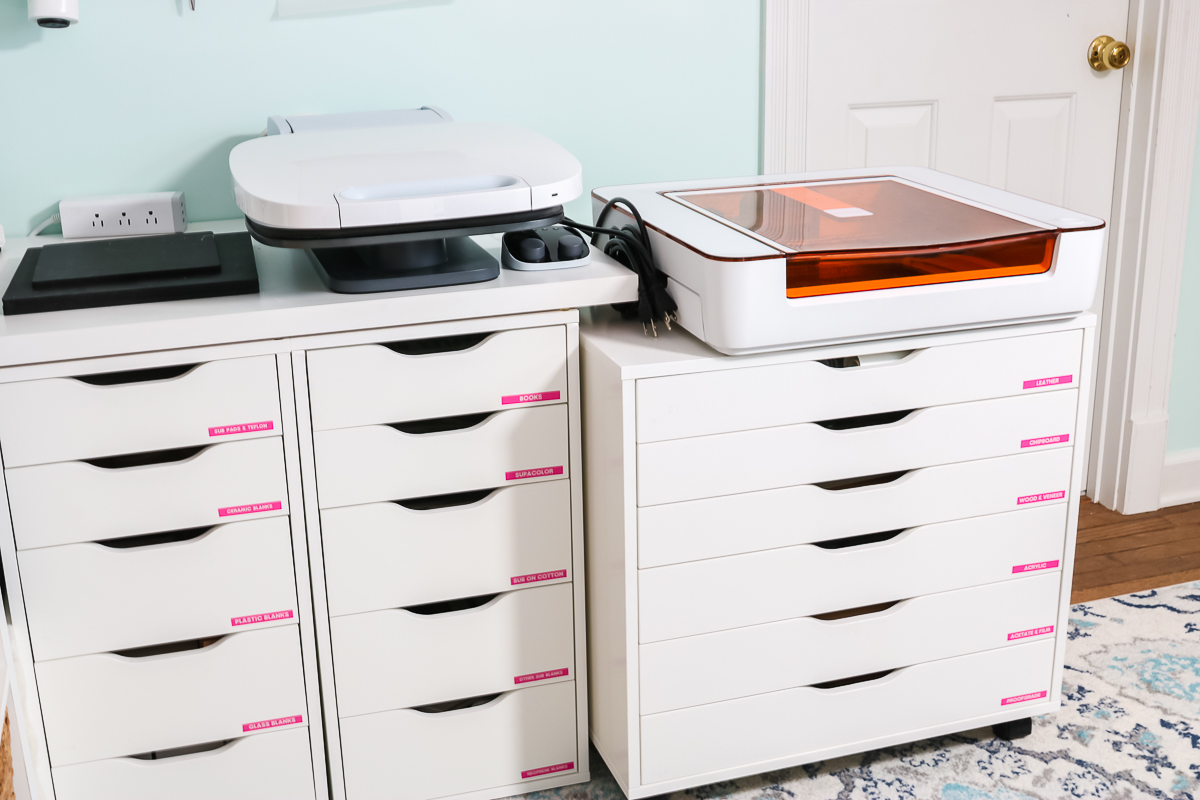
Next to that is a set of IKEA drawers with my Glowforge Aura on top. I have the air filter for my Aura behind this shelf so I can operate it in this area. The drawers are also on wheels so I could move it closer to a window if needed.
Cricut Blanks Storage
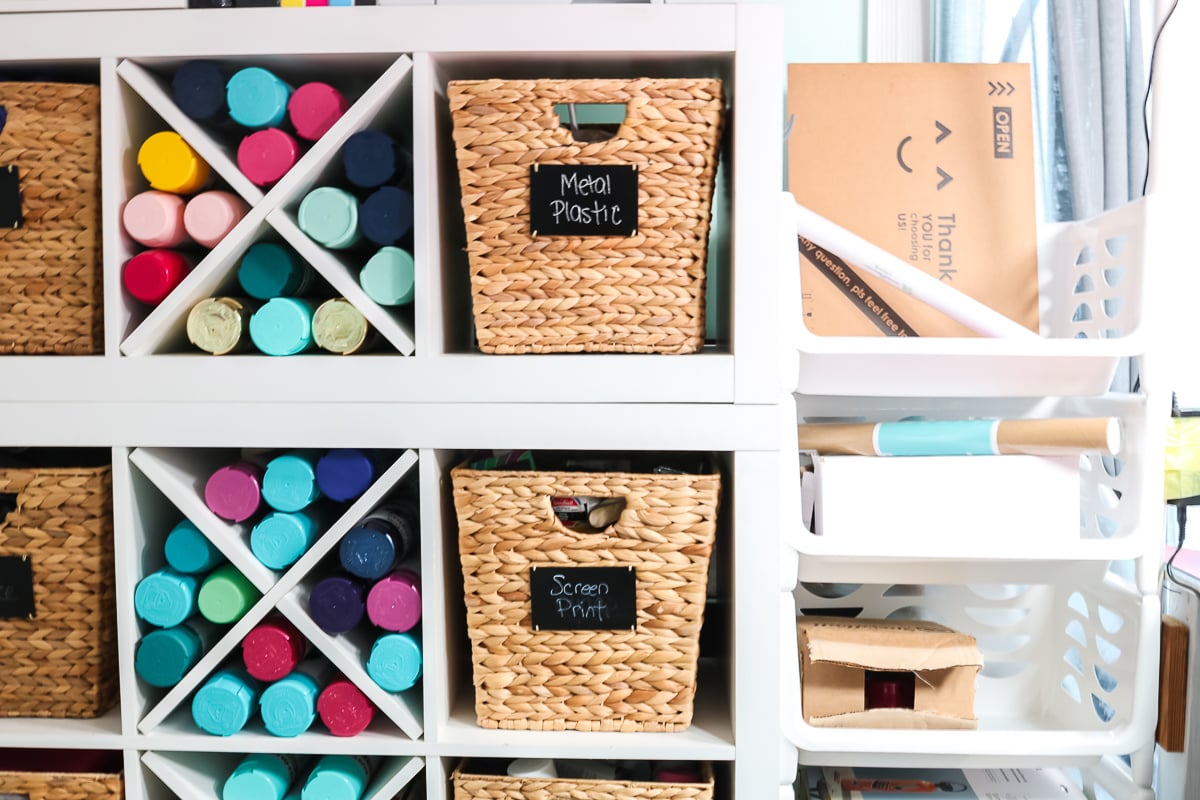
I also have another cube shelf that primarily has Cricut blank storage as well as spray paint. On top of that, I have my sublimation printers and paper storage.
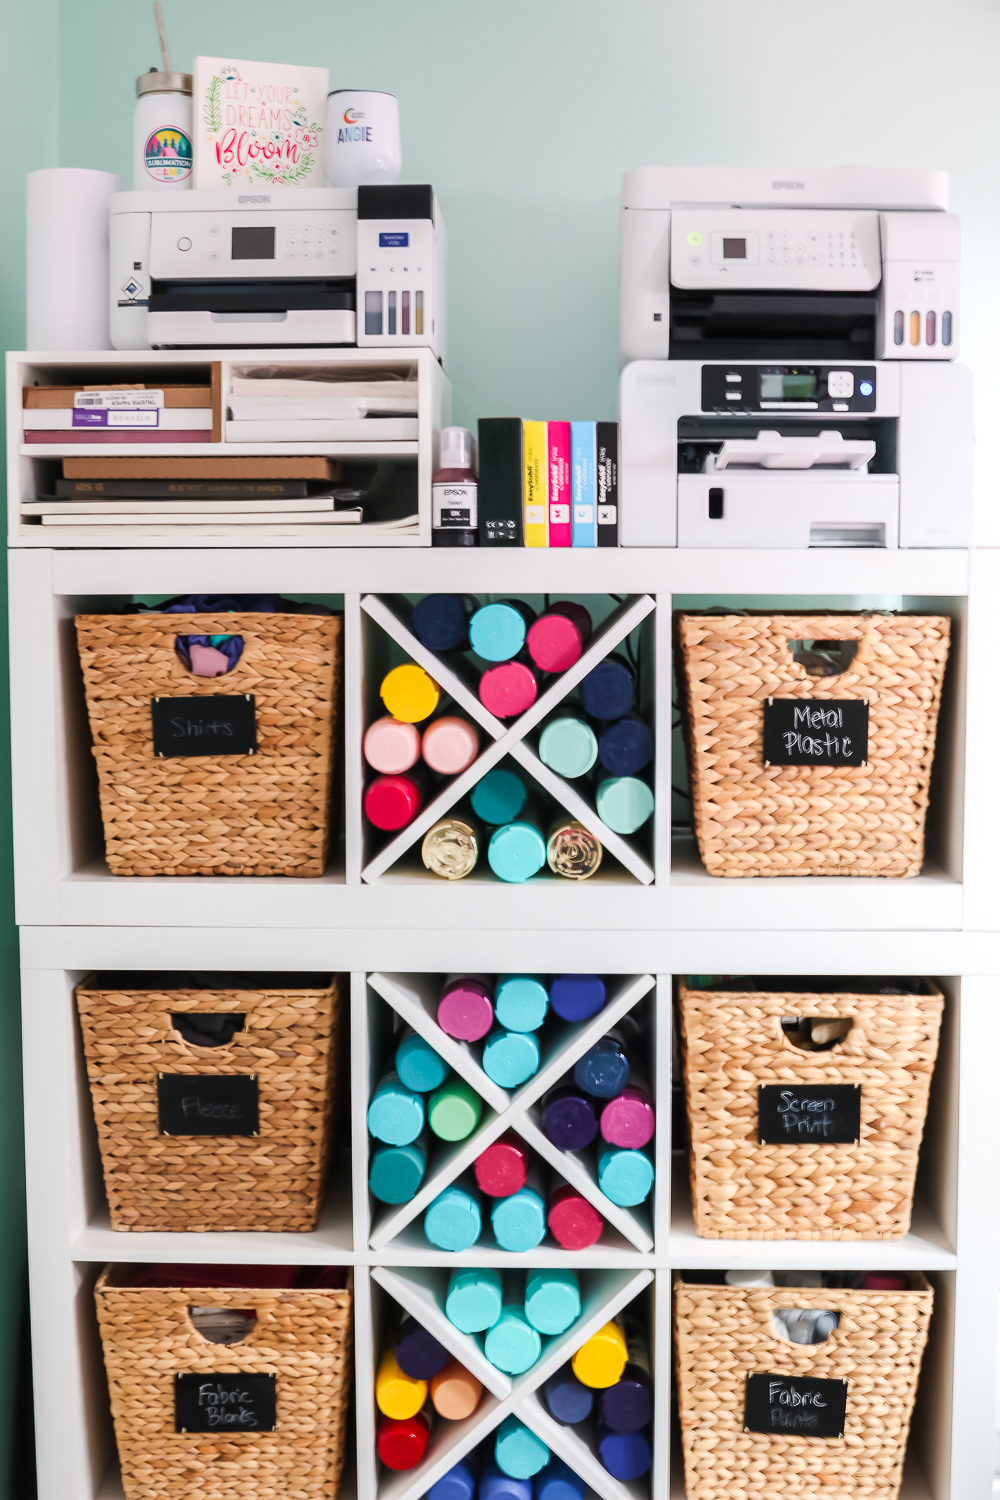
I will note that next to this I have a small set of bins for incoming projects. When packages come in for content, I am able to store them here until the video is made then I put the contents away.
Other Storage Areas
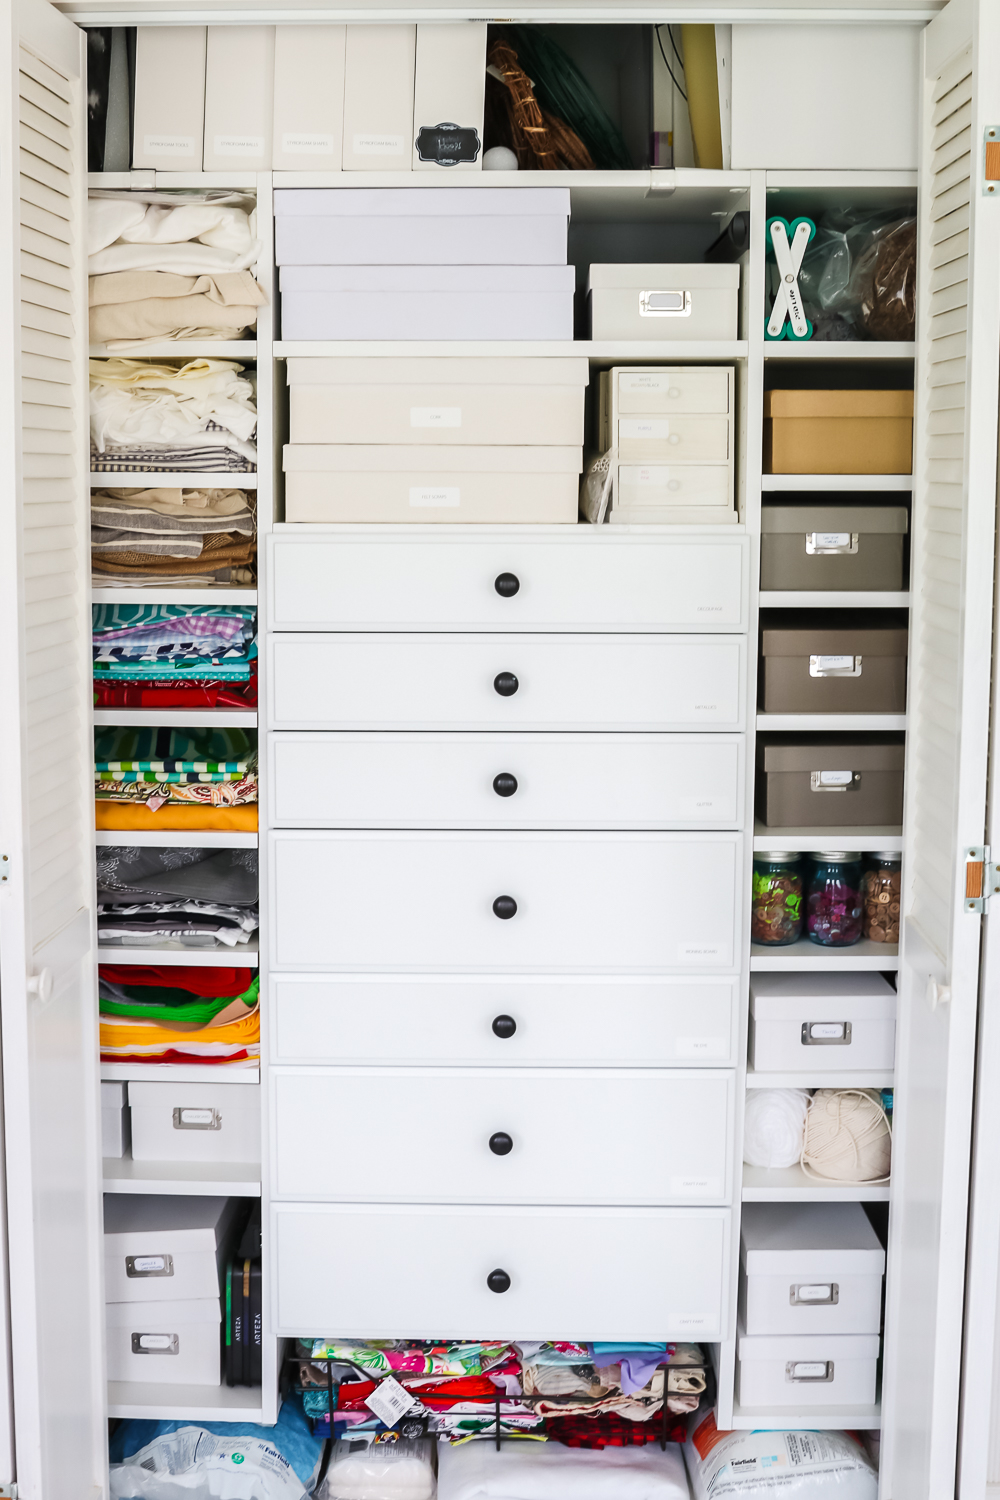
I did want to note that not all of my supplies are in my filming room. I have a craft closet in an adjacent room as well as an overflow area in a walk-in closet that is close by. I also have an office area where I do computer work.
You can see more about this craft closet here as I redid it with an organizer several years ago and it still works great!
Shop My Craft Room
Now that you have had the full tour, hopefully, you have some ideas for your own space. Here is a shopping list of supplies used in my craft room:
- Create Room DreamBox 2: Use code ANGIEHOLDEN at any time to get the best price available!
- Create Room Accessories
- Wall Control Pegboards
- Cricut Venture Smart Material Cart
- Shrink Wrap Drawers
- Cord Box
- Cricut tool organizer
- Vinyl storage
- IKEA Alex drawers
- Cube Organizers
- Cube Dividers
- Wicker Baskets with Chalkboard Labels (unable to find these online)
- Rolling Carts
- Lazy Susan Organizer
- Video lights
- Ceiling brackets
- Butcher paper roll
- Butcher paper holder
If I am missing any links, feel free to comment below and I will try to find a source for you! Add a few of these supplies to your wish list and start making your craft room a more organized space.
Big or small, I really think a Create Room DreamBox 2 can be a game-changer for any creative space. I held out for so long thinking my space was too small and the DreamBox would just take up too much room.
I was wrong! I should have done this craft room makeover sooner! The DreamBox is large but it holds so many supplies and freed up so much area in the rest of my room for more organized storage overall. I am in love with my new space!


Hey! Really cool video!
But will still miss your old craftroom, 😉
Thanks! Hopefully we all get used to it quickly 🙂
Super cool!
Thank you!