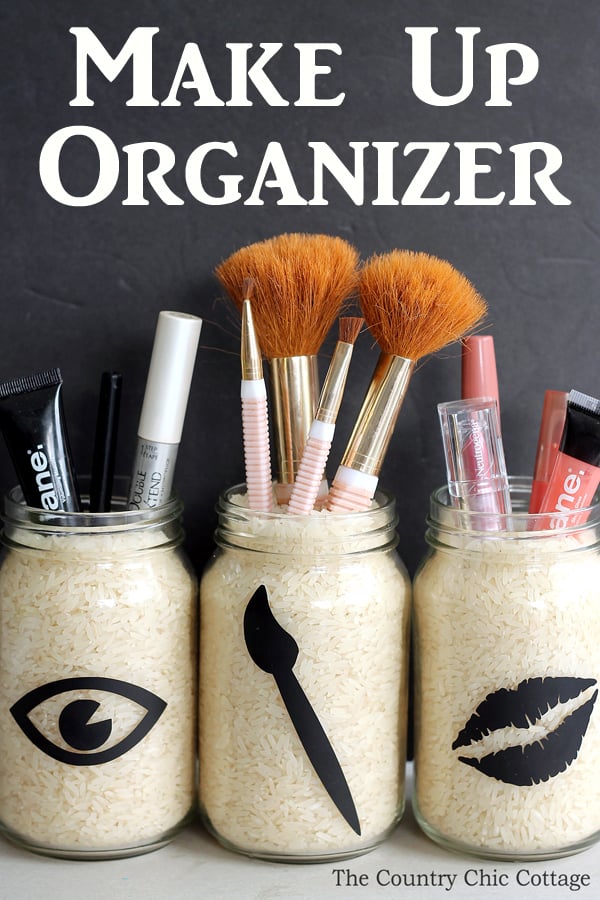
Get your make up finally organized with our DIY make up organizer! We have an idea for you today that will only take minutes to put together and will keep you organized in the bathroom or any small space! Grab some mason jars, or canning jars and get started on this fun project right now. You will have a makeup organizer in minutes and be ready to clean out that bathroom drawer!
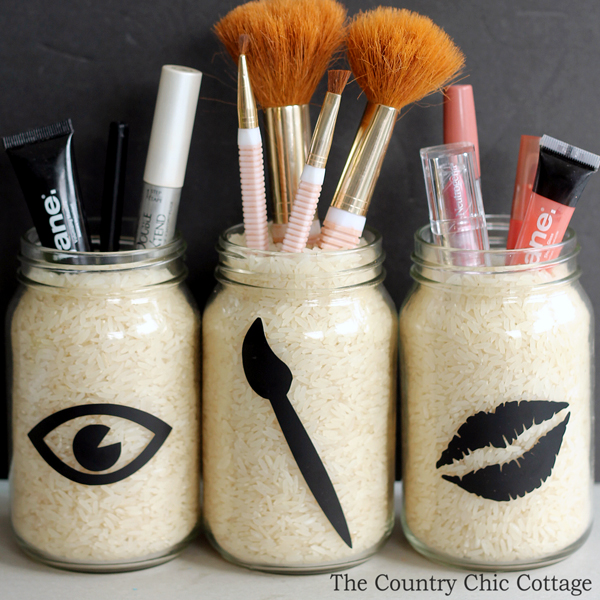
How To Make DIY Make Up Organizer
Extra storage is essential in any space and this make up organizer is perfect for small bathrooms or storage spaces where you want them to look clean but still trendy!
You can put this DIY make up organizer in your medicine cabinet, inside your drawer organizers, or in any vertical space where the space is too small.
This is also suitable for organizing your hair tools like your hair dryer as well! If you like this idea, just get a bigger jar, follow the directions below, and you’re good to go!
Download the FREE SVG Files
Are you ready to download your free SVG files to use for your makeup organizers? Click here and fill out the form to get the file sent to your email. Then from your email, you can download the file to your computer. If you have issues accessing the file, be sure to email thecountrychiccottage@yahoo.com and I will try to help you. Please note that this file is for personal use only. Contact me if you would like to use commercially.
Supplies Needed To Make DIY Make Up Organizer
- Mason jars (I love these smooth-sided ones I found at the Dollar Tree)
- Cricut (click here to see which one I love)
- Makeup Organizer SVGs (click here and fill out form to access)
- Black vinyl
- Rice
Step 1: Download & Cut Design
Download the file to your computer and then upload it to Cricut Design Space. You can see how to do that here. Resize the designs to fit your jars, then cut them out in black vinyl.
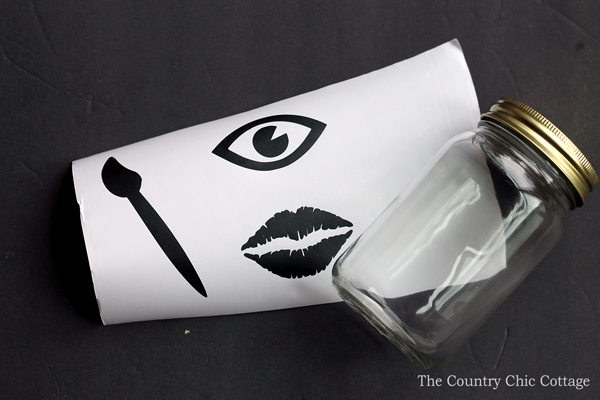
Step 2: Weed Design
After the design has been cut, weed away the excess surrounding the images. I like to use weeding tools to make this easier, but they are not a must.
Step 3: Add Design To Jar
Use transfer paper or carefully lift off the vinyl and apply it to a clean glass jar. Press down well on all edges of the vinyl to make sure everything is adhered to the jar.
Repeat this step with your other two jars.
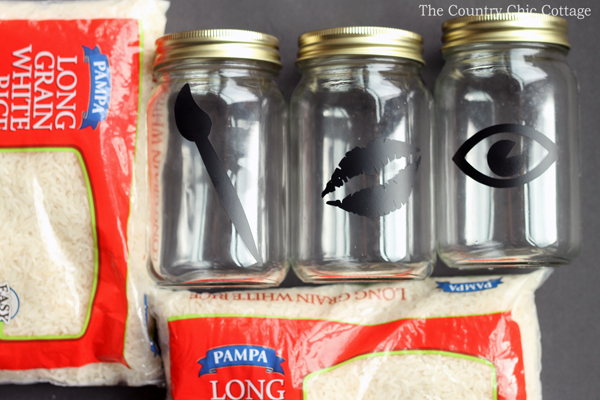
Step 4: Fill DIY Make Up Organizer With Rice
Fill the jars with rice almost to the necks. The rice will rise some once you add in your makeup. Your makeup organizer is now complete and just needs a few pieces of makeup and some brushes!
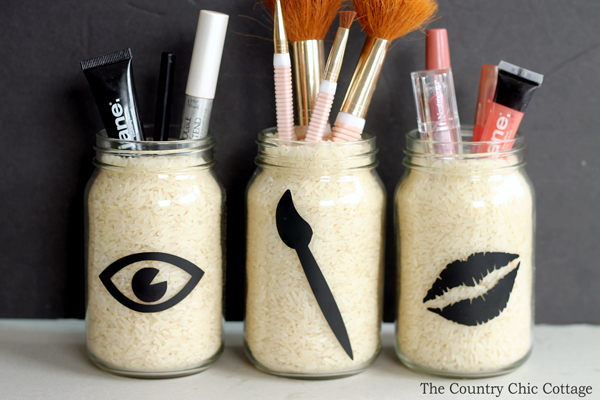
You can set this DIY make up organizer on your bathroom cabinet so your items are within easy reach and ready for you to use each day!
Don’t like the idea of using rice? Try some small white beads, cotton balls, or clear glass marbles. Either one would serve the same purpose and be equally as pretty! – However, rice is the more budget-friendly choice for this make up organizer.
I hope this bathroom organization idea will help you style your living area while making it look more cute and less cluttered!

FAQs About DIY Make Up Organizer
If you have questions about this DIY make up organizer, I have answers for you! Please leave your question for me in the comments if you don’t see it already answered below!
Do I Need To Clean My Jar Before I Start This Project?
Yes! I didn’t mention it in the tutorial, but you will want to wash and clean your jar before you add the vinyl. Also, I would clean the outside of the jar with rubbing alcohol because it will remove any extra ”dust” and it will give you a nice clean surface to add your vinyl on.
I’m Using A Jar With A Label. Do You Have Any Tips For Removing The Label?
If you are using jars from your kitchen (like pickle jars, jam jars, etc.) there are several ways that you can remove the original label.
For these types of jars, I would let them soak in warm soapy water then use a scraper to remove the label. This has worked for me, but if you are dealing with a stubborn label, below are a few more things you can do.
- Pour hot water into the jar, let it sit, and it will loosen up the label on the outside.
- Create a mixture of dish soap and vinegar.
- Apply heat to the label using a hair dryer.
I’m Using A Jar With A Label. Do You Have Any Tips For Removing Sticky Residue?
To remove any sticky residue from the jars, I would use Goo Gone, along with soap and water. However, if you don’t like the smell of Goo Gone or need other options, below are a few ideas.
- Adhesive Removers (like 3M Adhesive Remover, Un-Du, etc.)
- White vinegar
- Nail Polish Remover
What Cricut Machine Can I Use For This Project?
All of them! The Cricut Maker, Cricut Explore series, Cricut Joy, Cricut Joy Xtra, and Cricut Venture, can all cut vinyl!
The only thing to keep in mind is that each Cricut machine is different in regard to project size capabilities and the materials it can cut. So, depending on what project you have in mind, you might need to resize the design or cut it out in a different material.
Do I Have To Use Black Vinyl?
No, you can use any color of vinyl that you like for this project!
6 More DIY Organizers
Did you love this DIY make up organizer, and are looking for more organizer projects? Then check out the ideas below!
- Mason Jar Wall Decor: Bathroom Organizer
- Color-Blocked Craft Room Organizer with Rust-Oleum
- Printable Labels with Cricut for Organization
- DIY Cork Board with Cricut Iron-on
- DIY Desk Organizers
- Mason Jar Toothbrush Holder: Make Your Own
Declutter Your Home in 31 Days!

Clear the clutter and organize your home with our daily emails! Every day for a month we will send you a prompt to declutter! Sign up for our email list below to get started.



These are super cute! What a great idea!
Cute idea for something I desperately need! My make-up drawer is a disaster! Thanks for sharing!
Cute idea to use pictures for the jars instead of words!
My daughter needs these like yesterday! Totally whipping some up! Thanks for the inspiration.
Been trying to decide what to do with my “never mind how I often I straighten it up, my makeup drawer’s always a mess” drawer. Perfect idea. Although I may not do the “decals” since I have antique Mason and Kerr jars that belonged to my MIL and I love the aquamarine glass. 🙂
This is the second cool DIY that Iv’e seen today done with that cameo! Geesh ya’ll gonna make my husband mad at me! Great Ideal!
What a fun idea! Love it and to use rice is so unique!!!
I love how fun and whimsical these are. And they are super practical 🙂
This is so cute! I usually use the glass marbles in my vases, but rice is a cool idea too!
These are so cute! We’d love for you to share this project on our new crafty link party: http://www.leavesandstitches.com/creative-craft-bloggers-group-link-party-1/.
What a great idea to use rice! I bet it keeps all those little things standing up instead of scattered everywhere (like mine). 🙂 The decals are so cute too!
these came out so cute! love using mason jars for everything!
Found you through the link up–I am glad to see all your silhouette ideas!
These are adorable! I love the modern cutouts on the jars!! Loved it!! Thank you for sharing your wonderful creativity with us at Friday Favorites! I hope you will join us again this week! Hugs- Christine at Must Love Home
These are so creative! What a great storage idea!
Such a fantastically cute idea! I love that the jars are labeled with lips, an eye, and a brush! So clever! Thanks for sharing at Submarine Sunday!!!