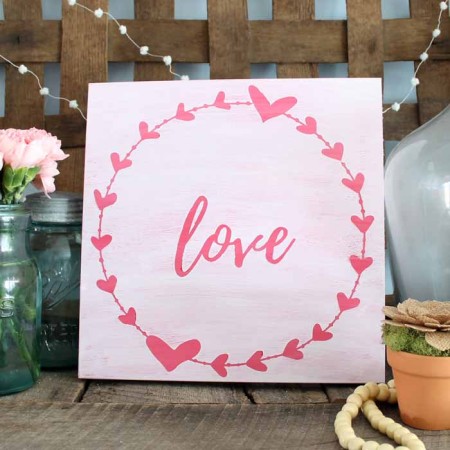
Add a little love to your home with this cute farmhouse-style love wall art! This tutorial will show you a new painting technique that makes this love canvas look rustic and beautiful.
Need some gorgeous love wall art for your home? Whether you’re looking for some Love Canvas Art projects for Valentine’s Day or as a way to simply add a little love to your everyday decor, you’ll love this idea.
The final product appears to be worn with layers and layers of paint, but in reality, the technique is quick and easy!
And this love wall art is a great complement to my DIY Love Bird Ornament, Valentine’s Day Vase, and Valentine’s Day Wreath.
Note: If you want even more Valentine’s Day art inspiration, check out my Mason Jar Picture on Canvas, DIY Love Pallet Art, and Rustic Love Sign from Barn Wood!
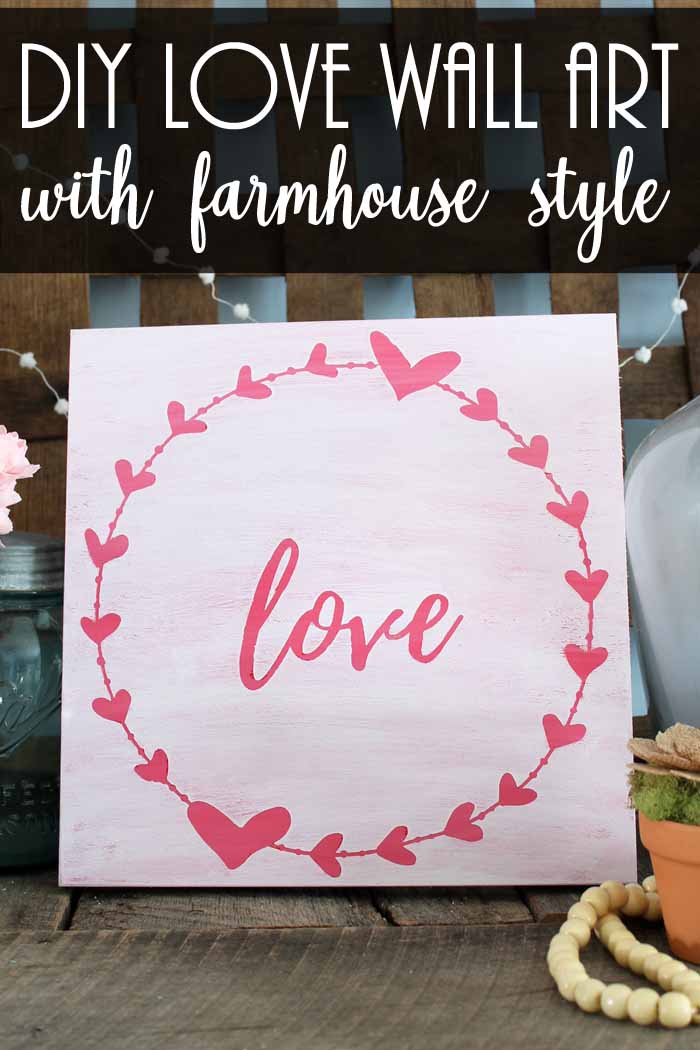
How To Make Love Wall Art
I have a painting technique for you today that will allow you to create this rustic sign in minutes with just two paint colors! Here’s what you need to know.
Supplies Needed
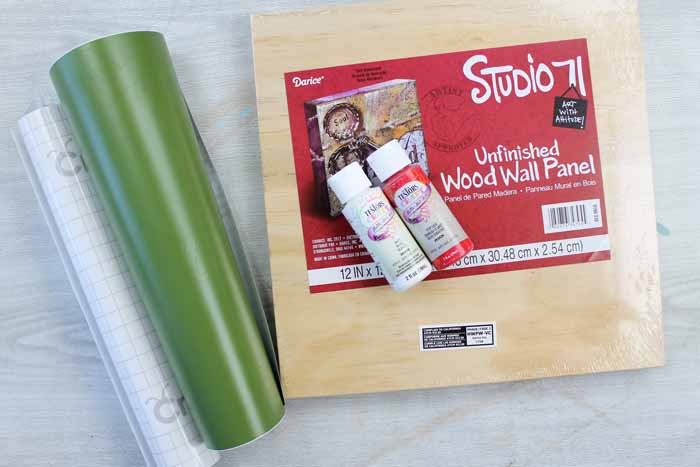
Gather up these supplies to make this project. I’ve included a few handy links to make it easier to find certain items.
- 12×12 wood wall panel
- Testors Paint (in matte White and Stop Sign)
- Cricut Cutting Machine (Want to see the difference between the machines? I compared the Cricut Maker and Explore here.)
- Vinyl in any color (12 x 12 sheet)
- Transfer tape
- Weeding tool
- Paintbrush
- Love wreath art
Video Tutorial
I really wanted to show you the steps for this painting technique rather than just tell you. So, I created a really short video below. Watch it to get an idea of just how easy it is to create this love wall art.
Love Canvas Art Instructions
Now for some step-by-step instructions as well, just in case you need them!
Step 1
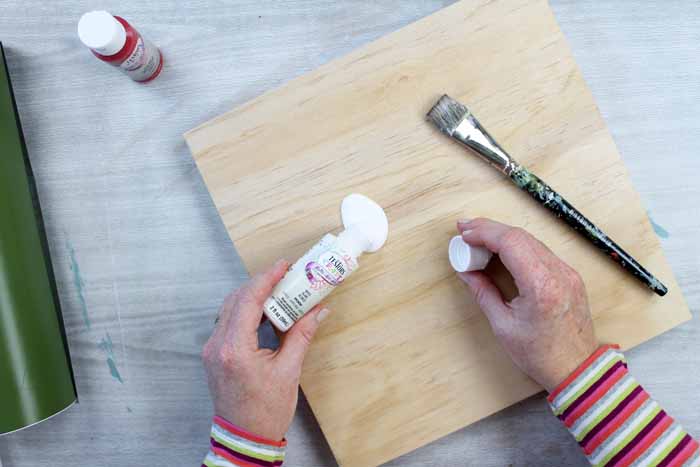
Start with your wall panel and the white paint. You can even just pour a bit of paint onto the panel.
Step 2
Use your paintbrush to cover the entire panel with white paint.
Step 3
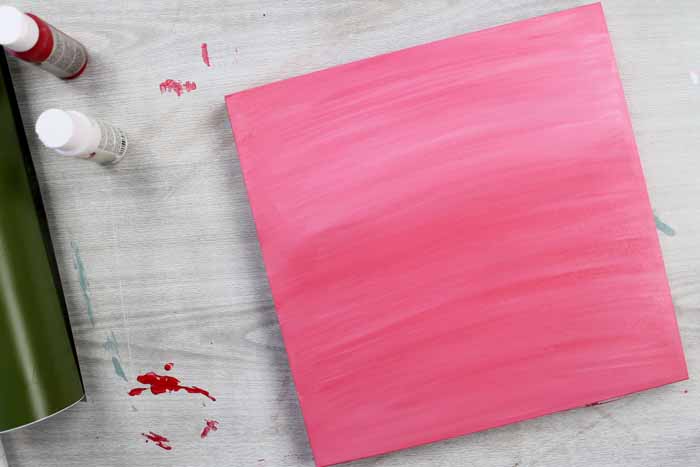
Next, while the white paint is still wet, pour on a bit of red paint. Use your paintbrush to spread that around too. The two will mix, creating a pink color that is varied.
Don’t forget to paint the sides of your love wall art canvas too!
Note: You will see more white in some areas and redder in others. This will be different for every piece you create, but that is the beauty of this method!
Step 4
Allow the paint to dry completely. In the meantime, download the cut file. Upload it to Design Space and cut it from a 12 x 12 piece of vinyl (any color is fine).
Don’t know how to upload your own image? Try our beginner’s guide here!
Step 5
Once cut, weed any excess vinyl and use transfer tape to apply to your wood panel.
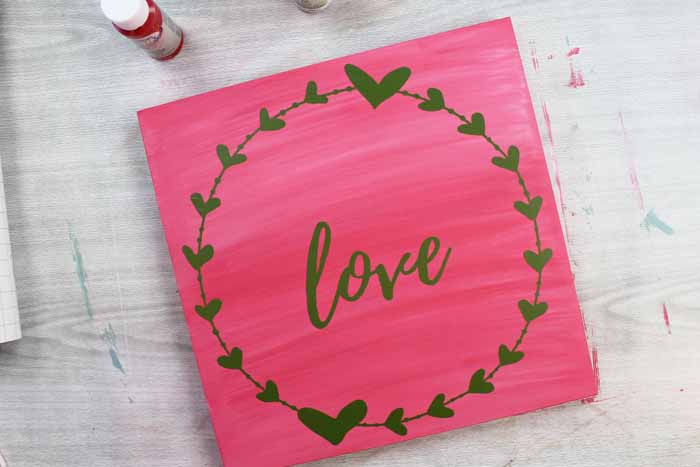
Step 6
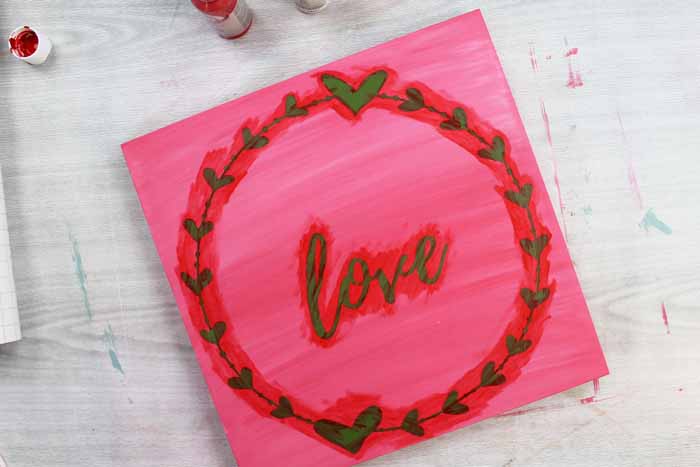
Now you don’t want any white paint to seep under your vinyl, plus the top layer needs a slight pink tint. So break out the red paint again.
Use VERY LITTLE paint on your brush and go around the vinyl, as shown below. This will help to seal the edges and give you cleaner paint lines.
Step 7
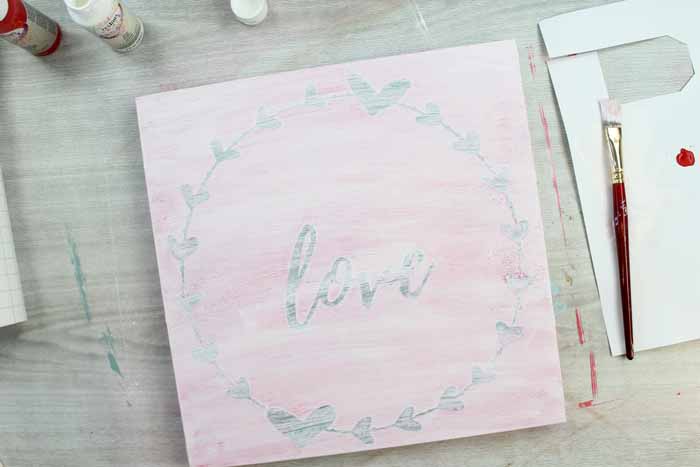
While this is STILL WET, start going over the top with LIGHT coats of white paint. I did three coats of white paint, one right after another.
Not allowing them to dry will help to give you that rustic appearance when the project is complete.
Remember to paint the sides of your love wall art canvas!
Note: The red paint we used in the previous step will blend slightly with your white giving you a faint pink tint as well.
Step 8
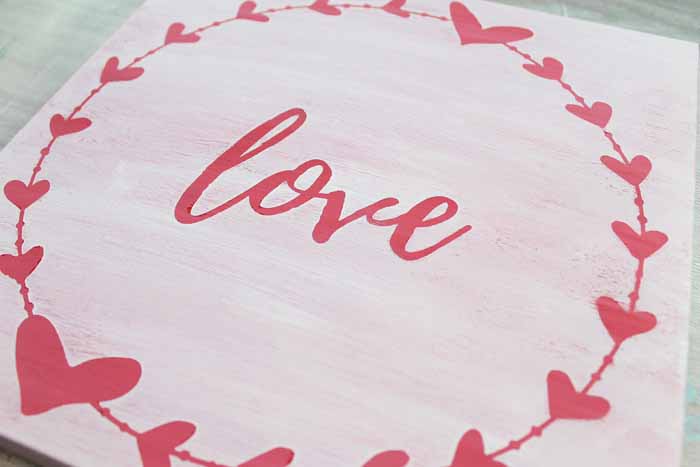
While the paint is still wet, lift up your vinyl and remove it from your love wall art.
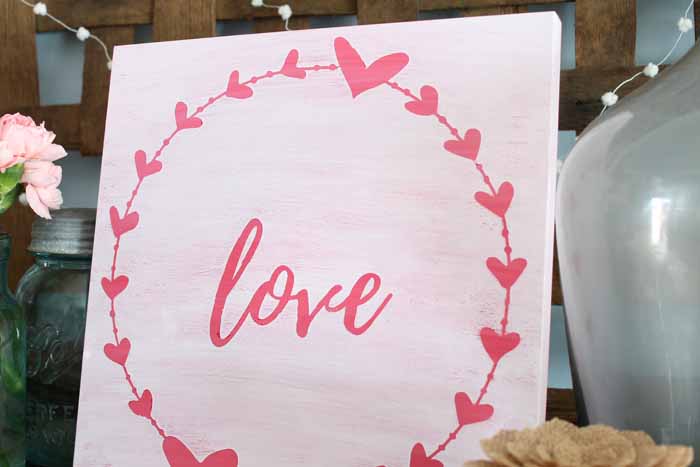
This is my favorite part! Lifting the masking and seeing that gorgeous art underneath. Notice how you can see some of the rustic texture in the image below.
Step 9
Allow your love wall art project to dry completely, then put it anywhere in your home.
This project is perfect for Valentine’s Day, but it would also work throughout the year. Add a little love to your home decor!
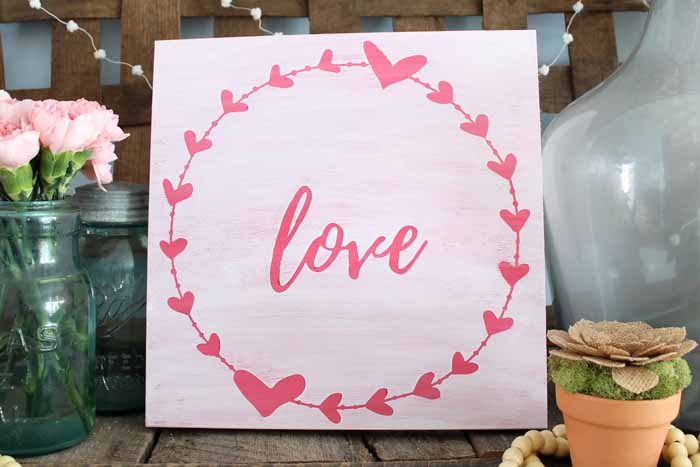
The varying shades of paint that are in this project are stunning, considering I literally used two different colors. You can see everything from the brightest red to the brightest white, with all shades of pink in between.
FAQs
I’ve seen readers ask several questions about this wall art project and technique. If you have a question but don’t see it answered below, please leave it for me in the comments.
Can I skip the color blending and use solid colors?
I love the effect that the blended colors create and think that the blended colors create a more cohesive design. But if you prefer to have more separation between the colors, sure, you could do that.
Try painting the canvas solid white with a pink (or red) image. Or reverse the colors and make the graphic white on a darker background.
Could I skip the multiple steps of painting and just apply vinyl?
Yes, you could make your love wall art that way. You would simply follow a process similar to what I did for this DIY Canvas Art project.
Please note that using this different method will produce different results in the final product, but it can be equally as amazing!
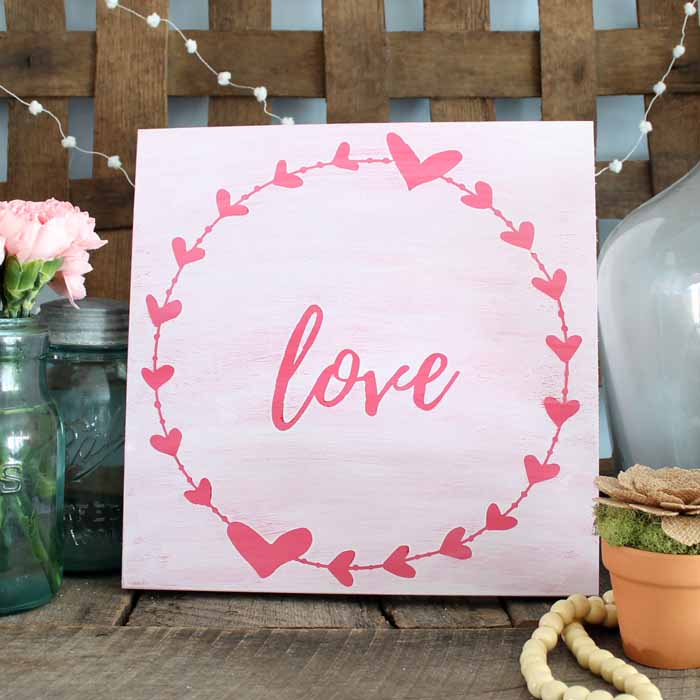
I hope you can get a chance to make your own love wall art for your home! I know you will love the stunning results and the additional love it adds to your farmhouse-style home.
More Valentine’s Day Crafting Inspiration
If you love this love wall art and want more crafting ideas for Valentine’s Day, check out these fun ideas!



Supplies
- 12×12 wood wall panel
- Testors Craft Paint in matte White and Stop Sign
- Cricut machine
- Cricut vinyl 12 x 12 piece in any color
- Transfer tape
- Weeding tools
- Paintbrush
- Love wreath art
Instructions
- Pour a bit of white paint onto the panel.
- Use a paintbrush to cover the entire panel with the white paint.
- While the white paint is still wet, pour on a bit of red paint and spread it around with the paintbrush. The two will mix and create a beautiful varied pink color.Remember to paint the sides of your panel!
- Allow the paint to dry completely. In the meantime, download the cut file. Upload it to Design Space and cut it from a 12 x 12 piece of vinyl (any color is fine).
- Once cut, weed any excess vinyl and use transfer tape to apply to your wood panel.
- Use JUST A LITTLE red paint on your brush and go around the vinyl. This will help to seal the edges so white paint doesn't seep under and give you cleaner paint lines.
- While the paint is still wet, go over the top with LIGHT coats of white paint. I did three thin coats of white paint, one right after another to create that rustic appearance.Remember to paint the sides of your panel!
- While the paint is still wet, lift up your vinyl and remove it from your love wall art.
- Allow your project to dry completely, then put it anywhere in your home.
New to Cricut?

Sign up for our email list to download the Beginner's Guide to Cricut Design Space for FREE today!
Sign up to get the guide emailed to you!


Awesome wall art!!
Lovely Wall Art!
This is too cute! I recently got a vinyl cutter and am itching to make this. Thanks for sharing at Meet up Mondays!
This is beautiful and a great tip for preventing the seeping under the vinyl .
Really loved this love wall art, Angie! I’ve recently been thinking about making some rustic signs so this tutorial couldn’t have come at a better time. Thanks for the detailed instructions and the video tut!