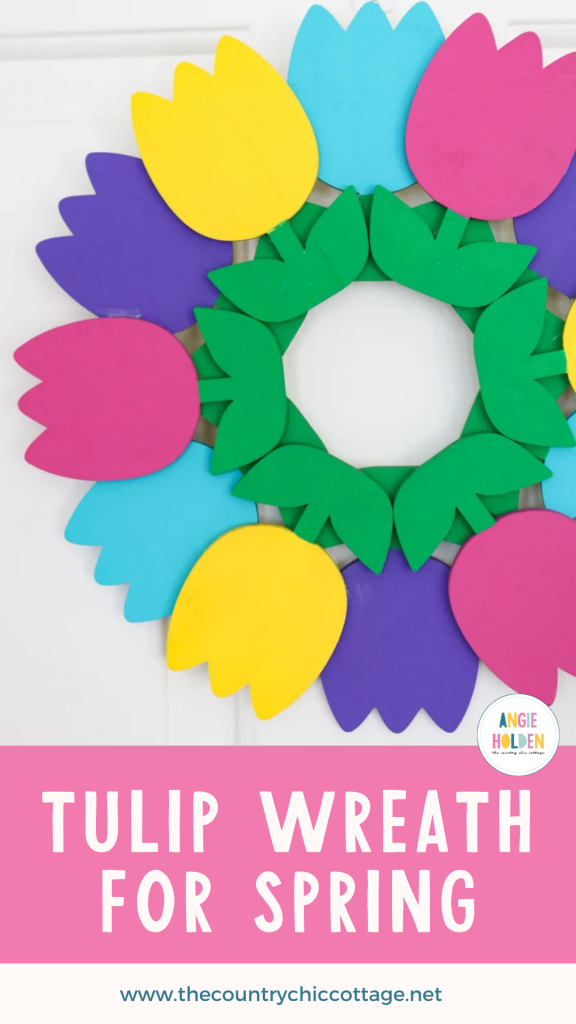
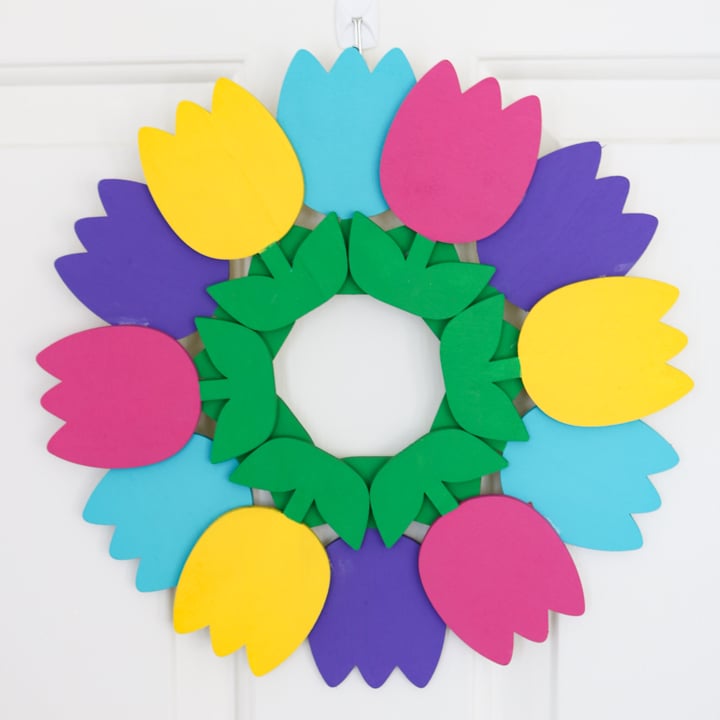
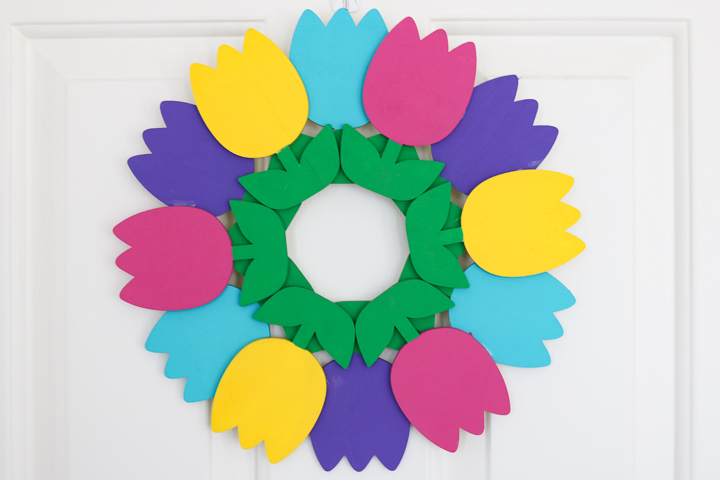
A wooden tulip wreath is a perfect addition to your front door this spring! From start to finish, this easy craft can be made in under 30 minutes! Plus, you can customize it with your own choice of colors. This would be a great front door decoration for spring, Easter, or summertime.
Let’s Talk Wreaths
I’ve got door hanger ideas galore! Everything from pumpkins to patriotic-themed, holidays, farmhouse style, you name it, and I’ve probably DIY’d a version of it.
I love this flower door decoration for spring because anyone can do this DIY! No crafting expertise is necessary. Plus, it’s open to interpretation, so you can easily add your style to it. You could also gift this to a friend with a cute Easter jar.
Many people make seasonal door wreaths at paint and wine classes. Those events are fun with your girlfriends, but they can get expensive. For just a few dollars, you could have just as much fun making this craft and enjoying each other’s company in the comfort of your home.
This is the kick-off to Craft Week, where I am joining in to bring you great crafts all week. You can find the crafts from the other bloggers at the bottom of this post!

How To Make a Tulip Wreath
Gather your supplies, then follow along with our instructions for making a tulip wreath below. This should come together in less than 30 minutes, not including the dry time for your paint. So you can make the entire project in one afternoon and add it to your front door!
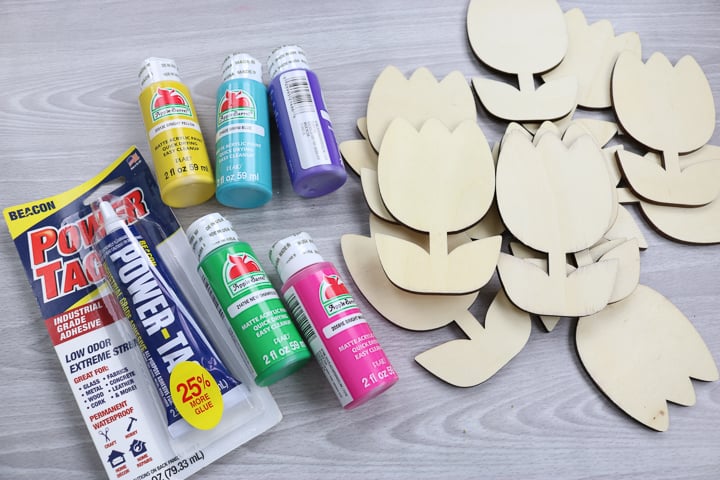
Supplies Needed To Make Tulip Wreath
- 12 unfinished wood tulips
- Craft paint in green, yellow, pink, aqua, and purple (or the colors of your choice)
- Paintbrushes
- Beacon Powertac Adhesive
TIP: If you are going to hang this wreath outdoors, you may want to use a good-quality outdoor paint or spray over the top with a good-quality sealer before hanging.
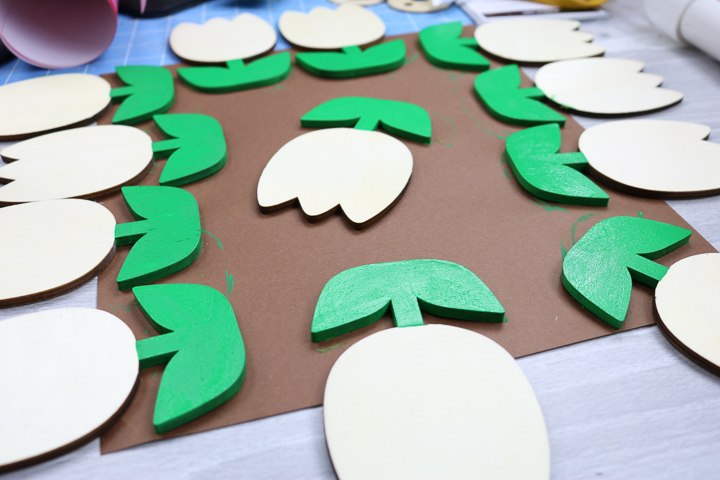
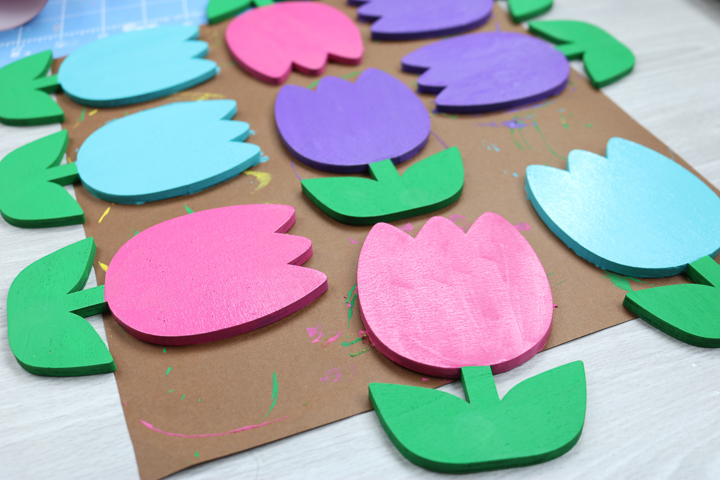
Step 1: Paint Stems Of Unfinished Wood Tulips
Start with the green at the bottom for the stems. Paint both the leaves and the stem green.
Be sure to paint the stems and leaves completely so no raw edges are visible. Also, note that this may require two coats of paint for complete coverage. Paint one coat, allow to dry, then add a second coat.
Step 2: Paint Flower Portion Of Unfinished Wood Tulips
Then, paint the tops of each of your tulips. I chose three colors for 12 tulips, so I painted four in each color. Again, be sure to paint the sides for a finished look. Once again, you may need two coats of paint for complete coverage.
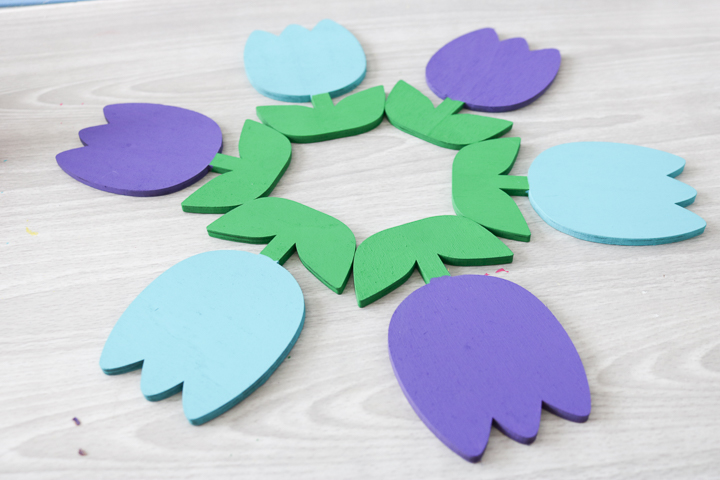
Step 3: Assemble The Wreath
Once the paint on your tulips is completely dry, you can assemble your wreath. Before using any glue, be sure you are happy with the arrangement of your tulips.
To assemble the wreath, you will glue the tulips in two layers. Be sure to do a test run before using any glue. When you are satisfied with your arrangement, it’s time to glue!
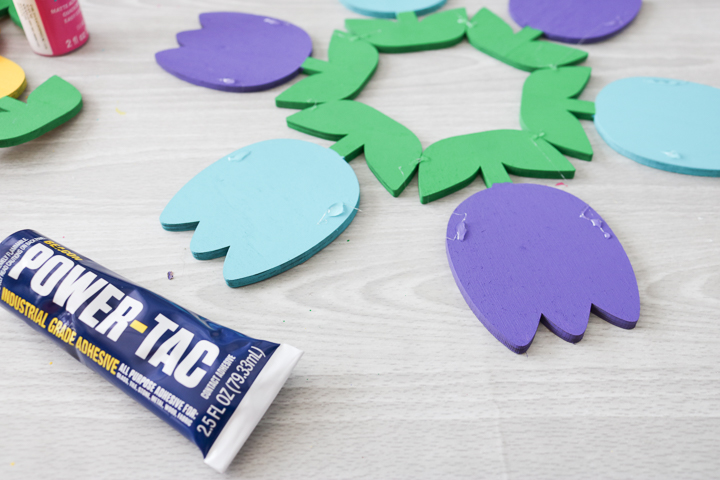
Step 4: Add Glue To First Layer
The first layer will be the bottom layer. This layer should alternate between two colors, as shown below. To glue this layer, apply glue where the stems of the tulips come together when placed in a circular shape.
Then, on top of the bottom layer of tulips, apply small drops of glue where the top layer will touch the bottom layer.
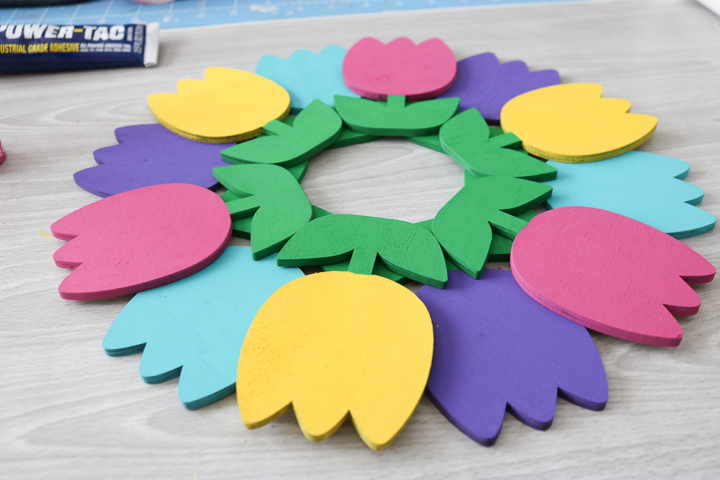
Step 5: Add Second Layer Of Tulips
Place the remaining two colors of tulips on top of the glue, alternating colors like the bottom layer. Be sure that each top tulip is on the glue dots.
Step 6: Allow Wreath To Dry
Allow the glue to dry completely before hanging it on your door. You may also need to add a loop of ribbon to the back for hanging.
So, will you make a tulip wreath for your front door this spring? This wreath is so simple yet stunning. It makes a great addition to your spring decor!
Craft Week Spring Projects
Today’s CRAFT WEEK post is sponsored by Darice. For even more craft ideas for National Craft Month, check out the spring projects below!


FAQs About Tulip Wreath
Here are some common questions readers have about making this tulip wreath. If you have a question but don’t see it below, please leave it in the comments so I can answer it.
Can I Adjust The Size Of This Tulip Wreath?
Yes, you can! Depending on the wood tulips you use, you can make this wreath as big or as small as you like.
Can I Use A Different Type Of Glue For This Tulip Wreath?
I found that the Beacon Powertac adhesive works best for this project. If you are going to use another glue, be sure it is rated for outdoor use and dries clear.
How Did You Hang Your Tulip Wreath?
I used a ribbon loop on the back that I secured with hot glue. However, depending on where you hang the wreath in your home, you could use another method (like a saw tooth hanger).
3 More Spring Wreath Crafts
If you love this tulip wreath, here are some other spring wreath crafts that you won’t want to miss!
- Fairy Wreath DIY: Easy Fairy Garden Spring Wreath Idea
- Easy DIY Spring Wreath Made With Burlap
- How to Make a Coffee Filter Wreath for Spring