
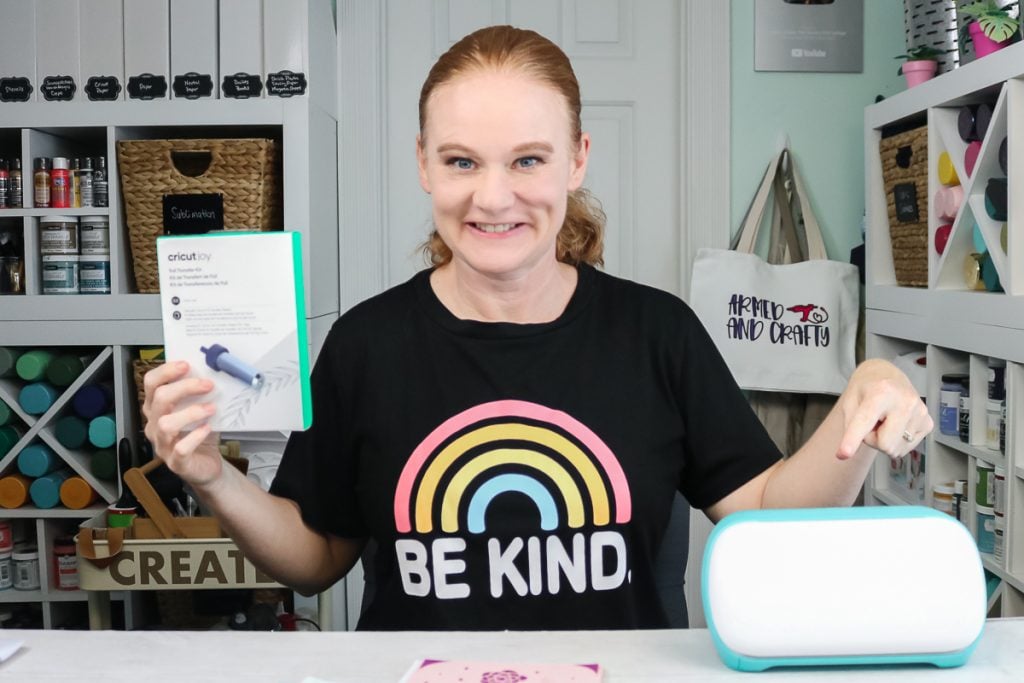
Today, I am testing the Cricut Joy Foil Transfer Kit! In this video, I'll show you what’s included in the box, how to use the kit, and demonstrate a few projects. Naturally, I decided to push the foil transfer tool to its limits to see what I could and couldn’t create with it. Make sure to watch the entire video so you can witness a project fail as well! If you own a Cricut Joy or Cricut Joy Xtra, you'll want to add this Foil Transfer Kit to your craft room.
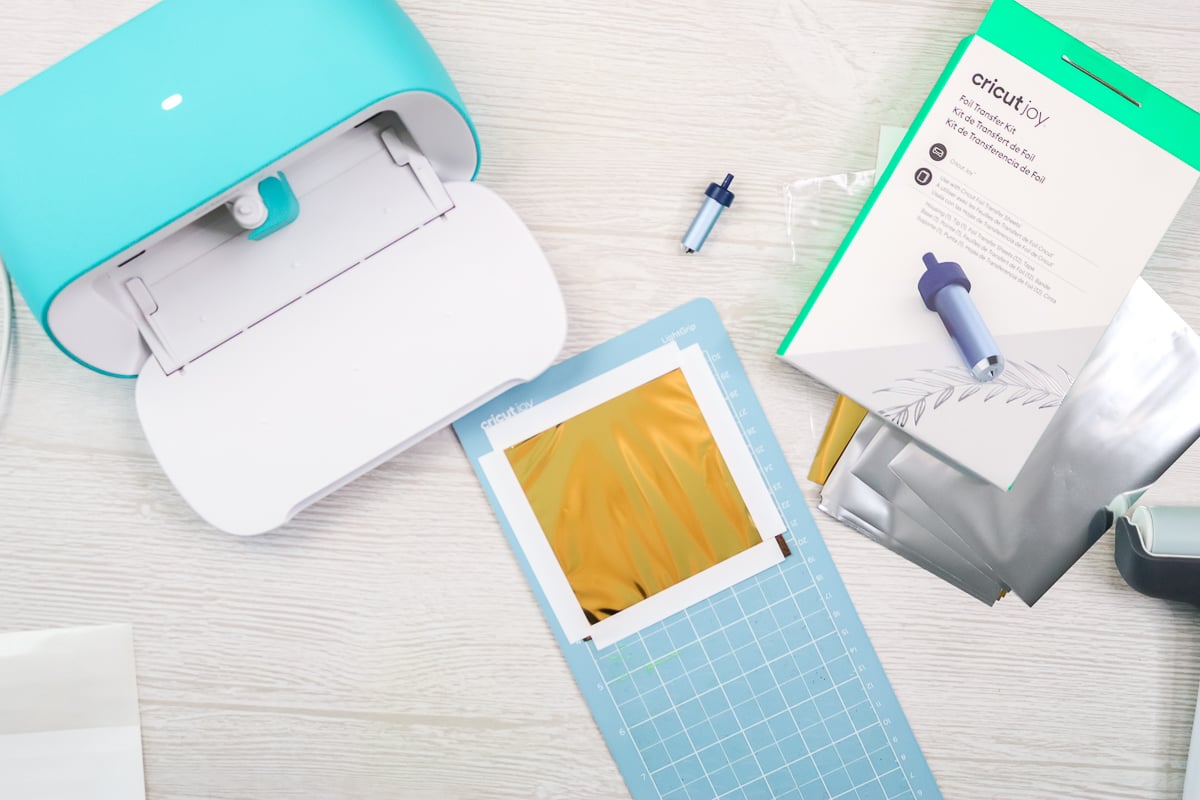
Cricut Joy Foil Transfer Kit
If you own a Cricut Joy machine, you may have heard that Cricut released a foil transfer kit specifically for the Cricut Joy series. I decided to create a video to showcase the tool, in case you're interested in purchasing one, curious about its features, or simply want to see how a foil tool works in action. The video below aims to answer all your questions! Please note that this video was made before the release of the Cricut Joy Xtra, but the tool operates in the same way with the newer machine.
If you don’t have time to watch the video, I’ll also walk you through the process below!
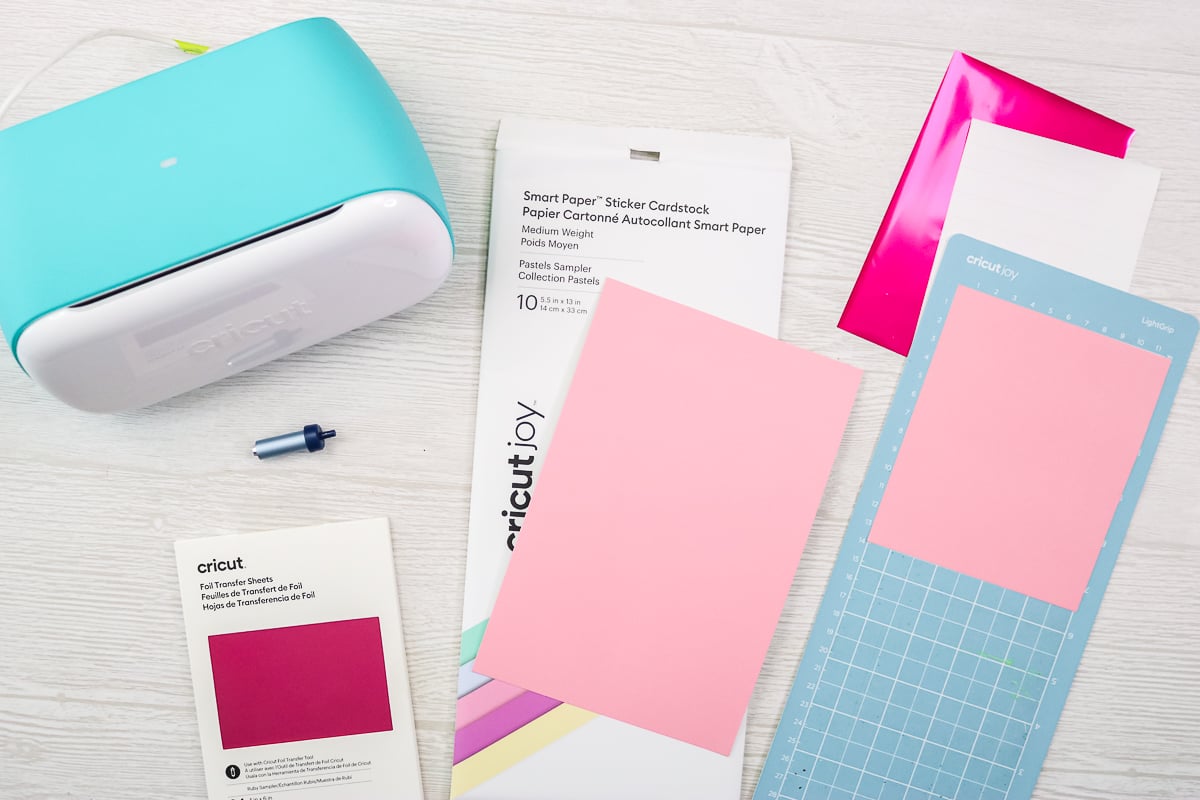
Supplies Used:
- Cricut Joy or Joy Xtra
- Cricut Joy Foil Transfer Kit
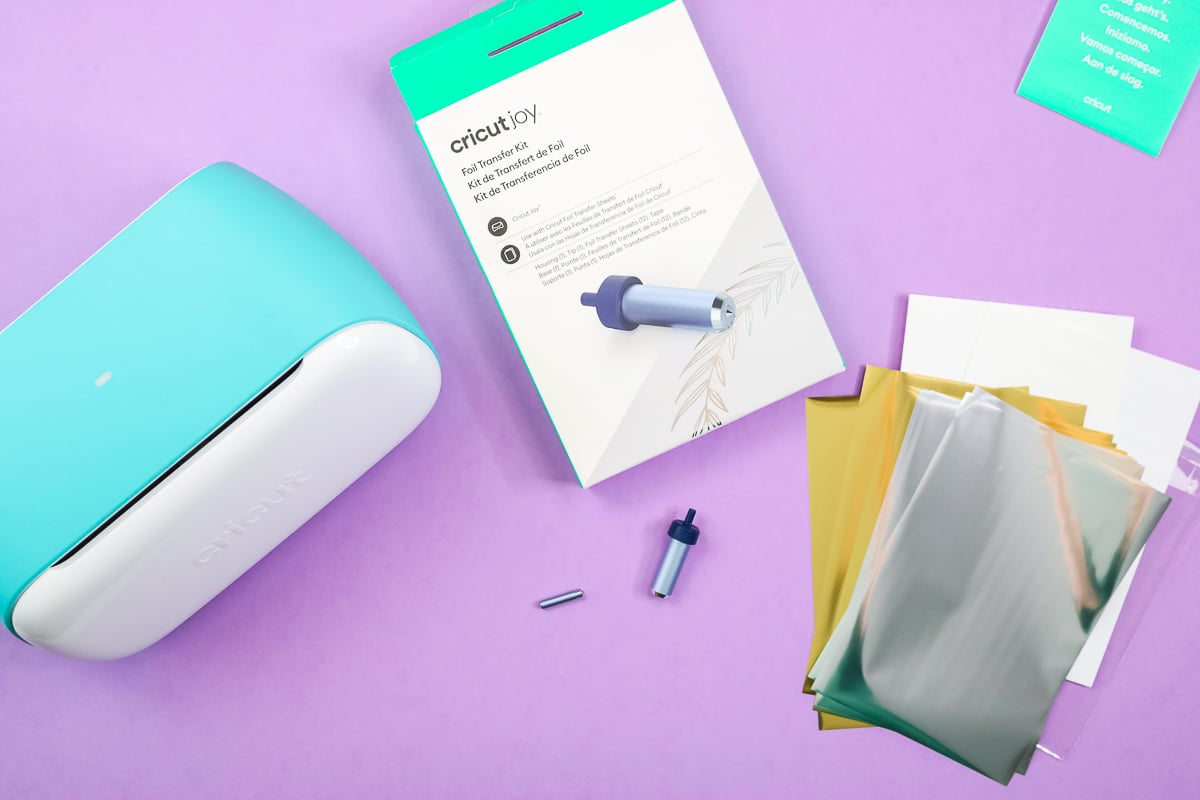
- Foil Sheets
- Insert Cards
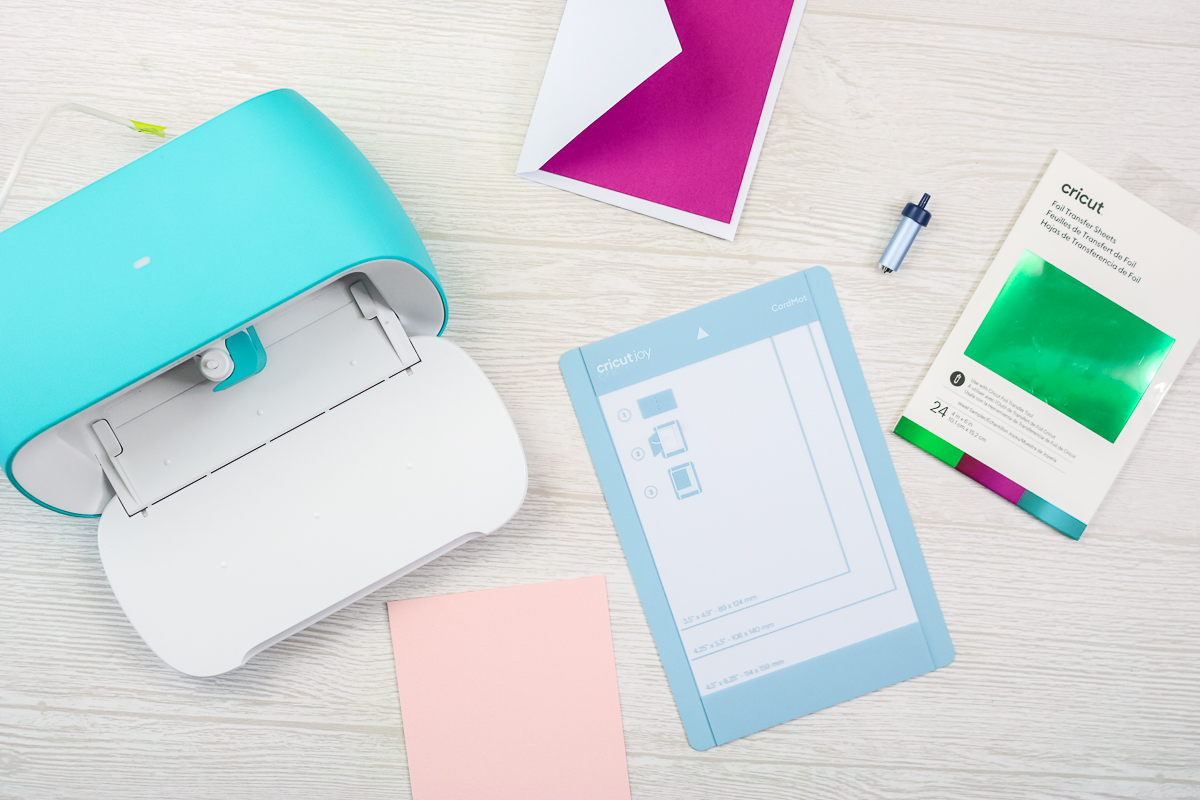
- Card Mat
- Smart Paper Sticker Cardstock
- Faux Leather
- Brayer
What is the Cricut Foil Transfer Kit?
The foil transfer housing will transfer metallic foil sheets to a variety of projects and surfaces. You'll want to ensure the kit is labeled for the Cricut Joy, as the foil transfer tool inside is specially sized for the Joy machines.
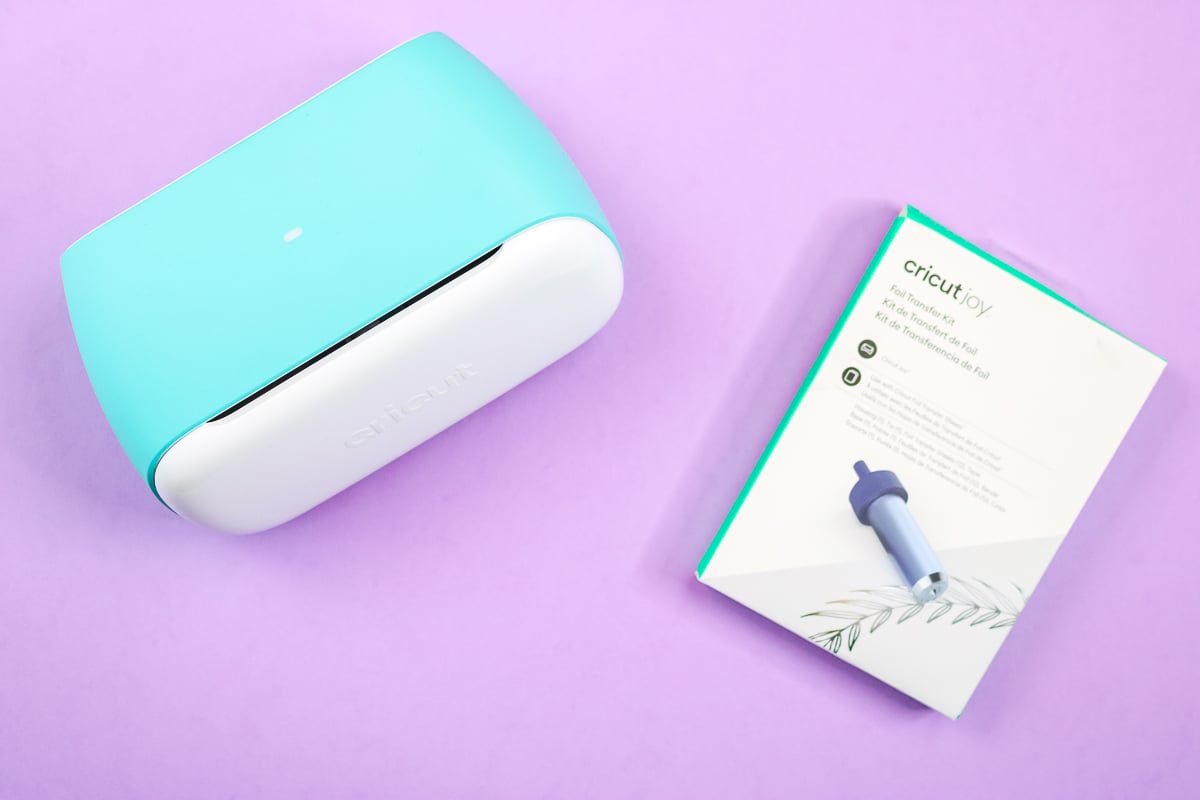
What is inside the Cricut Joy Foil Transfer Kit?
Let’s take a look inside the box! You will find the following in the kit:
- Start Guide
- Foil Transfer Tool Housing
- Foiling Tip (NOTE: There is only ONE for the Cricut Joy.)
- Some foil transfer sheets in both silver and gold
- Adhesive Tape
NOTE: If you want to branch out from the limited colors in the kit, you can buy alternative Cricut foil transfer sheets in several colors. In my opinion, the 4×6 size works best for the Cricut Joy machines. However, you can also purchase 12×12 sheets and trim them down to fit on your mat or use them for a larger project.
How to Use the Cricut Foil Transfer Kit
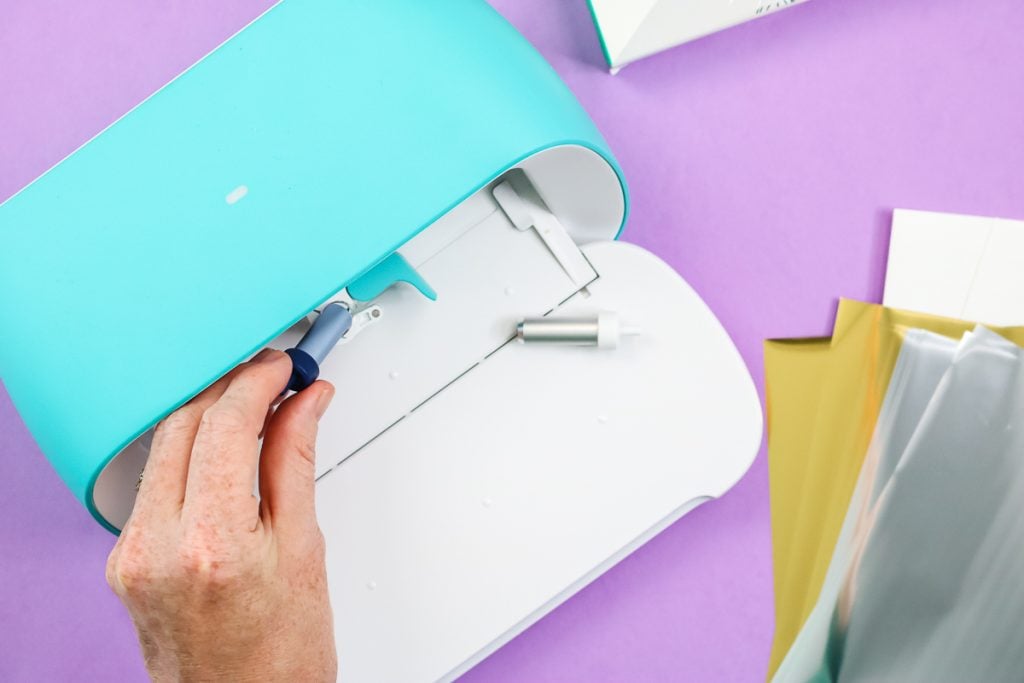
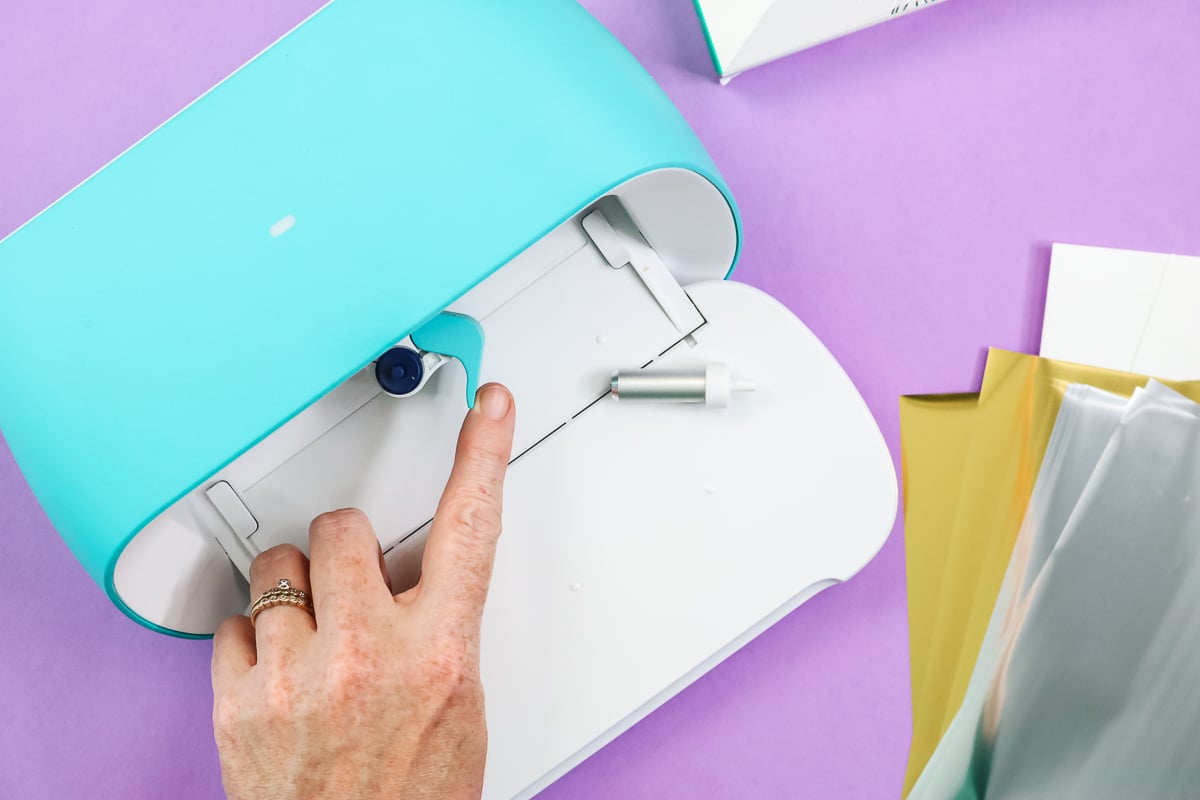
To assemble, simply press the plunger on the housing, insert the magnetic tip, and it’s ready to use.
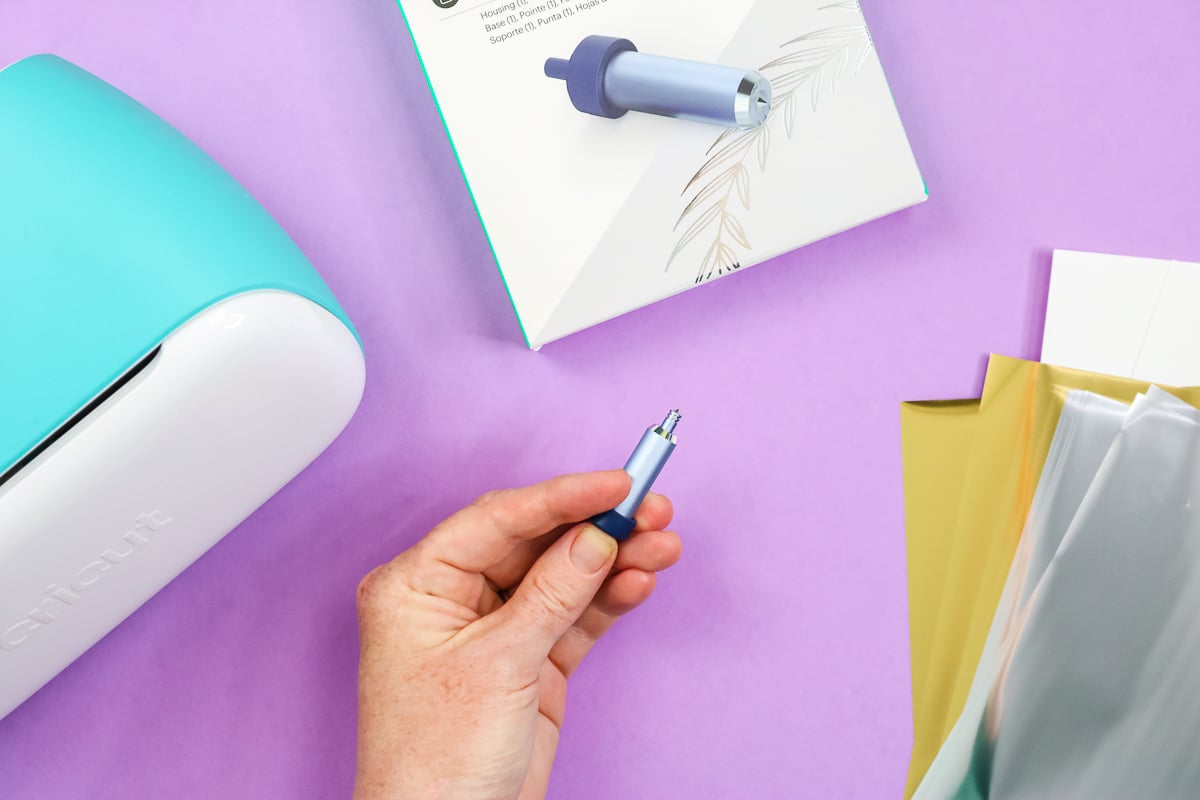
To add the foil housing to your Cricut Joy or Joy Xtra, flip down the front of the machine, open up the clamp, and remove the blade. Then, put the foil transfer tool in its place and close the clamp.
You are now ready to use the foil tool to transfer foil to your materials. I am going to test a few materials, so keep reading to see how they work!
Adding Foil to Your Projects with the Cricut Joy
Let’s try three different projects with the Cricut Joy Foil Transfer Kit. First, I'll show you how to set each one up in Design Space.
- A card
- Paper Stickers
- Faux leather earrings
NOTE: The foil tool can only currently be used with the desktop Cricut Design Space, so it is not available for mobile or tablets.
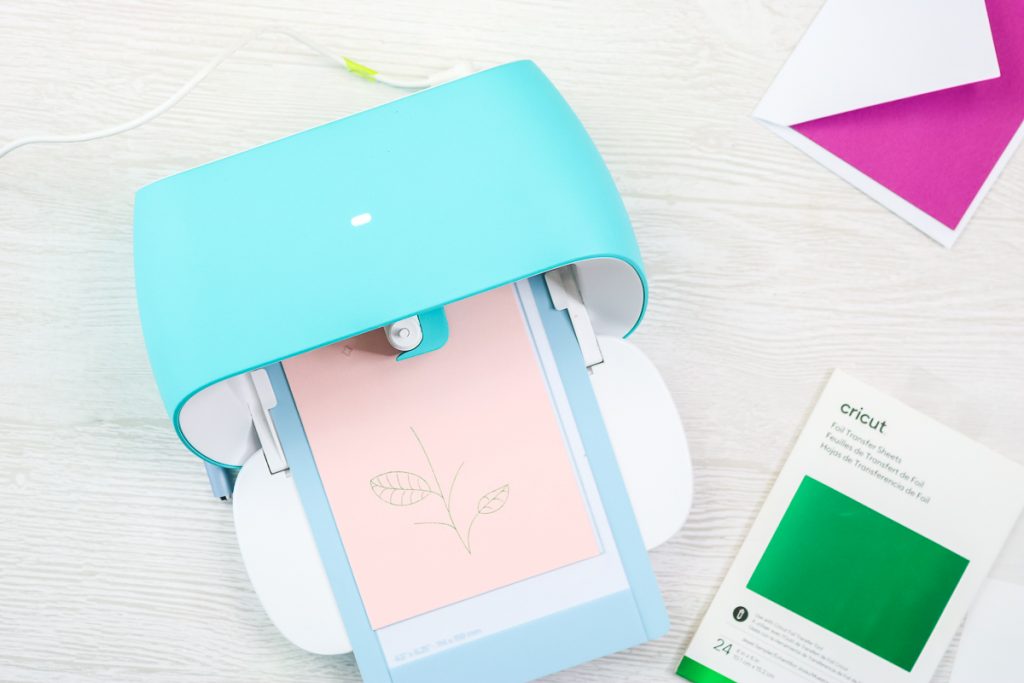
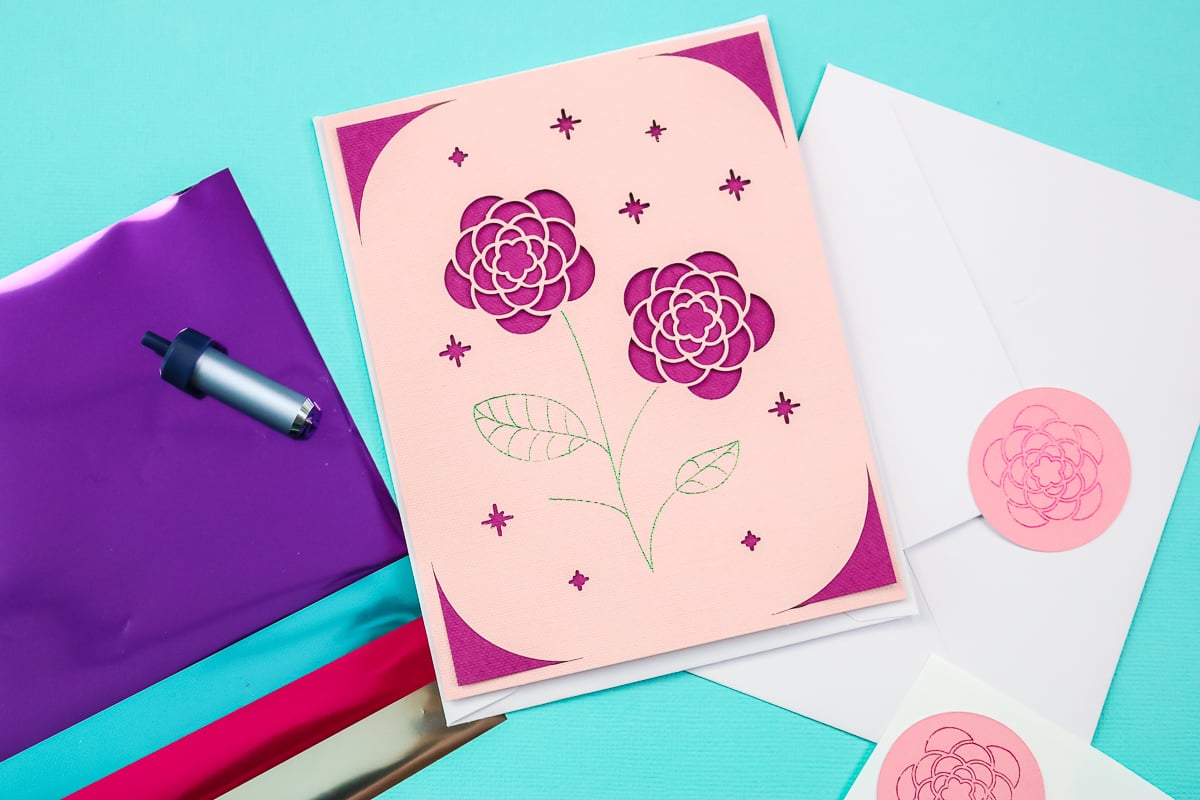
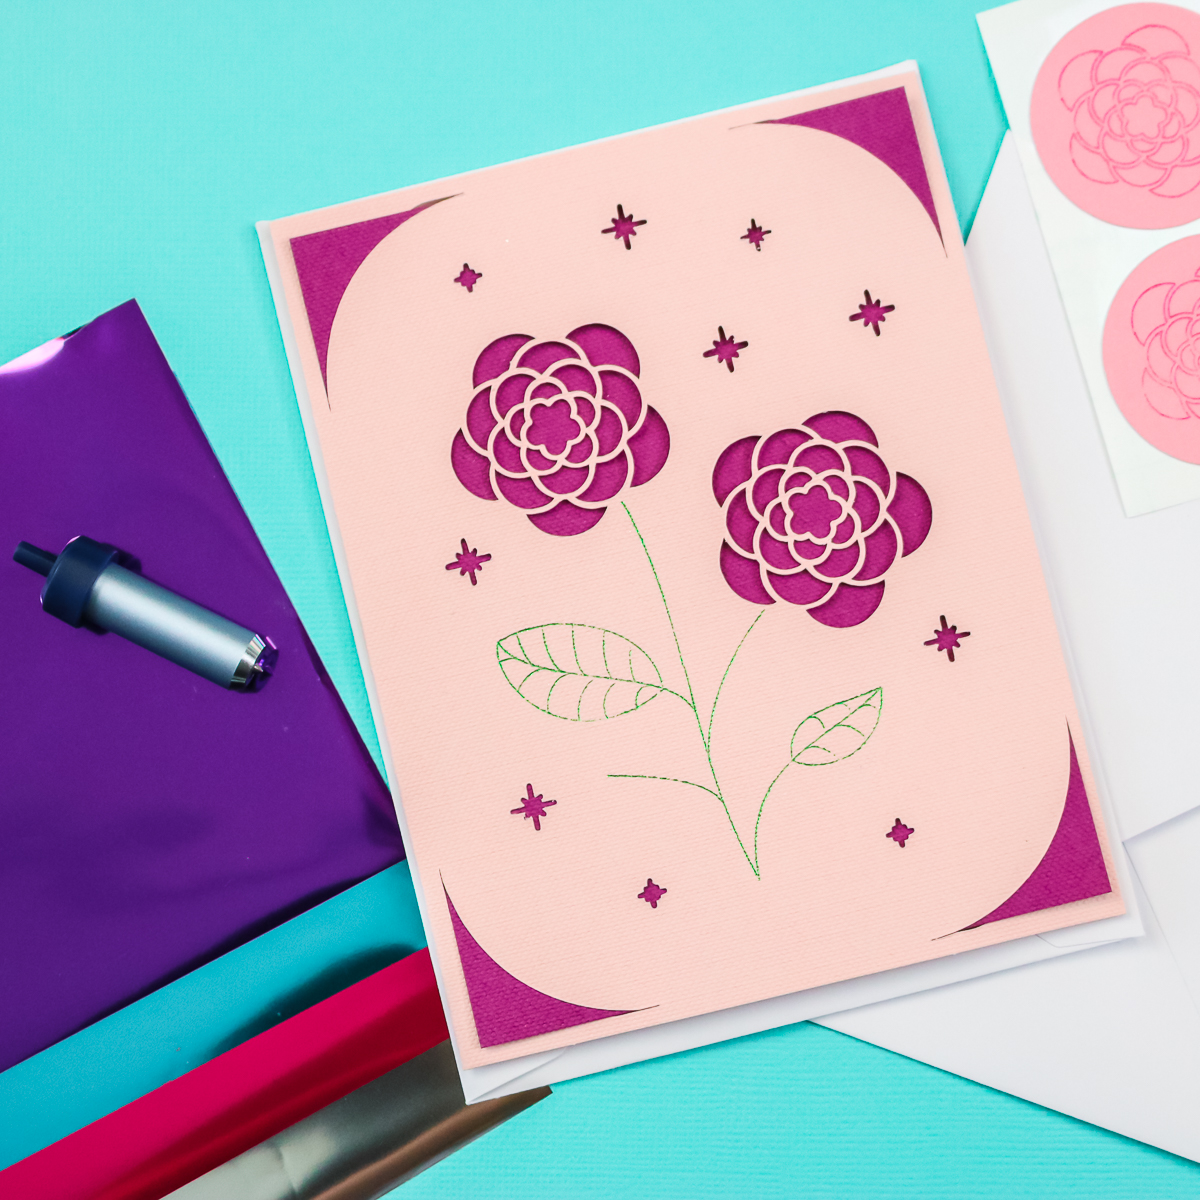
Design the Card
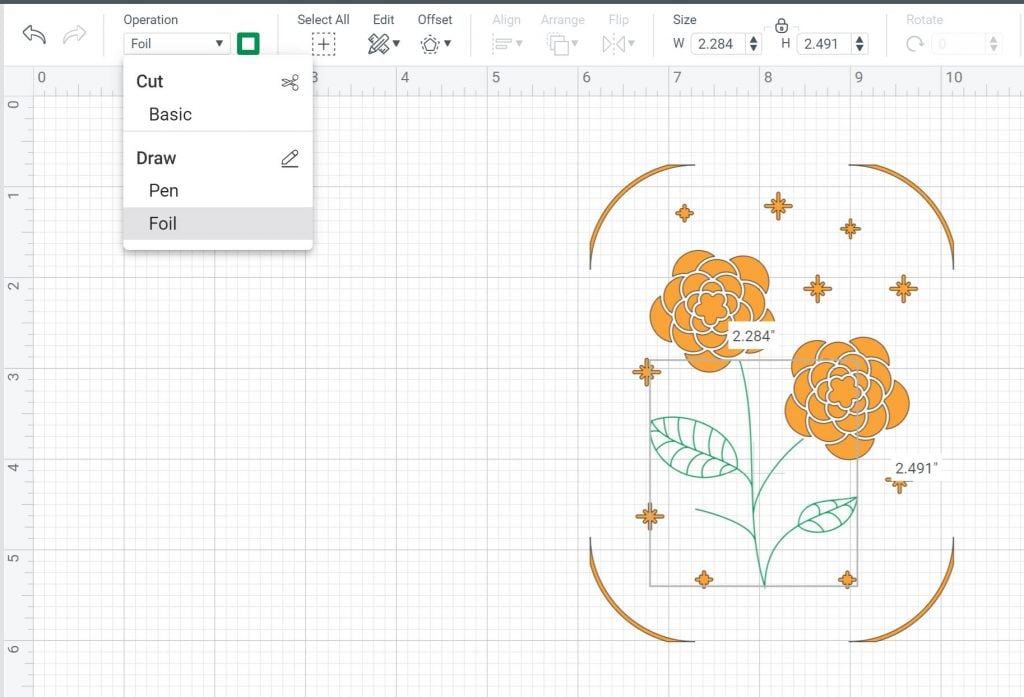
The first project I'm going to make is a card. I'm going to use insert cards that are for the Cricut Joy series, as well as my card mat. First, you’re going to pull a card onto your Cricut Design Space canvas from the Design Space Projects Library or upload one you have downloaded onto your computer. The one I’m using has a pen drawing as well as some cuts. I’m going to select the pen portion of the design and then choose the foil. Here, you have the option to change the color, so I'll make this part green foil. Keep scrolling for the rest of the steps!
Design the Stickers
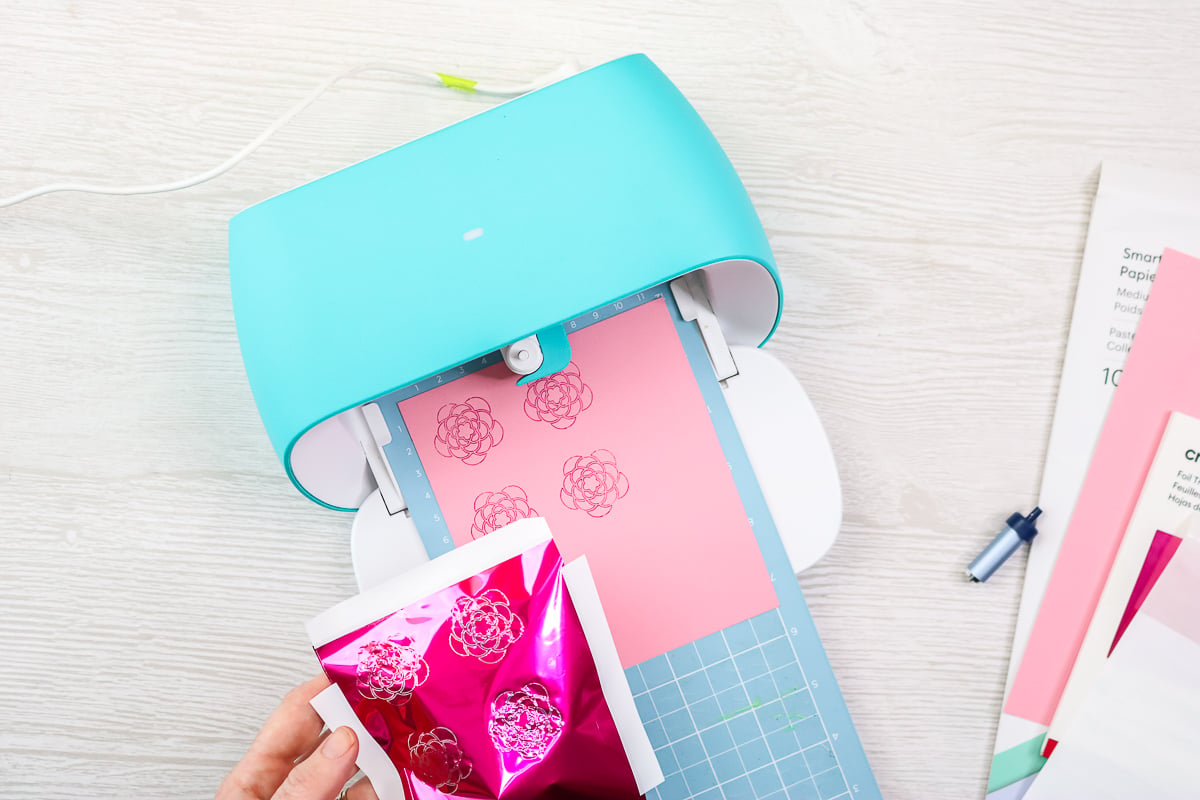
Next, we’re going to make paper stickers. I used the card design and sliced away one of the flowers. Then change that from a cut to a foil. I added a circle and attached the foil lines to the circle.
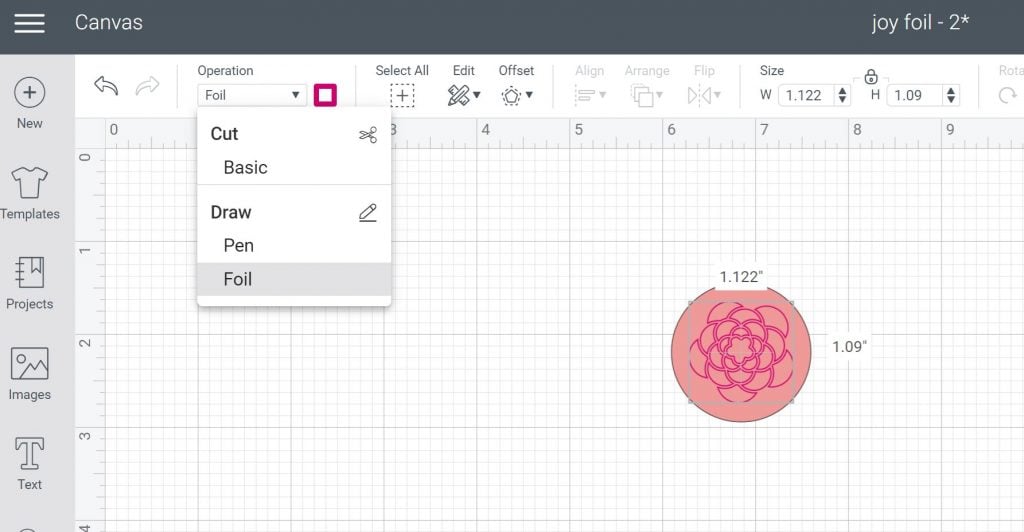
I'm used pink foil for this and pink cardstock. The Cricut Joy will first draw with the foil tip, and then the machine will prompt you to change to the blade to cut the circles. I think these would be cute as envelope seals on the back of the cards! Find the rest of the steps below.
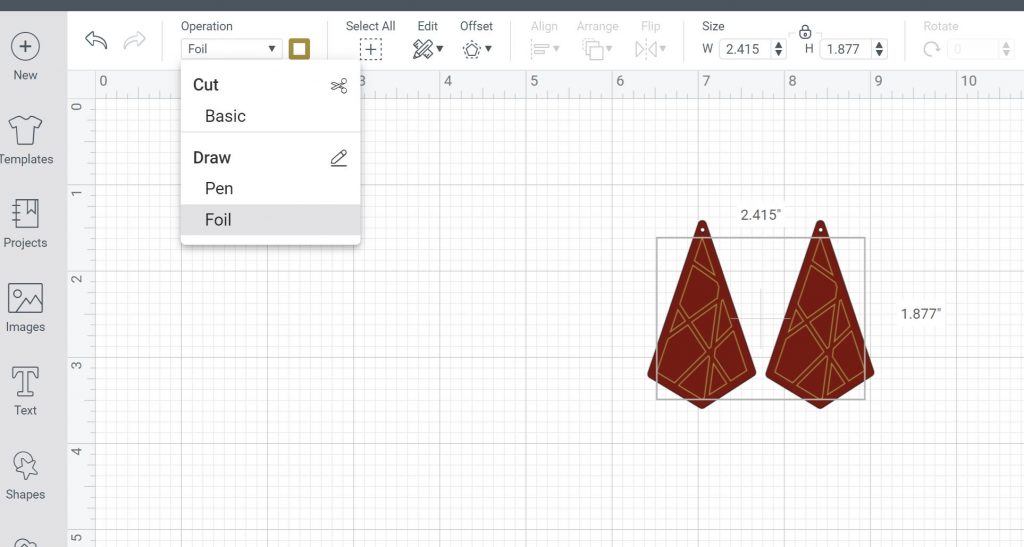
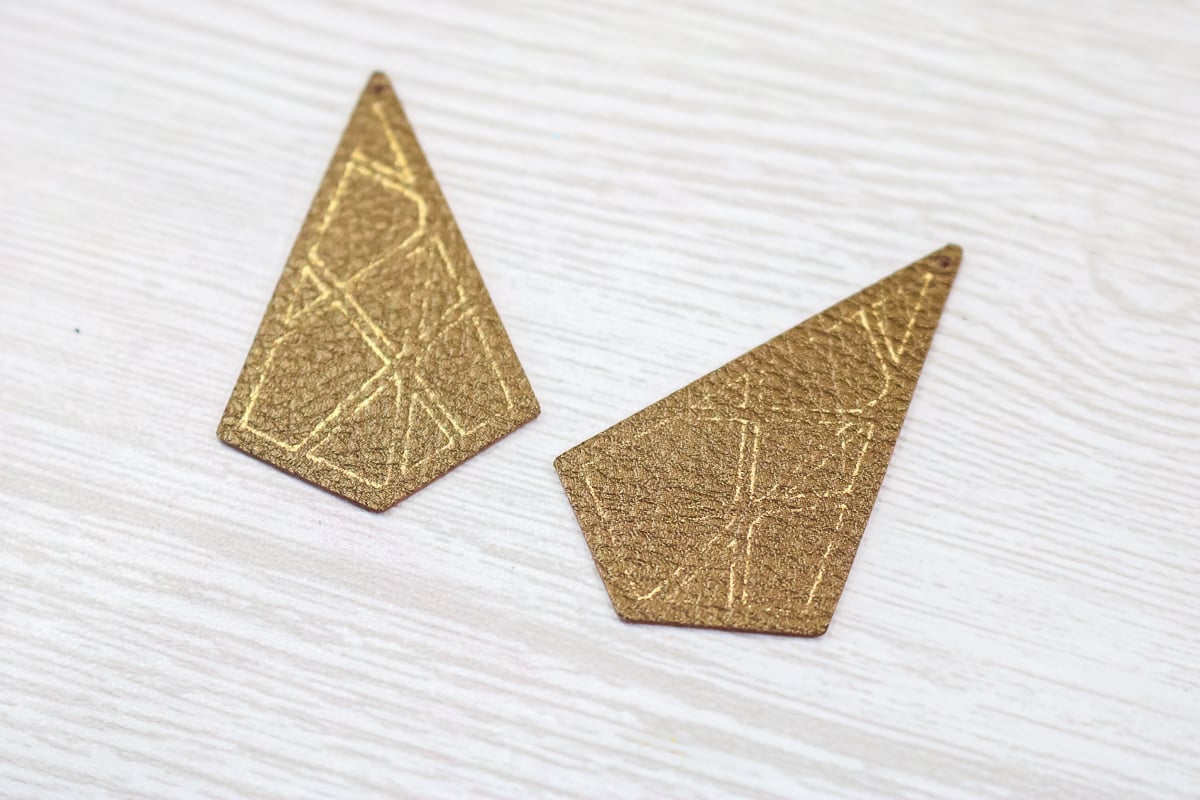
Design the Faux Leather Earrings
Our third Cricut foil transfer project is faux leather earrings, which have two different layers. I just picked an earring image in Cricut Design Space. Then pick the top layer and change that to foil. I’m choosing to do brown leather with gold foil on top. Click “Contour” and remove the contour around the cut areas, so that way it just foils the lines in the center. Then attach the foil lines to the bottom layer before cutting. I'll show you how to finish these below.
Now I'll show you how to complete each project using the Cricut Foil Transfer Sheets and your Cricut Joy!
Make Foil Stickers with Cricut Joy
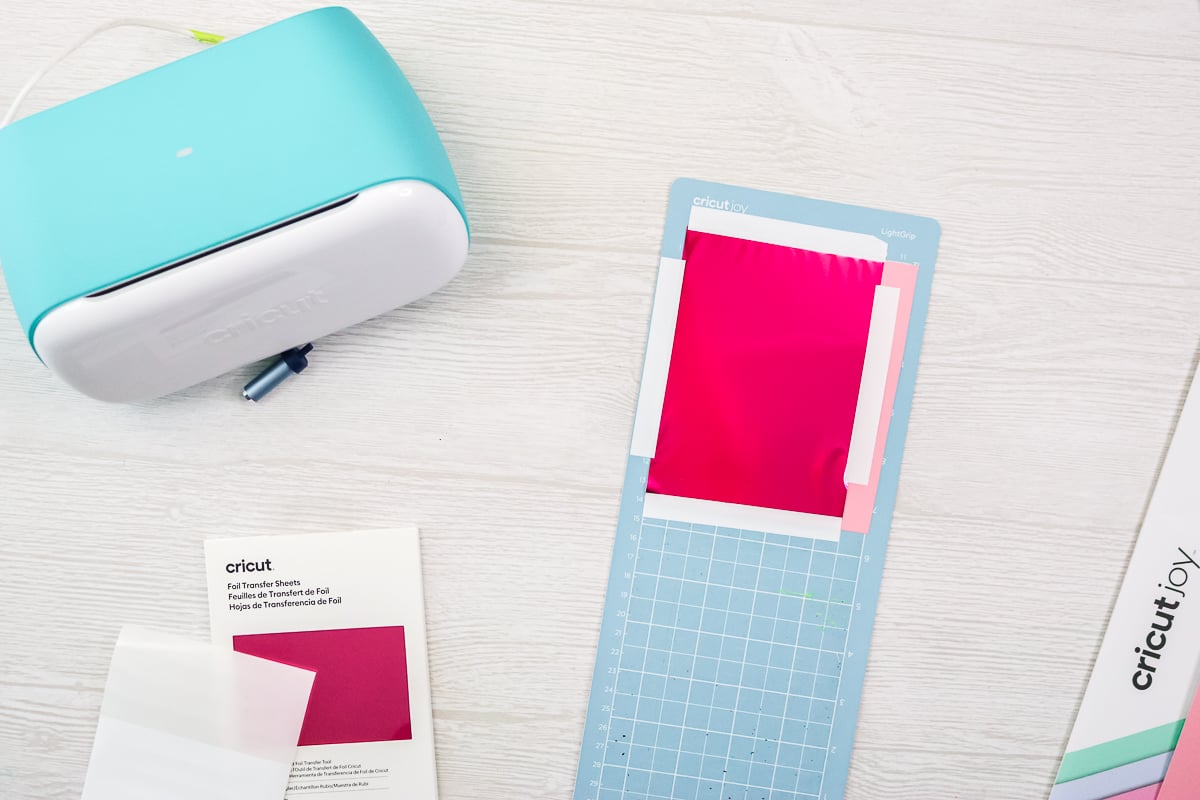
Take your Smart Paper Sticker Cardstock and trim a piece to fit. Place it on the mat.
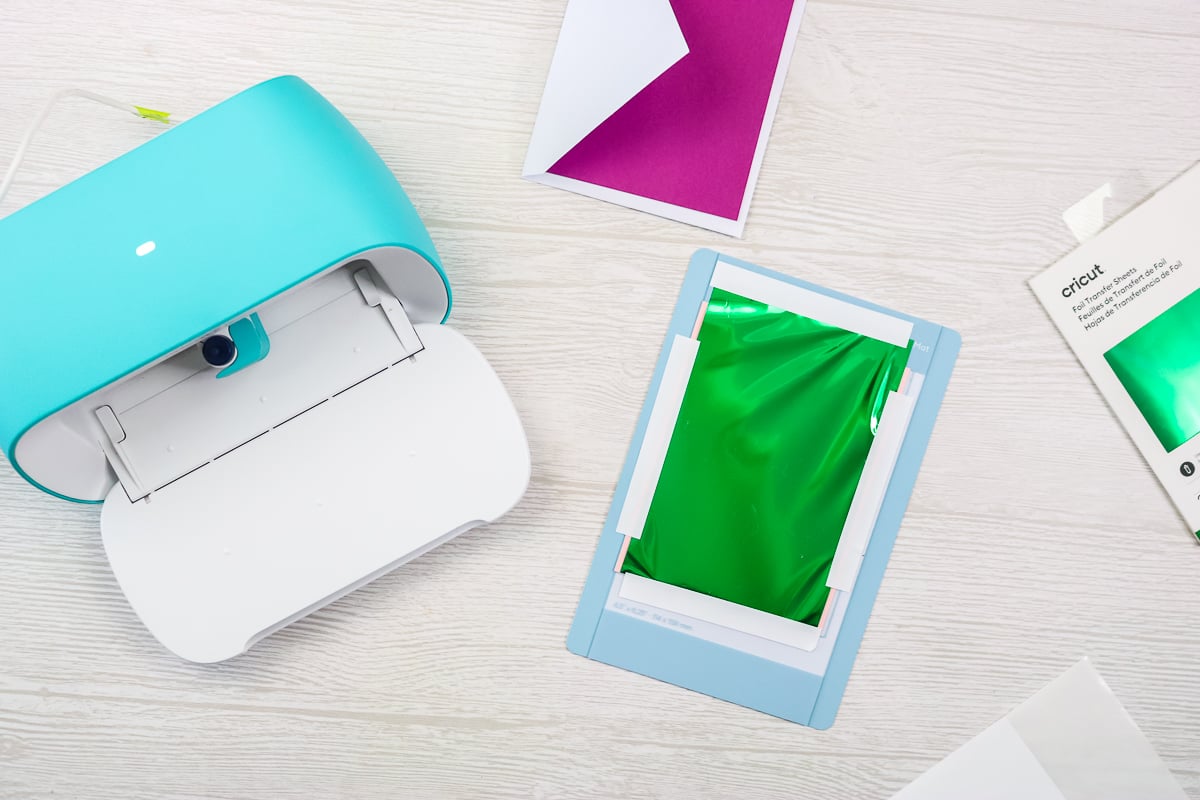
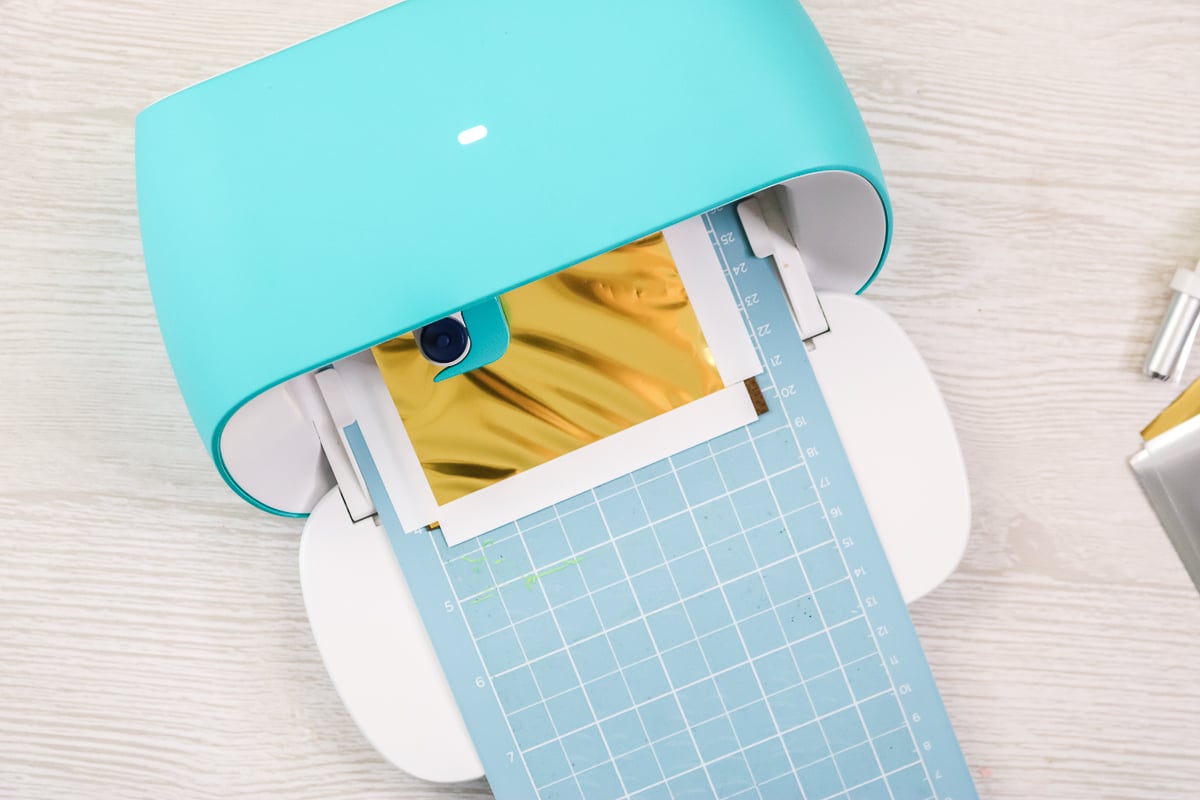
Then add a piece of foil over the top of the cardstock. Always trim your foil so that it doesn't get on the sticky portion of your mat. You will also want to look in Cricut Design Space and see where your foil lines are going to be. You will want to make sure the foil sheet covers that area. Next, secure your foil in place with the tape on all four edges. Be sure it is as tight as possible. The tape does come with the foil transfer sheets as well as the kit. If you do run out of tape, I think you could use something like Washi tape.
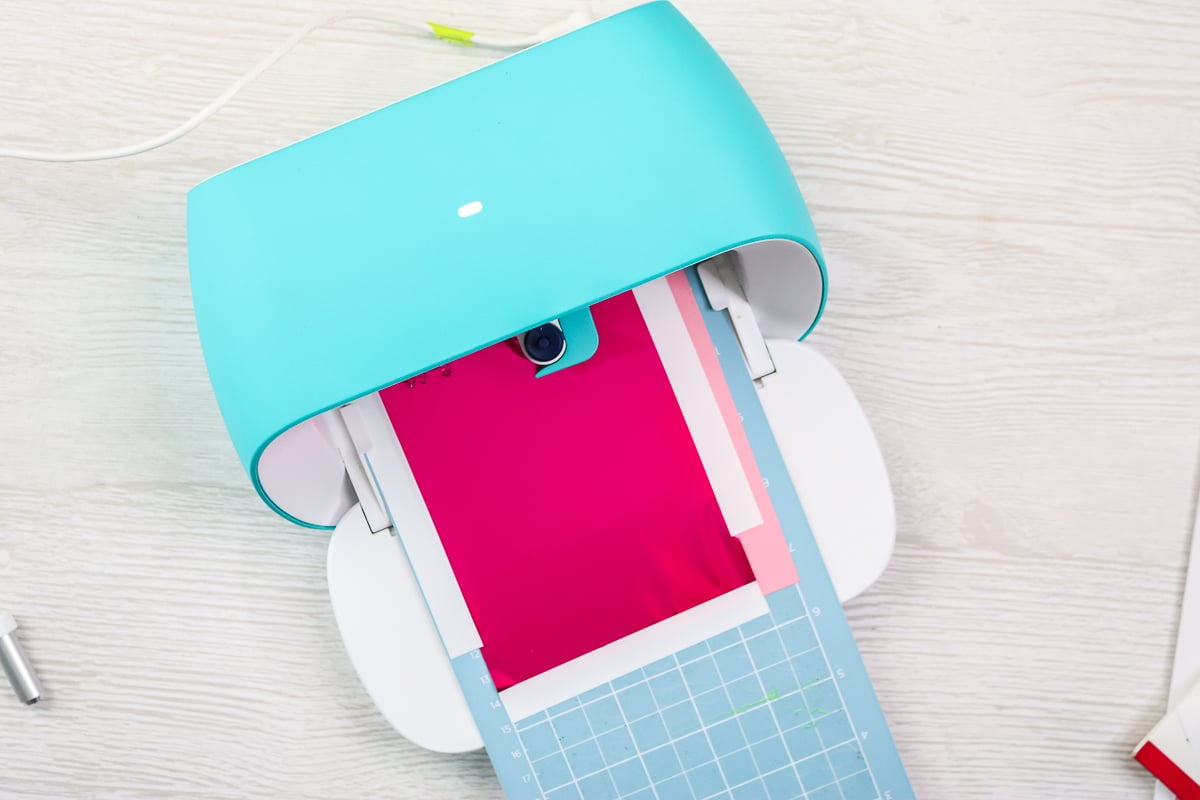
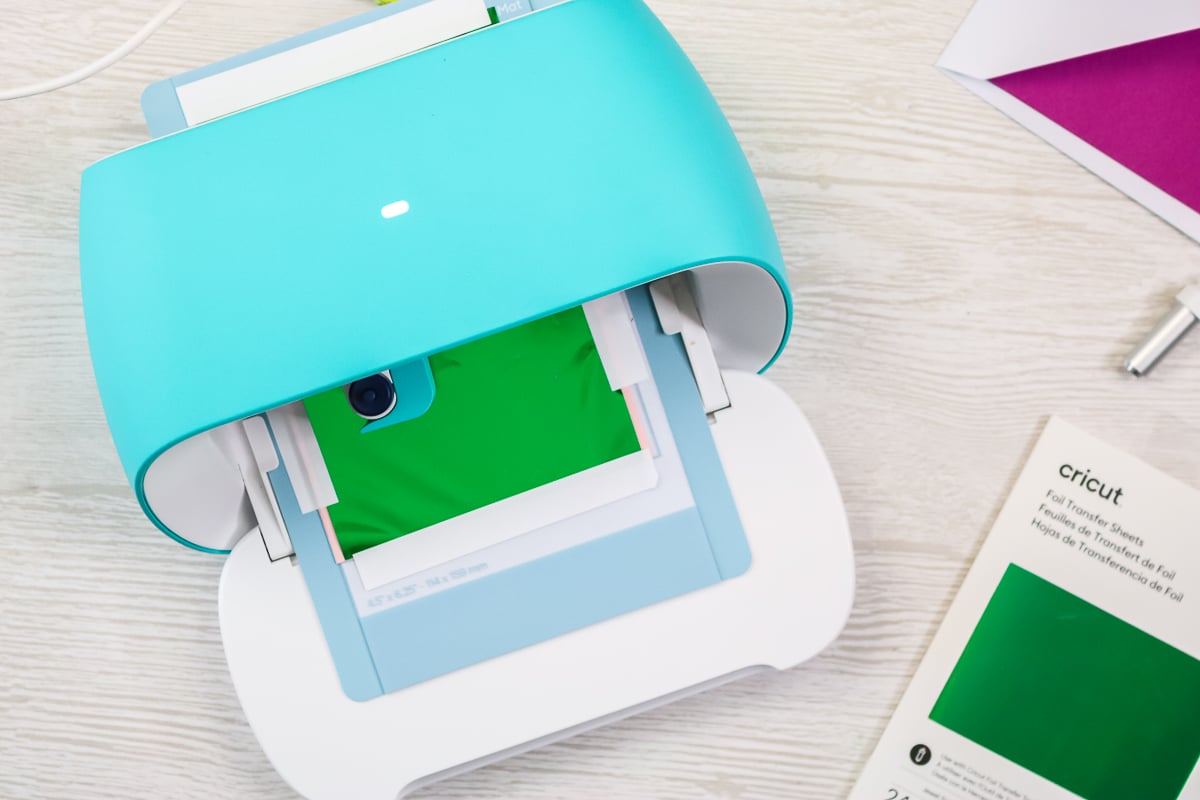
Now, it's time to put it in the Cricut Joy. To start foiling, load the foil transfer housing first, and put the mat with the cardstock and foil into the machine, which will automatically feed it in. Click “Go” in Cricut Design Space to start the foiling.
Once it's finished foiling, follow the instructions on the screen. Remove the foil sheet and foil tool and add the fine-point blade. Close the clamp, then click “Go” in Cricut Design Space to cut the stickers.
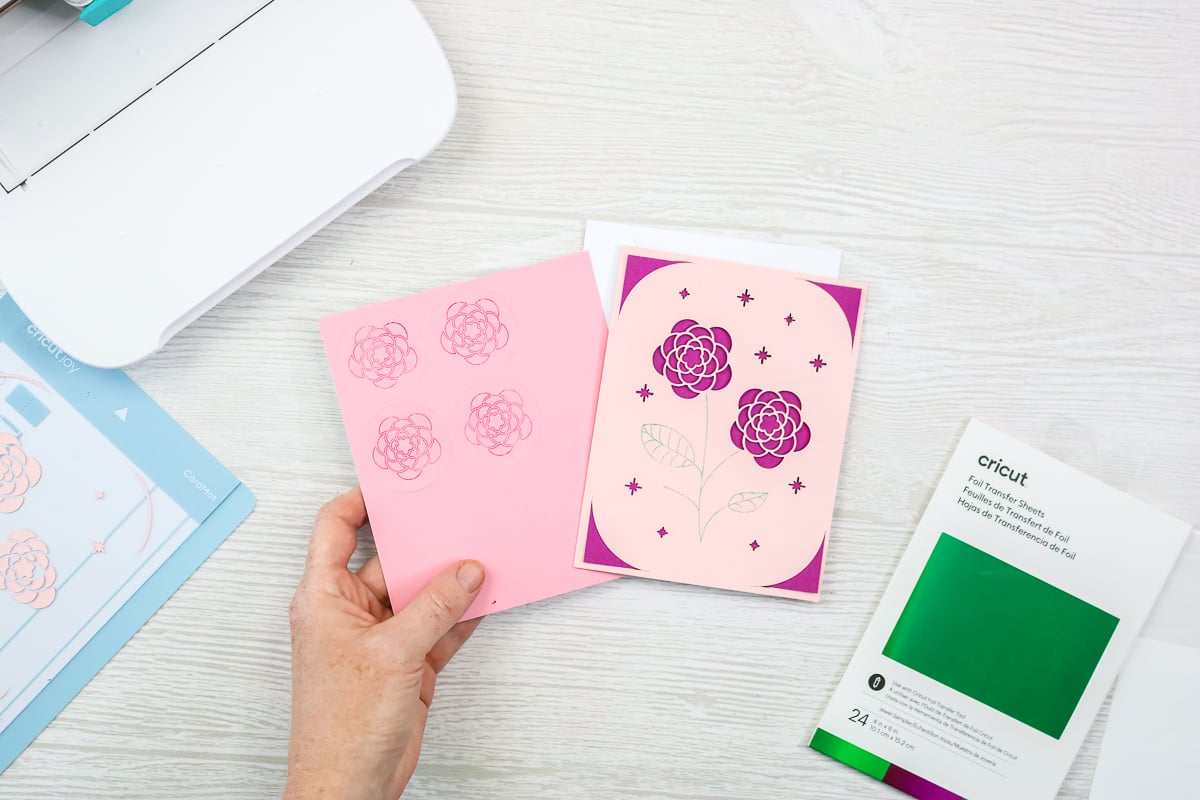
Once it's done cutting, click “Unload” in Cricut Design Space to remove the mat. When the mat is ejected, we can take a look at these stickers! The foiling is gorgeous, and it’s perfectly stuck on the paper and not going anywhere.

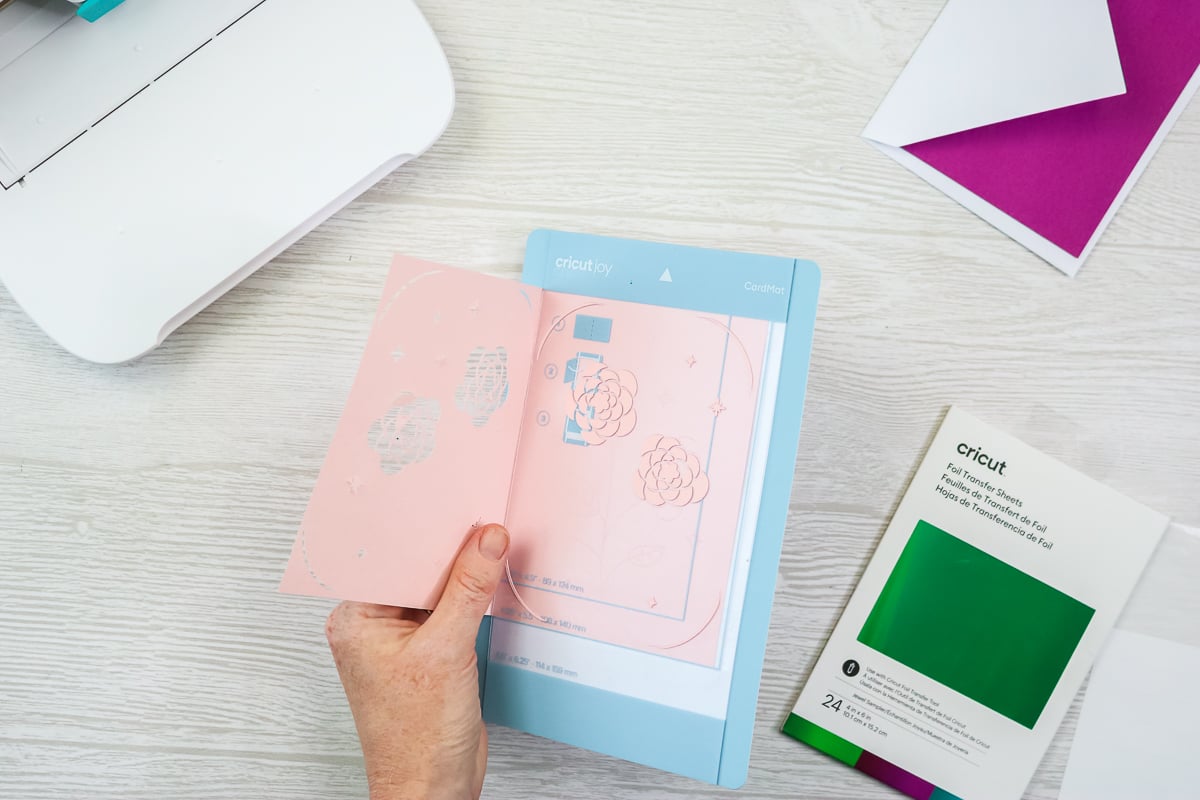
Making a Foil Card with the Cricut Joy
Let’s create a card that matches the stickers. I'm going to use a pink card, a purple insert, and a card mat. Start by placing the back of your card inside the card mat and laying the front on the sticky portion of the mat. One of the tricks to cards is to make sure it's stuck down really well onto the mat.
Then, use the foil tool by placing it in the Cricut Joy and positioning the foil sheet over the top of your card. Make sure your foil lines are within the card size. You’ll just repeat the same process you did before with the stickers and tape the foil into place.
Then click “Go” and allow the machine to do the foiling portion of your project.
Once the foiling is complete, follow the on-screen instructions. Remove the foil and foil tool, then drop the blade into the clamp. Press “Go” again in Cricut Design Space to cut the card details.
Now that the cut is finished, “Unload” the mat in Cricut Design Space, and remove the card from the mat. You might want to use something like a scraper or a spatula to get under there and prevent ripping of the delicate pieces. You may also find it helpful to gently curl the mat back away from the cardstock to prevent ripping or curling.
Once you've removed it, you'll add your insert into all four corners. Choose something that coordinates, but has a slight contrast, so that when you flip it over, you can really see those details and the gorgeous foil pop!
Make the Faux Leather Earrings
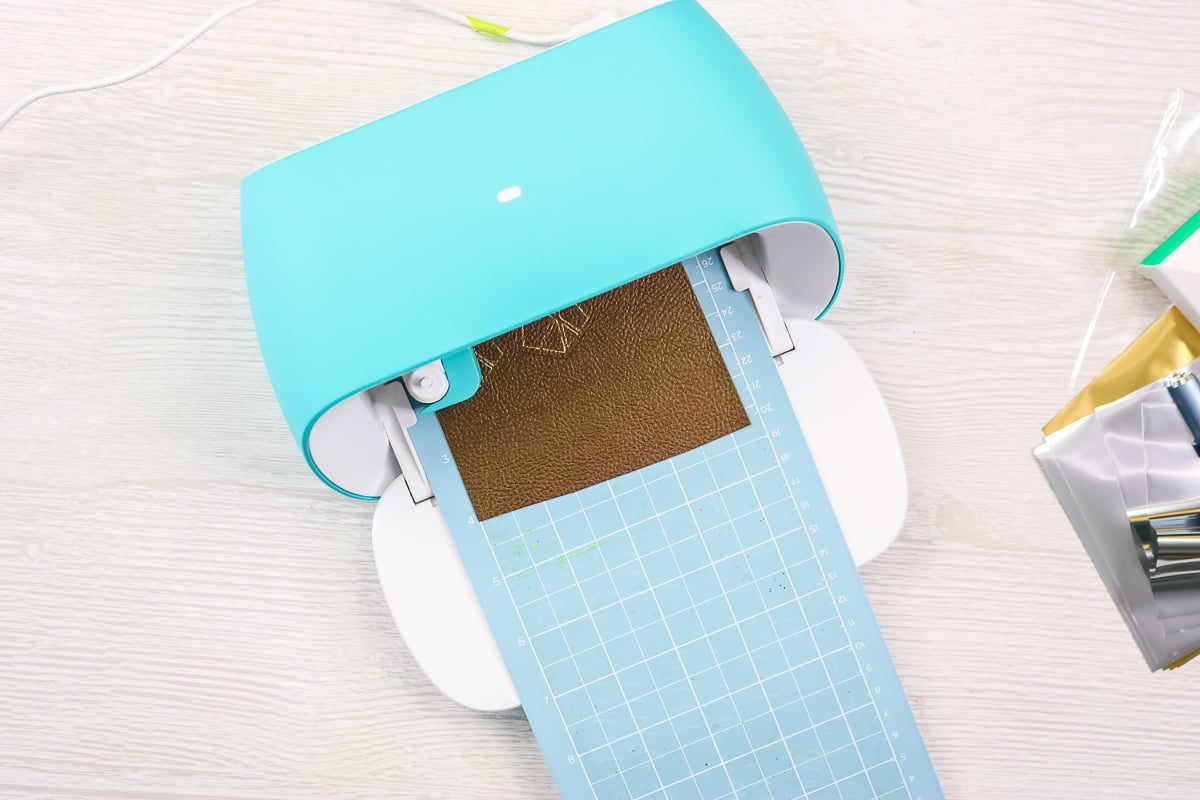
Let's move on to some faux leather earrings.. For this project, I'll be using the gold foil that came with the foil transfer kit. First, place the faux leather on the mat.
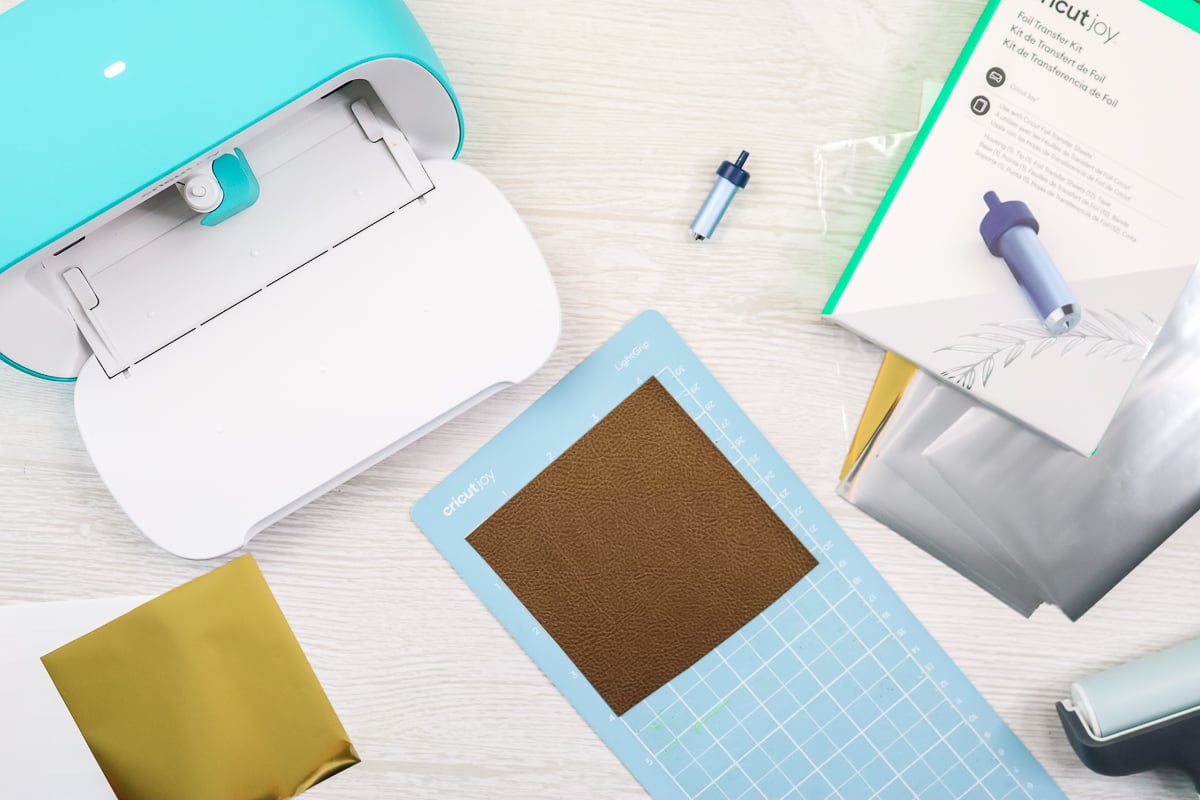
Repeat the same process for taping the foil sheet down over the top as the other projects.
To accomplish this, I needed to use the heavy cardstock setting since Cricut indicates that faux leather is not compatible with the foil tool. However, I wanted to test it for myself, so I added the Cricut Joy foil transfer tool, clicked “Go” in Cricut Design Space, and let the foiling begin.
Once the foiling was done, I put the blade into the Joy and clicked “Go” to cut these earrings.
Then I clicked “Unload” in Cricut Design Space and removed the earrings from the mat.
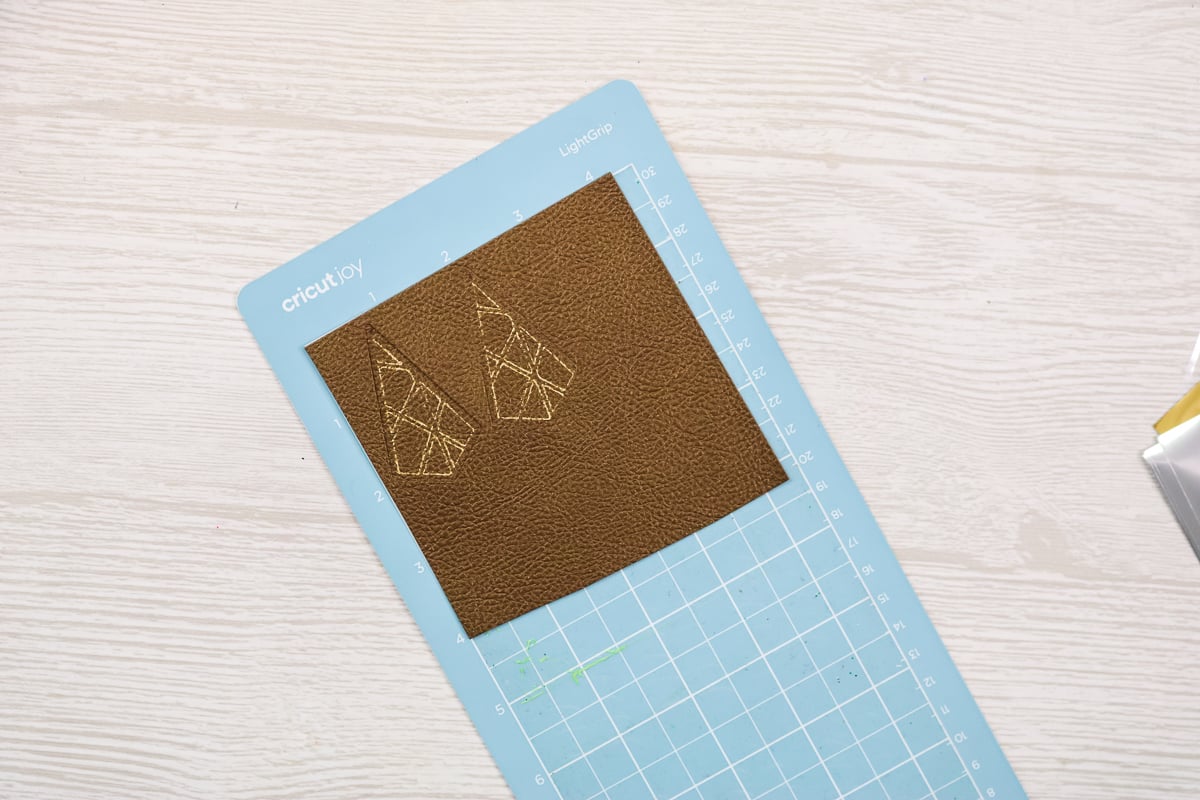
Once I looked closely at the earrings, I saw that the foil was actually lifting off the surface. I guess that the Cricut Joy simply doesn't have enough pressure to press that foil down into the faux leather. I would not recommend using the Joy to foil onto faux leather. I have done it successfully with my Explore here, though, so that would be an option if you have a Maker or Explore model.
Conclusion: Stick to Paper Projects!
I hope this helped you learn all about the Cricut foil transfer kit, and we were able to create a couple of successful projects! I believe you should stick with the recommended materials in Cricut Design Space, which are primarily all kinds of paper. I did push the foil transfer tool a little bit just to ensure that we couldn't go any further with it, and it doesn't seem like it has enough pressure to work with materials like faux leather.
It does add a fantastic touch to your paper projects, though, so I will definitely be using this Cricut Joy tool in the future. I love it for adding a little something special to cards and other paper projects.
I mean, who doesn't love that metallic shine on their projects? I think making paper stickers is another fun way to use this tool. Remember that the original Cricut Joy does not have print then cut capabilities, so sticker paper cardstock is a great alternative.
Are you planning to pick up the Cricut Joy Foil Transfer Kit for your crafts? I truly believe you will love the effects it creates and find that you reach for it again and again to add that special sparkle to your paper crafts.


Excellent. Thank you