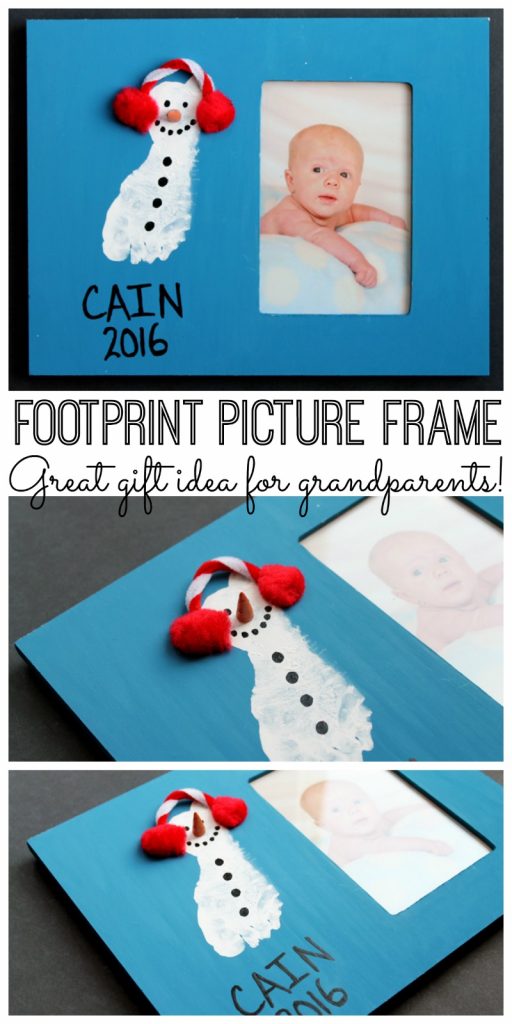
DIY baby photo frames can be something to treasure for years throughout the entire family–especially when you add a little baby’s footprint. This homemade photo frame is perfect for a Christmas gift, baby shower gift, birthday, and much more. Make this baby footprint art in minutes and gift it to grandparents or anyone else who wants a DIY sentimental gift!
This one was originally posted over at Crafts Unleashed where I am a paid contributor however I am posting here in case you missed it. Check out my list of sentimental DIY gifts and crafts for more holiday inspiration!
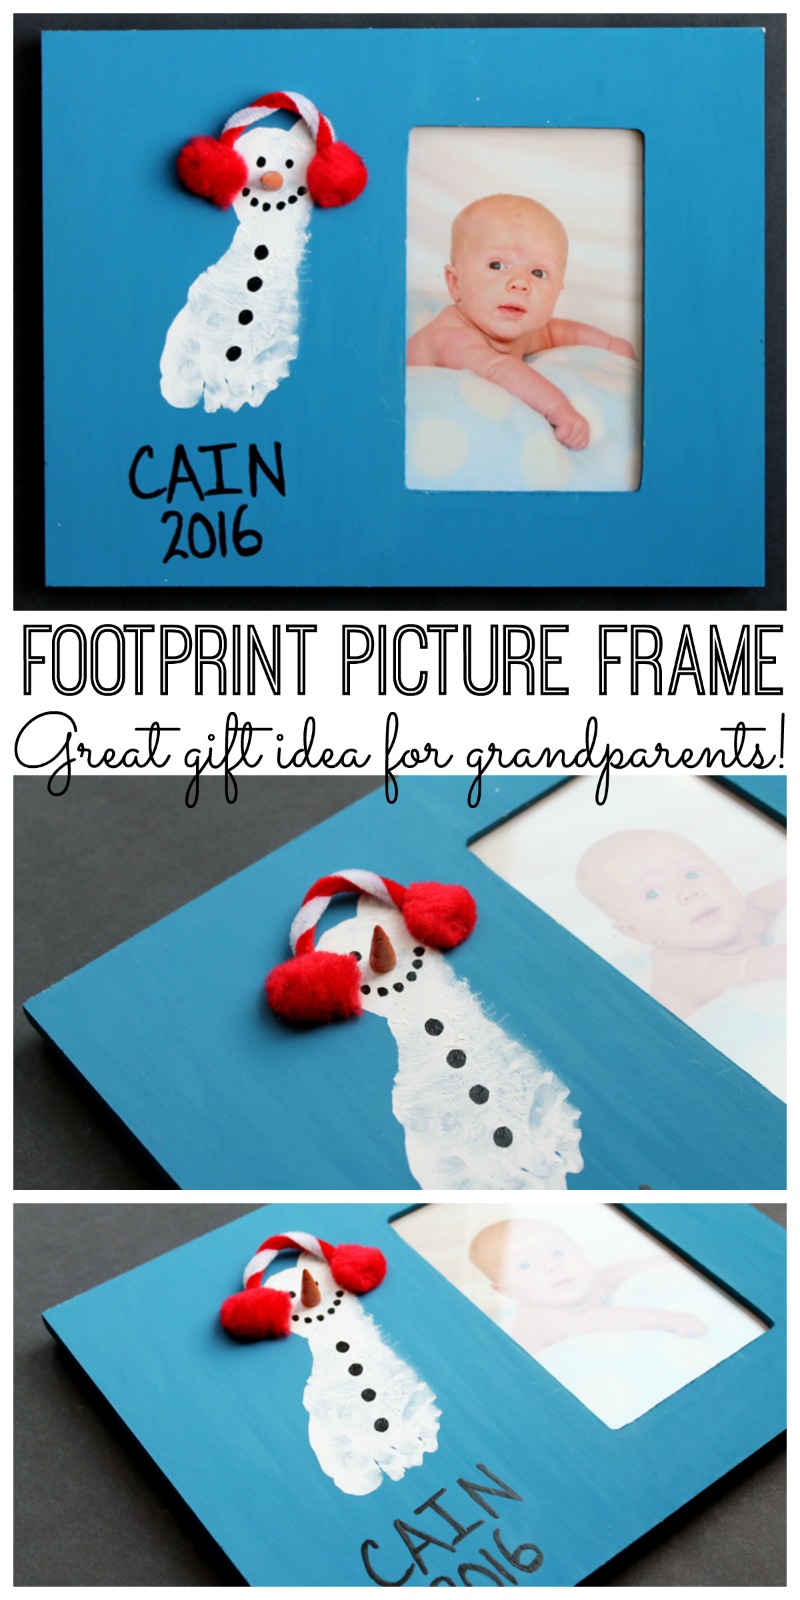
This DIY photo frame is so easy to make with just a handful of simple materials. Impress your loved ones or new parents with an art frame they can remember–one garnished with their baby’s footprint.
Making picture frames is a fun and family-friendly craft even the kids can join you on. Get creative and decorate the handmade frames with each holiday and season such as Christmas, Easter, Fall, etc.
I love this DIY family picture frame, this frame made from scrap wood, or these ornament frames made with a Cricut.
How to Make a DIY Picture Frame with Baby Footprint Art
Supplies Needed
Some links below may be affiliate links which means that you do not pay anymore however a portion of your purchase will go to support this site. I also may have received some or all of the products below free of charge. All opinions and projects are always my own.
- Wood Picture Frame
- Craft Paint: Use any color of choice. The options are endless and can get very creative and artistic. For this Christmas baby photo frame, I used blue, white, and red.
- White Craft Paint
- Black Paint Pen
- Carrot Snowman Nose
- Red Pom Poms: Feel free to use any color pom poms!
- Candy Cane Pipe Cleaner: Perfect for Christmas-themed fun and holiday frames!
- Hot Glue and Glue Gun: You will need these items to make sure everything is adhered to the frame.
- Paint Brush: Use different sizes. If you are painting objects on the frames, then you may need smaller paintbrushes.
Note: Make your own wooden picture frame or use one from the store. Make sure you have plenty of room to paint on it!
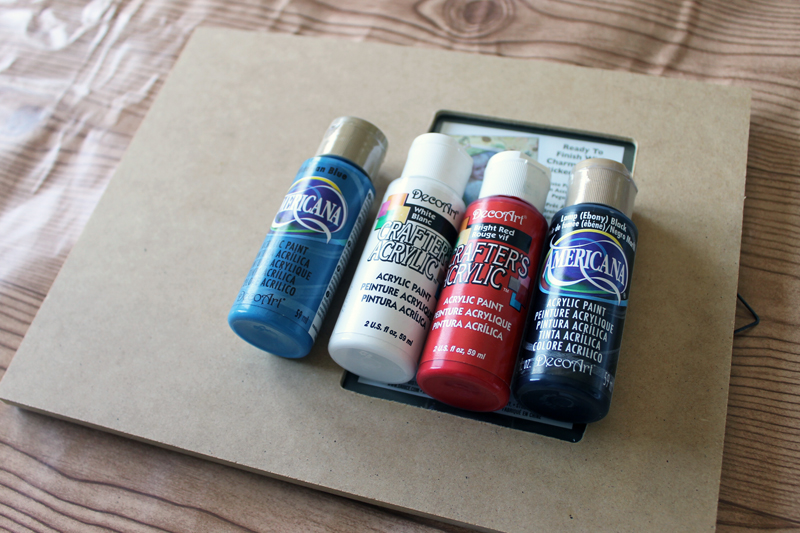
Instructions
Step One
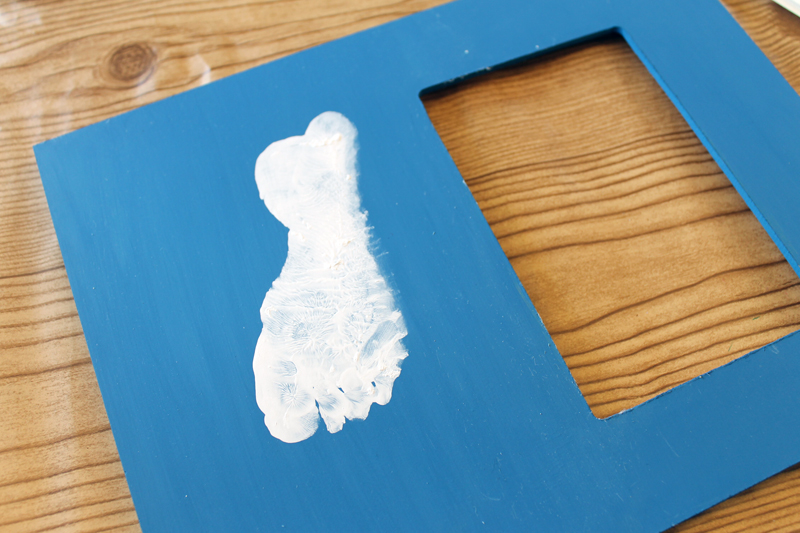
First, start by painting the Christmas frame in the color of your choice. Give it a couple of coats and be sure to get the sides as well as the front.
Allow the frame to dry completely before continuing to paint. Once dry, add your baby or toddler’s footprint. Apply white paint to the bottom of their foot, then press it well onto the frame surface.
Allow the footprint to dry on the frame before moving on. Be sure to wash those feet!
Step Two
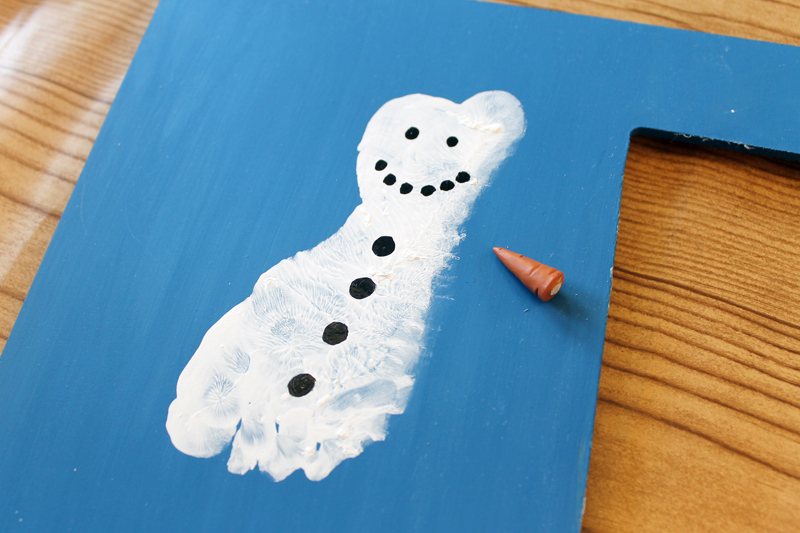
Next, make the snowman. Add the eyes, a mouth, and buttons with a black paint pen.
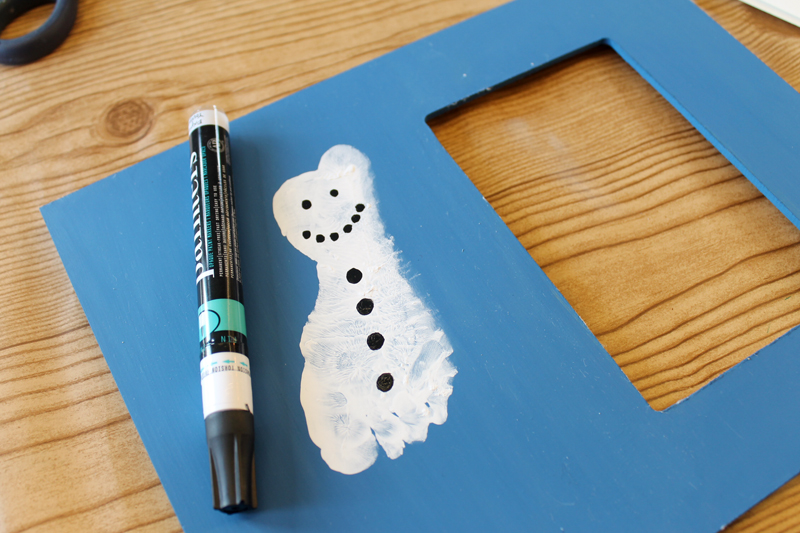
To glue on the carrot nose, first snip the end off with a pair of scissors then hot glue into place.
Step Three
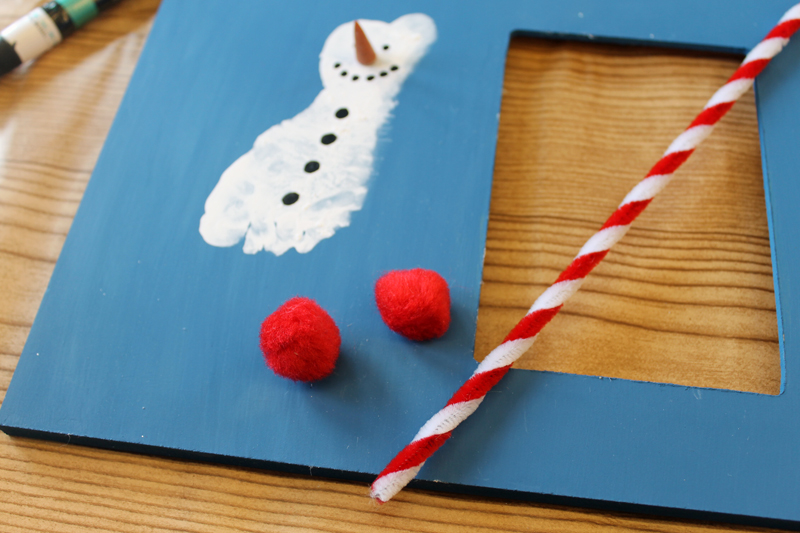
Next, draw the ear muffs on. You will need one candy cane pipe cleaner and two red pom poms to make the ear muffs.
Step Four
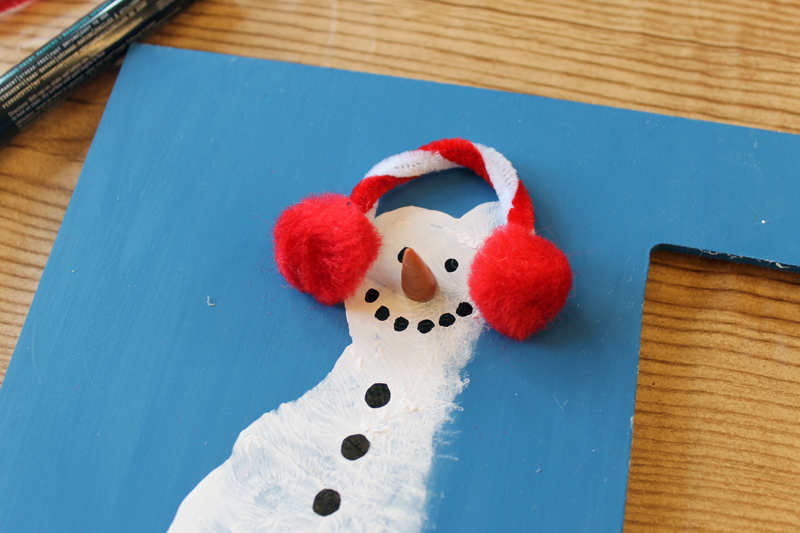
Cut the pipe cleaner into a smaller size and then add it to the frame with the hot glue. Glue it in place.
Step Five
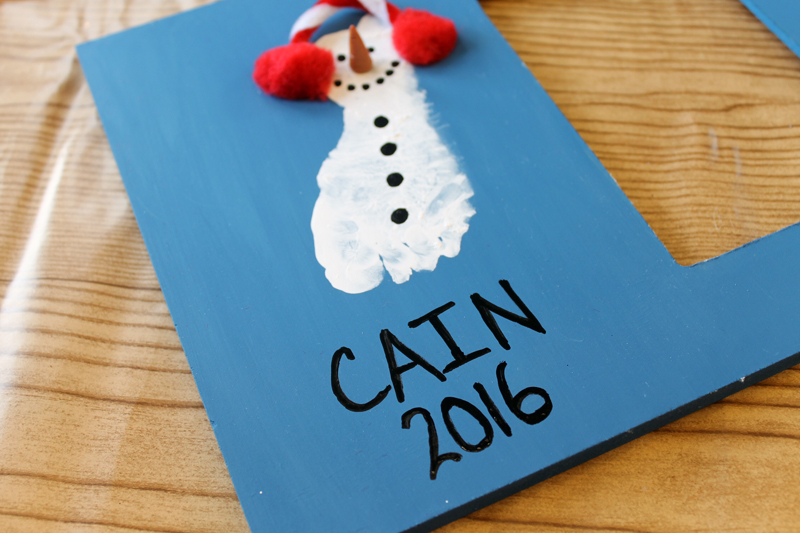
Finally, finish off your frame by adding the name and date of the child with the black paint pen. You can even draw additional things like, “First Christmas,” “Merry Christmas,” etc.
Just add in a picture of the baby to the frame before giving to your loved one. This DIY photo frame is ready to be wrapped up for your gift recipient!
How many baby photo frames will you make this holiday season? Give one to everyone on you holiday wish list!
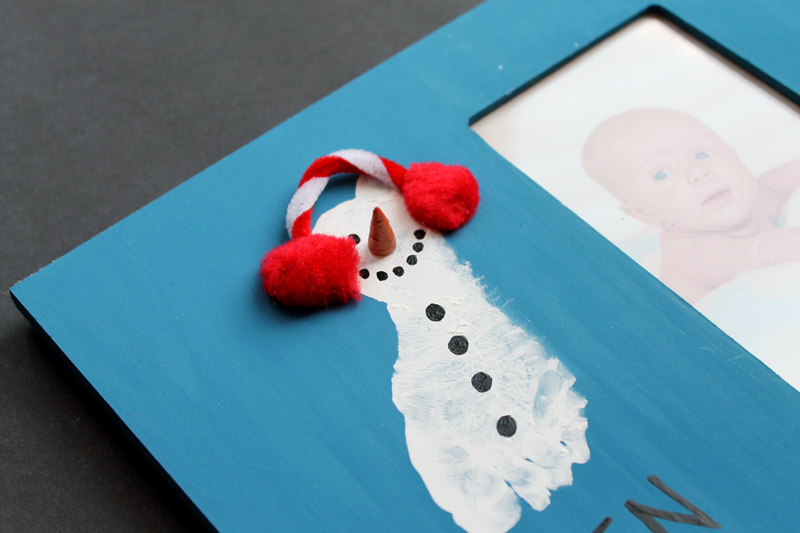
Can you imagine how much they are going to love this frame idea that you couldn’t find at Hobby Lobby or Pottery Barn? Guess what, with just some simple craft materials you’ll have your very own baby footprint art frame!
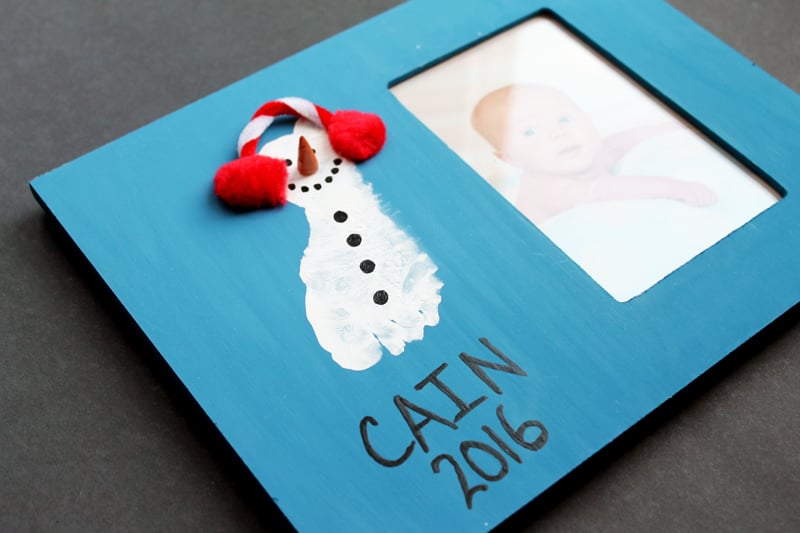
Be sure to get enough supplies to make one of these craft photo frames for yourself as well! You know you want one!
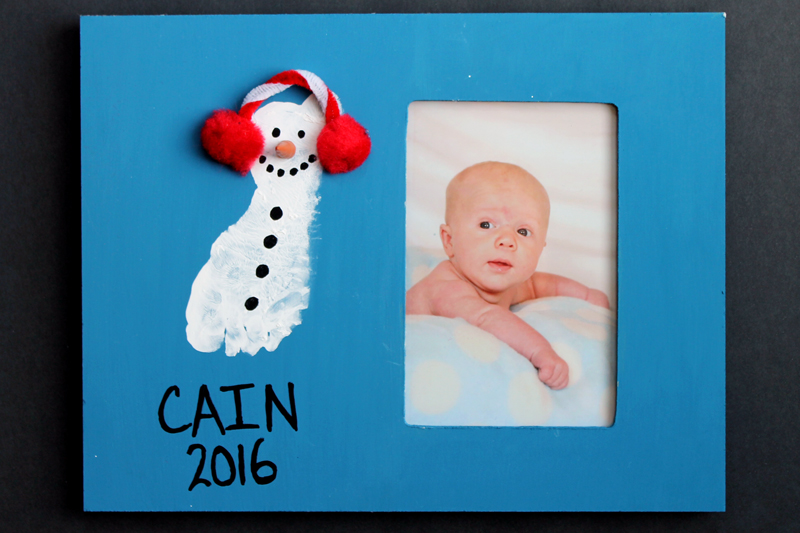
Love These DIY Baby Photo Frames and Need More Ideas? Try the Links Below!
- Thumbprint Art for Your Christmas Tree
- Fingerprint Rudolph Ornament
- Handprint Ornament Kids Craft
- Fingerprint Daddy and Me Coffee Mug
- DIY Modern Tree Art
- Family Tree Ornaments
- Wood Blocks Puzzle
Want to print the instructions for this DIY picture frame? You can use the card below!
Equipment
- Hot glue sticks
Supplies
- 1 wooden picture frame with plenty of space
- craft paint any color
- 1 black paint pen
- carrot snowman nose
- pom poms small; red or any color
- candy cane pipe cleaner
- paint brush
Instructions
- First, paint the frame in the colors of choice. Apply several layers and allow each layer to dry in between each coat.
- Next, cover the bottom of the baby's foot in white paint and press onto the dried paint onto the photo frame.

- Next, draw on the snowman's eyes, mouth, and buttons with the black paint pen.

- Next, glue on the snowman's nose by attaching the carrot nose to the snowman's face with hot glue.

- Make the ear muffs by using the pipe cleaner and pom poms. Cut the pipe cleaner into a small size and bend around the head of the snow man.

- Write the child's name and date on the photo frame or any other message you would like.




This is SO cute!
I would love for you to share this with my Facebook Group for recipes, crafts, tips, and tricks: https://www.facebook.com/groups/pluckyrecipescraftstips/
Thanks for joining Cooking and Crafting with J & J!
Do you sell the simply Blessed Stickers for the rustic frame? I would like to purchase 8 if possible. Stephanie
I don’t! I only offer the file so you can cut yourself.