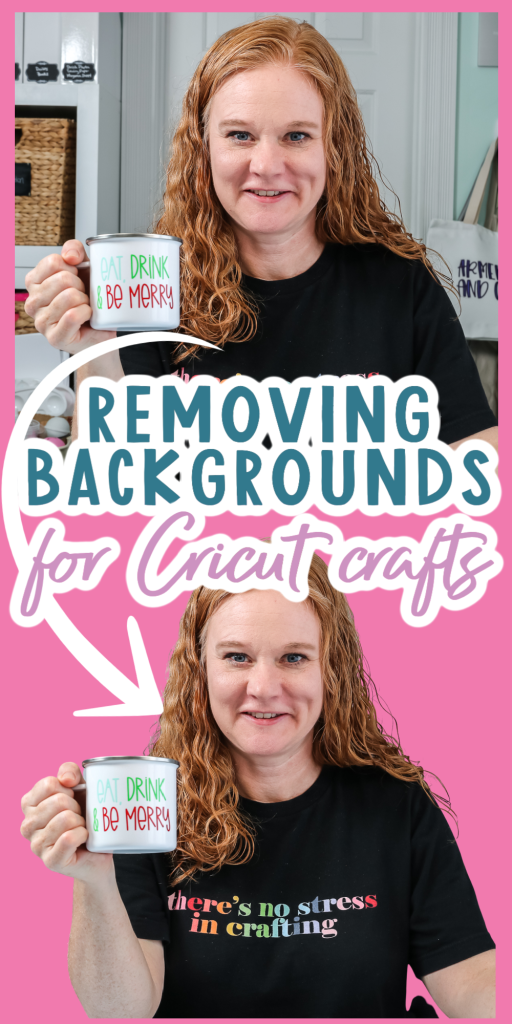
Today I thought I would test a few different options to find the best background erase for Cricut crafts. A few weeks back, Cricut released a background removal tool that is automatic. You should be able to click one button, remove the background from your image, and make something that with “print then cut.” The question of the day is, how good is the new background removal tool? The second question is, is it worth it? The tool is only for those with a Cricut Access subscription. Are there other tools out there that will do the same thing for less? Let’s find out!
Background Eraser
Let’s take a look at the Cricut tool, along with two other tools, to see which is the best option and which gets you the best bang for your buck. Click play and see me use all three tools in the video below.
Can’t watch the video or miss some of the information? Keep reading for more!
Background Removal Tools
There are a variety of tools out there that are both free and paid that will remove the backgrounds from your images. I am going to test 3 images with 3 of these tools to compare how well each of them works. The three tools I am testing are as follows:
- Cricut Background Removal Tool – I will show you how the automatic tool works as well as some of the results. This tool is for Cricut Access subscribers only so you will need to pay the monthly fee in order to use it.
- Canva – This tool does remove your backgrounds for free, however, you do need the paid version to download the version without the background. You can download as a JPG and use the manual tool in Design Space to easily upload the image without a background.
- Remove.bg – This completely free option is available to everyone for removing backgrounds from any image. I also love it because you can add various fake backgrounds to your image for fun effects.
Cricut Automatic Background Removal Tool
Let’s test Cricut Design Space’s new automatic background removal tool with three different images. I’m starting with a simple image. First, click upload in Cricut Design Space. Then, on the next screen, I almost always choose complex. Then you will see the automatic tool on the left hand side. You just press one button and wait for Design Space to remove your background.
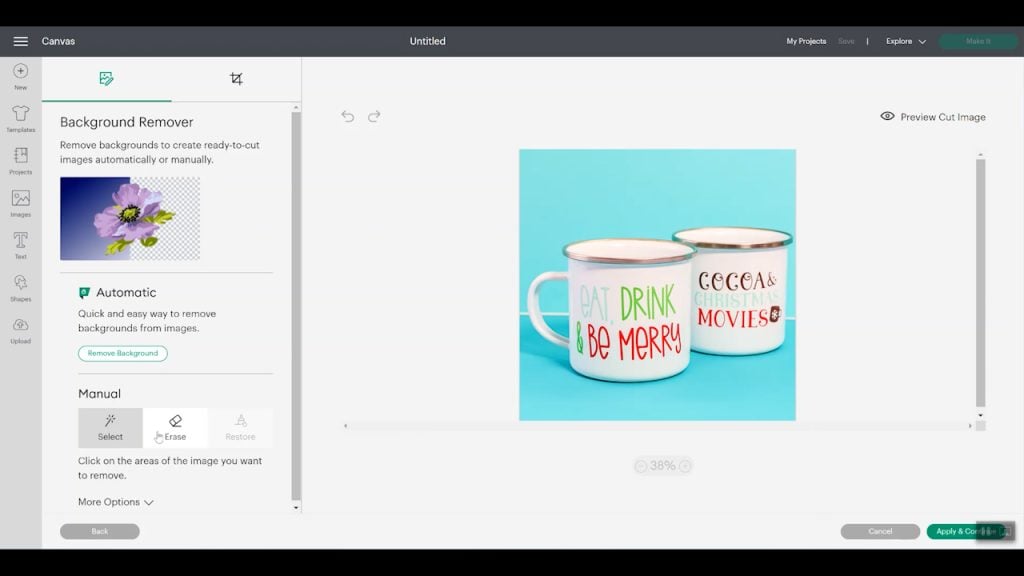
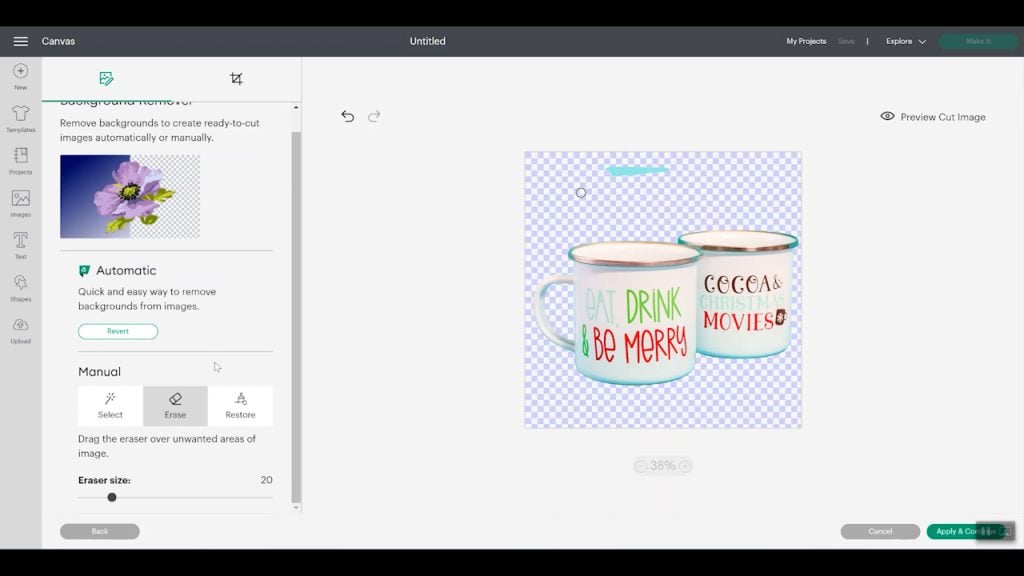
As you can see in the image below, it missed part of the background. Just click erase manually to remove that area. You can change the eraser size to larger as well. Remember that you want the background to be checked, which means that the background is not there anymore. You can click the “preview cut image” button at any time to see what it’s going to cut around. Once you are happy with the results, click “apply” and continue.
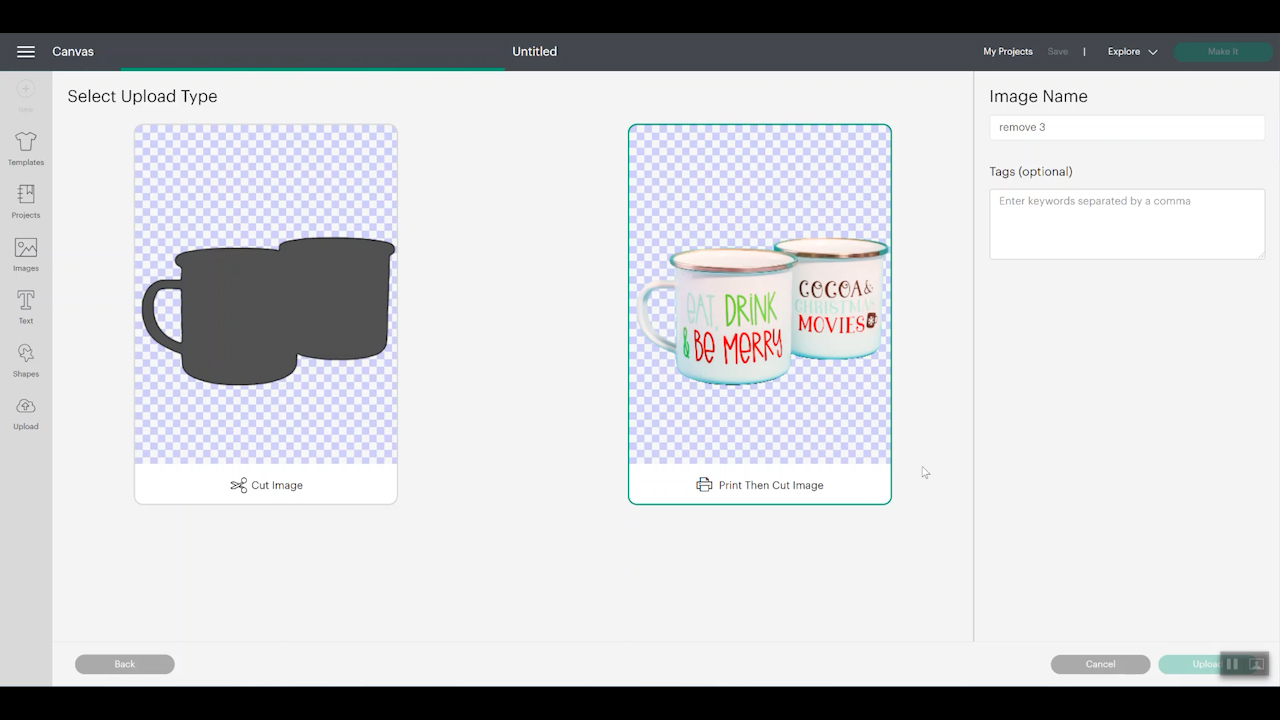
I can choose the “print then cut” option and upload that to my canvas. Then you would just pick it, add it to your canvas, and you would be ready to do a “print then cut”.
This time I have a picture of the same cup, but I’m holding it. This would be the illustration if you’re trying to remove the background from a photo with a person in it, with some things in the background. The background isn’t too overly complicated. I used the background removal tool in the same way as before. It did a decent job with this one as well.
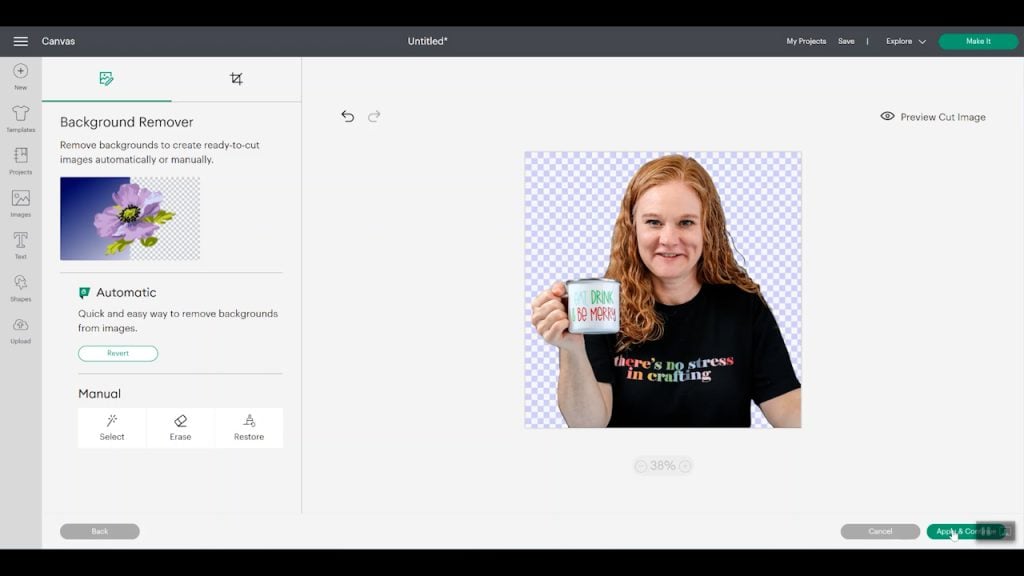
This one is an illustration of a person, but the background is extremely complicated and full of stuff. I’m interested to see if Cricut Design Space can tell the difference between the background and the person in this one. When I do the automatic tool, there’s something left in the corner.
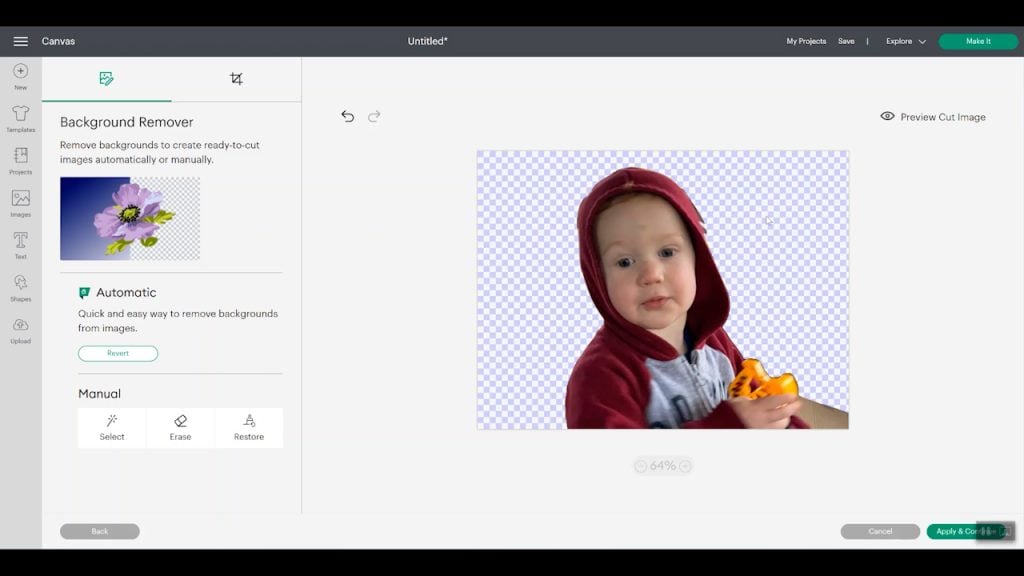
You would need to zoom in and remove any object. This would not be easy in this case as you would need to get around the fingers. All I can do is the best I can here with the manual tools. It’s definitely not going to be perfect.
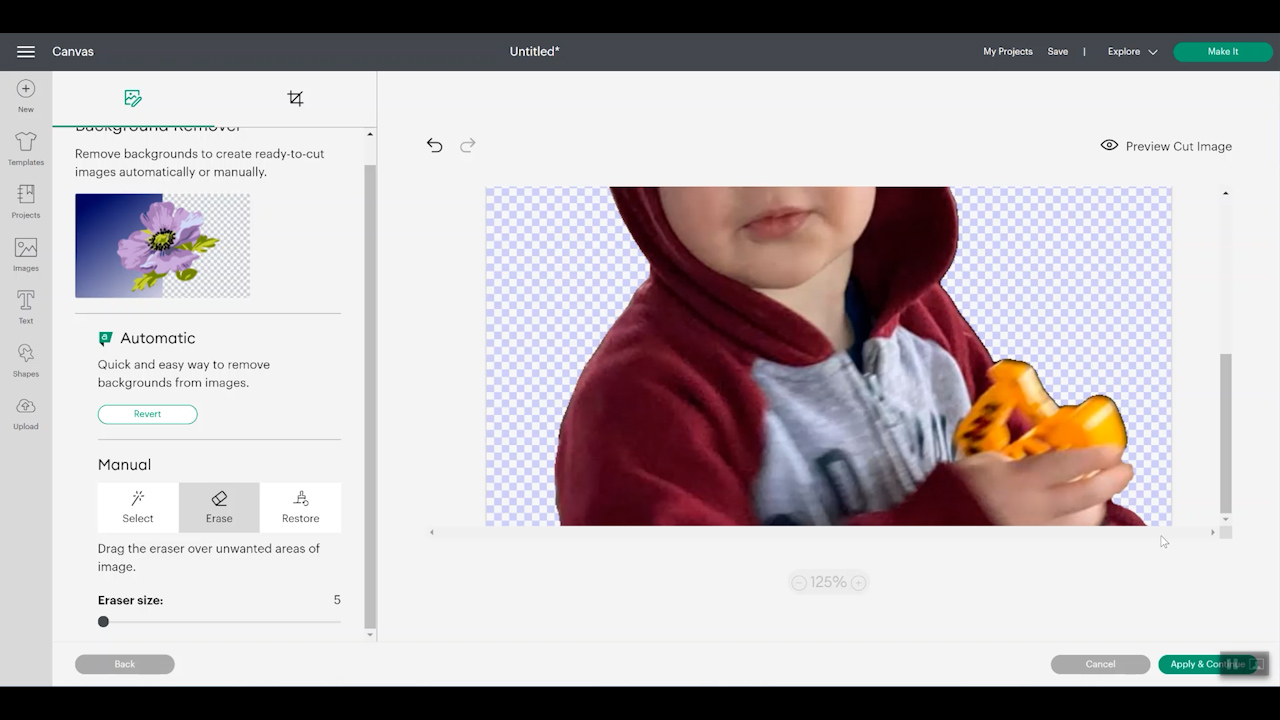
So all in all, the Cricut automatic background removal tool did not do bad at all. I am going to use two more free tools and upload those to Cricut Design Space, just so we can see them all on one screen. Let’s take a look at those other tools for removing the background and see how they compare to the Cricut automatic background removal tool.
Canva Background Eraser
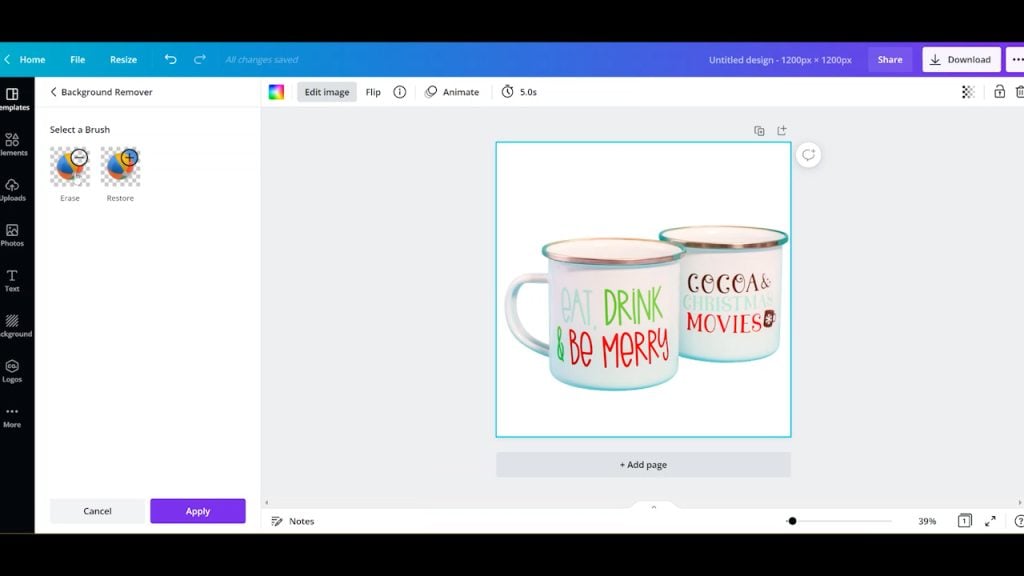
My second tool is Canva, which is a personal favorite of mine. This is my favorite tool for removing backgrounds. I actually have a subscription, but you can do things for free too. I started with the easiest image. Once your image is uploaded, you can click the image and click “edit image”. From here, you have a ton of different options, but we are after the background remover.
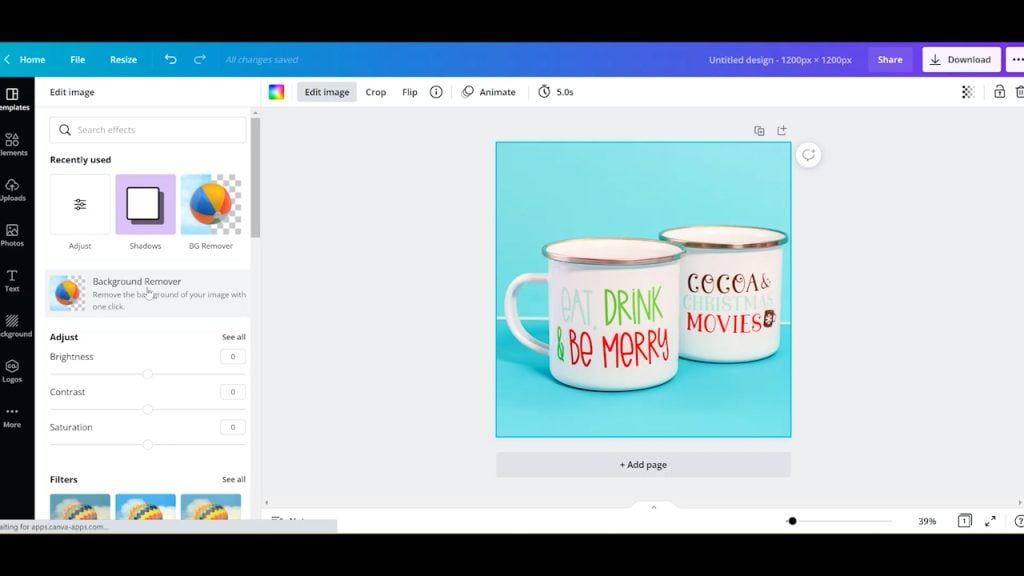
Just click the button and Canva does the work for you. You can erase or restore various portions of the image if you need to.
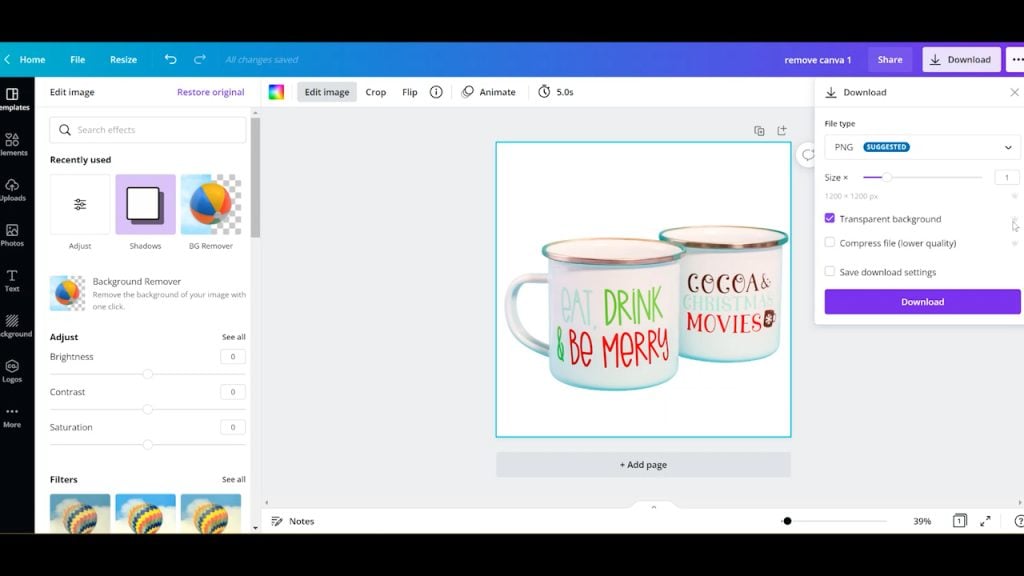
When you want to save this from Canva, you will click download. The best way to export is to select PNG then click the transparent background option. That’s the only way it’s going to export with a transparent background. However the transparent background export is a feature that comes with the paid subscription. If you just wanted to save this, without the background, as a JPEG you could. However, you would need to then remove the background in Design Space. It would have no problem removing this white background.
On all three images, Canva did a great job. I did still have to do some manual removal of the box in that last image. Let’s take a look at all of the images side-by-side with the versions we did in Design Space.
Cricut Background Eraser Tool Versus Canva
Here is a look at all three images side-by-side. I would say on the first image, they’re about equal. In the second image, Canva definitely got more details on my hair.
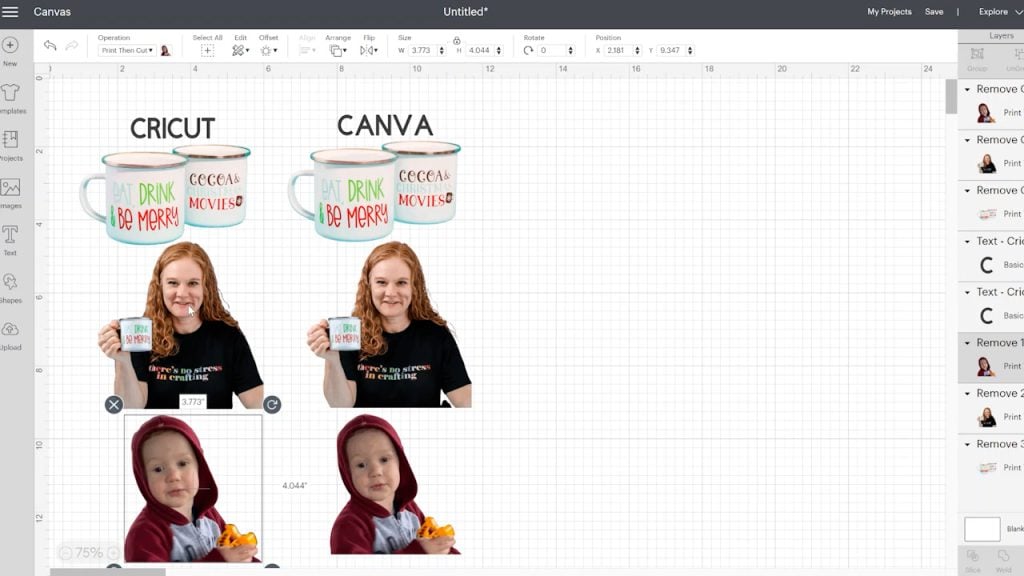
However, the fine details around my hair probably wouldn’t work with my Cricut. The Cricut got fewer details, but the cut would probably work with my Cricut machine. You can see what I mean in the image below. With the Cricut version on the left, it’s going to cut around my hair. The Canva version, however, caught all of that detail. It would try to cut all the pieces within my hair, which could be a nightmare on my Cricut. The Cricut background removal tool was smart enough to know that the machine can’t cut all these details in my hair, and you can see either gray or white in those areas.

There are cases where I would want the finer details especially if I was flattening to a colored circle to print a sticker. However, there are cases where the Cricut version would work better as well. It may depend on what you are making as to which background removal tool you want to use.
RemoveBG Background Remover
The third tool is Remove.bg. I’ve used it several times before, and it’s 100% free and automatic Hit the upload image button to begin.
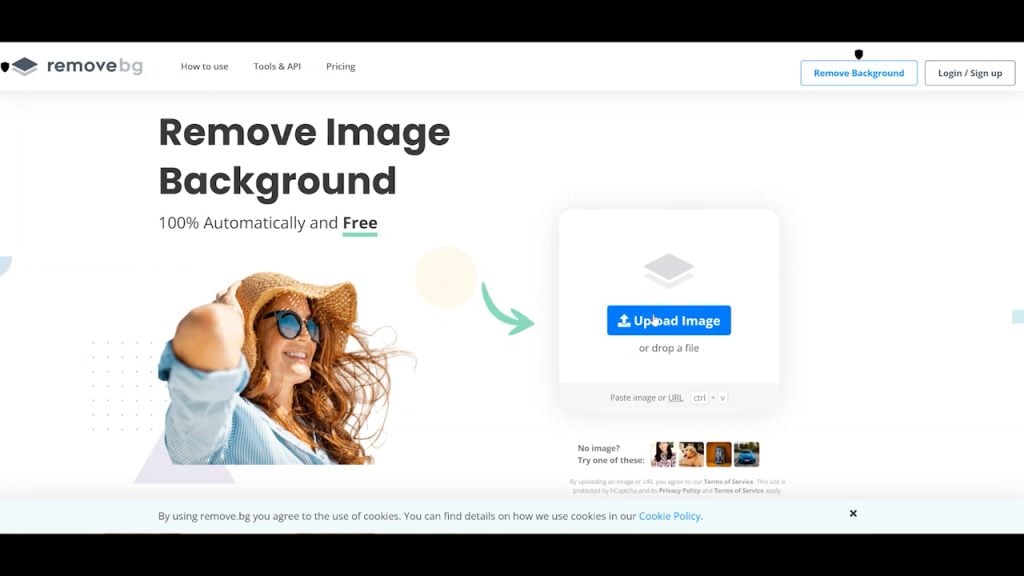
This tool automatically removes the background right away. It looks super great on this simple one. All we have to do is click download at this point. It’s an easy way to remove a background and super quick. The download of this one is free and comes with a transparent background for uploading to your Cricut.
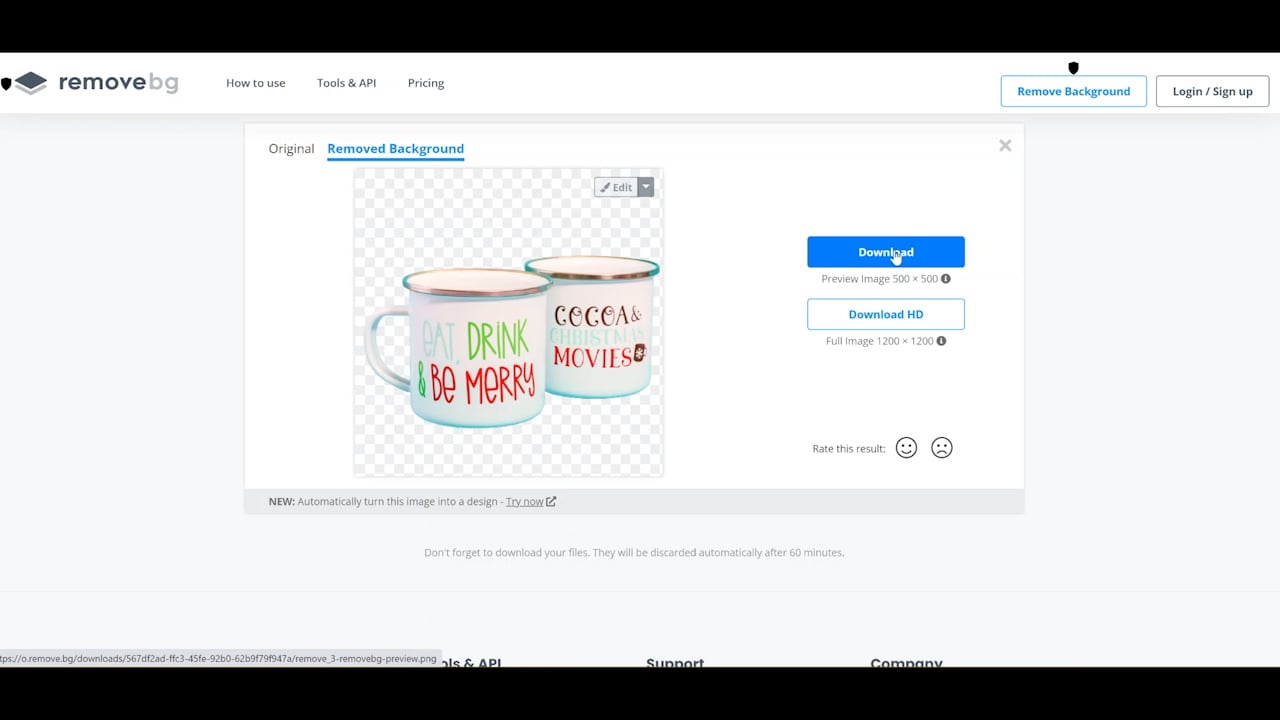
I continued on and removed the background on all three of the images. I did have to remove part of the box on the third image once again. Just click “edit” to manually erase it. There you can either erase or restore. As with the other tools, you can also make your brush smaller to get into the details. Once you are happy with the results, you do need to download it from here because once you click the X, any changes will be gone.
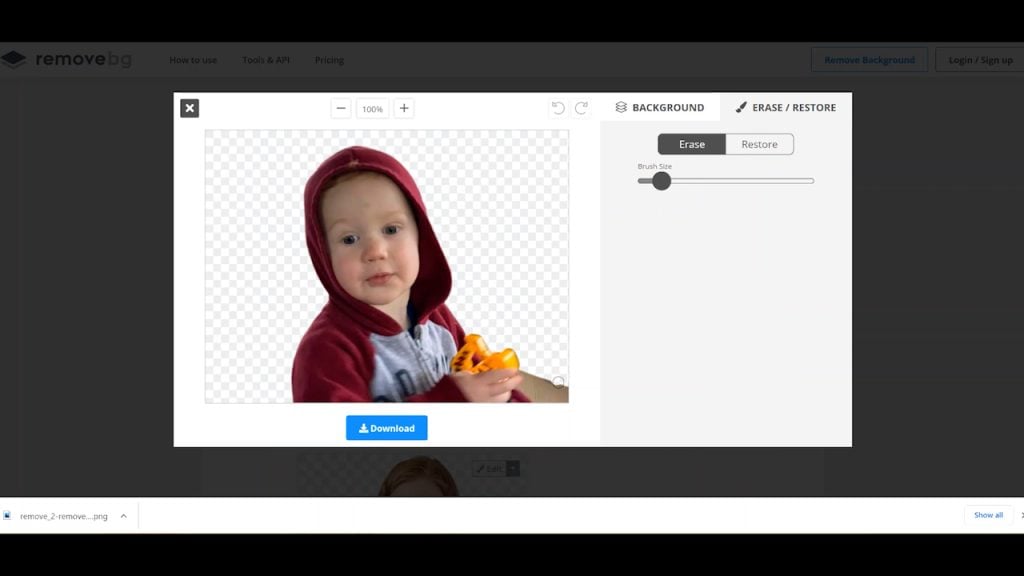
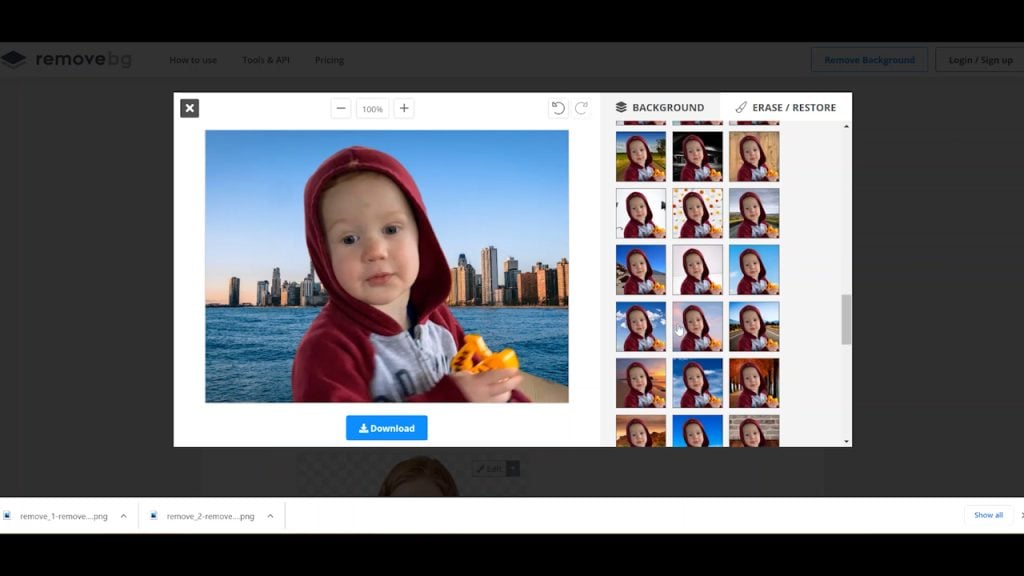
Another thing I wanted to point out about this tool, you can edit and insert other backgrounds, which I think is a cool feature. I could put a city scene behind here and have the person in the city. That’s a cool feature if you wanted to play around with that as well. Now let’s head to Cricut Design Space and see what the differences are between this and the other two options.
Comparison of All Three Tools
On the first image, all three tools are very similar. If you have a super simple image, any of the three would be fine. For the one of my image, I’m really impressed with remove.bg. It did a better job in removing the background than the Cricut, but not as super detailed as Canva. It was somewhere in the middle ground where I think my Cricut could cut it, especially if I contoured out a few of the small details. I definitely think I could get a cuttable image with remove.bg, so it is definitely a great option.
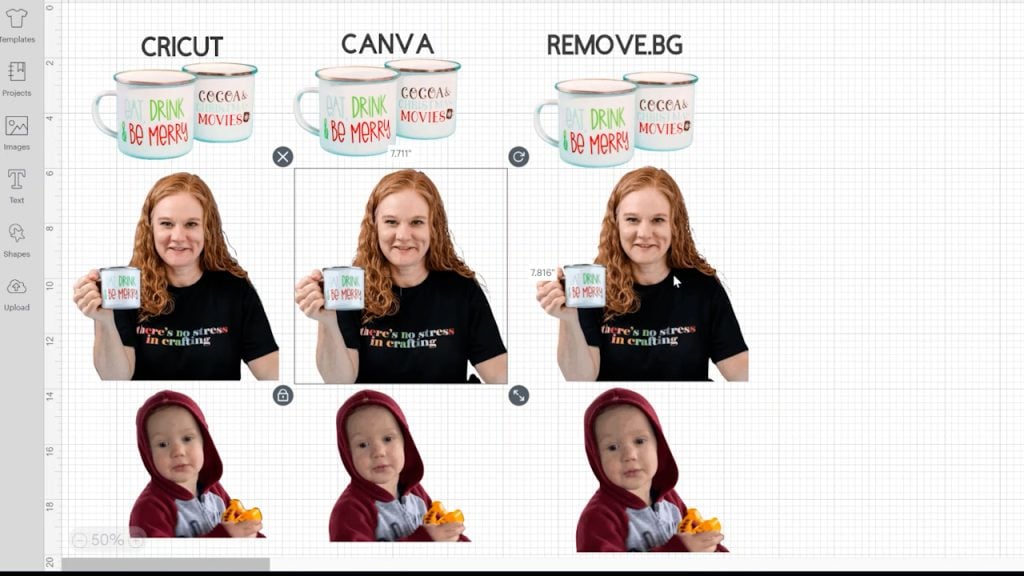
For the last image, I felt like the tools were the same in removing background also. I had to remove the portion of the box on all three sites. For me, remove.bg is definitely the most affordable option, especially if you don’t have a Cricut Access subscription. If you have that Cricut Access subscription, and it’s more convenient for you to use their background remover, then absolutely go ahead and use it.
Which Background Eraser Works Best for Your Cricut?
Let’s go over the pros and cons of each so you know which to use for your Cricut crafts:
- The Cricut automatic background removal tool is good but it is also slow. It does leave some of those tiny details, however, those are probably ones you can’t cut with your Cricut anyway. It might save you time in the long run as you may have to use contour to remove some details with other tools.
- Canva does an amazing job but it does catch a ton of detail. If you are looking for something to do print then cut on a colored background, I would definitely recommend this tool. The drawback is that you have to either pay to download the version with no background or do a few additional steps when uploading to Cricut Design Space.
- Remove.bg split the difference between the two for me. It’s free, which is one great benefit. It does a great job removing background and it is super fast. Plus you can upload the files right into Cricut Design Space and use them as a “print then cut”. There may be a few small details you would need to remove with contour but overall it did a great job. I really think remove.bg is the answer for those of you that don’t have Cricut Access, don’t want to get it, and don’t want to spend extra money for another subscription.

I hope this helped you decide what option is best for removing backgrounds for your Cricut projects. A background eraser can be great for your crafting and now you hopefully know a little bit more about picking the right one that will work for you!


