
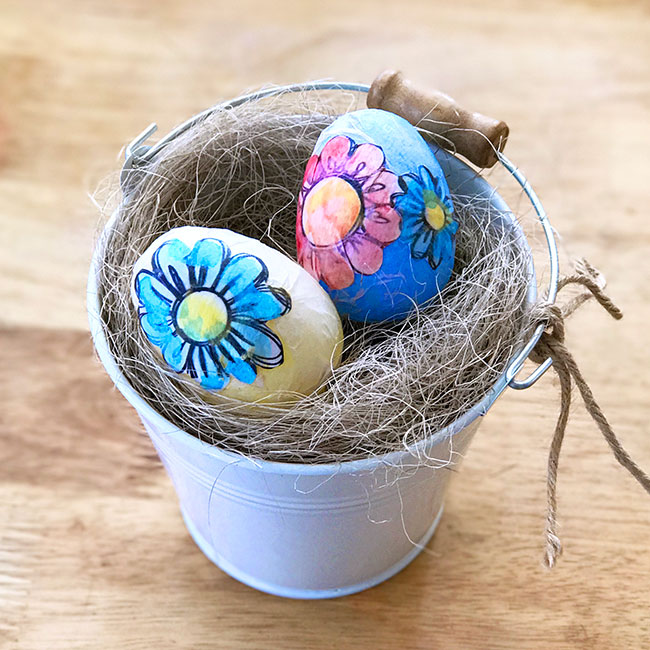
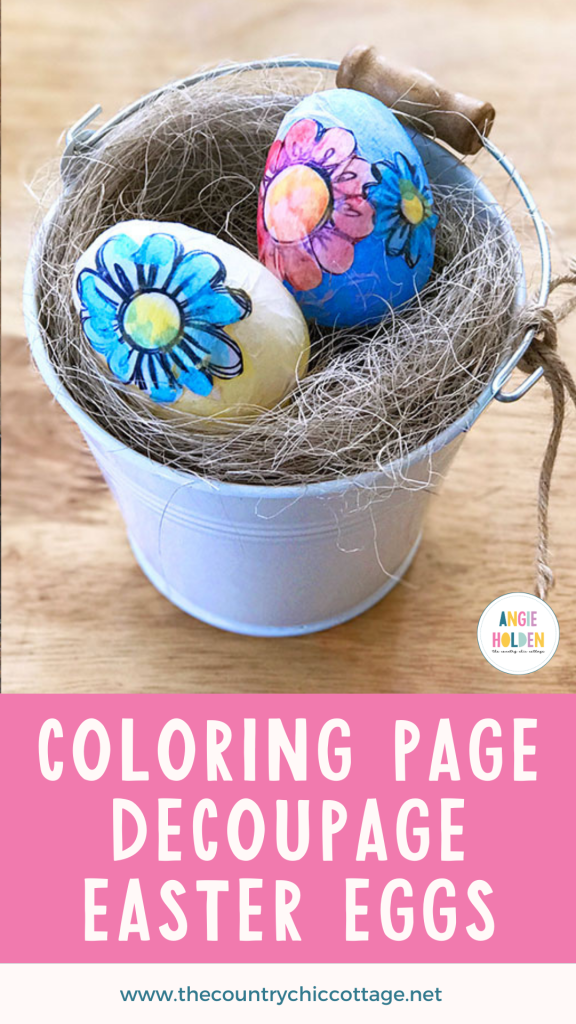
Jen with 100 Directions is back today, sharing some coloring page decoupage Easter eggs. Use up those coloring pages on a fun spring project!
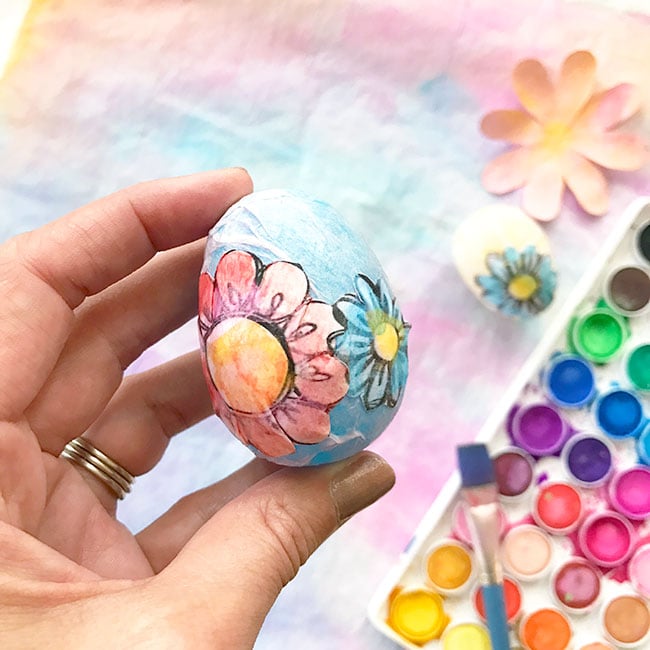
All those fun flower coloring pages you’ve been coloring are perfect for making pretty decoupage Easter eggs. I love making projects with all the colored art I’ve created, and this project is a quick one. You can make your own Easter decor or a few pretty eggs as gifts from the Easter Bunny. This project is perfect for teens, too. Today, I’ll show you all the steps to make your own!
How To Make Coloring Page Decoupage Easter Eggs
With this decoupage technique, you can make so many different art designs on your Easter eggs. Go with pretty pastels or bright and bold. I add tissue paper to my decoupage eggs so that the entire egg has a paper decoupage look and feel. You could skip this step if you’d like and decoupage the colored art to the egg as is. Get creative with it, and have fun!
Supplies Needed To Make Decoupage Easter Eggs
- Plastic or craft Easter eggs
- Tissue paper
- Colored coloring pages – Make a copy if you’d like to use the page a few times
- Mod Podge and Paintbrush
- Wax paper
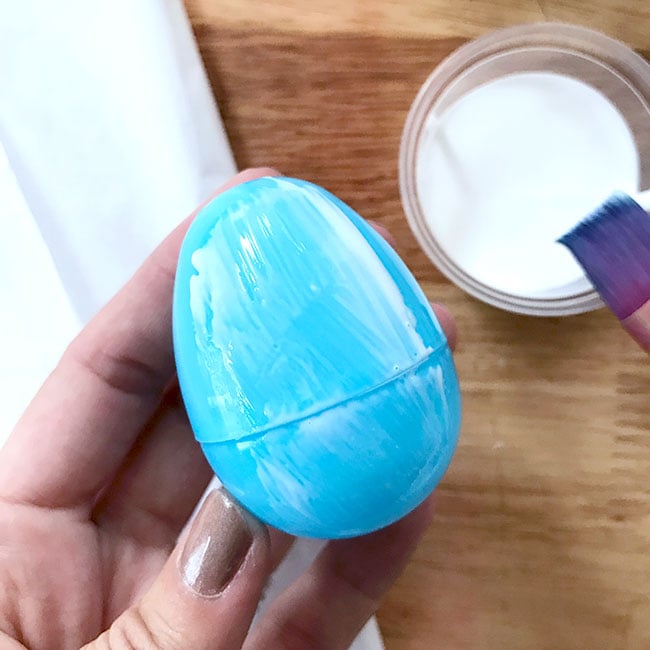
Step 1: Apply Mod Podge To Plastic Egg
Apply Mod Podge to the plastic Easter egg with the paintbrush.
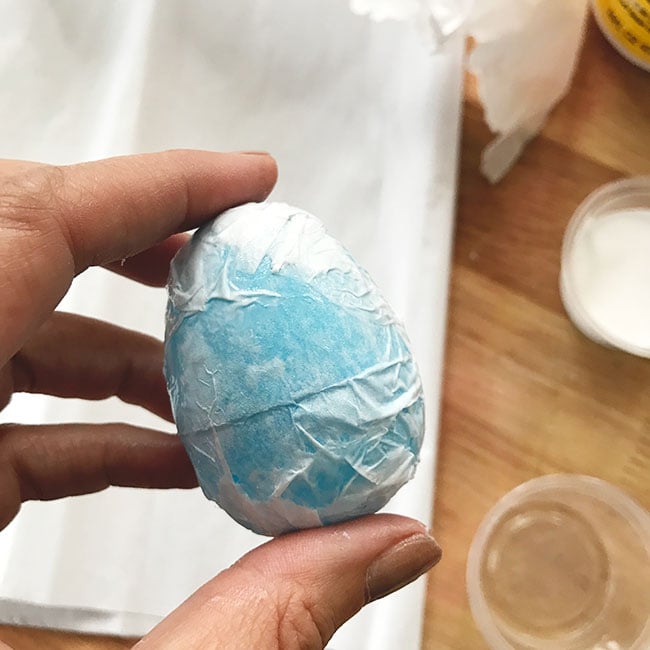
Step 2: Add Tissue Paper To Plastic Egg
Add tissue paper over the Mod Padge on the egg.
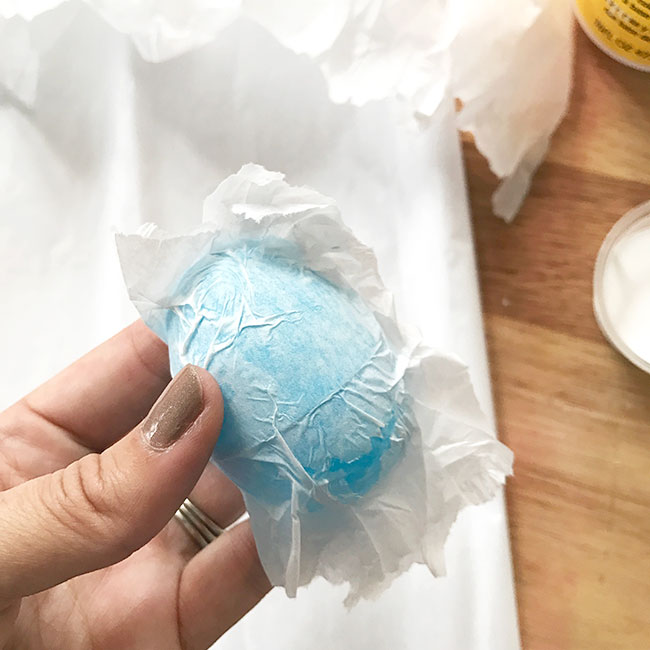
Continue to apply Mod Podge as you wrap tissue paper around the egg until the entire egg is covered. You can also add Mod Podge on top of the tissue paper to help it lay flat on the egg.
Work in a small area at a time so you don’t end up with Mod Podge all over your hands. Place the eggs on wax paper and allow them to dry. Alternatively, you can use small pieces of tissue paper and apply each separately, coating with Mod Podge as you go.
Step 3: Cut & Glue Coloring Page To Plastic Egg
Next, cut out designs from your coloring page.
Add Mod Podge to the egg where you want to place your design. Press the paper to the egg and continue to apply Mod Podge under and on top of the paper until it’s completely adhered to the egg. Mod Podge on top of the design will also seal and protect the colored page.
TIP: Adding the tissue or the coloring page designs to the egg will create some wrinkles. This is okay, as the paper needs to form to the round surface of the egg. Just press down and ensure the wrinkles are as flat as possible to get a nice finished look with your decoupage.
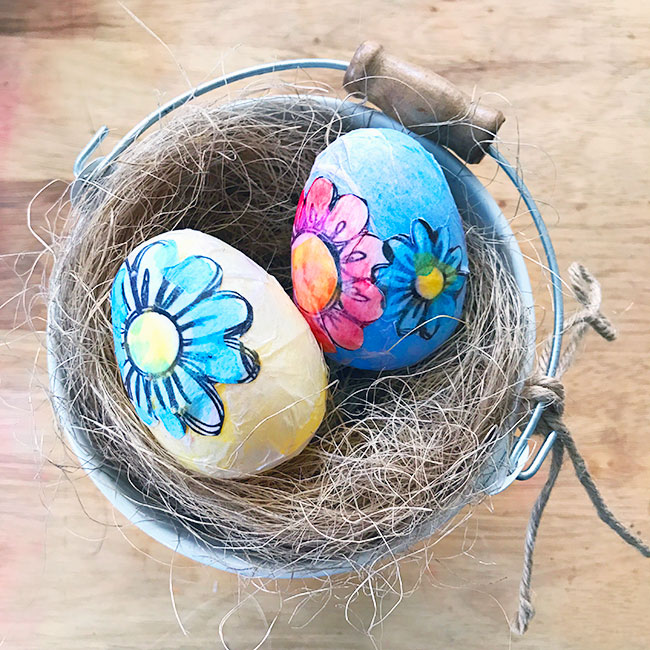
For this project, I used my own floral art coloring page; you can grab a copy here or use whatever pages you’d like. If you’re feeling extra artistic, you can make your own custom art and then decoupage that onto your eggs. I’ve got a few hand-drawn Easter eggs with a similar look that were also fun to make.
So grab all those coloring pages and books and have fun with your own decoupage Easter eggs. I can’t wait to see what you create!
FAQs About Decoupage Easter Eggs
Here are some common questions I see from readers about making these decoupage Easter eggs. If you have a question but don’t see it below, please leave it in the comments so I can answer it.
What If My Plastic Egg Has A Design On It?
That is fine if they have designs on them already; they will still work for this project!
Can I Adjust The Size Of These Decoupage Easter Eggs?
Absolutely! You can use smaller or bigger plastic eggs, depending on the look you are going for.
Can I Use Colored Tissue Paper?
You can if you want to. Colored tissue paper would probably work better on white plastic eggs compared to the colored eggs. This is because the colored tissue paper and the color on the plastic eggs might not look good together once the egg is dry. However, you can experiment and have fun mixing and matching different colors!
Can I Use Glossy Mod Podge?
Yes, you can! I like the look of the Matte Mod Podge, but you can use Glossy instead.
Where Can I Find The Floral Coloring Page Shown On Your Decoupage Easter Eggs?
You can grab a copy of Jen’s Flower Sketch Coloring Pages by clicking here!
5 More Easter Egg Crafts
If you love these decoupage Easter eggs, here are some other Easter egg crafts that you won’t want to miss!
- Marbled Easter Egg Wreath
- Decorate Easter Eggs with Washi Tape and Twine
- Large Easter Egg Decorations
- Adorable and Free Easter Bunny Egg Printables
- Fuzzy Yarn Wrapped Easter Eggs


I’m a sucker for decoupage and I love these eggs!
I love the idea of putting colouring pages to good use. Great idea.
Angie, these are sooo adorable! Thanks for sharing this wonderful idea! Pinned.
your Easter will be pretty! great idea for decoration 🙂
Ths would totally work with real eggs – just poke holes on both ends and blow out the egg and rinse.
Those are so festive. My daughter will love this project.
Thanks for sharing at Funtastic Friday.
These are so cute! Thank you for sharing!
Pinned!
Oh these are too cute! 🙂
I would love for you to share this with my Facebook Group for recipes, crafts, tips, and tricks: https://www.facebook.com/groups/pluckyrecipescraftstips/
Thanks for joining Cooking and Crafting with J & J!
These are so cute and I love how simple they are to make 🙂
Now that is a clever use of coloring pages! So cute! #MerryMonday