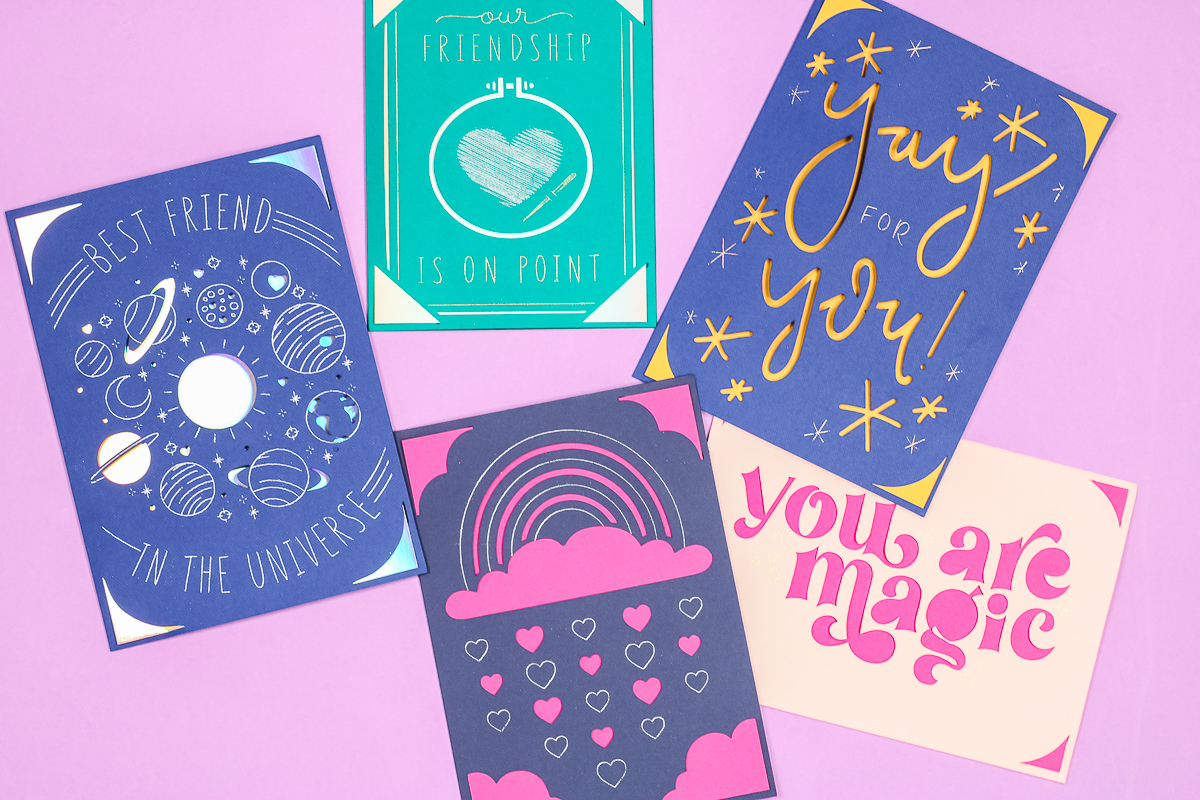
Raise your hand if you love Foil Cricut Cards! Well, if your hand is up, did you know that there are now Cricut Foil Insert Cards? I can’t get enough of the new Cricut Card Mat 2×2. Today I’m going to teach you how to use the Cricut Foil Tool to make Foil Insert Cards. In the past, you could make these cards with the Cricut Joy and the Joy Card Mat. Now, with the Card Mat 2×2, you can make Foil Insert Cards with any Cricut machine!
Looking for my post on Insert Cards with Cricut Joy? Find that here!
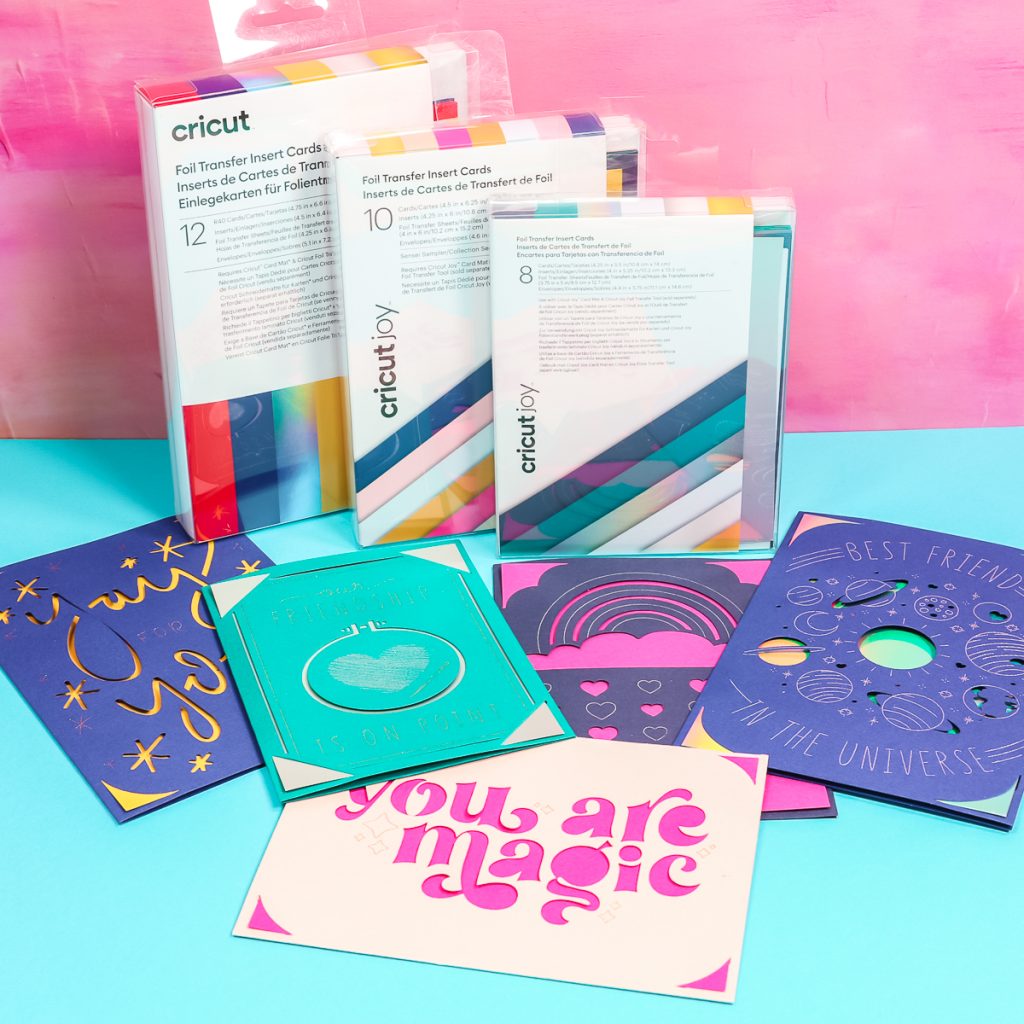
Foil Cricut Cards Video Tutorial
You can watch me create Foil Insert Cards with the Foil Transfer Tool, just click play on the video below.
Can’t watch the video or miss some of the steps? You can follow along below as well!
Foil Cricut Cards
I recently taught you how to make Insert Cards with the new Cricut Card Mat 2×2. Today I’m going to teach you how to Foil Insert Cards using the Cricut Foil Tool and the Foil Transfer Insert Card kits.
Supplies Used To Make Foil Cricut Insert Cards
- Cricut machine
- Card mat Explore/Maker
- Card mat Joy
- Foil card kits
- Spatula
- Foil tool Explore/Maker
- Foil tool Joy
- This project is made with Design Space files. Click here for this project.
REMINDER: As of the writing of this post the Foil Transfer Tool does not work in the app. You need to use the desktop app to use the Foil Transfer Tool.
What Are Foil Insert Cards?
Foil Insert Cards are made very similarly to regular Insert Cards. The main difference is that we’re using the Foil Transfer Tool. You do need to own the Foil Transfer Tool Kit as well as a Card Mat to make foil Insert Cards with the method I am showing below. You can make these on any Cricut machine with the right supplies. The cards themselves come in a wide range of sizes.
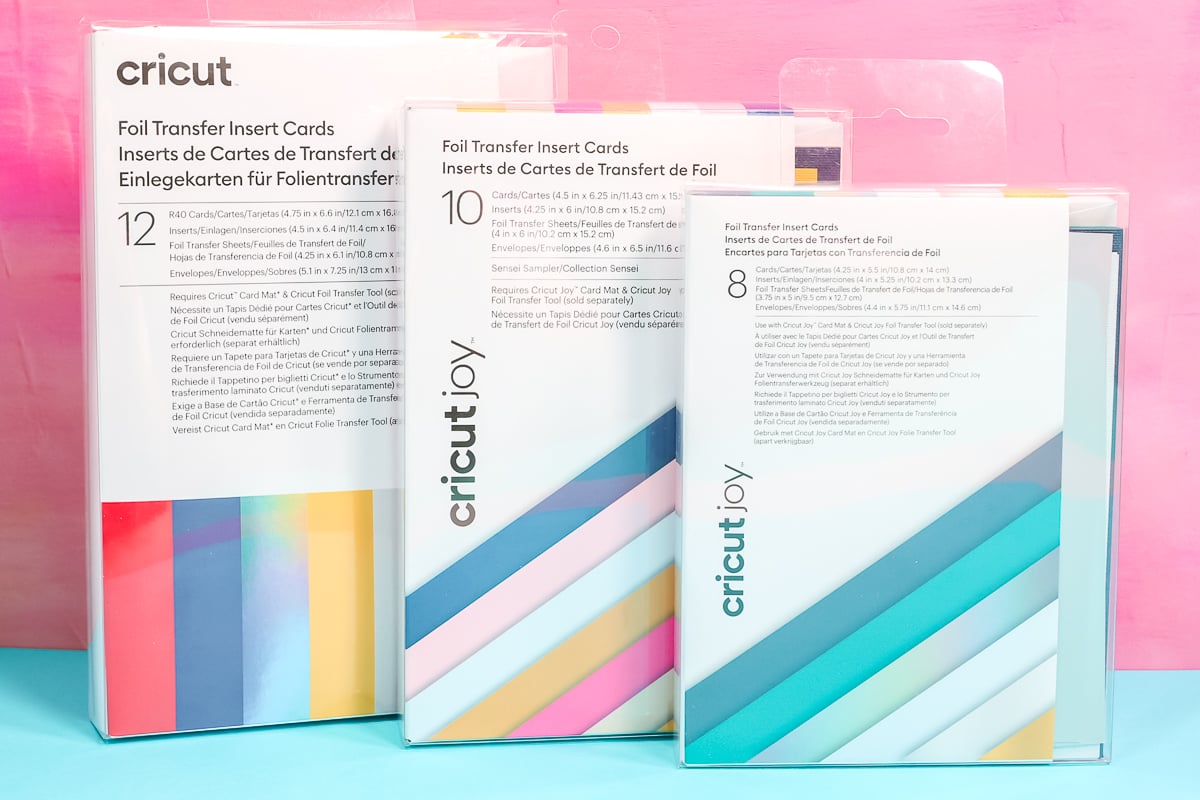
What Comes In The Foil Transfer Insert Cards Kit?
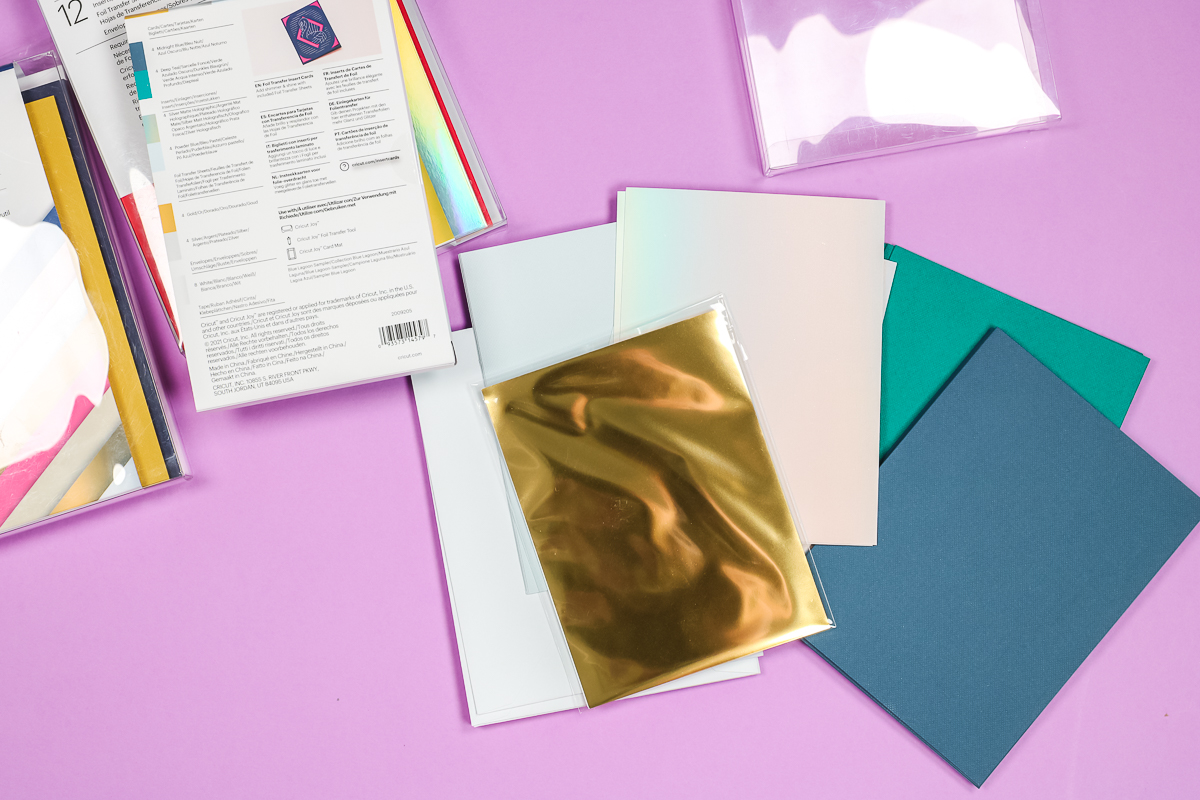
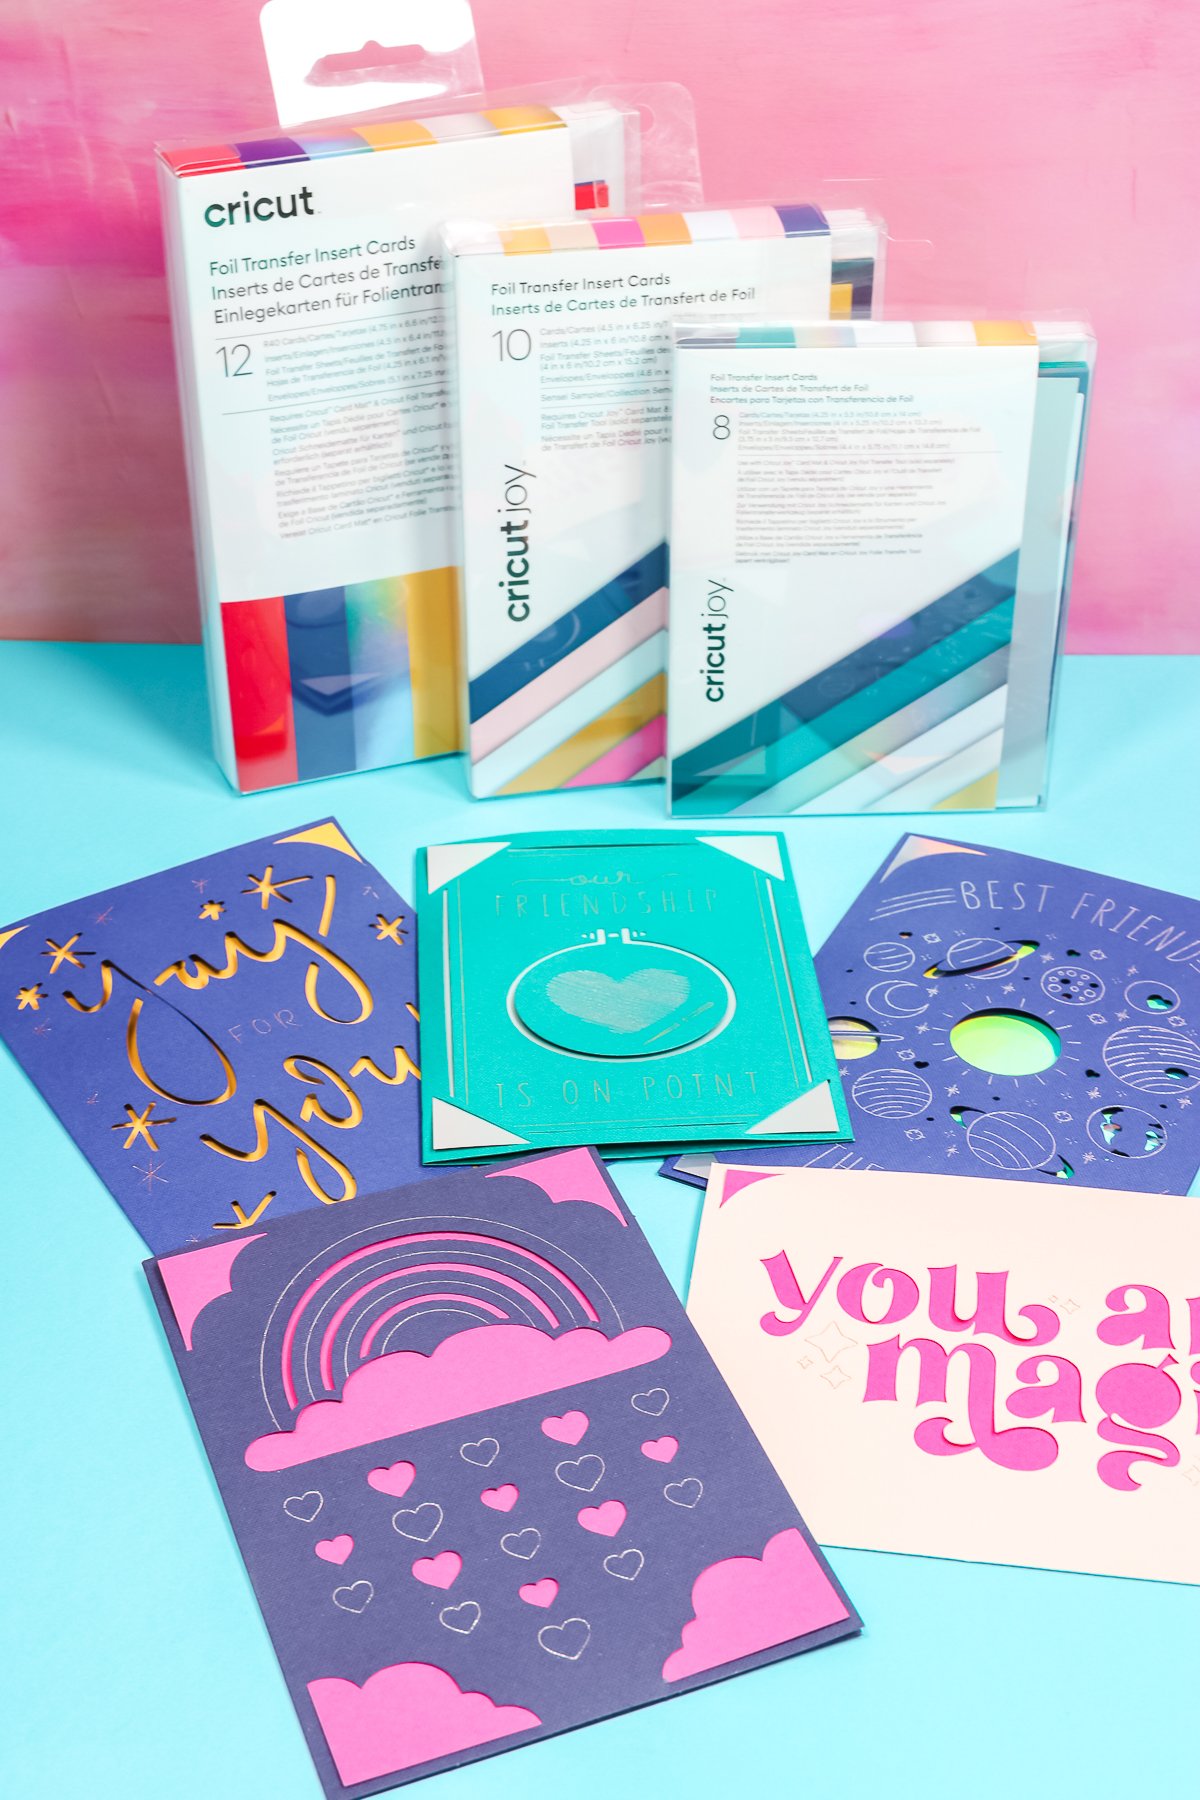
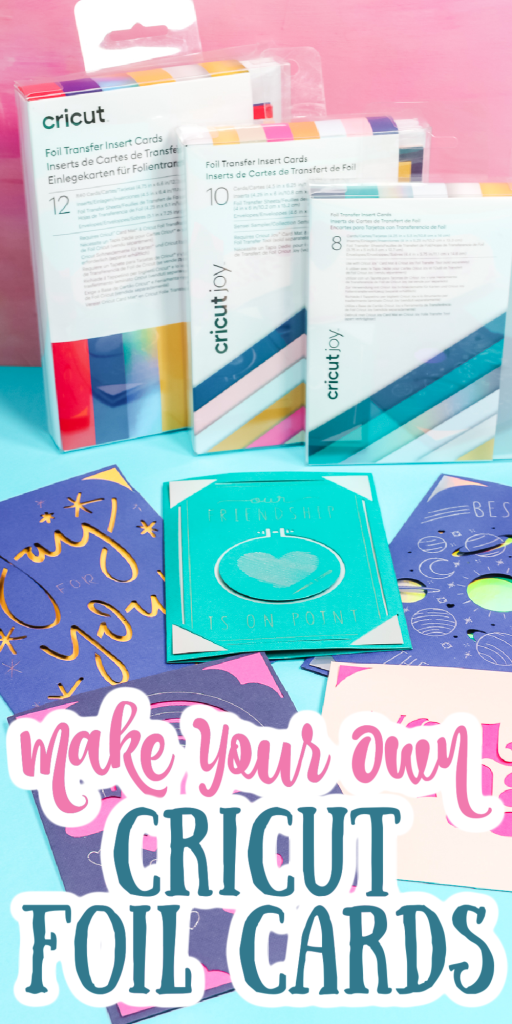
The Foil Transfer Insert Cards kit comes with almost everything you need to make foil insert cards. The following is included in the kit:
- Pre-folded Cards
- Envelopes
- Card Inserts
- Foil Transfer Sheets
- Tape
On the back of the packaging, you’ll see the colors of each of the components.
Cricut Foil Card Designs
If you’ve already made Insert Cards, the process for creating Foil insert Cards is very similar. You have the option of selecting Ready to Make cards under projects in Design Space. You can also create cards using Insert Card images in Design Space. The final option is using different images in Design Space and creating your own cards.
NOTE: You may find that my Design Space looks different from yours as I have some special testing permissions on my account.
Foil Insert Card Ready Made Projects
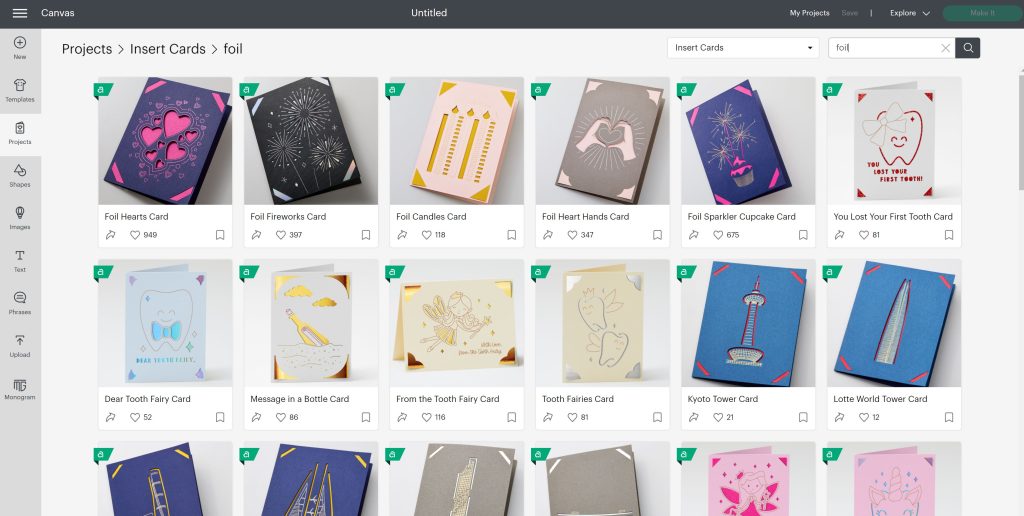
There are a lot of Ready to Make Foil Insert Card options in Design Space. From your Design Space canvas select Projects on the left side of the screen. Then, under Categories select Insert Cards. Once you have those pulled up you can search “Foil” and it will bring up all the different cards that are already designed and set up for using both Insert Cards and the Foil Transfer Tool.
With Ready to Make Projects, you select the size of the card you are using, and then following the prompts on the mat screen you’ll load your card onto the card mat and make your Foil Insert Card. You don’t have the option to customize the design of the Ready to Make cards so you will want to make sure you pick cards that have foil lines.
Finding Foil Insert Card Designs
If you’re looking for a little more freedom with your Foil Insert Cards let’s look at card images. From your Design Space canvas, click on Image on the left side of the canvas. From there, under All Images you’ll click on Project Type and then click the Cards checkbox to have only card images on your screen.
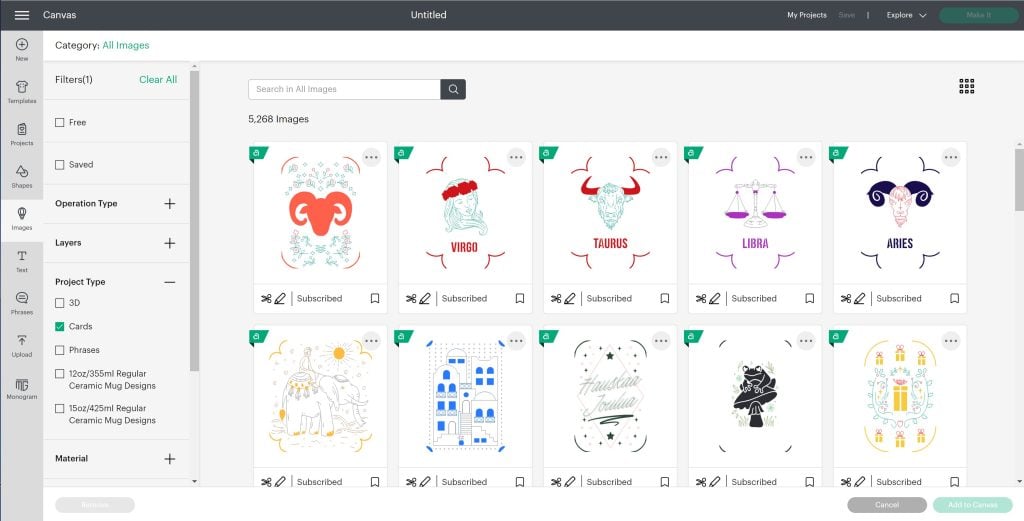
Here you can browse through the images and select the ones you want to add to your canvas. If you’ve chosen an image that doesn’t have a foil layer, you can create your own by changing a draw/write layer to a foil layer. Select the layer in the layers panel and then, in the top toolbar select Operation and then click Foil and select which foil tip you’ll be using.
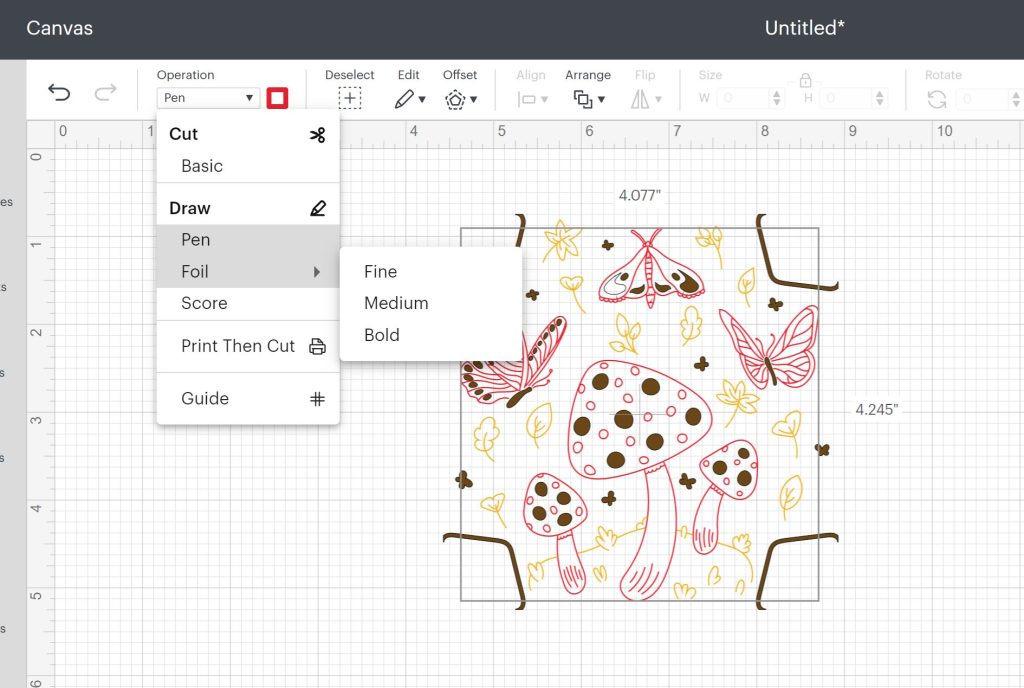
Remember, as of the writing of this post, you can only have one size card selected for the whole Card Mat. That means that if you select multiple sizes of cards you will have to cut them on different mats.
Creating Your Own Card Design
Now, what if you want to make your own card design? The great news is you can! Similar to using Insert Card images you can use any images to create your own Foil Insert Cards. You will want to start by searching for Cut Corners. Once you have your corners selected you can use almost any image to create an Insert Card. You just need to make sure the image fits your card size. You can also add shapes, text, or whatever you want to design your own card.
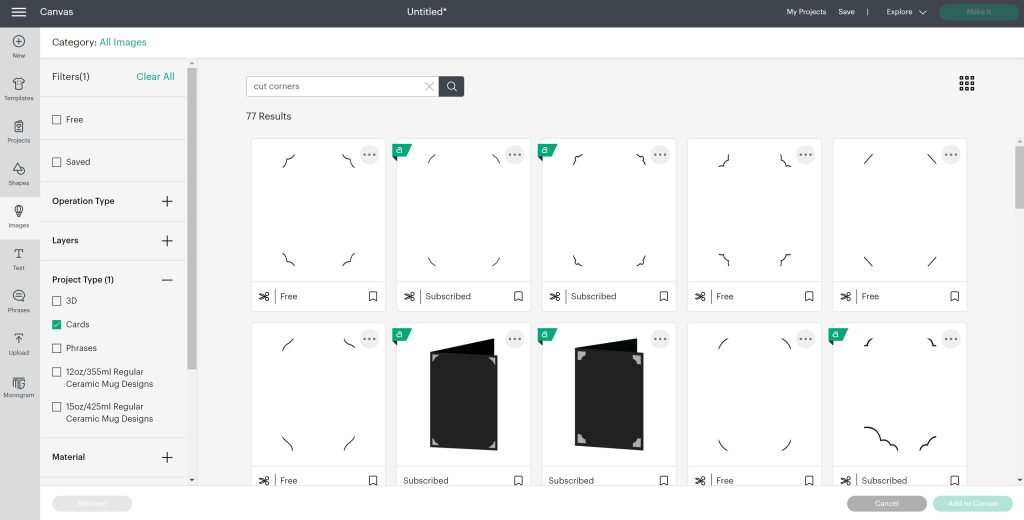
Struggling with what design size works on each card size? You can get a cheat sheet for those sizes here!
How To Make A Foil Insert Card
Now that you have your design made it’s time to make our card. Select Make It in Design Space and follow all the prompts on the mat and cut screens.
Adding Cricut Foil Insert Cards To The Card Mat
Remove the protective sheet from your Card Mat. Load your Insert Card into the Card Mat and then apply the foil sheet to your card. Using the tape supplied lay your foil sheet on top of your card, shiny side up, and tape it down making sure the foil is nice and snug against the card.

Cutting The Foil Insert Cards
Next, you’ll load your Foil Transfer Tool into clamp B of your Cricut machine. Design Space will always do the foil operation first.
IMPORTANT NOTE: I’ve moved my star wheels to the center portion of the mat. If you leave them across the bar they could mess up your cards, moving them to the center is the safest.
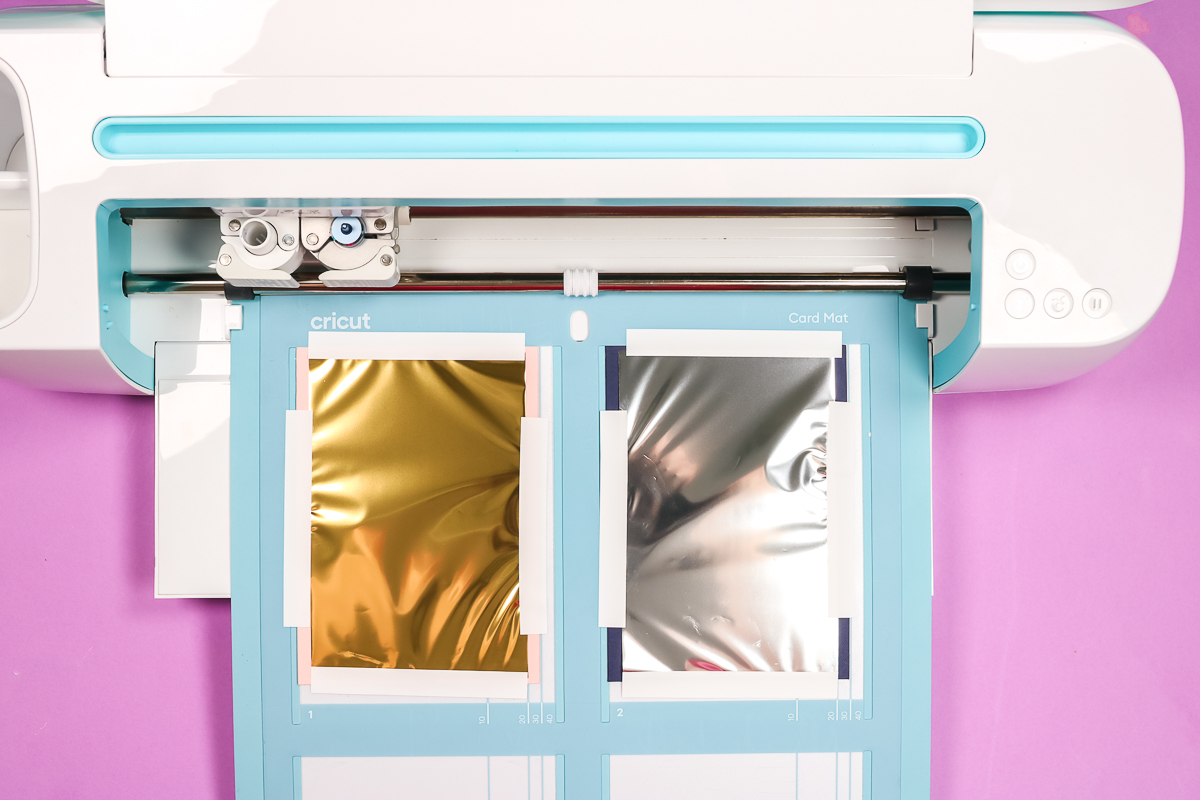
Now that we have our Insert Cards prepped with foil we’ll load the mat into the machine. Press the go button and your machine will do all the foiling first.
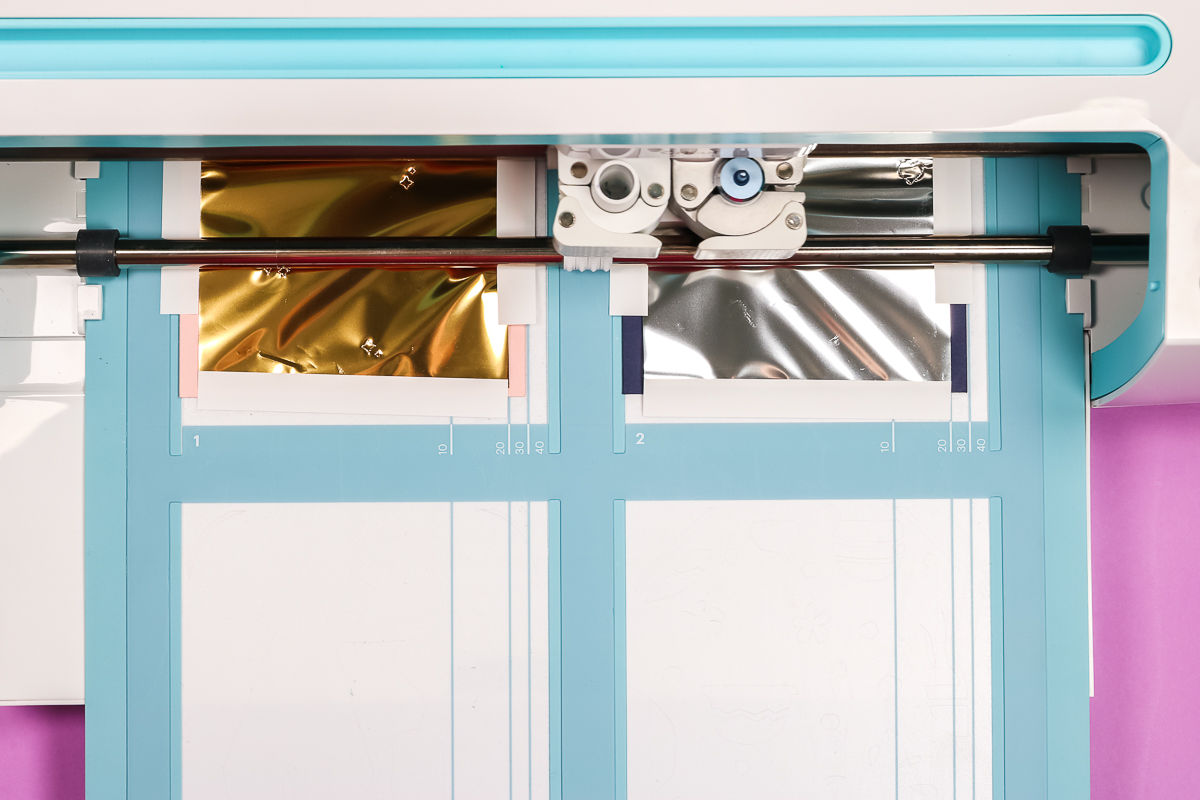
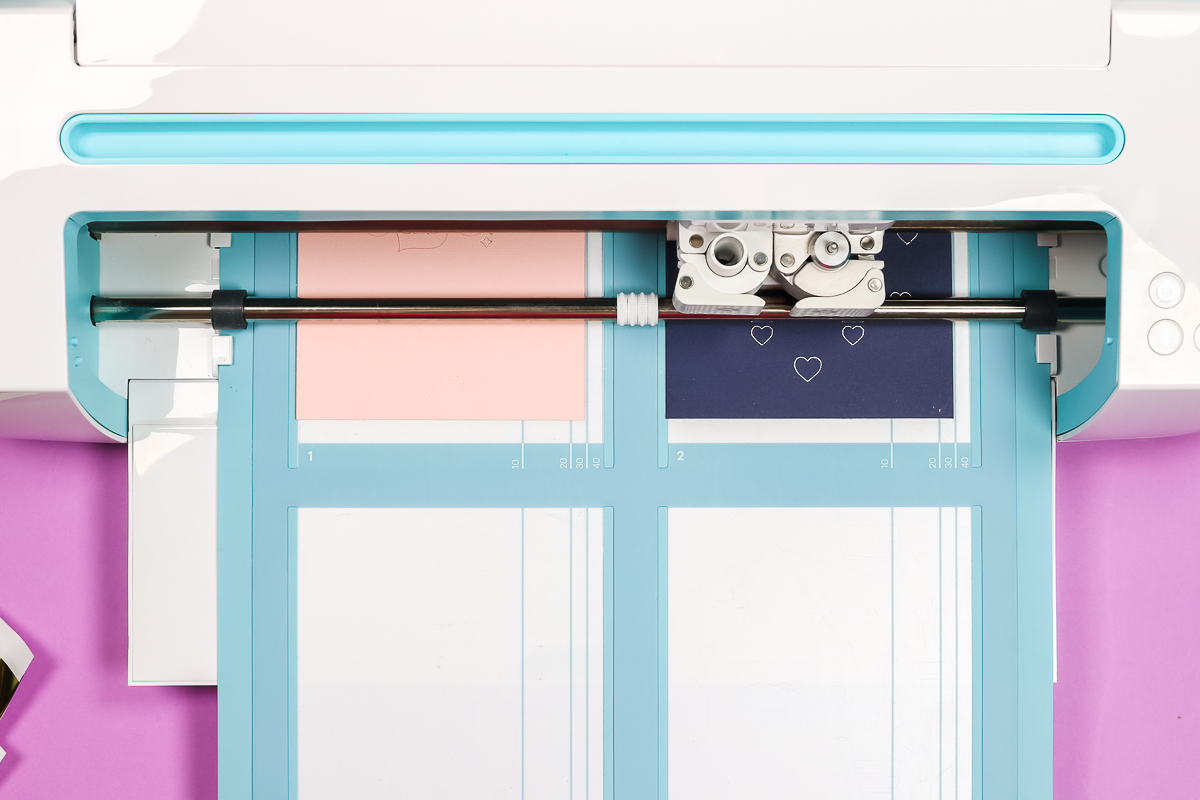
Once the foil parts are done Design Space will prompt you to change your Foil Transfer Tool out for the Fine Point Blade. Before proceeding remove the foil sheet from your Insert Card without unloading the mat from the machine. Now you can see all the foil that has transferred to your card.
Press the go button again and your Cricut will now do all the cut pieces. If you have any pen layers Design Space will prompt you to do those after the foil layers and before the cut pieces.
Removing Insert Cards From The Card Mat
Once your machine is done cutting unload your mat and take a look at your finished card.
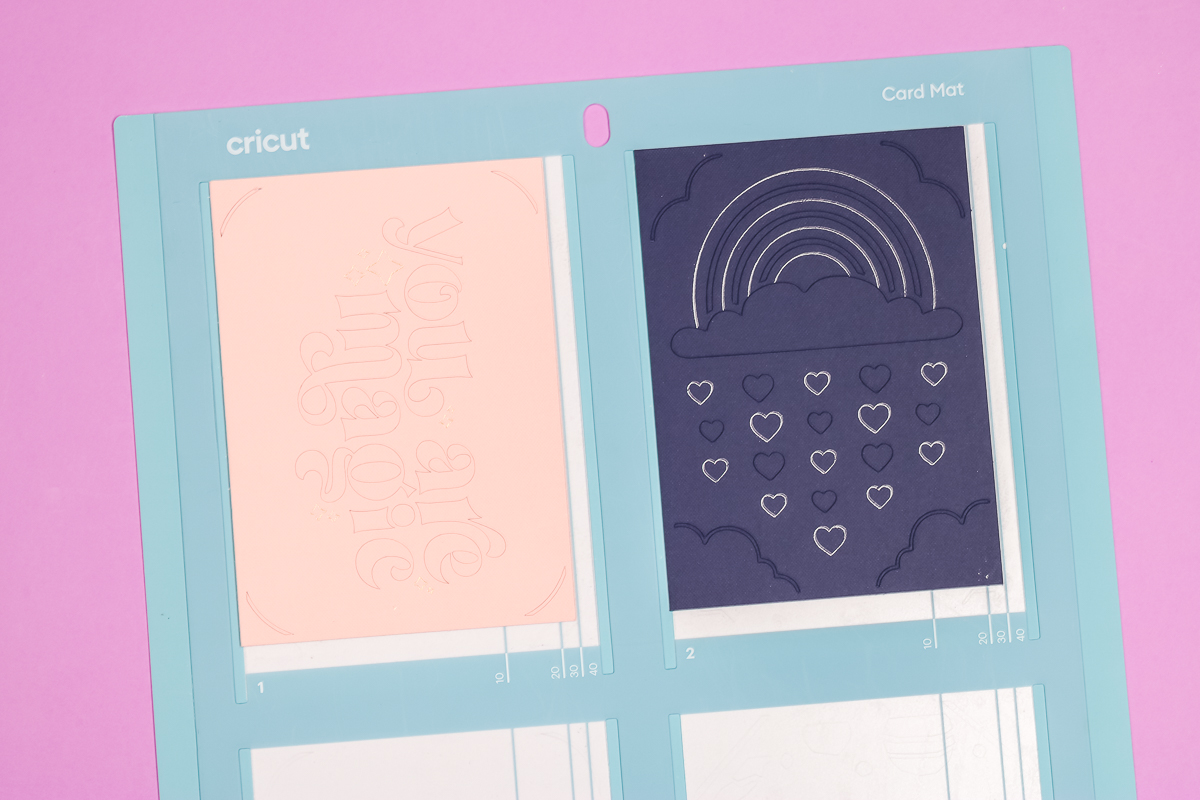
To remove your card from the Card Mat I recommend using your spatula tool and gently working it under the outer edge until you have it lifted enough to easily peel it back using your hands. The corner cuts are close to the edges and you don’t want to risk tearing them.
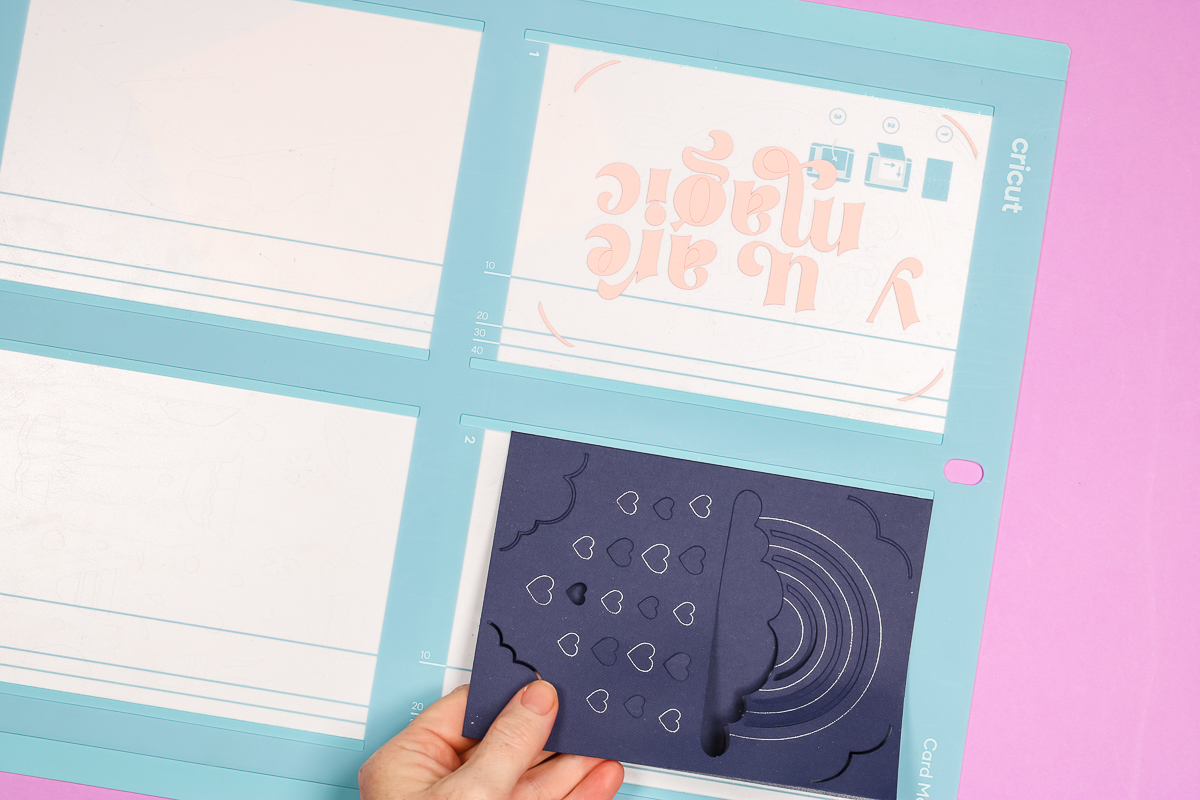
Carefully pull the top of the card away from the adhesive mat and slide it out. Look at the card, make sure any cut pieces are removed, and then, using a scraper tool remove any pieces stuck to the mat and replace the protective sheet.
NOTE: I made the YOU ARE MAGIC card upside down! Be sure to turn your designs the correct way in Cricut Design Space.
Finishing Your Card
The last step for your Foil Insert Card is adding the insert piece to the card. I really recommend taking your time for this step so you don’t tear any of your corners. Now that your insert is in place your card is finished!
Cricut Foil Insert Cards Tips and Tricks
Here are a few tips and tricks for using these Cricut cards successfully!
Sizing Your Foil Designs
The foil sheets are smaller than the front of your card. The Design Space cards that already have foil lines are designed with this in mind. If you alter pen lines to foil lines, keep in mind that some of those may fall outside of the foil area. You may want to move some of those before making your cards.

Choosing Insert Card Designs
Keep in mind that things like the centers of letters will not stay with your insert card. These pieces will be left on the mat. You can either leave them out of your design or pick up each one and glue it to your insert after you assemble your card.

Using Two Foil Colors On One Card
If you want to use two foil colors on one card, be sure to change your foil lines to two different foil colors. Then Design Space will prompt you to change your foil to a different color. You will swap out the foil WITHOUT ejecting the mat from the machine.
Final Thoughts On The Cricut Foil Insert Cards
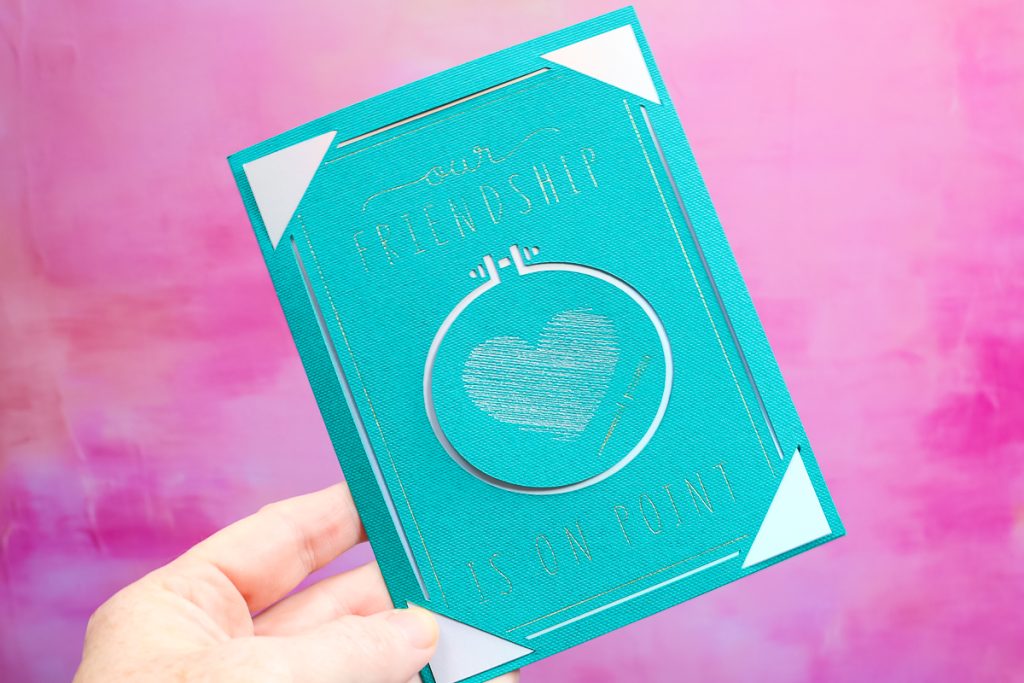
I was really happy with how my Foil Insert Cards turned out. If you read my first post using the Card Mat 2×2 to make Insert Cards with my Explore Air 2, you know I had a lot of issues with my cards not cutting in the correct place. For the Foil Insert Cards today I used my Maker machine and they’re literally perfect. I’m not sure if there have been changes to Design Space or if the Maker just does a better job but they cut beautifully and look amazing with the foil.

I know you will absolutely love making Foil Insert Cards with your Cricut machine. This is a great way to add something special to your cardmaking!
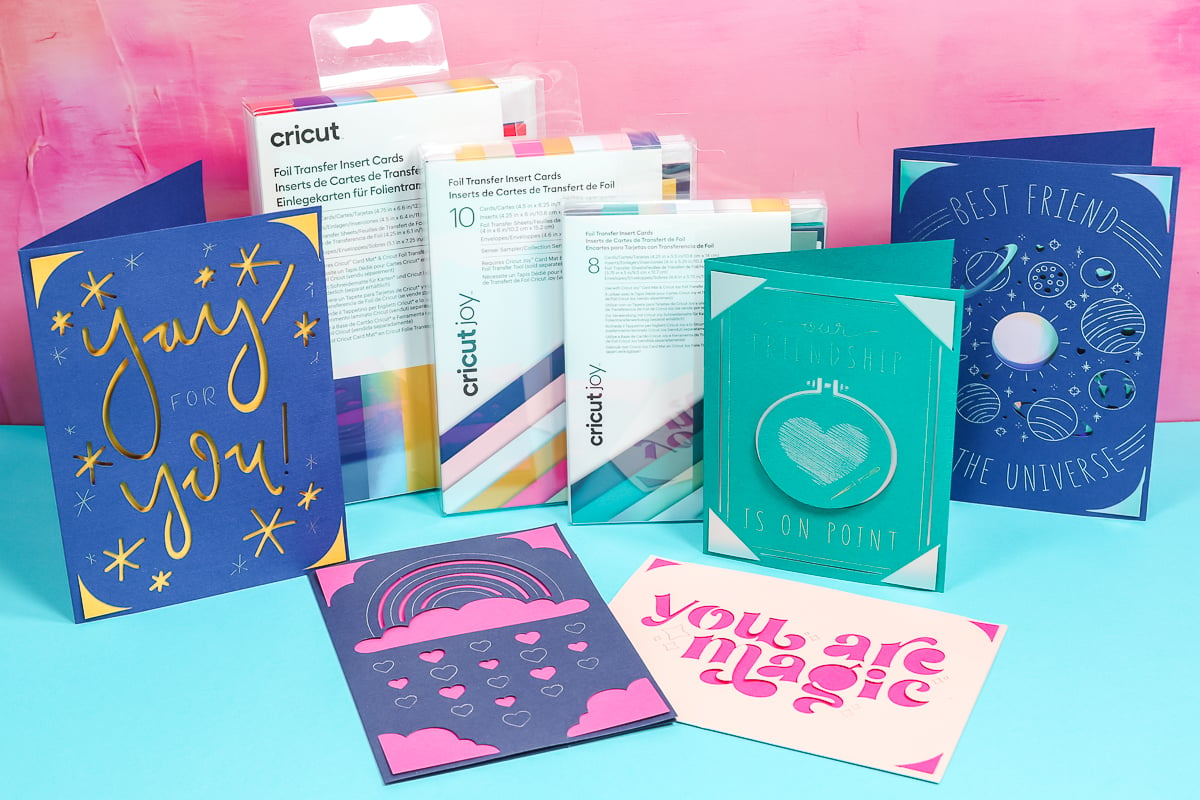
So, grab your Cricut foil card kits and get started on making your own designs today. I know you will love making some Cricut Foil Insert Cards of your very own!
FAQs About Foil Cricut Cards
Here are questions I frequently see readers ask about making these Foil Cricut Cards. If you have a question but don’t see it answered down below, please leave it in the comments so I can answer it for you.
Are The Original Foil Transfer Sheets The Same Size As These New Kits Or Are They Bigger?
These are all different sizes specific to the card so they are different from those you purchase separately. Now, you can use those you purchase separately and just trim them with scissors.
Can This Be Done Without That Specific Mat?
You can but you would need to make a card. I have something on that in my video titled ”Cricut Cards with NO Card Mat (Make Insert Cards!)”.
What Is The Pressure For Doing This? I Left It As Default And It Cut My Card Mat.
I usually use default. You can try less. However, a little bit of cutting into the mat happens.
Can You Write On The Inside Of The Insert Card’s?
Sure! Check out my video titled ”NEW Cricut Card Mat for Explore and Maker Machines: Ultimate Guide” to learn more about how to do that!
How Do You Lift The Card Off The Mat Without Tearing Through More Intricate Designs Like A Mandala Design?
I just go really slowly and work a spatula under it.
Can You Glue The Pieces That Are The Insides Of Letters To The Card?
Yes, you can!
Where Can I Get The Free Printable Cricut Card Cheat Sheet?
You can get our free printable Cricut Card Cheat Sheet by clicking here!
5 More Cricut Card Projects
Did you love these Foil Cricut Cards and are looking for more Cricut card projects? Then check out the ideas below!
- Easy Cricut Cards with NO Card Mat Required!
- Easy DIY Gift Card Holders Made With The Cricut
- Cricut Cutaway Cards on a Cricut Joy, Explore, or Maker
- Cricut Perforation Blade Card
- NEW Cricut Card Mat for Explore and Maker Machines: Ultimate Guide


Thanks for this video! I purchased the foil Transfer Insert Cards, but did NOT know the foil was for
the front of the card! I made one card with a pen – now I’m going to use the foil. I also found that
by using a “stencil” font, it works so you’re not missing any of the inside pieces, O A, etc. Thanks
again!