Have you ever wasted an entire sheet of material because the cut setting for your Cricut machine was off? Maybe you found a random scrap of vinyl and have no idea what brand it is. If this is you, I’m here to help. Today, we’re talking about Cricut test cuts and why/when you should do them!
Cricut machines today can cut hundreds of materials. This means dialing in the cut settings is more important than ever. Test cuts are the best way to ensure you get the best cuts with each material.
If you’re new to Cricut, learn all about Design Space in my Beginner’s Guide.

Why Do I Need Test Cuts?
As I said, Cricut machines can now cut hundreds of different materials. There are so many different brands on the market. Not all HTV, glitter cardstock, vinyl, etc, are created equal. There will be different thicknesses and even densities.
Every Cricut machine will also cut differently. This means any time you cut a new material, change blades, or change machines, I recommend doing a test cut. You may find that the setting recommended in Design Space isn’t the best for your machine or your specific material.
Doing a test cut can help dial in the right setting before you ruin an entire sheet of material. You can see more about Cricut test cuts by pressing play on the video below:
How Do I Set Up a Test Cut?
Setting up a test cut in Design Space is quick and easy. To begin, add a shape to the canvas. I like to use a heart because it has a sharp corner, sweeping curves, and a straight line. If you’re having trouble with a specific shape, you can use that to test.
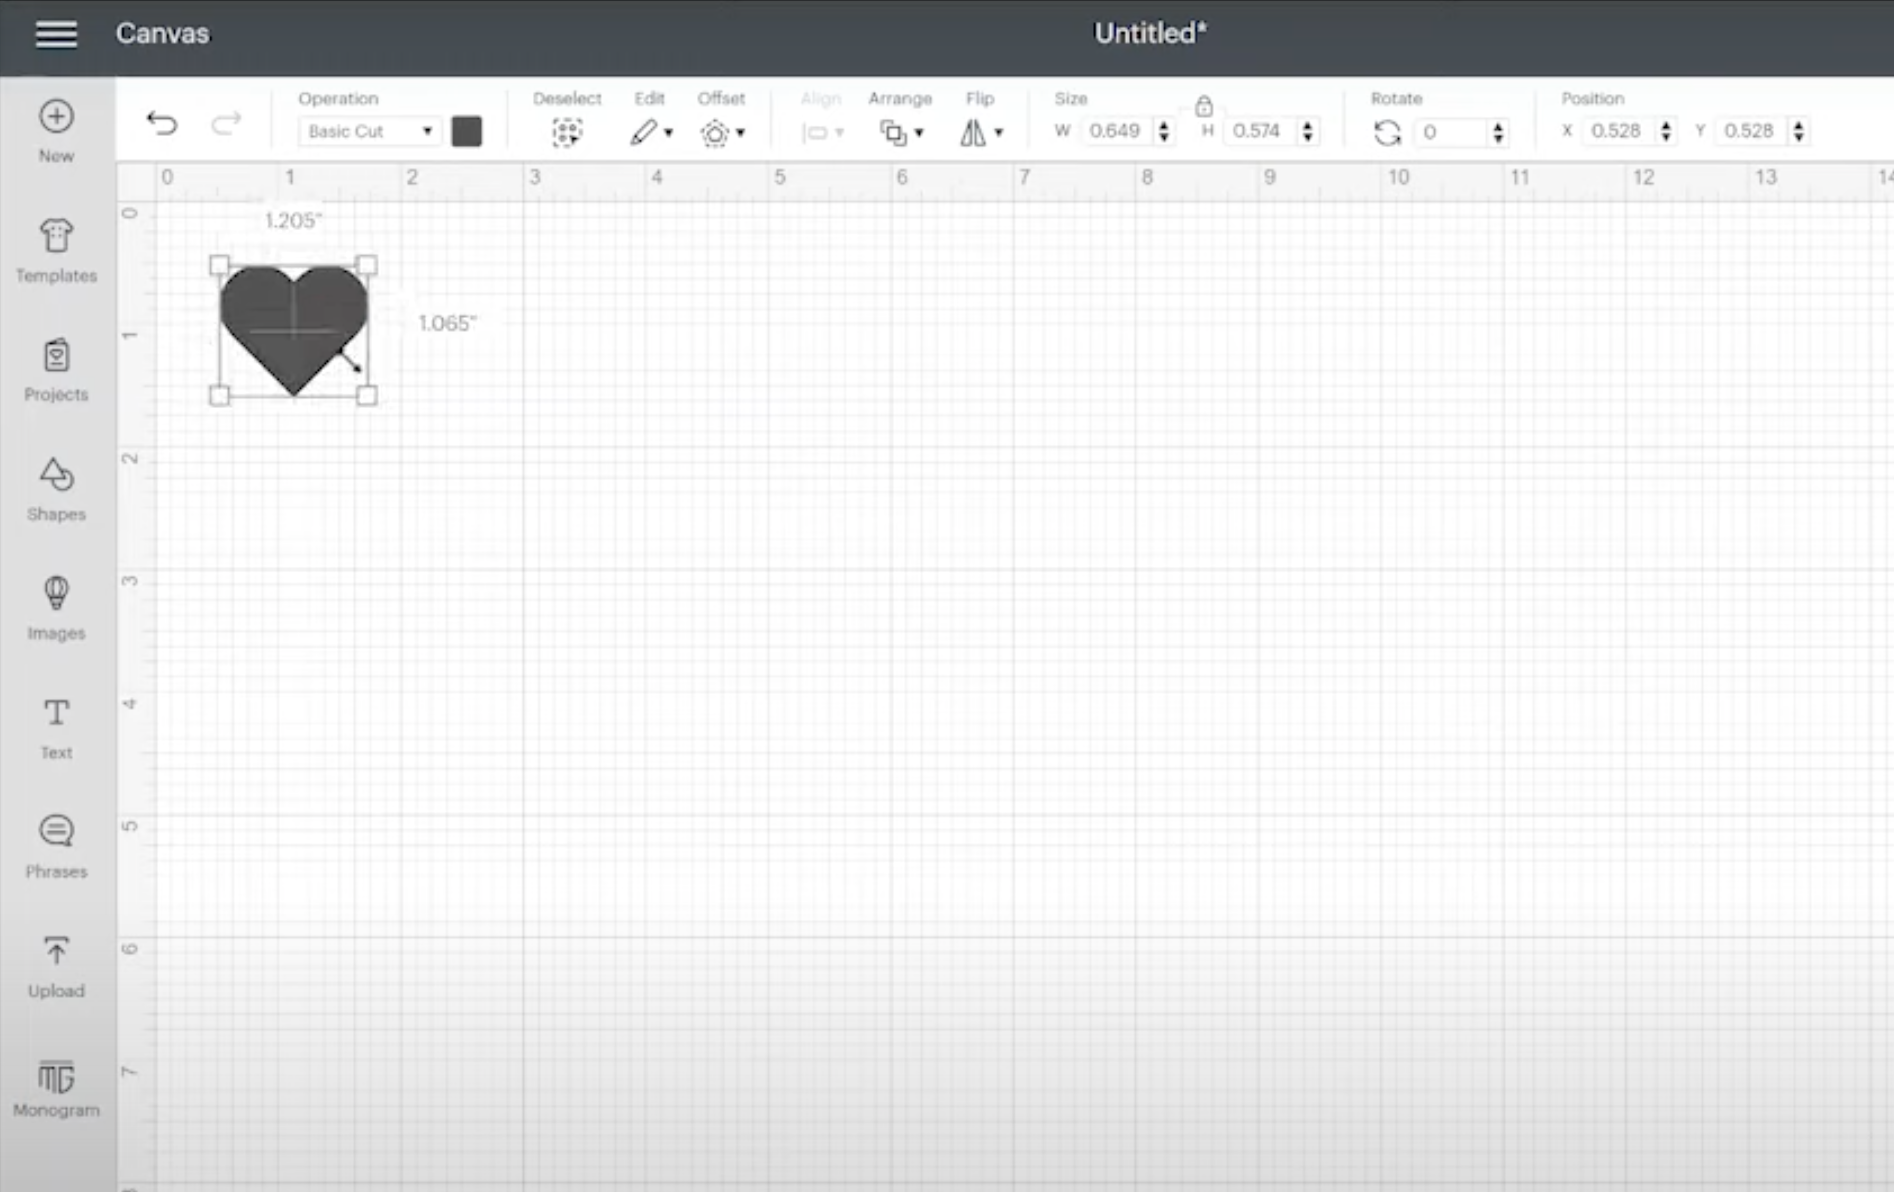
Resize the shape. I like to set the size to about half an inch. This allows me to test the material without wasting a lot of it. Once your shape is set up correctly on the canvas, click Make.
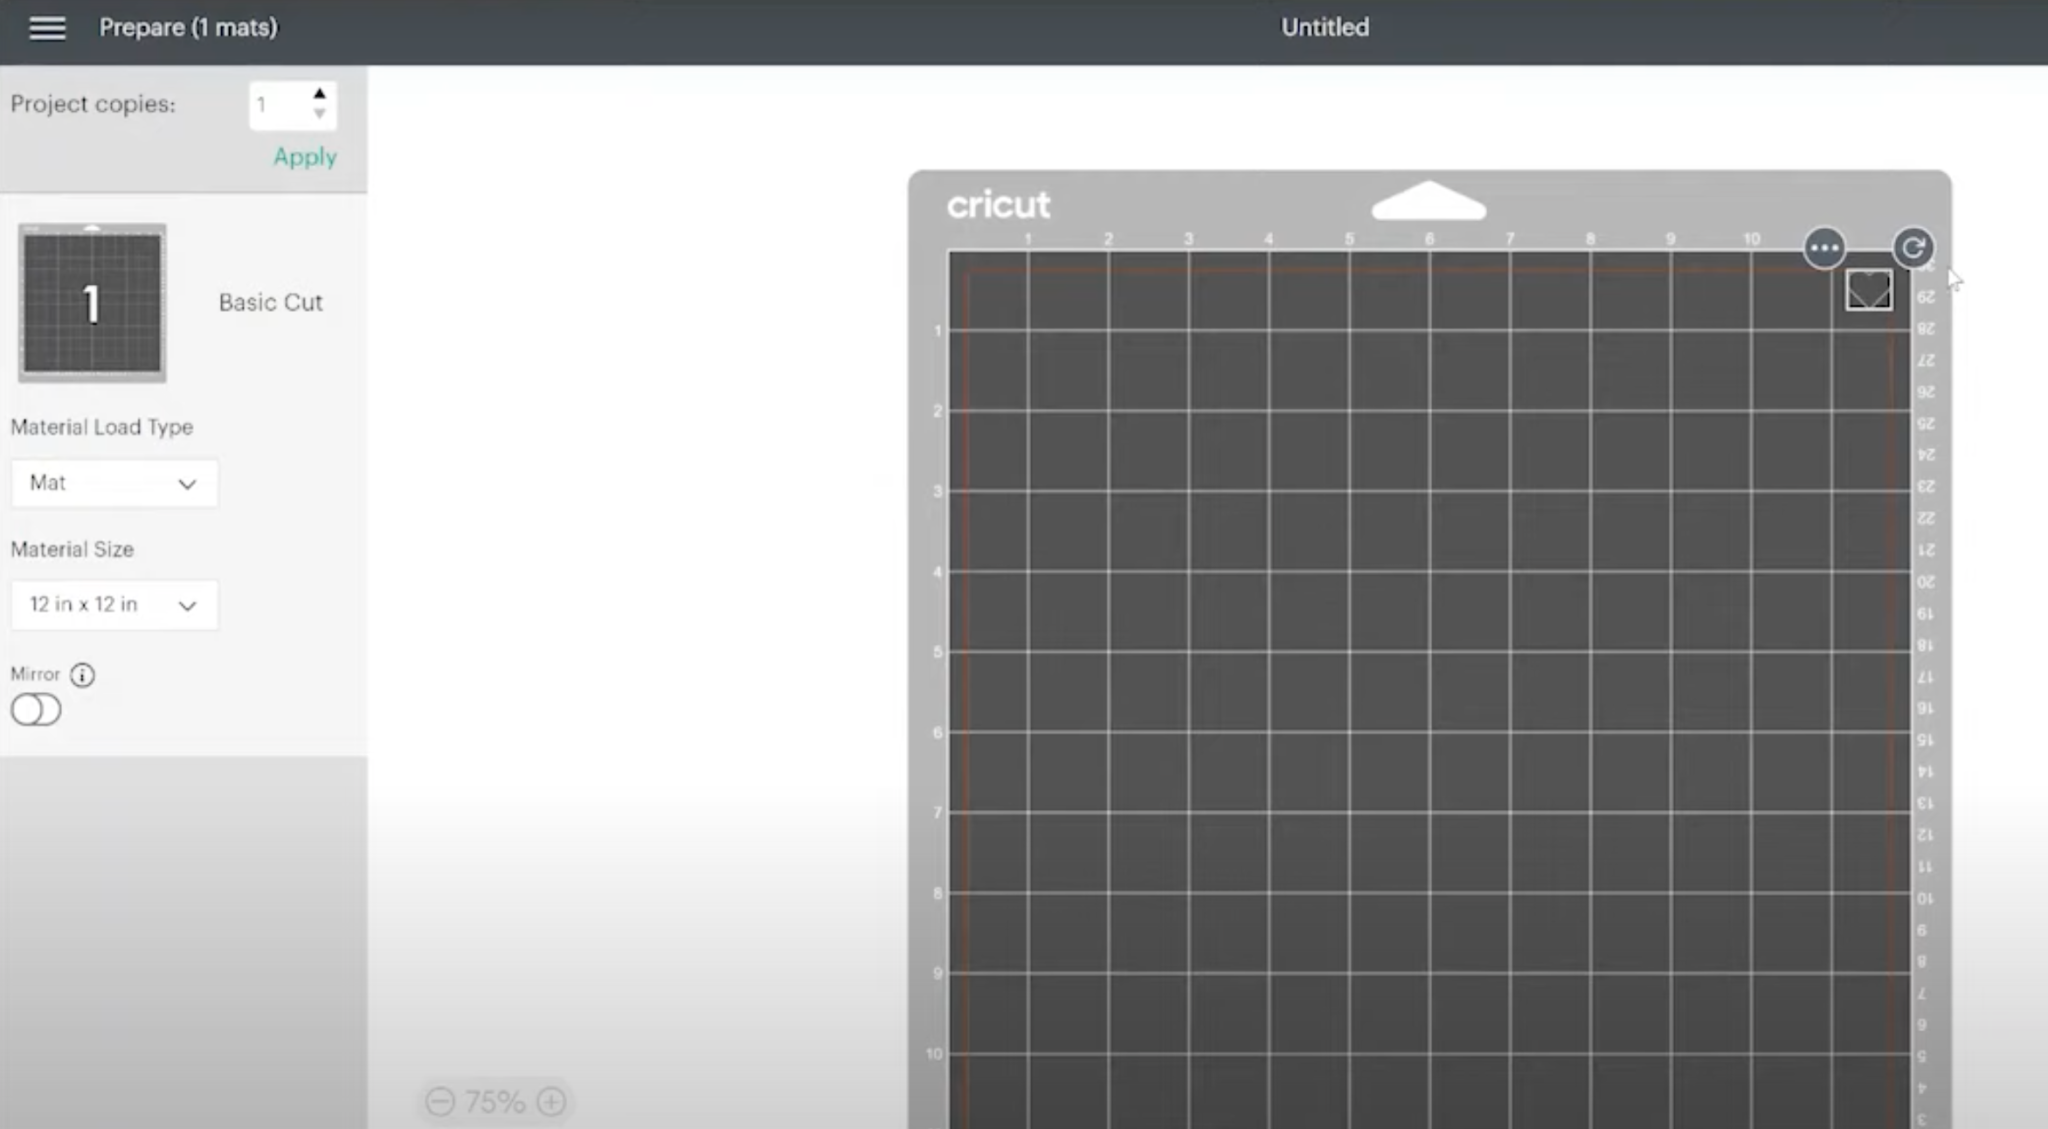
I like moving the design to the corner of the mat screen. You can put the design in any corner. I like the top right as a general rule. Typically, the extreme corners of your material aren’t part of your design, so using those areas to test cuts won’t affect your finished project.
Selecting a Material to Start With
Choosing a material to start with can be confusing. Look at the material you have and choose something that looks close. If you have a Cricut Explore machine with a dial, turn your dial to custom to see the whole list of options.
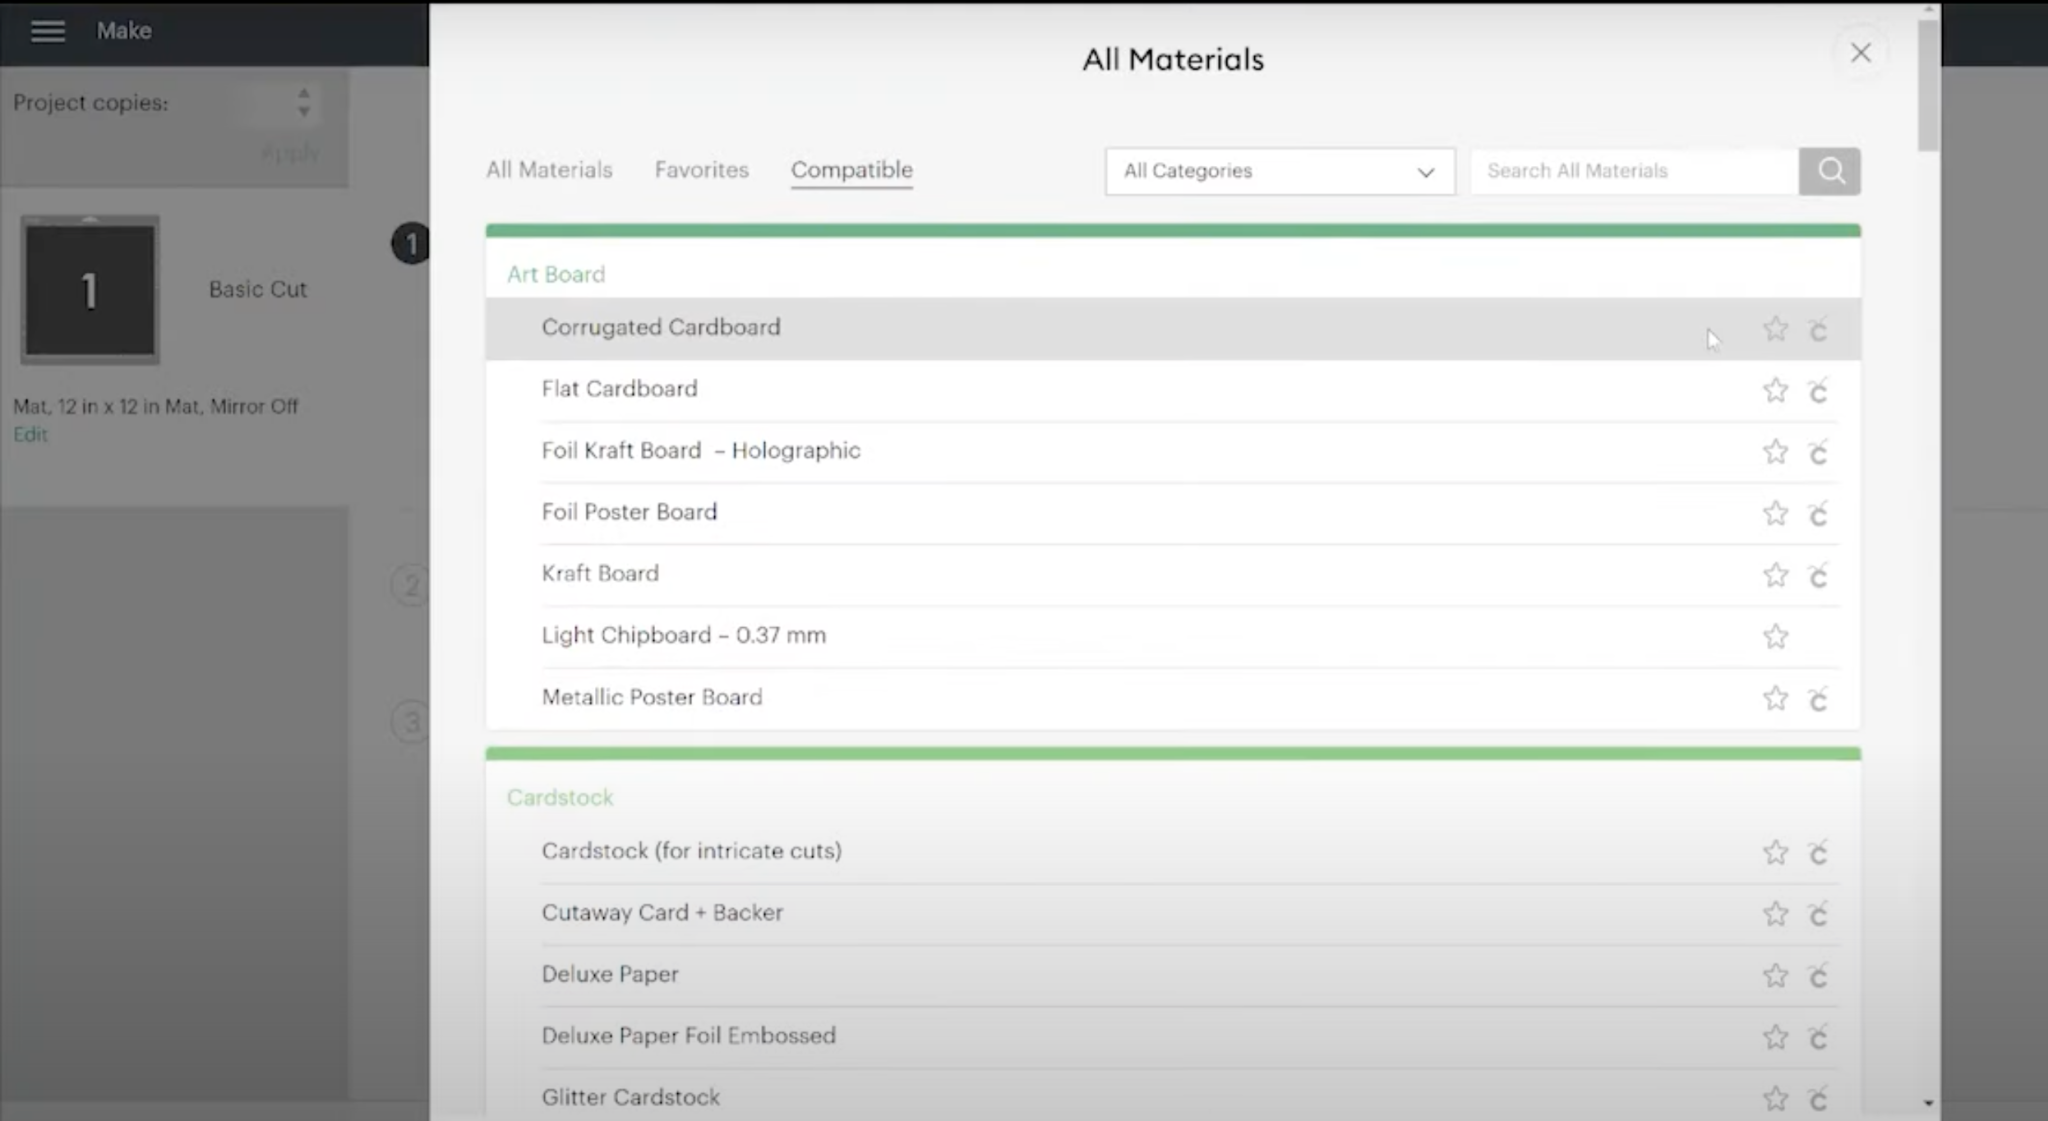
Once you select a material, you can also choose a pressure setting. Typically, I begin with the default setting. Add your material to the mat. If you’re using HTV, remember to place it shiny side down and cut out your shape.
Checking Your Test Cut
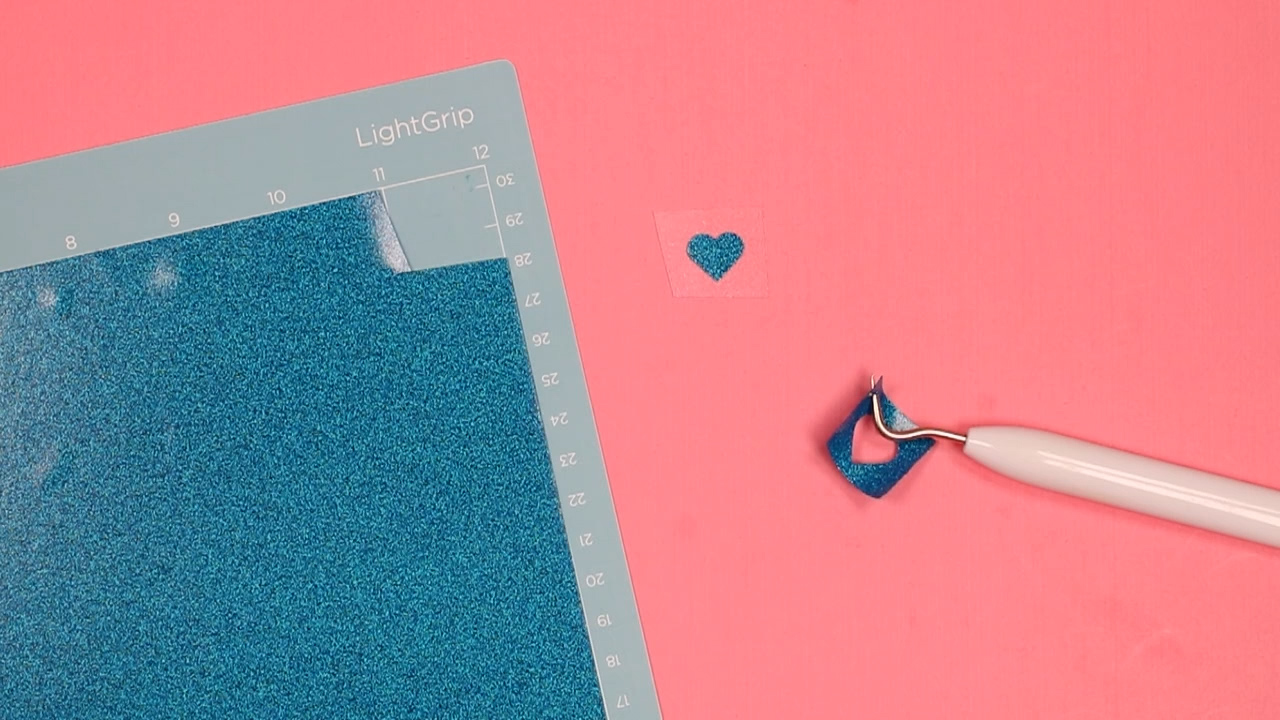
Remove the mat from your machine and cut away the small area that was cut. Using a weeding tool, try to remove the excess and see if the cut went through.
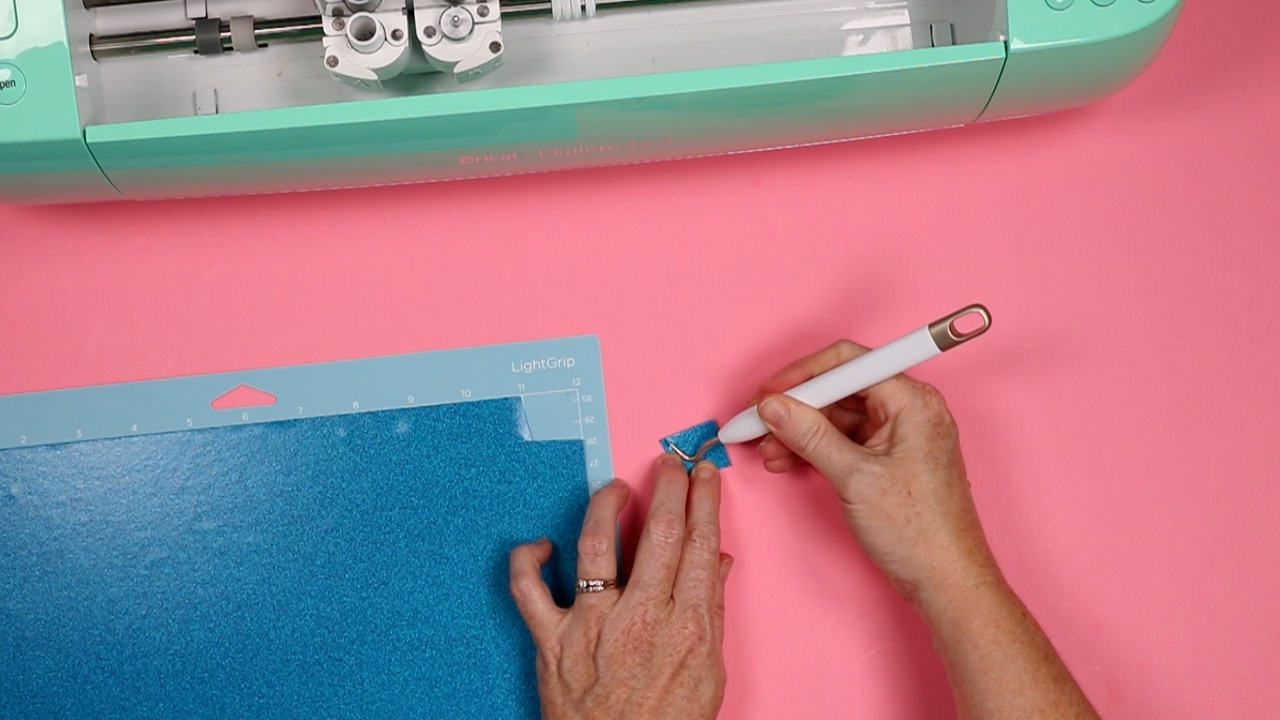
Do the cut lines look good? Did it cut too deep or not deep enough? If the cut isn’t clean, you can change your settings and try again. I recommend moving your shape to another corner to try again.
How to Adjust Cut Settings
Now that you have your results, how do you decide what to change to get the desired cut? Try these tips!
- When the cut looks good, continue and cut your project.
- If the cut setting is close, you can try adjusting the pressure first.
- If the setting seems off, choose a completely different material to try and start again.
- With cuts that are way off, you probably want to pick another setting. Pick a material that is slightly thicker than your material to cut deeper or slightly thinner than your material to make a shallower cut.
Once I have my cut settings dialed in, I like to make notes on the settings I use. You could keep notes with the results of your Cricut test cuts in a notebook or even write the setting out and stick them to the carrier sheet itself.
NOTE: If you do the test cut in the corner, you don’t need to remove the material from the mat before cutting your final project.
My Final Thoughts on Cricut Test Cuts
I can’t stress enough how much time, materials, and frustration you will save if you do a test cut. It can seem like an added step, but having an entire sheet of material ruined by bad cuts is a situation no one likes to deal with.
If you’ve ever been frustrated with cuts not cutting through the material, a test cut would’ve saved you. If you’ve cut an entire Infusible Ink sheet and cut all the way through the carrier sheet, a test cut would’ve saved you.
A test cut would’ve saved me in, I don’t know how many instances when I did not take the time to do one. So, I try to take the time to do the small test cut to ensure that my settings will work.
More Cricut Projects
Want to see what else your Cricut can do? Check out these posts!
