The Cricut Venture was announced today and I have the machine to give you a sneak peek. This is everything you ever wanted to know about the new largest Cricut machine in one very long blog post. You can find information on the features, where to buy, as well as example cuts so you can decide if this machine is right for you.
I will be comparing this machine to the other Cricut machines on the market at a later date. To see those other machines now, you can click here for my comparison.
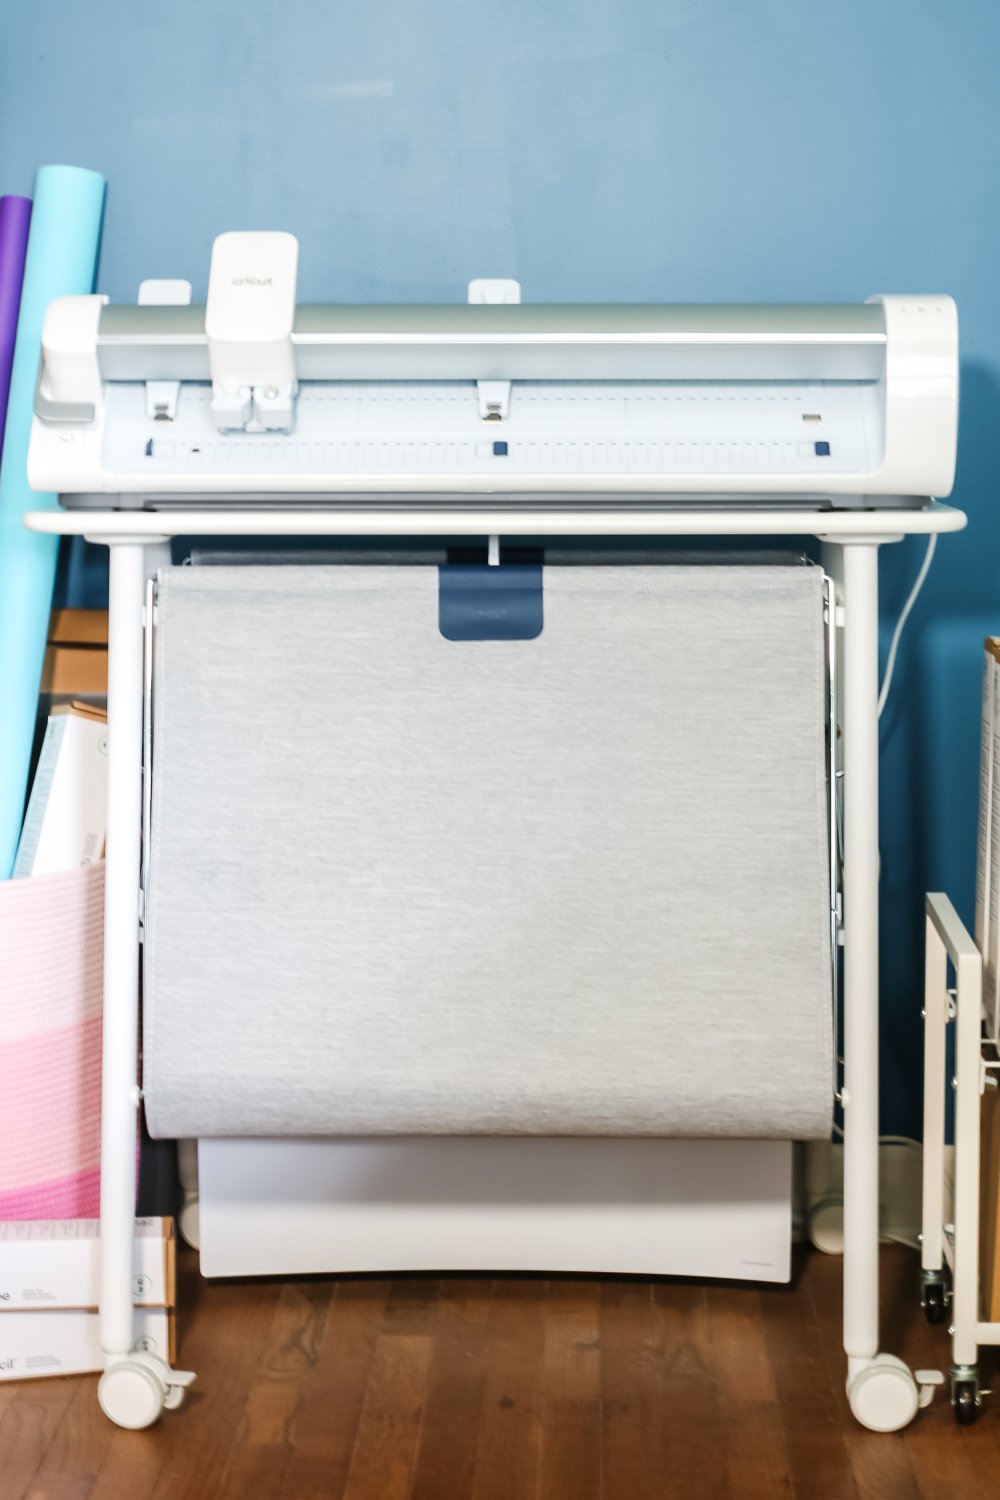
Cricut Venture
Want to watch a full video on this large Cricut? You can click play on the video below and watch the machine in action. Given that this is the fastest Cricut machine ever, I would recommend watching at least a part of the video so you can see the speed.
What is Cricut Venture?
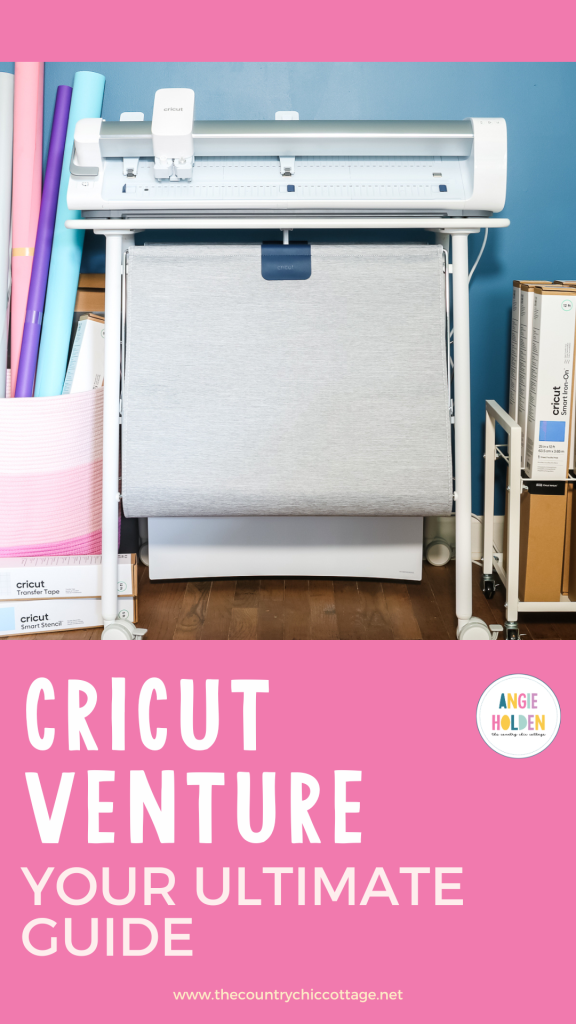
Cricut released a new Cricut machine in July 2023 that is called the Cricut Venture. This machine is the most durable, fastest, and most accurate machine that they have ever released. It is also the largest machine with a 24-inch cutting width.
Keep reading to see more about the features of the machine as well as the optional docking stand that you can purchase along with Venture. The stand is one of my favorite parts of this machine as it really allows this industrial-sized cutting machine to be accessible for the home crafter.
What comes in the box?
NOTE: Be sure to remove all packaging material that may be inside your machine before use!
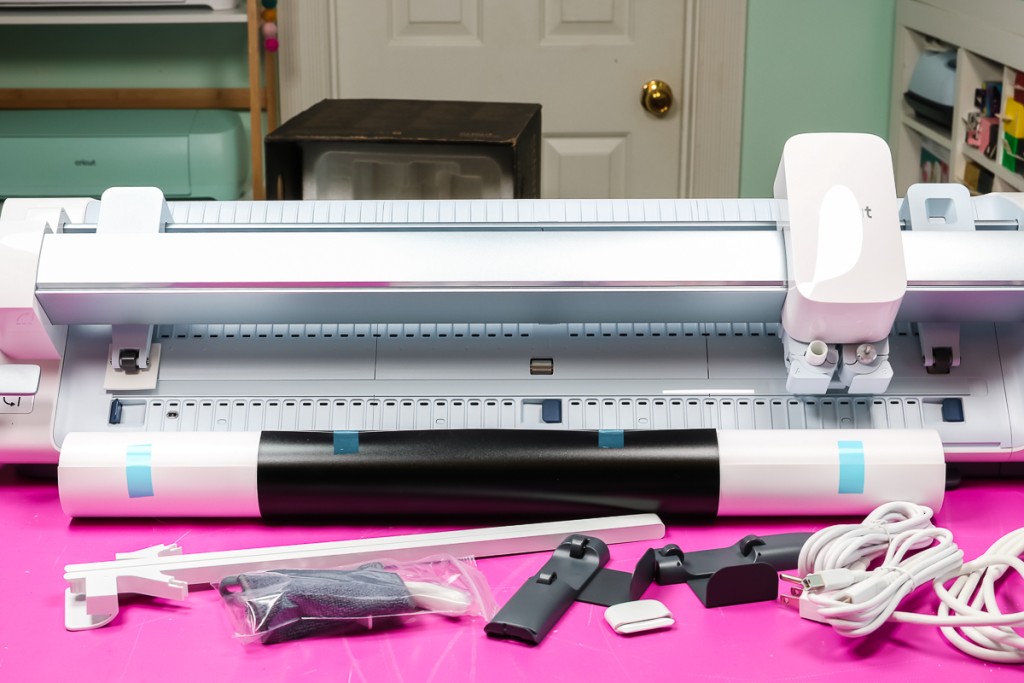
In the box with the Venture you will find the following:
- Cricut Venture
- Power Cord
- USB Cords (PC and Mac)
- Roll Supports
- Mat Support Arms
- Fine Point Blade (This blade is in the machine.)
- Cutoff Tool
- Cleaning Kit
- Smart Vinyl (This material will allow you to make your first cut right out of the box.)
Cricut Venture Set-up and Test Cut
Once you get your machine out of the box, you will need to set it up and register it. In the packaging, you will find a website address that will walk you through the process.
Setting Up Your Cricut Machine
For set up, you will need to connect your machine to a computer. The website will walk you through each step of the process as well as make your first cut. If this is your first Cricut machine, you will download Cricut Design Space during this process. This is the software that will operate and send designs to your machine.
NOTE: Currently Cricut Venture only works with a computer and not with mobile devices!
Making Your First Cut
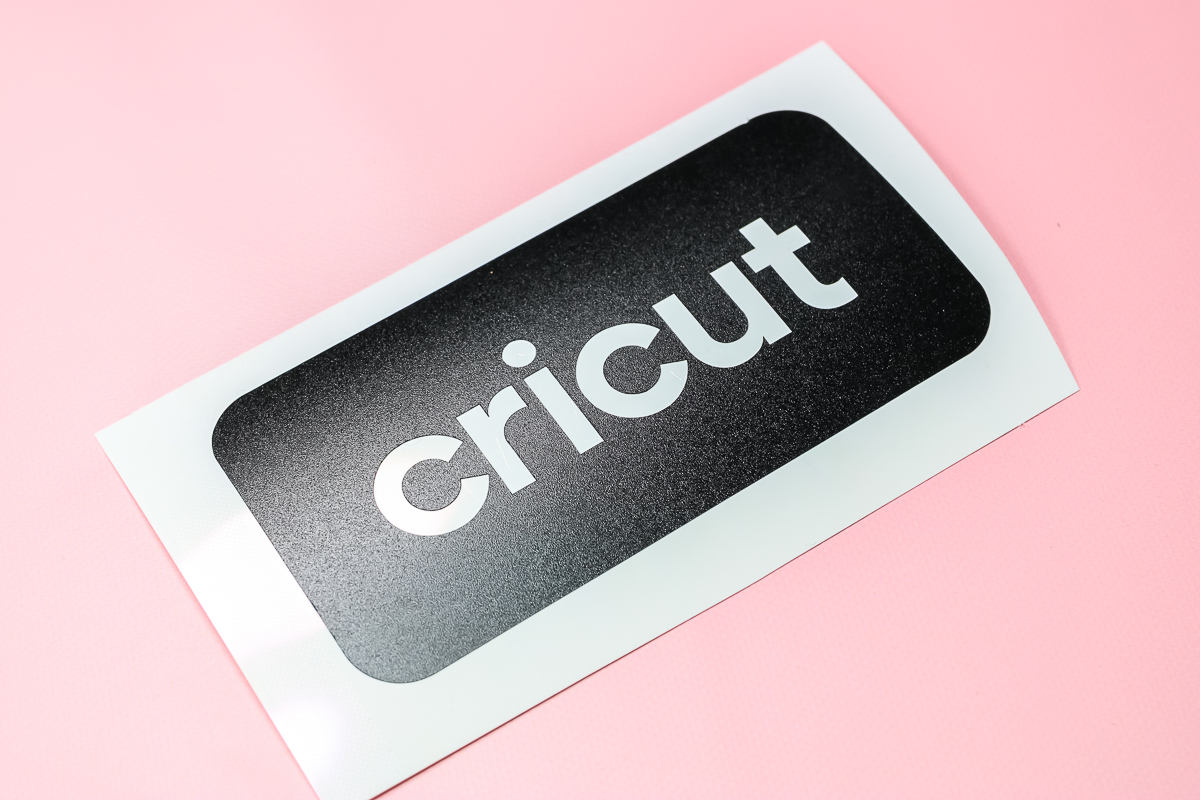
The setup process will also walk you through making your first cut. The steps will display on the screen and you will cut a Cricut logo. Use the rolls of vinyl that come with the machine for this step. This is a great way to get familiar with your machine and learn about the process of making cuts. I will also walk through a cut without a mat below.
Cricut Venture Features
Let’s take a look at some of the features of Cricut Venture before we start making projects with the machine.
Speed
This machine is the fastest that Cricut has ever made. It is really amazing to watch in person! I would encourage you to watch the video above to see just how fast this machine cuts.
The speed is faster with cuts both on and off the mat. This was important to me as I wanted a machine that was faster when cutting all materials. The Venture cuts 100s of materials and they will all cut with that same speed and precision.
Angle
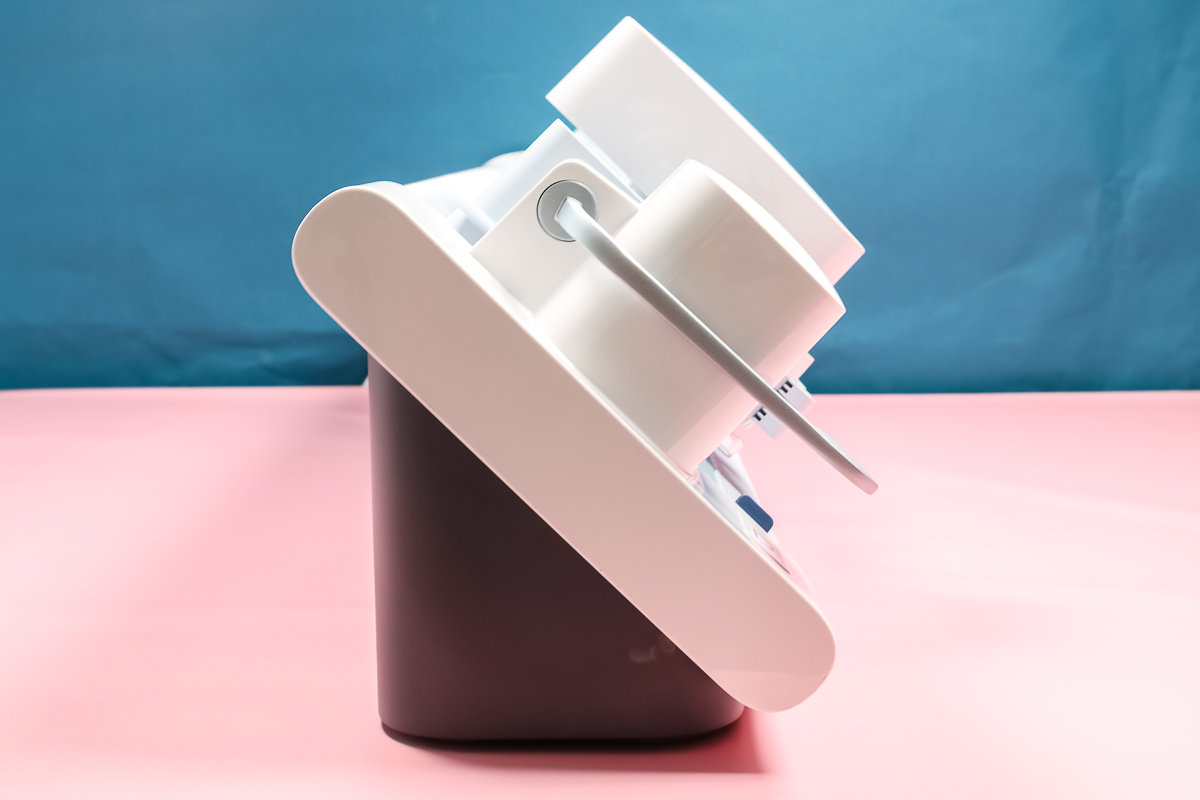
With a machine that cuts this large, you will need a HUGE area to operate the machine if it was flat. Approximately 3 feet behind and in front of Venture would be required at a minimum. Instead, the machine is at an angle so you can use less space when operating it!
The angle of Venture allows you to use the vertical height when working with things like large mats and vinyl rolls. This means that you can use less space when crafting with this machine and that makes it ideal for crafters that don’t have a ton of room.
I will show you how this works with both mats and rolls of material below so keep reading to see this machine in action.
Buttons
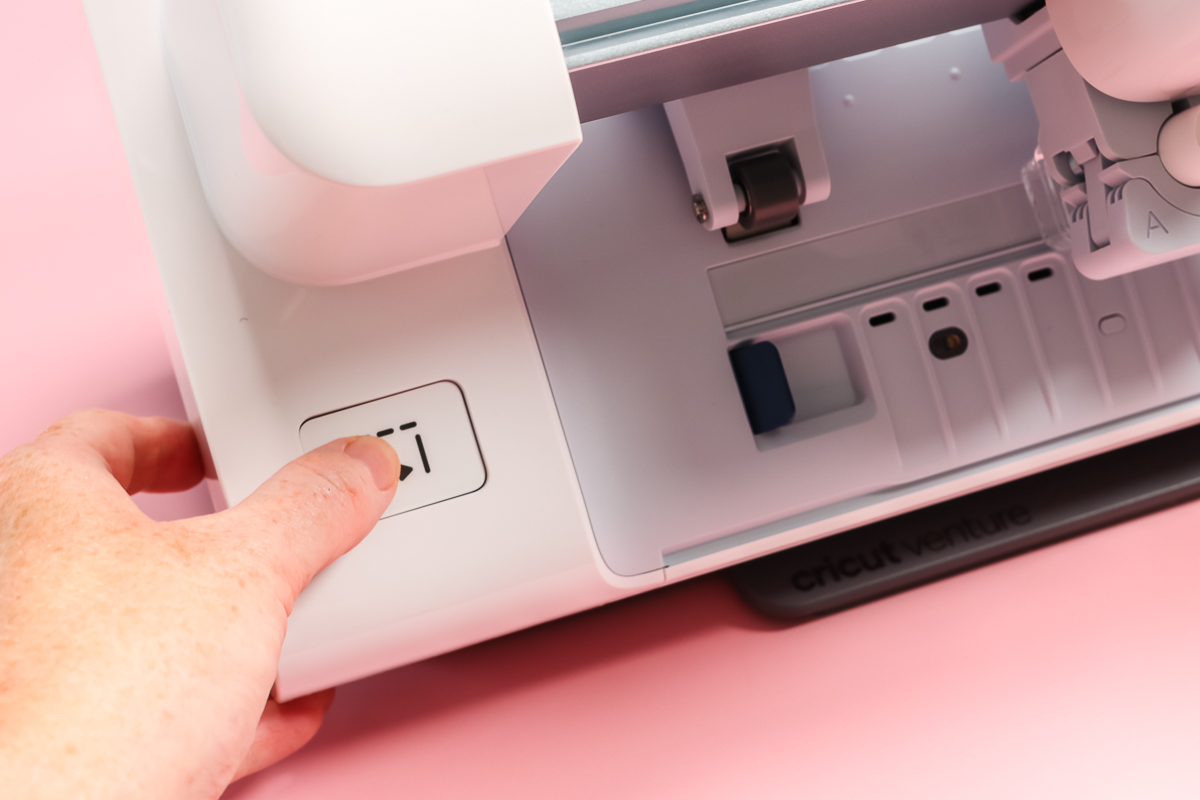
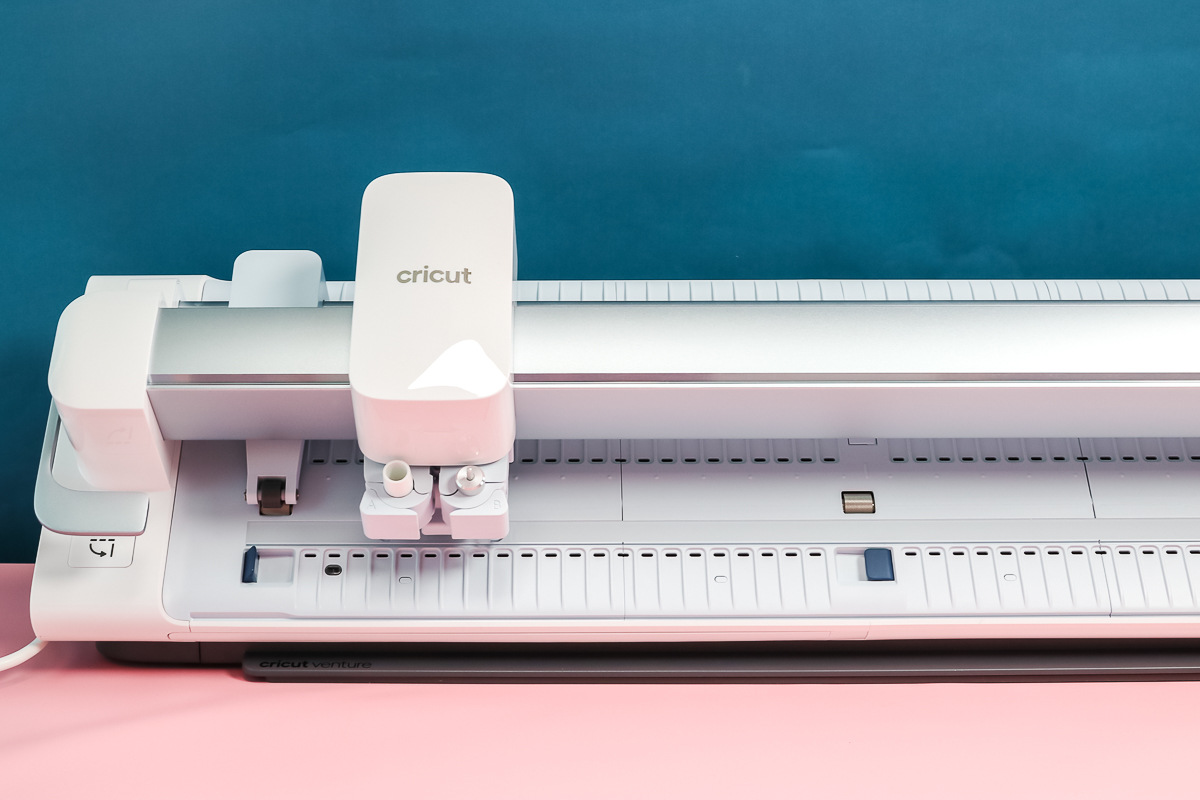
Let’s take a look at the buttons on Cricut Venture. On the left, you will see a button that will extend the mat guides. There is an entire section on using mats that will explain what these guides do.
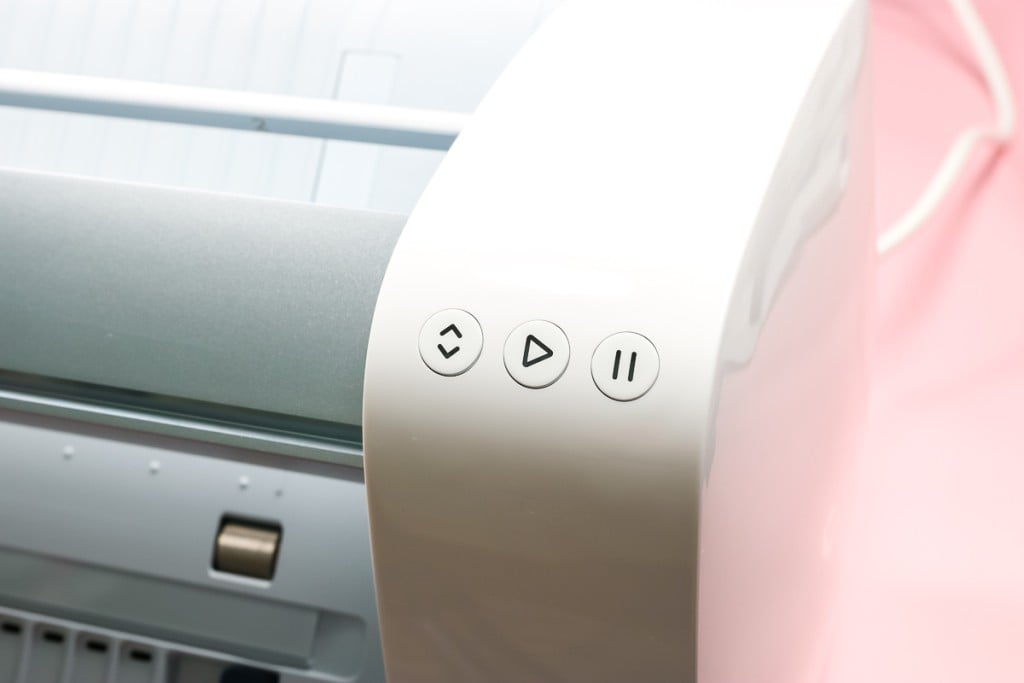
On the right, there is a set of three buttons.
- Load/unload button – used when loading your materials or mats into the machine.
- Go button – used to start your cut.
- Pause button – can be used at any time to stop the cut.
These will look very familiar if you have had a Cricut machine in the past. There is also an indicator light here that will illuminate when the machine is on.
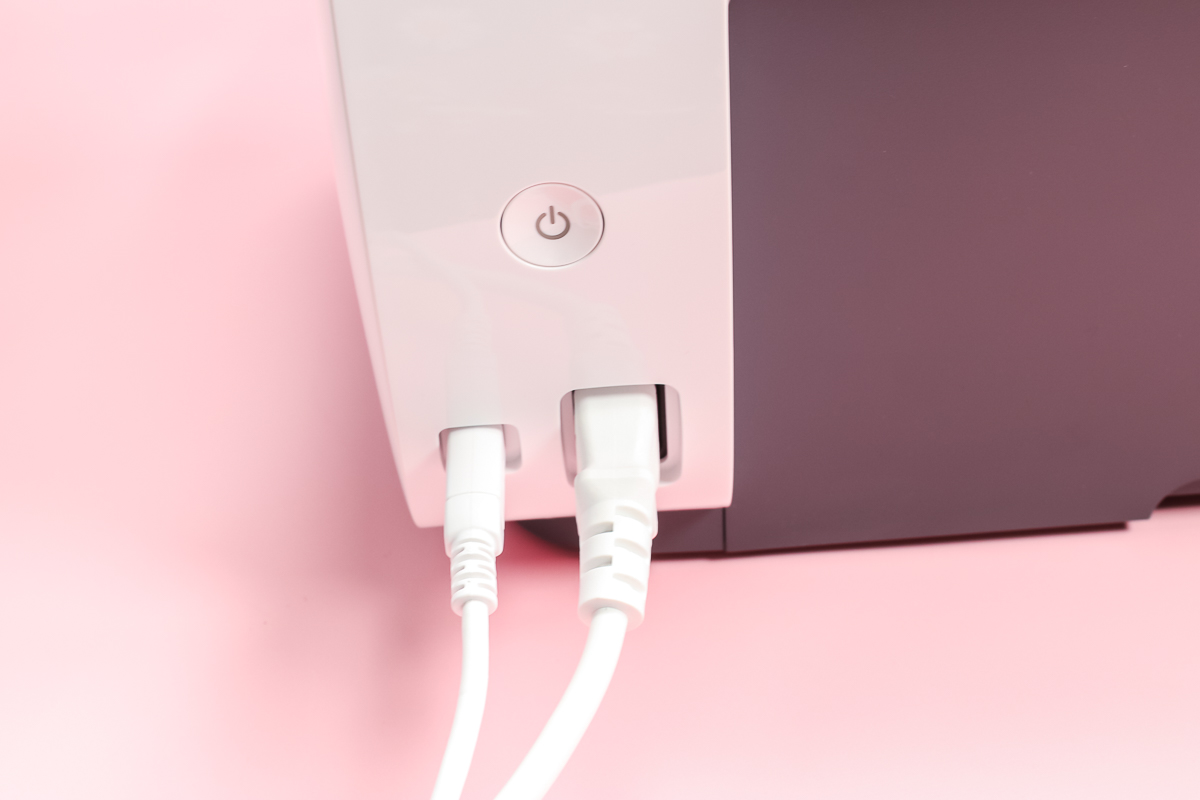
On the back of the machine behind the buttons above, you will find the power button. Press it to turn the machine on and off.
Cords
Also in the image above, you will see some cords. The right is the power cord and the left is the USB cable.
Bluetooth vs. Corded Connection
You do not have to use the USB cable with your Venture machine. You can connect to the machine via Bluetooth as well. Whichever way is convenient for you will work.
Rollers
The pinch rollers on the machine are what allow the machine to grip the material for cutting without a mat.
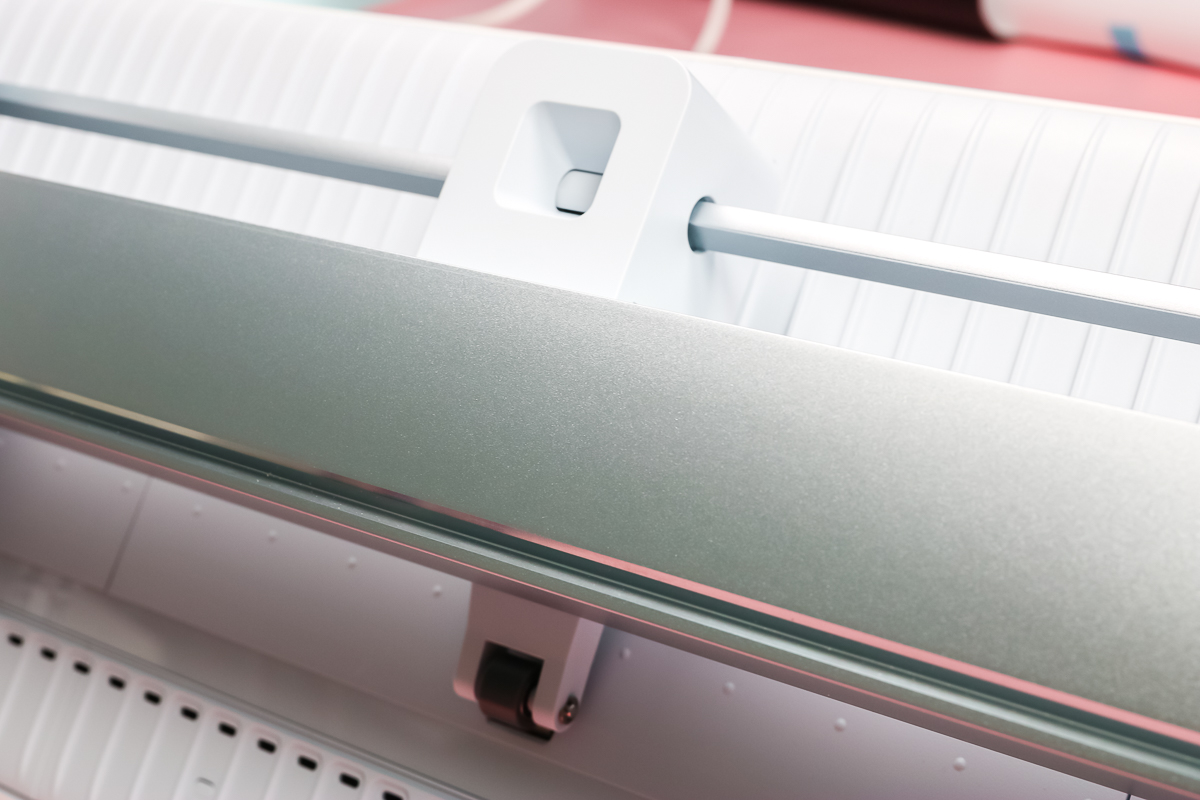
Use the arm on the left side of the machine to raise and lower these rollers. Raising the arm raises the rollers and lowering it will lock them into place.
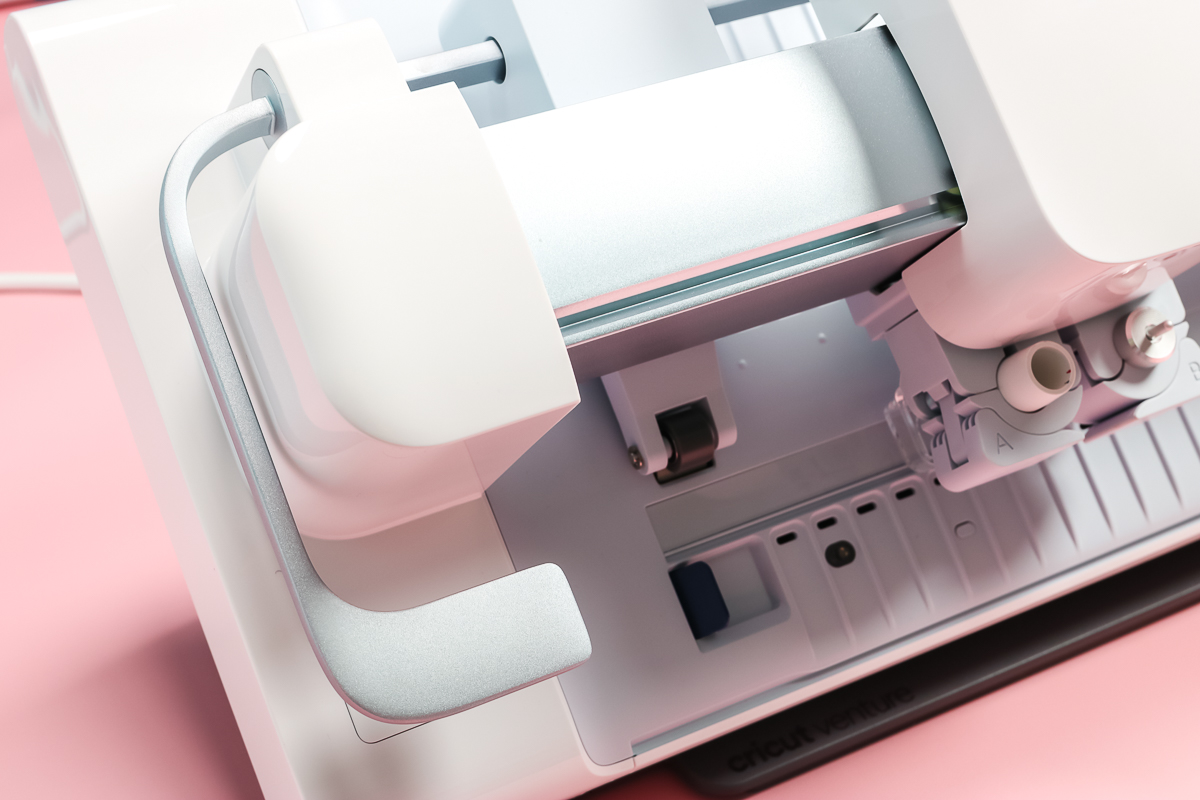
The left roller is fixed but can be moved for cleaning. The right roller has two positions. The number 1 position is at 13 inches and the number 2 position is at 25 inches. These are made for Cricut Smart Material. The pinch rollers much be in one of these two positions.
NOTE: There are numbers on the bar that the rollers slide on to indicate which position is 1 and which is 2 so you do not have to remember.
Guides
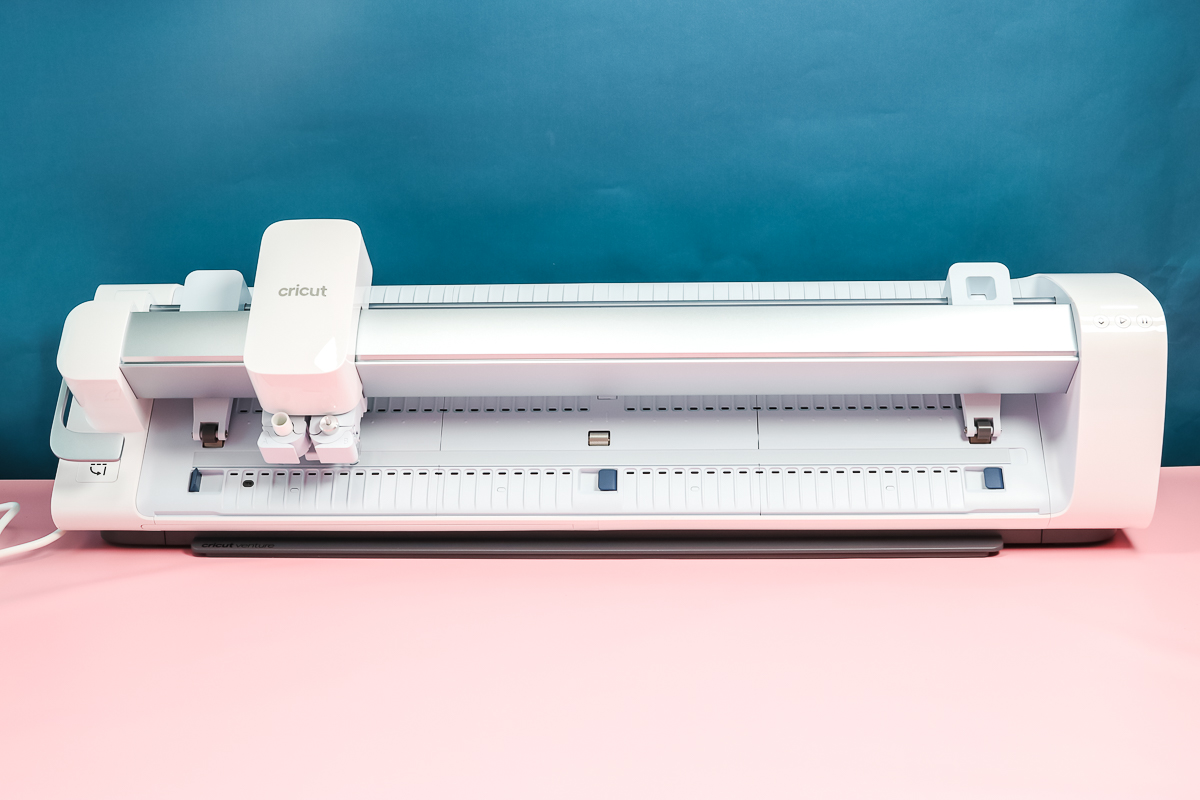
There are also three guides that will help to keep your material or mat straight in the machine. The small blue levers on the front of the machine will open and close these guides.
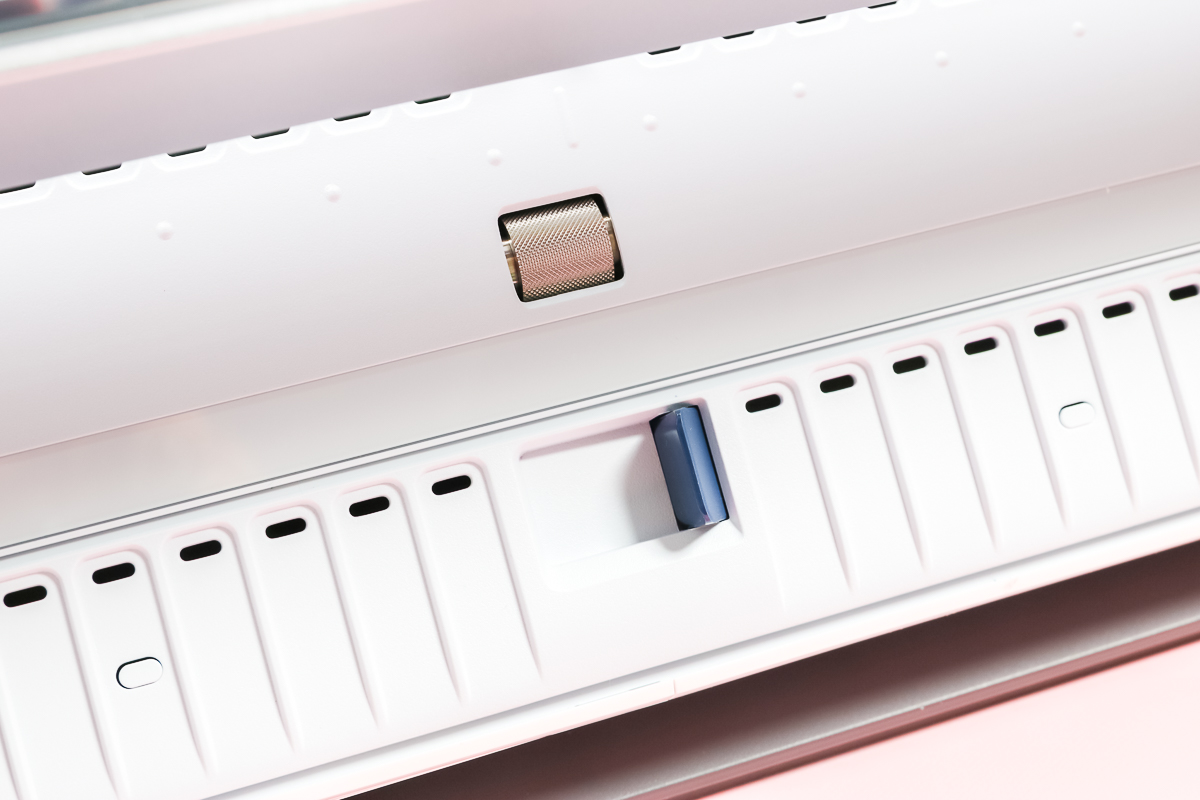
When you open and close the blue levers you will see long guides open and close along the machine. Cricut Design Space will tell you which guides should be up. The guides are on the left, in the center, and on the right.
Vacuum
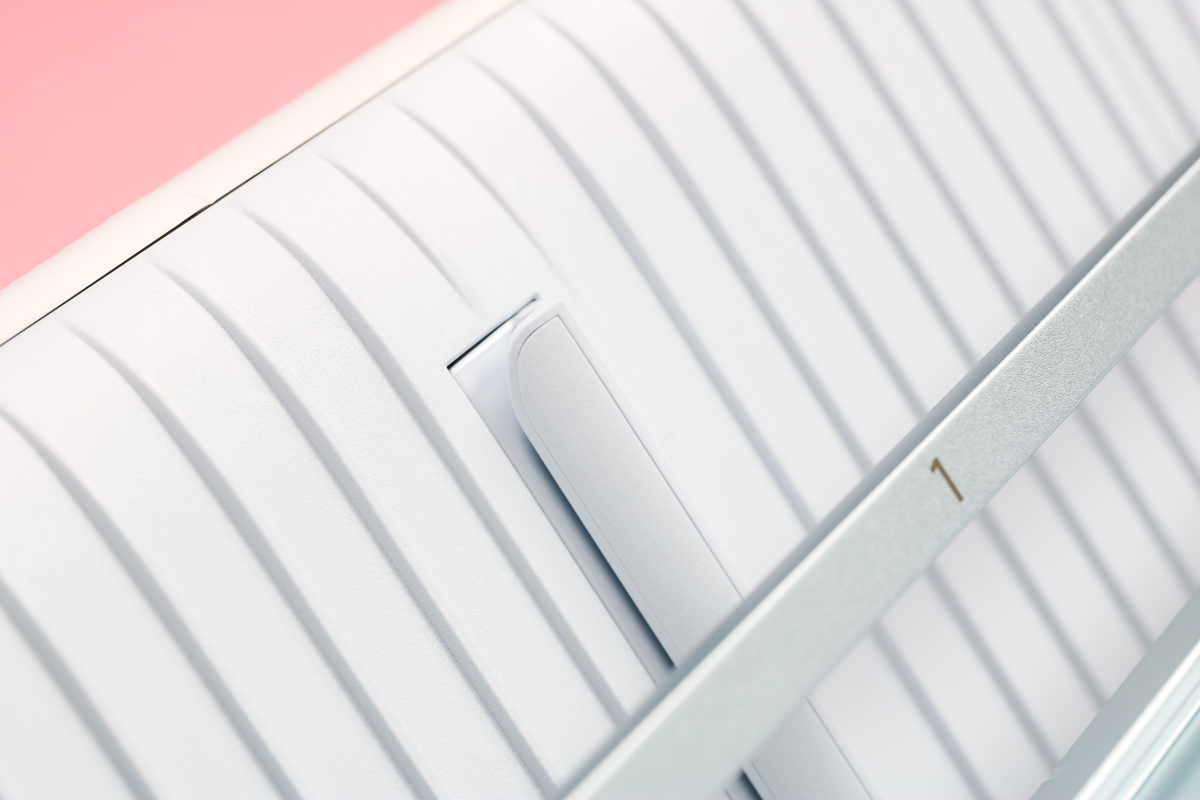
The small holes all along Cricut Venture are for a vacuum system. This will turn on automatically when you start to insert your material into the machine. This is what helps to hold your material flat even though the machine is at an angle. The is critical for a good cut.
NOTE: This vacuum does make a noise and will be on during the operation of Cricut Venture.
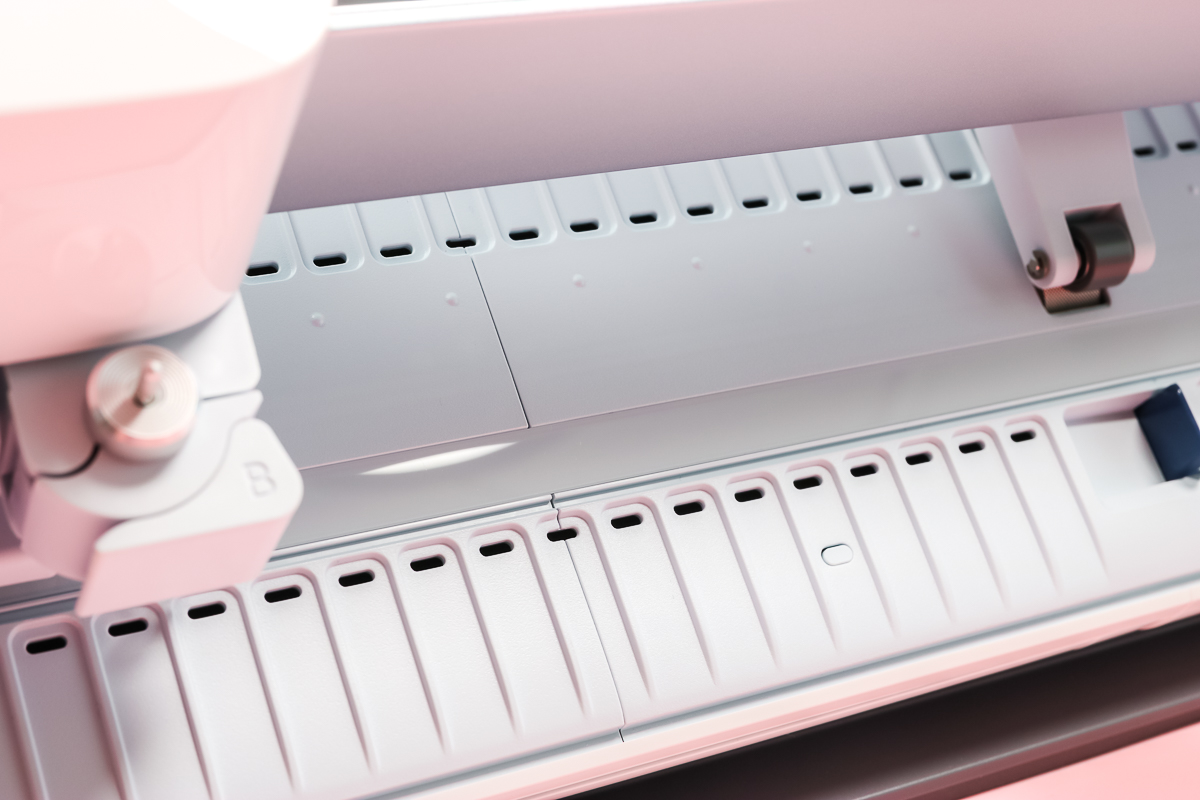
Roll Supports
Cricut Venture does come with roll supports in the packaging. These are only to be used if you are using the machine on a table. If you get the docking stand, you will not need these roll supports.
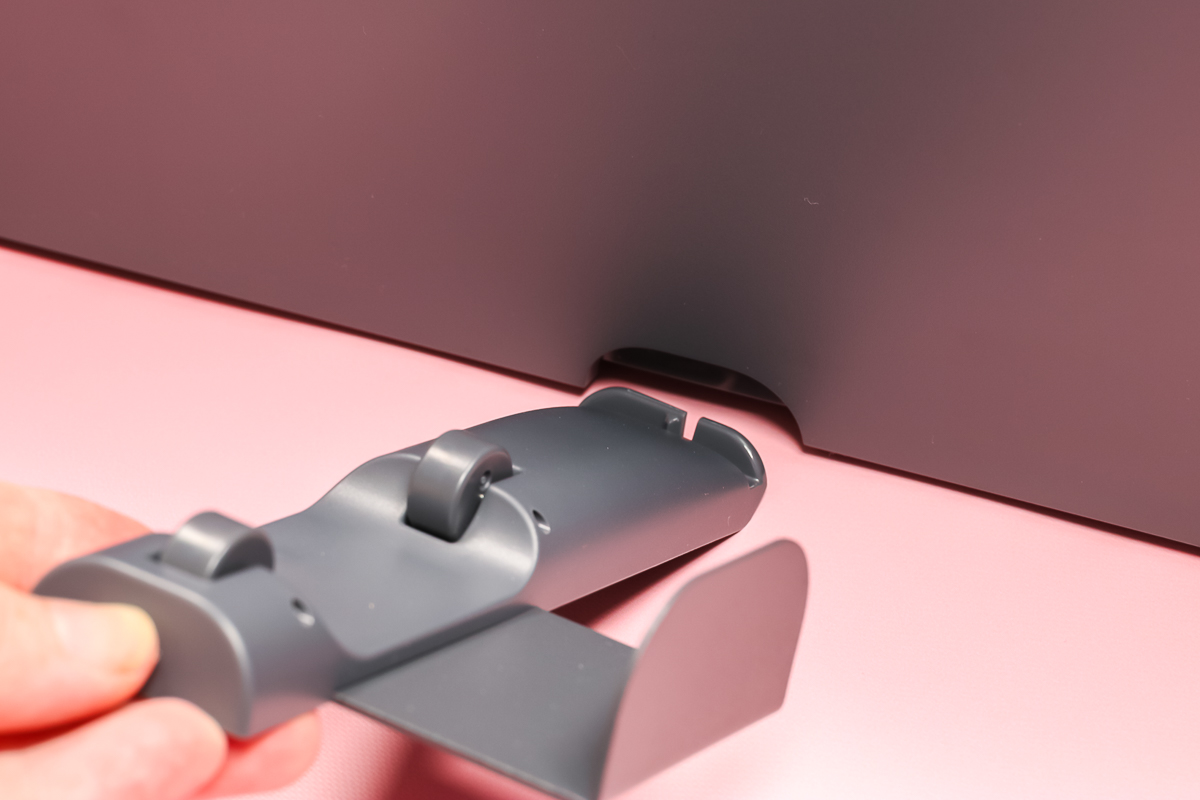
Along the back of the machine there are some grooves. Insert the supports at an angle then lay flat down on the table to lock them into place.
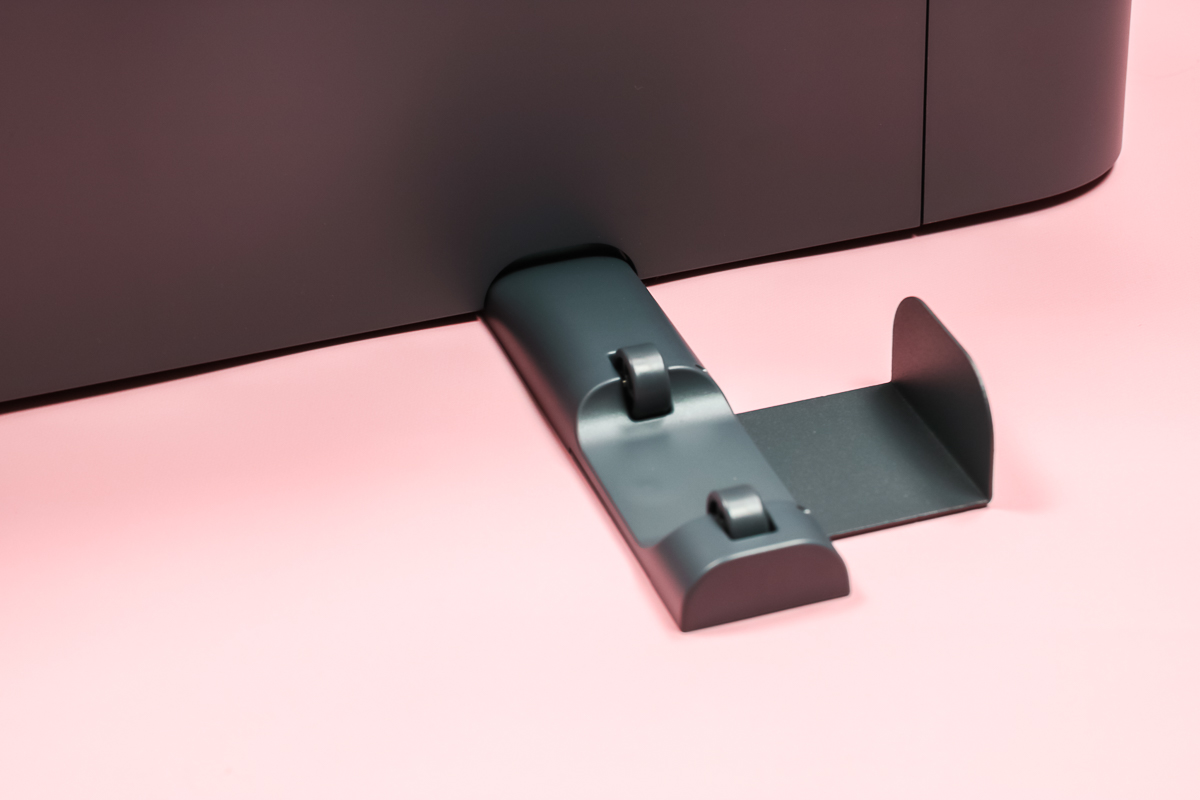
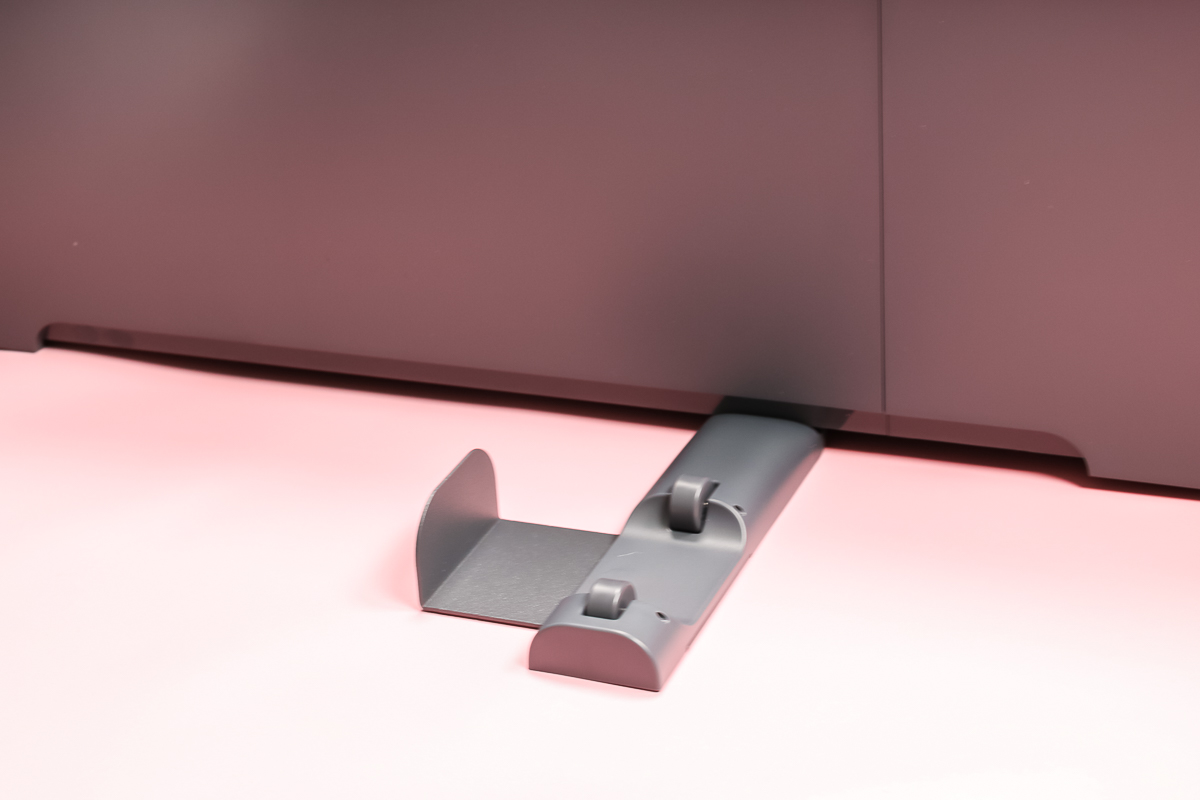
The guide on one side is fixed while the guide on the other side can move anywhere in a long groove to accommodate both the 13 and 25 inch materials.
Cutoff Tool
Cricut Venture comes with a Cutoff Tool that can be used to manually cut off your roll of material when it is done cutting.
NOTE: We will discuss the Auto Cutoff Blade later in this post which is an additional accessory that will do this automatically.
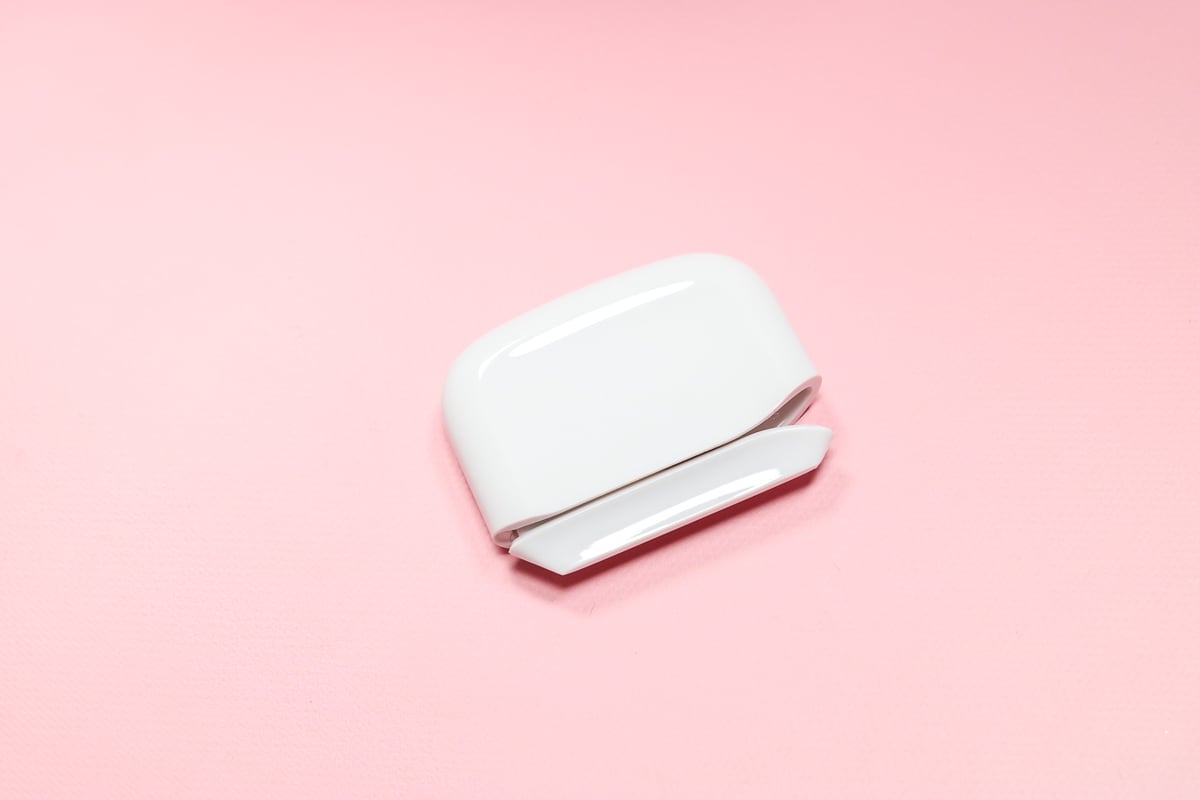
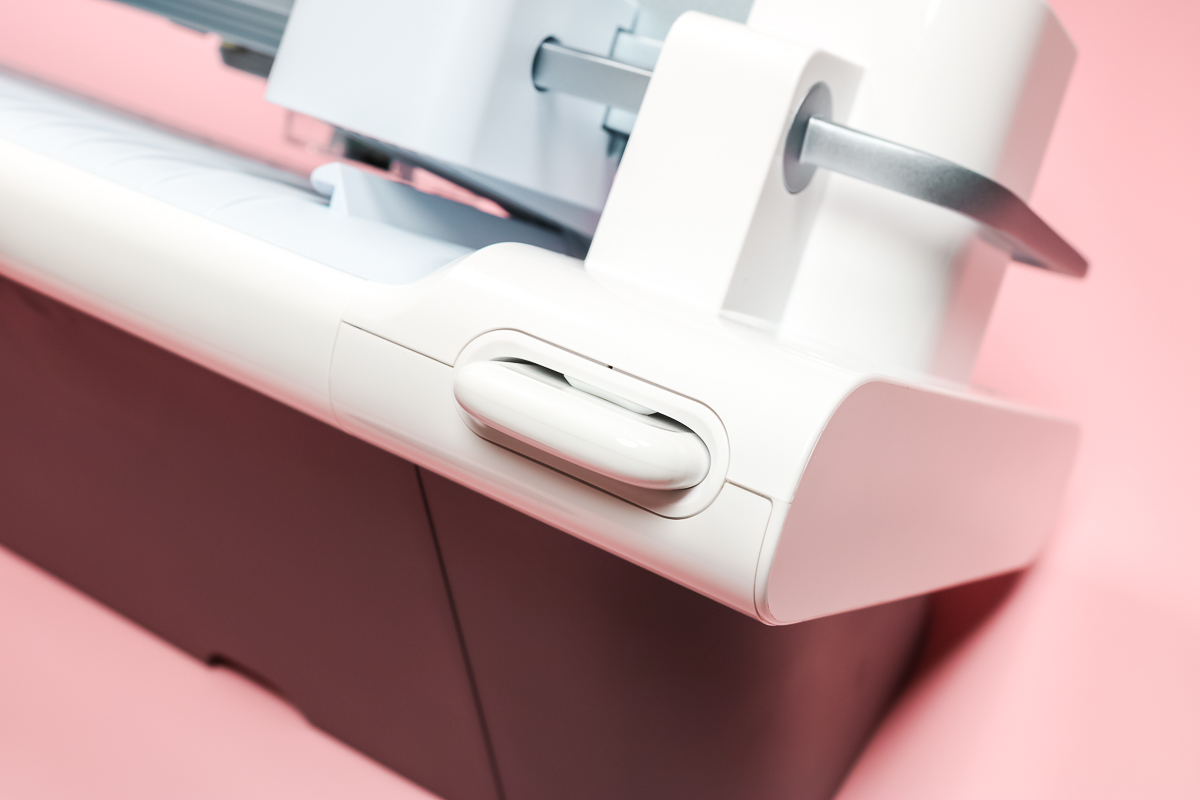
The Cutoff Tool has a storage slot in the back on the left side of Venture.
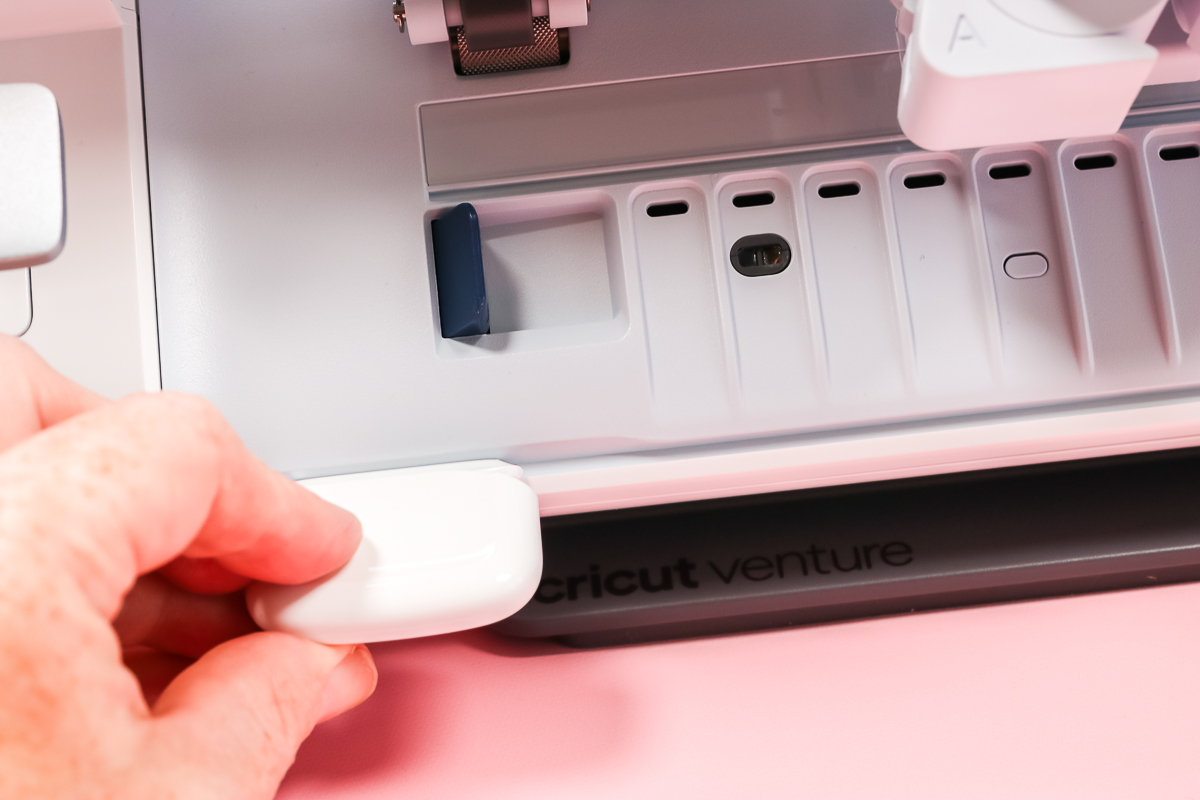
When your cut is done, add the Cutoff Tool to the slot on the front of the machine and run the tool along the groove. This will ensure that your roll of material is cut off in a straight line and that it is ready for the next project.
Cricut Venture Blades and Accessories
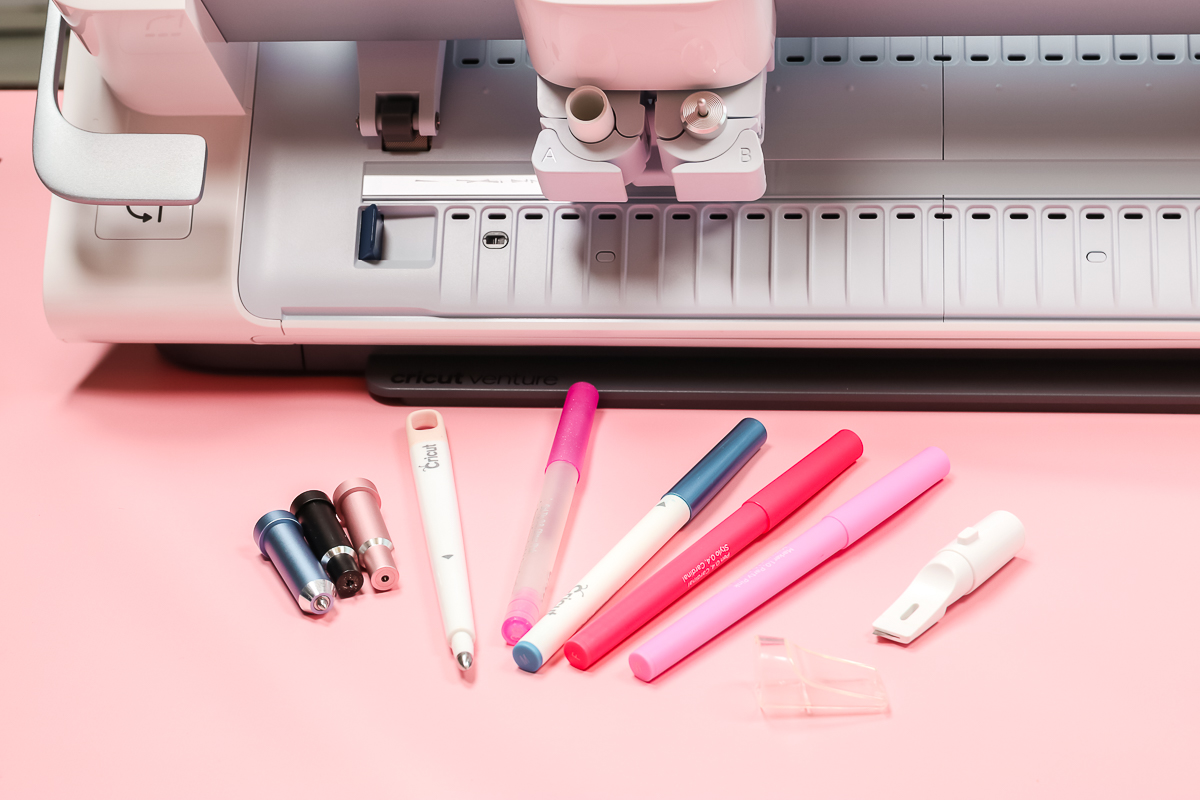
There are some new blades for Cricut Venture plus this machine can use the same blades as the Cricut Explore series of machines. Let’s run through each of those so you can get the most out of your machine.
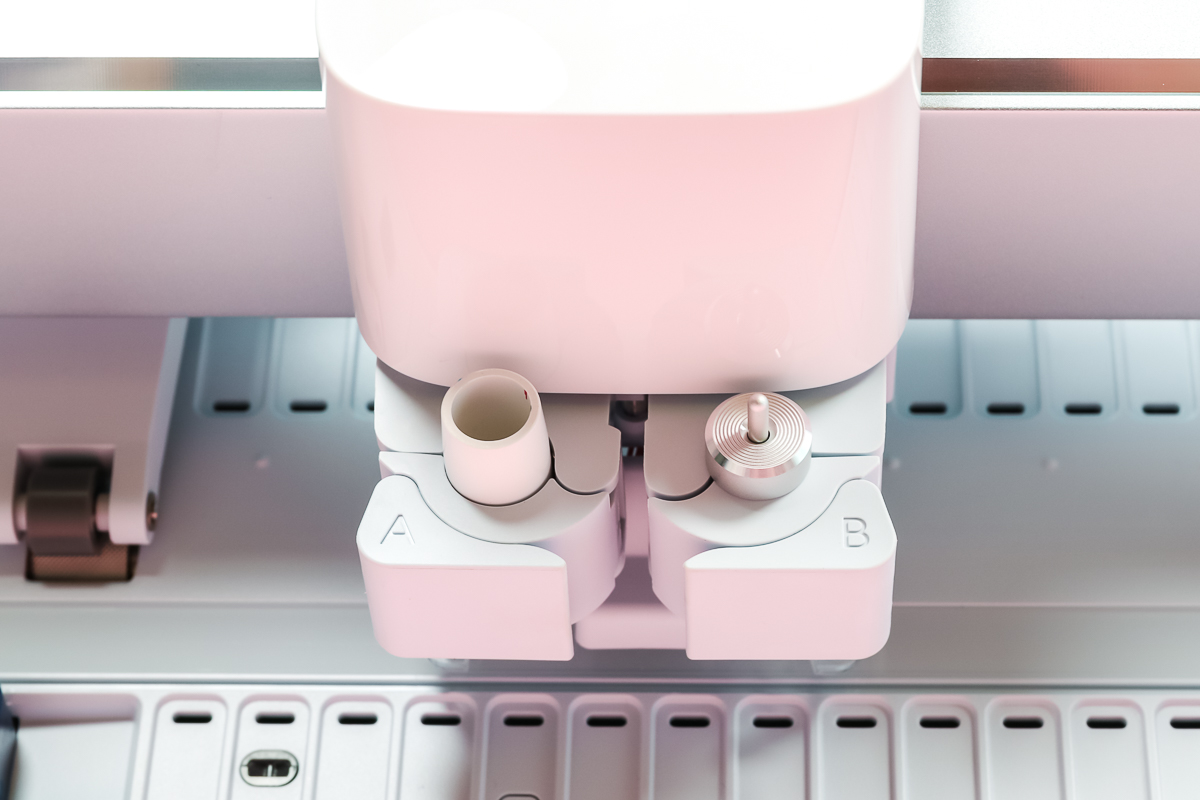
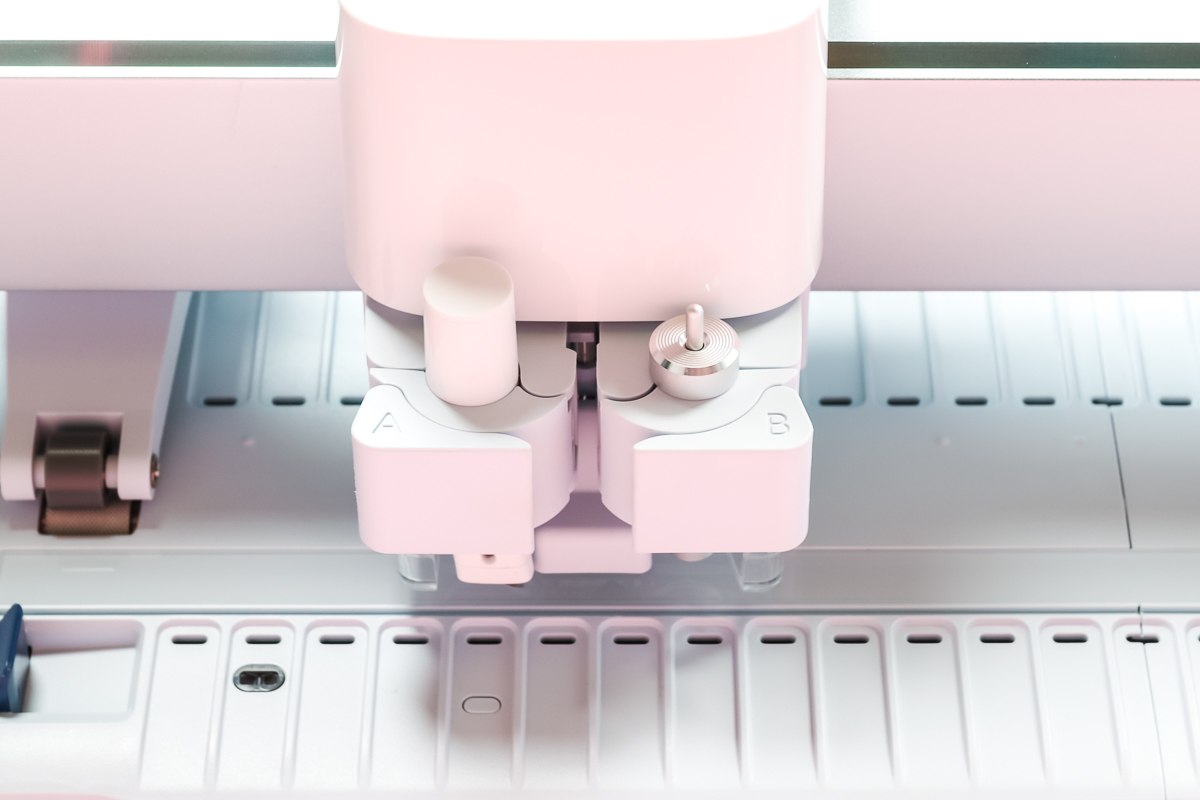
The clamp setup on the Venture is similar to other machines with an A and B clamp. The A clamp is primarily for pens and other accessories. The B clamp is for blades. There are some exceptions so keep reading for more information.
Blades
The machine will come with a fine point blade installed in the machine. Any other blades mentioned below will be an additional purchase. However, if you have an Explore series machine, you may already have some of these blades.
Performance Fine Point Blade
The fine point blade that some with Venture is different than the fine point blades in other machines. Cricut found that the blade life was very short on Venture with the regular or premium fine point blade. So, they developed the performance fine point blade to get the best performance with this machine.
Since I do not think that anyone wants to be changing blades all of the time, I do recommend that you only use performance fine point blades in your Cricut Venture. I think you will be happier with the cuts and performance.
NOTE: The housing for the fine point blade is the same so you may need to mark your performance fine point blade in some way if you have more than one Cricut machine.
Auto Cutoff Blade
There is one blade that is only for Cricut Venture and it is the Auto Cutoff Blade. This blade can automatically cut off your roll of Smart Material once the cut is complete. I will show you how to use this blade later in this blog post.
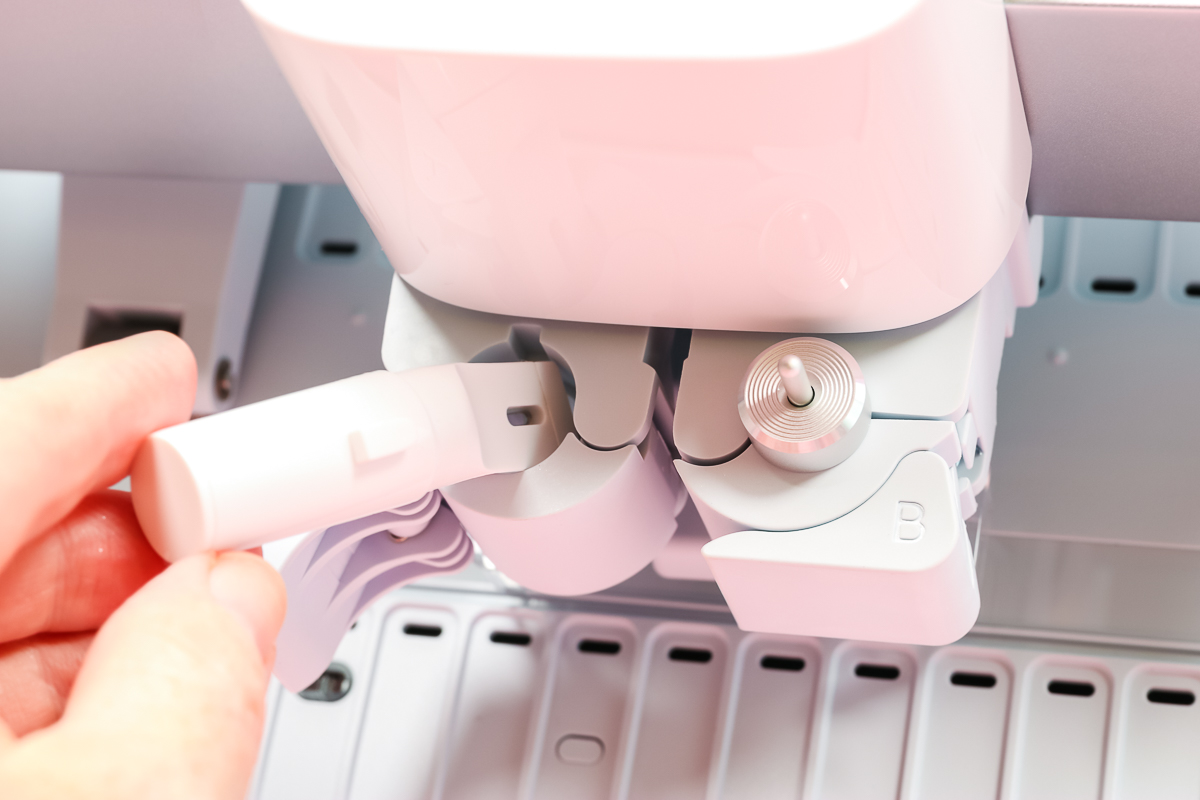
This blade is an exception as it goes in clamp A instead of clamp B. Remove the protective cover from the blade. Then remove the adaptor from clamp A by pushing from the bottom. Slide in the Auto Cutoff Blade with the location tab to the back. Make sure it is set all the way down and close the clamp.
Other Blades
As mentioned, your other Explore blades will work in this machine. Here is a list:
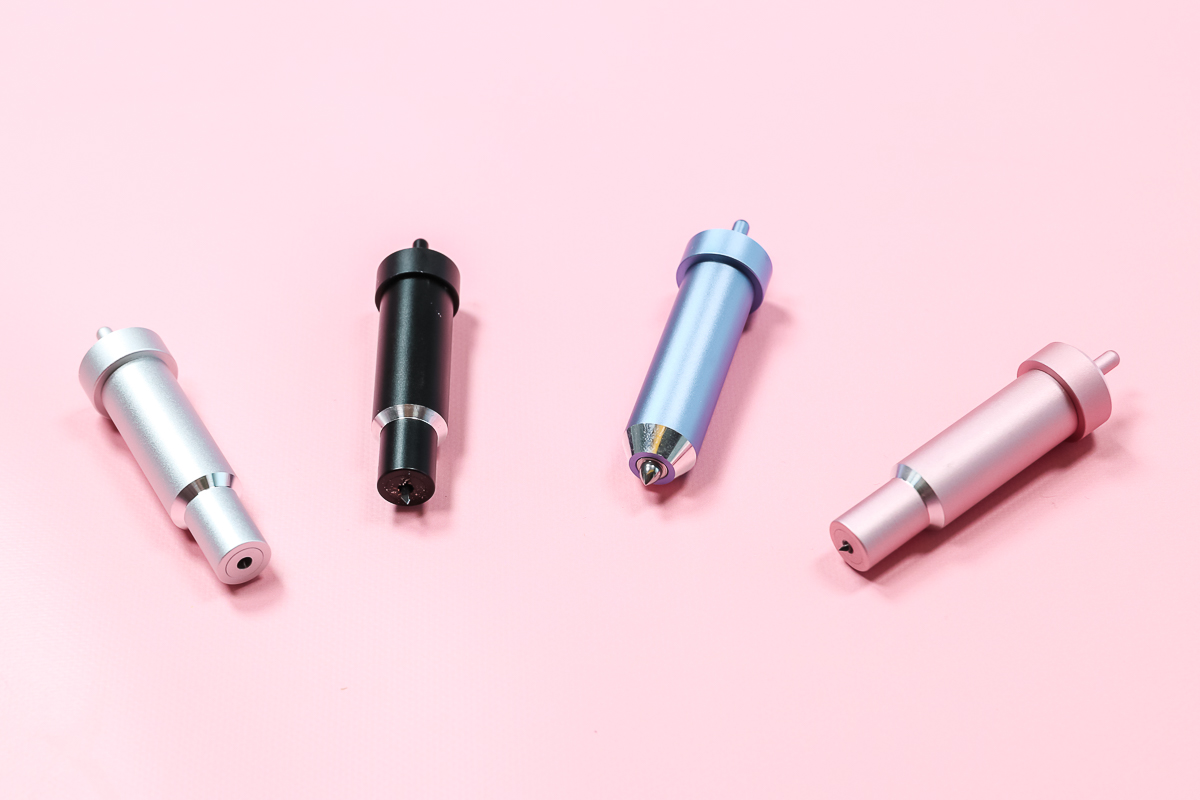
- Deep point blade – this blade is in a black housing and has a different angle. Used for specialty materials that are thicker.
- Foil tool – has three tips and is used for adding foil to your paper projects and more.
- Bonded fabric blade – blade in a pink housing that should be reserved for fabric. Just like scissors, you want a blade that you just use for cutting fabric. This is just the fine point blade in the pink housing. I would recommend adding a performance fine point blade to a pink housing for maximum life.
NOTE: The Maker-specific blades will NOT work in Cricut Venture.
Pens
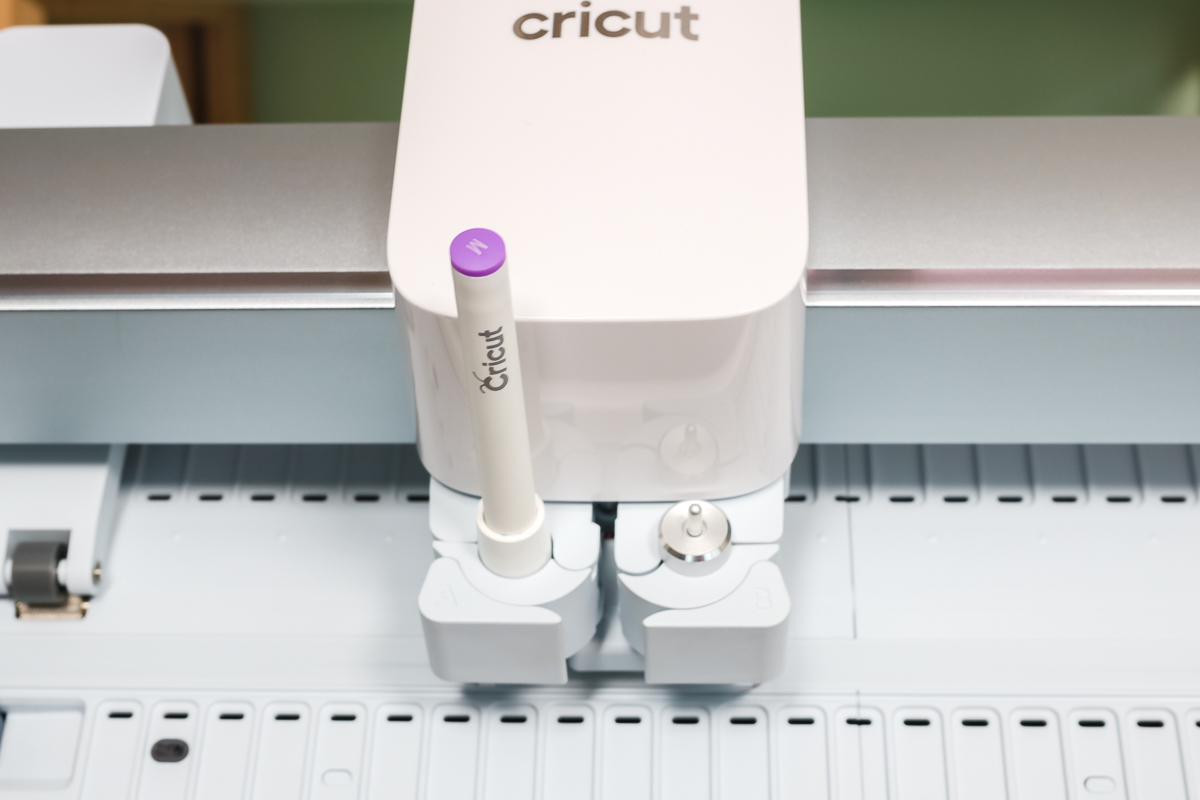
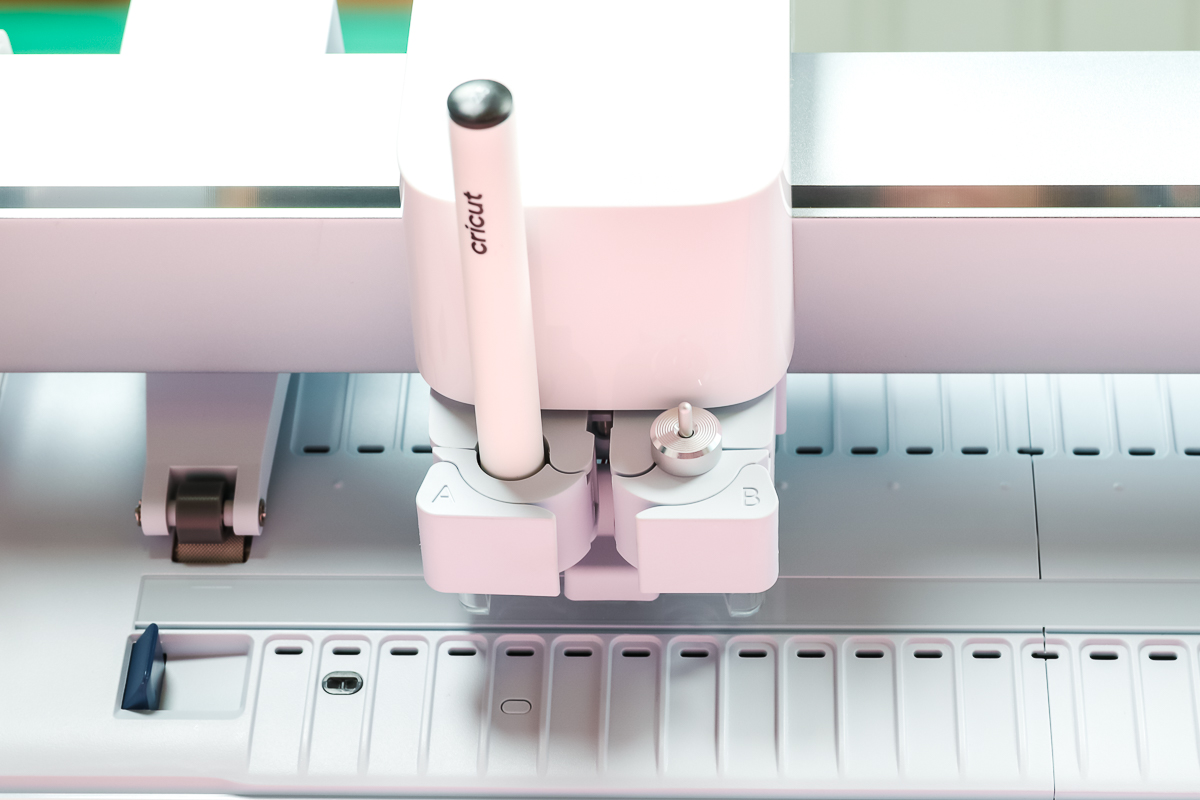
You can use any Cricut pen that is for the Explore or Maker series in your Cricut Venture. This would include Infusible Ink pens and other types as well. Just add to clamp A with the adapter in place. So, yes you can write and draw with Cricut Venture!
NOTE: The Cricut Joy pens and Makers will not work in this machine.
With this release, Cricut is also coming out with permanent markers. I will be doing another post on those but they are large so you need to remove the adapter to add them.
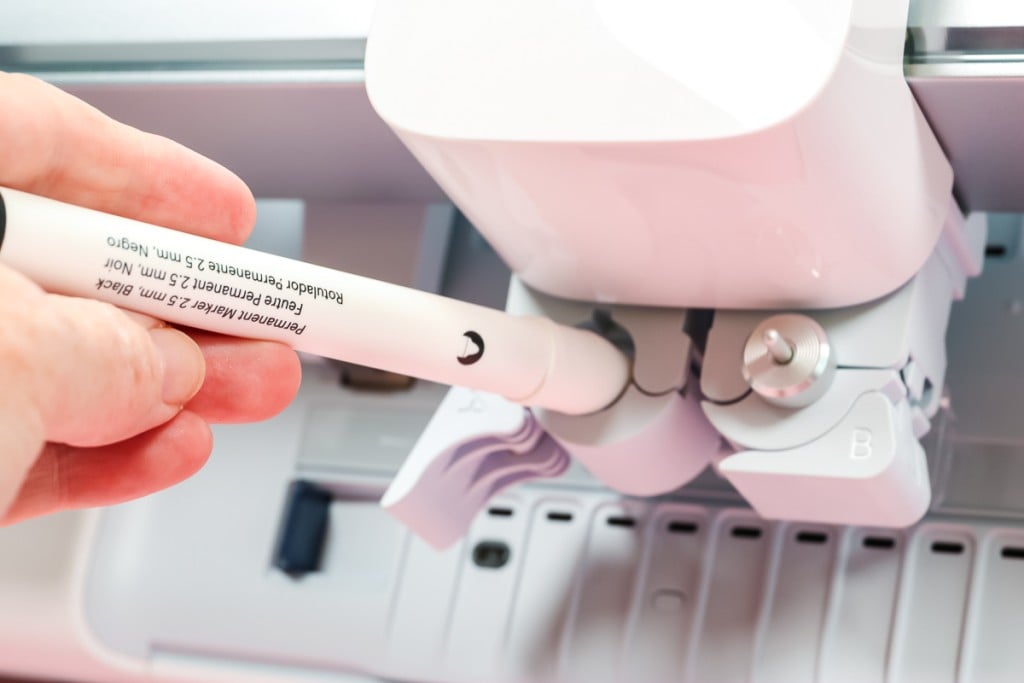
Just drop them into place and they have a stop to keep them in the right location. Close the clamp to use.
Scoring Stylus
The other accessory that you can use in clamp A is the scoring stylus. You can score with Cricut Venture as well using this accessory. Just add to the clamp with the adaptor in place and close the clamp.
Cricut Venture Mats
The mats for Cricut Venture are different from the mats for the other machine. Also, because the machine is at an angle, you will need to have the support arms extended to use the mats on this machine.
Performance Mats
Cricut found that the regular mats were not strong enough to withstand use in the Venture. So, the performance mats were developed. These come in the following sizes and strengths:
- 12 x 24 mats – light, standard, and strong grips
- 24 x 28 mats – light, standard, and strong grips
There is no fabric mat for Cricut Venture. The light or standard grip mat should be used to cut bonded fabric. These mats are used in a similar way to any Cricut machine but we will go through how to cut on a mat below.
Also, on the 12 x 24 mats you may notice that the hold to hang them by is on the long end. This works great with the docking stand we are going to discuss below.
NOTE: The regular Cricut mats can NOT be used on your Cricut Venture!
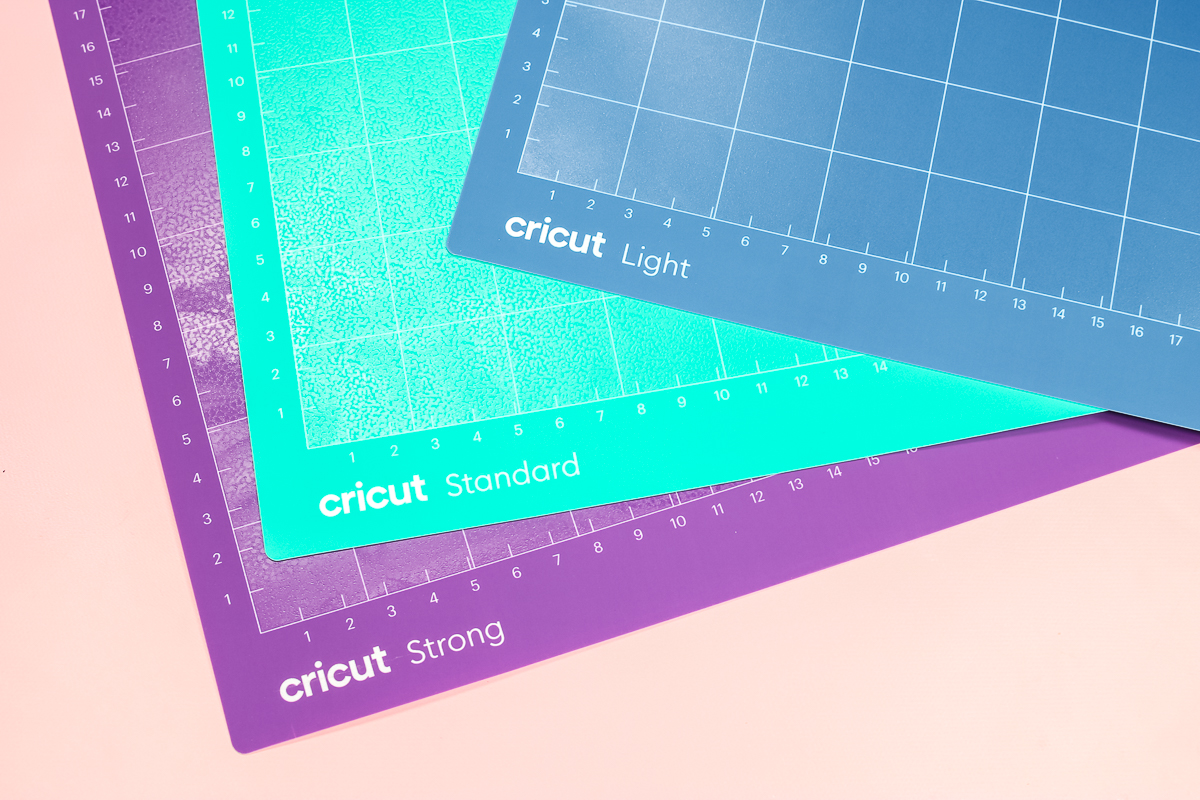
You may also notice a color difference. The existing Cricut machine mats are a different shade of blue, green, and purple.
Mat Supports
You will need the mat support arms extended to use a mat on your machine. If you are using the 12 x 24 mat, the supports in the machine will be enough.
Lift the roller arm lever on the left-hand side and press the button below it to extend the mat guides. A guide will come out of the top as well as the bottom.
IMPORTANT: If you are using Venture on a table, you MUST put it on the edge of the table to use a mat. The mat guide cannot extend otherwise.
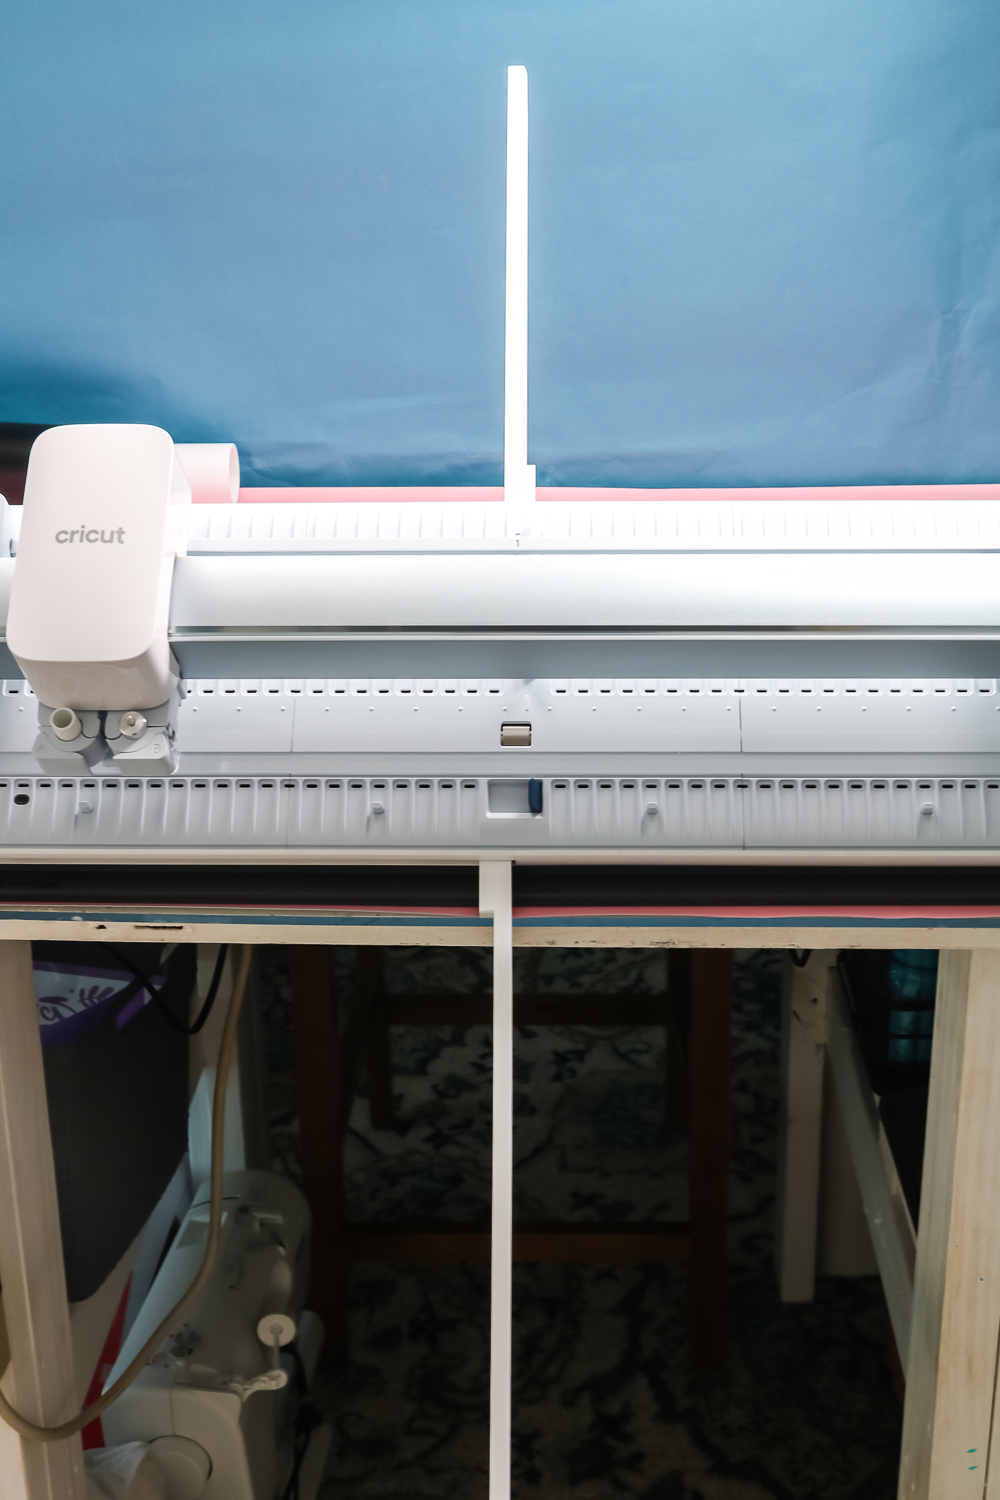
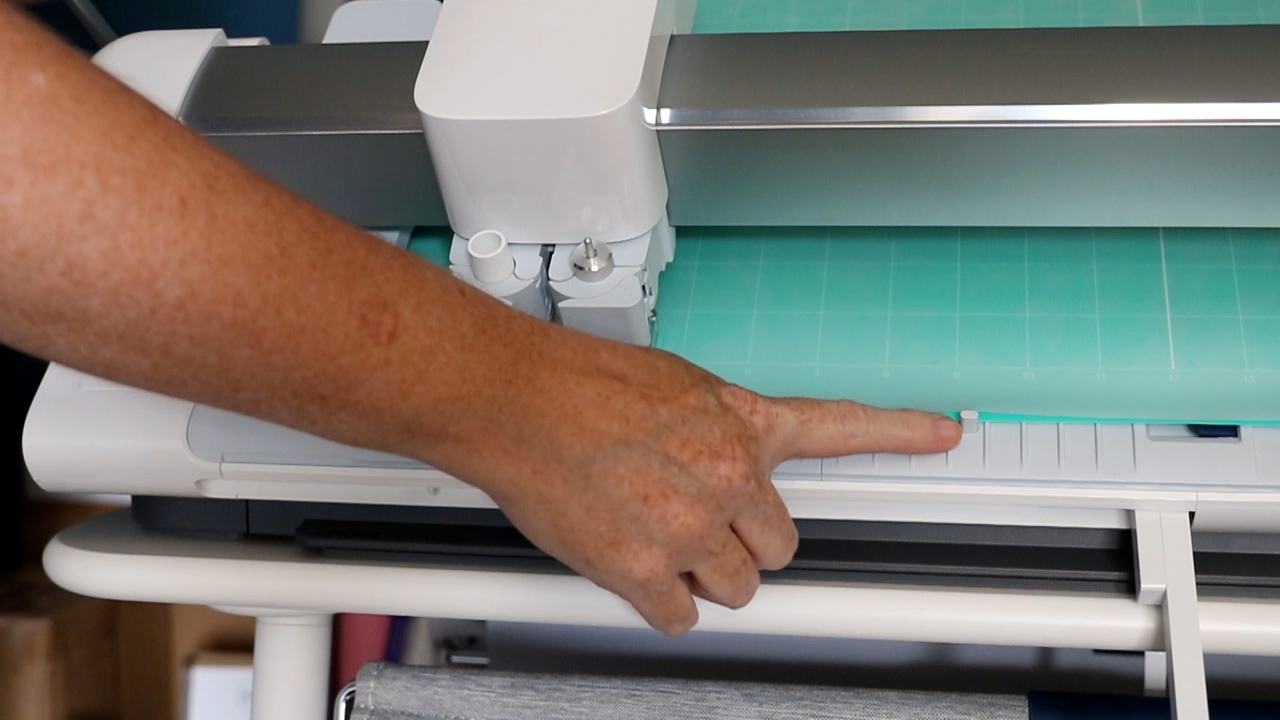
When you extend the mat guides, you may notice a series of stops that rise up at the bottom of the machine. These are for you to rest your mat on when adding to the machine. These will go down as soon as you close the arm for the pinch rollers.
NOTE: These will NOT extend each time unless you repeat the same steps of closing the arms and pressing the button to open them again. I do NOT do this each time and just add my mat approximately in location. Venture can see where the mat is located so this is not an issue.
Additional Mat Support Arms
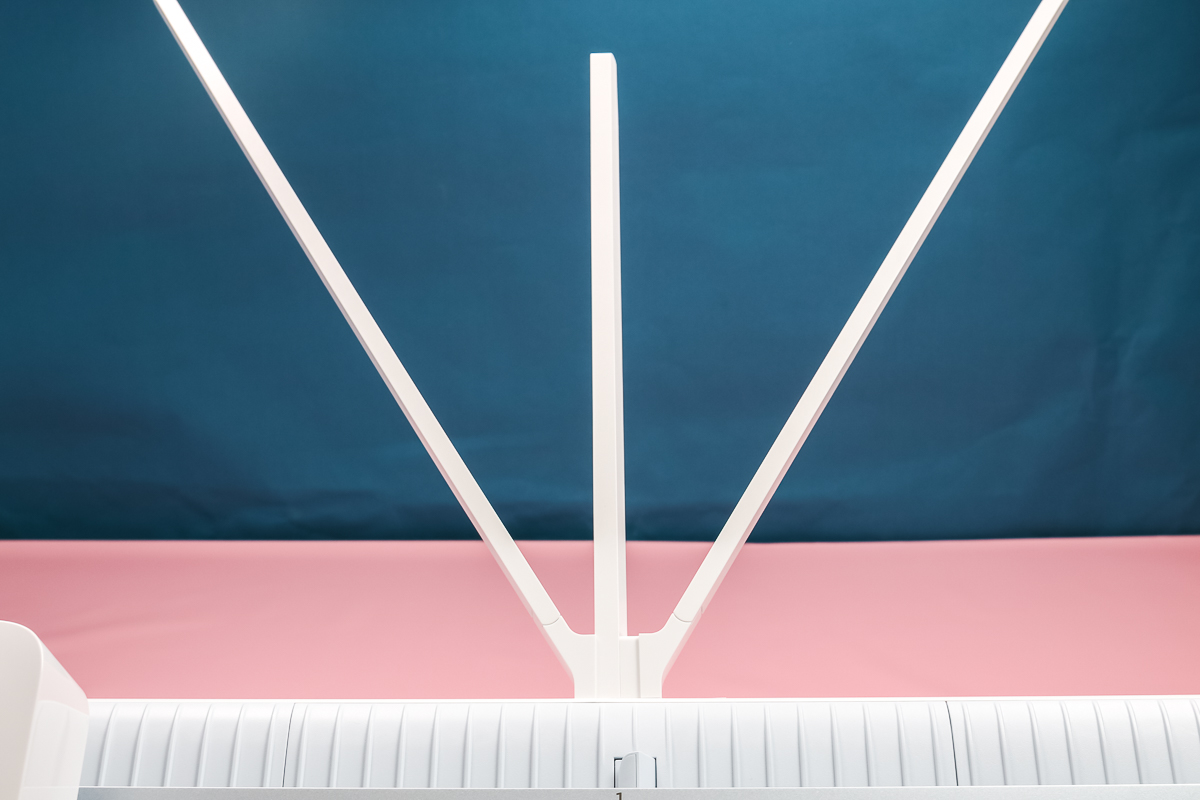
If you use the 24 x 28 mat, you will need the additional support arm that comes with the machine. It does not come assembled so you will need to add the arms as shown in the image below. You can disassemble it for storage as well.
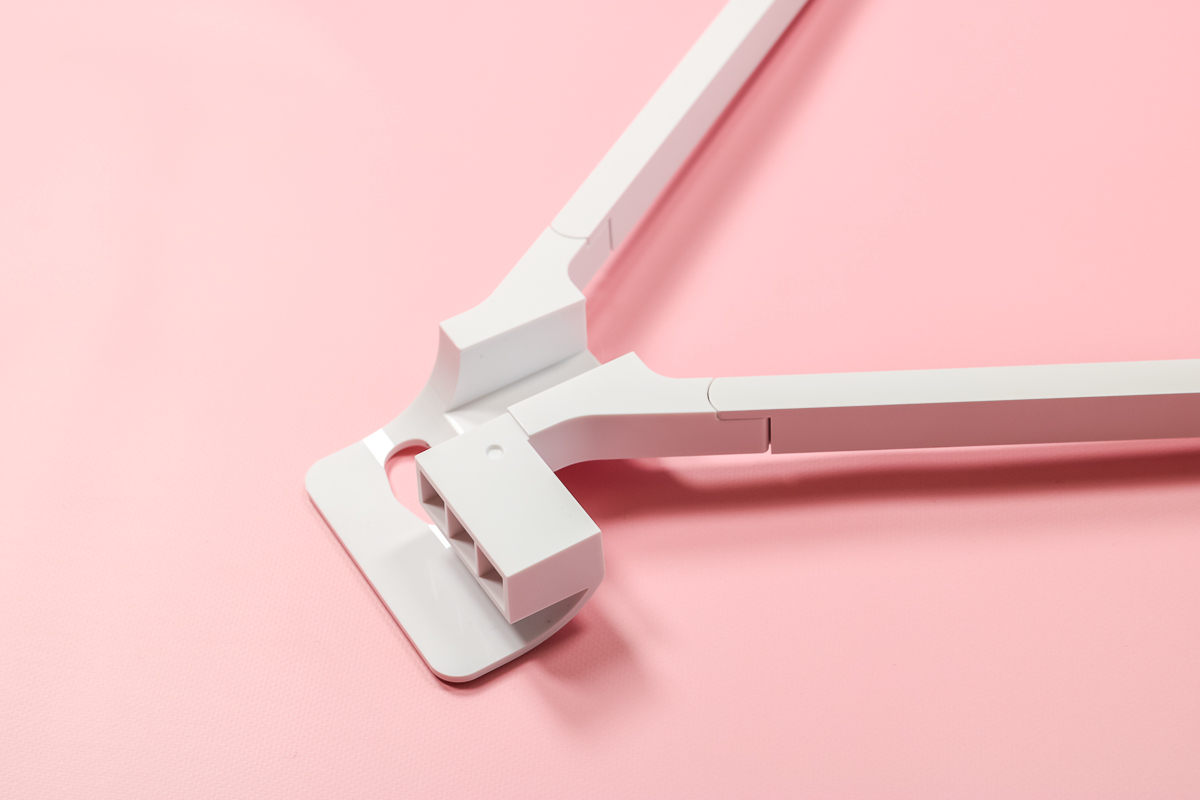
Slide this behind the main support in the back. It just slides down the support and into a recess on the machine. You will remove this BEFORE closing the support arms.
How to Use a Mat in Cricut Venture
Now that you have seen how to add the mat supports, let’s make a cut on a mat using this machine. I am going to use the new 24 x 28 cardstock in the project below. I talk more about that in the material section of this post.
NOTE: I am using the docking stand in these images and you can see more about that below.
Designing in Cricut Design Space
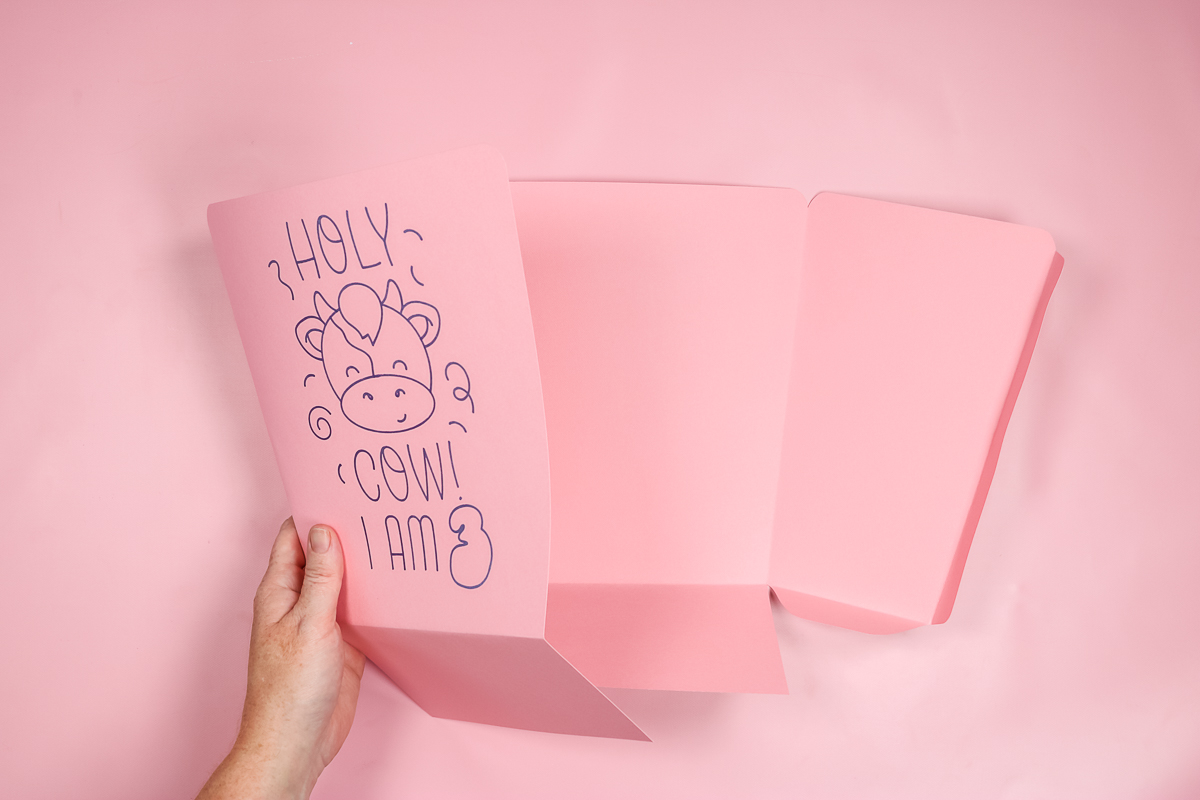
For my example, I am showing you how to cut a box with score lines as well as some writing. I found the box in images in Cricut Design Space. I then resized it so it was 24 inches long. The box already had score lines.
Find a pen line drawing that you want to add to the box. Locate it on the box on your canvas. Pick everything and click attach.
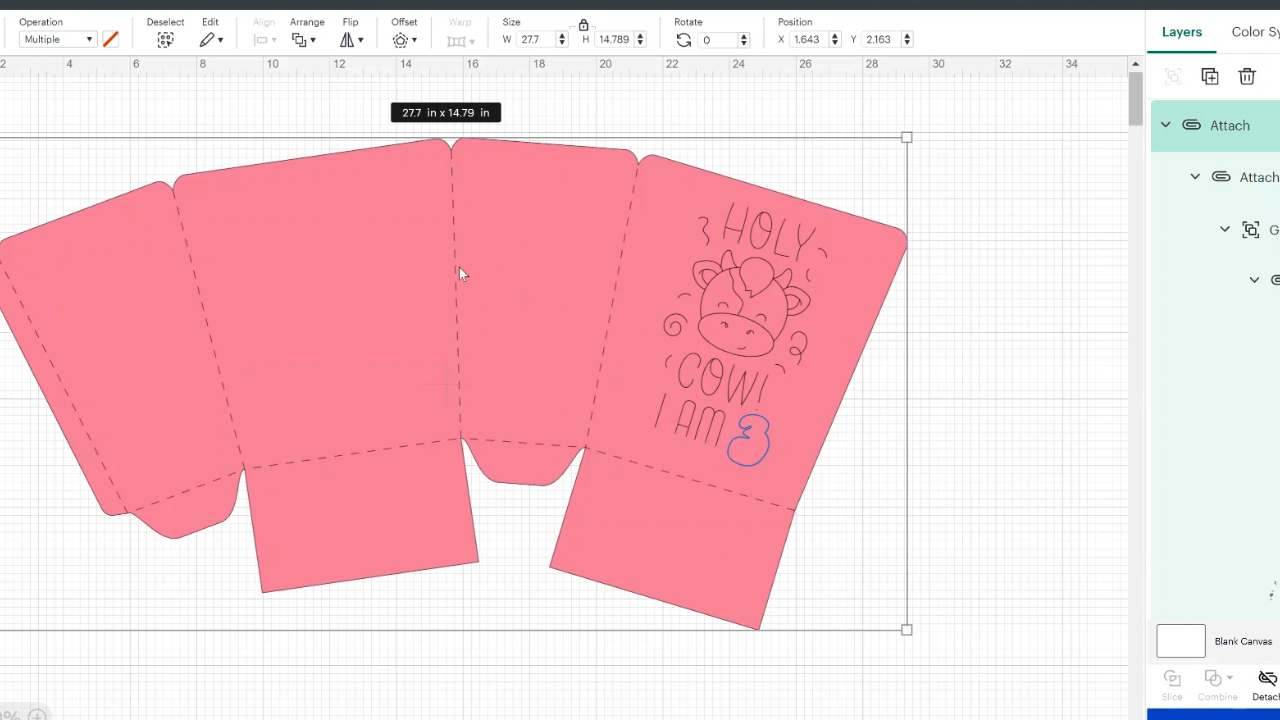
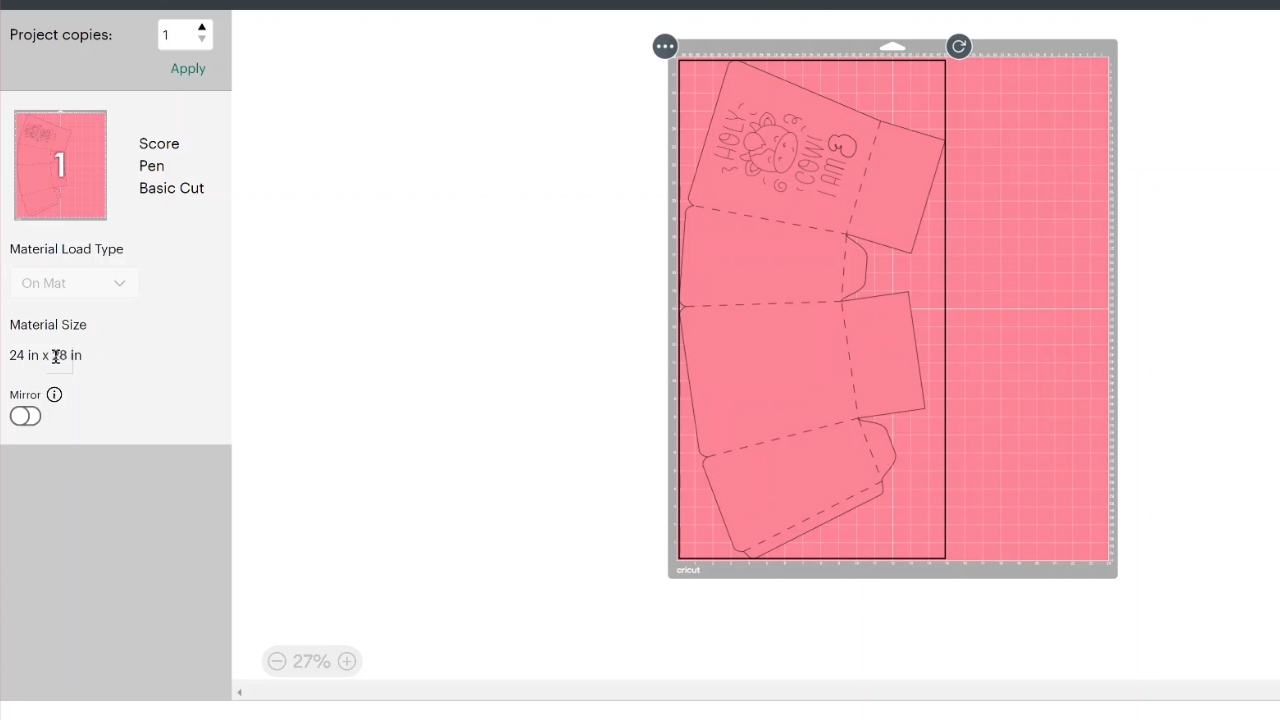
Click Make It and you will see your design on the mat. This will also tell you what size mat you will need to use.
NOTE: Cricut Venture locates all cuts in the bottom left corner of the mat which is different than other Cricut machines.
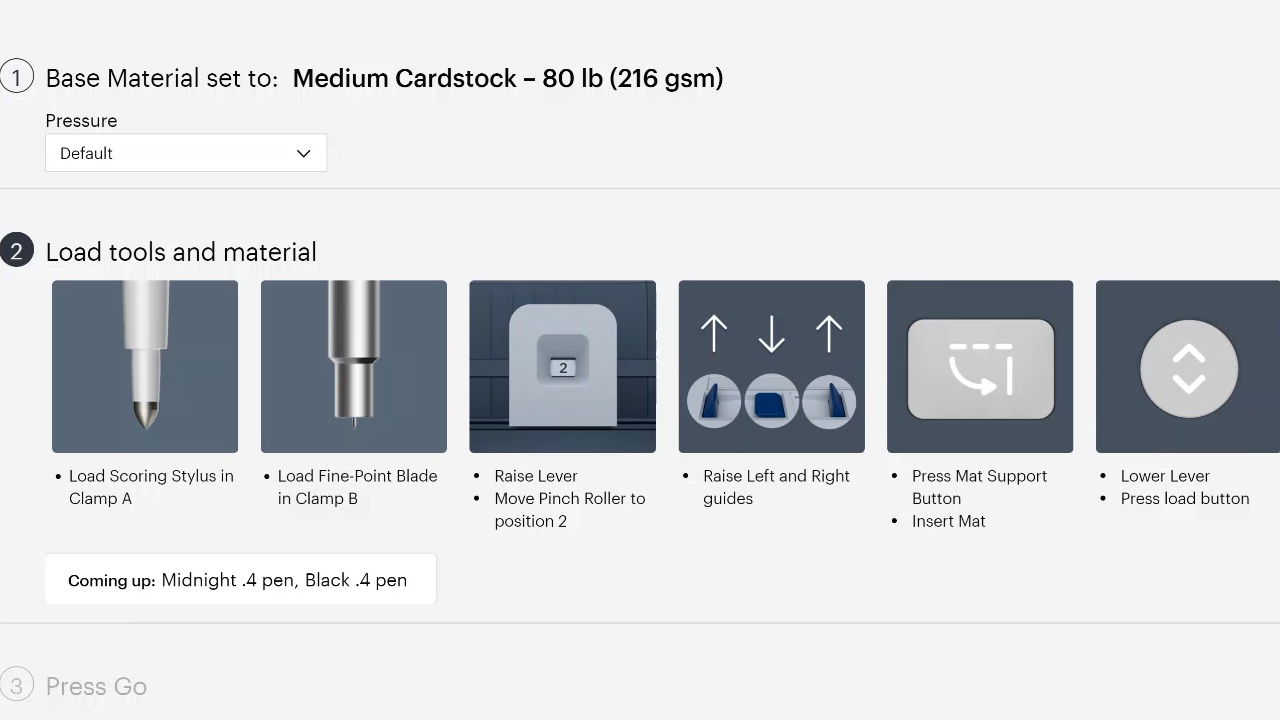
Then click continue. You can now pick your material and Cricut Design Space will tell you what materials you need, where to move the pinch rollers, which guides need to be lifted, and any other instructions. You should follow these each time.
Add Material to the Mat
Remove the protective cover from the mat.
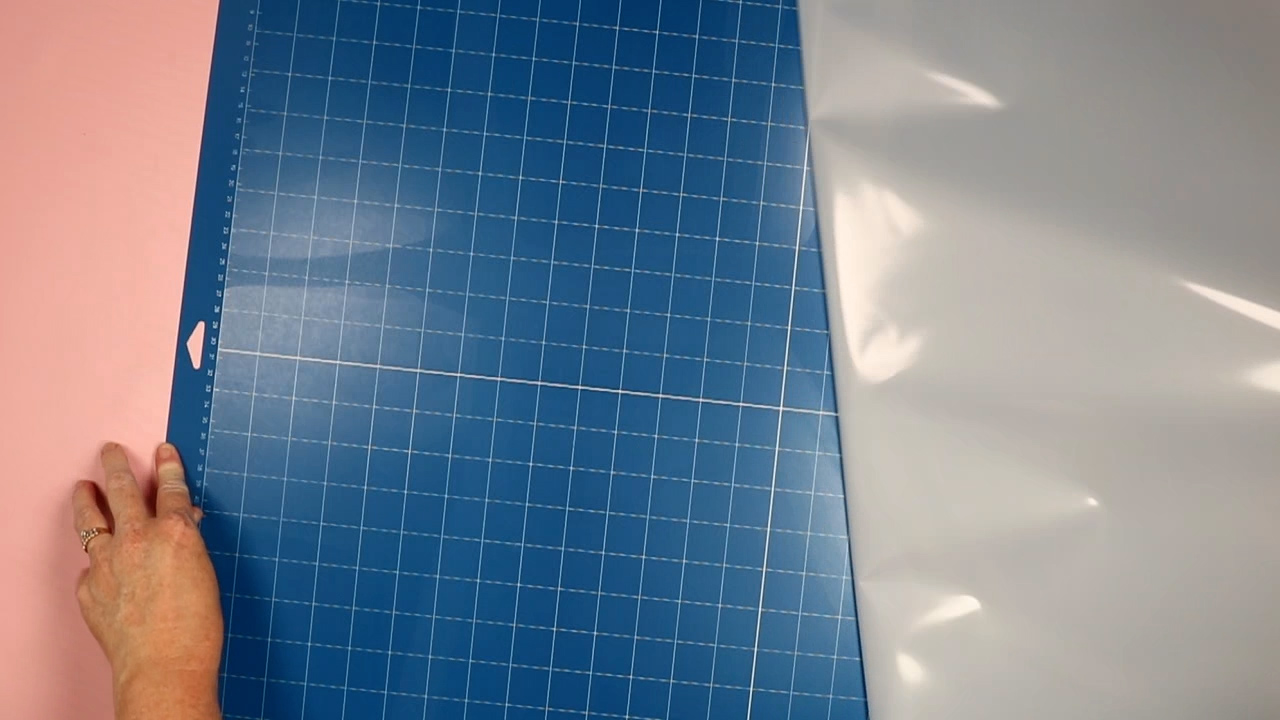
Then add your material to the sticky area of the mat and press it down well. You do want to make sure your material is down well.
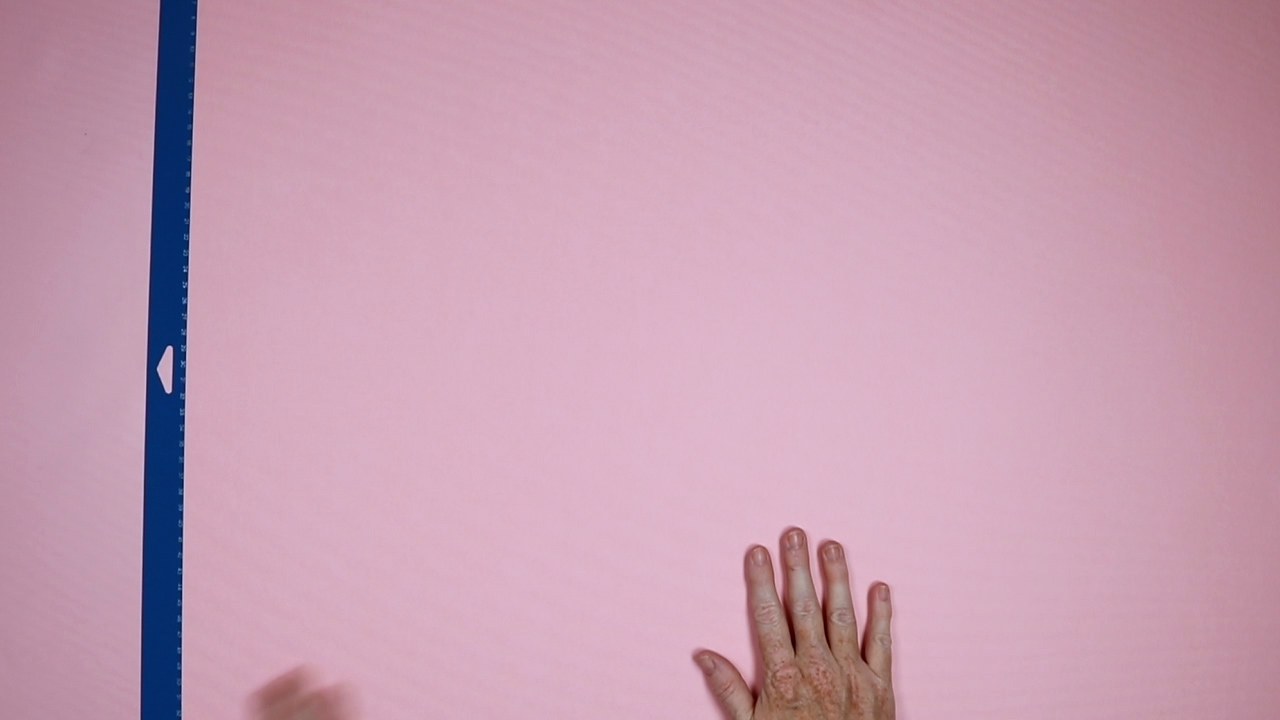
Adding Mat to the Machine
Make sure that the proper support arms are installed. In this case, I have that extra support arm attached as I am using the larger mat. Raise the arm on the left side to raise the pinch rollers then add your mat from the back of the machine.
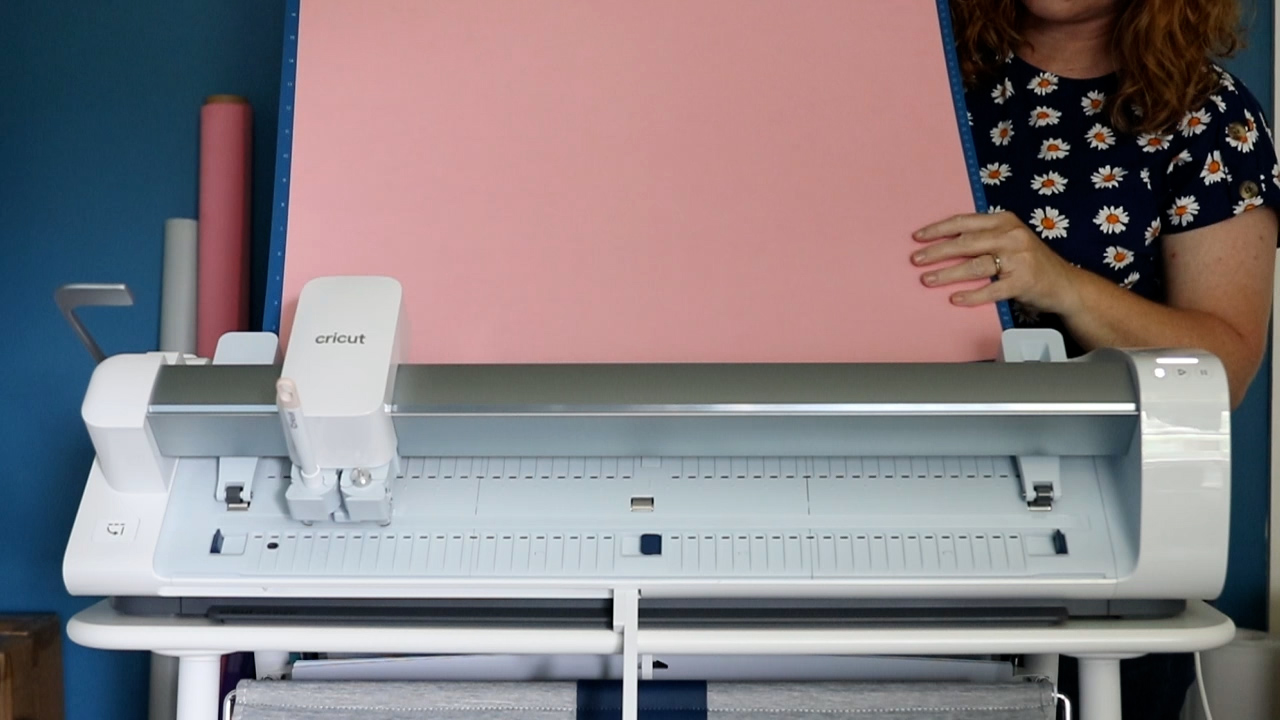
Close the arm to lower the pinch rollers and hold the mat into place. Press the load/unload button. The Venture will do the rest. It will ensure the mat is in the right location. It will run the mat through the machine before starting to cut. Once this is done, the go light will start blinking and you will press it to start your cut.
Scoring, Drawing, and Cutting on Paper
If you are scoring or drawing on your project, Cricut Design Space will tell you what to add to both clamps. In this case, the machine scored my paper first then it stopped and asked me to put the pen in the machine.
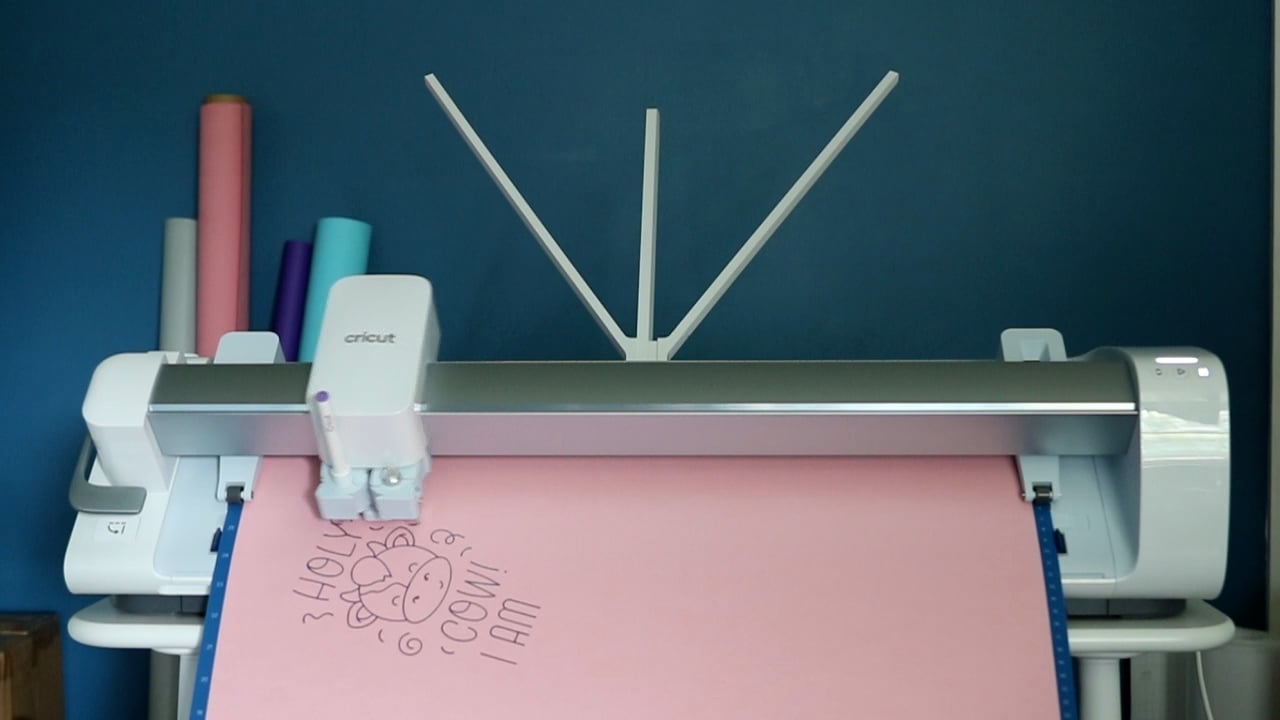
Then the machine continued to draw on the paper then cut around the outside of the design. If you want to see how fast the machine made this project, be sure to watch the video above.
Finishing Your Project
Once the cut is complete, Cricut Design Space will ask you to unload the mat. To do that, all you have to do is lift the lever to raise the pinch rollers. Then just remove the mat from the back of your machine.
For paper especially, it is important to turn the mat over and peel the mat back from the material. This ensures that the material does not curl.
IMPORTANT: Add the protective sheet back to the mat. I like to roll it up and line up with the hole at the top first then apply to the entire sticky area.
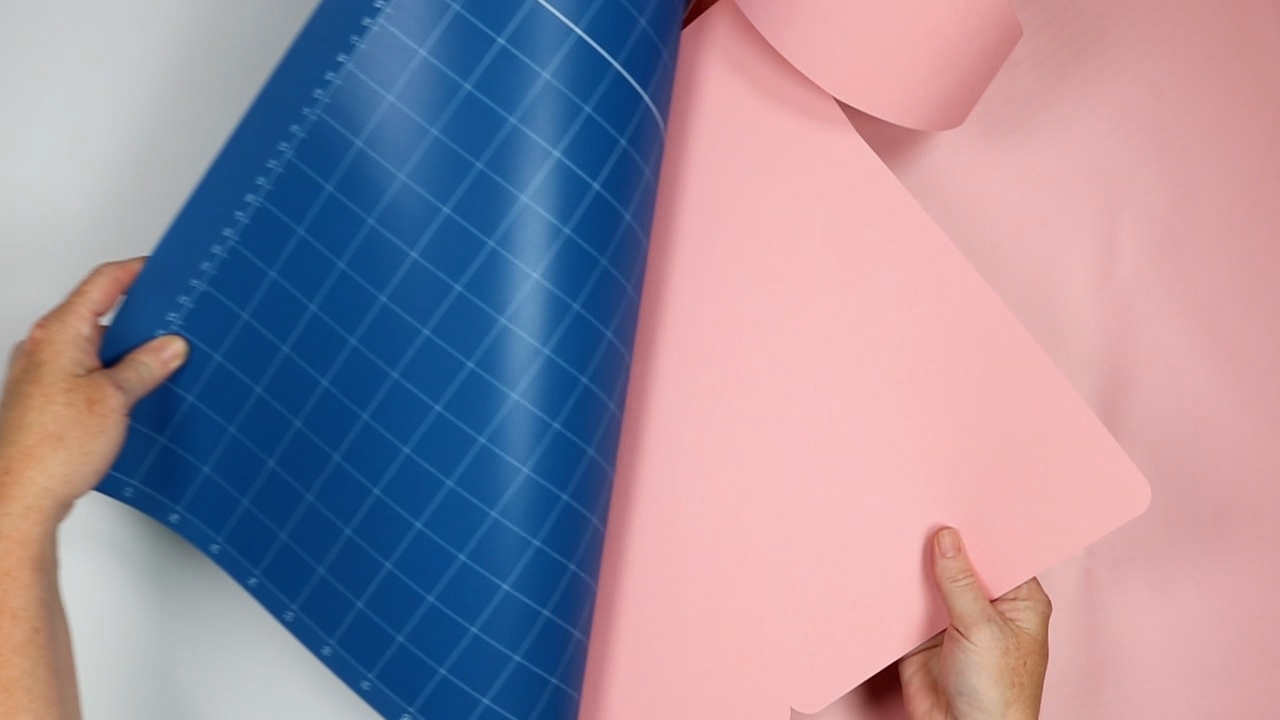
Then, in this case, I used the score lines to fold the box and then some adhesive to hold it together. I love that I was able to make a huge box with my Cricut Venture.
Cricut Venture Docking Stand
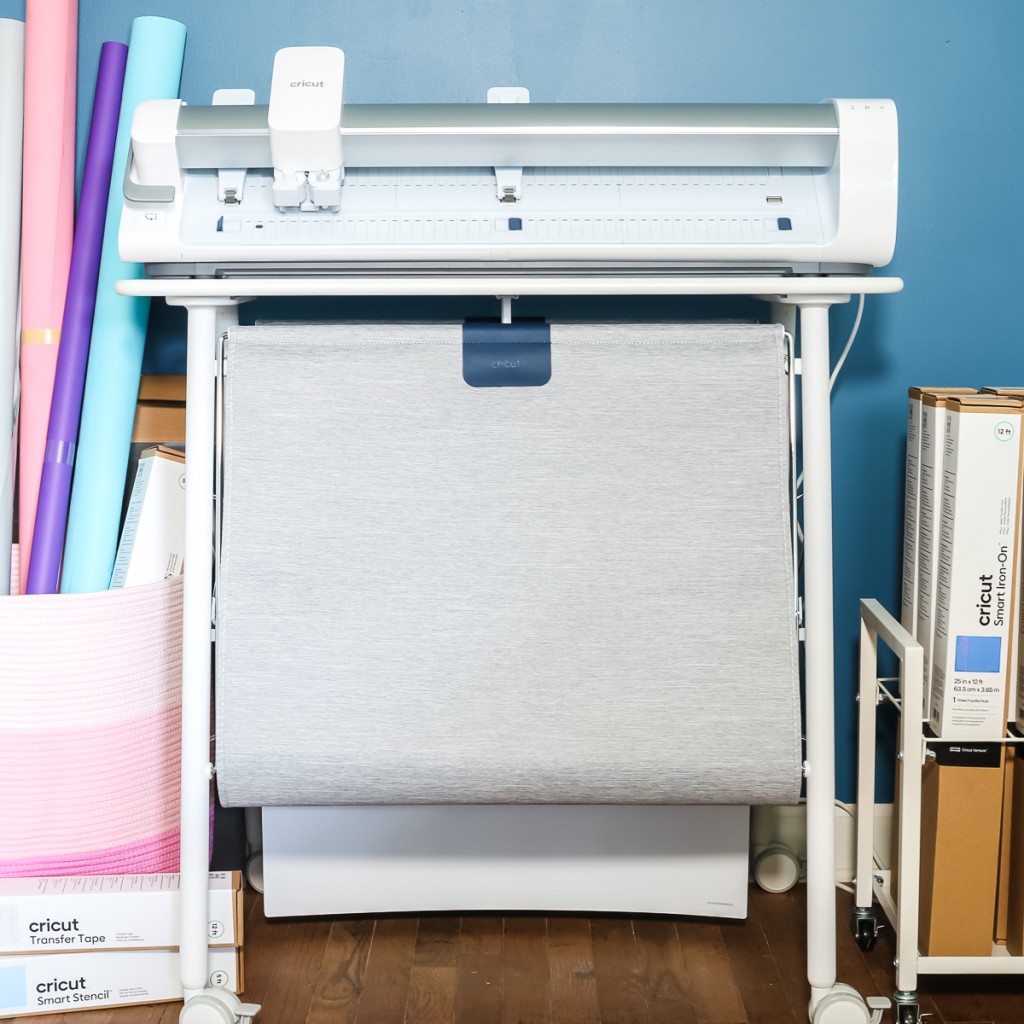
This optional accessory is one of my favorite parts of this machine. I highly recommend considering getting the stand when you purchase your Cricut Venture. I love all of the features and the fact that I have a place to store my machine as well as the mats.
NOTE: This docking stand cannot be used with any other Cricut machine. It does NOT work with the Explore or Maker series machines.
Adding Your Machine
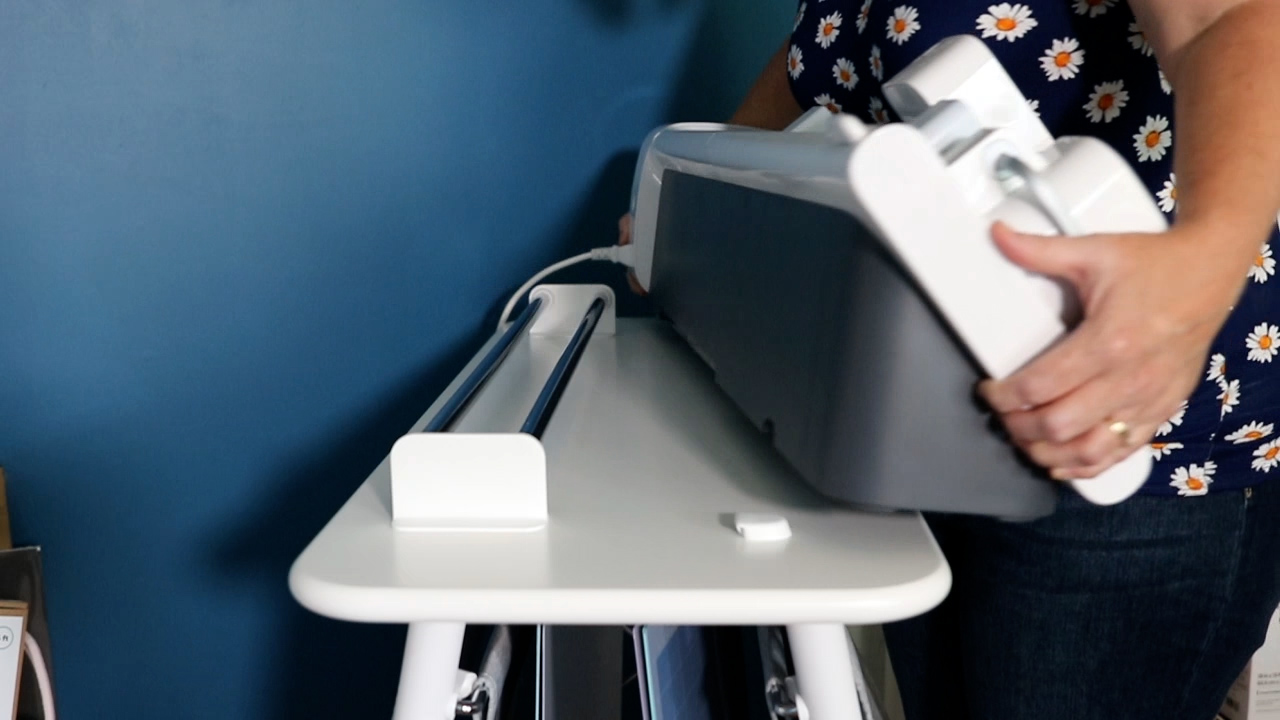
There are location knobs on the stand and corresponding recesses on the machine. Hold the machine at a slight angle and line those two up. The machine will just lock into place. Once on the stand, it will not move around. However, you can tilt the machine towards the front to unlock and remove it from the stand.
Stand Features
Let’s talk about some of the stand features as this is what makes me think this cart is a must for your Venture.
Roll Holder
The stand includes a roll holder in the back. There is no need to use the roll supports that come with the machine. Just add your roll of material to this holder and feed it through your machine.
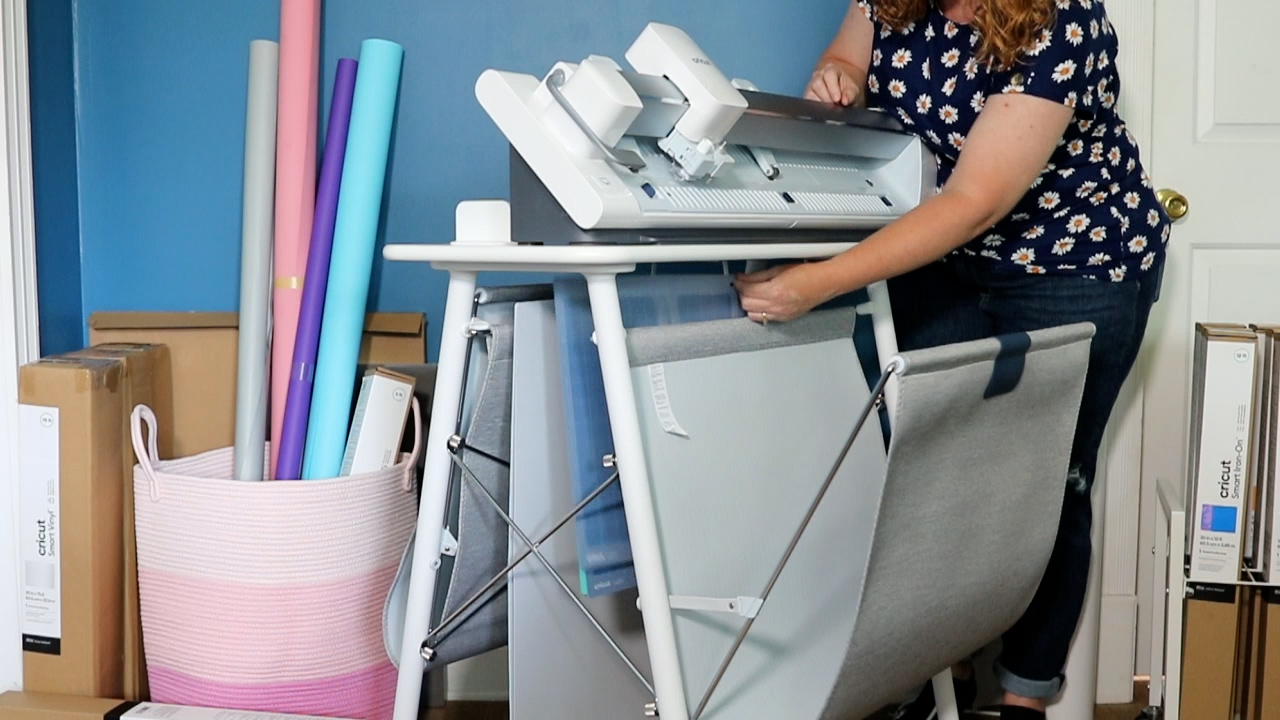
Catch Baskets
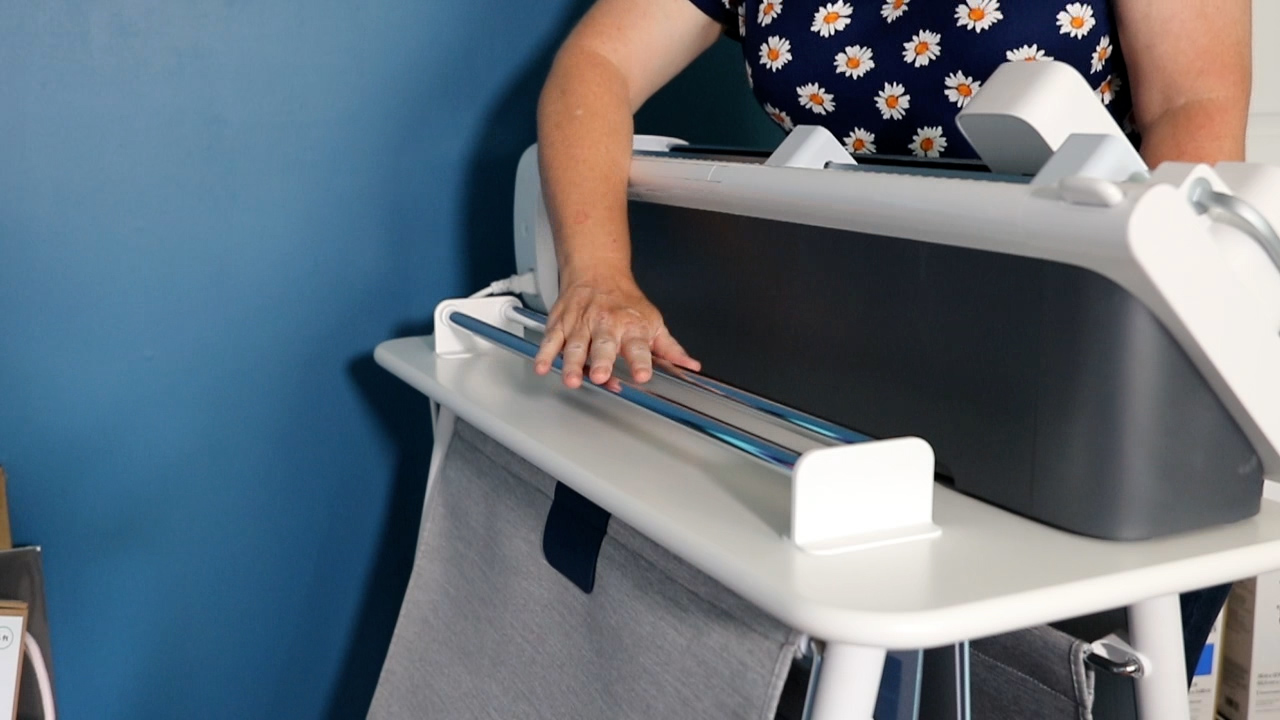
There are catch baskets on both the front and the back to catch your roll of vinyl and cut pieces. These are made from an anti-static material as well. I find these extremely useful in keeping my large cuts off of the floor and preventing them from getting dirty with dust and hair.
Just tilt open the catch baskets and they have a stop that holds them open. If these get pulled on, the stop will break away, however, it is easily reconnected. This is a great feature so you do not have to worry about someone pulling on the baskets and breaking them.
Mat Hooks
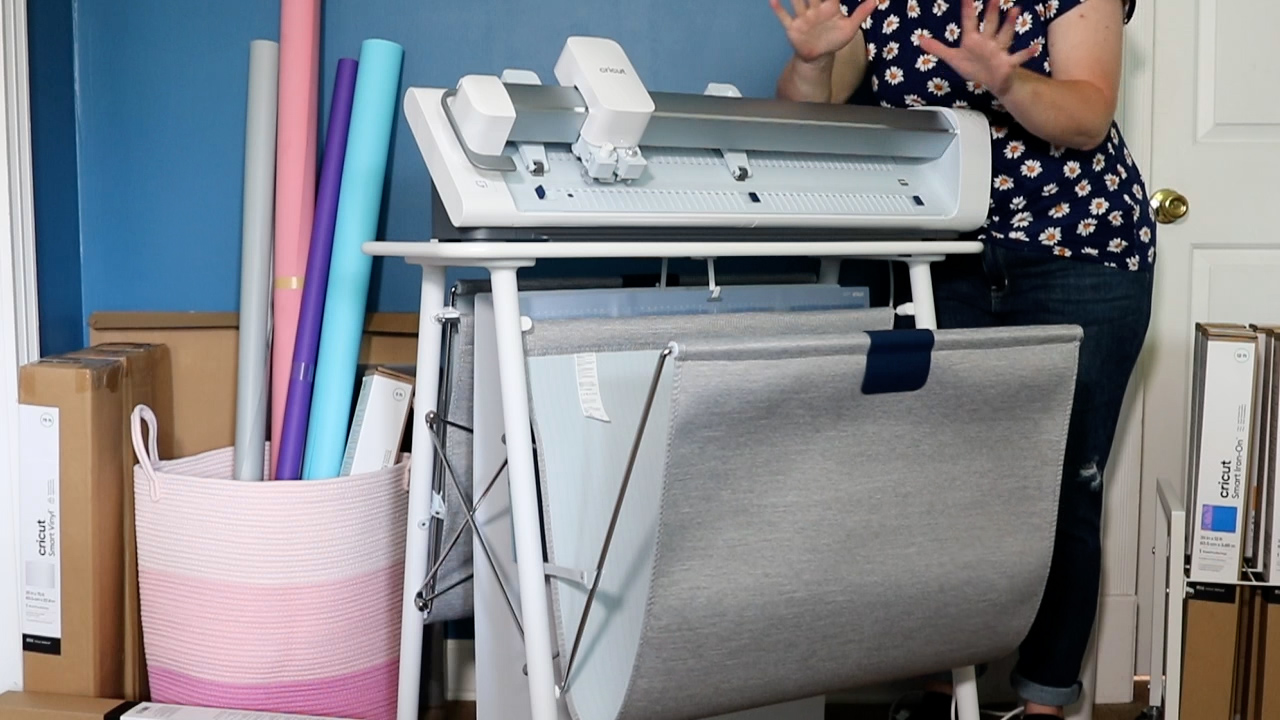
There are two hooks on the inside of Venture that are used for hanging your mats. Open the catch basket and slide the mat in the opening then add the mat to the hook using the provided hole. This is definitely one of my favorite features as these mats are large and can be difficult to store.
Locking Wheels
The wheels are perfect for moving Venture around your home to use in different rooms or moving out of the way if you need the space. They do lock into place if you want to keep the machine secure.
Materials Cricut Venture Can Cut
This machine can cut so many materials! With a lot of professional-grade cutting machines, materials are limited to only vinyl products. However, Cricut Venture can cut 100s of materials. You can actually cut anything that a Cricut Explore machine will cut with this machine. Let’s walk through some of the options.
Smart Materials
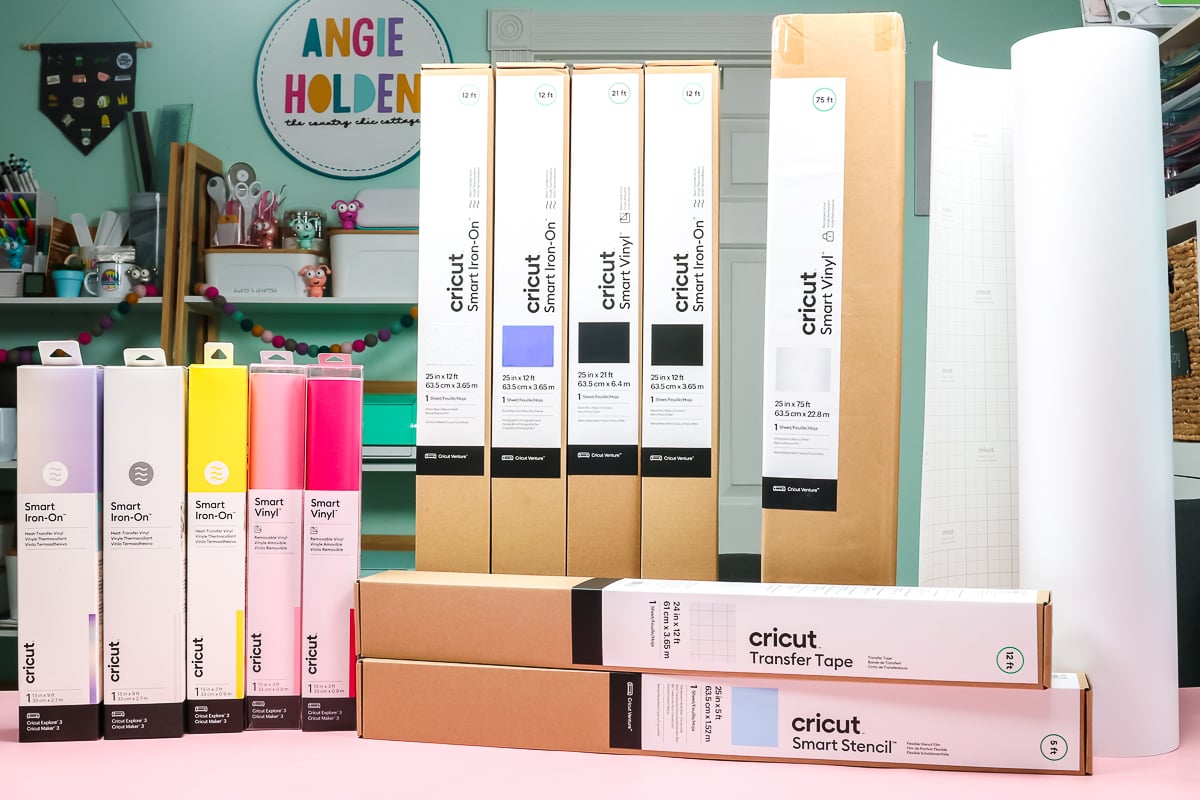
To cut without a mat in Cricut Venture, you will need to use Cricut Smart Materials. You can find Smart Materials in the following sizes:
- 13 inches wide – 5 , 12 , 21, and 75 feet long
- 25 inches wide – 5 , 12 , 21, and 75 feet long
Smart Materials include iron-on, vinyl, and stencil vinyl. There is also wide transfer tape to go with these materials for the application.
There is also Smart Paper Sticker Cardstock which is a cardstock with an adhesive on the back. It now comes in 13 x 25 inch sheets as well as 13 x 13 inch sheets.
Materials on a Mat
If you want to cut other materials or brands, you will need to put those on a mat. There are so many materials that you can cut on a mat! I cannot mention them all in this post but here are some ideas!
Cardstock (in new larger sizes!)
You can cut cardstock on a mat with this machine in any size as long as it fits on the mat that you have. Cricut has even released 24 x 28 sheets of cardstock so that your paper projects can go even larger. You can see an example of that above.
Other Material Types
Want more material options? Here are a few ideas of some of the things you can cut with Cricut Venture:
- Iron-on or HTV
- Vinyl
- Bonded Fabric
- Felt
- Acetate
- Wood Veneer
- Infusible Ink Sheets
- Faux Leather
- Magnetic Sheets
- Adhesive Foil
- Copy Paper
- Craft Foam
- Faux Suede
- Stencil Film
- Poster Board
- Sticker Paper
- Kraft Board
- Vellum
- Window Cling
- and so much more!
I thought I would cut a few of those materials just to prove this machine works! I cut the first 8 materials in the list above and was super impressed. It cut all of these materials wonderfully and the speed was so impressive to watch!

Cricut Venture Print Then Cut
Yes the Venture can do print then cut and the sizes got even LARGER! If you have a large-format printer, you are going to love Cricut Venture and making print then cut projects faster than ever before!
Print Then Cut Sizes
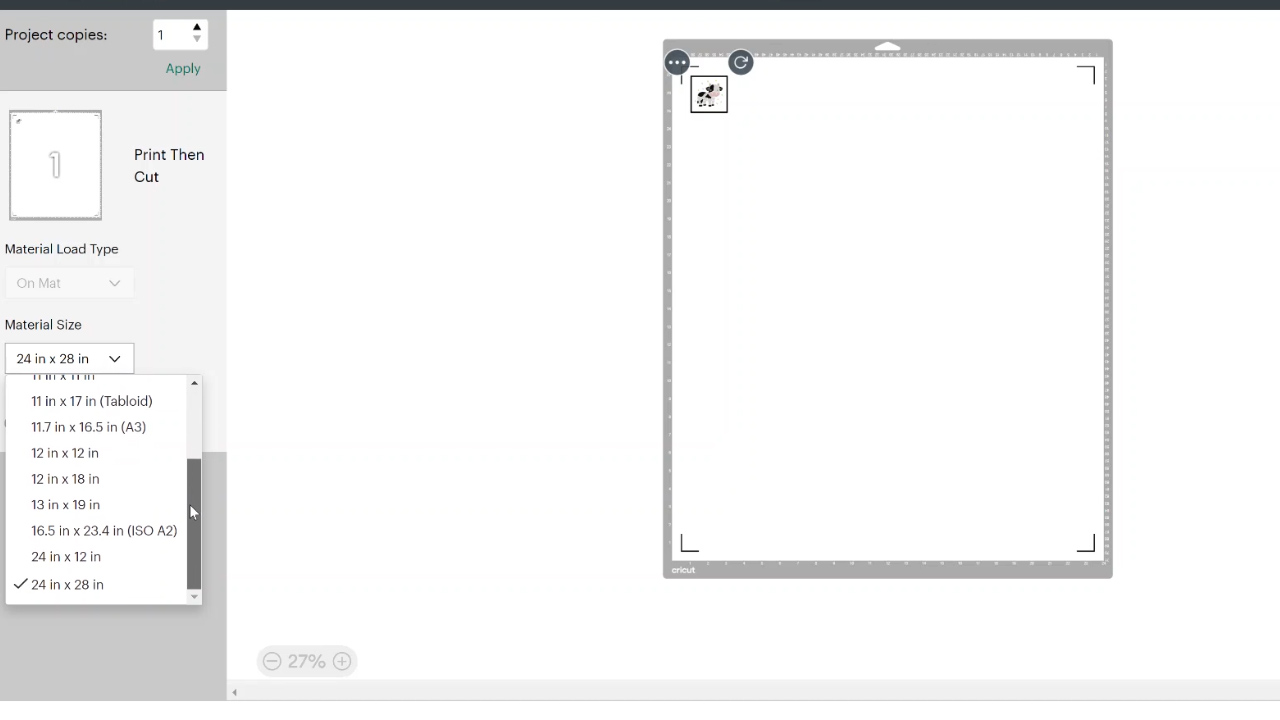
Now you can go even larger with print then cut! The Venture opens up print then cut sizes up to 24 x 28 inches! You can see some of the sizes that you can print below.
How Does Print Then Cut Work
Let’s chat about print then cut. It is similar to the other Cricut machines and this is a brief overview.
Designing in Design Space
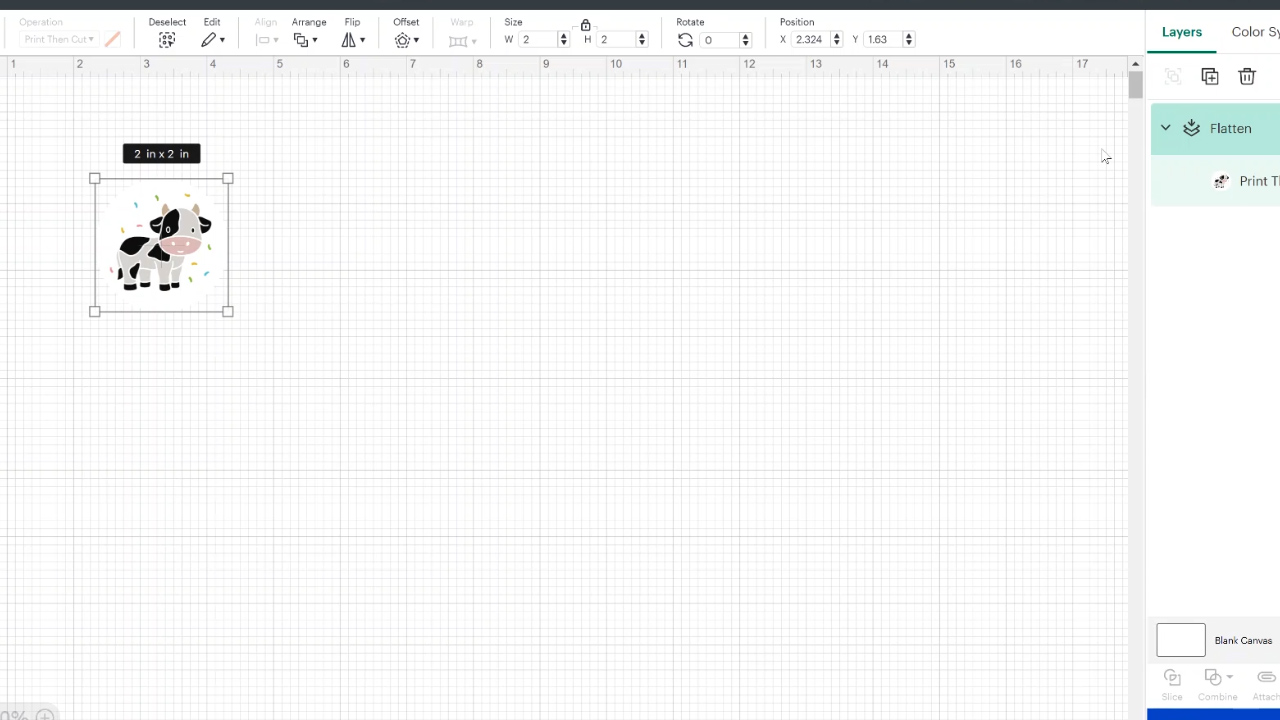
Add any design to Cricut Design Space. You can flatten a cut file if you would like to make it a printable file. Here I added a cute party cow to a circle and flattened it.
Printing Your File
Then click make it. You should see the file you are printing on a sheet of paper with registration marks in the corners. Change your paper size to whatever you are using to print. Then I changed my number of copies to 12 and clicked apply.
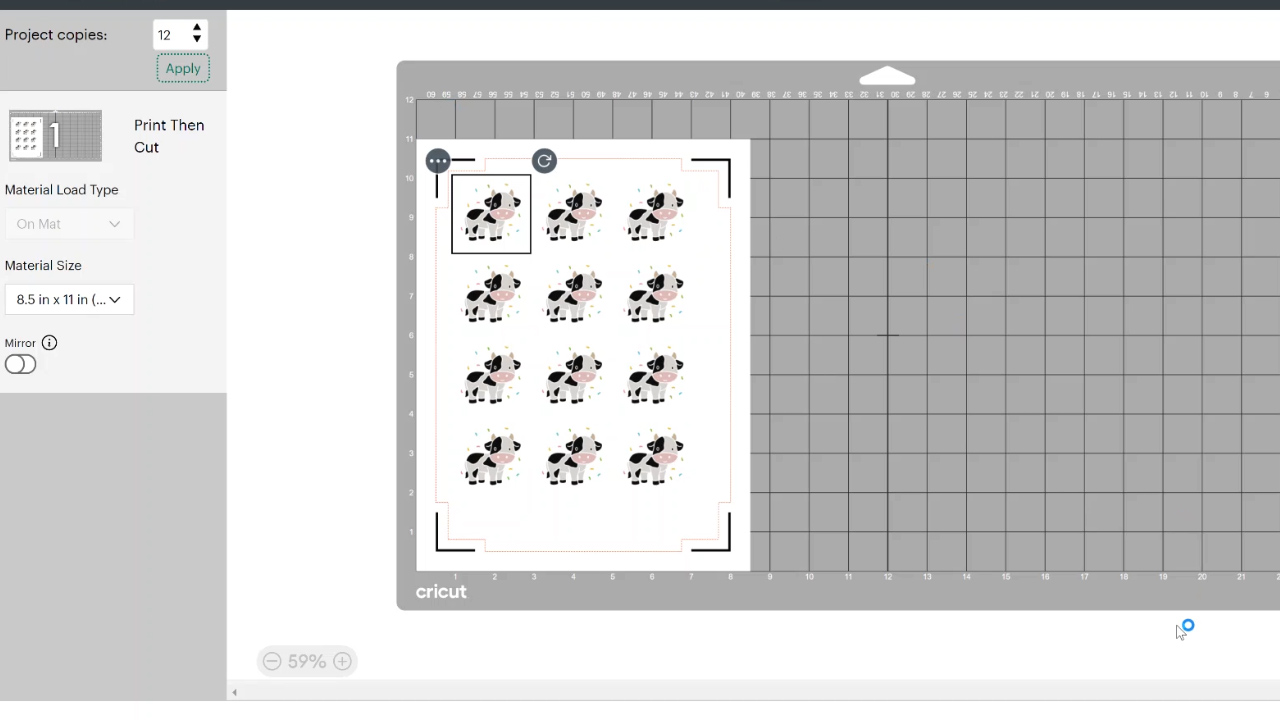
Click continue and you will be able to print your design from this screen. I like to use the system dialogue box to change my paper type and quality setting to get the best cut possible. Then, again, Design Space will tell you what tools you need to perform the cuts.
Cutting
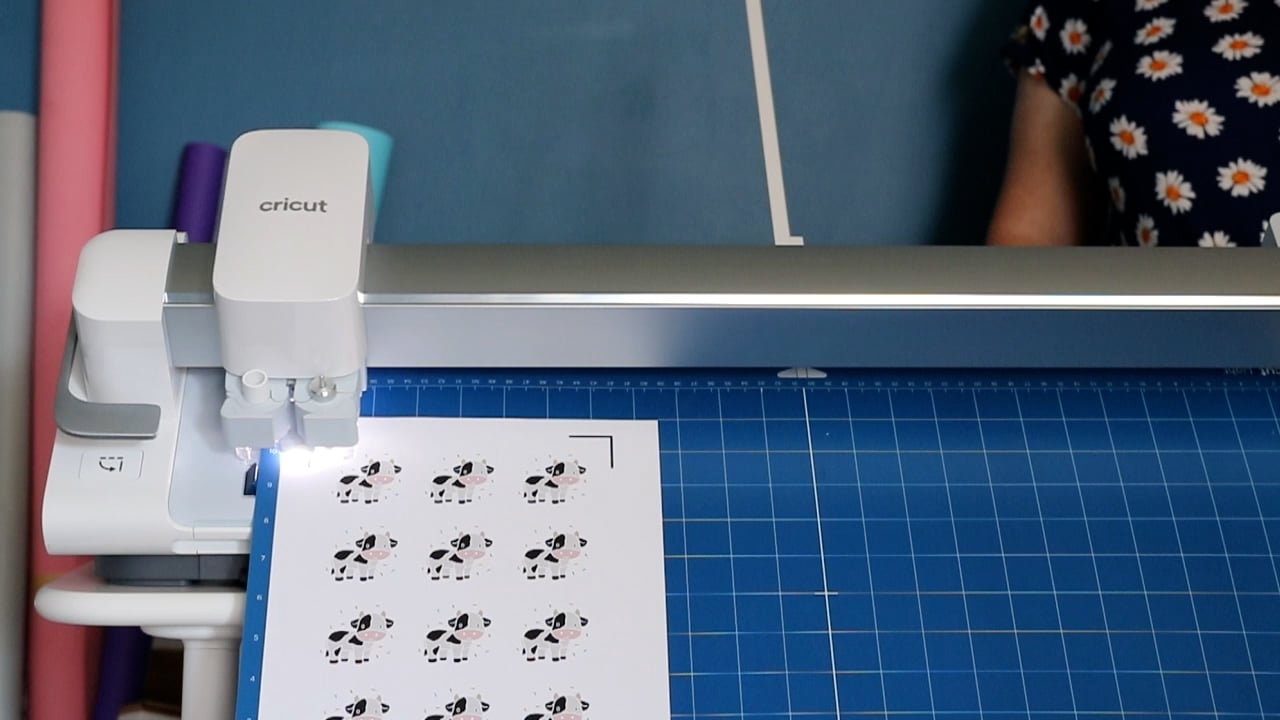
Add the printed sheet to your mat. Make sure you add the mat in the same orientation as is shown on the screen in Design Space. Then add your mat to the machine similar to the way we did above. Once you press go, Cricut Venture will read the registration marks then start to cut around your design.
Finishing Your Project
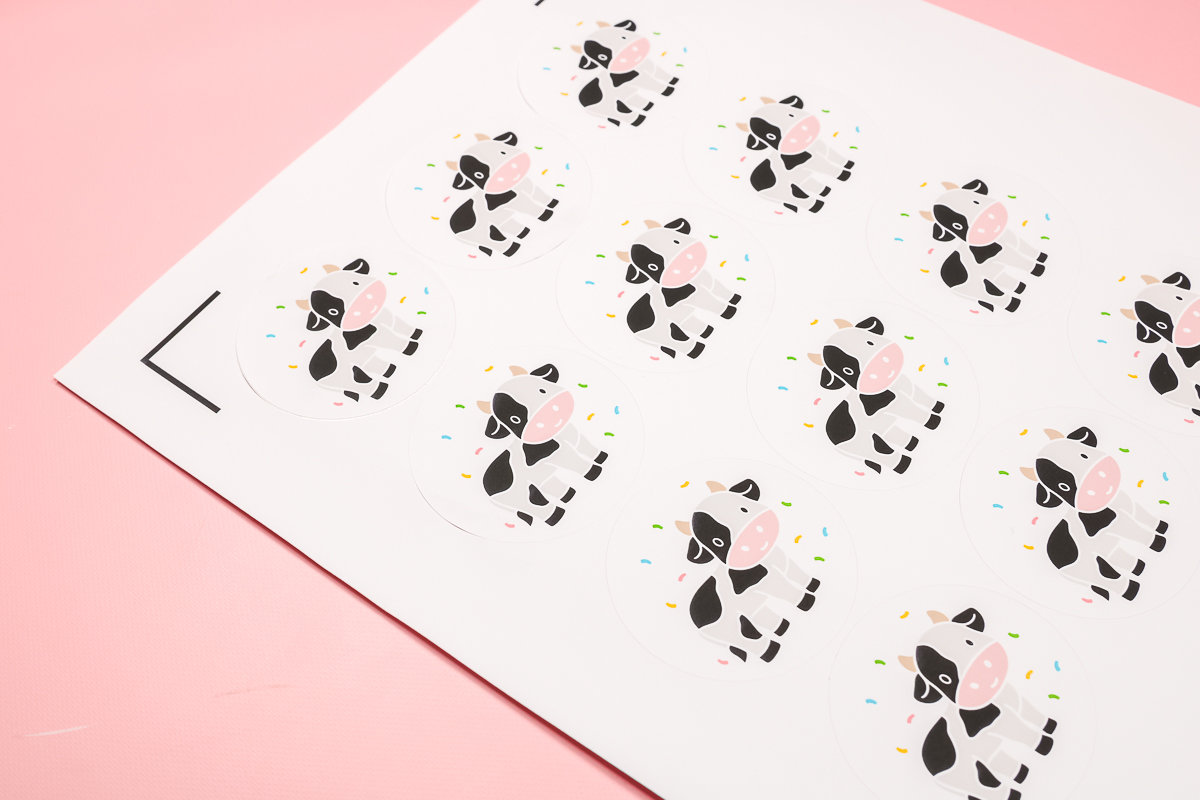
Remove the mat from the machine in a similar manner to above. Then remove your sticker sheet. I used Cricut Printable Vinyl for these stickers and the kiss cut was great! This means that the stickers remove from the sheet but the backing paper on the sheet remains as one piece.
Cricut Venture Matless Cutting
Now let’s take a look at cutting without a mat. You must use Smart Materials for Cricut Venture in order for it to do matless cutting. In this example, I am going to be using 25-inch wide smart vinyl but the same steps would apply to any matless cut.
Adding Design to Design Space
I picked a cute design in Cricut Design Space and resized it to 24 inches to try a cut at the maximum width.
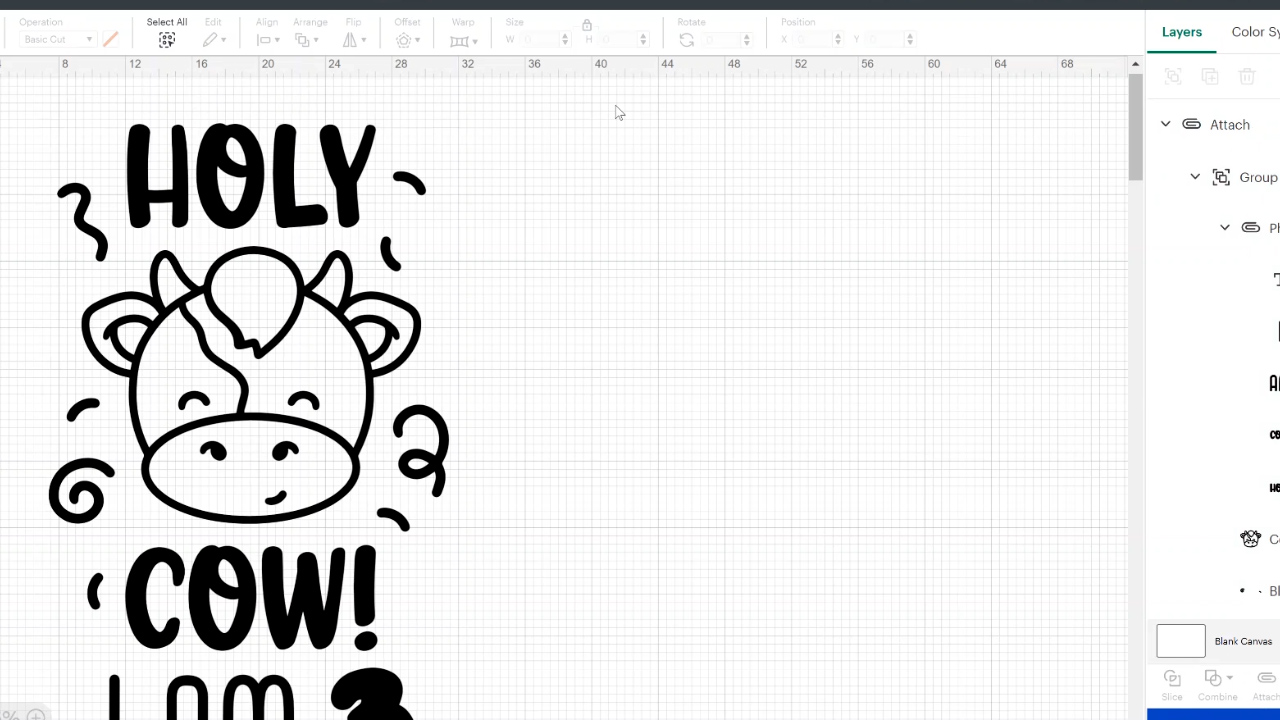
Click make it to start your cut. Cricut Design Space will tell you how much material you need for the cut. Do not worry about cutting off a piece this length as Cricut Venture will measure the material for you.
REMEMBER you need 3.25 inches extra in length for any design that you are cutting for the machine to grip the material. It is best to just add a long roll of material to the machine and allow Venture to cut and measure the material.
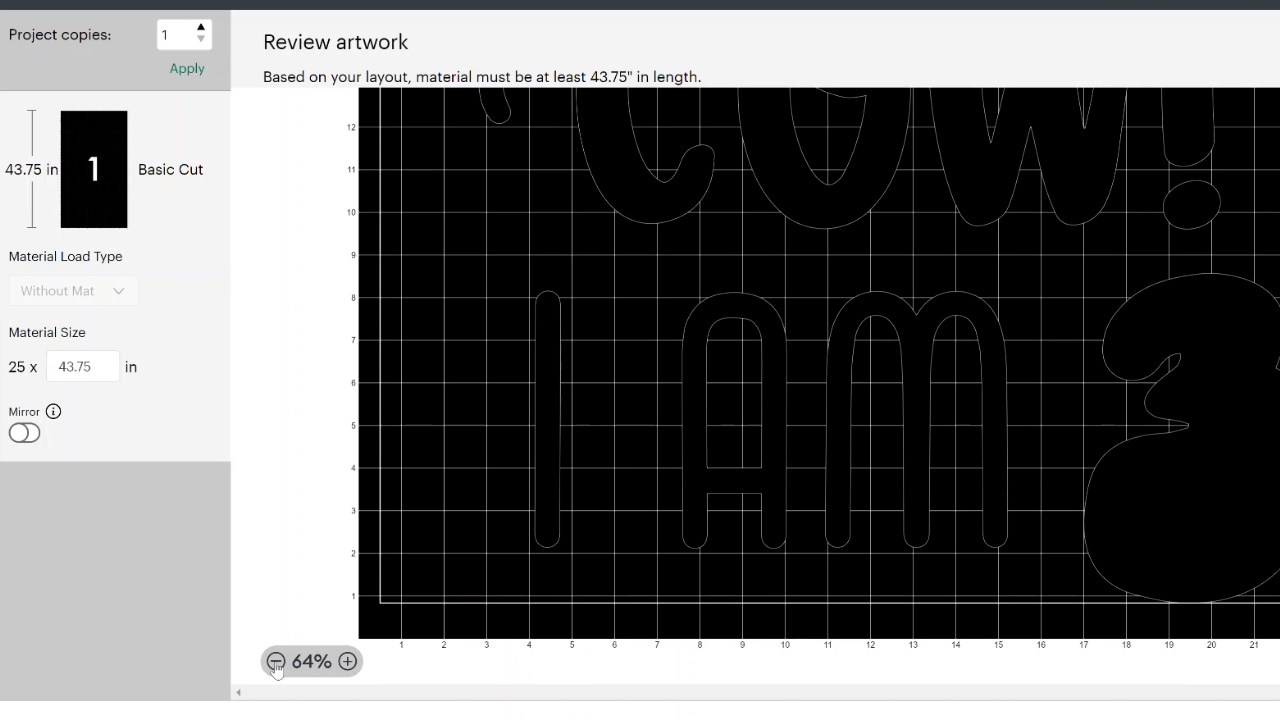
You can change the number of project copies if you would like on this screen as well and Design Space will continue to calculate how much material is needed.
Setting Auto Cutoff Blade
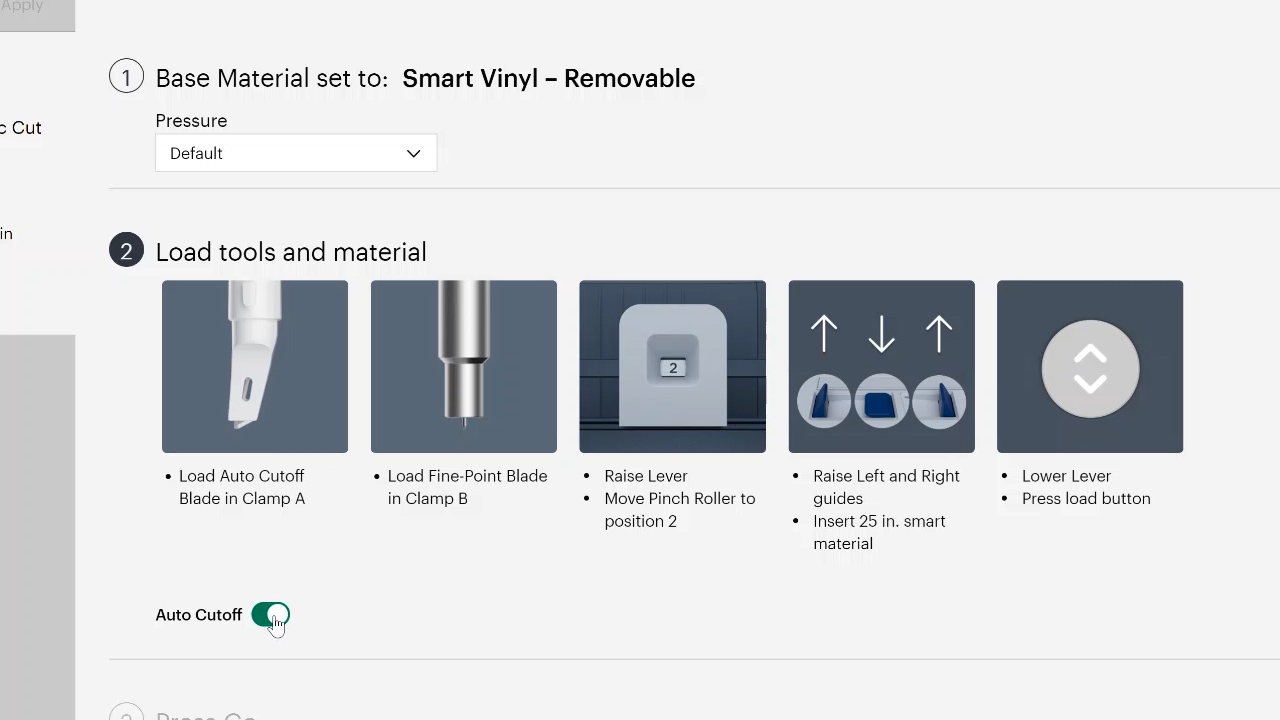
Click continue and you will see the cut screen where you pick your material. Once you material has been chosen, again you will see the set of instructions for cutting. However, there will also be a toggle to use the Auto Cutoff Blade.
If you switch this toggle to on, the instructions will change telling you to add that blade to your machine. This blade will automatically cut your roll of material off as soon as your cut is finished. The cut piece of vinyl will then fall into the catch basket on the front of your docking stand.
NOTE: This is optional. You can use the manual cutoff blade instead that comes with Cricut Venture.
Adding Material to Machine
Follow the directions and add the Auto Cutoff Blade to clamp A and the fine point blade to clamp B. Make sure your rollers are in the right location and that the correct guides are raised. Then raise the pinch rollers and add your roll of material from the back of the machine.
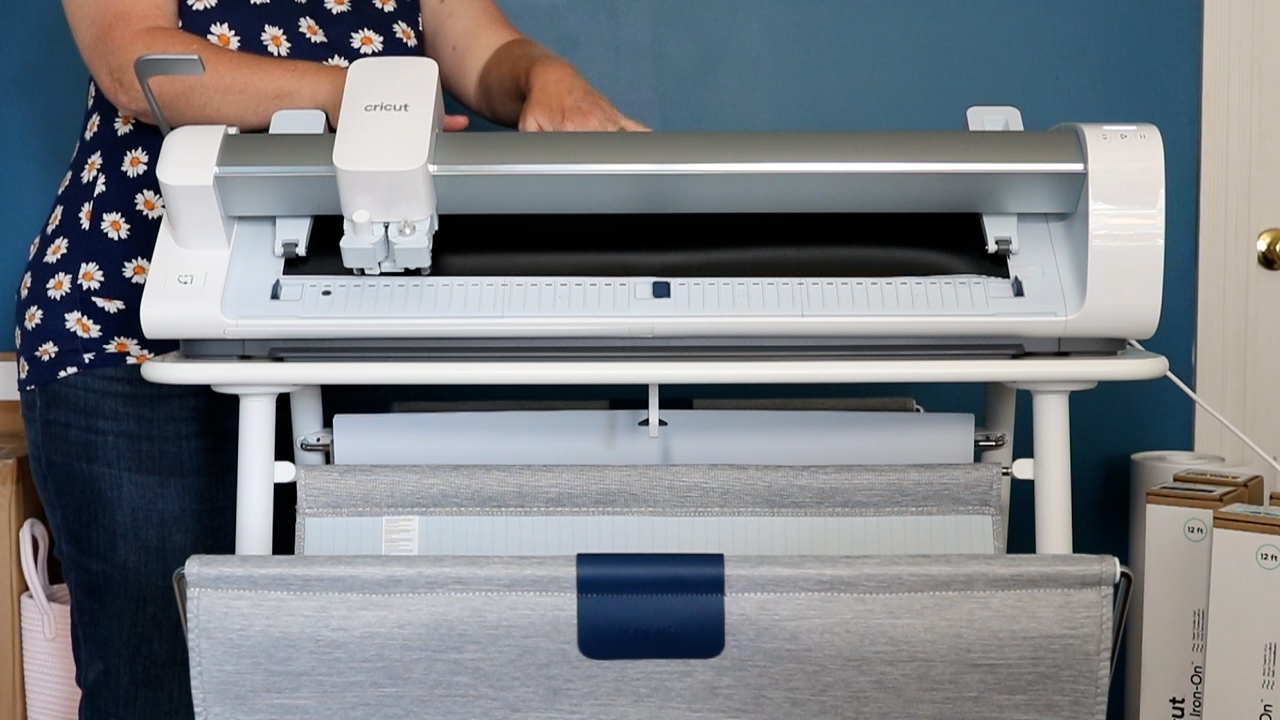
Since I am using the docking stand, I am using the roll holder on the stand. If you are using the machine on a table, be sure to add the roll supports to the back of the machine.
When feeding in the material, make sure it is going under the guides on both sides. Remember the vacuum will start when you begin to feed in your material. Be sure to feed until the material goes between the blue guides at the bottom.
If you are using the docking stand, make sure the catch baskets on both sides are open before starting your cut.
Cutting Materials Without a Mat
Lower the pinch rollers then press go on the machine once the light is flashing. The machine will start cutting your design. You may notice that the machine feeds the roll of material in first. This is because it will measure to make sure you have enough material. This is where the catch basket in the back will come in handy as the material will unroll.
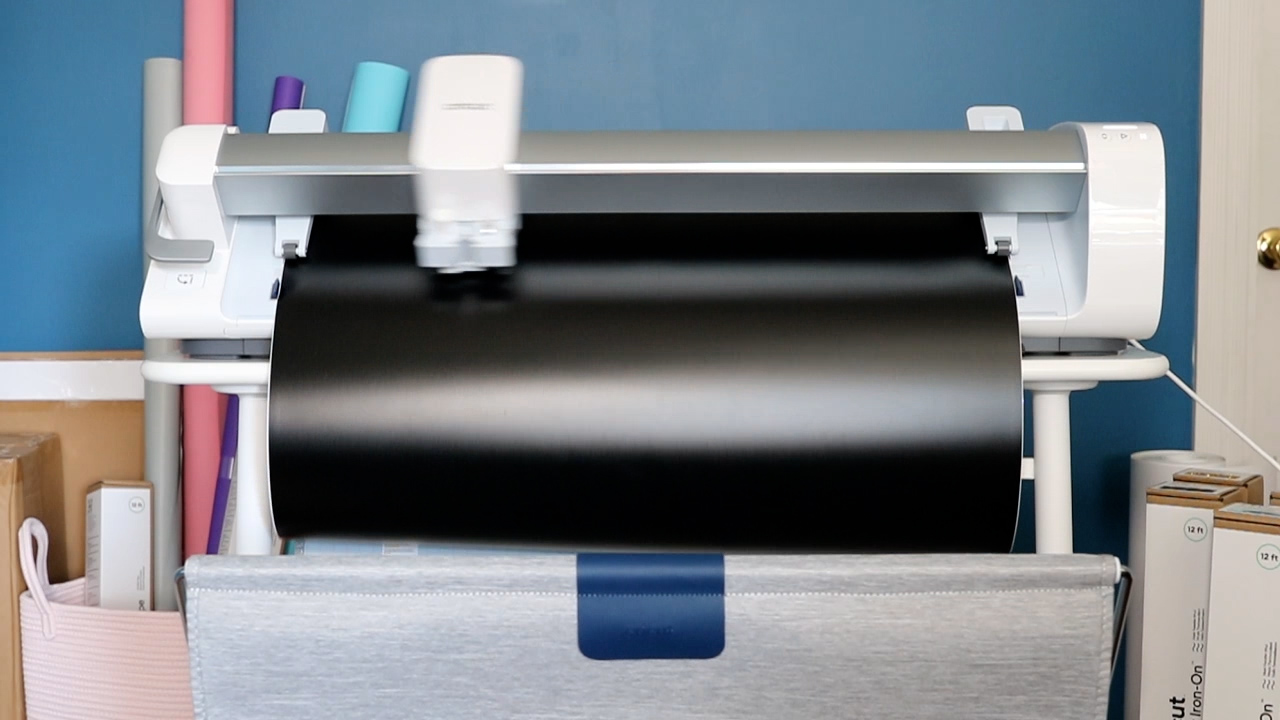
Once the cut is done, the machine will automatically make a cut across the entire roll of vinyl and the cut piece will fall from the machine.
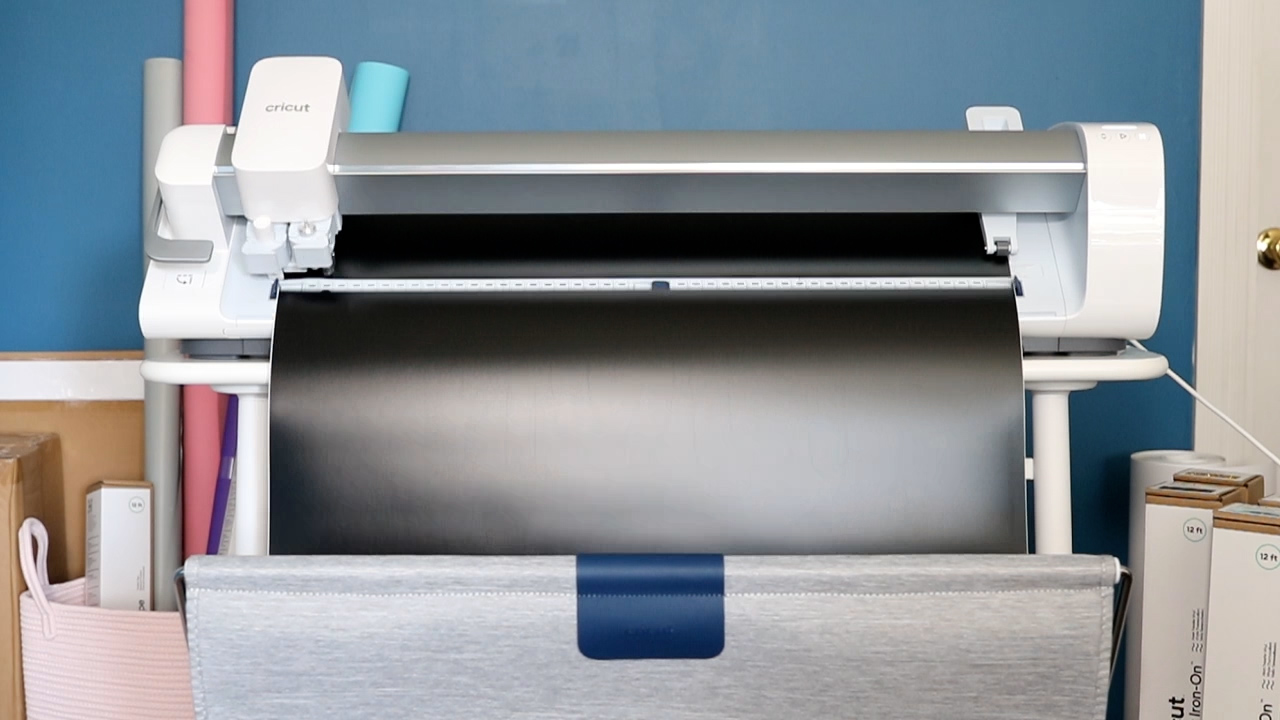
Finishing the Cut
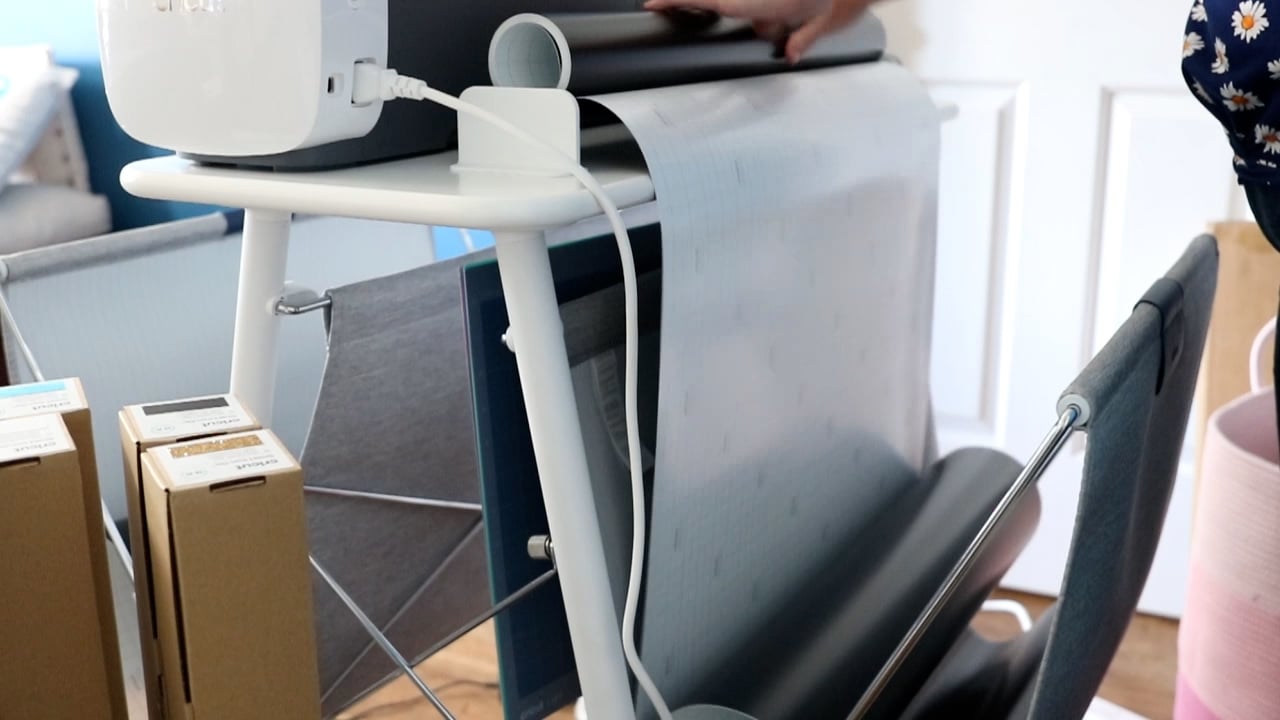
Now that your cut is complete, you can grab your finished cut piece from the catch basket on the front of the machine. To remove the roll of material, raise the arm to raise the pinch rollers then pull the roll out from the back of the machine.
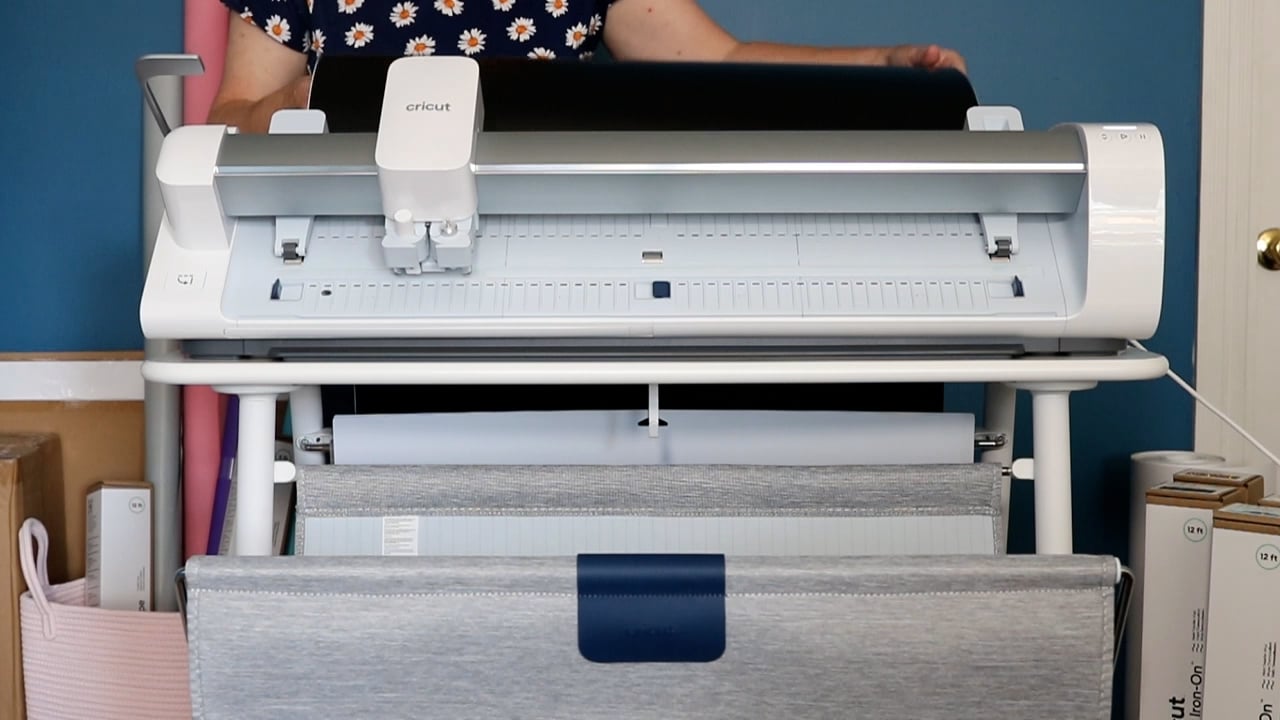
You may notice that your roll has unwound some in the back. I just roll the material back up for storage for my next project.
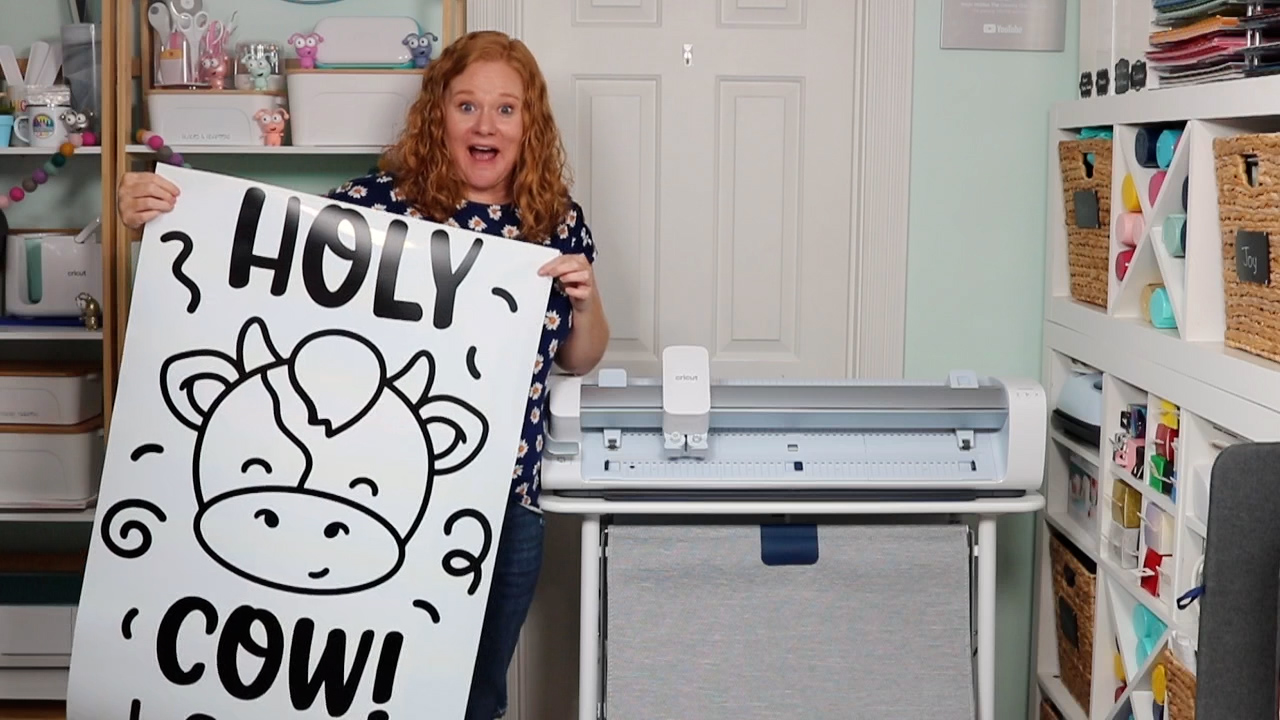
In this case, I cut a vinyl wall decal for a party. I weeded the entire thing and I love how it turned out! Now you can make huge wall decals for any room!
Cricut Venture Maximum Cut Sizes
What are the maximum cut sizes for Cricut Venture? You do need space around your design for the machine to grip the material. Therefore, these sizes are the maximum that you can cut from each type of material. Design Space will prompt you if your design is too large, however, here is a quick list for your reference:
- 25 inch wide Smart Material – 24 inches wide by 12 feet long (you can repeat these cuts up to 75 feet)
- 13 inch wide Smart Material – 12 inches wide by 12 feet long (you can repeat these cuts up to 75 feet) NOTE: This is wider than the Explore 3 and Maker 3 can cut these same materials.
- 13 x 25 Smart Paper – 12 x 22 inches
- 12 x 24 mat – 11.75 x 23.75 inches
- 24 x 28 mat – 23.75 x 27.75 inches
- Print then cut – the maximum size for printing is 24 x 28 inches but you still need room for the corner registration marks when printing.
IMPORTANT: Glitter Iron-on does not do as well on longer cuts so it is recommended to keep designs on that material to 5 feet.
Cleaning Your Cricut Venture Machine
With any professional cutting machine, you will need to do periodic cleaning to ensure the longest life for your machine. Approximately every 100 hours of use, Cricut Design Space will prompt you to clean your machine. You can also do the following cleaning steps if you see any debris.
Cleaning the Rail
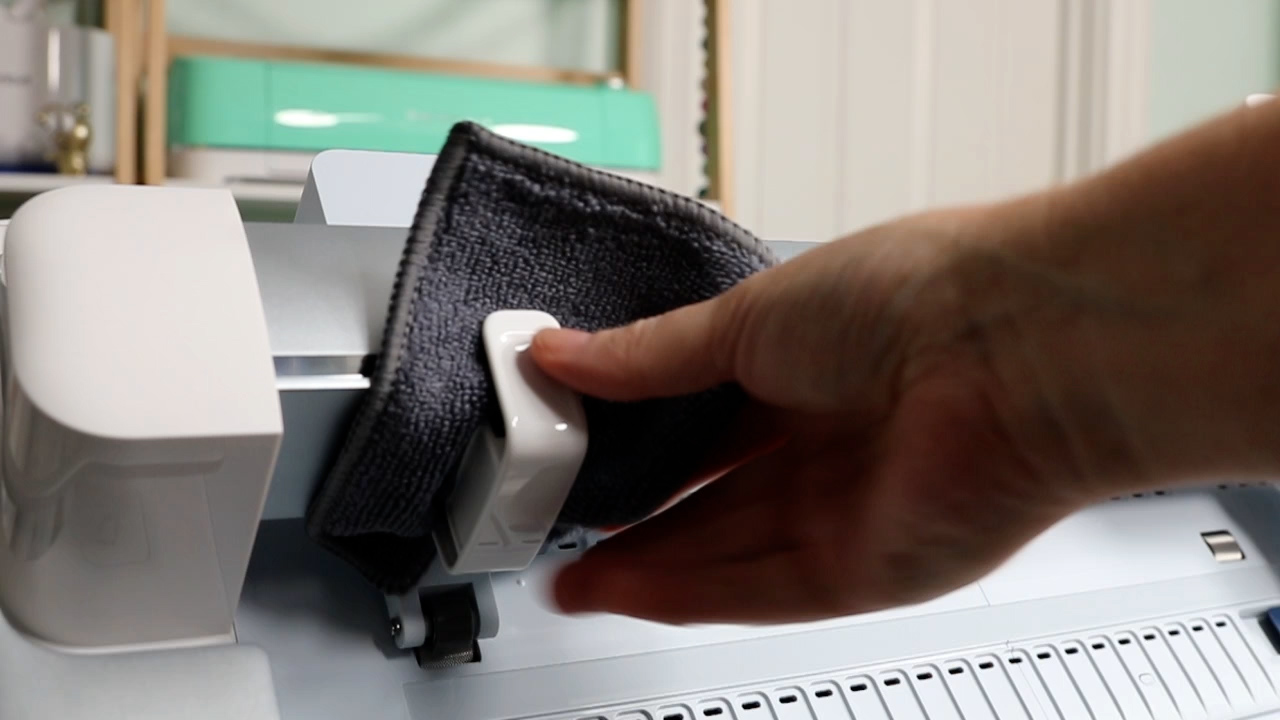
Add rubbing alcohol to the microfiber cloth in your cleaning kit. Use the clip in the kit to add the cloth to the rail. Run the clip up and down the rail to clean the grooves. Remove the clip when complete.
NOTE: You can move the head by hand without damaging the machine.
Cleaning the Rollers
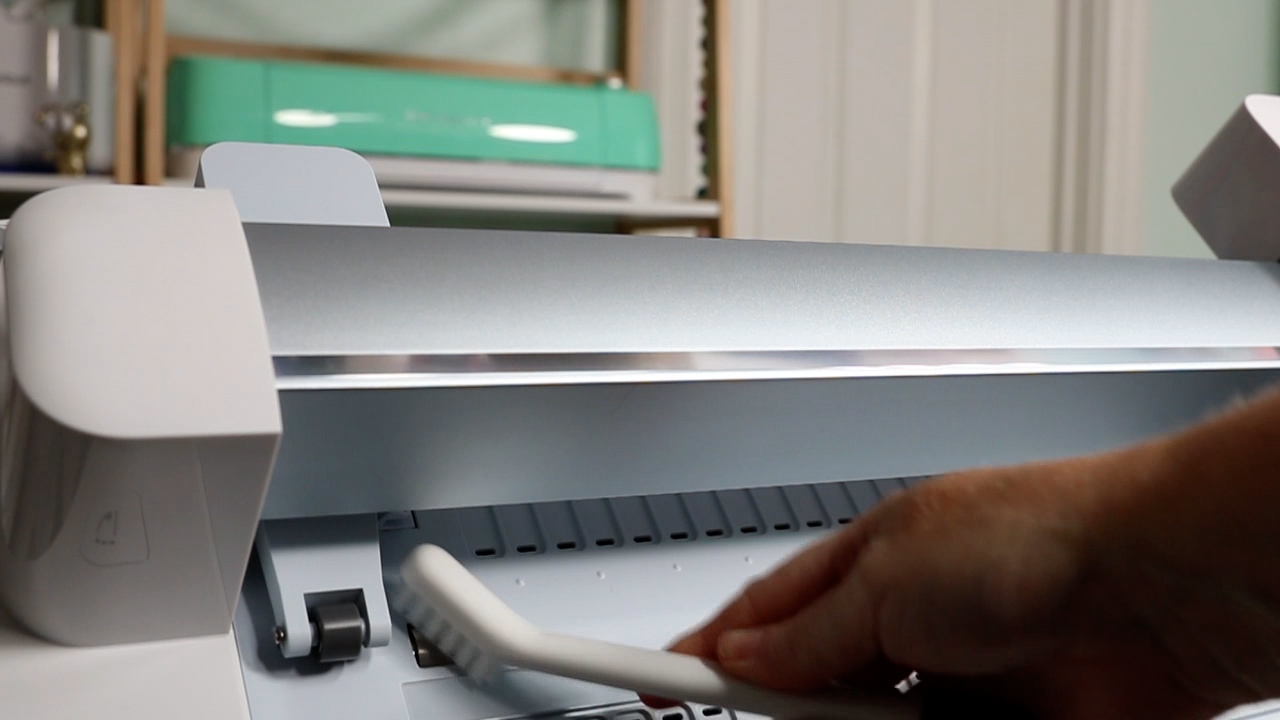
Add some rubbing alcohol to the brush in the cleaning kit. Lift the pinch rollers and move them out of the way by hand. Then brush off the roller. You can start the cleaning cycle in Cricut Design Space so that the rollers turn during this step.
Purchasing Cricut Venture
Are you ready to invest in Cricut Venture? Well, here are all of the details you need for purchasing!
Pricing
When released the MSRP on the Venture is $999. The cart is an additional $349. There is a bundle that is $1249. All of those prices are in USD and are not guaranteed. You may find it for lower on sale or that the pricing goes up at a later date. I do not have international pricing.
Where to Buy
The machine does not go on sale until July 24, 2023 at 10 pm ET (9 pm PT, 11 pm CT, 12 am ET).
When it is released, the machine will be on sale online at the following retailers:
- Cricut (NOTE: Financing will be available.)
- Michaels
- HSN (Stand is only available here until August 2023.)
HSN will be the ONLY retailer to have the stand until August of 2023. So if you want the stand, be sure to purchase from there.
When Does It Go on Sale
In the US and Canada, the machine goes on sale July 24, 2023. I do not have release dates for other countries.
Warranty Information
The warranty for the machine is for 1 year. You can purchase an additional warranty in the US when you buy your machine.
Cricut Venture Review
What do I think about Cricut Venture? Do you need this machine? Here are my thoughts!
Who Needs This Machine
I think there are a few different types of people who will purchase this machine:
- Those that are looking to make even larger cuts for their crafting.
- Craft business owners that want to stop running with multiple Cricut machines and want a more robust option.
- Cricut lovers who just have to have the latest machine and REALLY want to try the Venture!
My Favorite Features
Overall I love the Cricut Venture! The machine itself is the most durable and accurate Cricut machine ever. There are a wide variety of great features but here are my top favorites:
- The angle on the machine. This is a game changer for large-format cutting machines! This feature alone makes this a machine I can actually USE in my small craft space.
- The docking stand. Every feature of this stand makes it a must-have for me. I seriously think the stand is a great addition to this machine and something you should try to add to your purchase. The stand makes this machine even easier to operate in any space.
- Large mats. Being able to cut larger projects on and off the mat makes this machine a game-changer for those of us that dream of larger projects.
- Cutting speed. You really have to watch the video or see this machine work in person to appreciate just how fast it is! I have never seen anything cut this fast! Plus, the fact that it can cut faster on and off the mat was super important to me.
- Cutting a variety of materials. Most professional cutting machines are very restrictive on the materials you can cut. This machine can cut 100s of materials and all at that fast speed with incredible accuracy!
I hope this helps you to choose whether or not you need the Cricut Venture. Stay tuned for even more tutorials using this machine as I will have more to come!


I just got my venture. Is there a way to cut multiple colors/images on the one mat. For instance I have svg files from Dreaming tree and a particular image needs to be cut 3 times. Is there a way to put three sheets of cardstock on the one mat and not have to change every time. Thank you for your very imformational tutor.
You can do that. On the mat screen in Design Space you’ll move the objects to the area of the mat that matches the color you’re wanting to cut. All of the designs will be the same color on the screen but you will dictate the color based on what you put on the mat. I hope that helps 🙂