
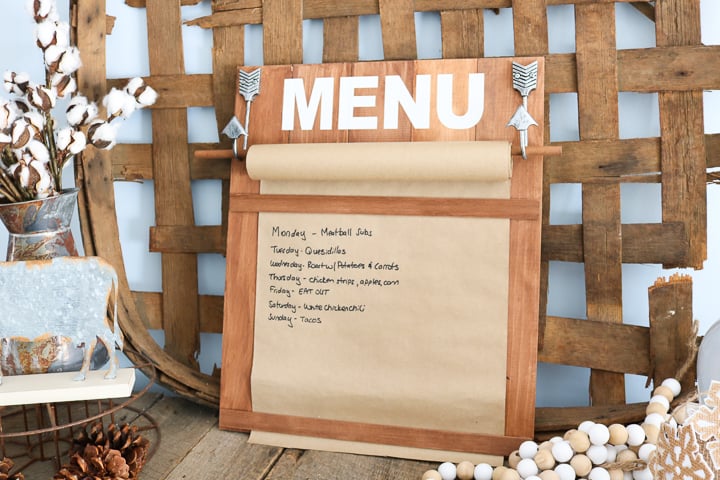
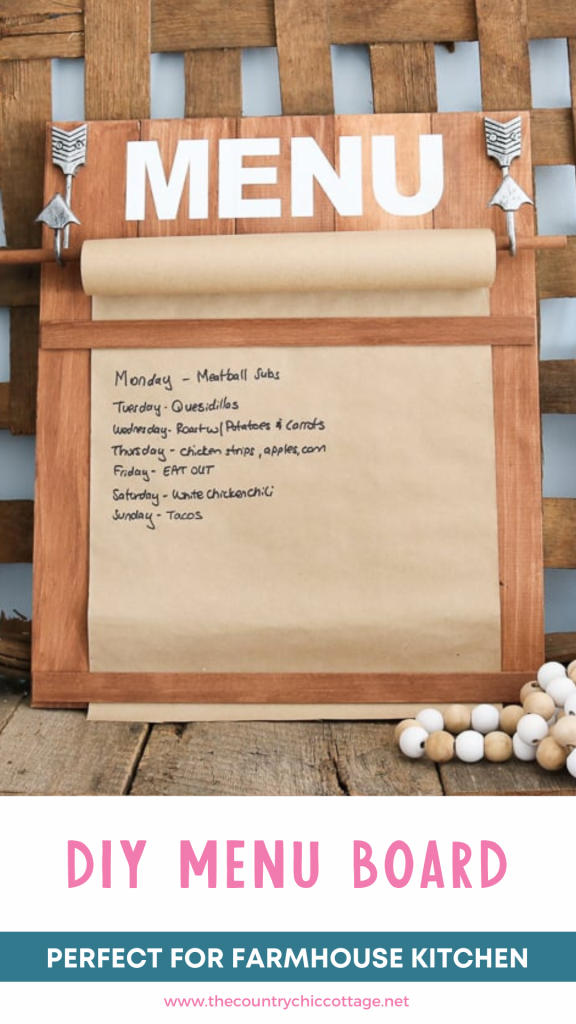
Create a DIY menu board with this easy-to-follow tutorial. No farmhouse kitchen is complete without a rustic menu board!
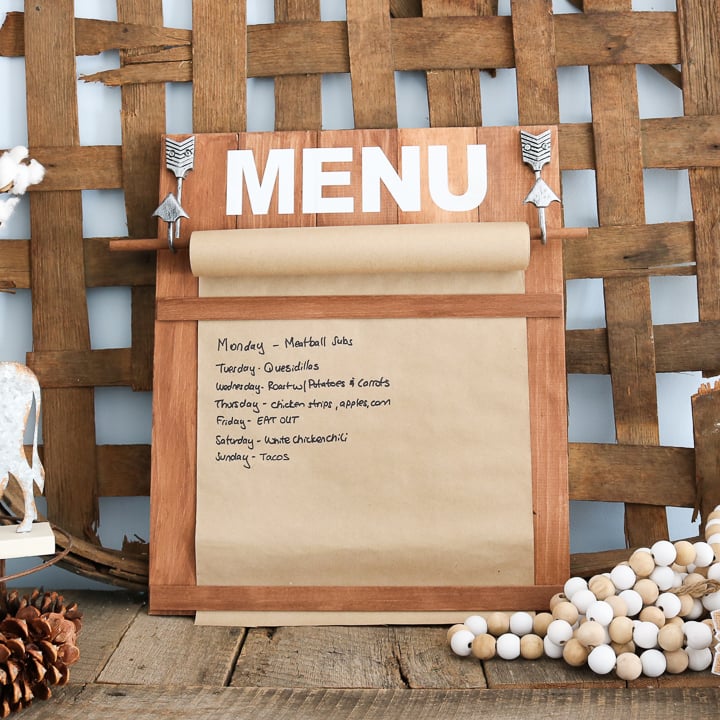
How To Make A DIY Menu Board
I think every family faces a similar problem: people wondering what’s for dinner. In the past, I tried announcing my plan for dinner in the morning, but the kids would forget and ask me again and again.
I got tired of repeating myself! So I decided that our kitchen needed a menu board so that I could write down my menu plan for the entire week and never have to answer the “what’s for dinner?” question again.
If you love all things farmhouse style, you are going to love how this one looks in your farm kitchen. My favorite part is the kraft paper roll! You can write anything you want on it, then pull it down and tear it off when you want to change it up.
If you like to save time and money through meal planning, this kitchen menu board is the one project you need to organize your home.
NOTE: Complete your farmhouse-style kitchen with some of our other projects, including Kitchen Wall Storage, Utensil Organizer, and ‘Fresh Eggs’ Sign.
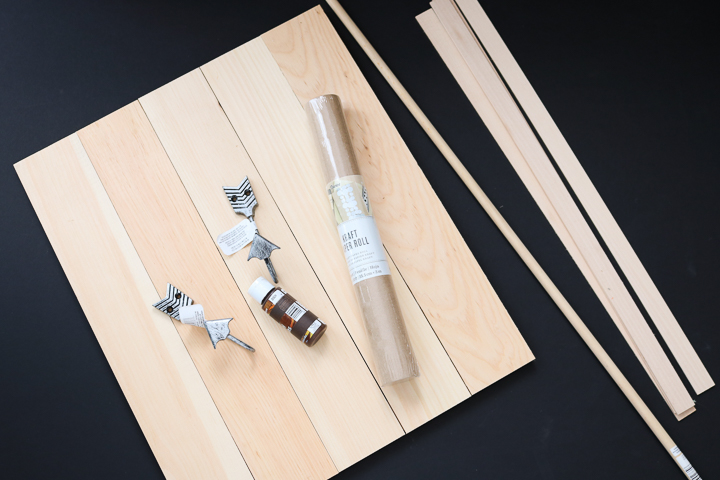
Supplies Needed To Make DIY Menu Board
- Unfinished wood pallet sign
- Kraft paper roll – Make sure the roll isn’t wider than the width of your pallet sign
- Wood stain
- Arrow hook (2 required) – I used silver, but you could use gold or dark finish depending on your kitchen
- 1/2″ dowel rod (at least 17 inches long)
- 1″ basswood strips (2 required)
- Saw
- Screws
- Screwdriver
- Paintbrush
- Rag
- Wood glue
- White vinyl
- Cricut machine
- Transfer tape
- Weeding tools
- Cricut Menu cut file
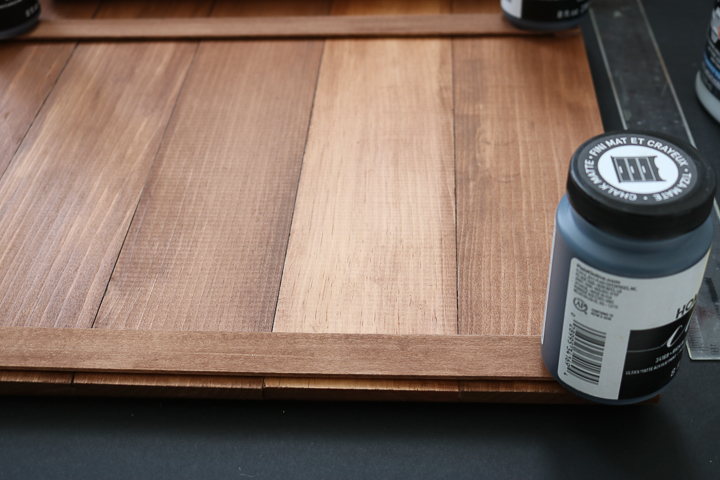
Step 1: Stain Wood Pieces
Start by staining all of your wood pieces and using a wood stain in the color of your choice.
Simply brush on the stain, allow it to sit for a few minutes, then wipe away the excess with a rag. Repeat the same process for the sign, dowel, and wood strips.
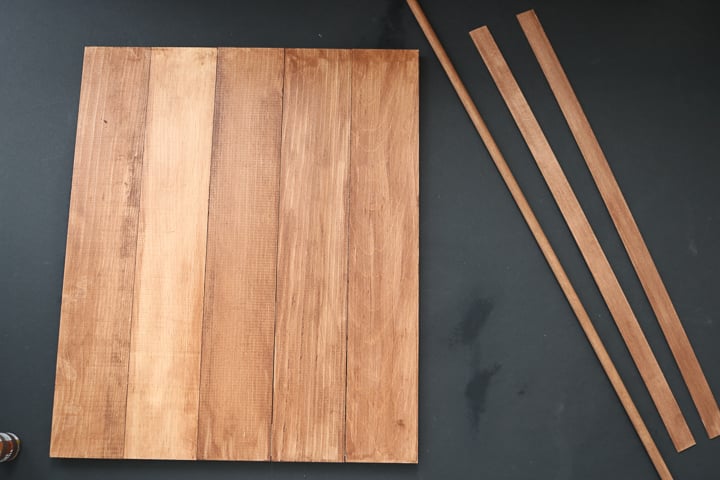
Step 2: Cut Dowel & Wood Strips
Next, cut the dowel and wood strips to size with a saw. Measure and mark the pieces at the appropriate length, and then cut.
You will need a dowel and two wood strips that are almost the width of your wood panel.
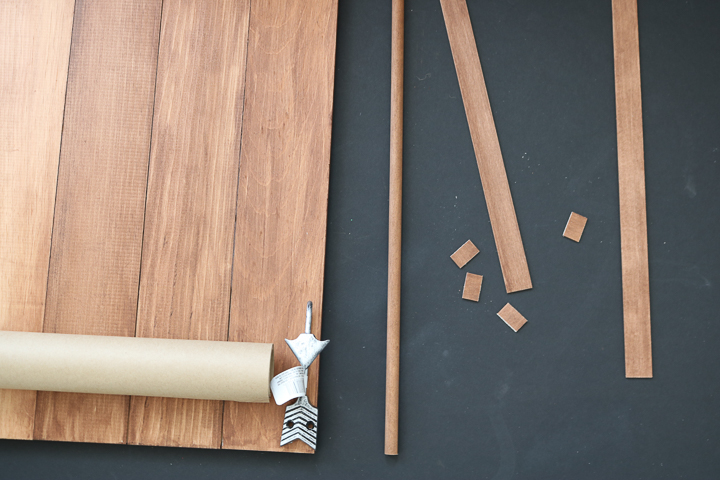
NOTE: You will also need to cut four small pieces from the wood strips to help raise them off the board. Stain the cut ends of each of your pieces and allow them to dry.
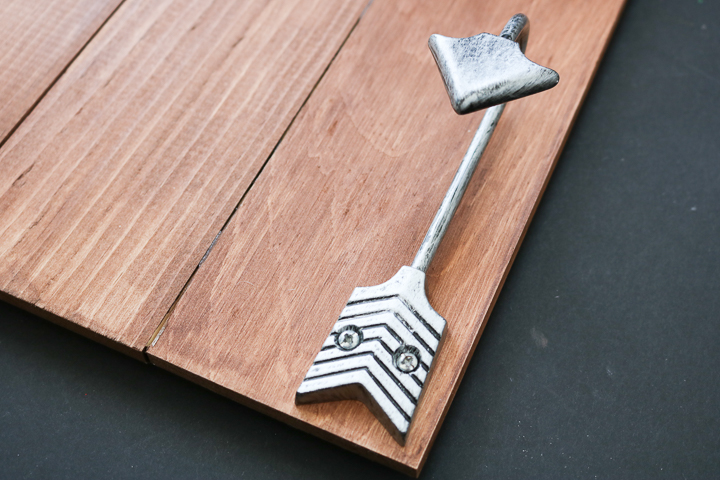
Step 3: Add Arrow Hooks
Once the stain has dried, you can start assembling your DIY menu board. Add the arrow hooks to the top of your board with screws.
Step 4: Glue On The Remaining Wood Stripes
Lay out the remaining pieces onto your wood panel. You will want a short piece of the wood strip under each end of your long wood strips.
Use wood glue to secure everything in place. Weigh down your joints while the glue dries.
Step 5: Add The Word ”Menu” To The Top Of The Board
While you wait for the glue to dry, you can make the word “MENU” and add it to the top of your kitchen menu board. Here’s how:
- Open up the cut file and use your Cricut to cut the word from vinyl.
- Weed away all of the excess vinyl, including the centers of the letters.
- Use transfer tape to remove the vinyl from the backing paper and add it to the wood panel.
Does this process seem confusing? Check out the basics of working with vinyl for more details.
PRO TIP: You can choose to add other words to the top and use this project for other purposes if you wish.
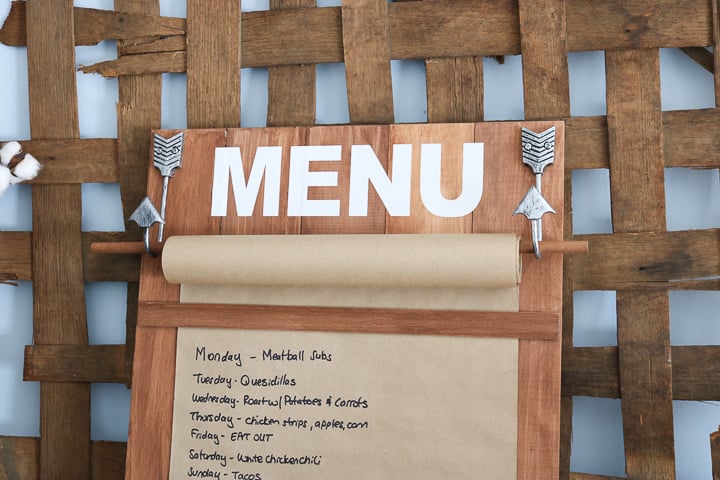
Step 6: Add Kraft Paper
Now it’s time to finish your DIY kitchen menu board by putting your kraft paper roll on the dowel and adding it to your hooks.
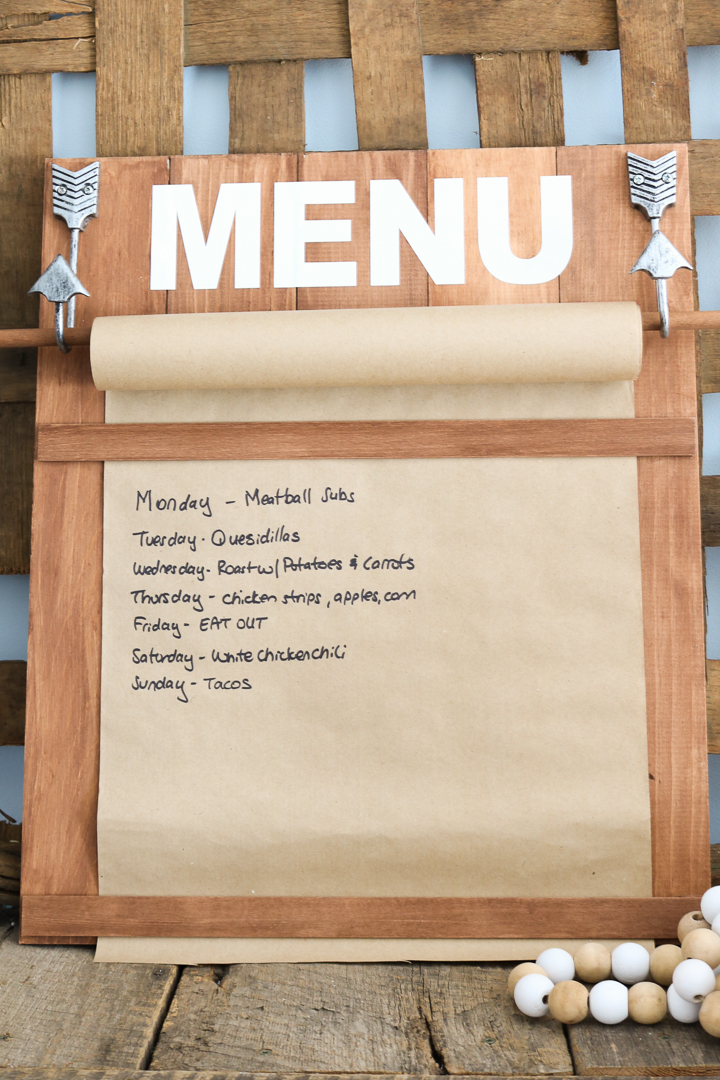
Your DIY menu board is now ready for display anywhere in your kitchen. Write out each week’s menu on the kraft paper, then just pull it down and tear it off at the end of the week. Easy peasy!
So grab your supplies and get started on this farmhouse-style menu board today. You will love how it looks in your home!
FAQs About DIY Menu Board
Here are a few common questions that I often see readers asking about making this DIY menu board. If you have a question, please check if I’ve already addressed it below. If you don’t see your question listed, please leave it in the comments!
Can I Adjust The Size Of This Project?
Yes, you can!
Can I Change The Color Of This DIY Menu Board?
Absolutely! You don’t have to use brown stain for this project. You can use a different color of stain or use paint instead, and the paper comes in other colors as well.
Can I Use Hot Glue Instead Of Wood Glue?
I prefer using wood glue in this project because it’s specially formulated to have a tight hold on wood.
However, hot glue would work if you don’t have wood glue. It just might not maintain a firm bond over time with the wood and stain.
Will The Bottom Wood Strip Break Off When I Rip My Paper To Update My Kitchen Menu Planner?
I haven’t had any problem with that happening. The wood strip is surprisingly strong.
However, if you have concerns that you might break the wood strip or snap it off, simply press down on the wood strip (especially at the end where you begin ripping the paper) while you gently tear away the paper.
What Are Other Ways That I Can Use This DIY Menu Board?
I can see this same board idea used in a variety of ways. Replace the word “menu” with “to do” or “schedule,” and you have another way to organize your home. It could also be a chores board if you have kids that rotate chores each week (or throughout the week).
No matter how you choose to use it, it’s the perfect complement to your Farmhouse Kitchen Decor!
However, if you want a menu board that uses a different design, check out these great ideas from Village Farm Life and Amy Latta Creations.
5 More DIY Farmhouse Inspirations
Do you love this farmhouse-style kitchen DIY menu board and want more ideas? Check out these popular projects!

New to Cricut?

Sign up for our email list to download the Beginner's Guide to Cricut Design Space for FREE today!
Sign up to get the guide emailed to you!


I love the menu board idea. I was thinking I can add a “cutting edge” taken off a foil box or what ever behind the wood strip at the bottom to make it cut off better??
Such a great idea!