Are you ready to try an embossed HTV technique? You will love it and the variety it will add to your iron-on projects. I’m going to test a variety of different materials to see which ones work and which ones don’t so you can decide what to use when embossing HTV for yourself!
This technique involves layering HTV. If you haven’t layered HTV before, check out my layering Iron-on vinyl beginner’s guide.
I first saw this process at Printing United with Siser. I shared a quick video of them showing us their process and everyone loved it so I am back with a full tutorial.
You can watch the entire process and see how each of the different materials works by pressing play on the video below.
How to Emboss HTV
Today I am going to make customized zippered pouches. We’ll test a variety of different materials to see how they work with the HTV.
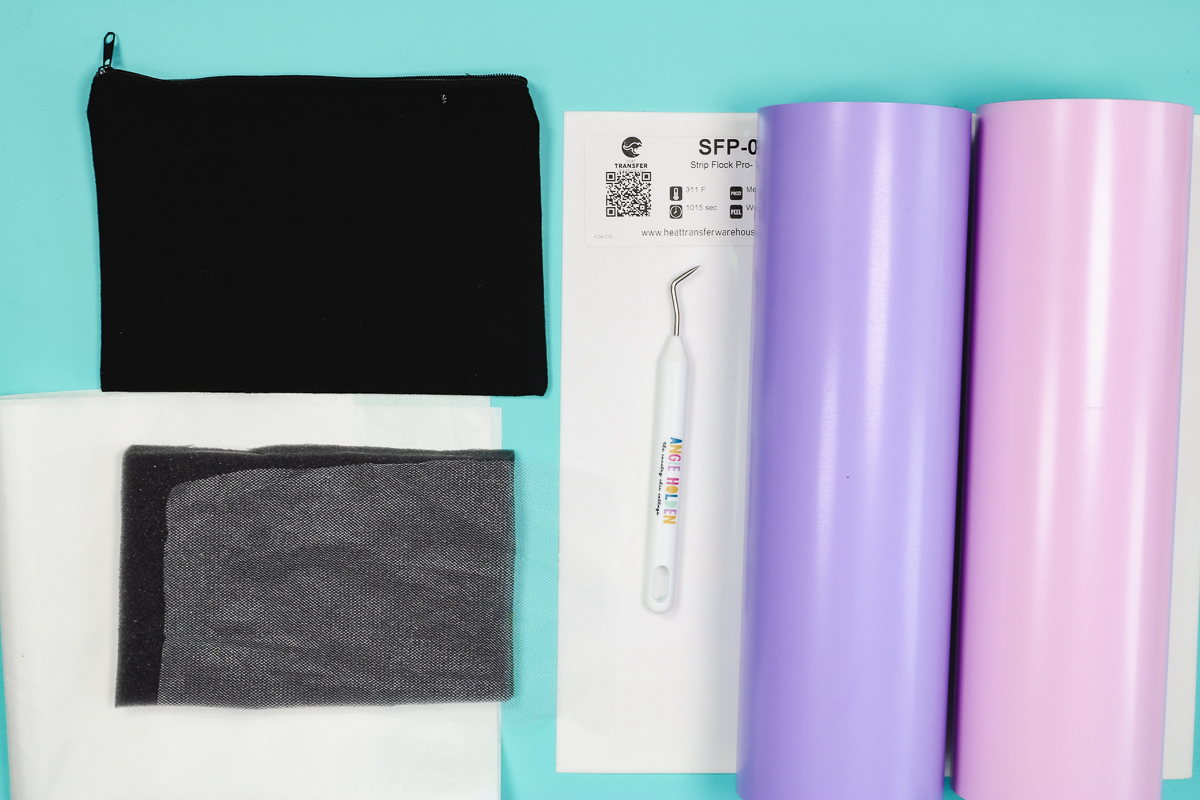
Supplies Used
Before we begin there are a couple of things you need to know. The bottom two layers are Flock HTV and you need to use Siser Stripflock. That is the only flocked HTV that I know of that can be layered and work properly.
For the top layer, you can use any thin HTV. Siser recommends Siser Electric or EcoStretch. Depending on what you use to emboss the HTV you may have different final results.
- Varsity Font
- Cricut Machine
- Siser StripFlock
- Siser Electric or Siser EcoStretch
- Weeding Tool
- Teflon Sheet
- Pressing Foam
- Heat Press or EasyPress (I tested this project with both a traditional heat press and an EasyPress and both worked so you can use whichever press you have.)
- EasyPress Mat
- Black (I am going to do this technique on a black zipper pouch. You can likely do this on any blank that HTV will stick to.)
- Netting, tulle, burlap, etc. (You will also need something to do the embossing. I am going to use a variety of different materials, and we’ll look at each of them as we continue.)
Step 1. Create Design in Design Space
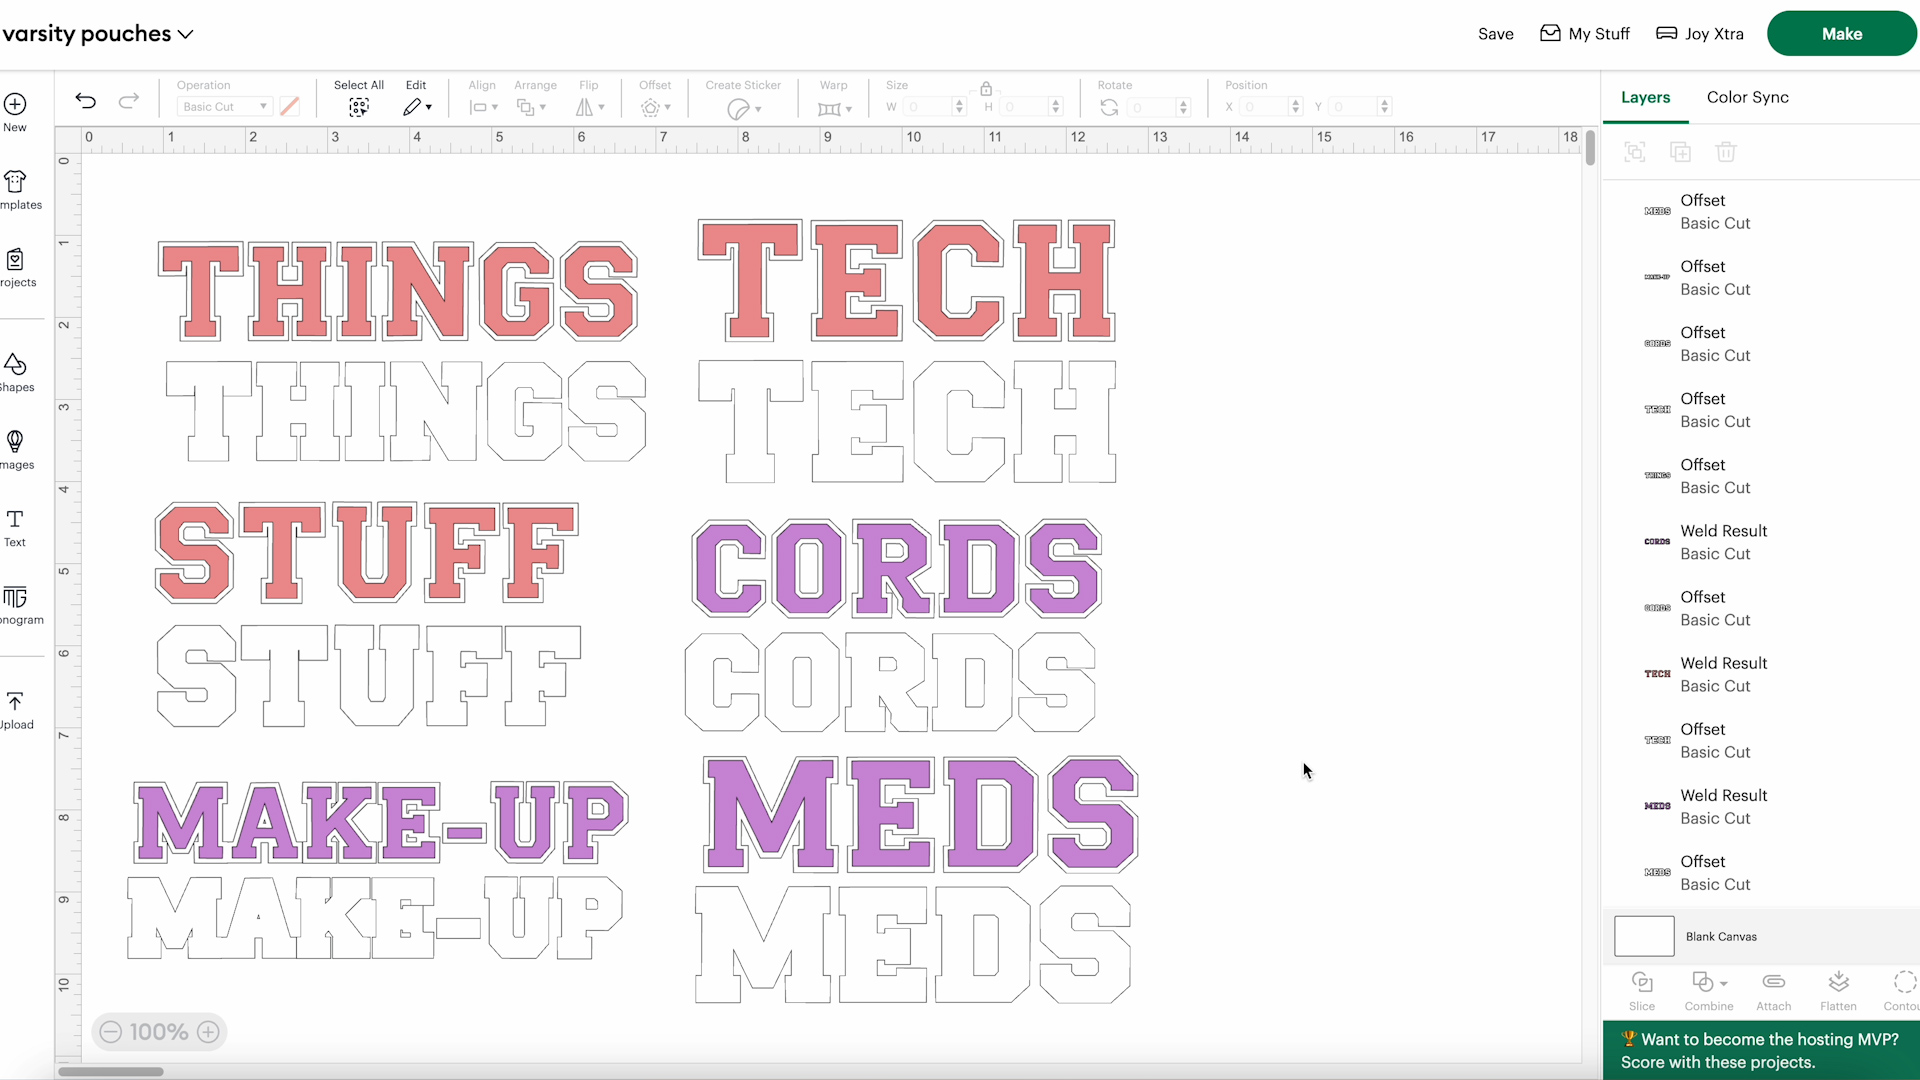
I am using the Varsity font for each of these pouches.
Use the Text tool in Design Space and size each word to fit whatever blank you’re using.
I want to remove the outer line of this font. To do that select all the letters and click Weld. This will turn the separate letters into one single image which allows us to use the Contour tool to remove the outer line.
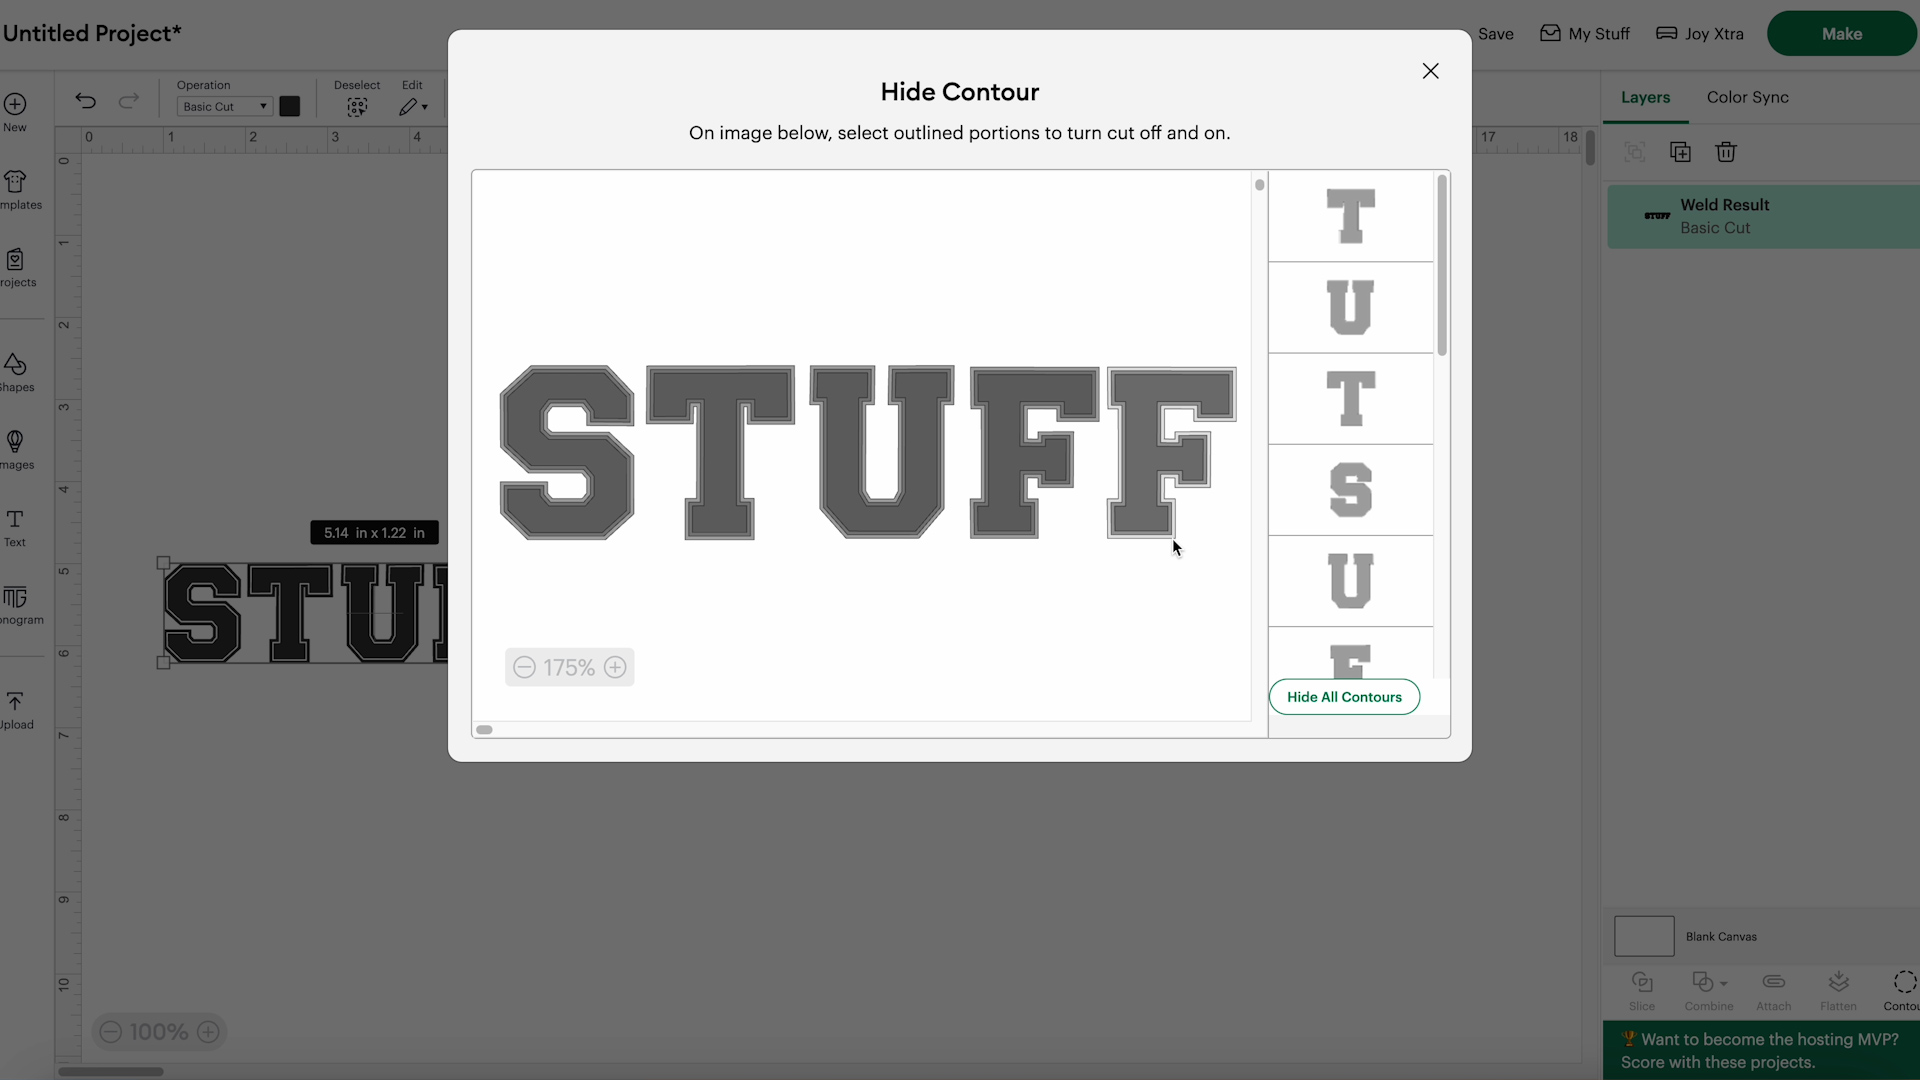
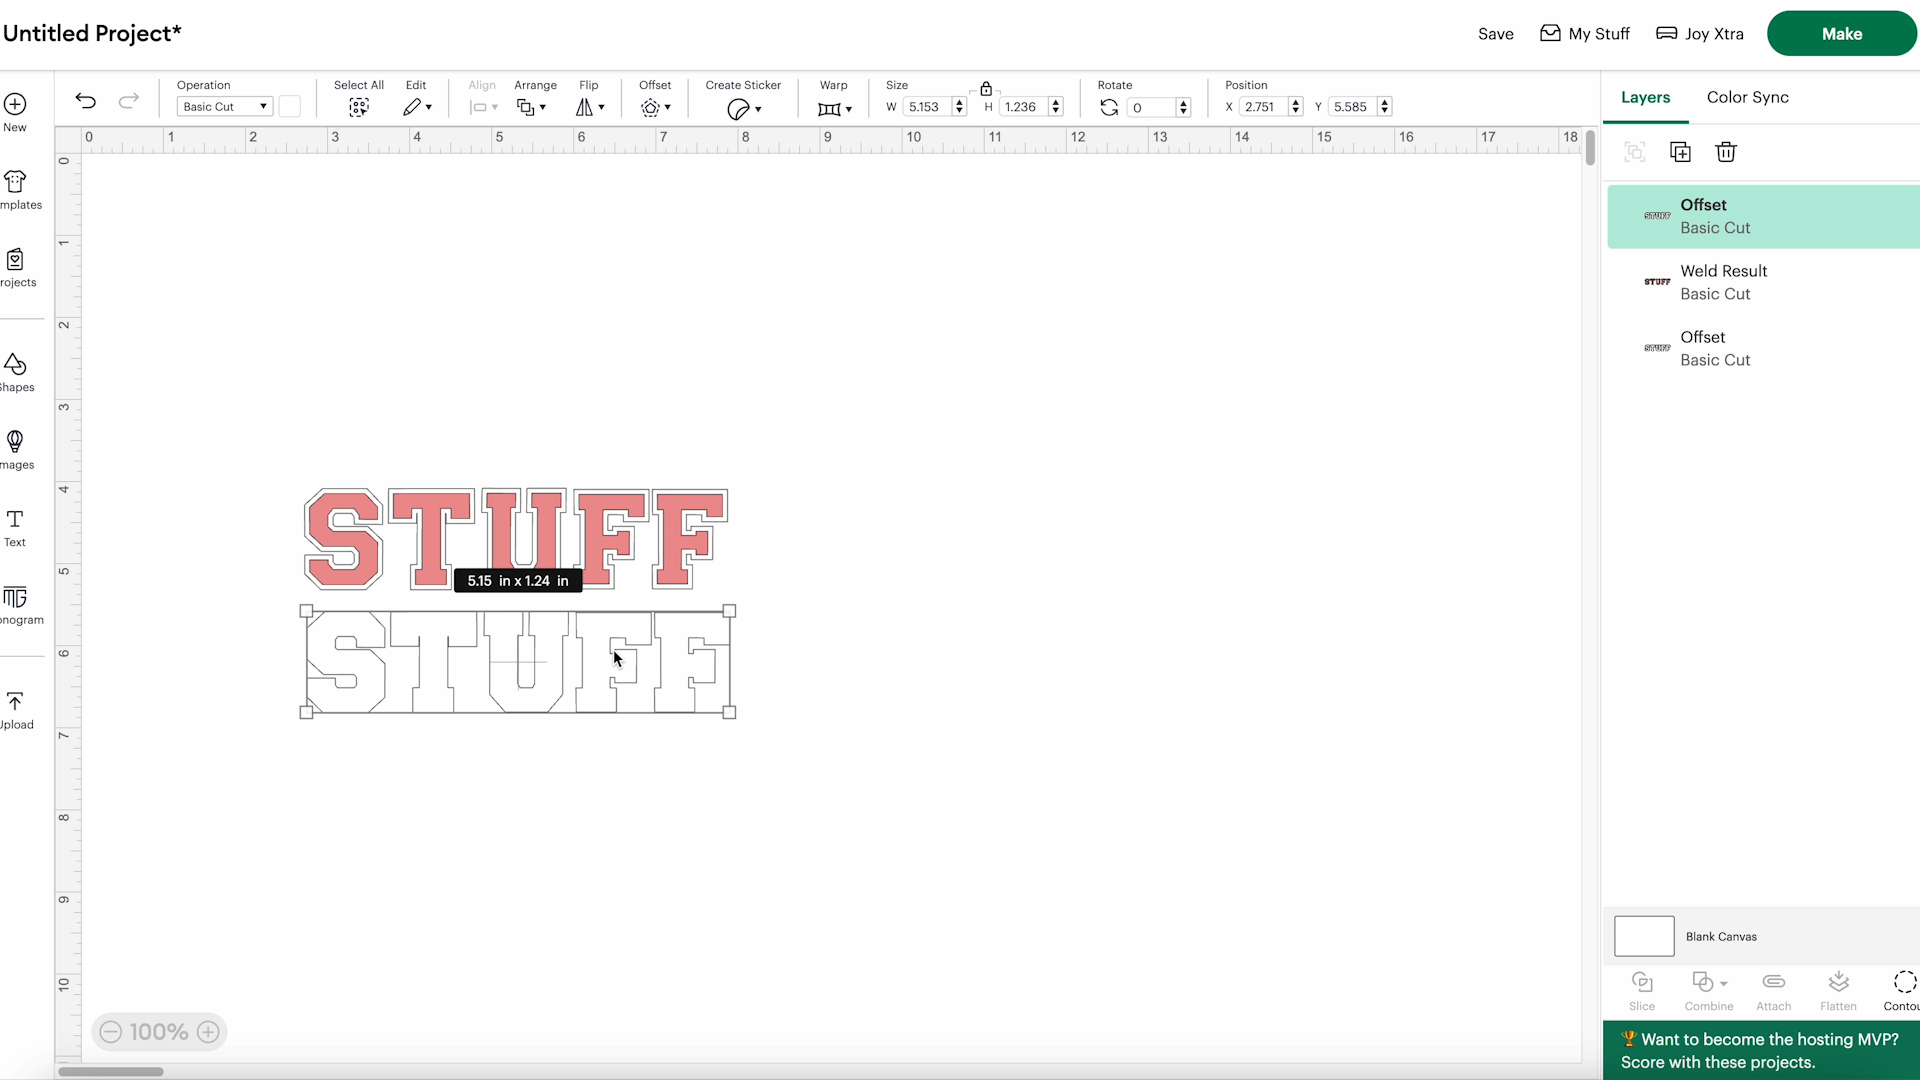
This now gives us the top layer of the design. We need 3 different layers so now we’re going to create an offset.
The next 2 layers will be the exact same size. This means I only need to create one offset and then I can duplicate it.
Click the Offset button in the upper toolbar and I sized mine to 0.06. I chose square corners and then click Apply.
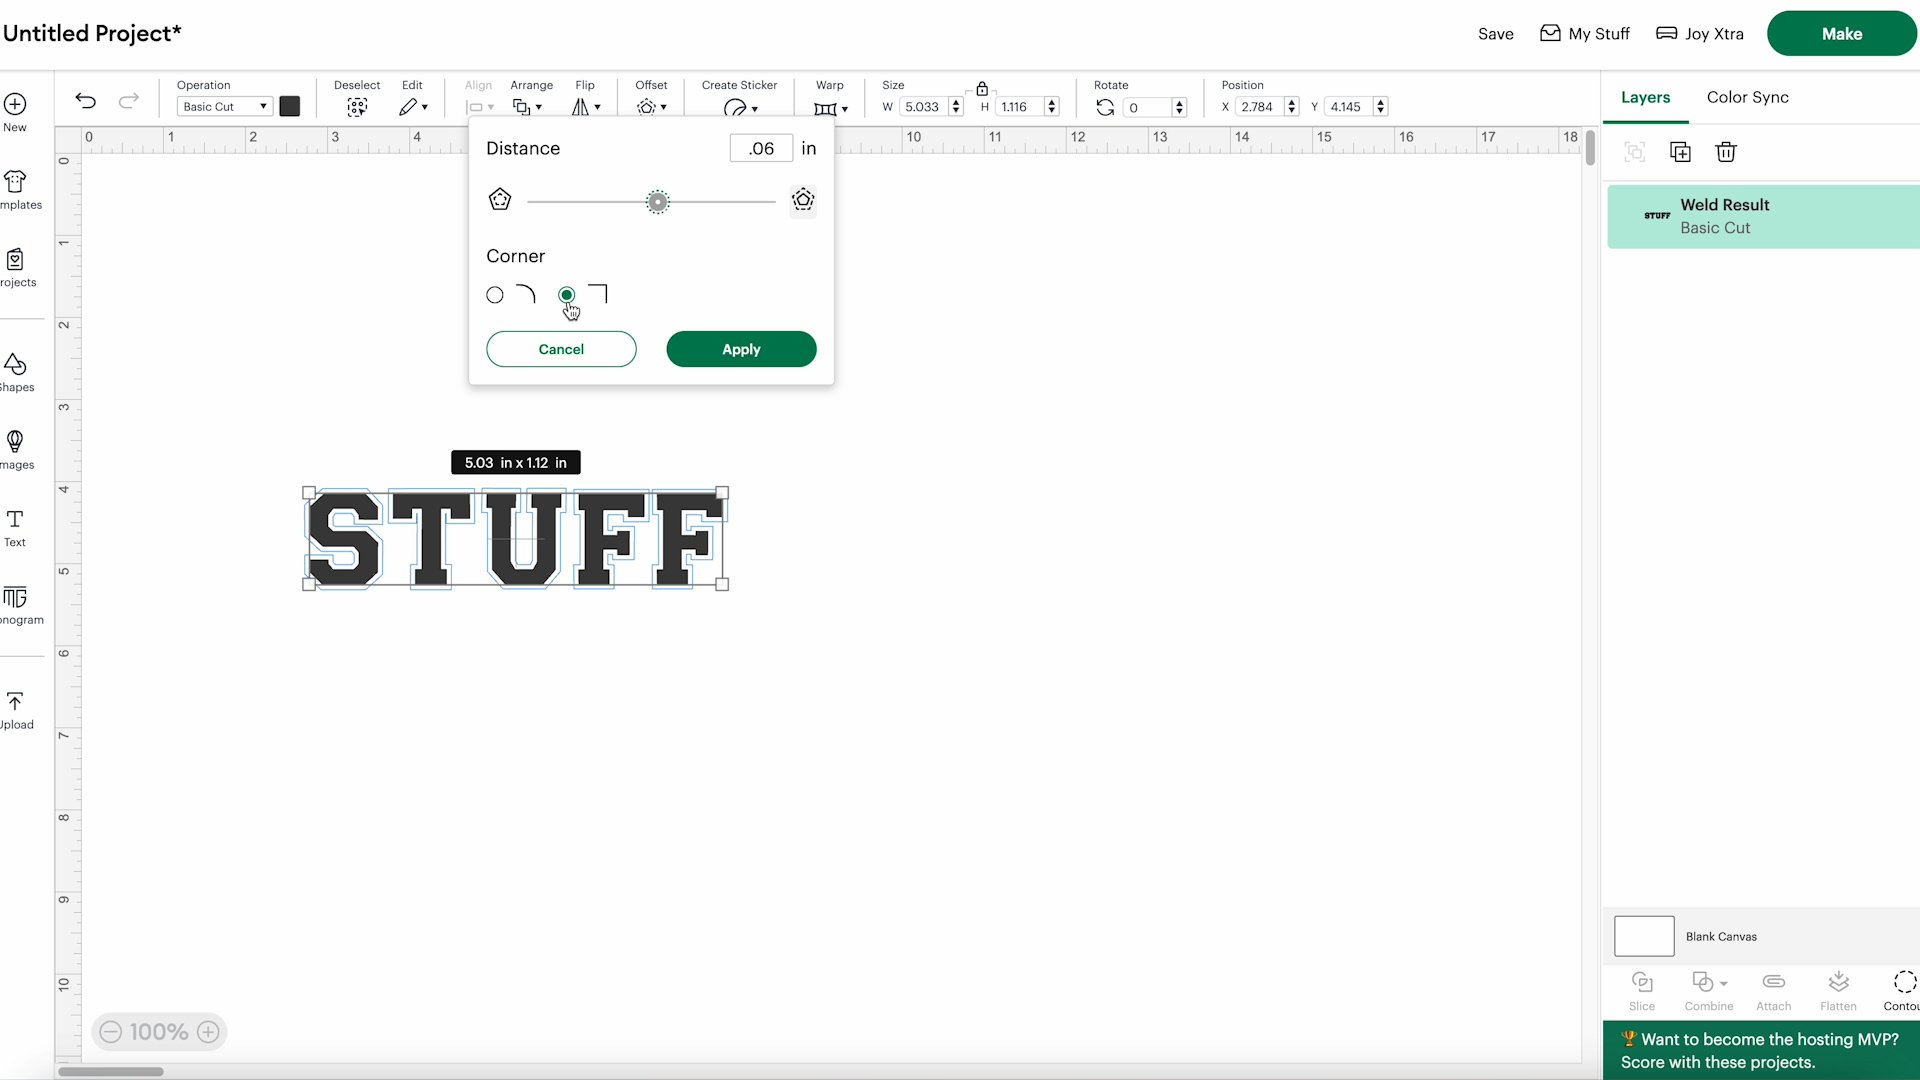
I changed my offset color to white and then duplicated the offset layer. This is because we need two flock layers cut for every one top HTV layer.
I like to change the color of the design so it matches the HTV I’m using. You can change it to whatever color you would like.
Repeat this process for any additional designs.
Step 2. Cut Out Design
Next, we’re going to select the machine that we’re using and click Make.
I am cutting my materials on a mat, select whichever process you’re using. Since we’re using HTV every mat needs to be mirrored so turn that on and then click Confirm.
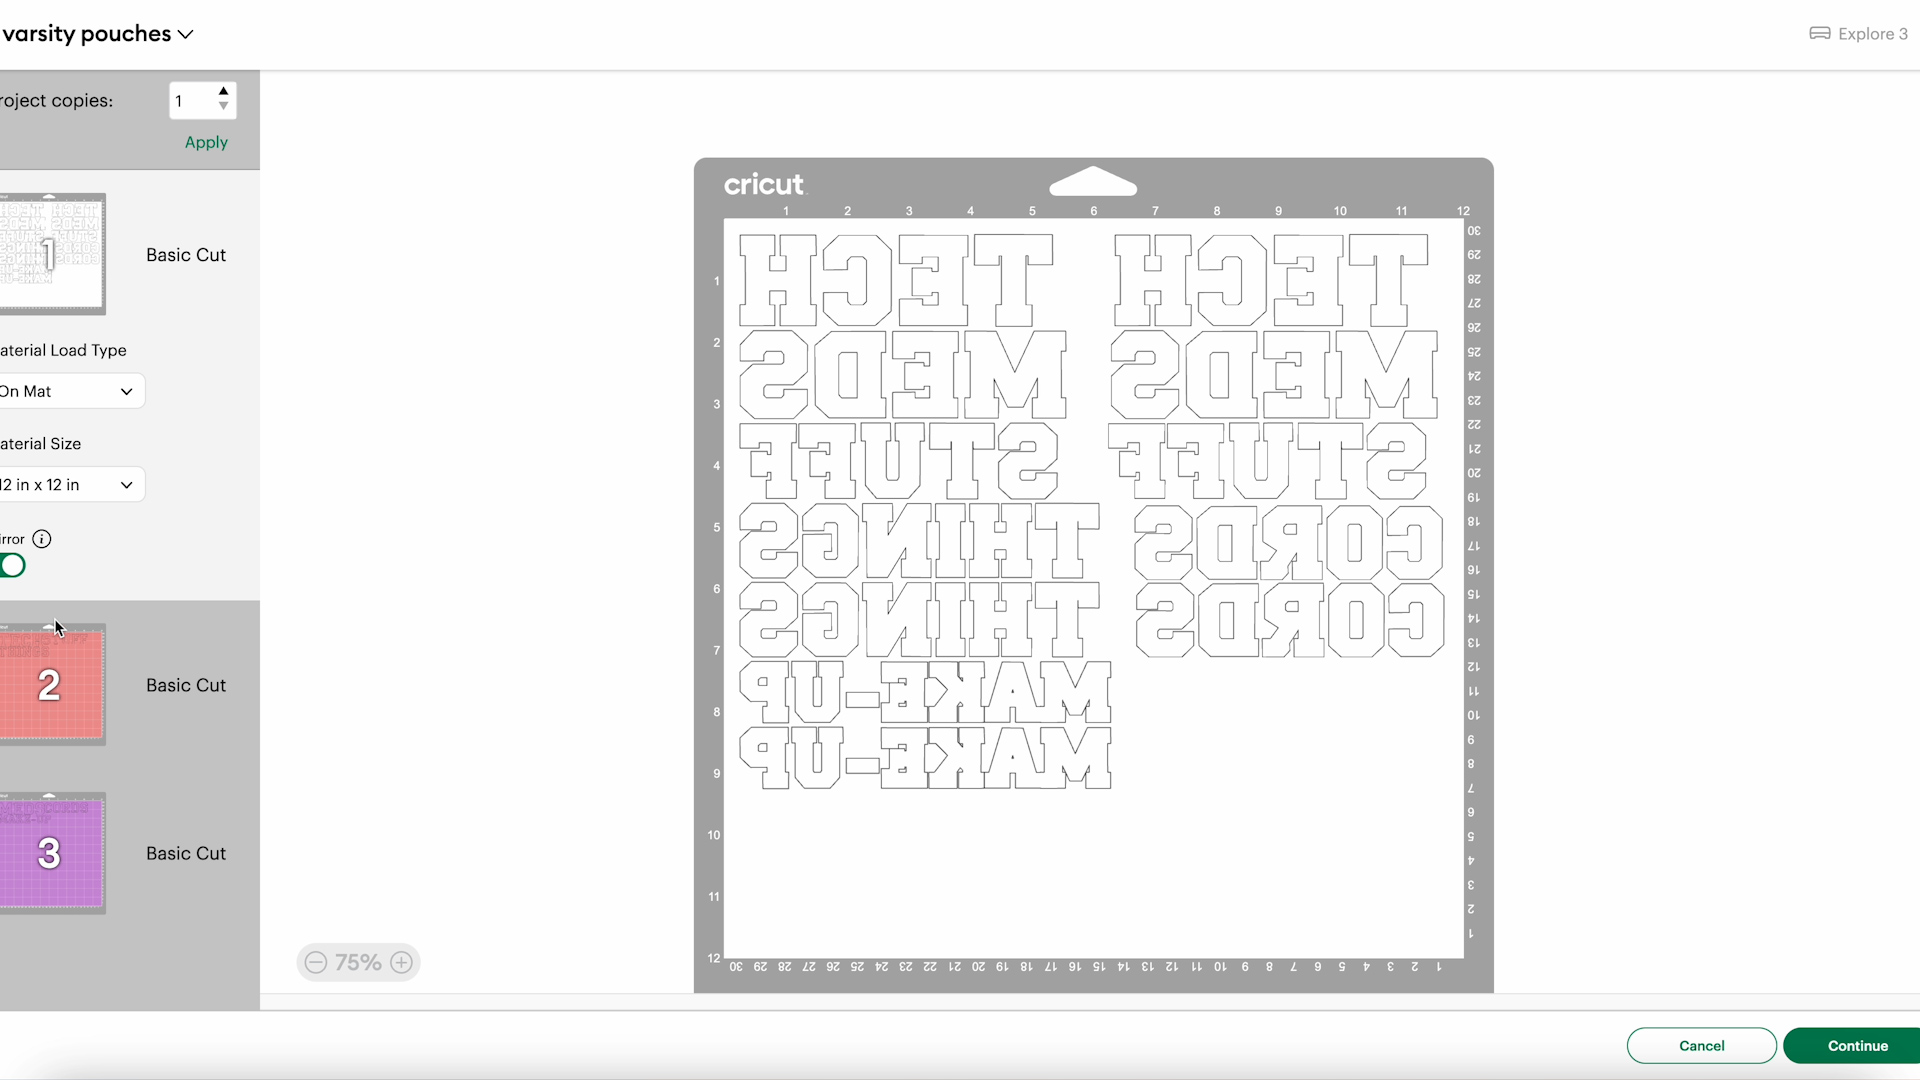
For the flock material, I used a green StandardGrip mat. It stuck well to that mat. For the other materials, the blue LightGrip mat worked great.
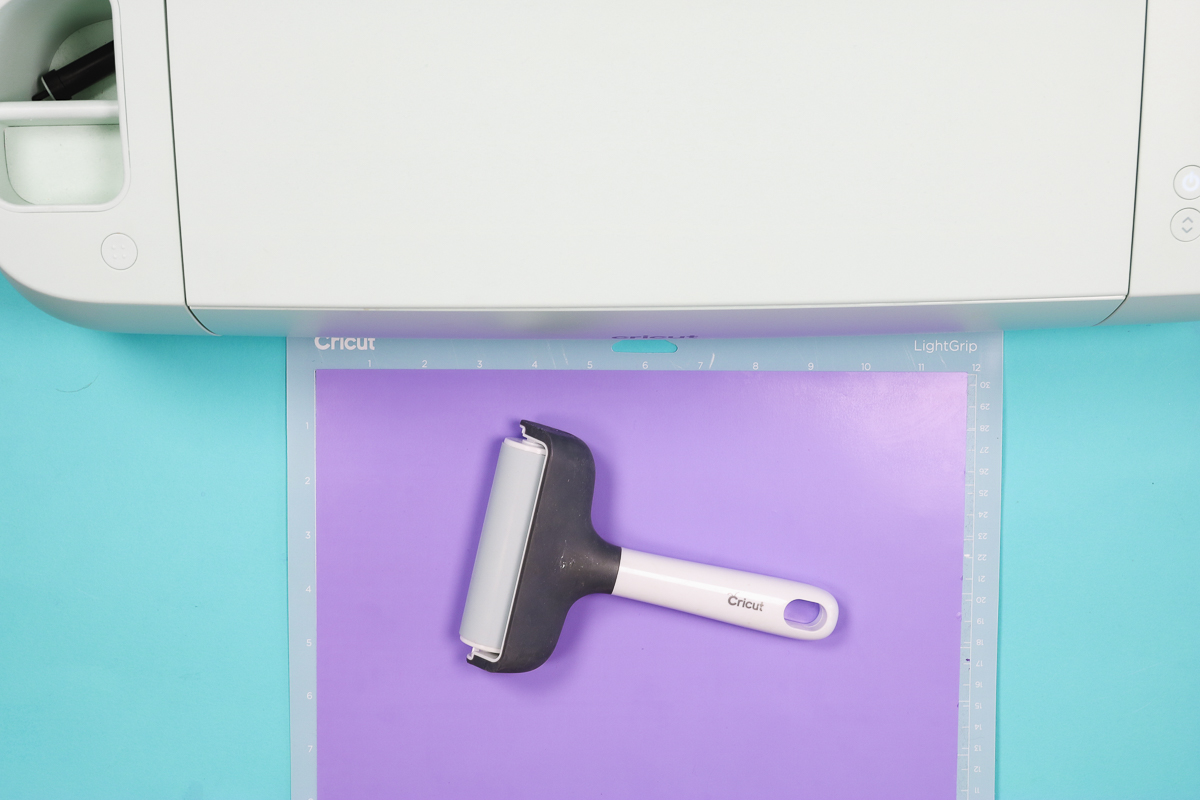
Add the material to the mat and use a brayer to ensure it is stuck down well.
All of these materials can be cut with the regular Fine Point blade and I am using an Explore 3 today.
For the top layer HTV materials, I used EasyWeed Electric and EasyWeed EcoStretch and both of those cut well on the Everyday Iron-on setting. For the StripFlock, I used the Everyday Iron-on setting with More pressure selected.
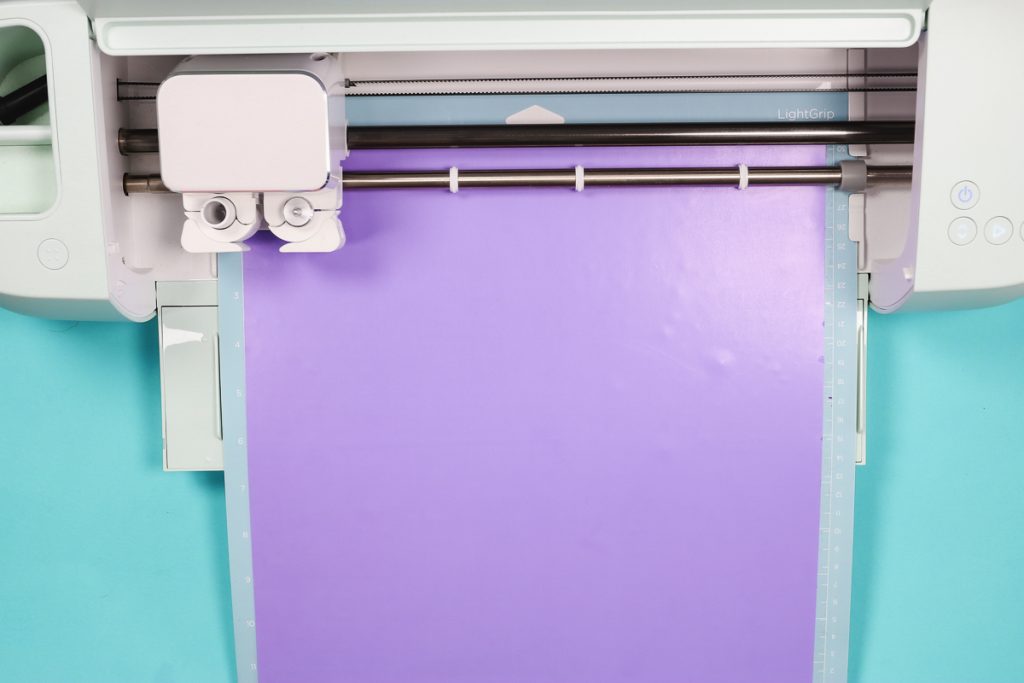
Load the mats into the machine and cut out the designs.
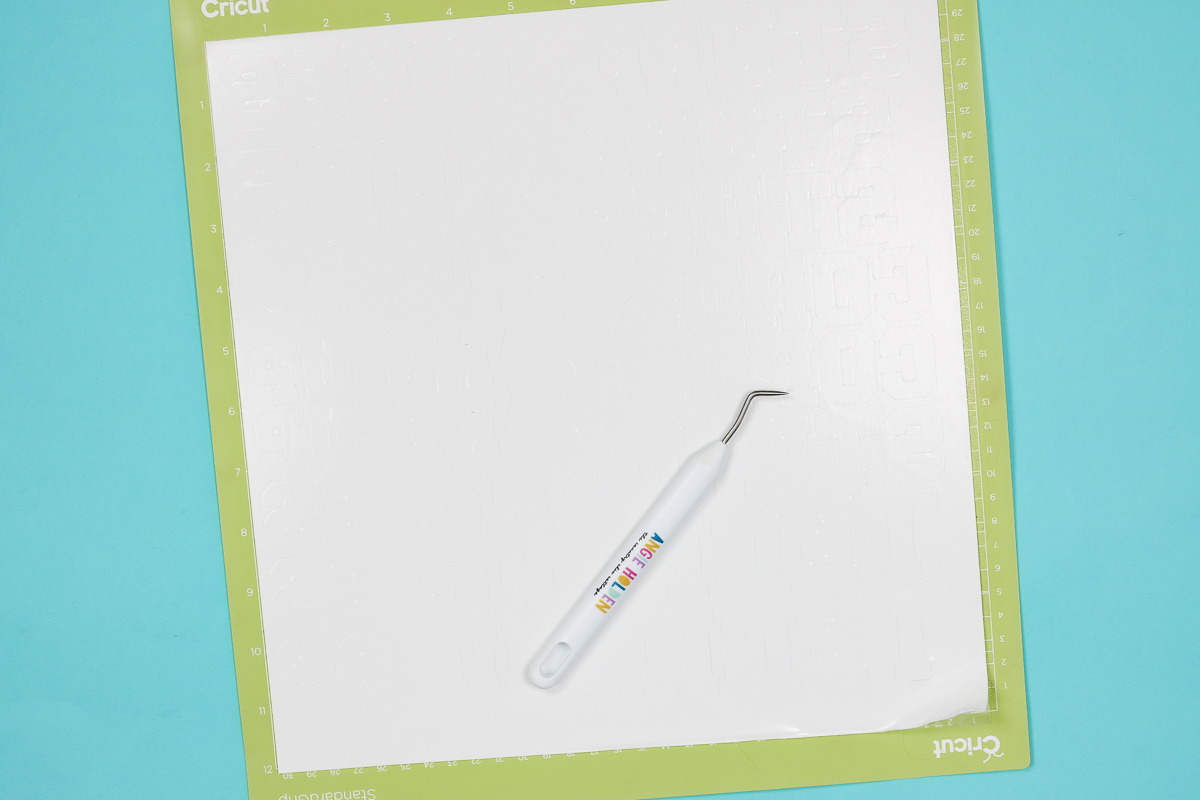
Step 3. Weed HTV
You can weed the material on the mat or remove the material from the mat and then weed it.
I like to remove all the material on the outside of the designs first and then remove any interior pieces. Pay attention to the insides of letters and any sections between letters that didn’t come out when weeding the outside.
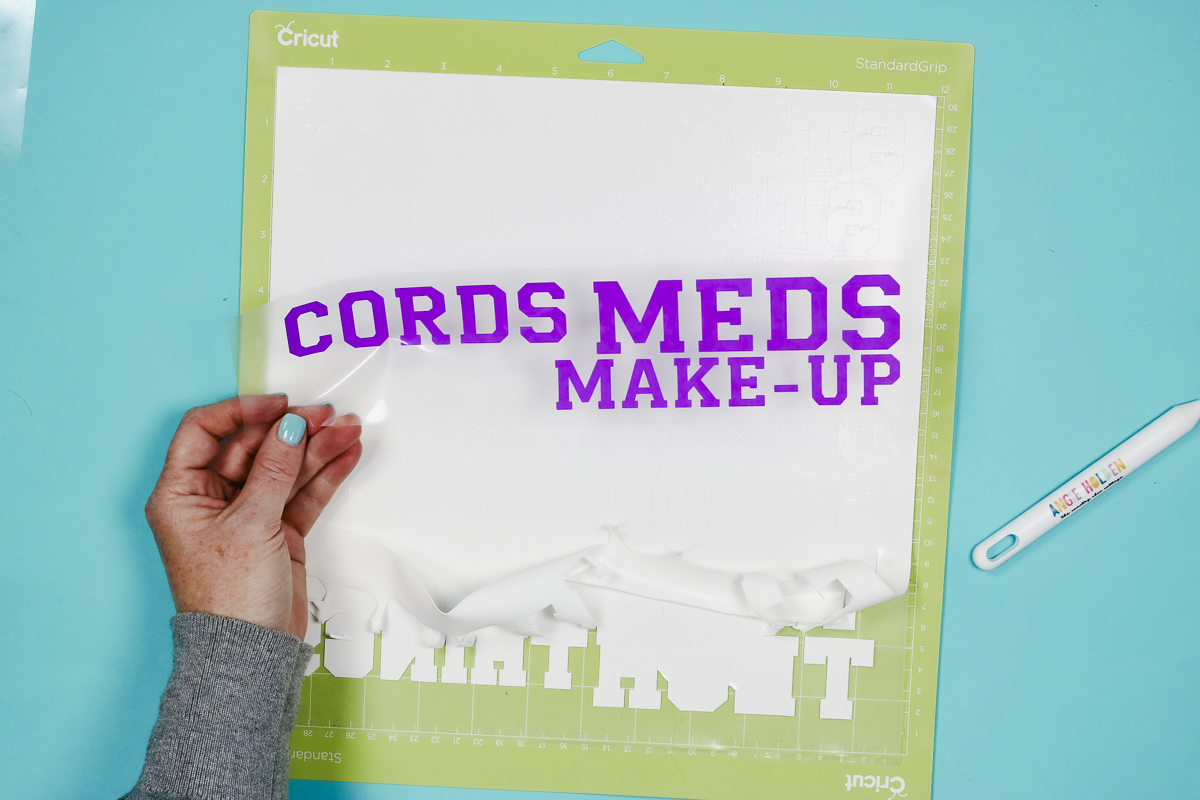
When you’re finished weeding, flip the material over and it should look exactly how you want it on the blank.
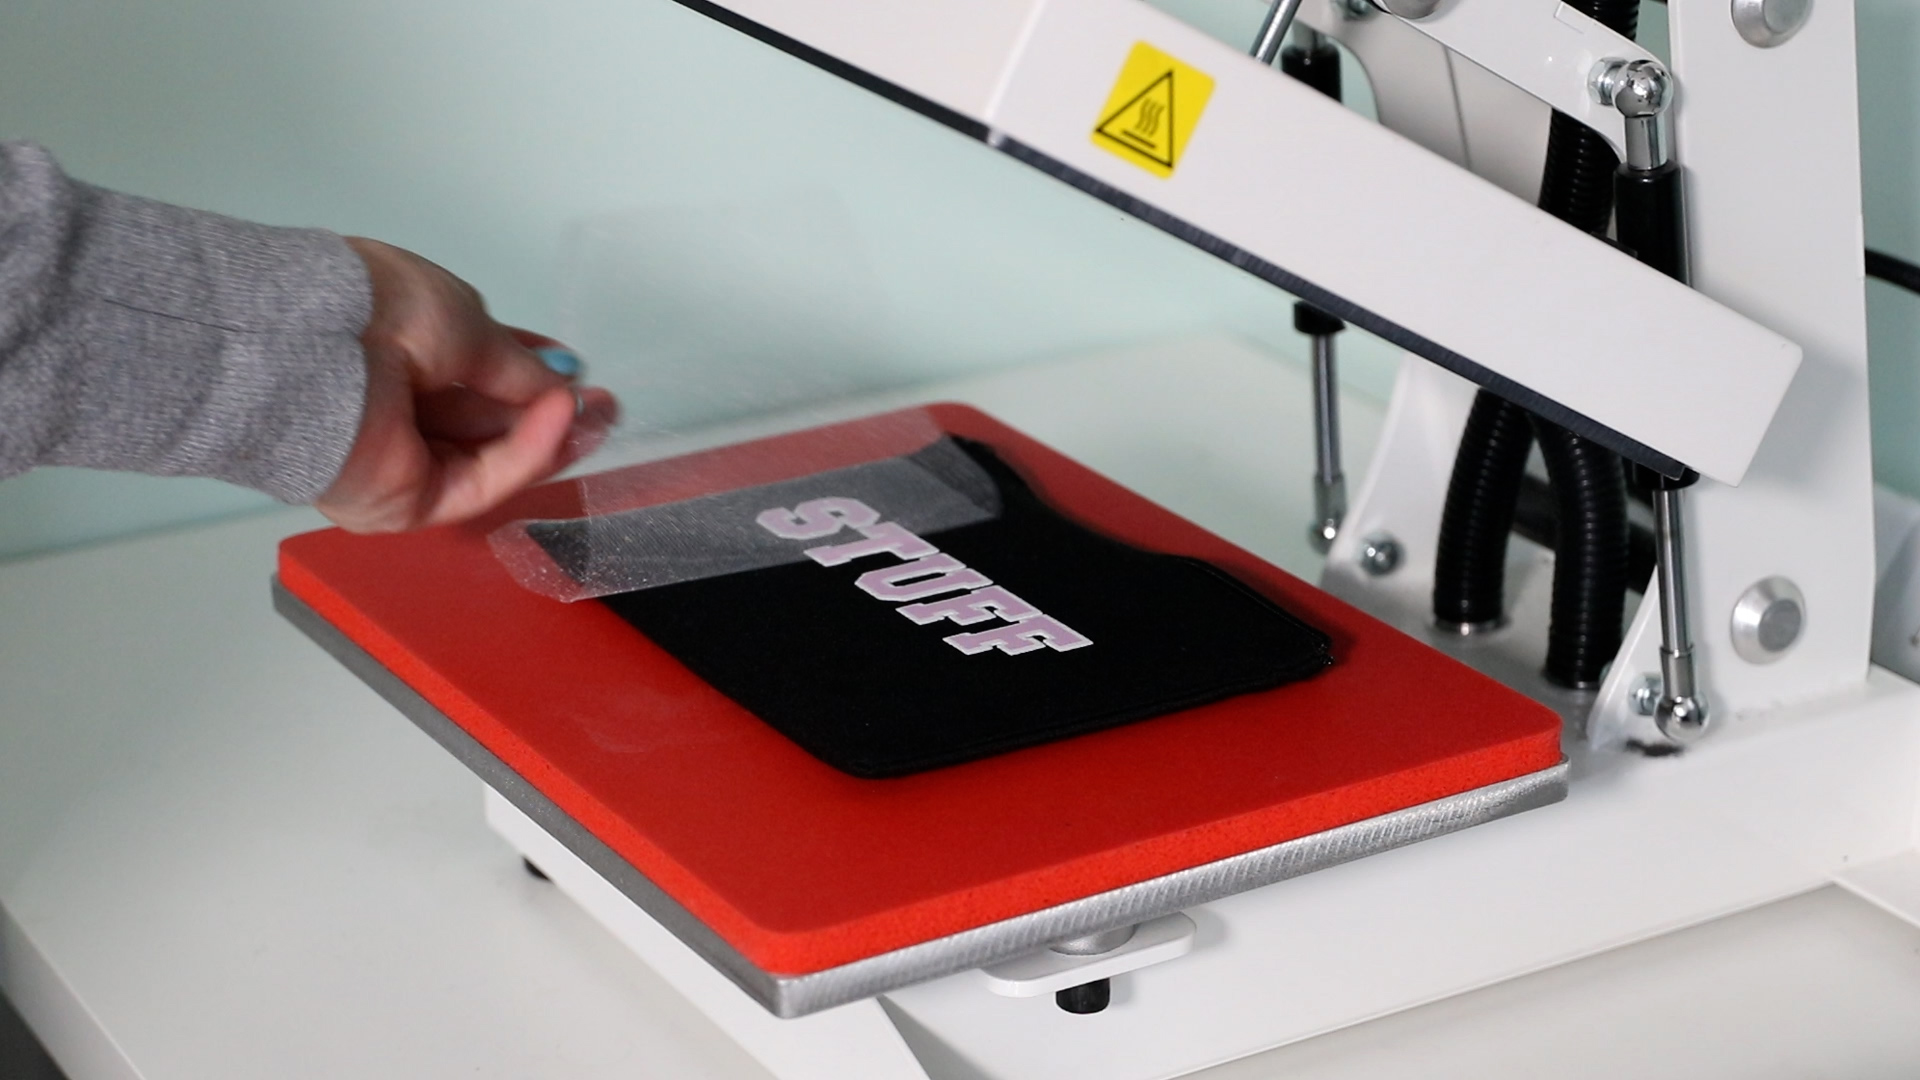
Step 4. Prep the Blank
Before adding the HTV material we need to prep the blank.
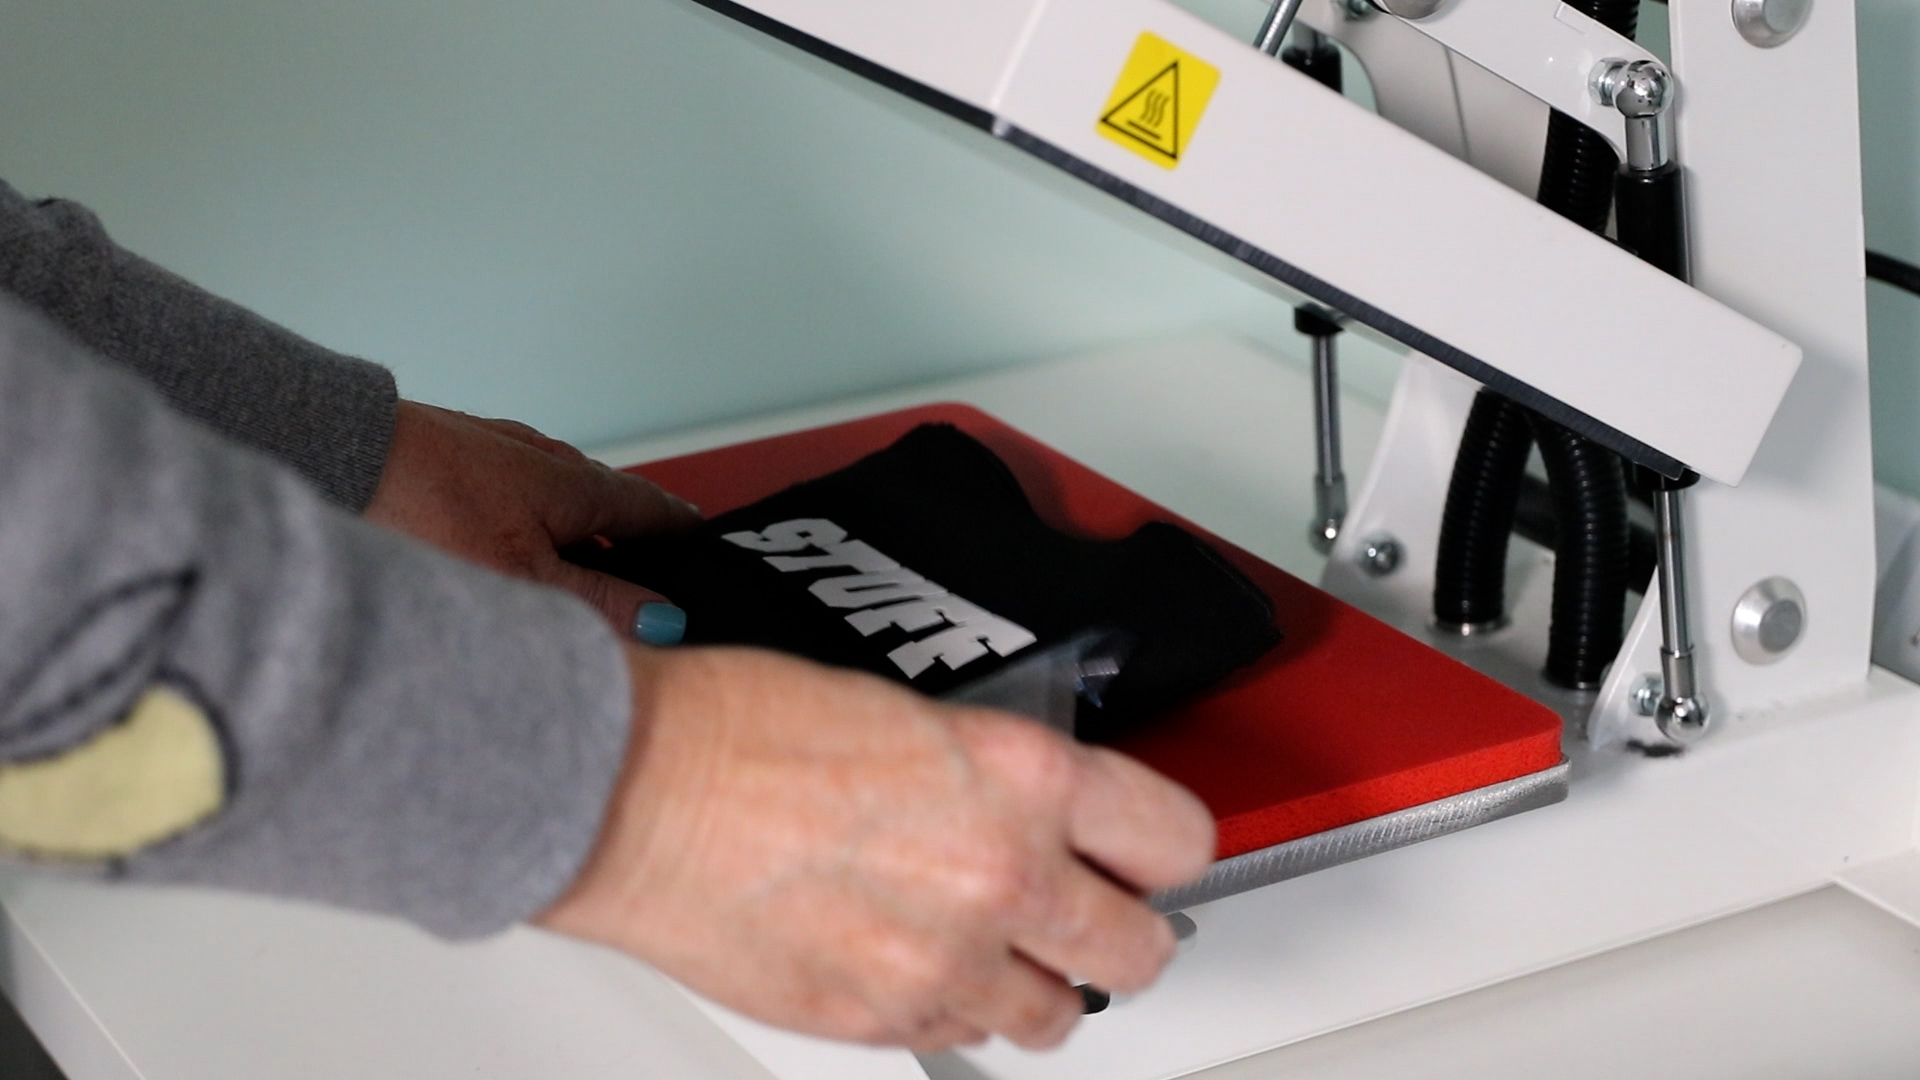
First, I am going to add heat-resistant foam to the inside of the pouch. Make sure the foam fits completely inside the pouch. The foam will lift the pressing area so it’s higher than the zipper.
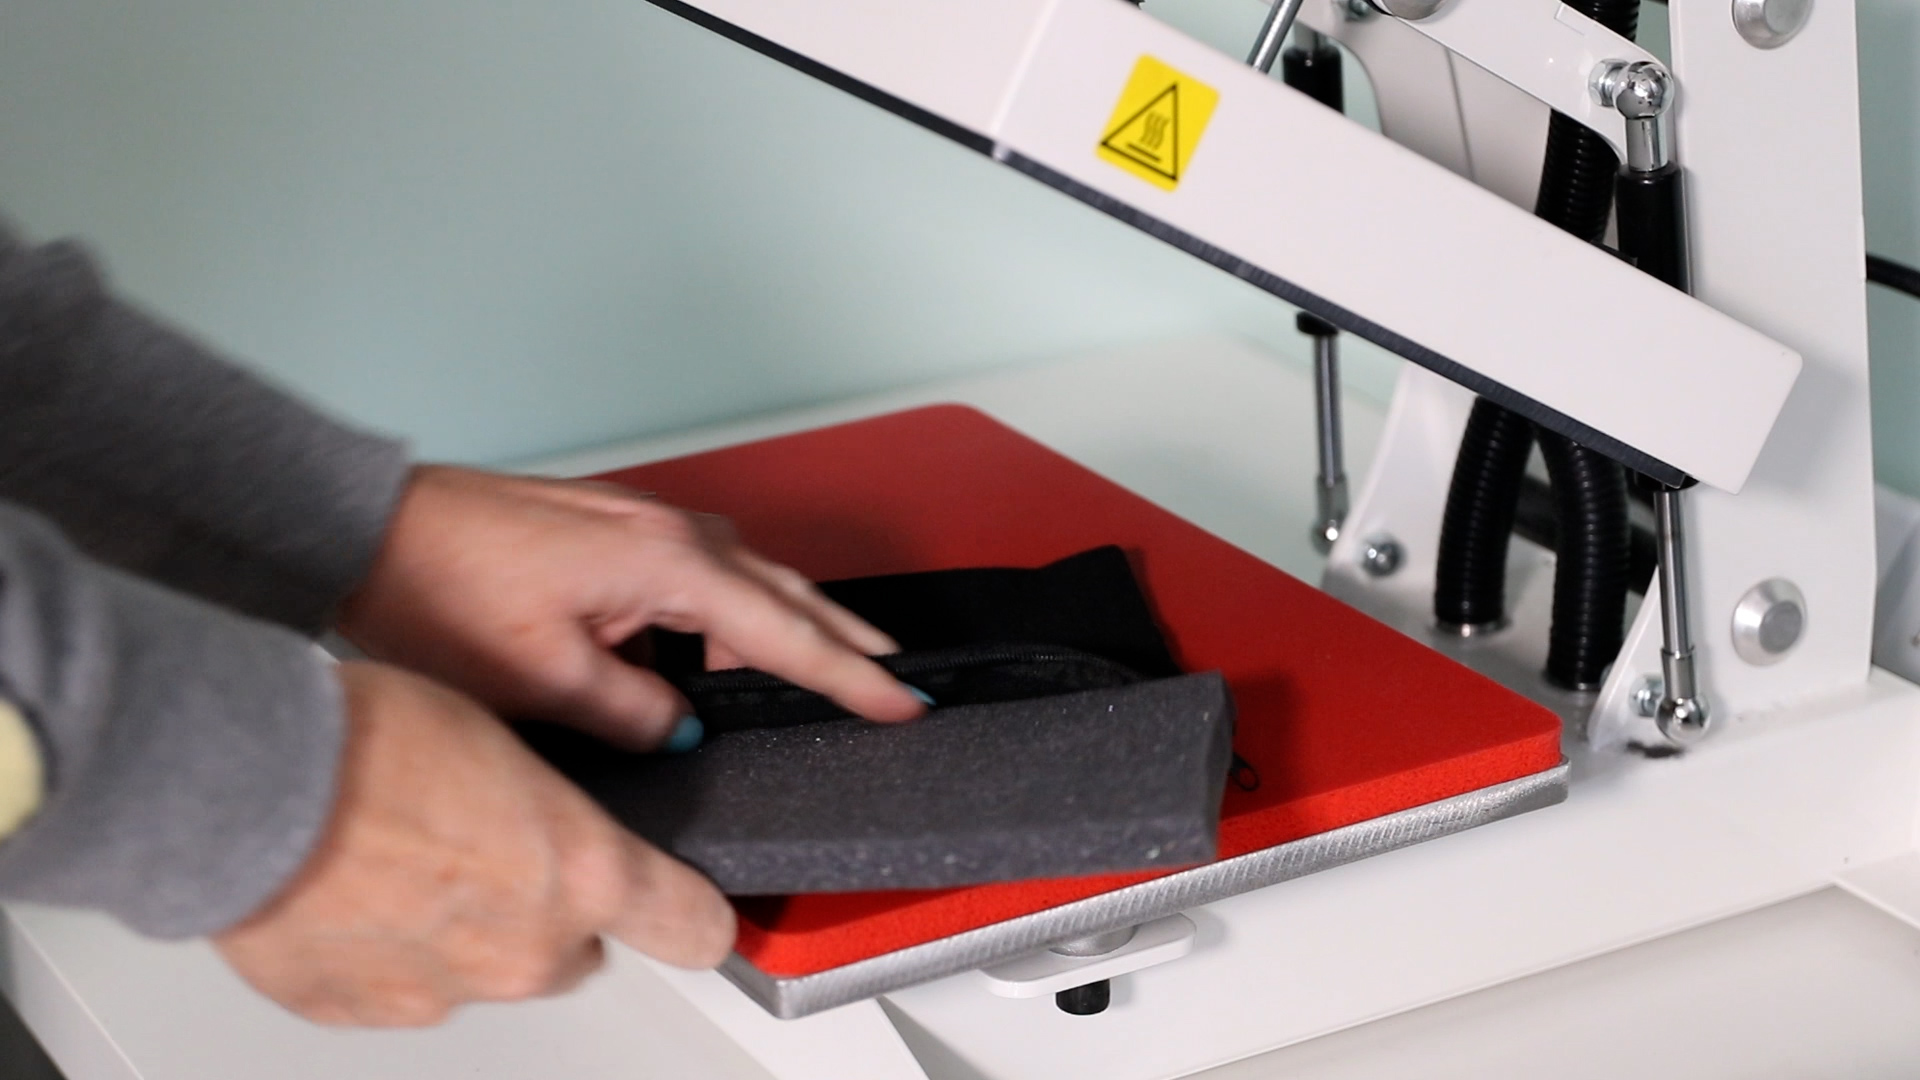
Preheat the blank for about 5 seconds to remove any moisture from the fabric.
Step 5. Press the HTV
The first layer is StripFlock. Locate the design where you want it and press at 310 degrees for 10 seconds. Depending on the blank you’re using your time and temperature may change.
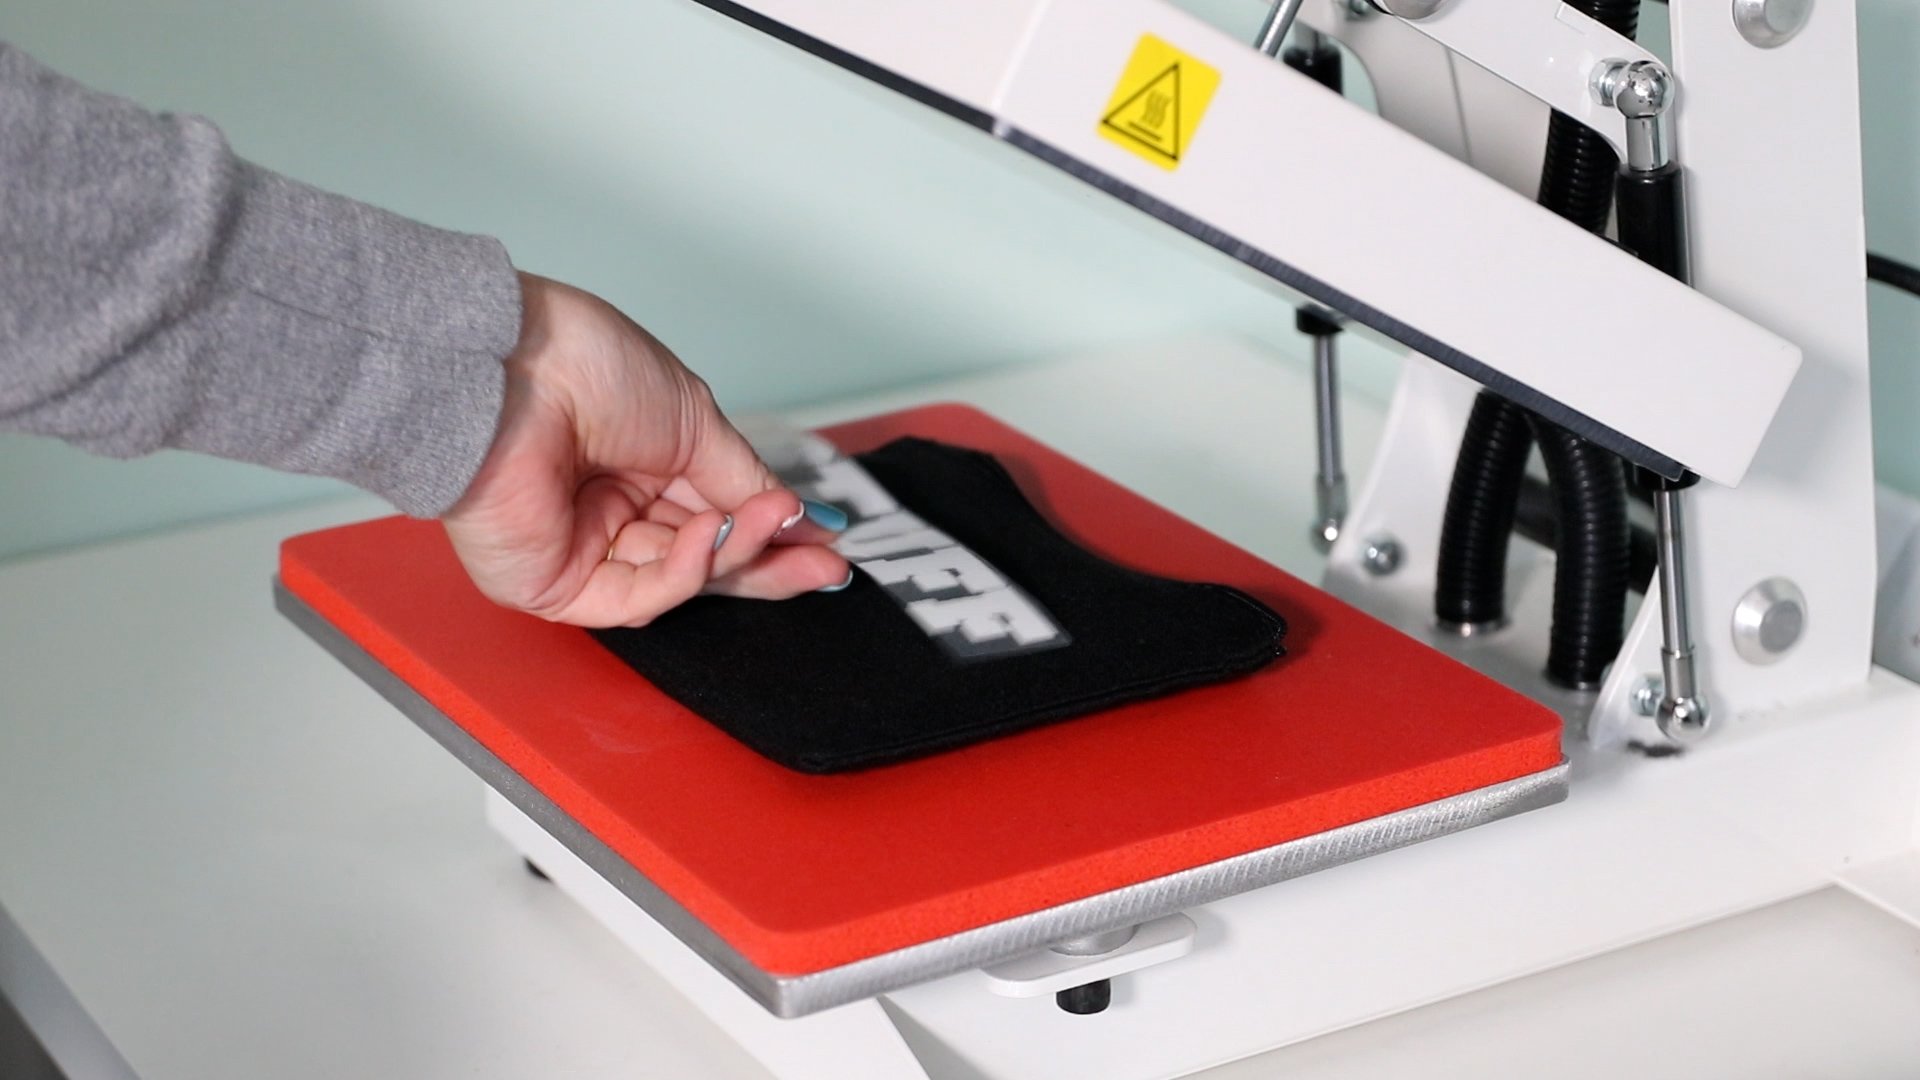
This material is a warm peel. Allow the material to cool for a few seconds and then remove the carrier sheet.
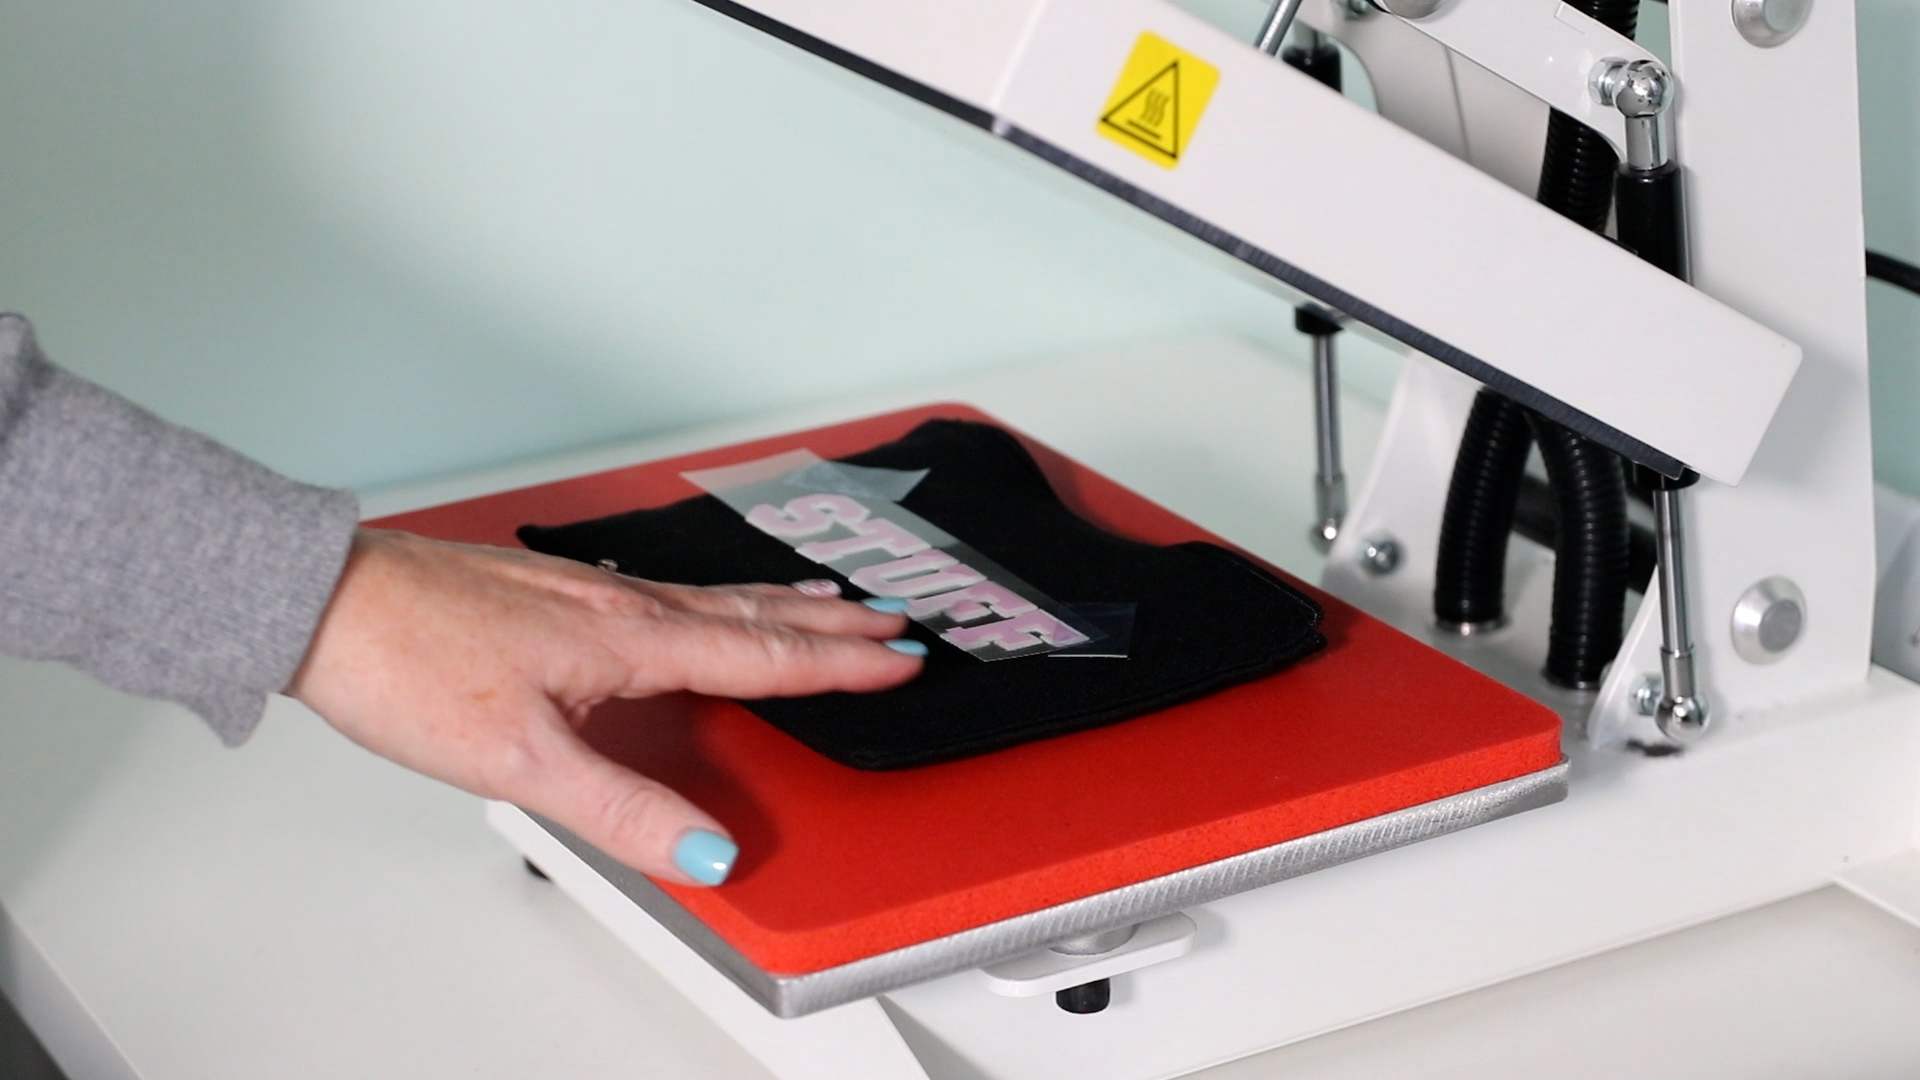
The second layer is also StripFlock. This layer will be located directly on top of the first layer. If needed, use heat-resistant tape to hold it in place.
Press this layer again at 310 degrees for 10 seconds. Allow to cool for a few seconds and remove the carrier sheet.
HTV sticks really well to HTV so it should be easy to remove the carrier sheet.
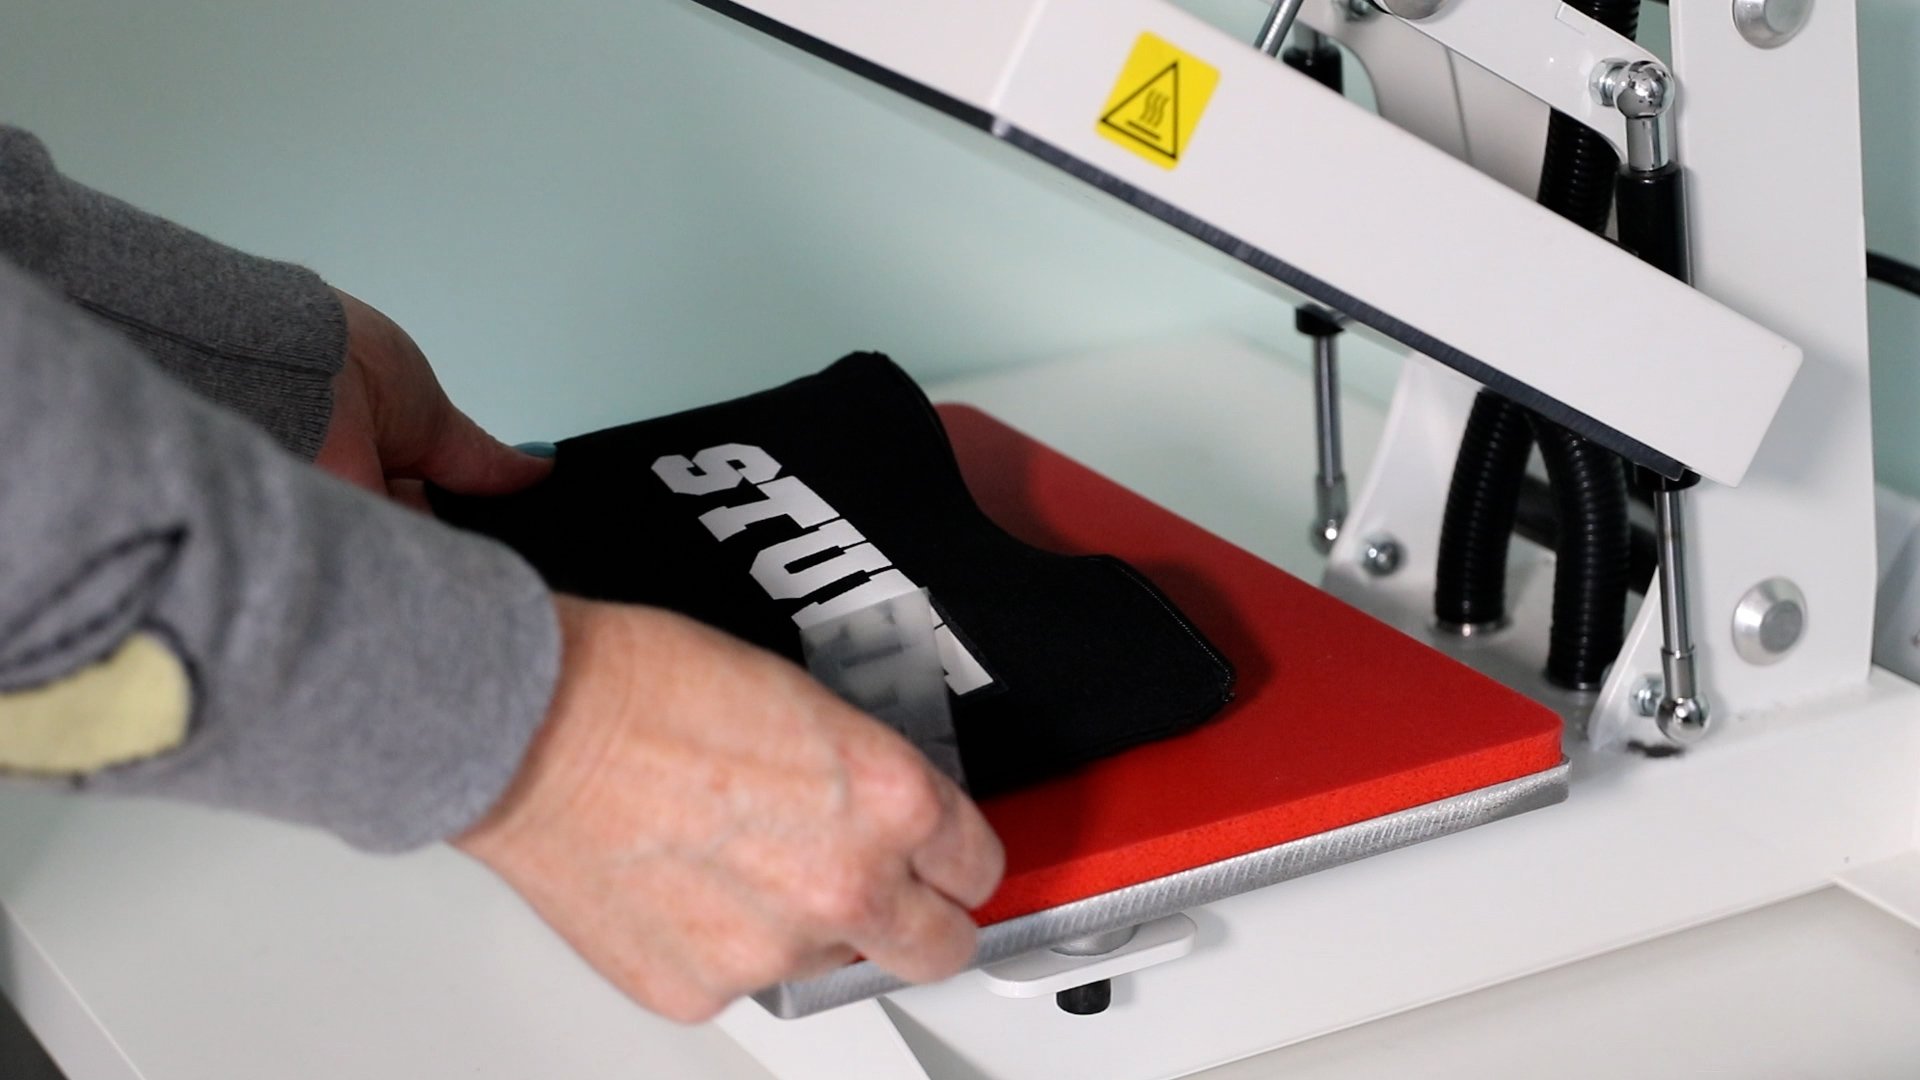
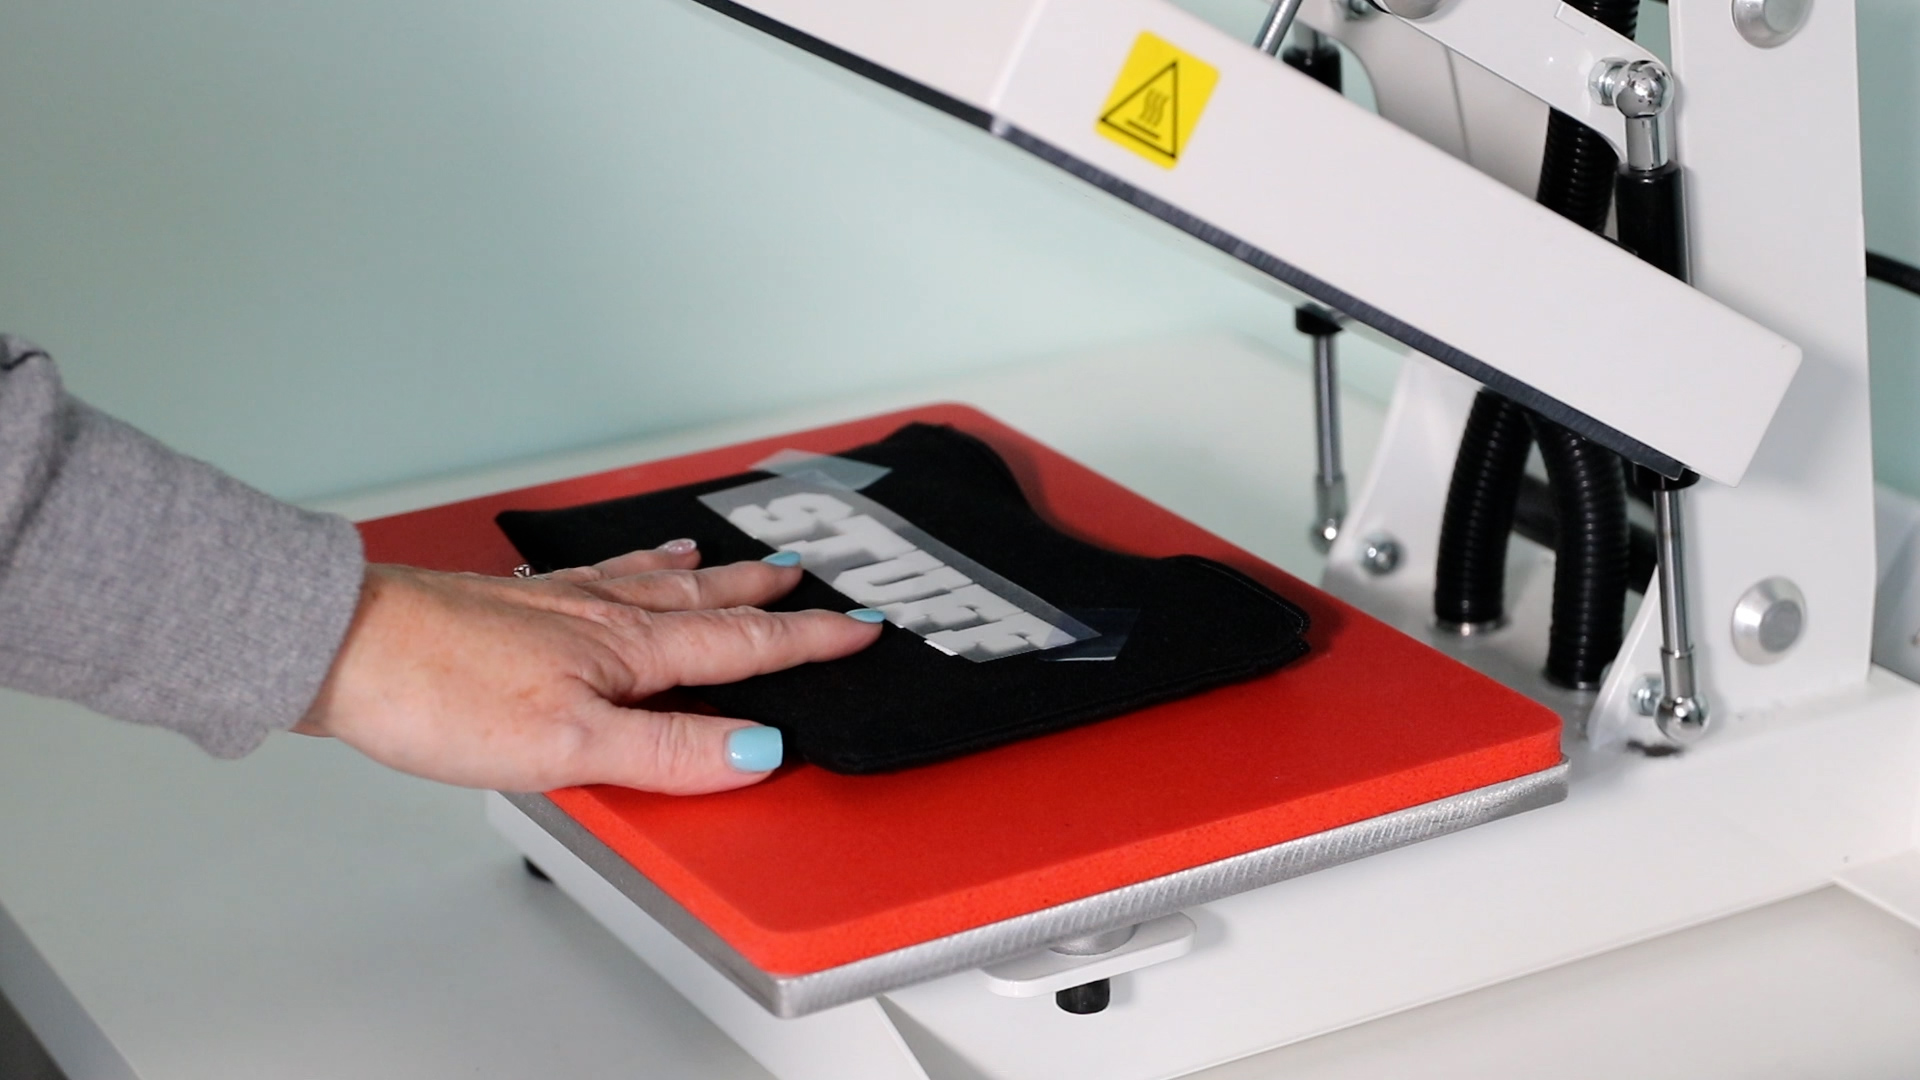
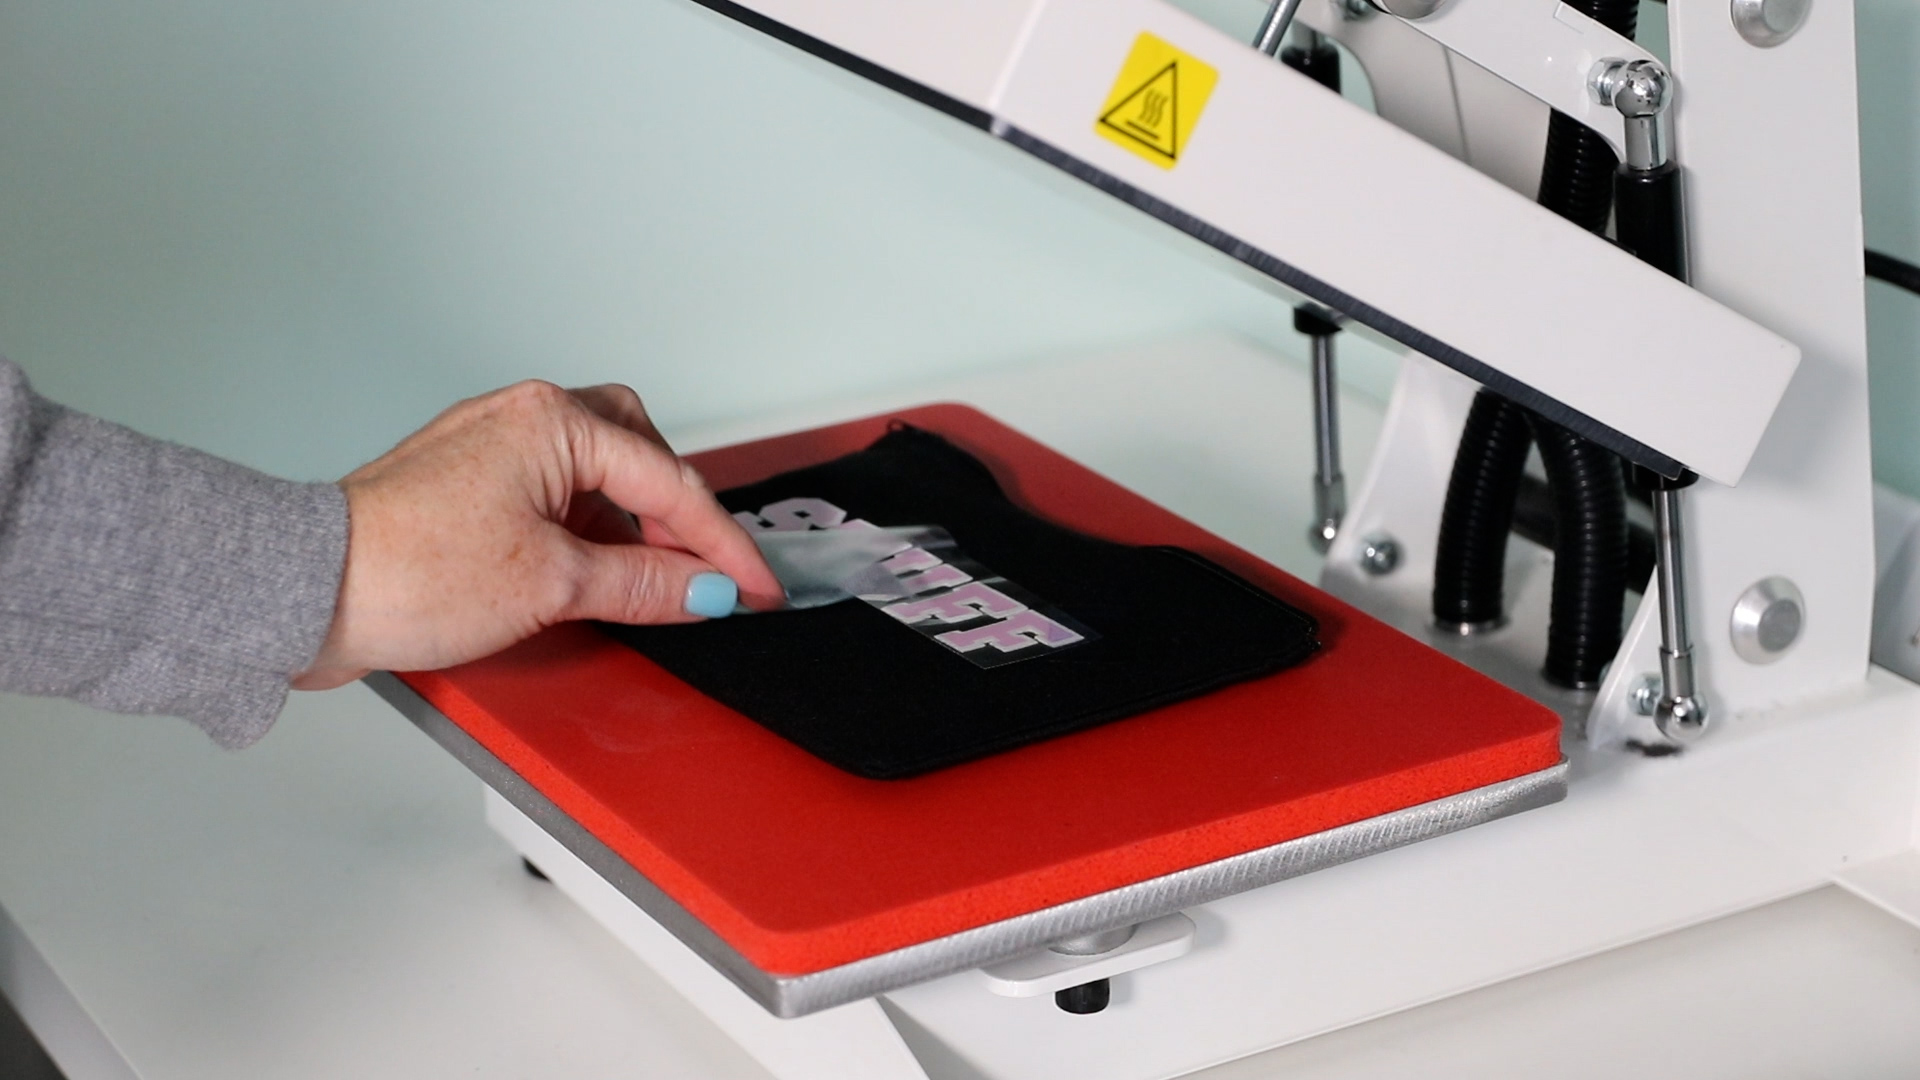
The top layer will be either the Electric or EcoStretch. Locate the design where you want it and if needed hold it in place with heat-resistant tape.
Make sure all the HTV is covered by the carrier sheet and press. This material is also 310 degrees for about 10 seconds and is a warm peel.
Allow to cool for a second or two and peel back the carrier sheet.
Step 6. Emboss the HTV
Grab whatever material you’re going to use to emboss the HTV and lay it over the top. I am using a mesh material first.
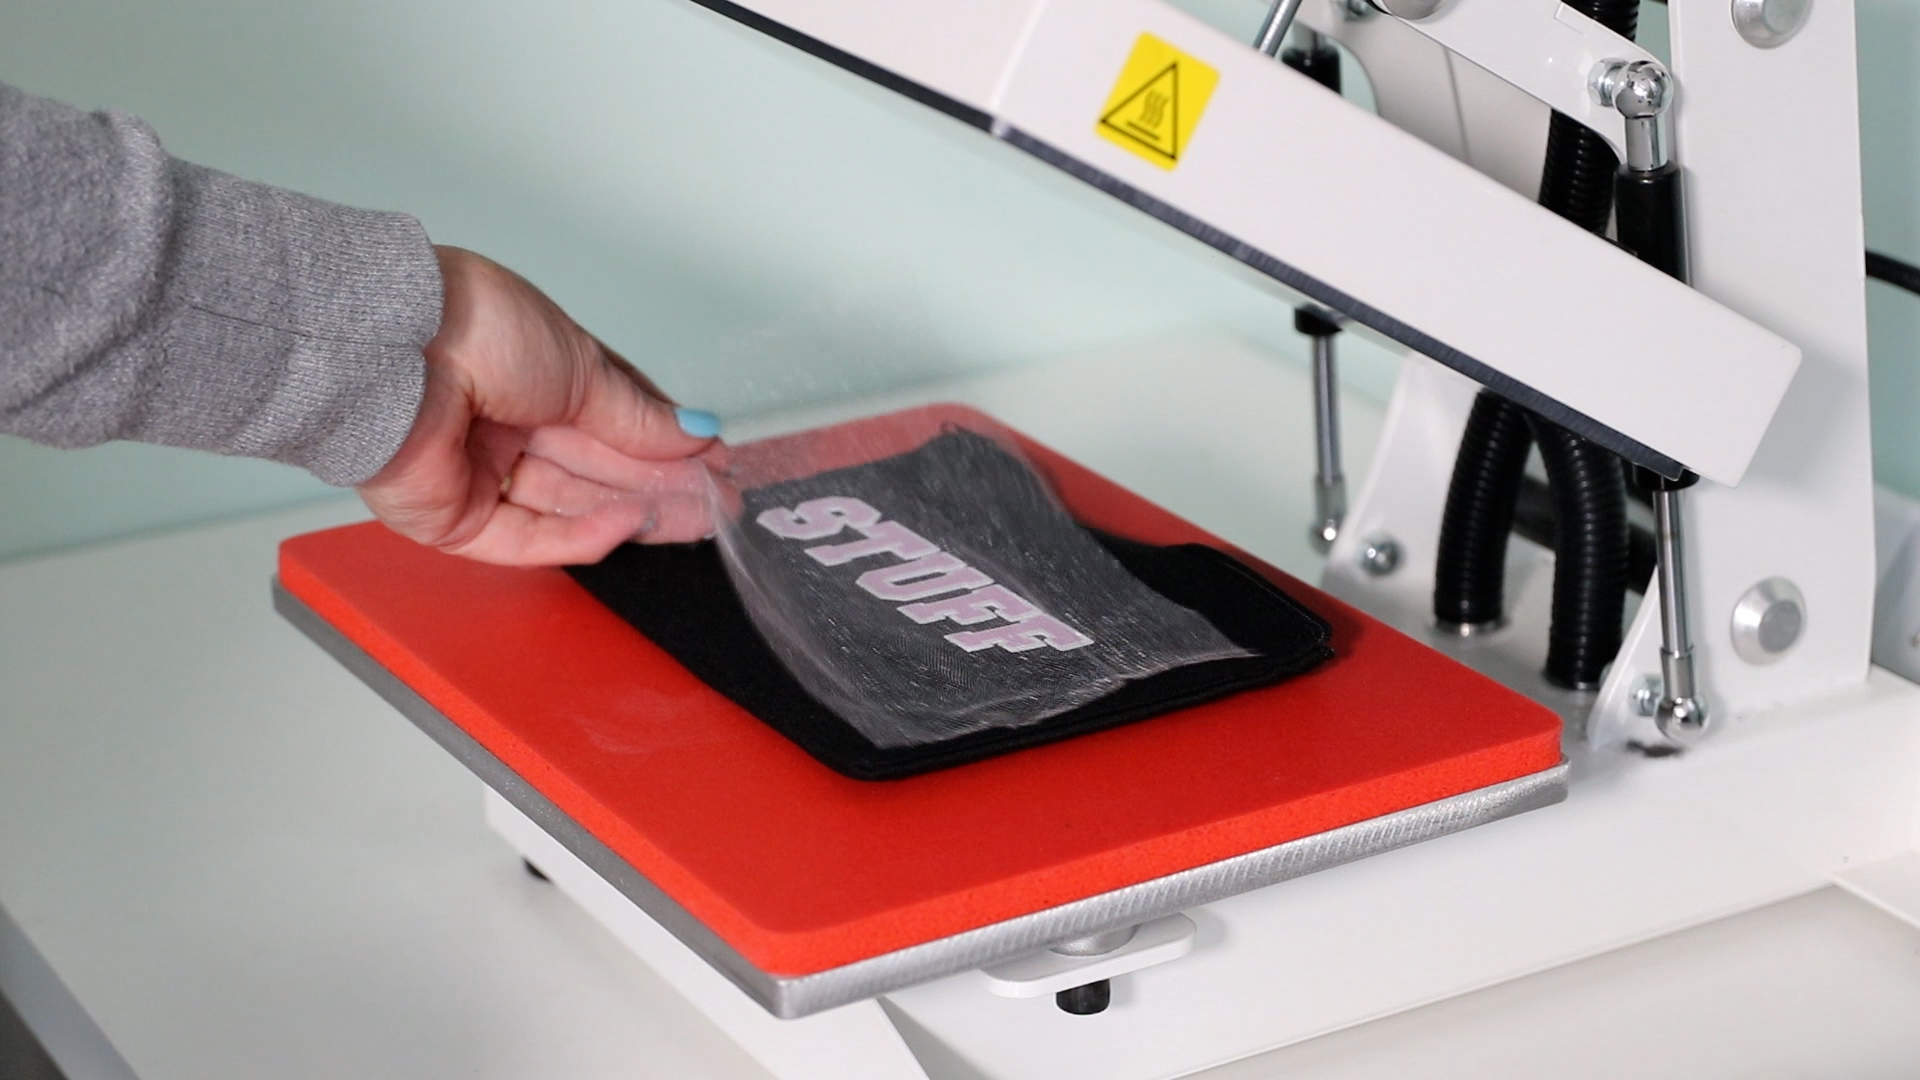
Lay the mesh on top of the HTV and cover everything with a Teflon sheet or another protective paper.
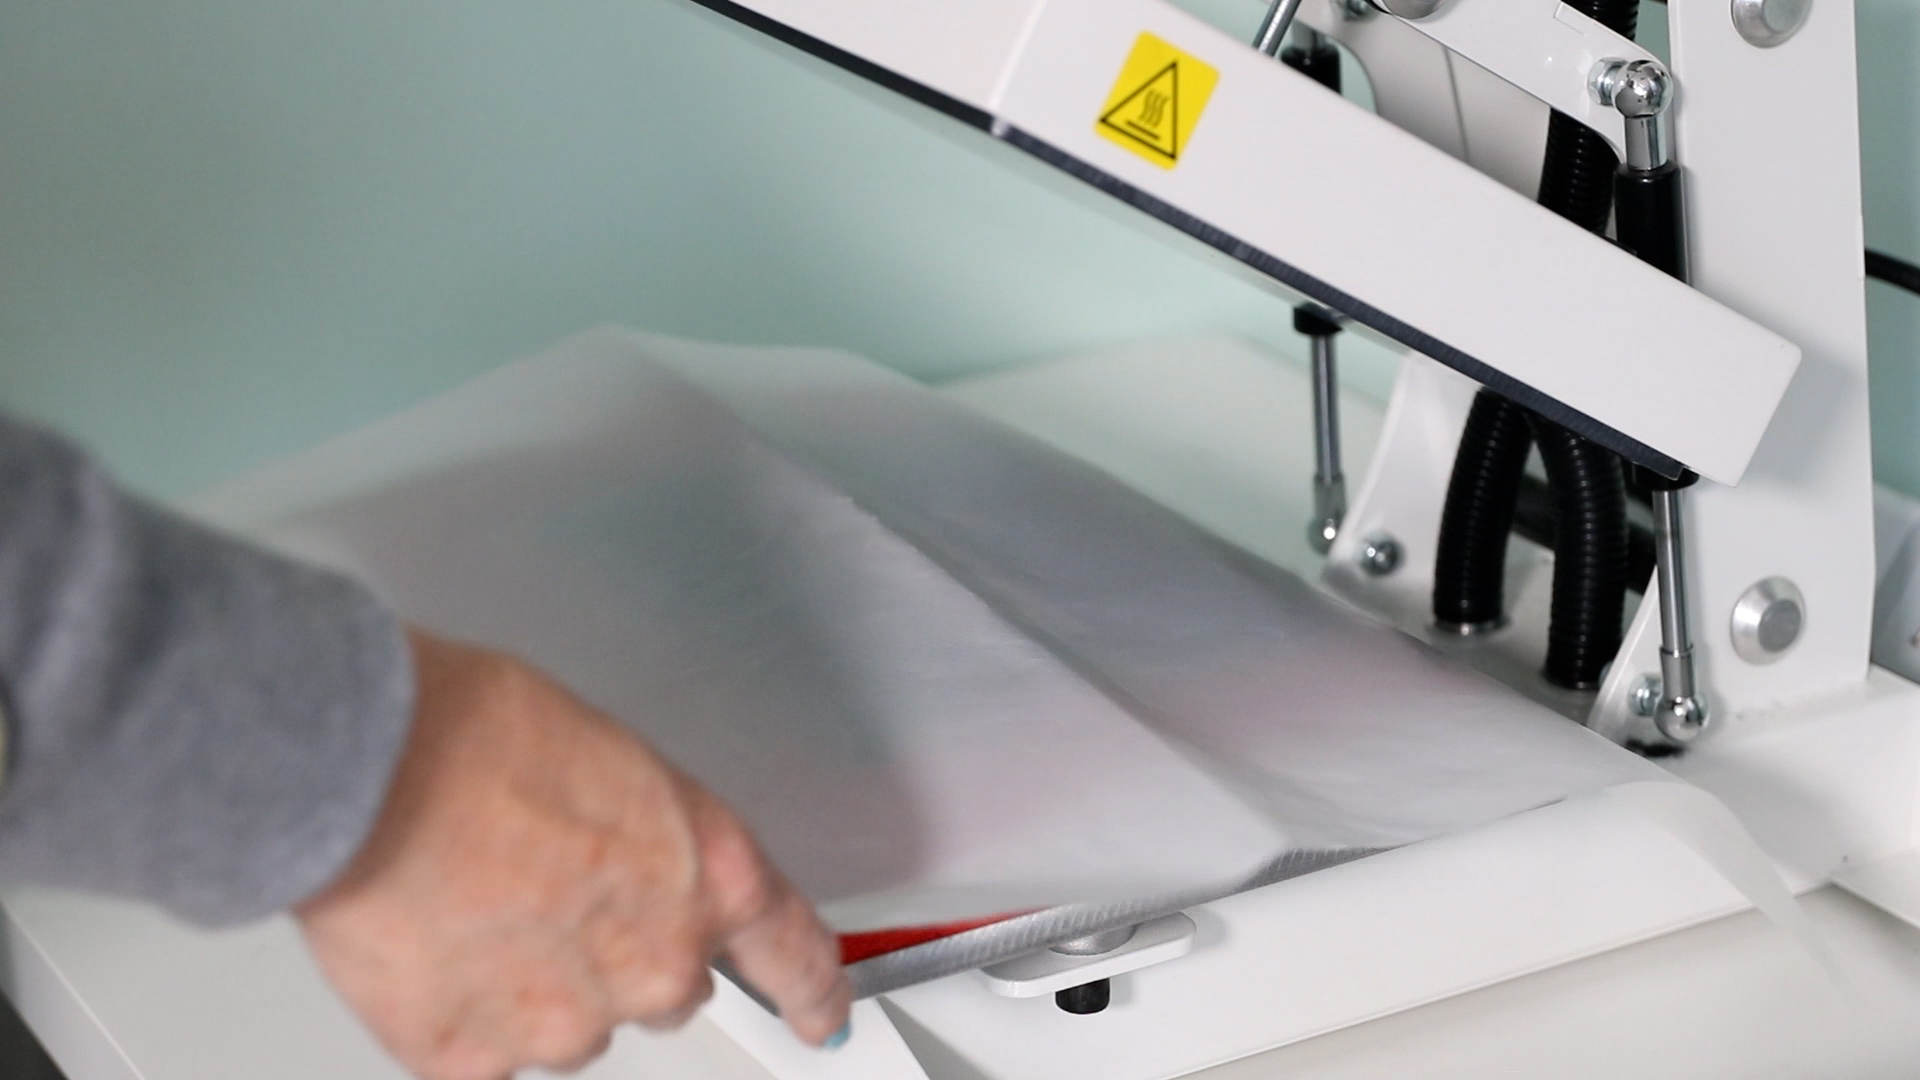
For this step of the project, we need to increase the pressure. Press with heavy pressure for about 10 seconds.
Remove the heat source and peel back the protective sheet and the embossing material.
Now our project is finished. Remove the pressing pillow and we’re done.
Embossed HTV Results
Let’s look at the results from the different materials I used.
Once I got started I kept looking for materials I had around my house that might work for embossing. Let’s look at the results of the different materials.
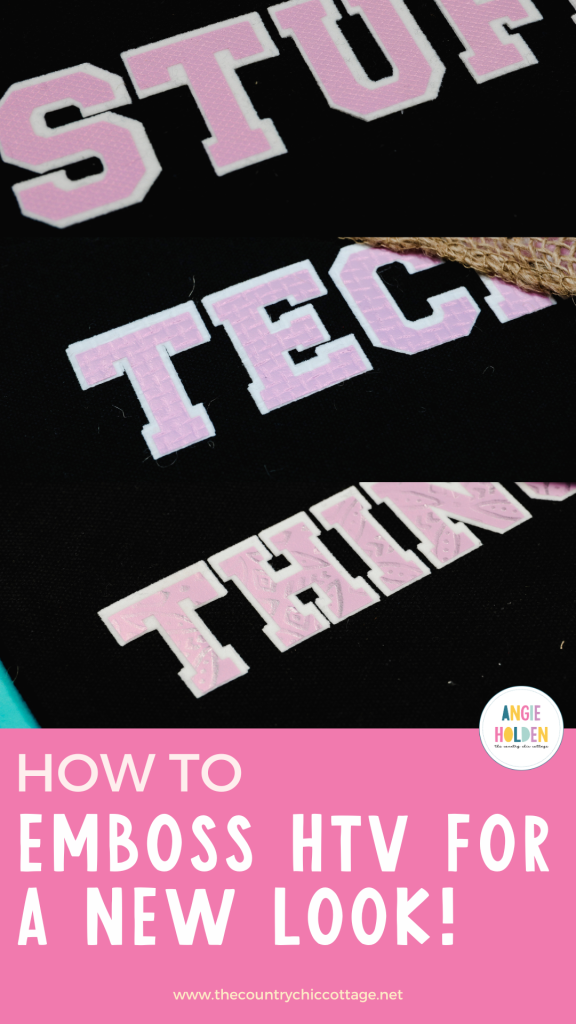
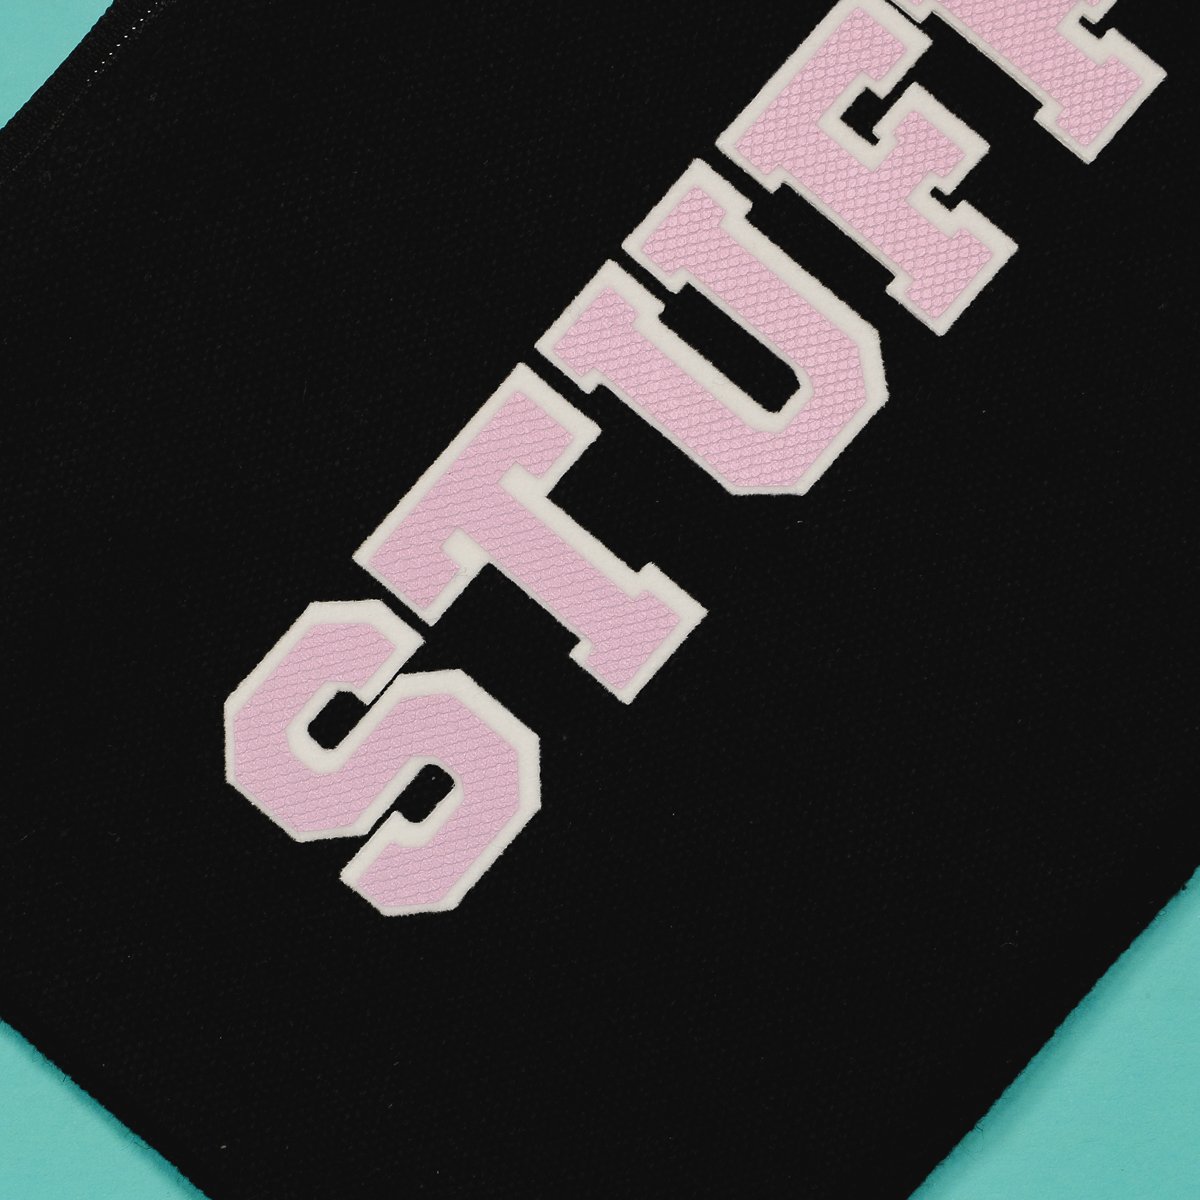
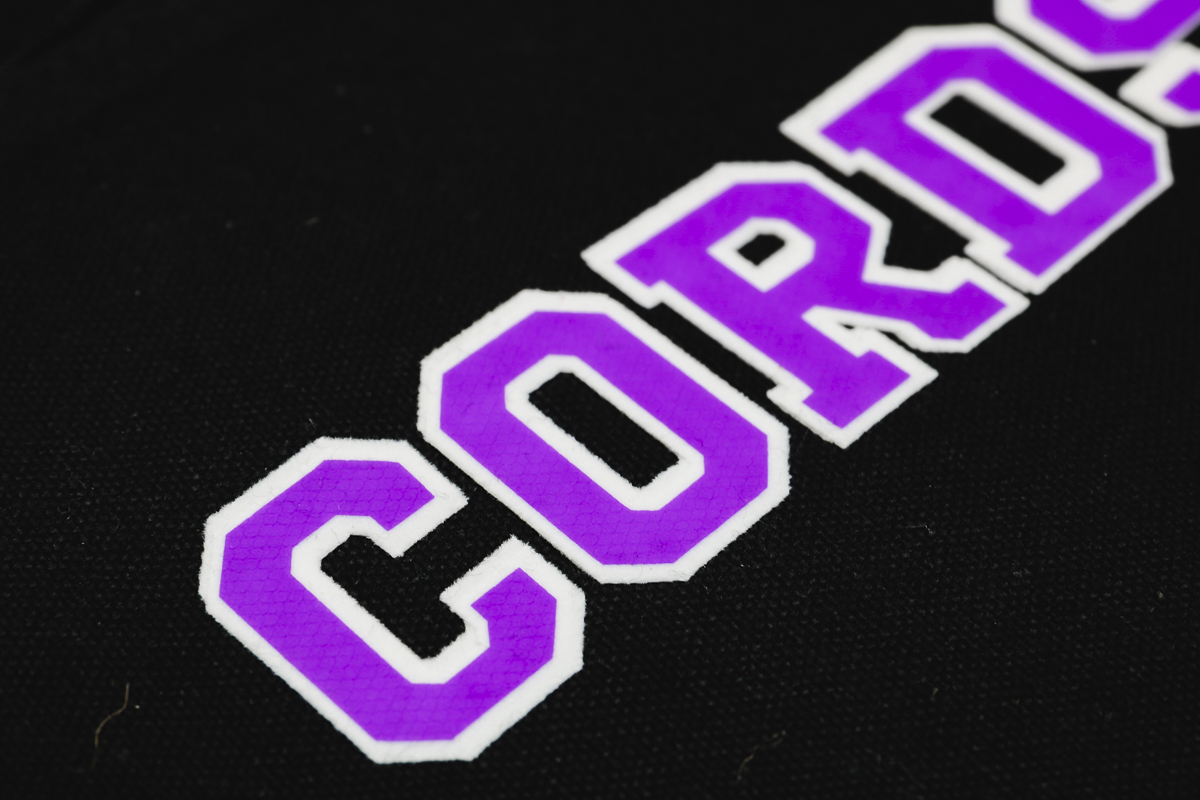
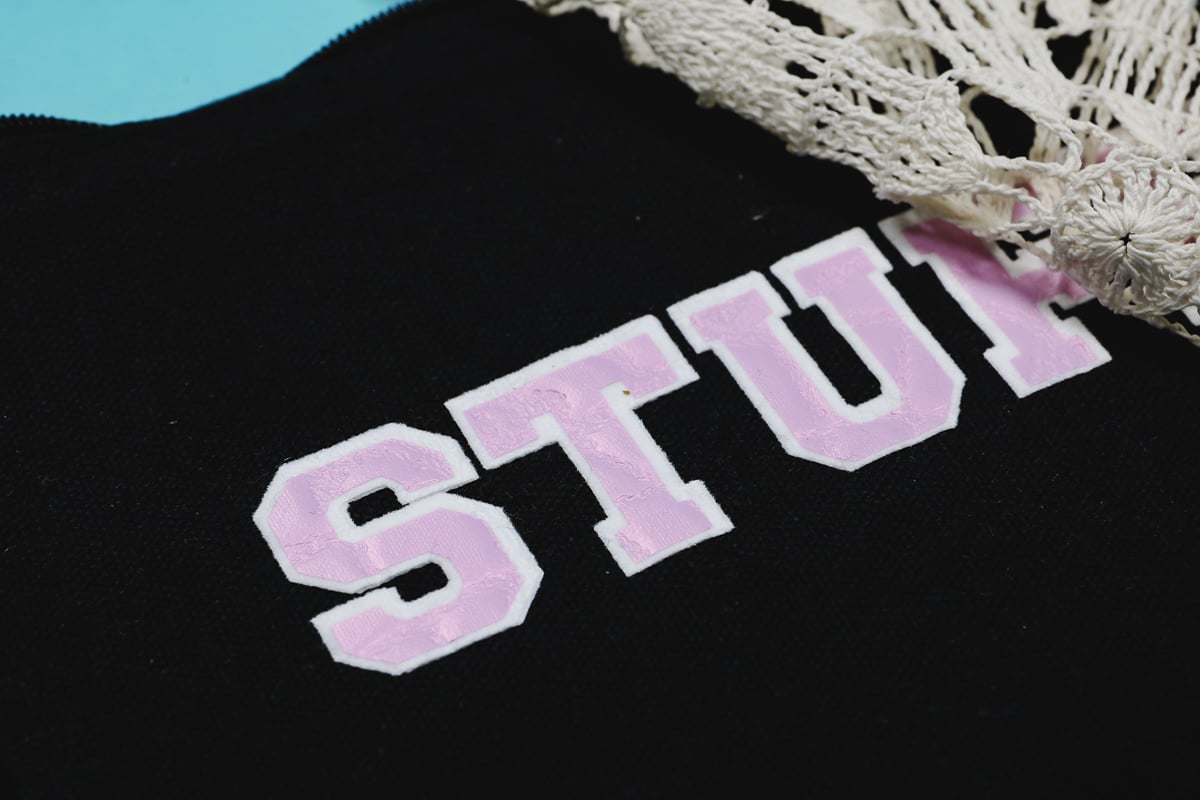
HTV Embossed with Tulle Mesh
This looks amazing. I love how well the design transferred into the EasyWeed Electric HTV.

This process was very clean and easy.
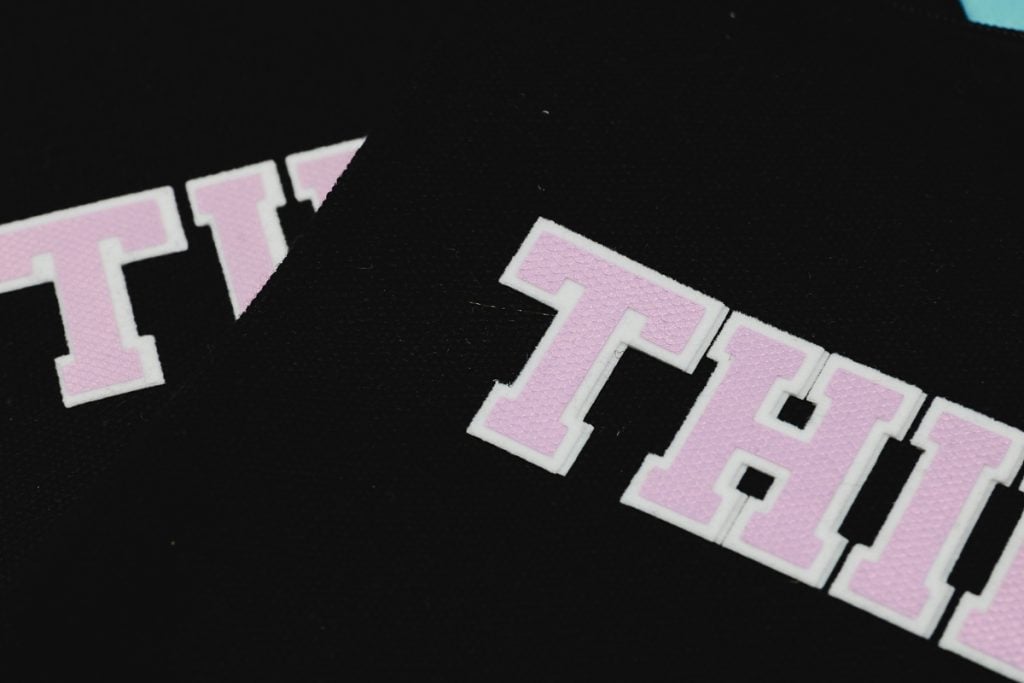
Next, I tried the same material on the EasyWeed Stretch. In this case, you can see the texture but it isn’t as noticeable as the Electric HTV.
It did work but every HTV and embossing material will be different so you’ll want to test them.
HTV Embossed with an EasyPress
I tested this process with the EasyPress. I did have to press down hard with the EasyPress but it looks just as good as the project with the heat press.
You can definitely do this process with an EasyPress.
Embossed HTV with Burlap
Using burlap was a bit messy but it turned out amazing. I love how the design is a little more open.
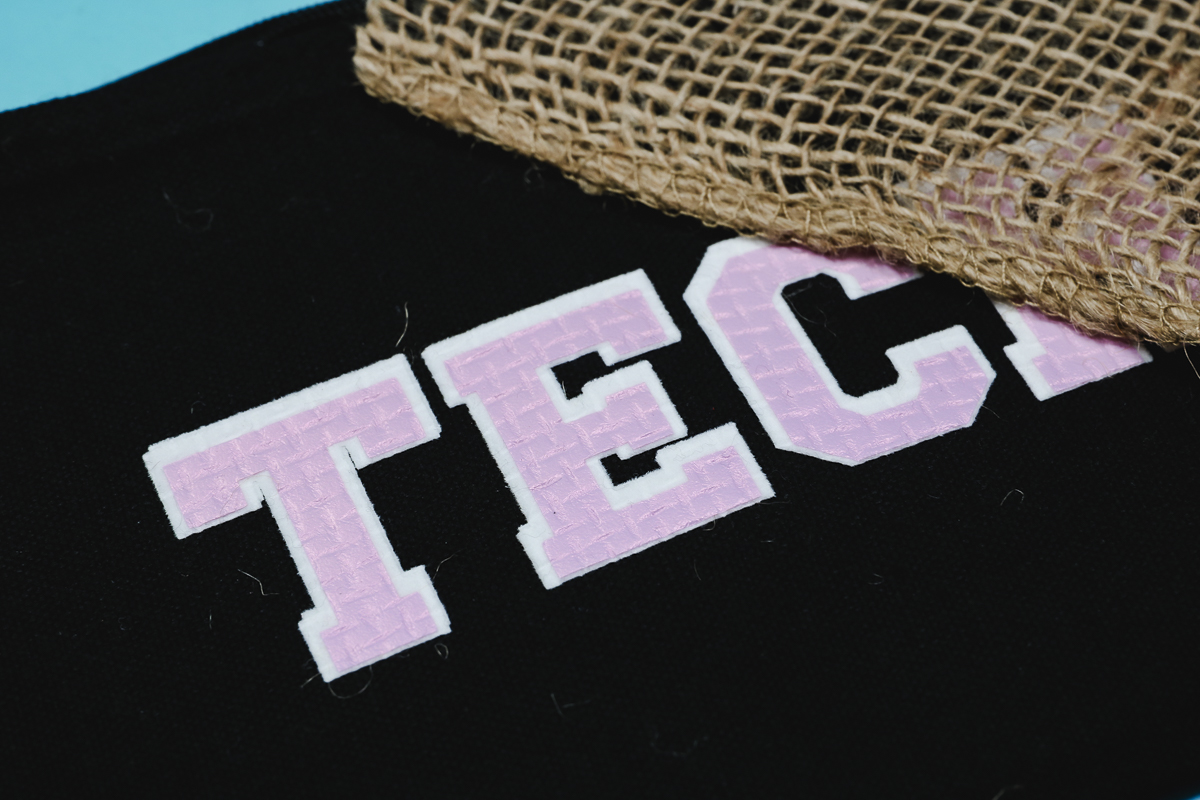
You’ll be able to clean the burlap off the fabric using a lint roller and I think that little bit of extra work will be worth it.
Embossed HTV with Paper
Next, I tested using embossed paper. The only paper I had was foil embossed and I didn’t realize that the foil would transfer with the heat.
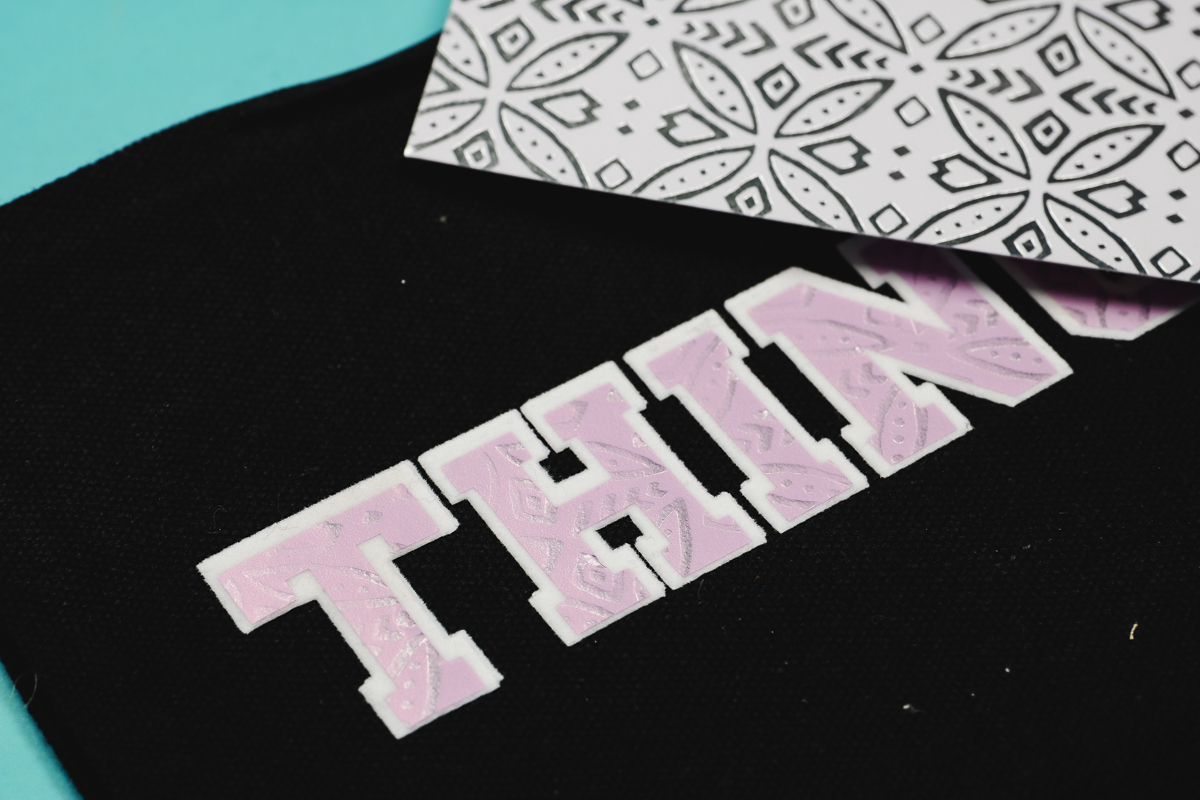
This turned out really cool. The paper embossed the HTV and it now has a foil look too.
I’m not sure if this will hold up in the wash but it worked well on a zipper pouch and since it won’t need to be washed much I think it will last.
Doily Embossed HTV
For my next test, I grabbed a doily I had at my house. The design did transfer but it isn’t as neat as the other materials.
I think if the HTV surface area was larger it may look better but it wasn’t my favorite of the materials I tried.
Embossing HTV with Ribbon
Next, I wanted to see if I could use ribbon to make stripes in the HTV. I laid the ribbon across the middle of the design and it did leave an indent in the HTV.
You could use multiple pieces of ribbon to get stripes across the whole design. You can try different ribbons to see if you get a better embossing than I got with the ribbon I used.
Emboss HTV with Sequin Fabric
For the next test, I used sequin fabric. This didn’t emboss very deep and the glitter pieces stuck to the HTV.
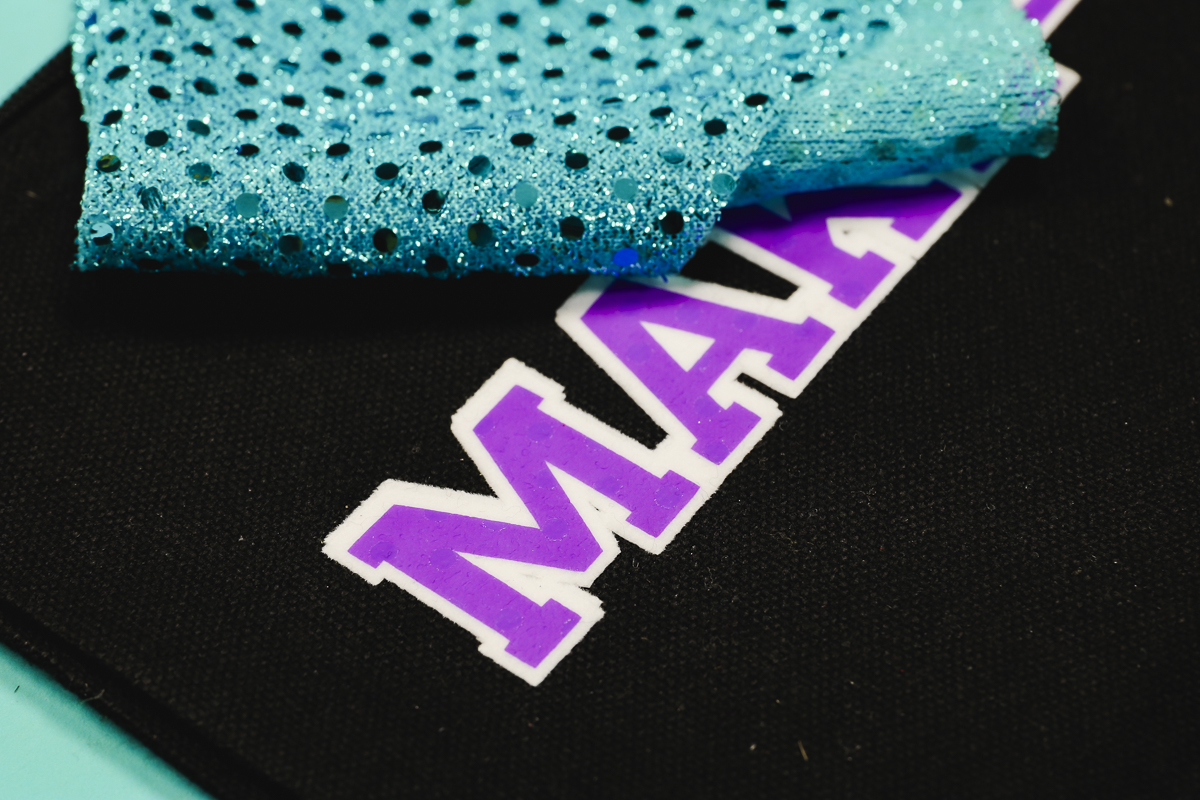
I was able to lint roll them off while it was still hot. The effect is okay but not my favorite of the materials I tried today.
Try Embossing HTV for Yourself!
Of all the materials I tried today, my favorites are the mesh and burlap. Both look amazing and they worked well each time I tried them.
I also really liked how the embossed paper turned out. Having the design both embossed and foiled was an added bonus.
I can’t wait to see what materials you try for this process. The possibilities are endless. If the material can withstand the heat, you can try it.
I hope I’ve answered any questions you have about how to emboss HTV with different materials. If you have any additional questions, leave them in the comments and I’ll be happy to answer them for you.