
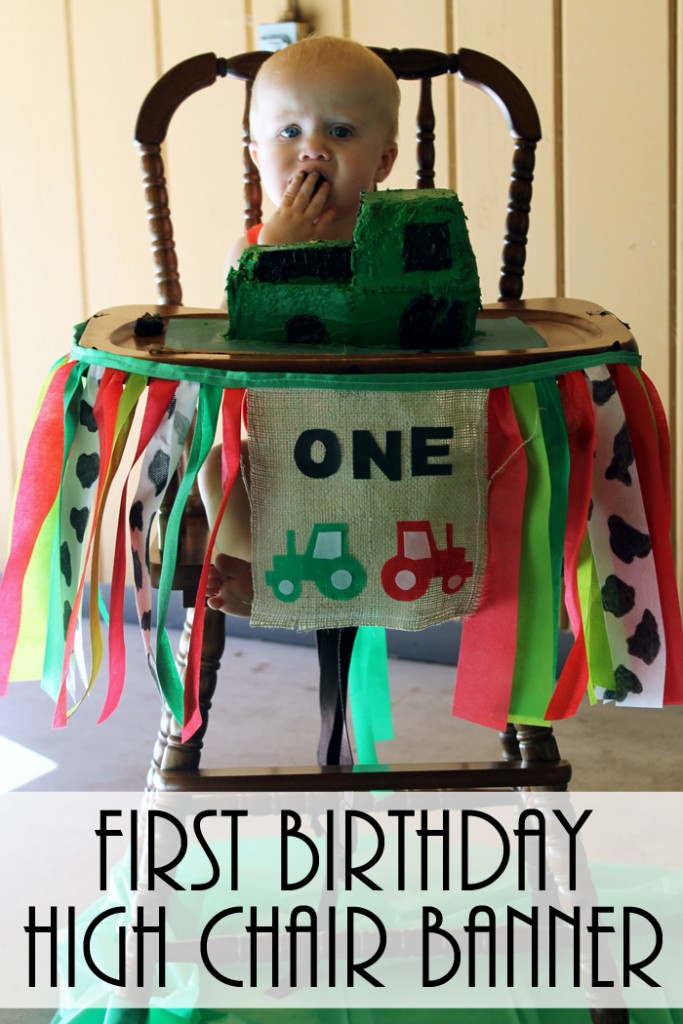
A fun trend in birthday parties is to make a high chair birthday banner! A few months ago, I made one for my grandson and wanted to share a tutorial here. You can make it just like mine or use the instructions to make your own version. The banner makes for really cute pictures when they are diving into that cake!

How To Make High Chair Birthday Banner
If you have never made a high chair birthday banner, then you will love this party craft! This project is easy to make and can be customized in a variety of ways. I will be showing you how to make this high chair birthday banner in a ”farm and tractor theme”, but you can make your own in any theme/style you like!
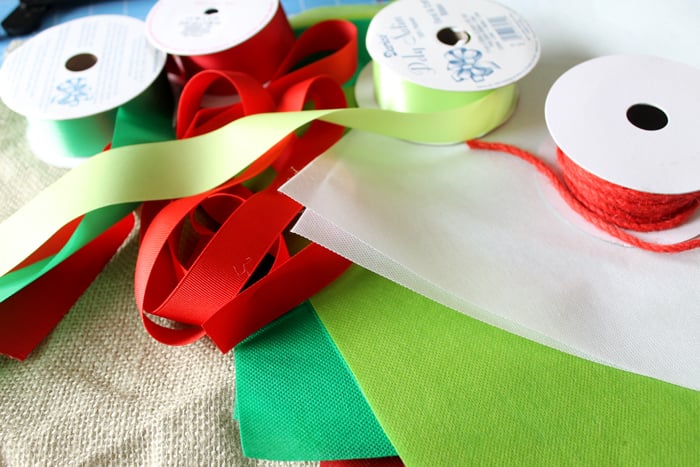
Supplies Needed To Make High Chair Birthday Banner
- OlyFun material (perfect because it will not fray)
- Ribbon
- Paint pen
- Burlap
- Marker
- Scissors
- Tacky glue
NOTE: For this project, I cut out all my pieces by hand, but you can use a Cricut machine instead. I talk more about how to use a Cricut machine for cutting the fabric in Step 7. If you would like to use your Cricut to cut the fabric you will need to add the following supplies to the list above.
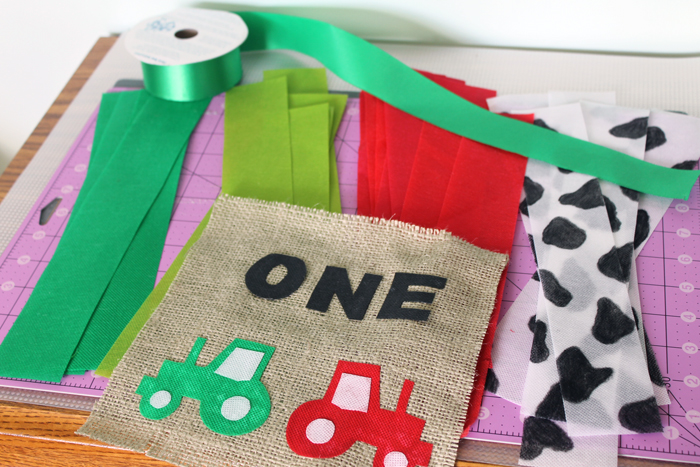
Step 1: Cut Olyfun Into Strips
I started by cutting the OlyFun into equal-sized strips. This material will not fray and is perfect for this project.
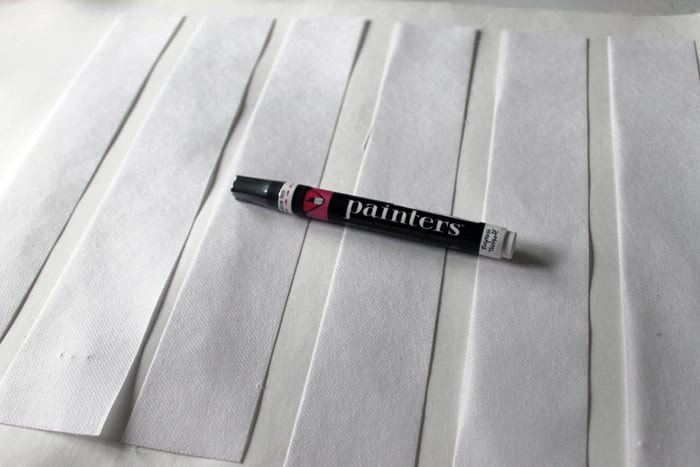
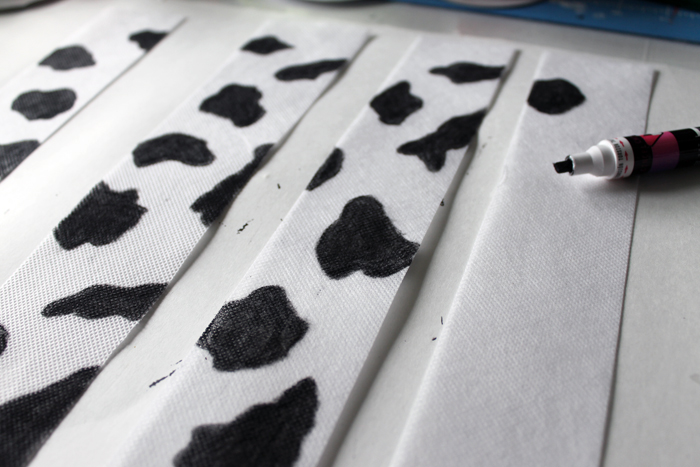
Step 2: Add Cow Pattern To White Strips
I used a paint pen on the white strips to draw on the ”cow spots”.
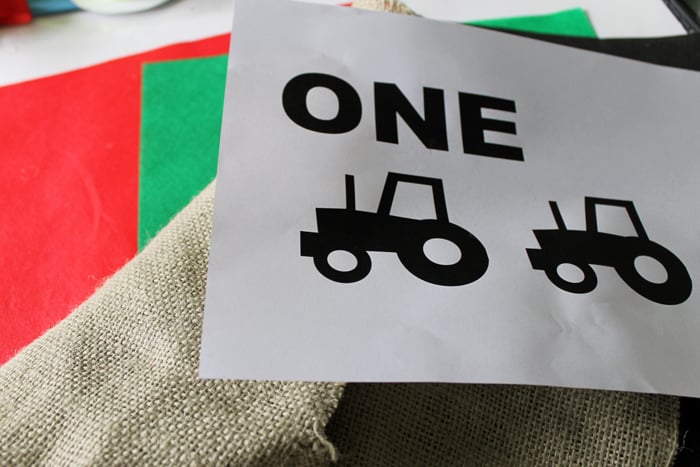
Step 3: Print Out Tractor Shape & Age
I then printed out some tractors and the word “ONE” on my computer.
Step 4: Trace Tractor
I used a marker to trace around the tractor shapes onto the OlyFun.
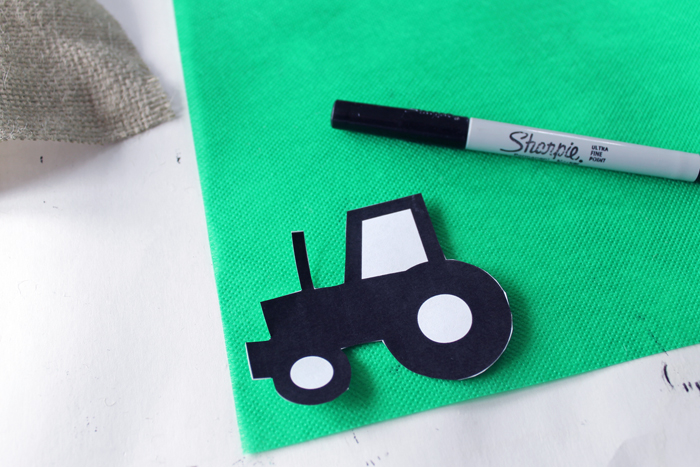
Step 5: Trace Windows & Inner Tires
I cut the window and inner tire pieces from my tractor and traced them onto another color.

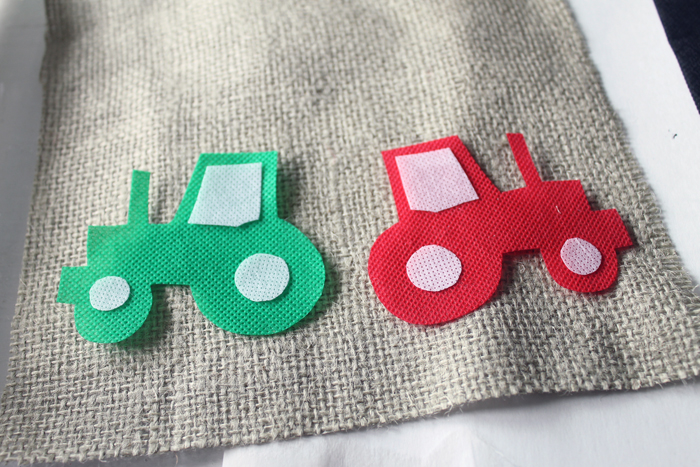
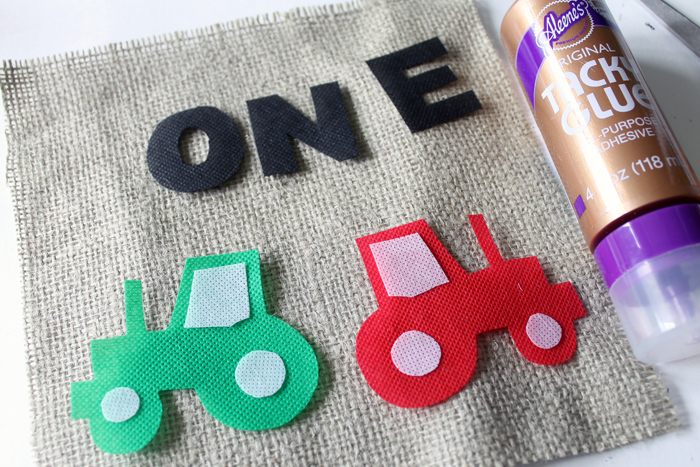
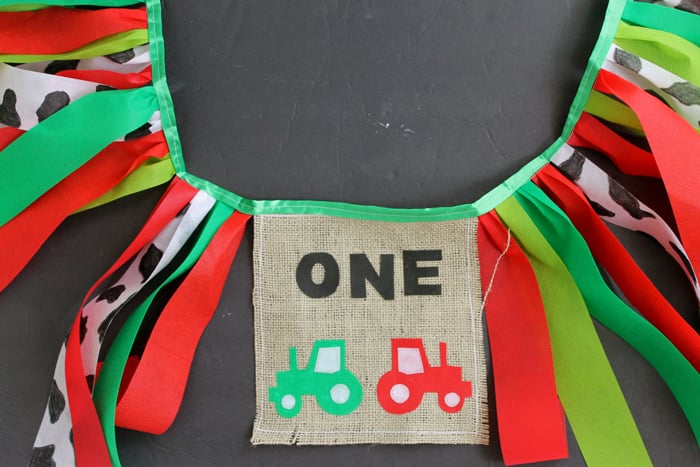
Step 6: Place Tractors On Burlap
I then placed all of those pieces on a rectangle of burlap.

We did a green and red tractor for this first birthday highchair banner.
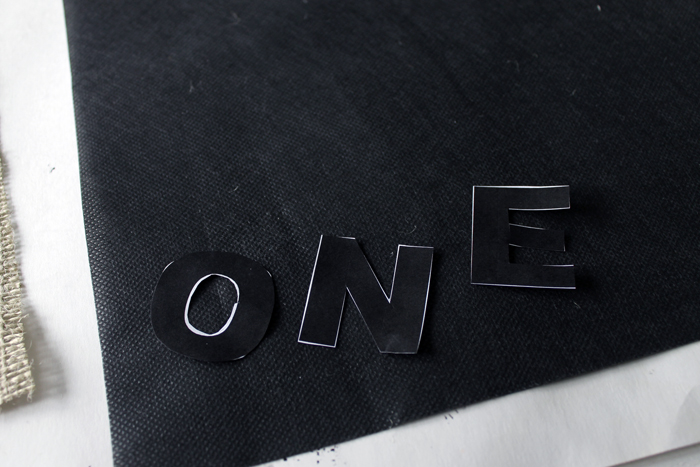
Step 7: Cut Letters From Black OlyFun
The letters were cut from black OlyFun. One tip is to use a piece of chalk to trace onto black fabric so you can see it more easily.
How To Cut Fabric Pieces With A Cricut Machine
If you don’t want to cut any of the fabric pieces by hand, you can use your Cricut machine instead!
To do that, first, cut your fabric strips on your fabric mat. Then search for a tractor design in Cricut Design Space. Cut out the main tractor piece from your red and green fabric and cut out the windows and inner tire pieces in white fabric.
Finally, cut out the age of the birthday boy or girl (in our case the word ”one”) in black fabric.
To learn how to cut fabric with your Cricut machine (and the correct blade to use) check out our ”Cutting Fabric with Cricut Machines” blog post!
NOTE: If you are recreating the cow strip I made in Step 2, you can cut out the white fabric strip with your Cricut machine and then draw on the ”cow spots” (like I did) with your paint pen. Or, you can cut out the ”cow spots” from black fabric with your Cricut machine and glue them to your white fabric strip.
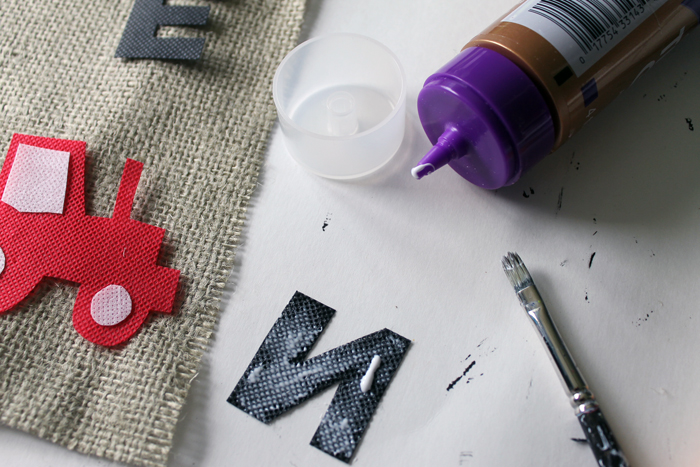
Step 8: Glue Tractor & Letters To Burlap
I used tacky glue to adhere everything to the burlap.
I actually used a paintbrush to make sure I got all of the surfaces when gluing.
Step 9: Sew High Chair Birthday Banner Together
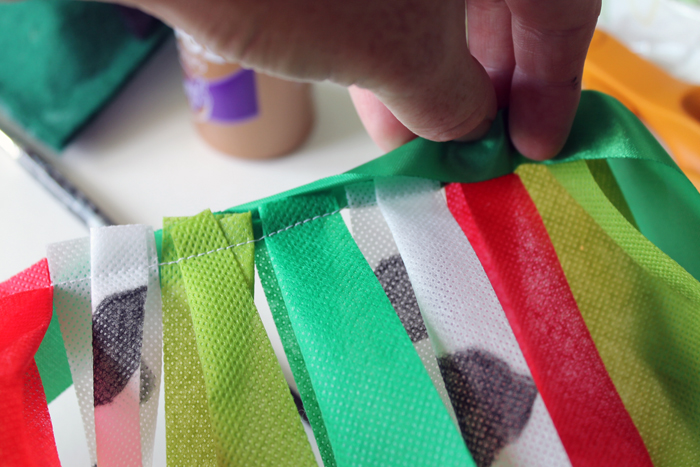
It is time to sew this one up! As you can see below, I had multiple strips of OlyFun in different colors, as well as a roll of ribbon. I started by stitching all the way around the burlap piece to prevent any fraying.
I then stitched the OlyFun pieces to the ribbon as shown below. Measure your high chair and make it long enough to go all the way around the tray. Add the burlap piece in the center when sewing. After I stitched once, I turned my ribbon over the top and stitched again to give a more finished appearance.
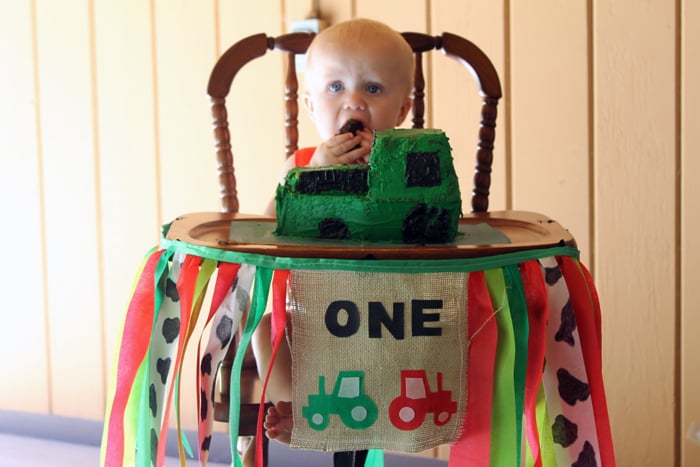
This first birthday high chair banner was done and ready for the party! I love how this farm-themed version turned out but you can use this same technique to make a version to fit your party theme.
Just wrap it around the high chair and tie it in the back. Secure with double-sided tape if needed. Then put in the birthday boy and let him dig into his cake! This first birthday high chair banner makes for the perfect photo op at the birthday party!
FAQs About High Chair Birthday Banner
Here are a couple of common questions I see from readers about making this high chair birthday banner. If you have a question but don’t see it down below, please leave it in the comments so I can answer it for you.
Can I Change The Size Of This High Chair Birthday Banner?
Yes, you can! You can make this high chair birthday banner smaller or bigger depending on the look you are going for.
Can I Use A Different Kind Of Glue?
I find that tacky glue works best for this project, however, you can use hot glue if you prefer.
What Cricut Machine Can I Use For This Project?
For this project, I would recommend using the Cricut Maker or Cricut Explore series machines.
Can I Sew This High Chair Birthday Banner By Hand?
I don’t recommend sewing this high chair birthday banner by hand. This is because the project would take much longer to make and might not be as sturdy sewn together by hand.
7 More Birthday Party Decor Ideas
If you love this high chair birthday banner, here are some other birthday party decor ideas you won’t want to miss!


This turned out super cute! I love all of the small details you put into it. I just recently made one for my son’s first birthday and I definitely felt like it made the party 🙂
Great idea to make this a photo booth corner with the birthday celebrant.
Awww this is soooo cute! I love the customization. Thanks for sharing!
#TrafficJamWeekend
Really smart to use a paint pen to make the cow details!
This is darling, and perfect for a first birthday photo opp! Thanks for linking up with Merry Monday this week.
What a cute idea!! 🙂
I would love for you to share this with my Facebook Group for recipes, crafts, tips, and tricks: https://www.facebook.com/groups/pluckyrecipescraftstips/
Thanks for joining Cooking and Crafting with J & J!