
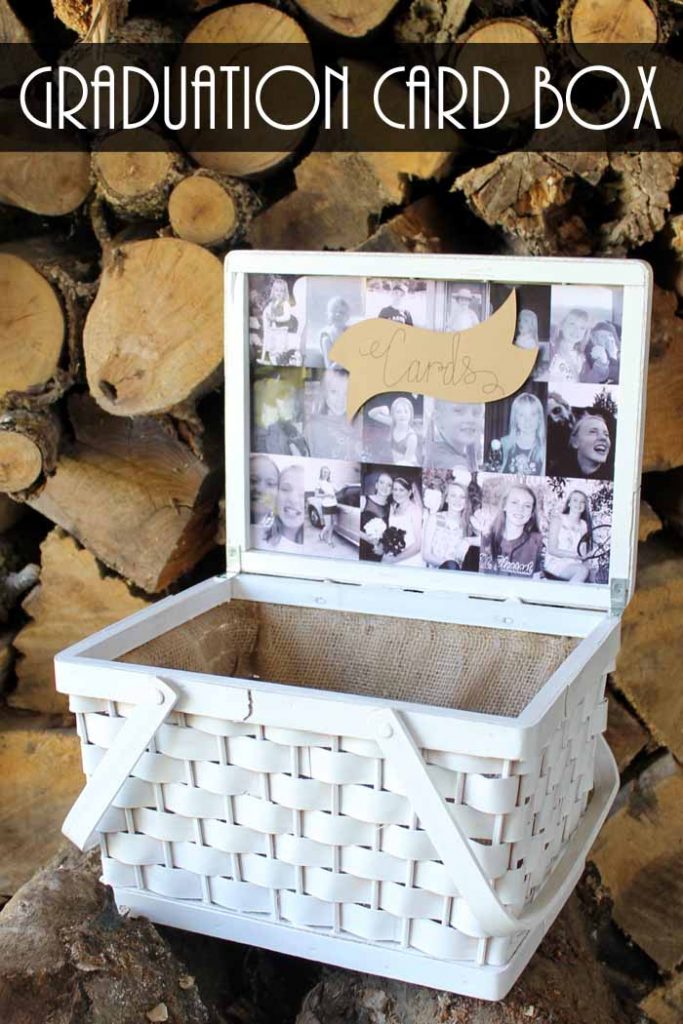
A graduation card box is a great way to collect a bunch of cards for the graduate! All you need is a simple basket to get started. This could easily be used for weddings and other occasions, too!
How To Make A Graduation Card Box
Whether you are hosting or attending, there is always so much to do around graduation time. When we hosted my daughter’s outdoor graduation party, I had a list a mile long!
Graduation is a special time and parents and children need to soak up every moment! This card box is a great way to make sure you don’t miss any of the well-wishes a loved one has for you. Plus, it makes it so easy to transport!
The supply list calls for a picnic basket, but you can use any size basket you have on hand. Also, the printed photos can be swapped for colorful paper or a single photo if you prefer.
Supplies Needed To Make Graduation Card Box
- Picnic basket
- White spray paint
- White card stock
- Printed pictures
- Adhesive
- Cricut Kraftboard in Natural
- Black Cricut Pen with 0.4 tip
- Adhesive
- Cricut Cutting Machine (Want to see the difference between the machines? I compared the Cricut Maker and Explore here.)
- Banner cut file
- Ruler
- Scissors
- Burlap
- Hot glue and glue gun
- L-brackets

Step 1: Spray Paint Basket
To begin, spray paint your basket and allow it to dry while you make the other elements.
Step 2: Cut & Design Banner
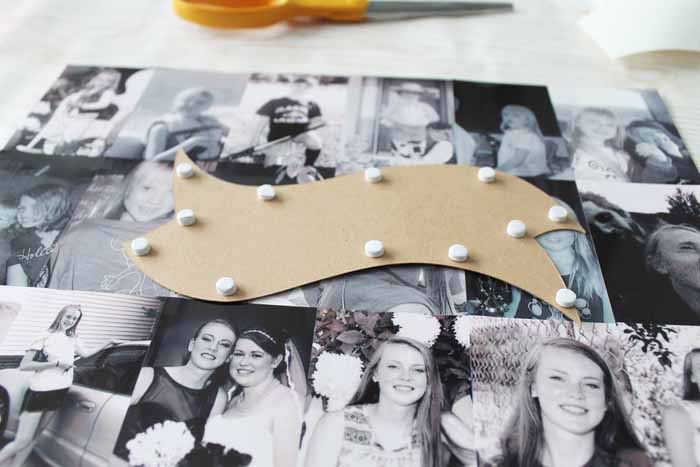
Choose a banner cut file in Cricut Design Space. Then cut it from kraftboard and use the Cricut machine to write on the lettering. Set aside.
NOTE: Confused by Cricut Design Space? Download our beginner’s guide here.
Step 3: Print Photos & Cut Cardstock To Fit Lid
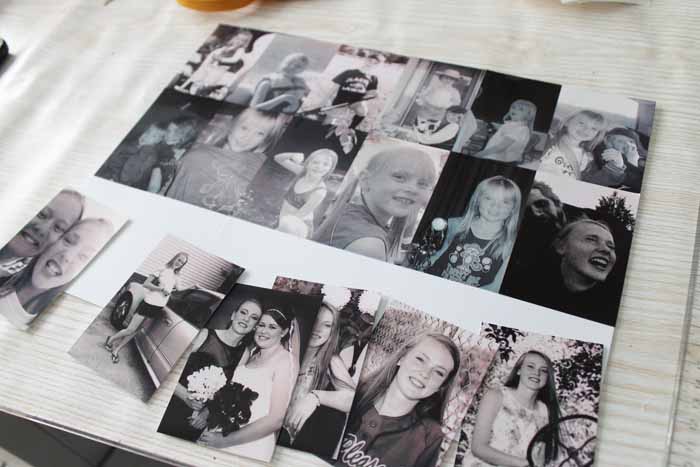
Next, we will work with the printed pictures. You can print these however you choose but I used my HP Sprocket Plus. Measure the inside lid of your picnic basket and cut card stock to fit the opening. I had to use two pieces of card stock adhered together for this.
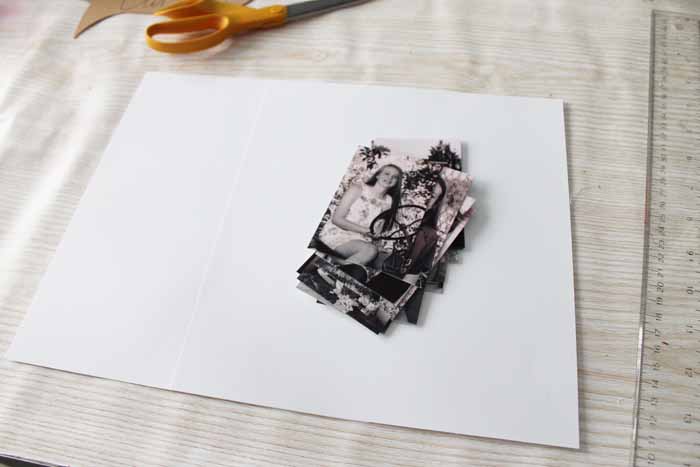
Step 4: Glue Pictures To Cardstock
Lay out your pictures onto the card stock and secure them into place. The HP Sprocket actually prints on self-adhesive paper so this step was super simple.
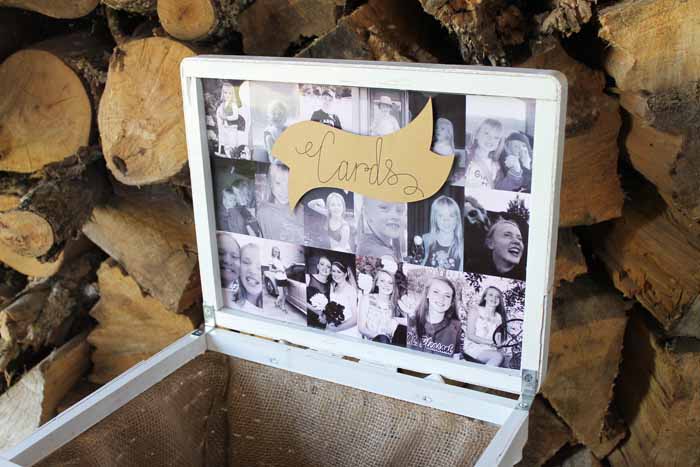
Step 5: Add Cards Banner To The Middle Of The Photos
Add the “cards” banner to the middle of your photos. To adhere the banner piece, I used dimensional adhesive dots for a 3D effect on my final project.
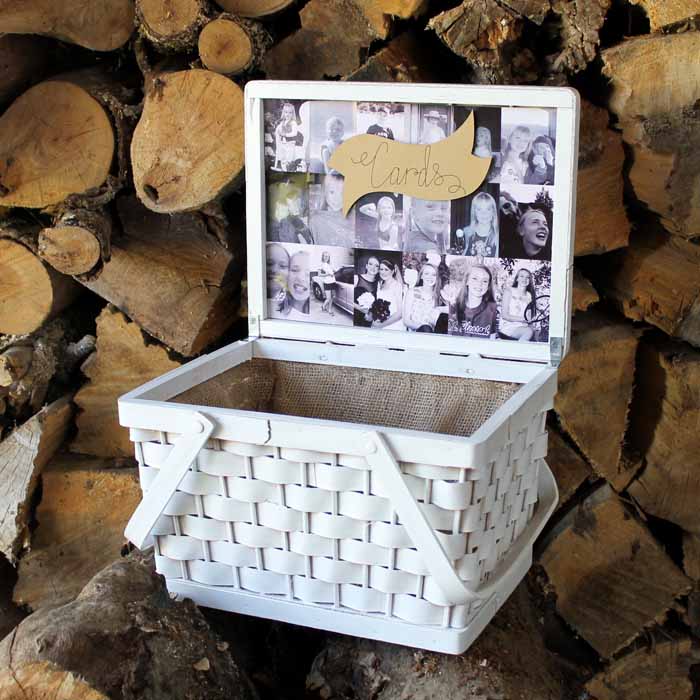
Step 6: Glue Entry Photo Piece To The Inside Of The Basket Lid
Add the whole piece (the photo collage with cards banner) to the lid of the painted picnic basket and secure it in place with hot glue.
You can also add a couple of L-brackets to the lid to hold it open if you like.
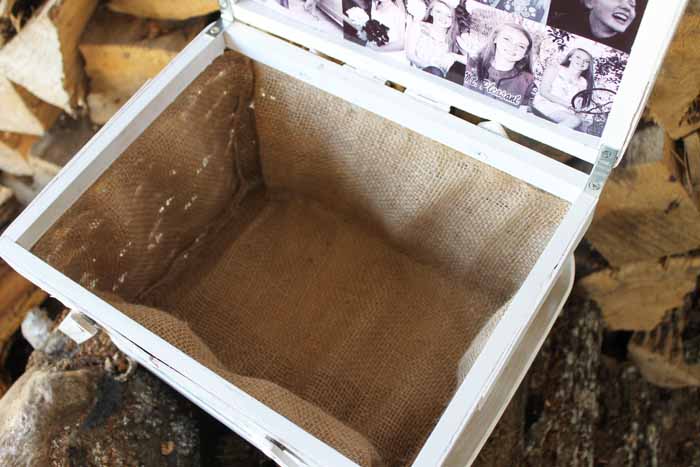
Step 7: Line The Inside Of Your Graduation Card Box
Then, line the inside of your picnic basket with burlap for a rustic look. Simply cut the fabric to size with scissors and use hot glue to secure it into place.
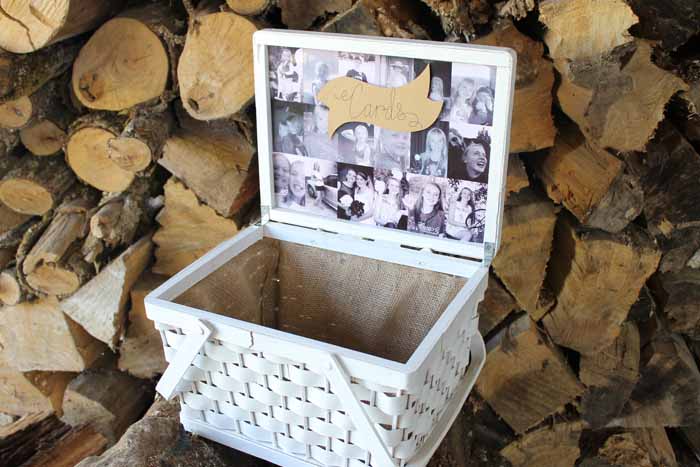
Your graduation card box is complete and ready for your party!
This is actually a super simple idea but it looks great! I can’t wait to use this one at the graduation party I will be throwing later this month! Y’all stay tuned for even more ideas.
Tips and Tricks for Graduation Card Box
Now that you’ve seen this fun graduation card box, are you ready to make your own? Here are a few tips and tricks to ensure your project goes as smoothly as possible!
- Design Your Graduation Card Box Around The Theme Of Your Party – For my card box, I was going with a rustic theme, however, you can pick any theme that you like. For example, you could base your graduation card box around school colors, sports, the degree someone is going to pursue, etc.
- Print In Color – I chose to print my photos in black and white, but you can print in color instead!
- Use Graduation Photos – You may have noticed that I used a variety of photos, but this project would be great for displaying those graduation photos you had taken!
- Skip Graduation – As I mentioned before, you don’t have to use this card box just for a graduation party! Instead, recreate this project and use it at a bridal shower, wedding, baby shower, or other special occasion.
5 More Graduation Crafts
Did you love this graduation card box and want more graduation crafts? Then check out the projects below!
- Graduation Party Ideas: Words of Wisdom Jar for Graduates
- Printable Funny Graduation Cards
- 20+ Handmade Graduation Gift Ideas
- Clay Pot Graduation Cap Decor
- DIY Cupcake Wrappers For Graduation (Made With Cricut)


Thanks for sharing @DearCreatives Inspiration Spolight party. See you again soon. pinned, and sharing.
I love this, I am going to use your idea to make myself a sewing basket #ourminilinkyparty@_karendenniska