Need something fun to do with the kids? Try our guides below on how to draw insects with fingerprints. Using your thumbs, fingers, and a mason jar printable, create a collection of creative bug designs! This fun craft idea is perfect for spending an afternoon creating with kids of all ages. Y’all enjoy!
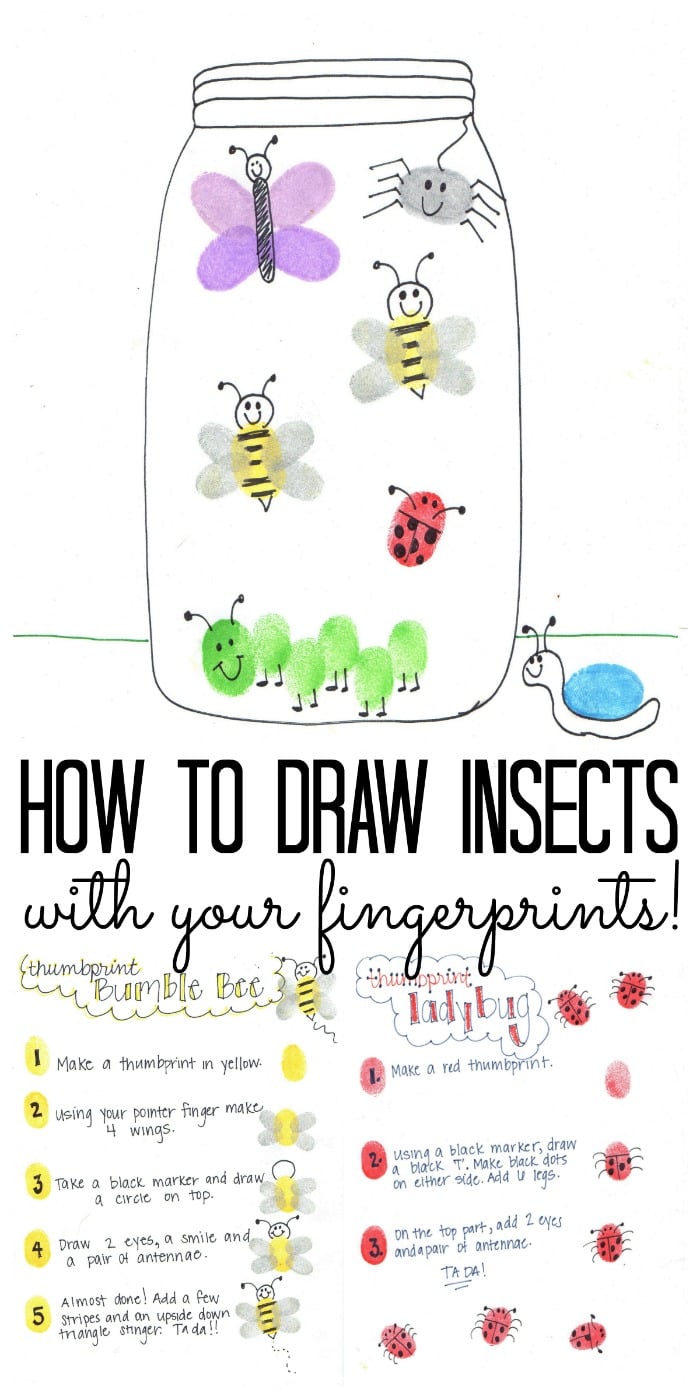
This is a really fun craft for kids. They can use their imaginations to create bugs of different colors and shapes all with their hands. And what kid doesn’t like sticking their hands in paint? Plus, the adults don’t have to deal with live bugs trapped inside of jars!
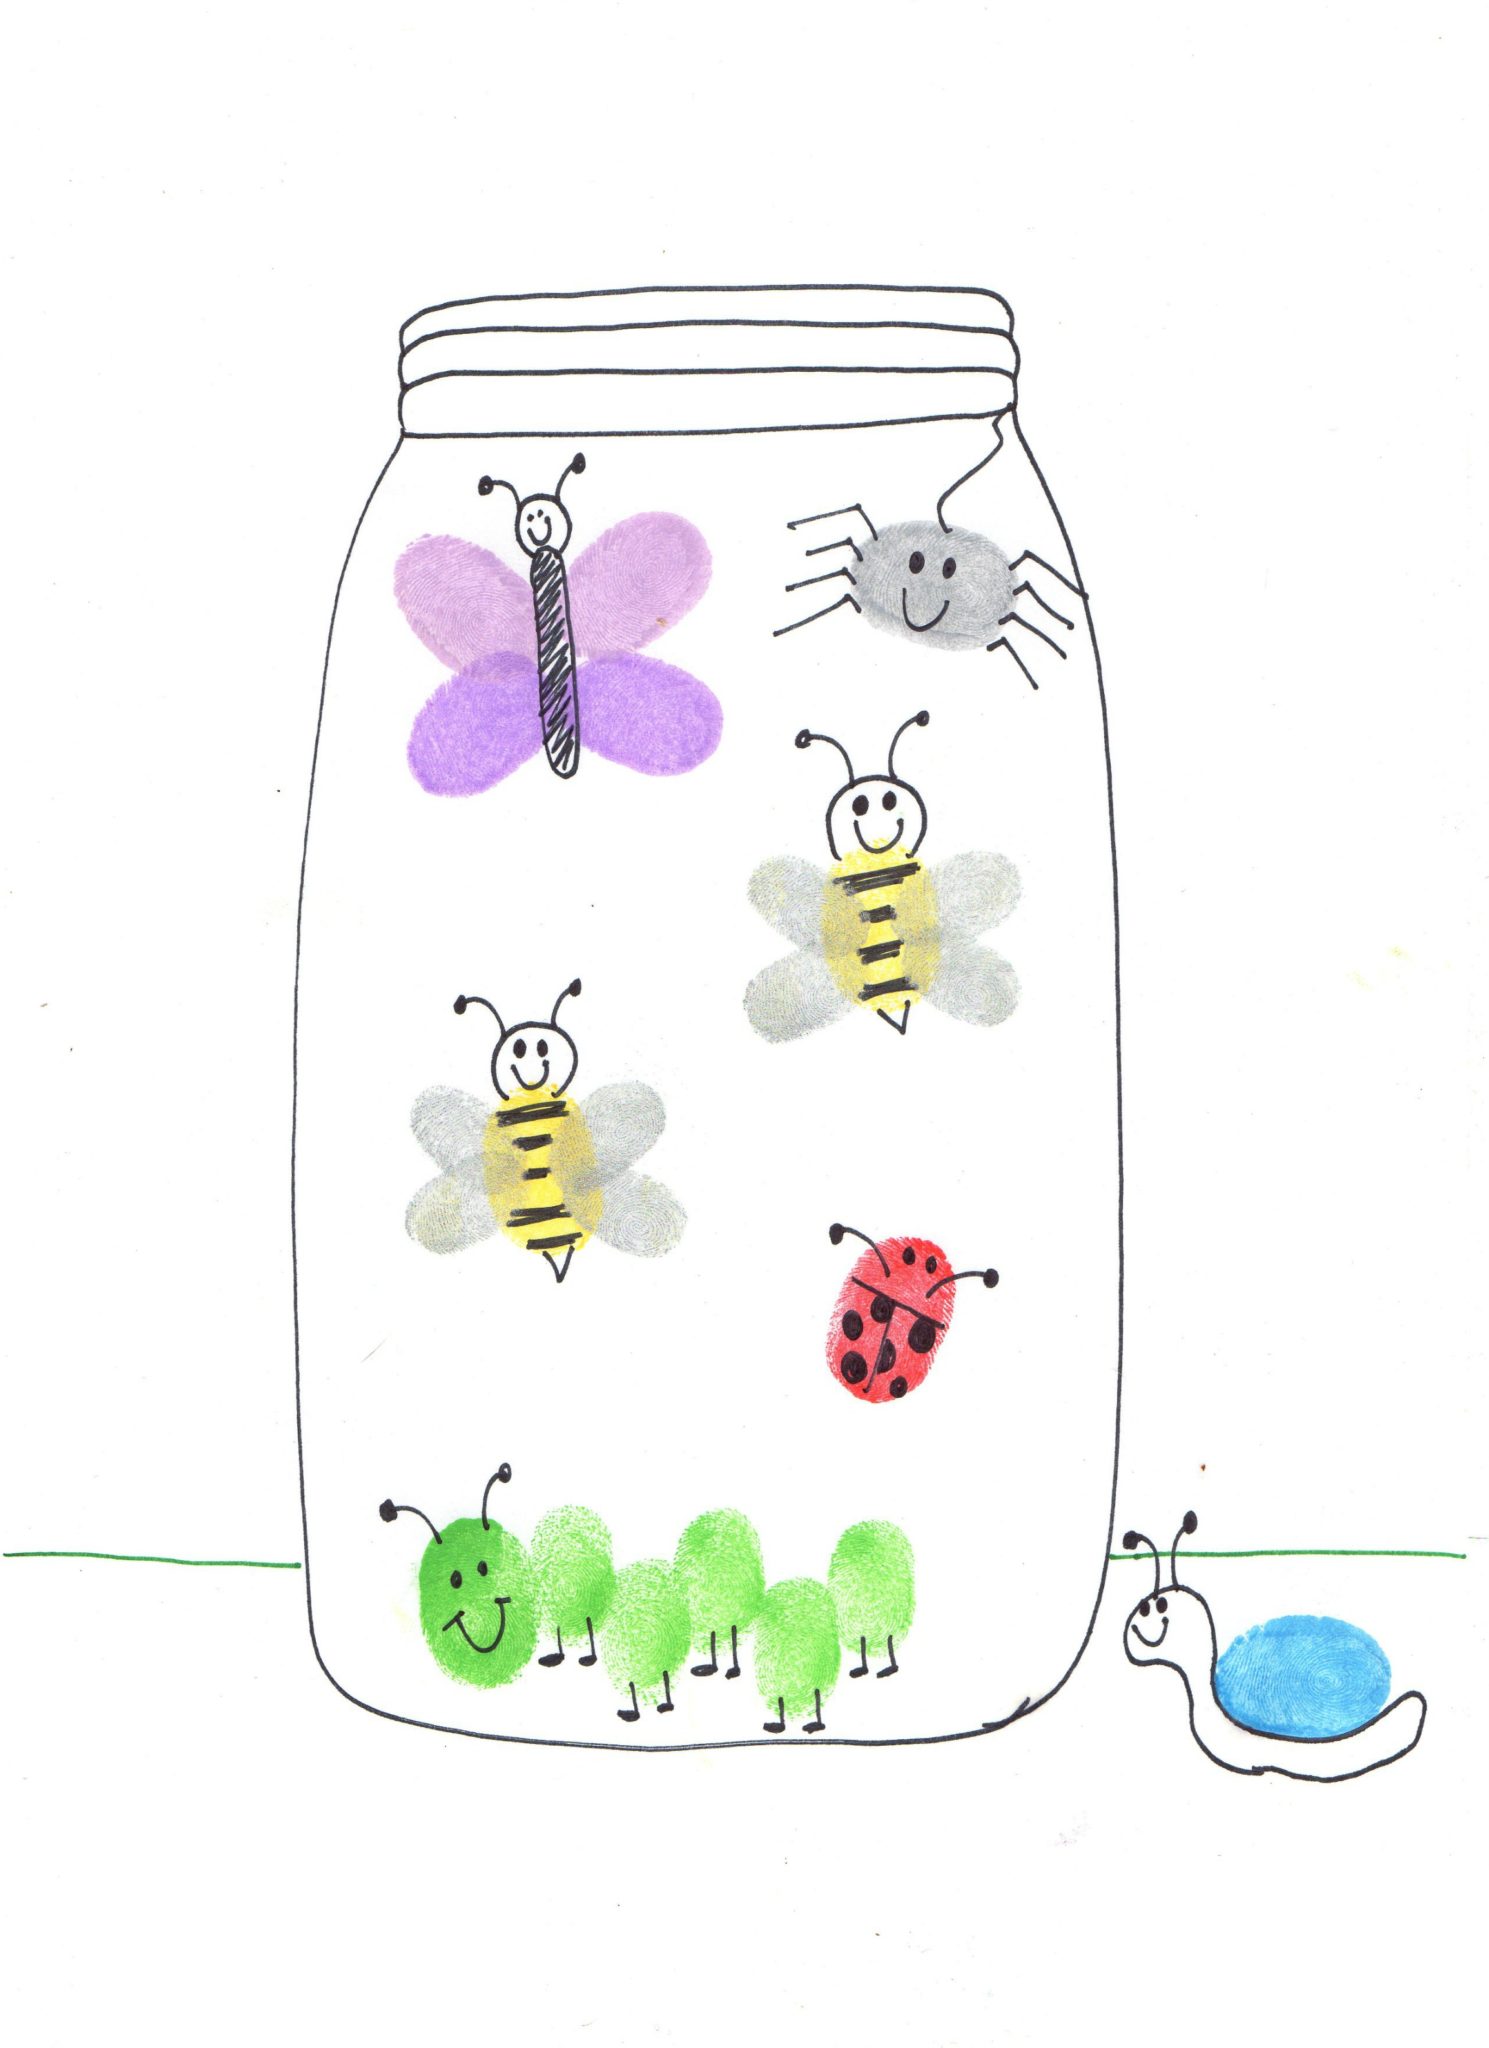
My kids used to love this project when they were little. Instead of making them on a plain sheet of paper, I created a mason jar you can print out and let the kids add their own bugs to the jar!
Drawing Fingerprint Insects and Bug Art
If you’re a teacher, you could really create a buzz with this project. It’s fun for the kids, but also science-class friendly.
Encourage your kids or students to create an entire ecosystem of insects, complete with leaf drawings, twigs, and more!
Below, I have printable instructions for the following insects:
Supplies needed:
- Stamp pads
- Sharpies
- Paper
- Free printable bug jar (click here to download and print)
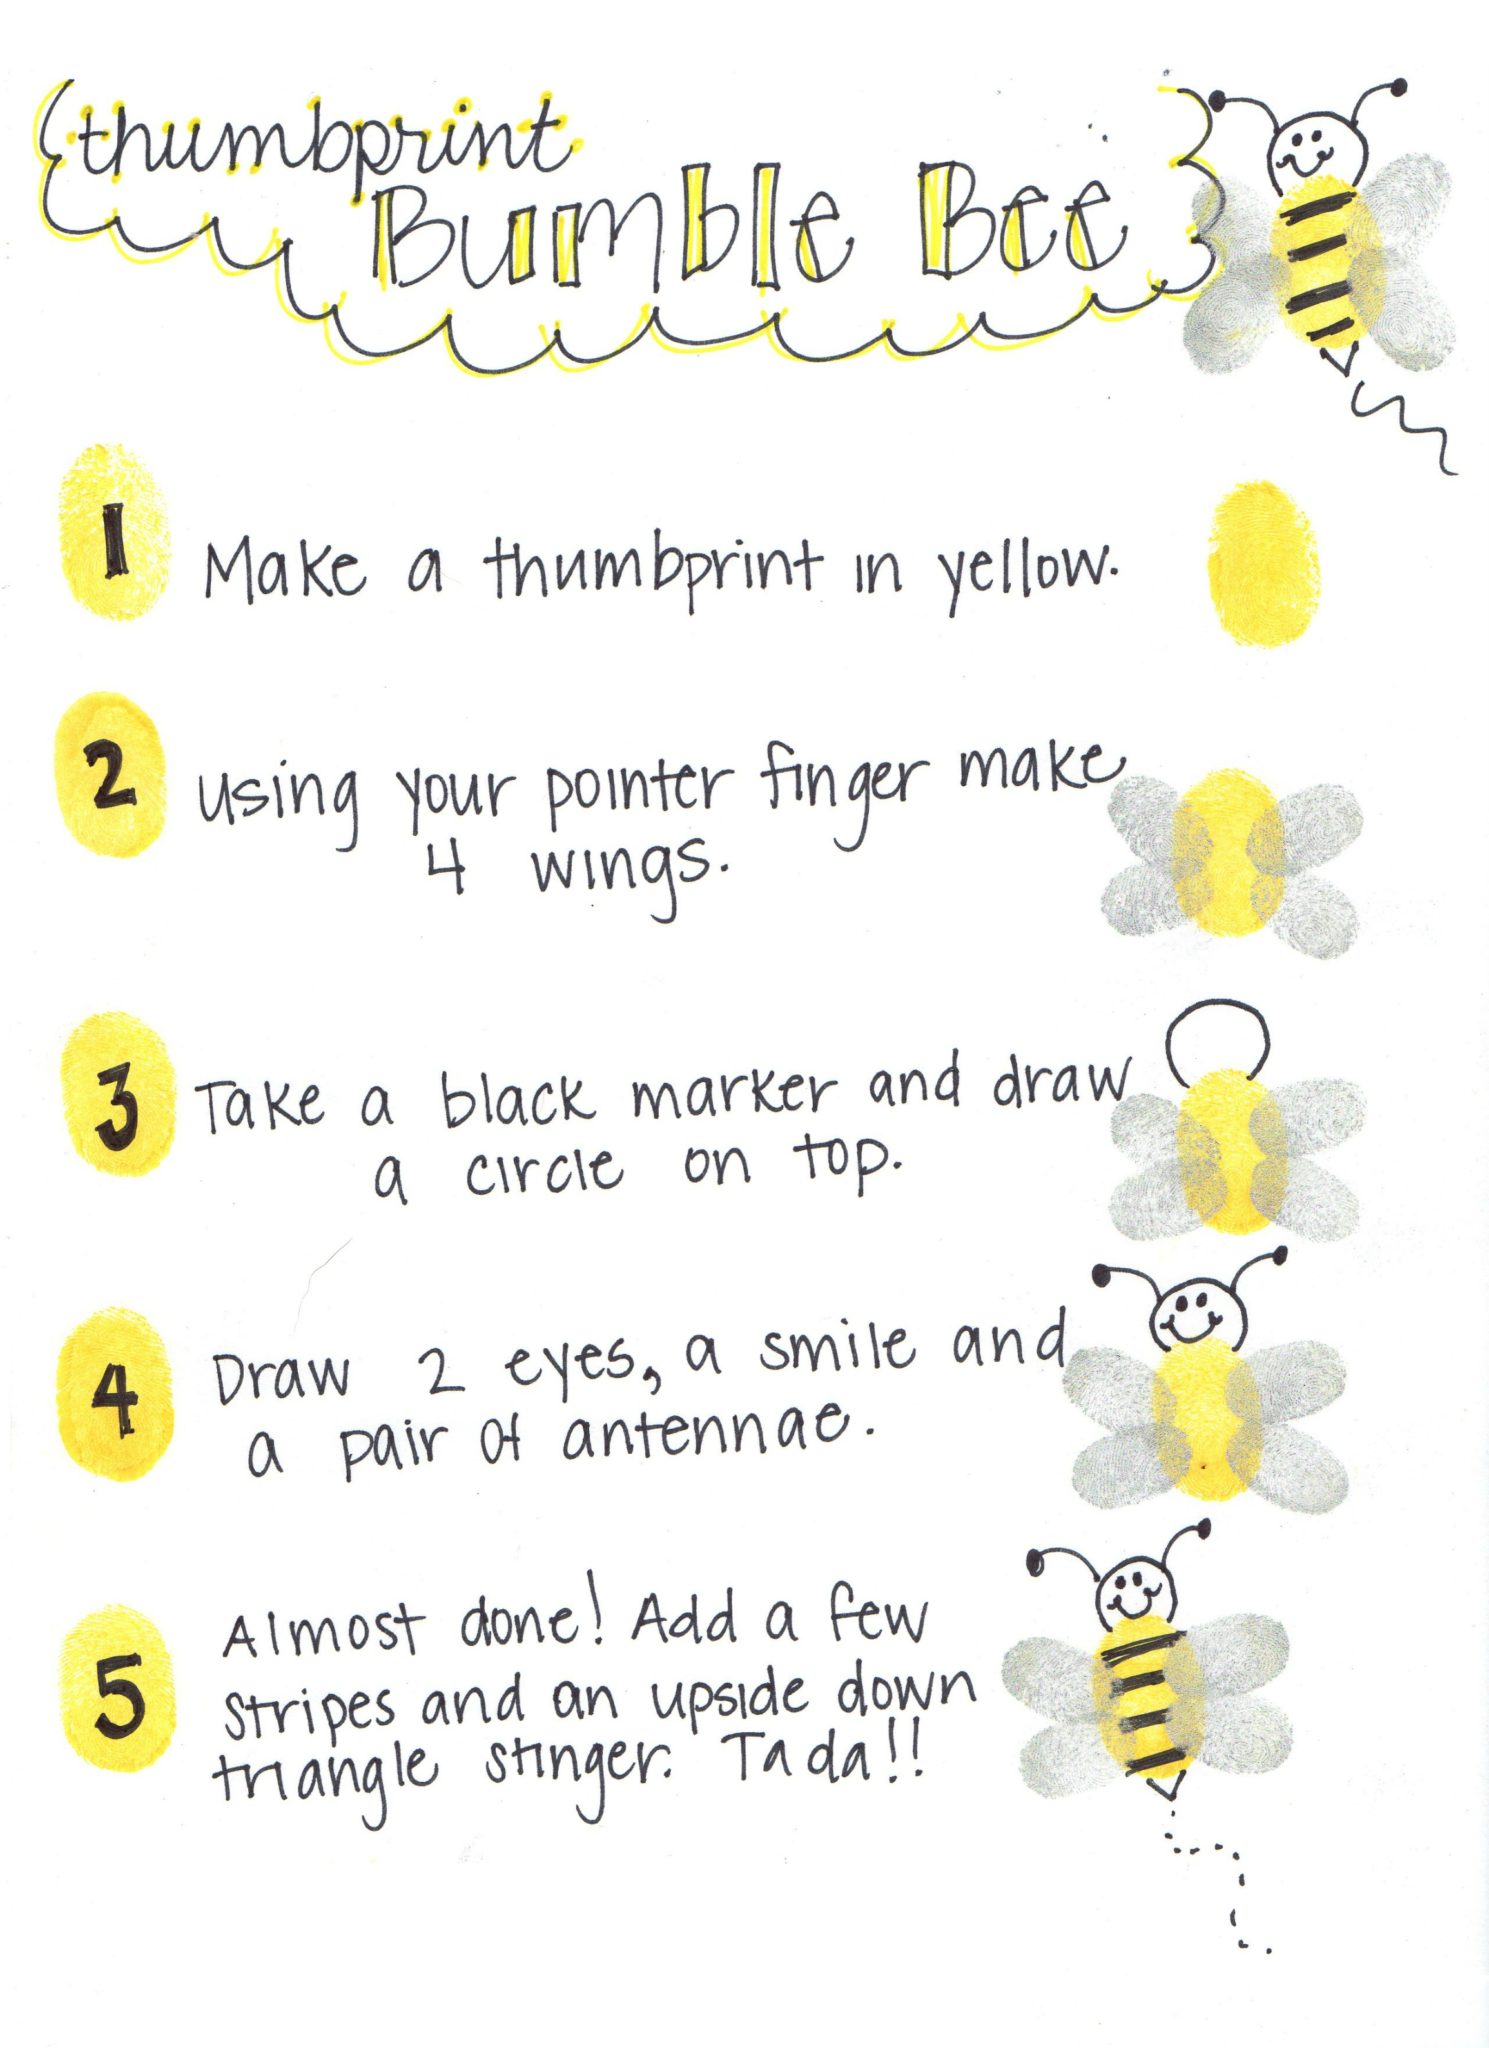
Bee Instructions: (click here to print)
Using your thumb and pointer finger, make this bumble bee come to life with a few easy steps!
- Make a vertical (up and down) yellow thumbprint.
- Using your pointer finger make 4 fingerprint wings, two on each side.
- Draw, with a black Sharpie, a circle head on top of the yellow thumbprint.
- Add two antennas to the top of the head. At the bottom of the thumbprint, make a small ‘V’ shaped stinger.
- Draw some black stripes on the thumbprint.
- Add two eyes and a smile.
Butterfly Instructions: (click here to print)
This butterfly is so precious! Made with your thumbprint, you can use any color stamp pad for the colors of your choice.
- Make two horizontal (sideways) thumbprints in the color of your choice.
- Above (or below) that make two more thumbprints.
- Draw a long oval shape connecting all of the thumbprints together. This will be the butterfly’s body.
- At the end of the oval, draw a circle. This will be the butterfly’s head.
- Make a set of two antennas on top of the head.
- Draw a smile face on your butterfly.

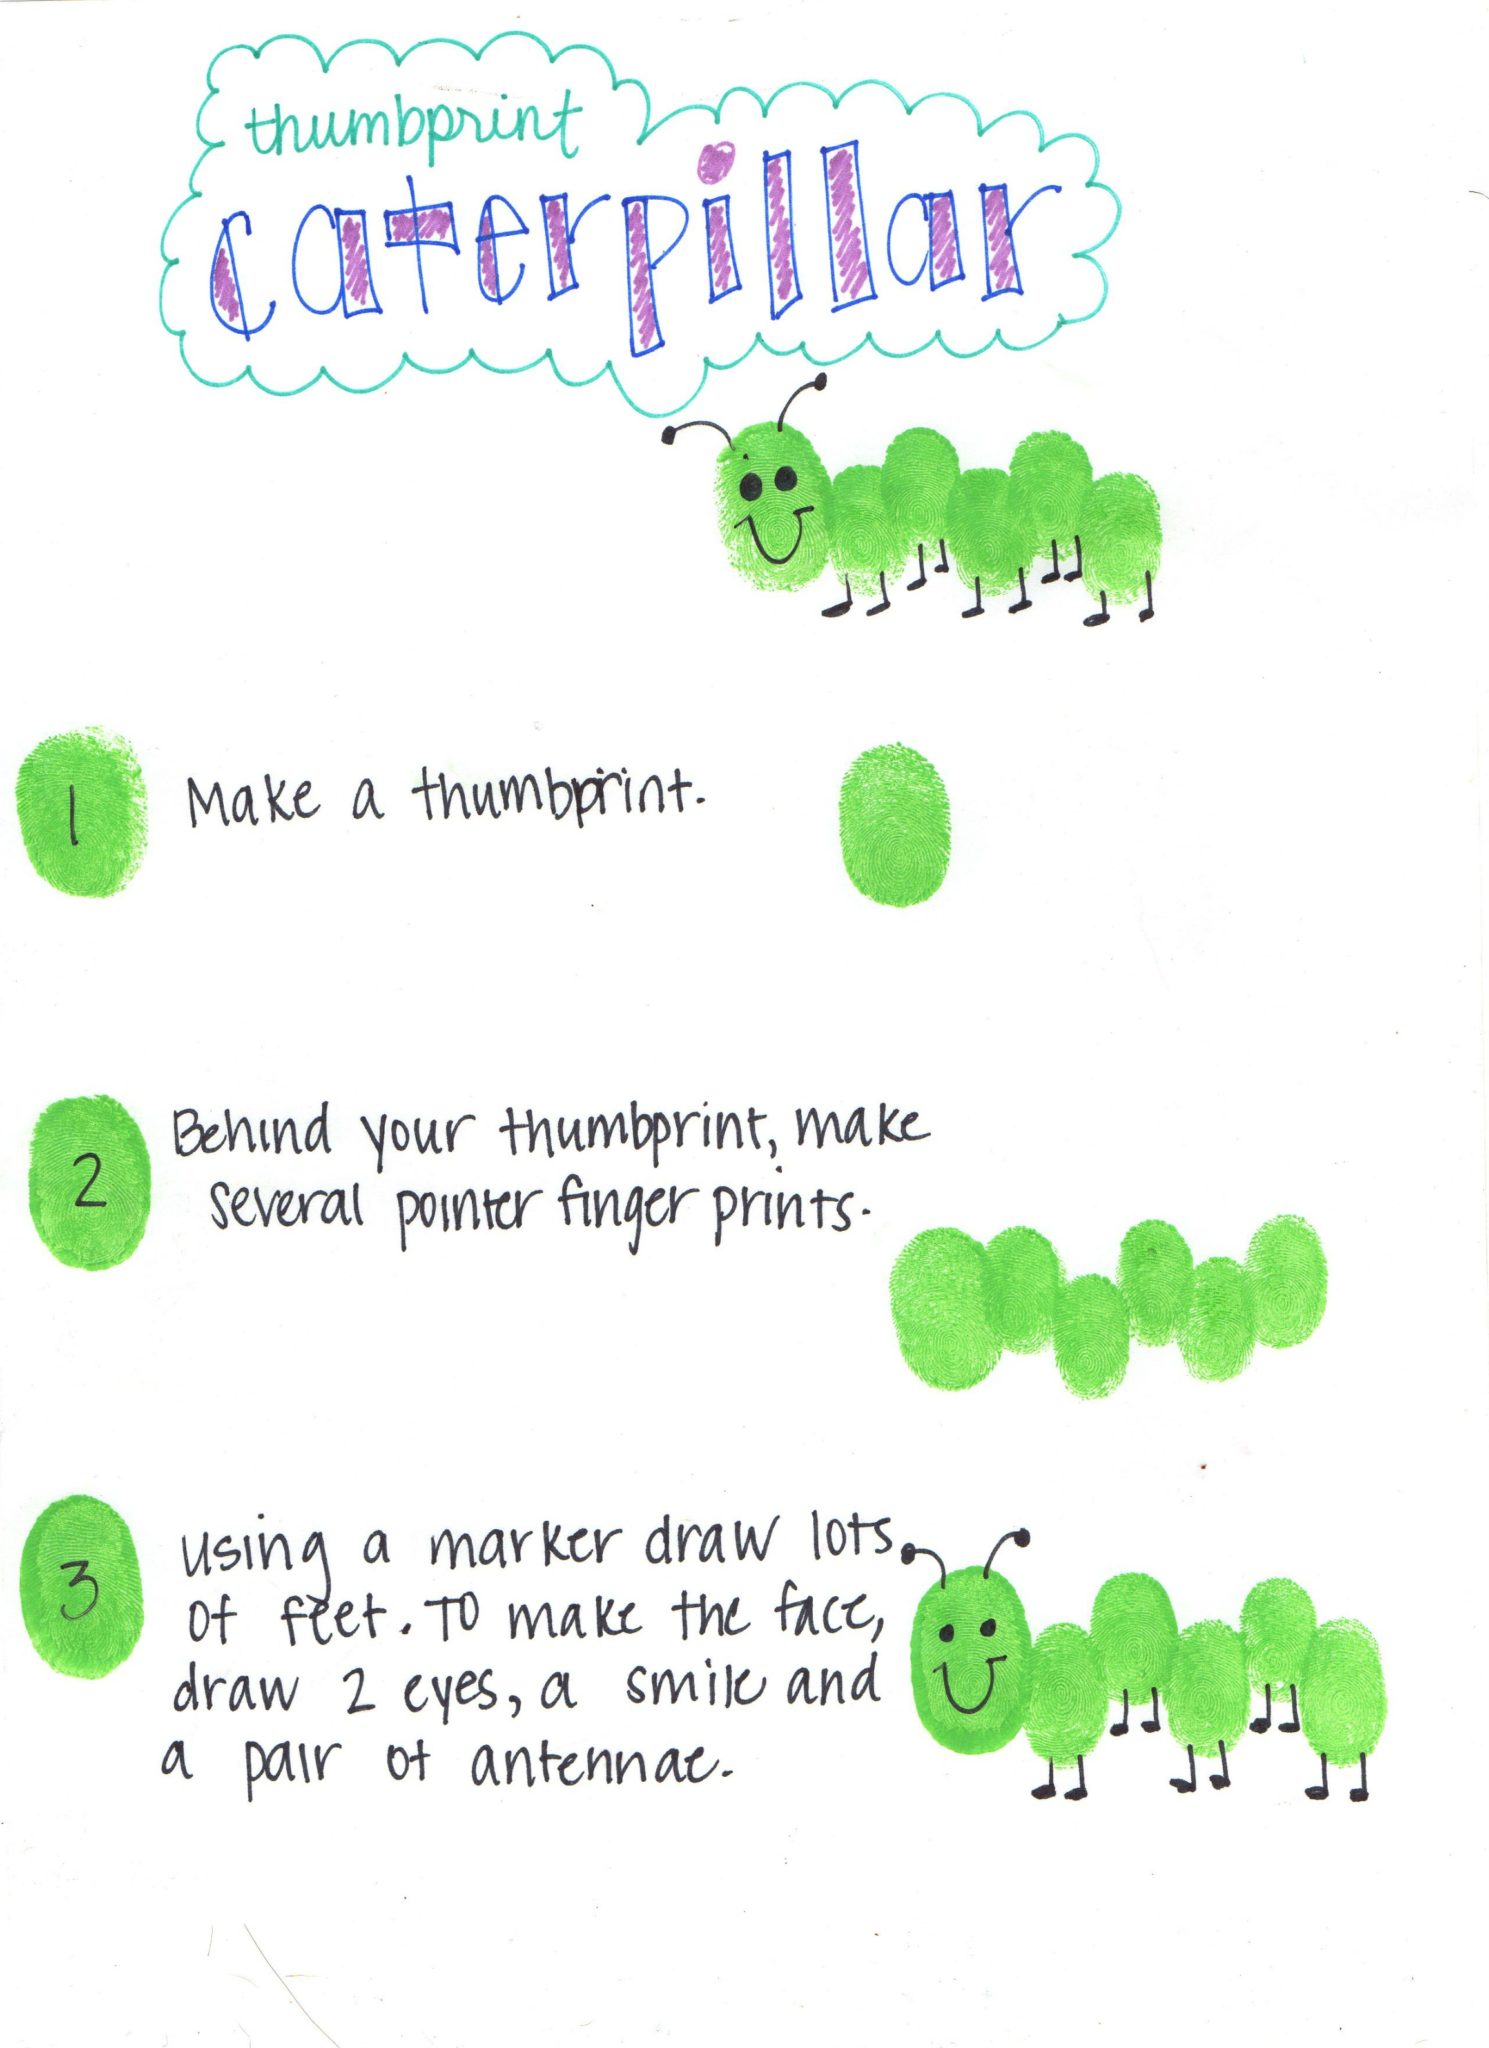
Caterpillar Instructions: (click here to print)
The cutest caterpillar! You can make him as long or as short as you like.
- Make a vertical (up and down) thumbprint. This will be the caterpillar’s head.
- Follow behind with several vertical thumbprints to make the caterpillar’s body.
- Add two antenna to the first thumbprint.
- Draw two eyes and a smile on the first thumbprint.
- Make two feet on each of the body thumbprints.
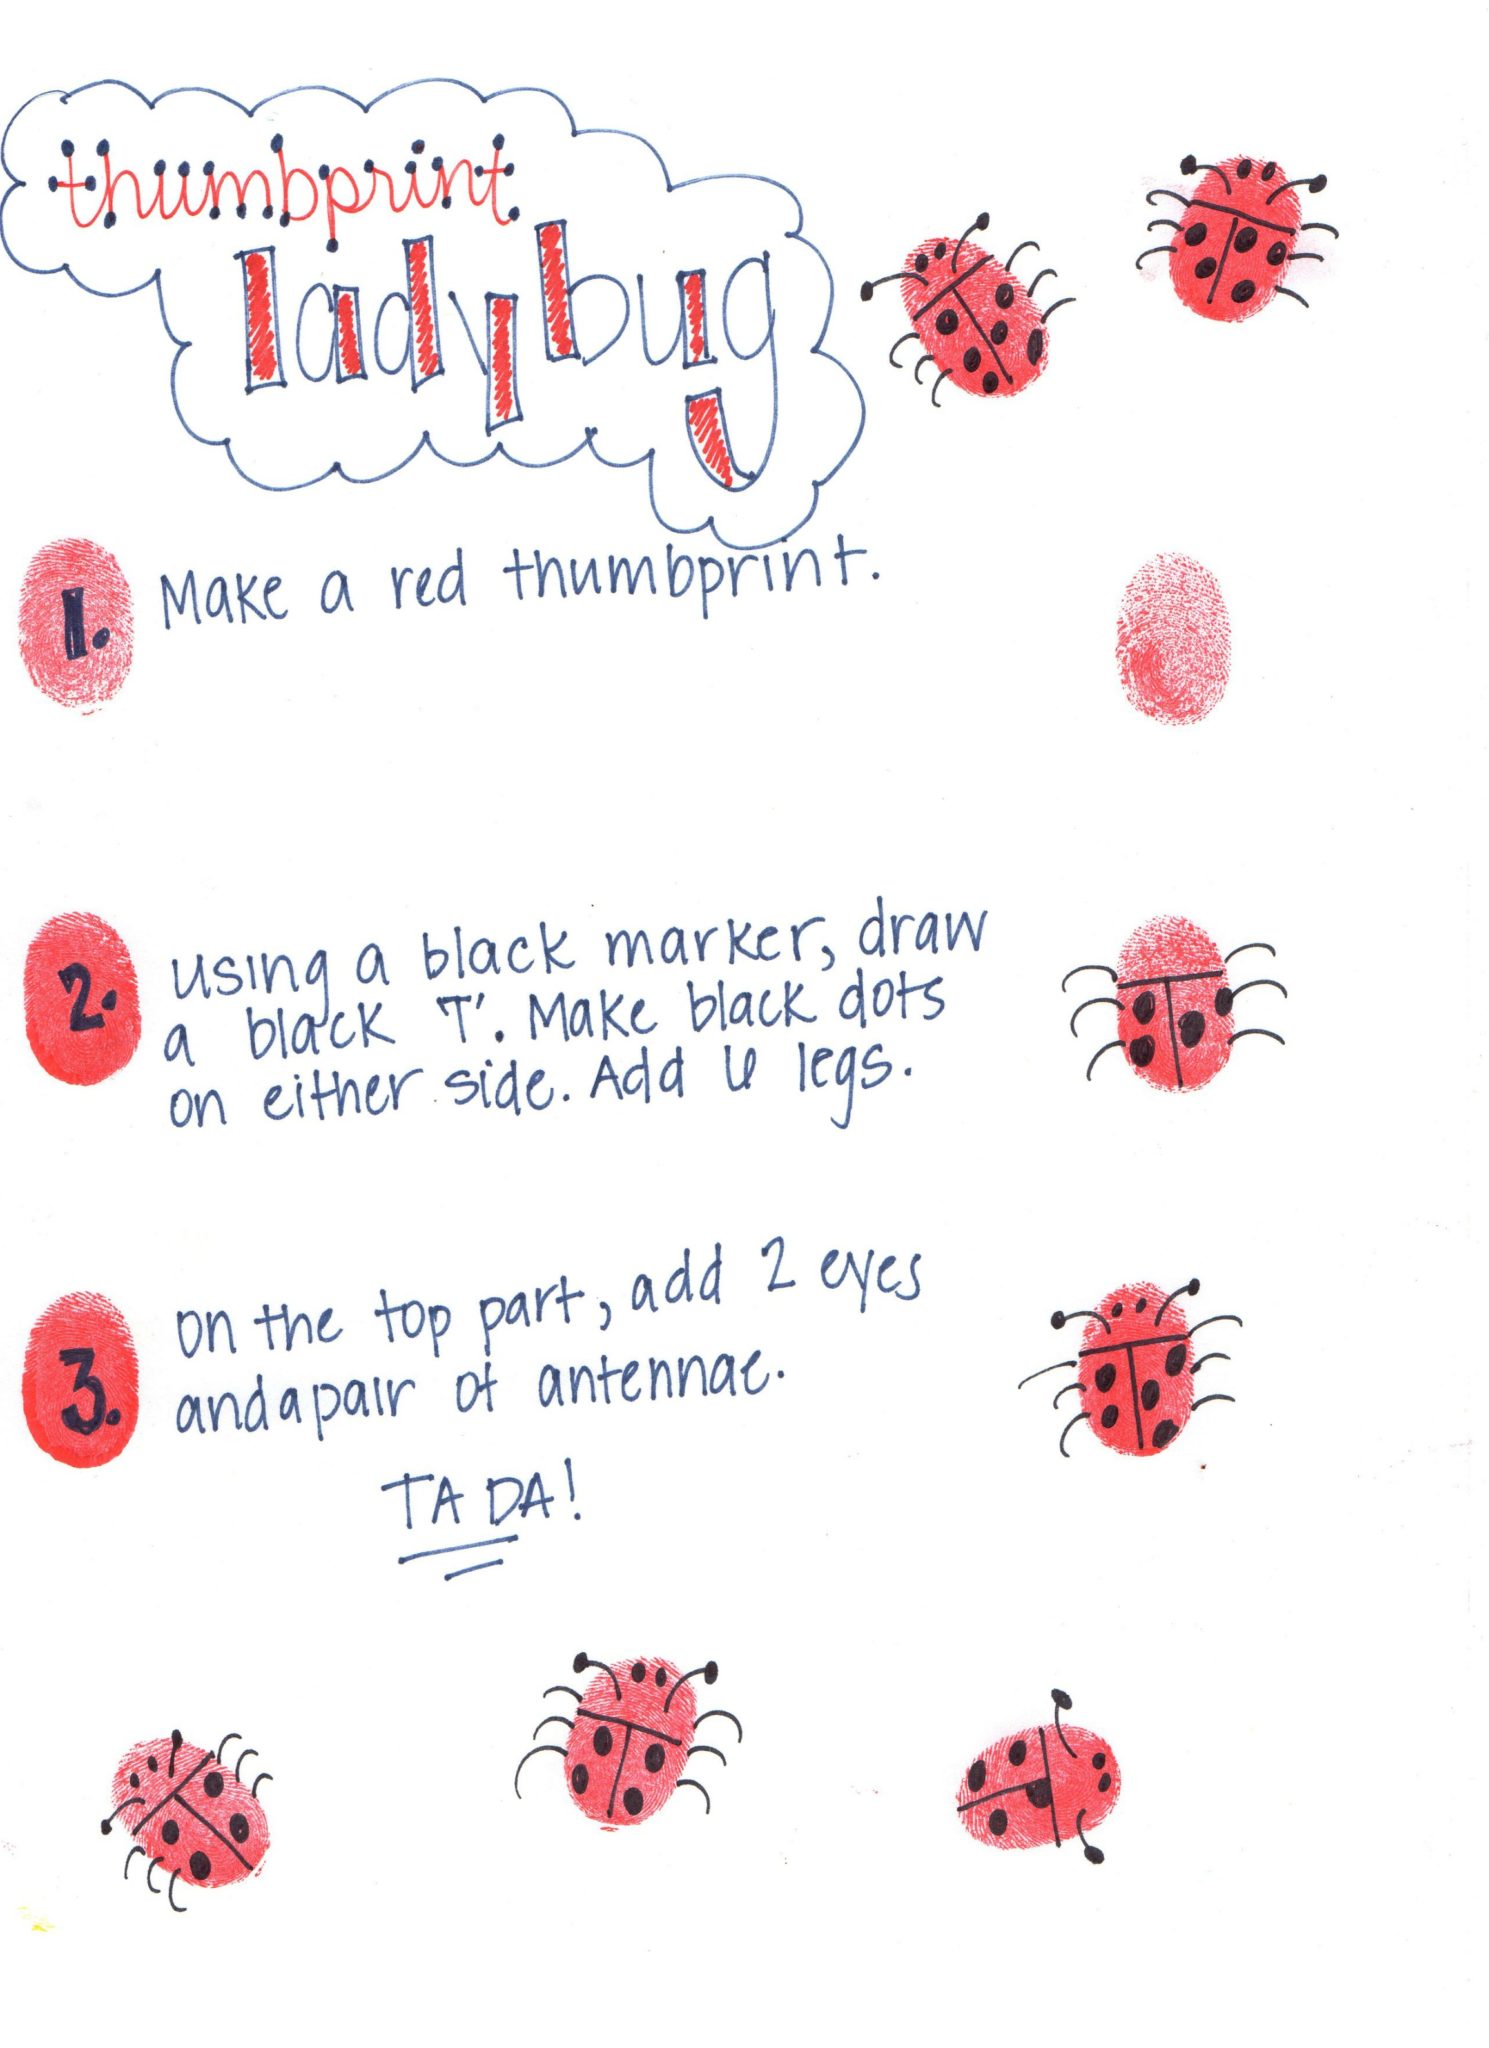
Ladybug Instructions: (click here to print)
Ladybugs are good luck so make an abundance of these to fill your mason jar!
- Begin with a red thumbprint.
- Draw a black line across the thumbprint.
- Draw a vertical line off the first black line to form a ‘T’ shape.
- Then draw two little eyes.
- Make a pair of antennas.
- On the ‘T’ shape area, draw and color in black dots.
Spider Instructions: (click here to print)
A great Halloween craft! You can even give this little guy a purple body for extra spookiness.
- Make a horizontal (sideways) thumbprint in a gray or silver color. You can use black, but it is hard to draw on!
- Draw 8 spider legs, four on each side.
- Draw 2 eyes and a smile.
- If you would like, draw a long line to make your spider ‘hang’ from it’s web.

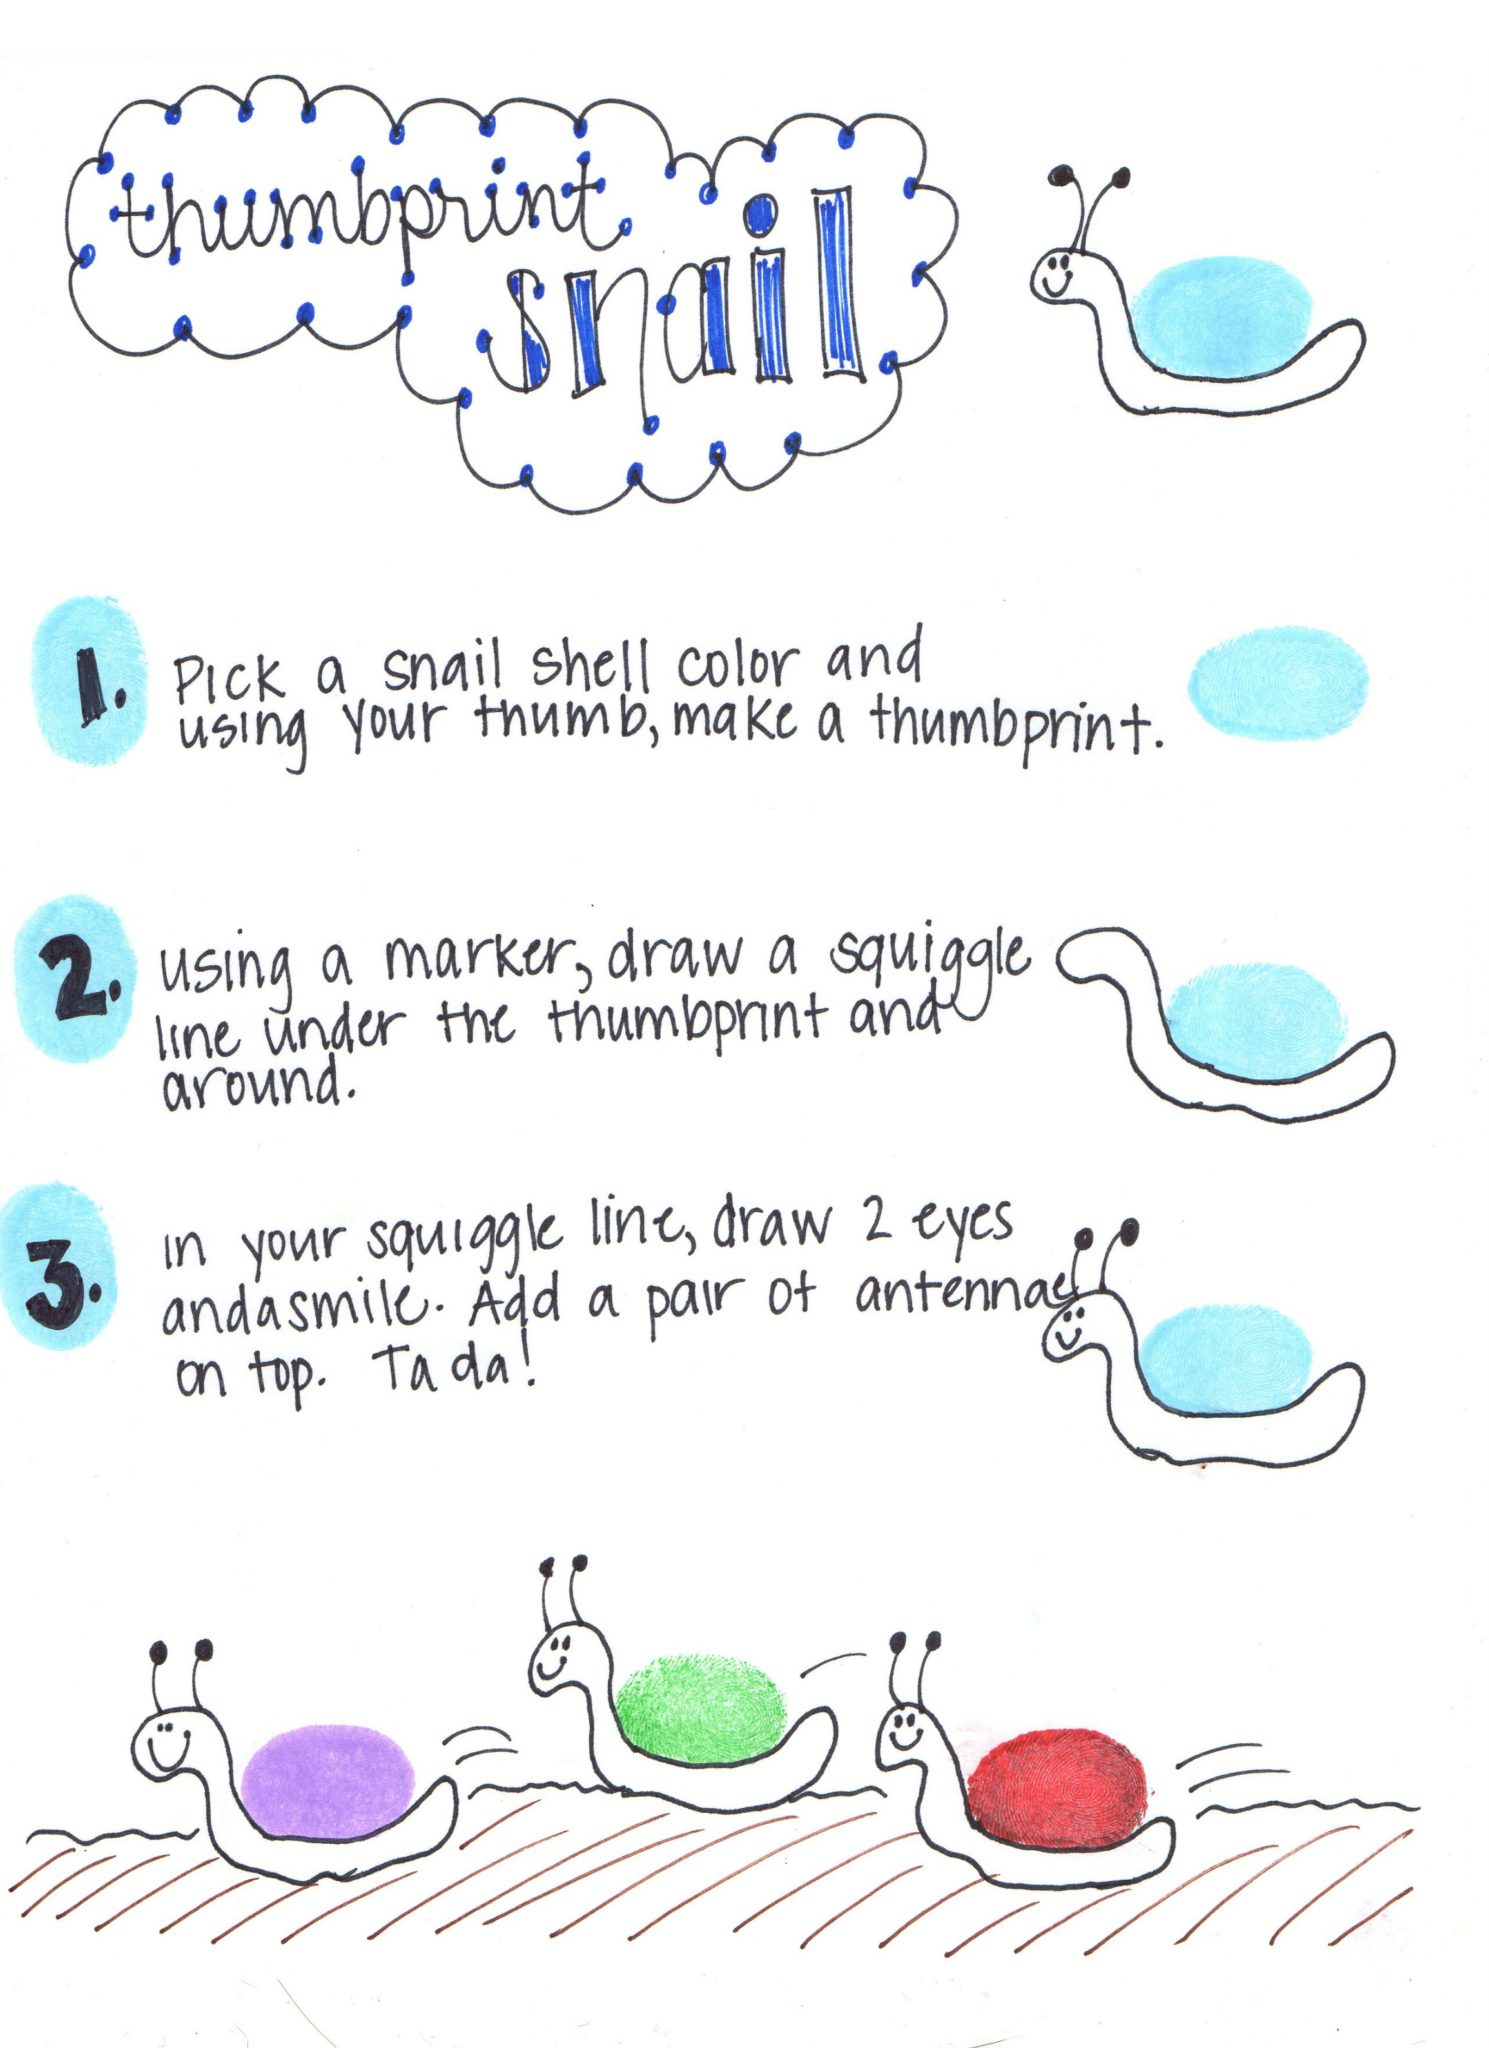
Snail Instructions: (click here to print)
Slow it down and make this snail in the color and shape of your choice.
- Make a thumbprint – horizontal or vertical it doesn’t matter which.
- Draw around the thumbprint, back down to form the tail and bring it up to make the long neck and head.
- Add a pair of antenna.
- Draw eyes and a mouth.
Now that you know how to draw insects, which ones will you add to your jar? Your kids are going to love these techniques and filling up their mason jar with their favorite bugs.


Superb activities