If you’re giving a room a refresh, complete your new look with a custom and unique lamp. The process is simple, and the results are incredible. Use this tutorial to learn how to transform a simple lamp into a fun sports-themed baseball lamp.
I love letting my creative juices flow and transforming old items into something “new” and beautiful! Not too long ago, I created this DIY Sports Lamp, and it was so successful that I felt encouraged to make another unique lamp.
My rustic farmhouse big boy room needed a lamp! He loves sports, so why not a baseball lamp? A good knockoff seemed to fit the bill, and I was inspired by a similar lamp I saw in the Potter Barn kids catalog.
I admit that I love the way it turned out! I am so happy with the final product that I can’t wait to show you how to make it so you can make your own!
Note: If you love creating affordable knockoff items, I have some great projects for you! Check out my Painted Garden Stool Ballard Knockoff, West Elm Knockoff Hive Vase, and Pottery Barn Knockoff Candle Holders for some great ideas.
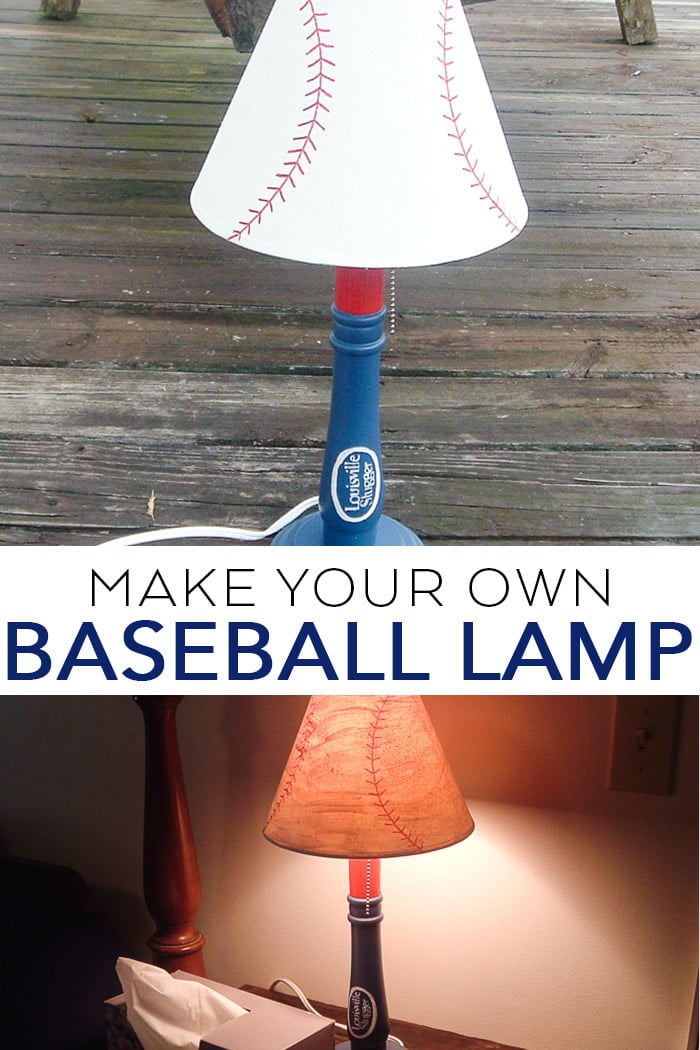
How To Make A Baseball Lamp From A Thrift Store Find
This tutorial includes everything you need to know in order to make your own unique baseball lamp from an old lamp.
Supplies Needed
Here’s what you’ll need to gather to complete this project.
- Lamp (I found mine at the thrift store)
- Shade (also from the thrift store)
- Spray paint
- Craft paint or vinyl
- Duct tape
- Cricut machine (see which is my favorite)
- Cricut cut file
- Card stock or vinyl
- Red permanent marker
- Paintbrush
Baseball Lamp Transformation Instructions
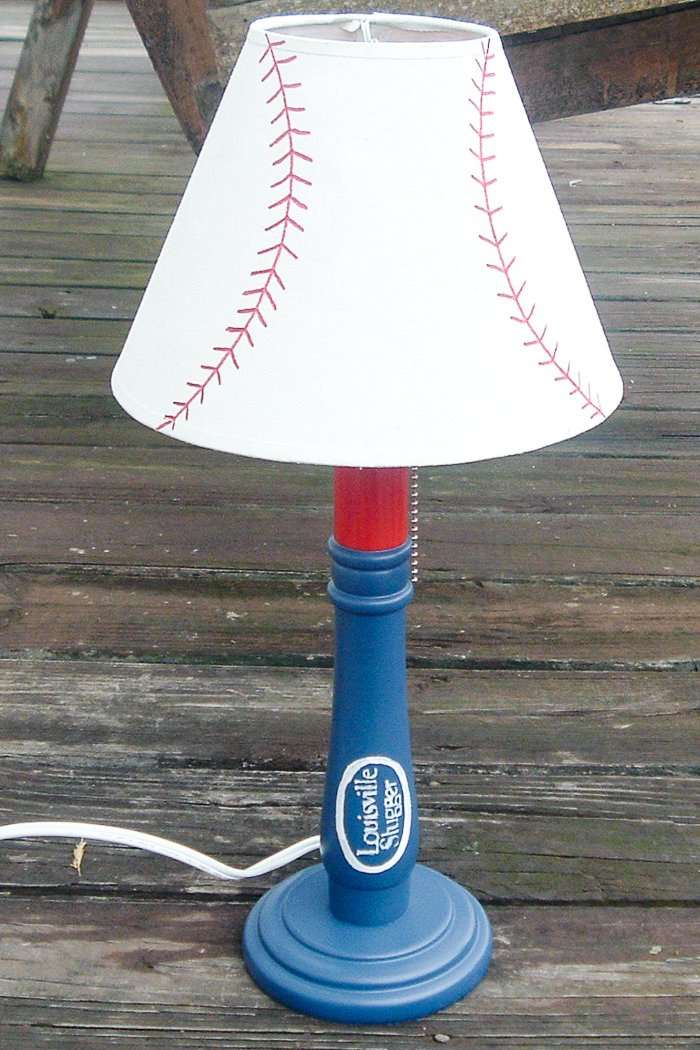
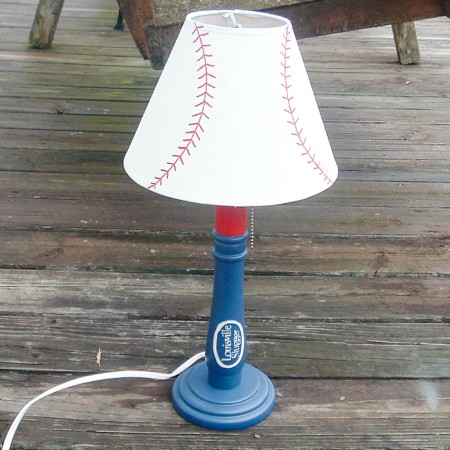
I started with this lamp from the thrift store. My cost: $3 for the lamp, $1 for the shade, $1 for red duct tape, and $4 for spray paint = $9.00.
Here’s how I turned it into a fun baseball lamp for a kid’s room.
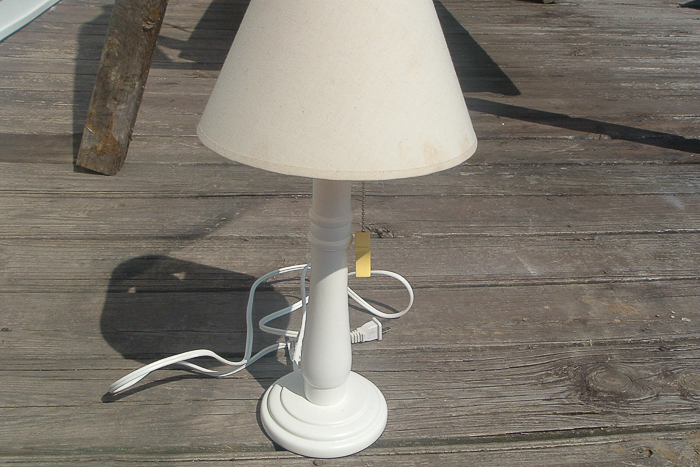
Step 1
I cut off the moon on the end of the pull, masked off the remaining pull, and painted the base navy blue. You could use any color that you want to fit your decor. The blue fit my room decor.
Step 2
For the baseball lampshade, I took white Folk Art craft paint and went over the inside and the outside of the shade.
Step 3
Next, I took a red permanent marker and drew the baseball lines. I used a plate for the general circle shape, but I drew the entire thing freehand.
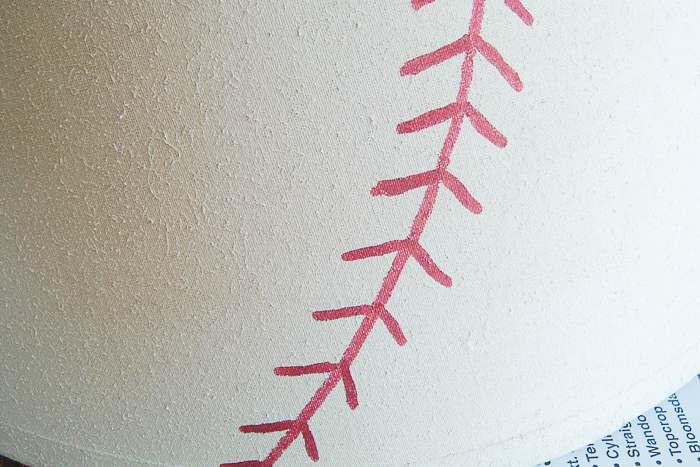
Step 4
I wanted a Louisville Slugger logo on this baseball lamp, so I used my Cricut to make a stencil. I cut mine from plain card stock and made a stencil.
Note: You could use stencil vinyl or even just cut the entire thing from white vinyl and stick it on your lamp. I painted my logo on the lamp base in white paint.
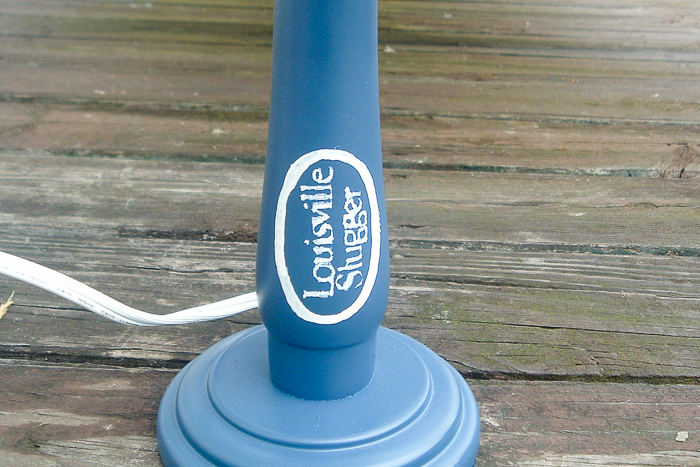
Step 5
I wrapped red masking tape around the lamp to create the “grip area” part of the bat. It was easy and looks like the grip on a bat.
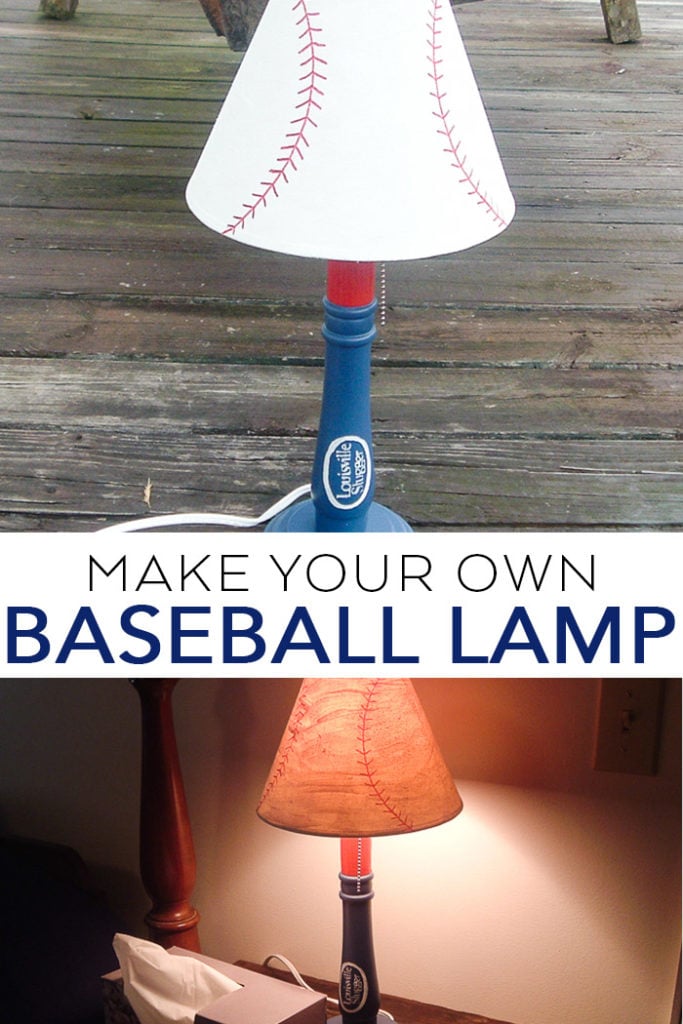
And once that was done, this baseball lamp project was complete!
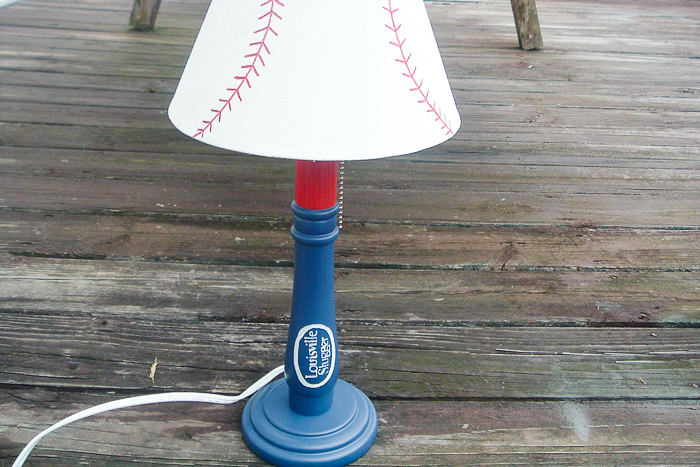
I am so pleased with the results! This baseball lamp is the perfect addition to my room.
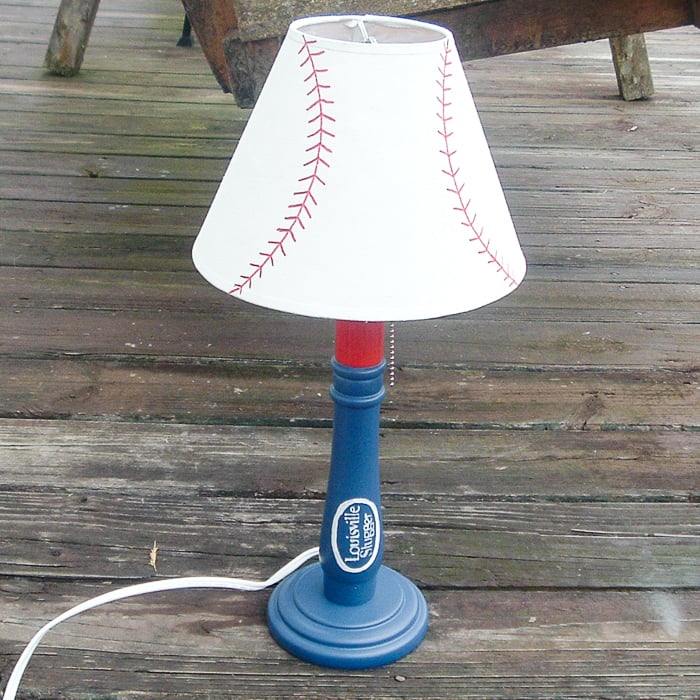
It was a stroke of luck to find a lamp base in the ideal shape to make a baseball out of it. I nearly fell over when I saw it on the shelf!
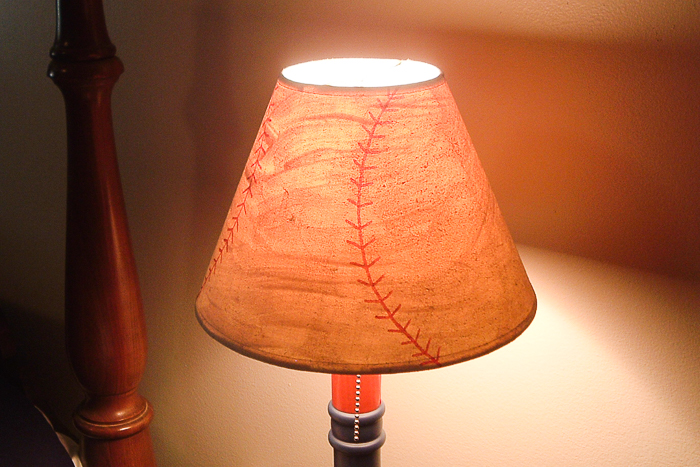
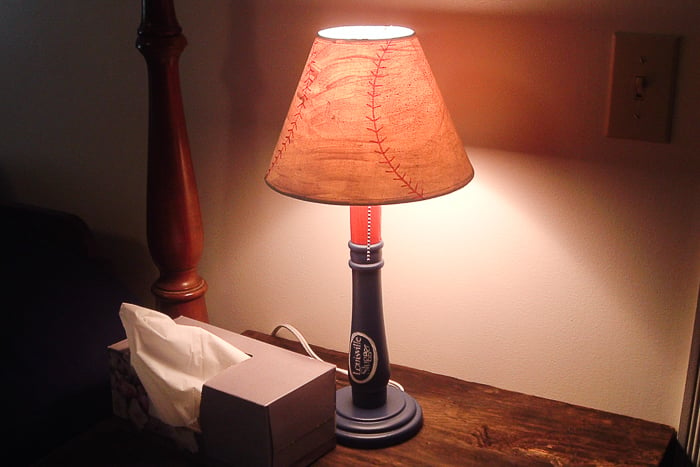
Plus, there’s a “happy accident.” When you turn the lamp on, the shade looks like a well-worn baseball. It is perfect for my rustic sports-themed room. I adore this baseball lamp when it is on in the evening.
Baseball Lamp FAQs
Do you want to make your own special lamp but have questions about the process? I’ve answered a few down below, but if you have one I haven’t answered, please leave it in the comments for me.
How can I make a baseball lamp if I can’t find a lamp that’s the right shape?
Get creative! Use the process I outlined above as a basic idea of what to do to transform a lamp and adapt it to fit whatever you’re able to find.
If you find a base that’s smoother without the details that this one has, it’s easy to transform into a bat. Or if you find something that’s much larger, you could paint or glue baseballs or bats onto the base. With just a little creativity, you’ll be able to create something incredible – and uniquely yours!
Could I use vinyl for images instead of drawing them?
Sure, that would work! If you decided to go the vinyl route, you would use a technique similar to what I did with this DIY sports lamp. However, instead of putting the images inside the lampshade, you could put them on the outside so you can see the image during the day too.
More Crafting Inspiration
Do you love this baseball lamp project and want more ideas? Check out these popular crafts!
Supplies
- Lamp (I got mine from the thrift store)
- Lamp shade (also purchased from the thrift store)
- Spray paint
- Craft paint or vinyl
- Duct tape
- Cricut machine
- Cricut cut file
- Card stock or vinyl
- Red permanent marker
- Paintbrush
Instructions
- Cut off the end of the pull and tape off the remaining pull. Paint the base the color of your choice.
- Paint the inside and the outside of the lamp shade with white paint.
- Take a red permanent marker and draw the baseball lines. A plate can be helpful for the general circle shape, then add the cross stitches by freehand.
- Use your Cricut to make a stencil for the Louisville Slugger logo. I cut mine from plain card stock.
- Wrap red masking tape around the lamp to create the "grip area" part of the bat.
New to Cricut?

Sign up for our email list to download the Beginner's Guide to Cricut Design Space for FREE today!
Sign up to get the guide emailed to you!



Love it! Perfect:-)
Wow – amazing transformation! It looks fantastic in your little boy’s room!! Thanks for sharing 🙂
Super cute!! Love love love!
Amanda
http://www.todaystoptwenty.blogspot.com
Yours is cuter. Seriously!
Love your blog
I am your newest follower
xo
Pam
This is awesome, I love it!
I like your version better too! And the price tag. It looks great. =]
Yep, add me to the list of people who like your version better than PB! And the color definitely goes with your room!
hiya , great copy , and tutorial , tfs , i am visiting from someday crafts and am your newest follower maybe you will pop by mine and follow too
Angie, that is precious! You did a great job. I love the seams you freehanded! I’m so impressed! Great job!
It’s really cute. I like yours better too. What a great find Angie.
Hey that turned out awesome!!
I like your lamp better than the Pottery Barn. Great job!!! I will be copying this. Thanks for sharing.
You were featured over at Today’s Top 20 — Hooray!
Amanda
http://www.todaystoptwenty.blogspot.com
Any little boy would love to have a custom lamp like that, Angie. 🙂 Job well done, and thanks for linking up!
Awesome! I like yours better! 🙂
Cute lamp! What a great idea! Can’t wait to see what you have in store for that table too! I’m a new follower and found you through Vintage Revivals.
Visiting from Vintage Revivals. I love your lamp! We want to do a baseball theme in my son’s room and that would be perfect! Soooo glad I have a Silhouette.
LOVE THIS!! I am so exited to try it, but I’m not the most crafty Mom so I hope it turns out as good as yours!!
We liked this so much over at Copycat Crafts that we featured it recently! You can view it here
http://www.copycatcrafts.com/pb-inspired-baseball-lamp/
We’d love it if you’d like to display a featured button! You can grab your button on the right hand side of your post. Thanks!