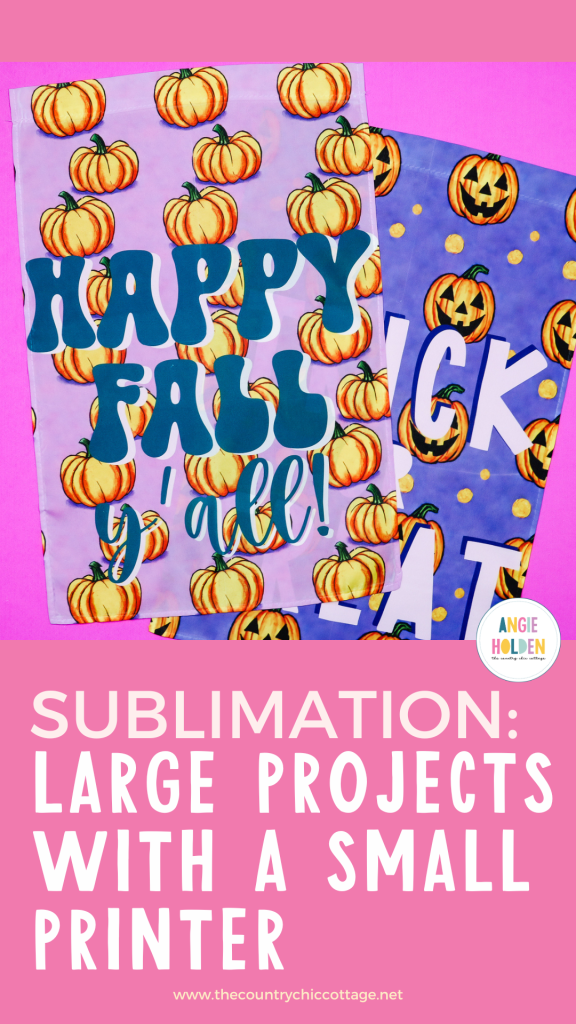
Are you ready to tackle large sublimation projects with a small printer? Today I'm going to share all my tips and tricks for lining up sublimation prints from smaller sublimation printers and show you how to apply them to a larger blank.
If you're new to sublimation, my Beginner's Guide to Sublimation is the perfect place to start.
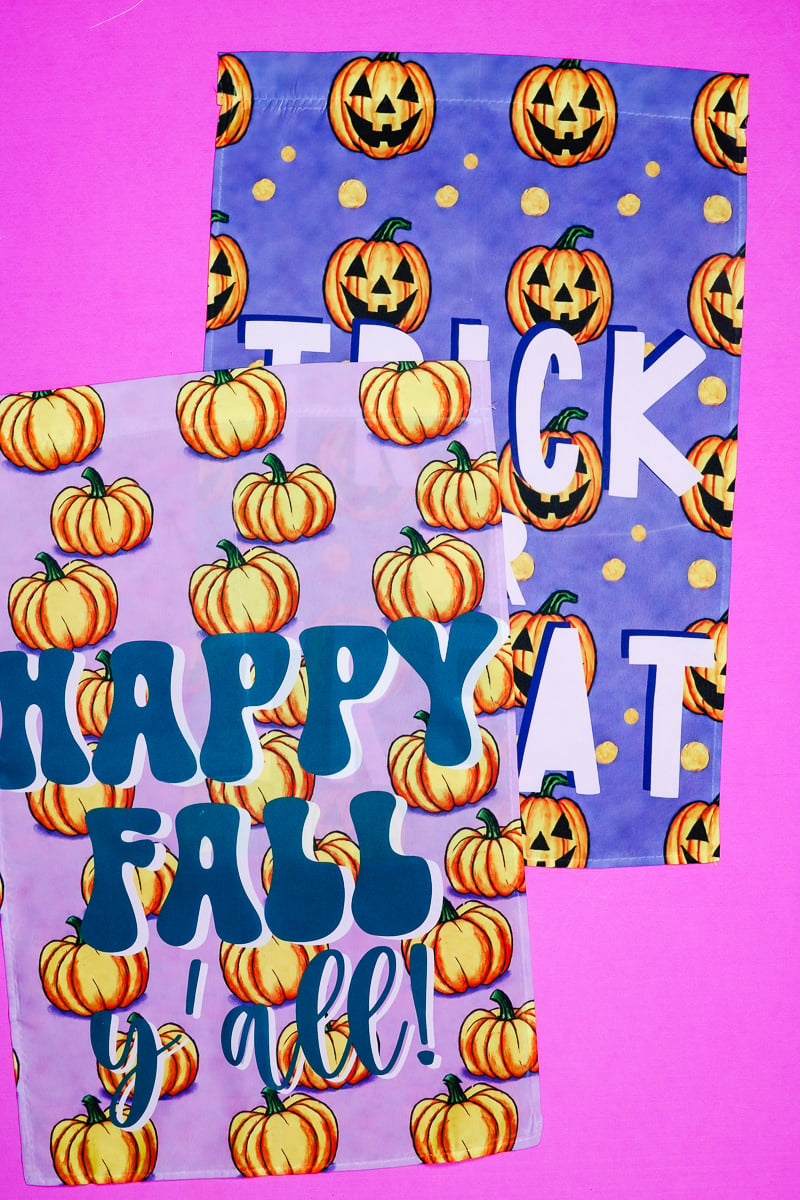
Sublimation Garden Flags
For today's project, I am going to create large sublimation prints for garden flags for Halloween and fall. This project requires taking one image and printing it onto multiple sheets of paper and then lining those papers up and pressing them onto a blank.
I have been practicing this technique for over a year now. Lining up and pressing sublimation prints takes time to learn. You can actually watch me go through the whole process and learn my tips and tricks by pressing play on the video below.
Supplies Used
Blanks Used
Other Supplies Used
- Sublimation Printer
- Sublimation Ink
- Sublimation Paper
- Heat Press
- Lint Roller
- Heat Resistant Tape
- Protective Paper
- Heat Resistant Gloves
- Tape Dispenser
- EasyPress Mat
- Cricut BrightPad
- Cutting Mat
- Rotary Cutter
- Ruler
- Scraper
How to Piece Together Large Sublimation Prints
The first step in the process of making large sublimation projects with a small printer is to turn your single design into multiple prints. You will also need to know the size of the blank you're pressing the design onto. Let's look at how to choose a blank for projects like this.
Choosing Blanks for Large Sublimation Projects with a Small Printer
I cannot stress enough how important it is to practice this process before using more expensive blanks. I've been practicing for over a year and am still hit or miss on the finished products.
Between lining up the prints and having to press the design multiple times there are a lot of of opportunities for mistakes.
While you're learning, I suggest finding an inexpensive blank. These sublimation garden flags are really inexpensive and fun to use, especially when they turn out. You could also practice on a roll of white polyester material, whatever you find that won't break the bank. Remember, you're likely to make mistakes and need a lot of material to practice on.
What I really like about these garden flags is that they give you the opportunity to test piecing together the prints and pressing them multiple times. Since pressing can be more troublesome than piecing the design itself, practicing this step is also very important.
How to Print One Design Onto Multiple Pages
I find it easiest to separate the design into multiple pages in Adobe Acrobat Reader. The reader is free to use and I have a link to that in the supply list above.
You may see a prompt to pay for Adobe Acrobat, that is for the pro version. You do not need that for this process.
To use the Adobe Acrobat Reader, your file will need to be a PDF. If your file is a different format, you can find online programs that will convert the file to a PDF.
If you wan to use a PNG file, Jennifer Maker has a tutorial on using a PNG with Microsoft Word. I find the Adobe method a little easier but you can try her tutorial if you know Word well or you have an issue converting your image.
If you don't already have the reader downloaded, follow the instructions and open the PDF.
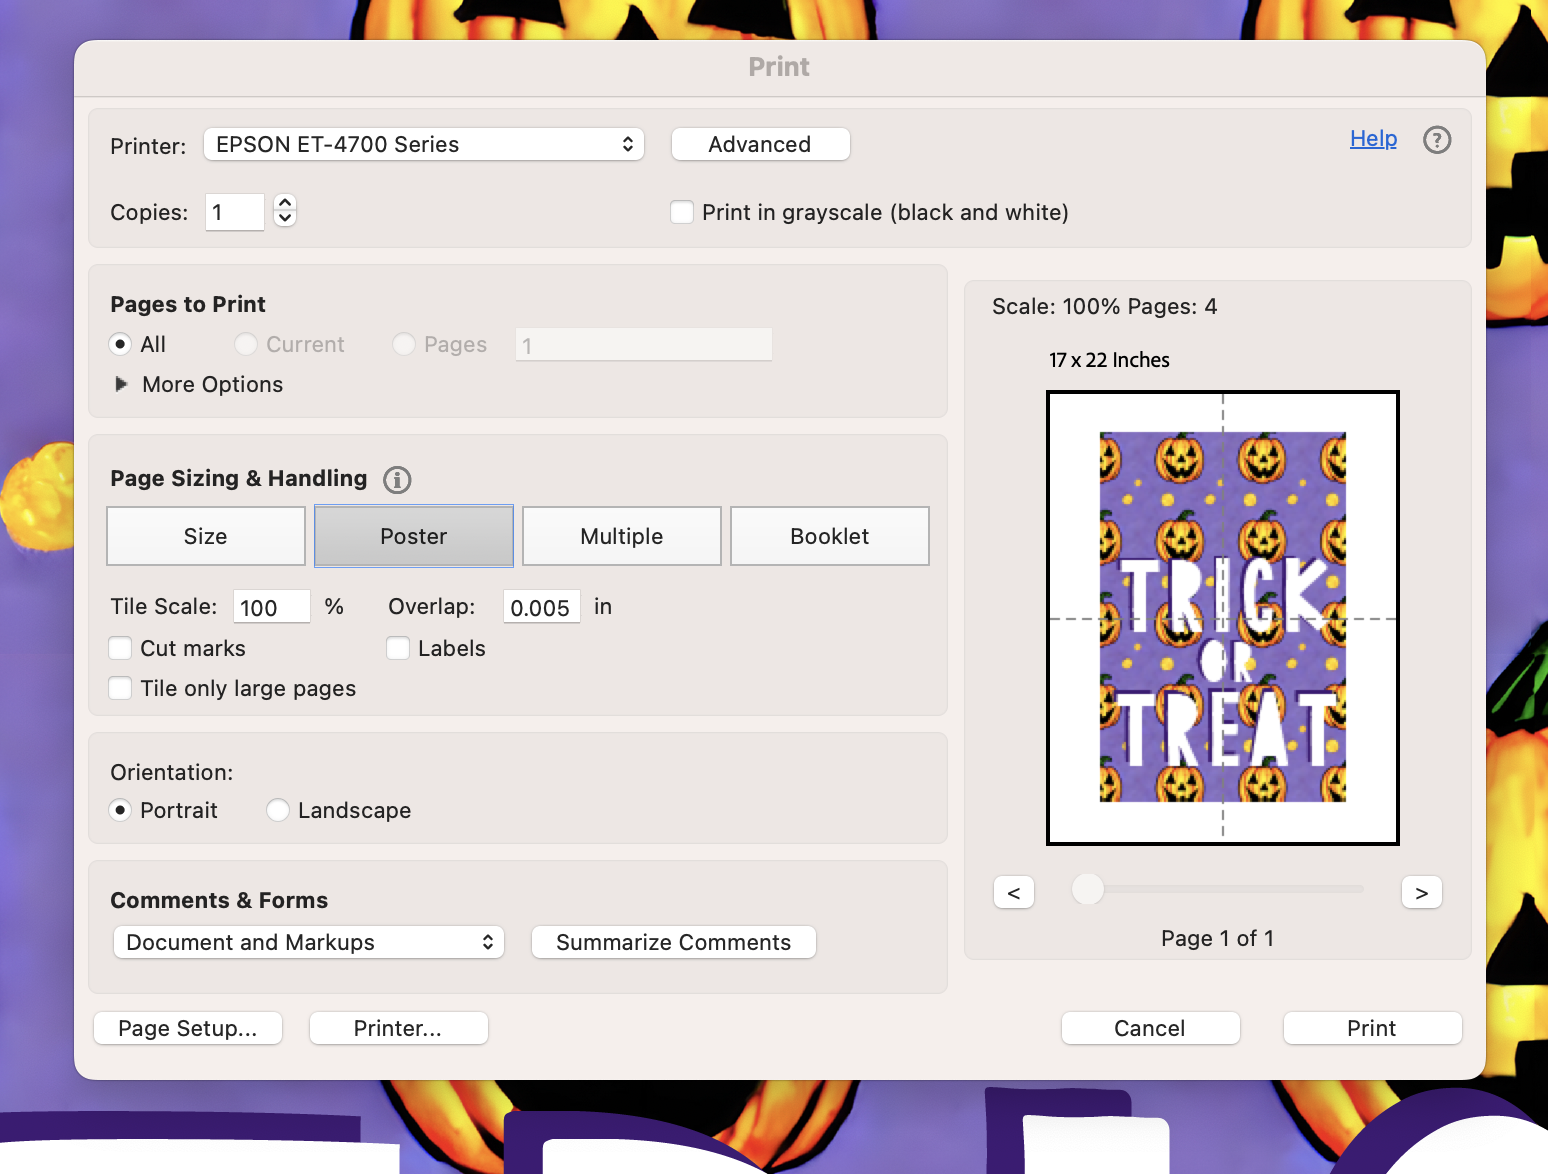
Click File and then Print. From here you can choose your printer. You can use this method with any printer.
Where it says Page, Sizing, and Handling, select Poster. When you choose Poster, you'll see that the image in the preview changes from one sheet to four. Where the dashed lines are, your page will be divided.
My design is already the size to fit my sublimation garden flag so I'll leave the Tile Scale at 100%. If you're using a different blank and haven't already resized the image, you will need to make adjustments here.
The next box is Overlap and you can see that the default is a very small overlap. That amount is so small and we will be trimming to prepare the print for piecing together. I am leaving the overlap but if you notice any problems you can always set the overlap to zero.
Most printers that can print pages 8.5 x 11 inches can print pages 8.5 by 14 inches.
Depending on your design, this size paper may be a better option. If you have both sublimation paper options, it could be worth trying both paper sizes to see what works better for your design.
Choose based on which gives you the fewest seams or by what puts seams in the best location.
Adjust Printer Settings
From here, you'll go through and adjust all of your printer settings like you would do for sublimation prints. I am going to print on my Epson EcoTank that I have converted for sublimation.
Select the Matte Paper Setting, Best Quality, and then flip the design horizontally. If you have already mirrored your image, do not flip it again.
Print your sublimation print as normal. REMEMBER: A sublimation print is sublimation ink printed onto sublimation paper from a sublimation printer.
How to Join Sublimation Prints
Now that we have our images printed. After much trial and error, this is the method that worked best for me.
First, you need to lay out the papers to see how they all fit together. Before we start trimming we need to know where to trim.
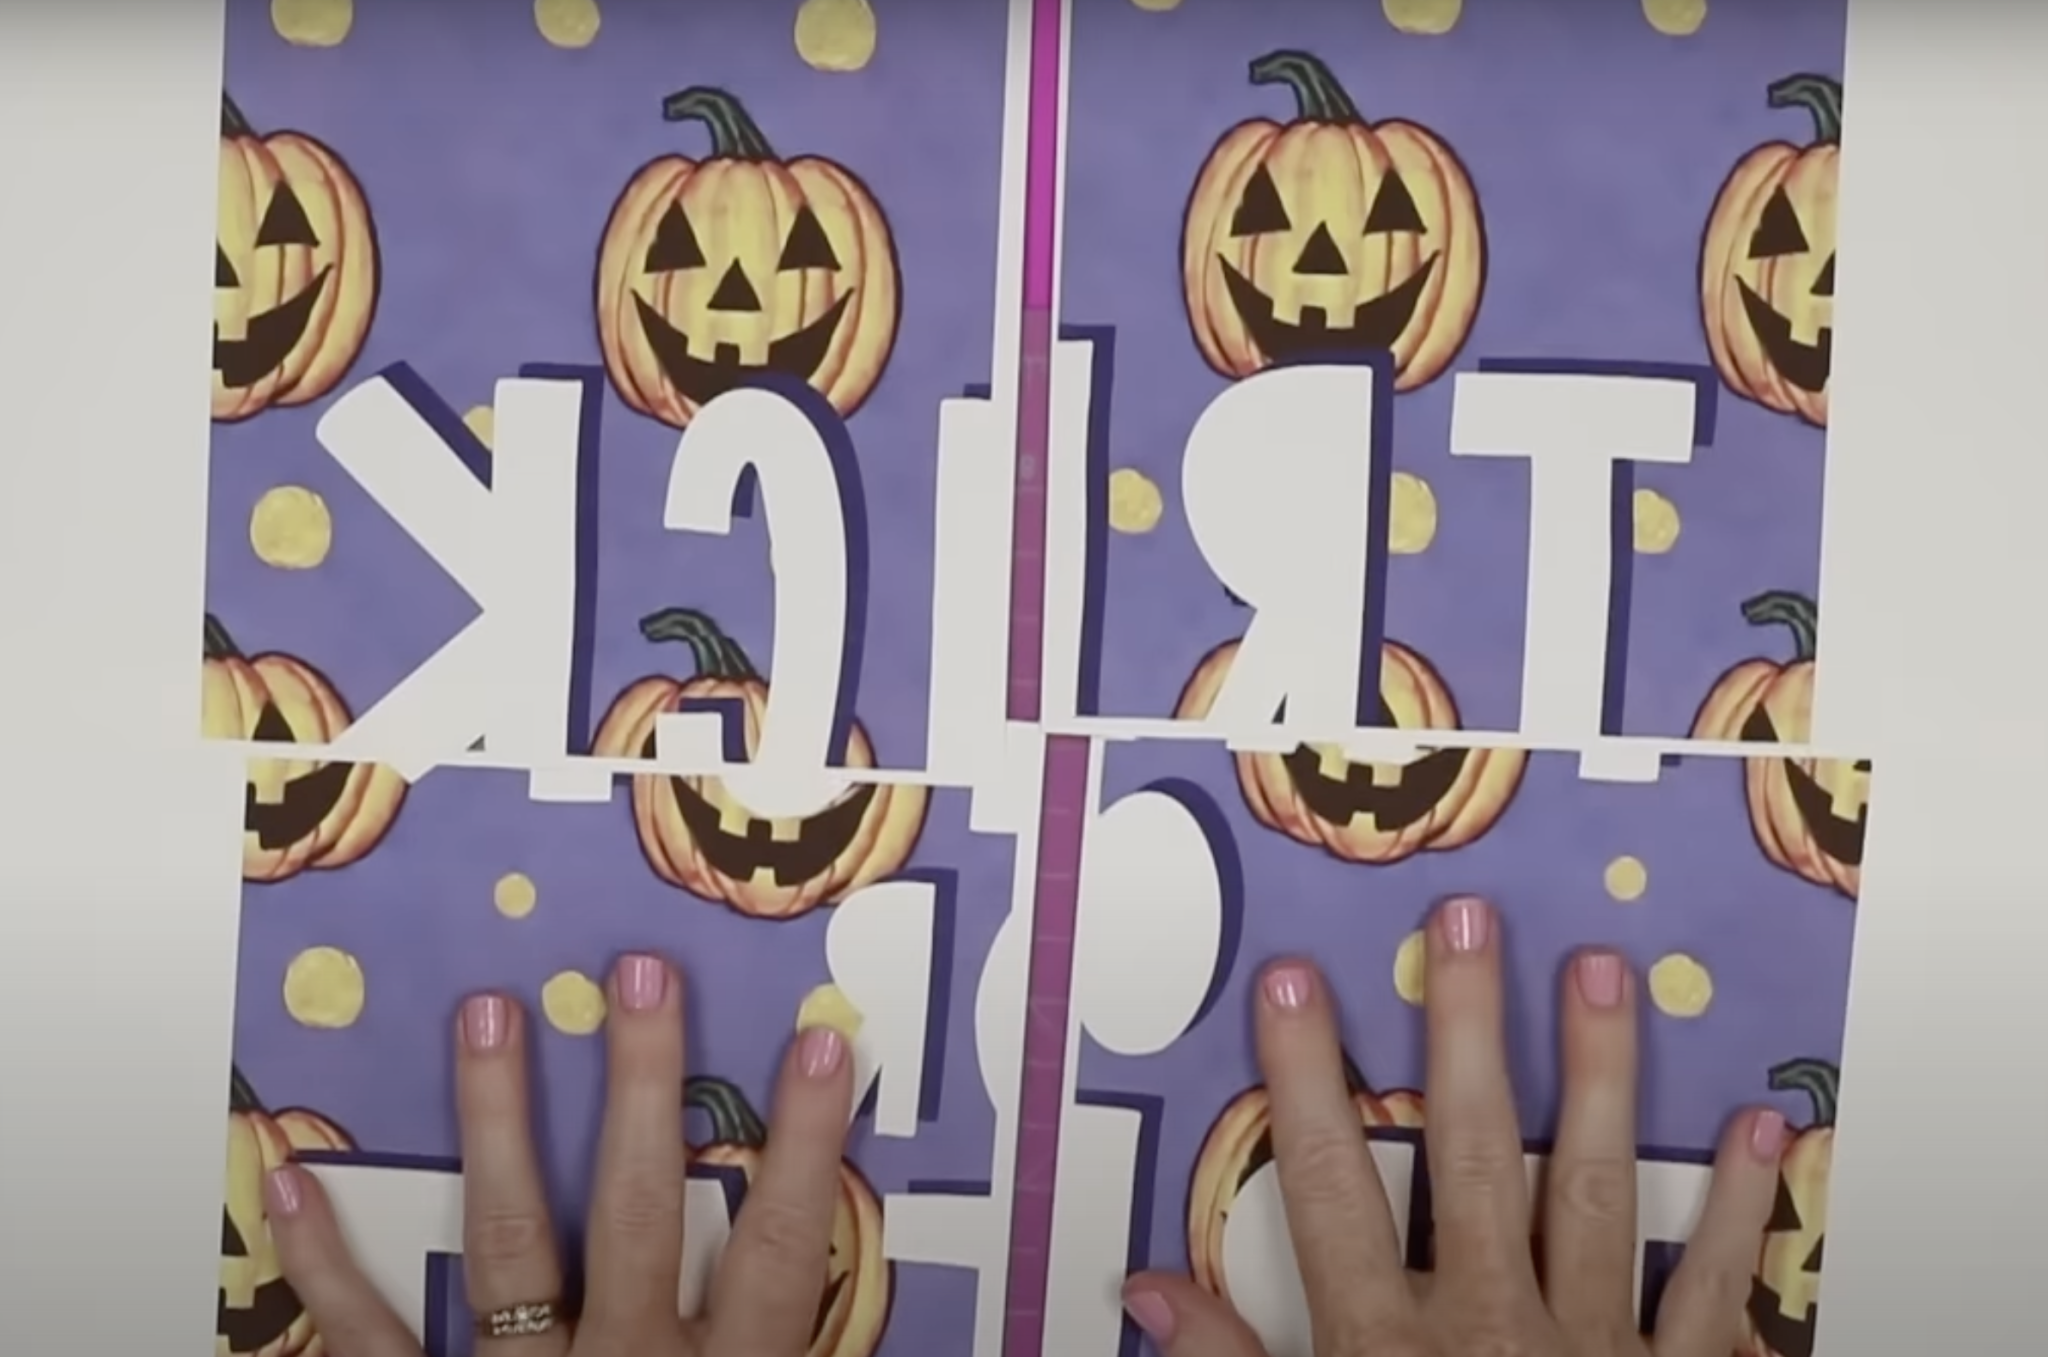
Where the two pages meet we need to trim off the excess white from one side. Leaving the white on the other side gives you a little room to attach the two pieces.
How to Trim Large Sublimation Prints
To trim the white off the print I really like to use a rotary cutter and a clear quilting ruler.
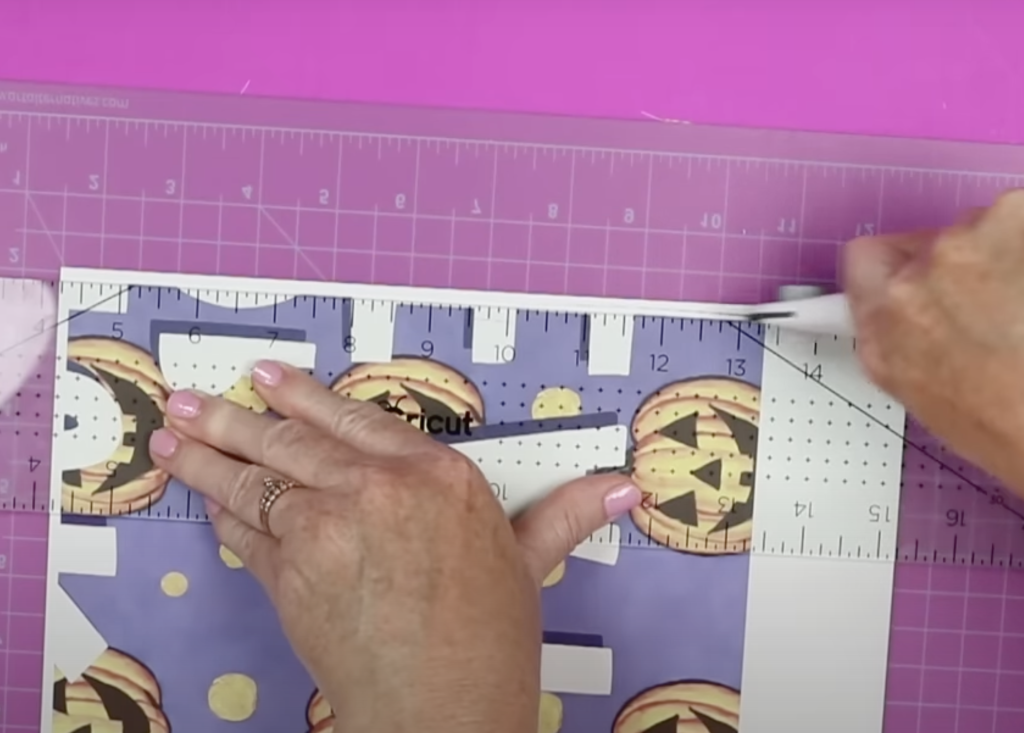
Using a clear ruler makes it easy to cut right along the edge of the print.
Using a paper trimmer isn't recommended because it's hard to line it up with the exact edge of the print and if you need to cut off small slivers of paper the trimmers don't perform well.
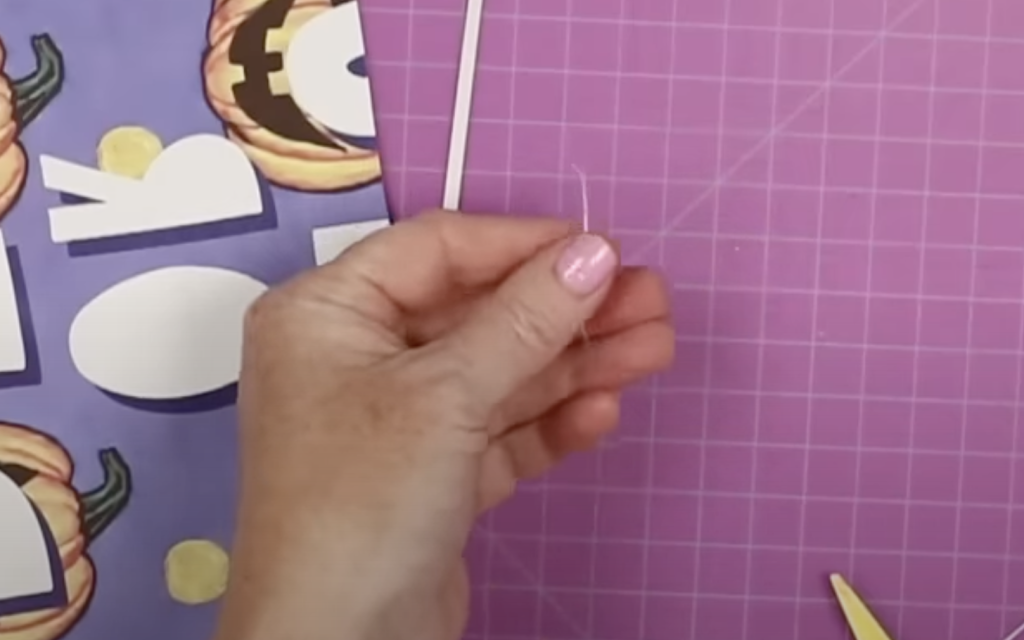
As you can see, with the rotary blade and ruler I am able to remove tiny pieces of white paper that will affect the final project.
Check Print Cut Edges
To make sure all the white is removed from the edge of the print I like to move the print to a surface that isn't white. This allows you to see if there is any white left along the printed edge.
Here I am focusing on the purple areas of the print and making sure there is no white left on the edge. This can be hard to see with something white below it.
Attach Sublimation Prints with Heat Resistant Tape
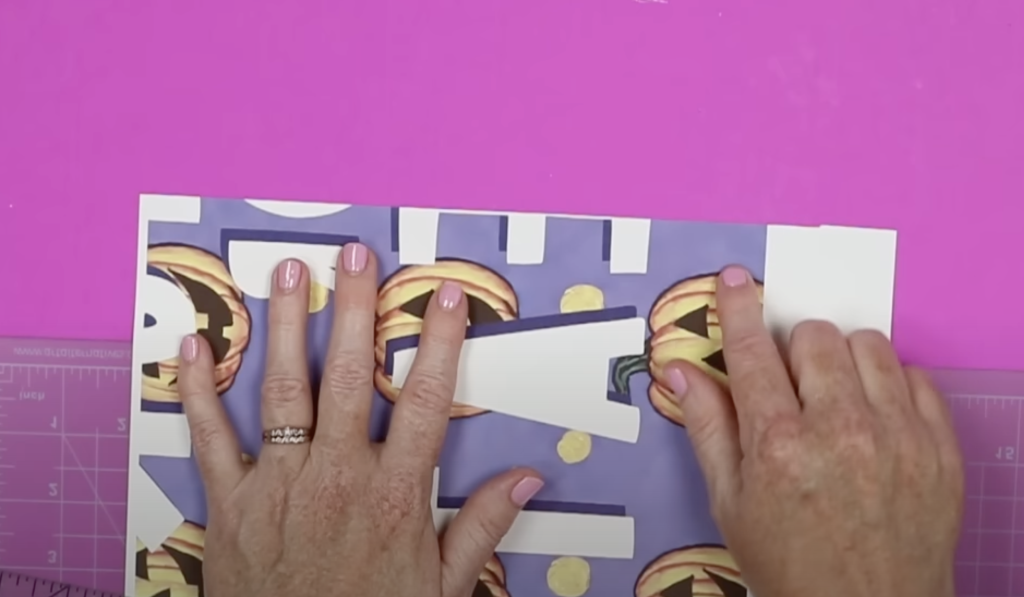
Now I have two prints and we can attach them together. Here you can see that the left print has the white paper trimmed away and the right print still has a little white left.
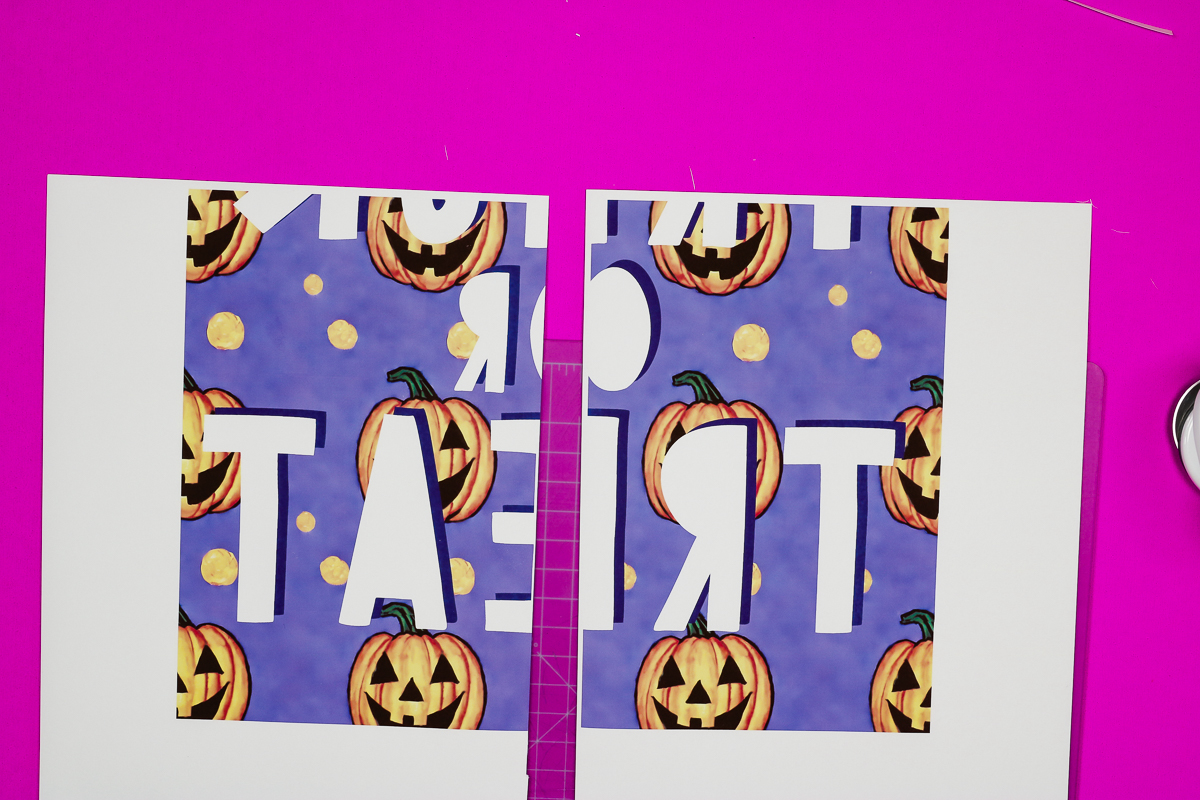
I find a light box like the Cricut BrightPad is really helpful in lining these prints up.
Make sure you're using heat-resistant tape to attach your prints. Your tape will heat up during the pressing process.
I added tape the length of the print to the back of the print that has the white on the edge still. You'll want to leave about half the tape hanging over the edge so you can stick that to the other print.
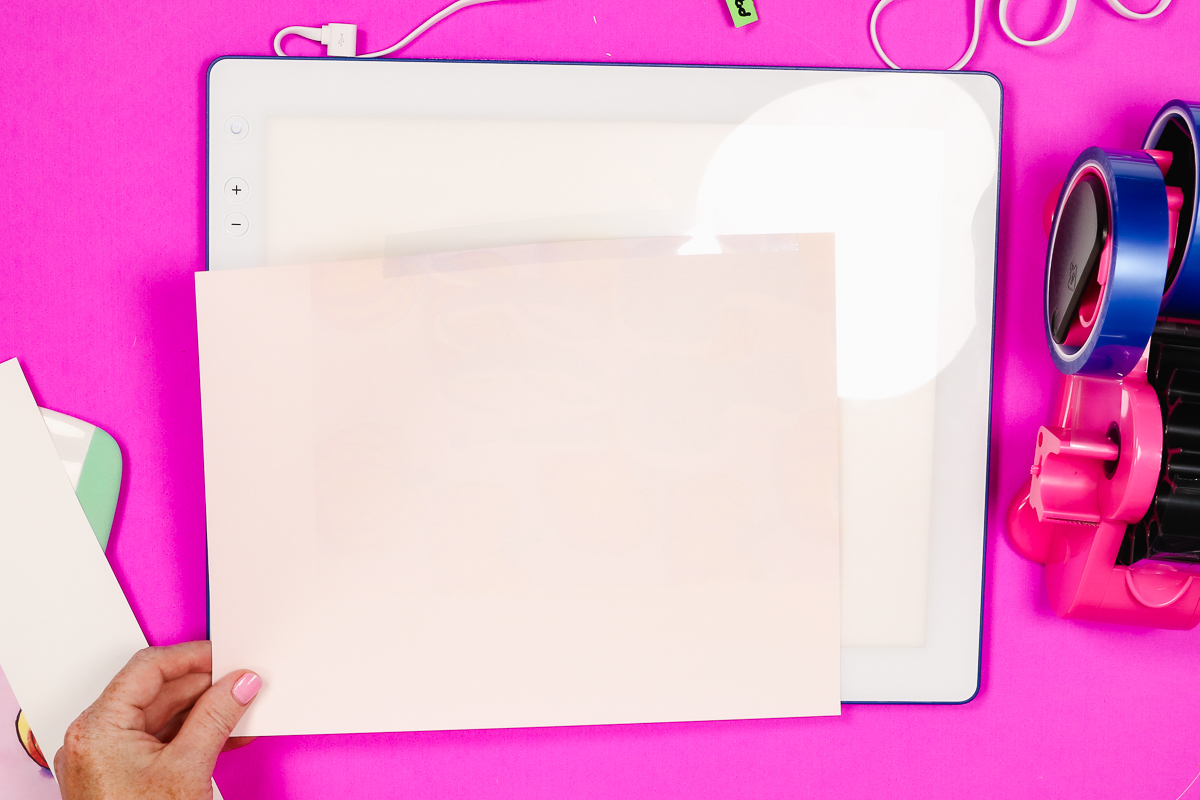
Take your time lining up the prints. This step is very important. I like to tack them in place so I can reposition them as needed.
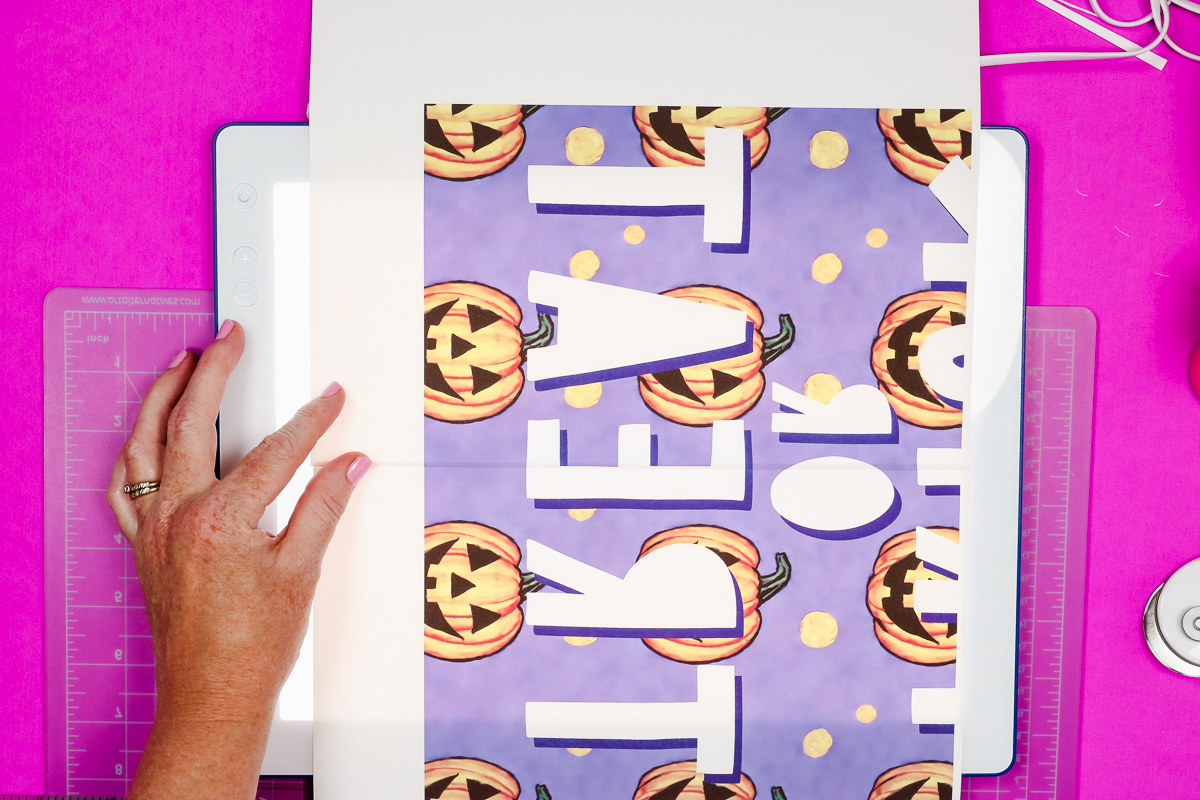
I find it's helpful to check the top and bottom of the print and anywhere things line up, like the tops and bottoms of the letters.
Attach All Pages Together
Here, we have both the top and bottom prints taped together. Now we can attach those pieces together.
We're going to use the same process we did before. Trim all the white away from one side and tape both sides together.
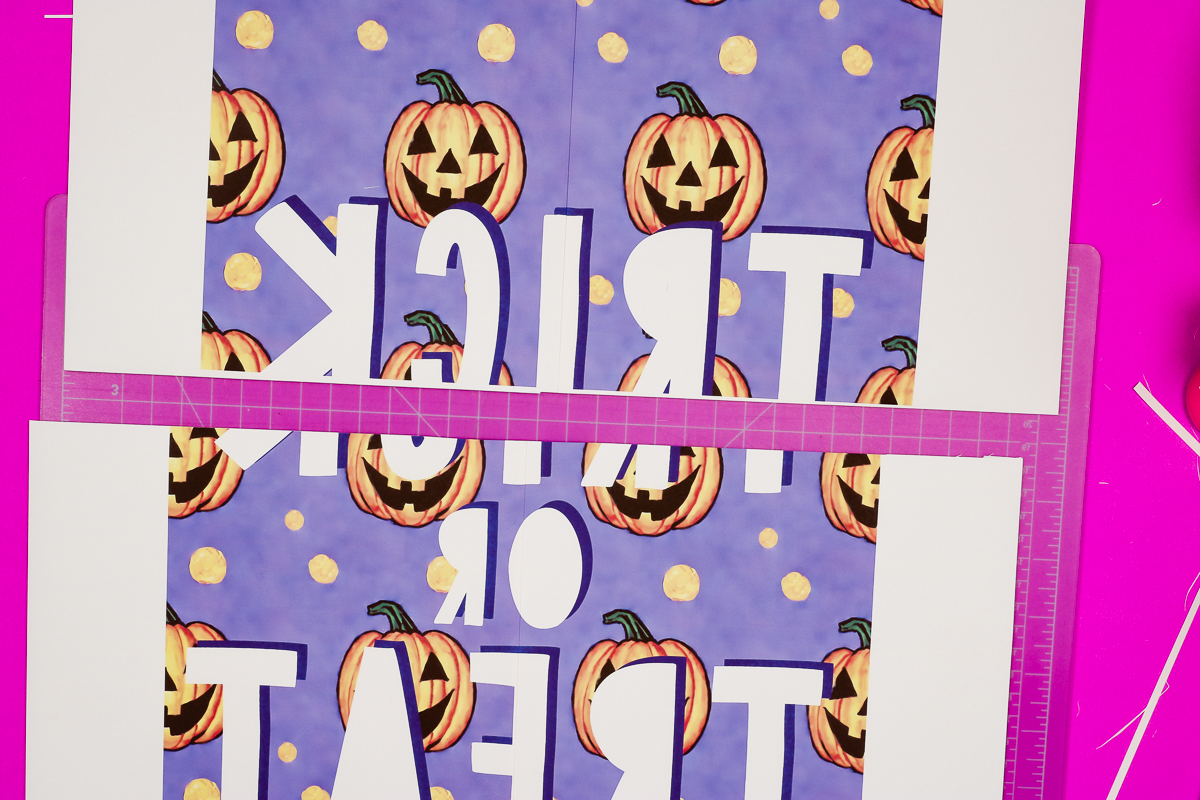
When all of the pieces are taped together use a scraper tool to burnish the seams really well. You don't want any gaps or wrinkles in the print.
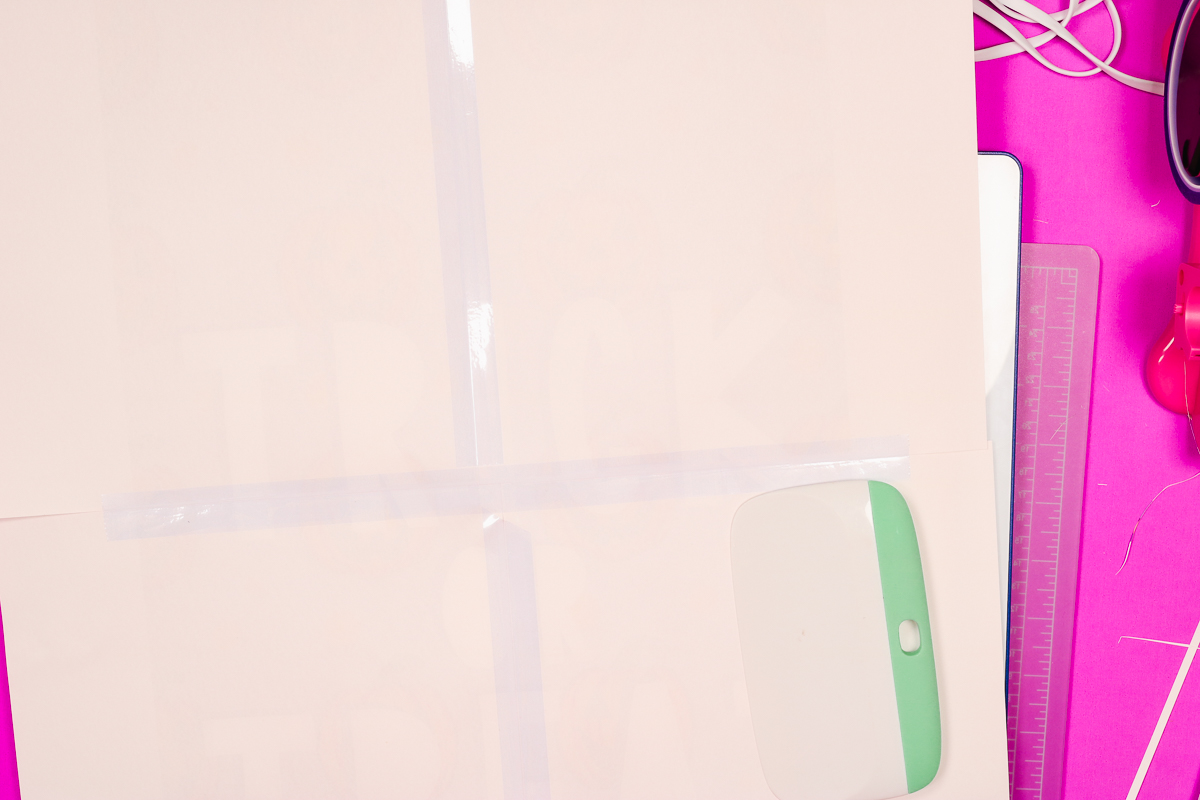
Add Large Sublimation Print to Garden Flag
Now that our print is all taped together it's time to prepare the garden flags so we can attach the sublimation print.
Preheat Sublimation Blank
Before we add the print we need to preheat the blank. I noticed that these sublimation flags tend to have a lot of moisture and shrink with heat.
This often happens with less expensive blanks. I pre-pressed mine multiple times at 375 degrees for 50 seconds to really get out the moisture and to get it to shrink as much as possible.
We don't want the blank shrinking with the sublimation print attached, that could cause some issues with the transfer.
Locate Large Sublimation Print Onto Sublimation Blank
Now that the garden flag is ready it's time to add our print. Make sure your garden flag is completely cool before adding the print to prevent ghosting.
As you can see my print is slightly larger than the garden flag itself. I wanted the entire surface of the garden flag to be sublimated.
Another great thing about these inexpensive garden flags is that you can see through them pretty well. This makes locating the print so it is centered on the flag easier.
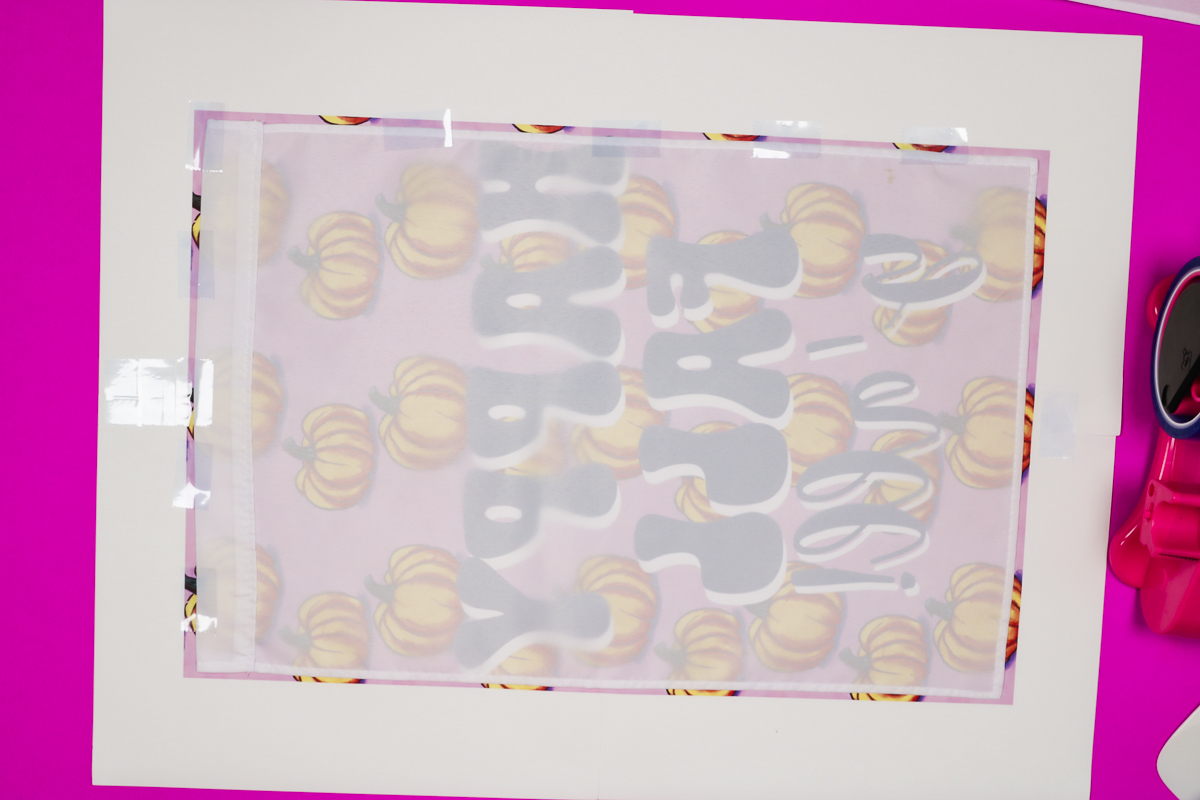
Once you have it located how you want, tape the flag into place really well.
Pay close attention to seams. As I'm taping around the edges, I like to make sure and tape the flag at each seam so it's less likely to move or separate in those locations.
Press Sublimation Print onto Garden Flags
Now that we've pre-pressed and located our design it's time to press the design onto the flag.
Through my experimenting, I learned that moving the print around too much can cause some issues in the final product.
First off, I recommend using the largest heat press you have. I am using my Cricut Autopress and I've added a piece of cardboard larger than the sublimation flag to the Autopress and then to protect the cardboard I placed the large EasyPress mat on top of it.
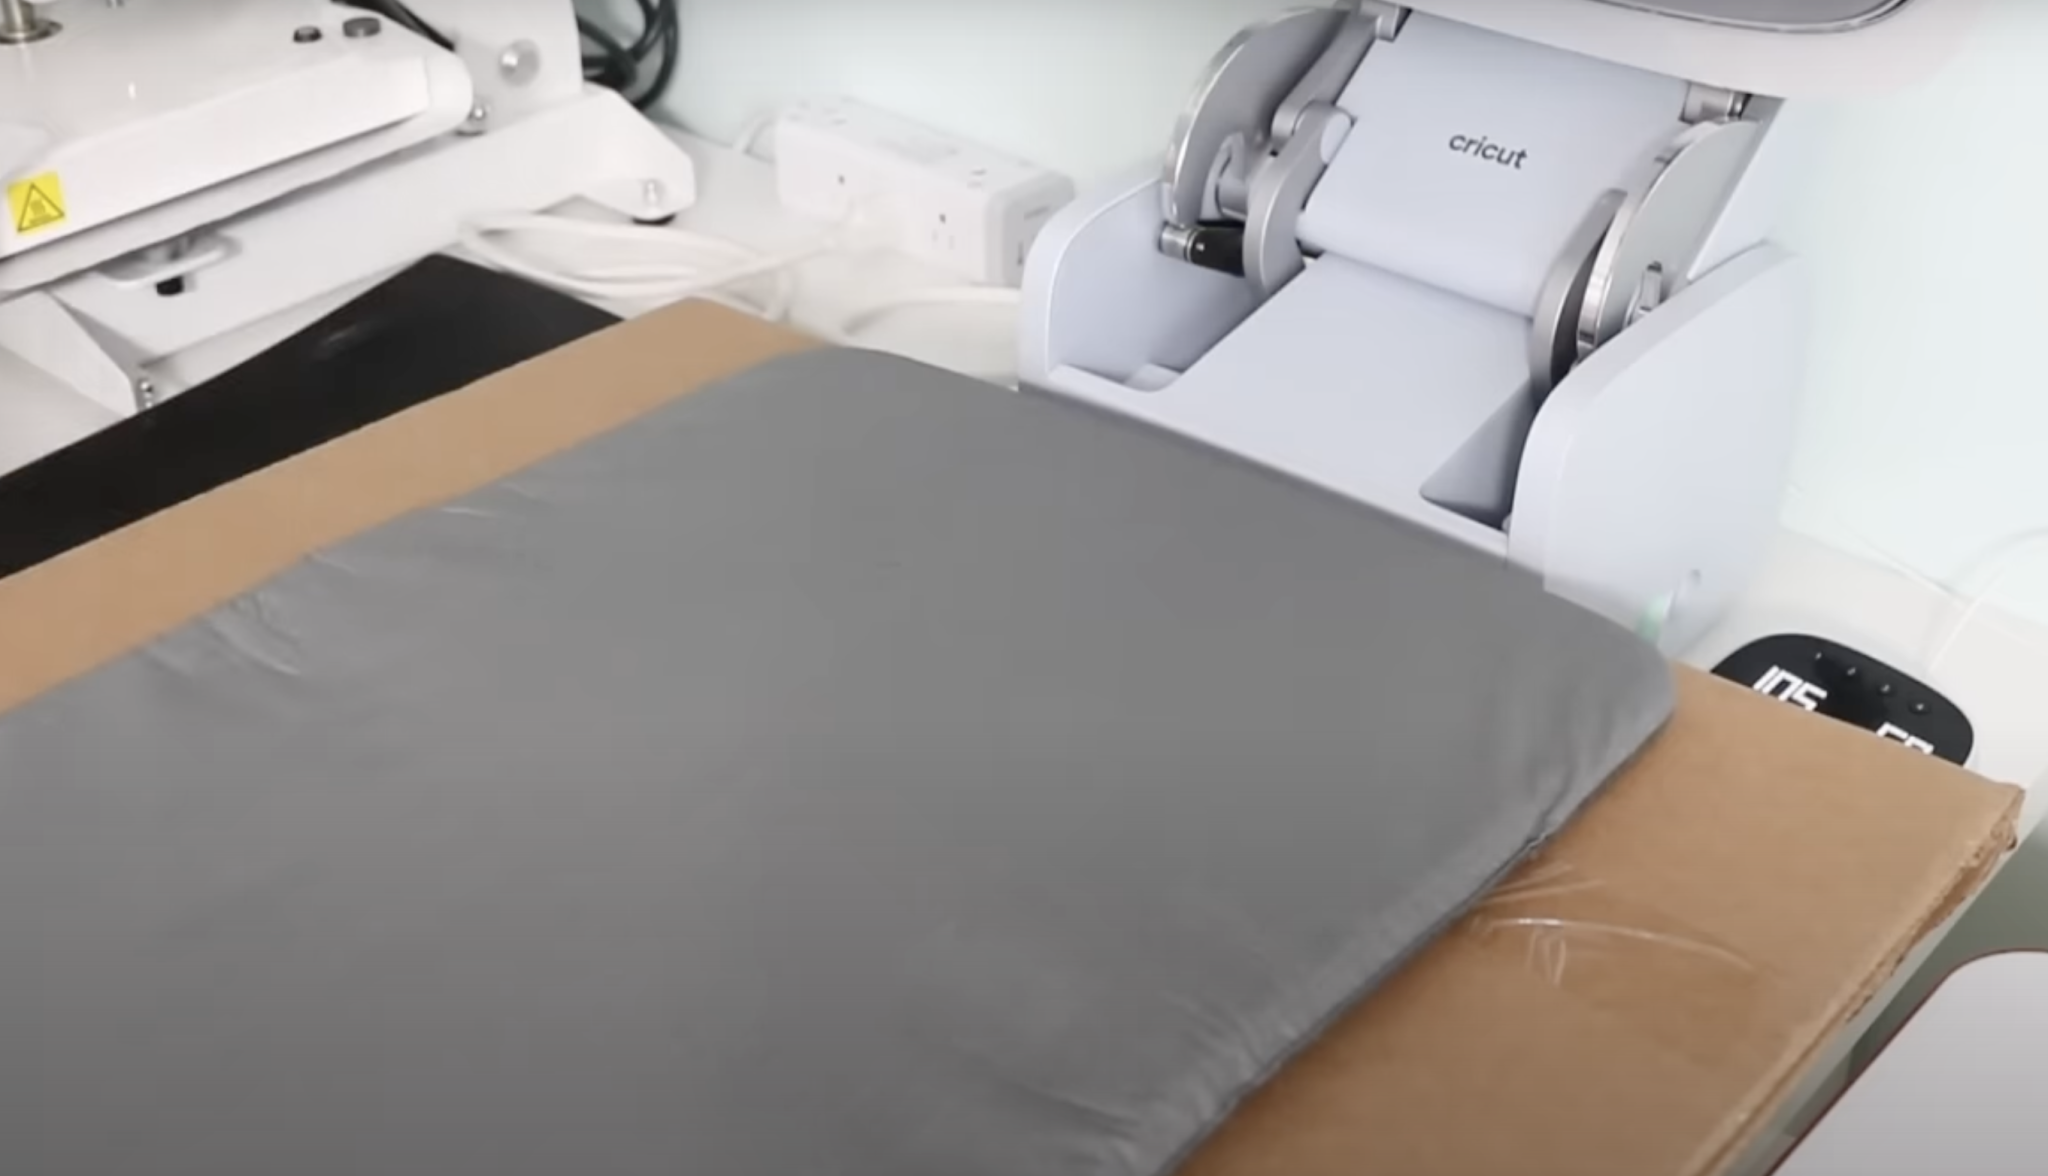
Next, we're going to cover the mat with protective paper to protect it from any ink that may bleed through the flag.
Now we need to add the sublimation print and flag to the heat press. My EasyPress Mat is slightly larger than the image itself. This is helpful because I won't have to move the mat around after pressing the first time.
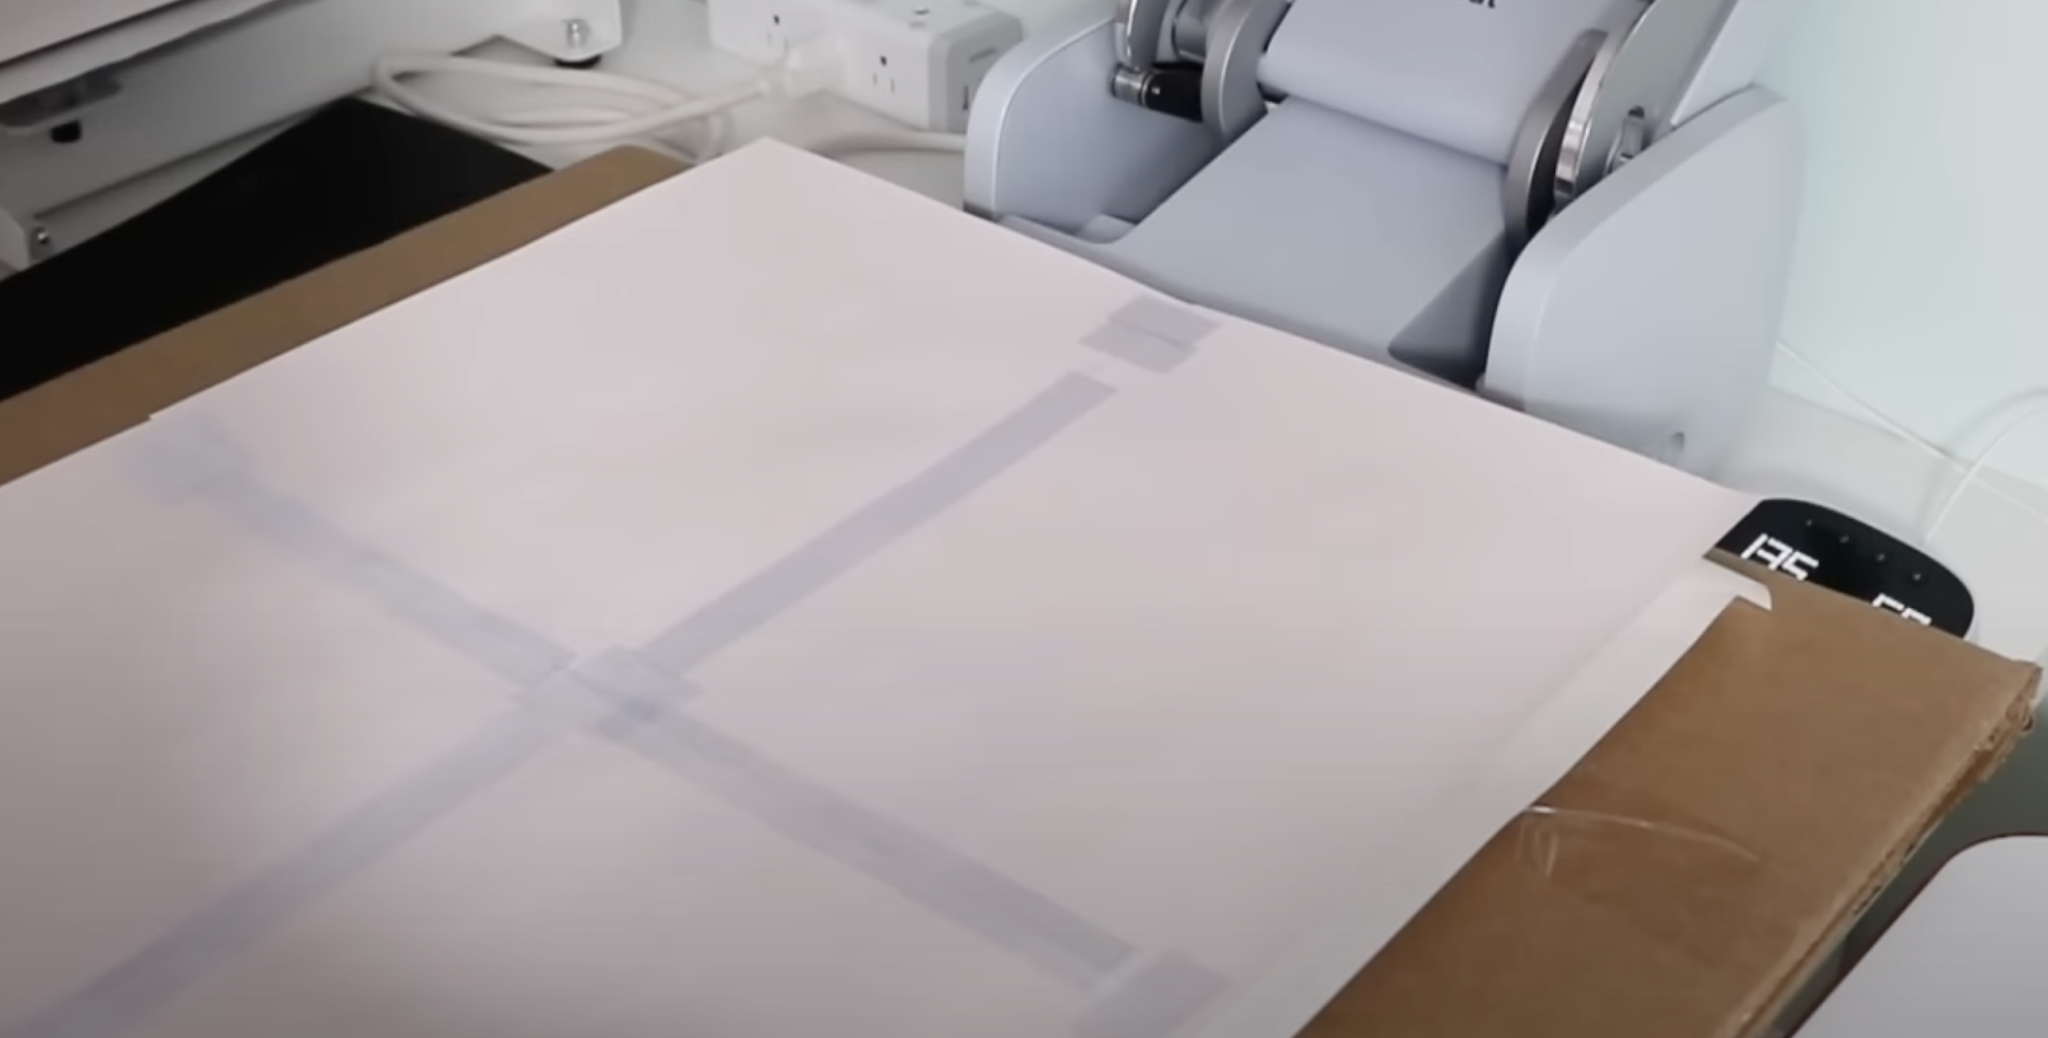
Place the project garden flag down, paper side up onto the EasyPress mat, and cover it with protective paper. Make sure as much of the design is in the heat plate area as possible and close the press.
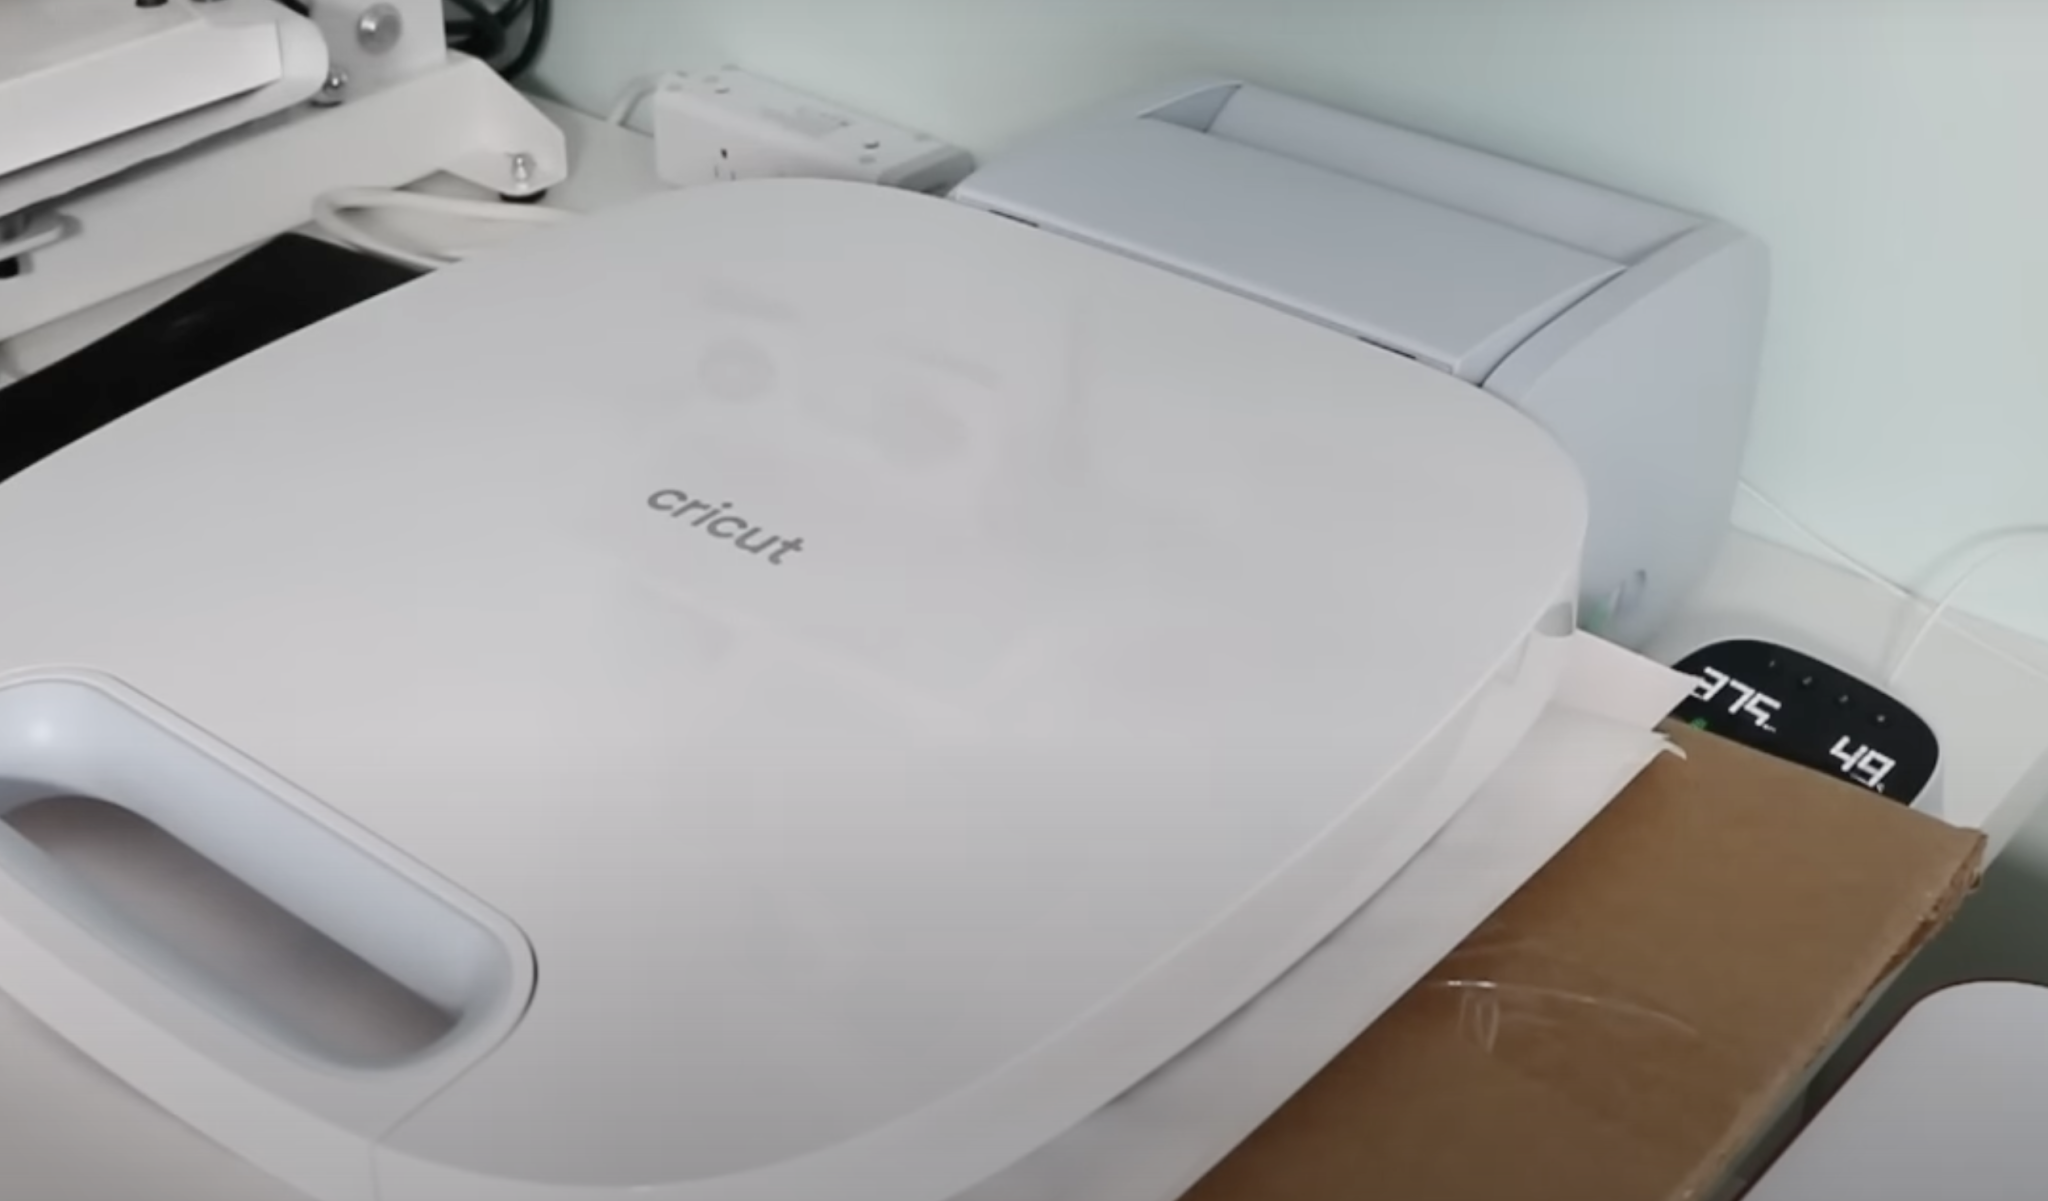
You can see that the paper does hang out the sides of the Autopress a little bit. That area is blank paper. Other than the section by the handle, my image is under the heat plate.
I will need to press my design in two steps to get the whole thing sublimated onto the flag.
Press the first area for the full-time and temperature.
Rotate the Sublimation Print and Press Again
Because my press is large enough to press the whole design in two presses when it opens I need to rotate the entire thing and press again.
You can see that there is a very clear indent in the protective paper that will help me line the project up and make sure I'm covering the rest of the design with the second press.
Pay attention to where the plate of the heat press curves. You don't want to miss those areas with the second press.
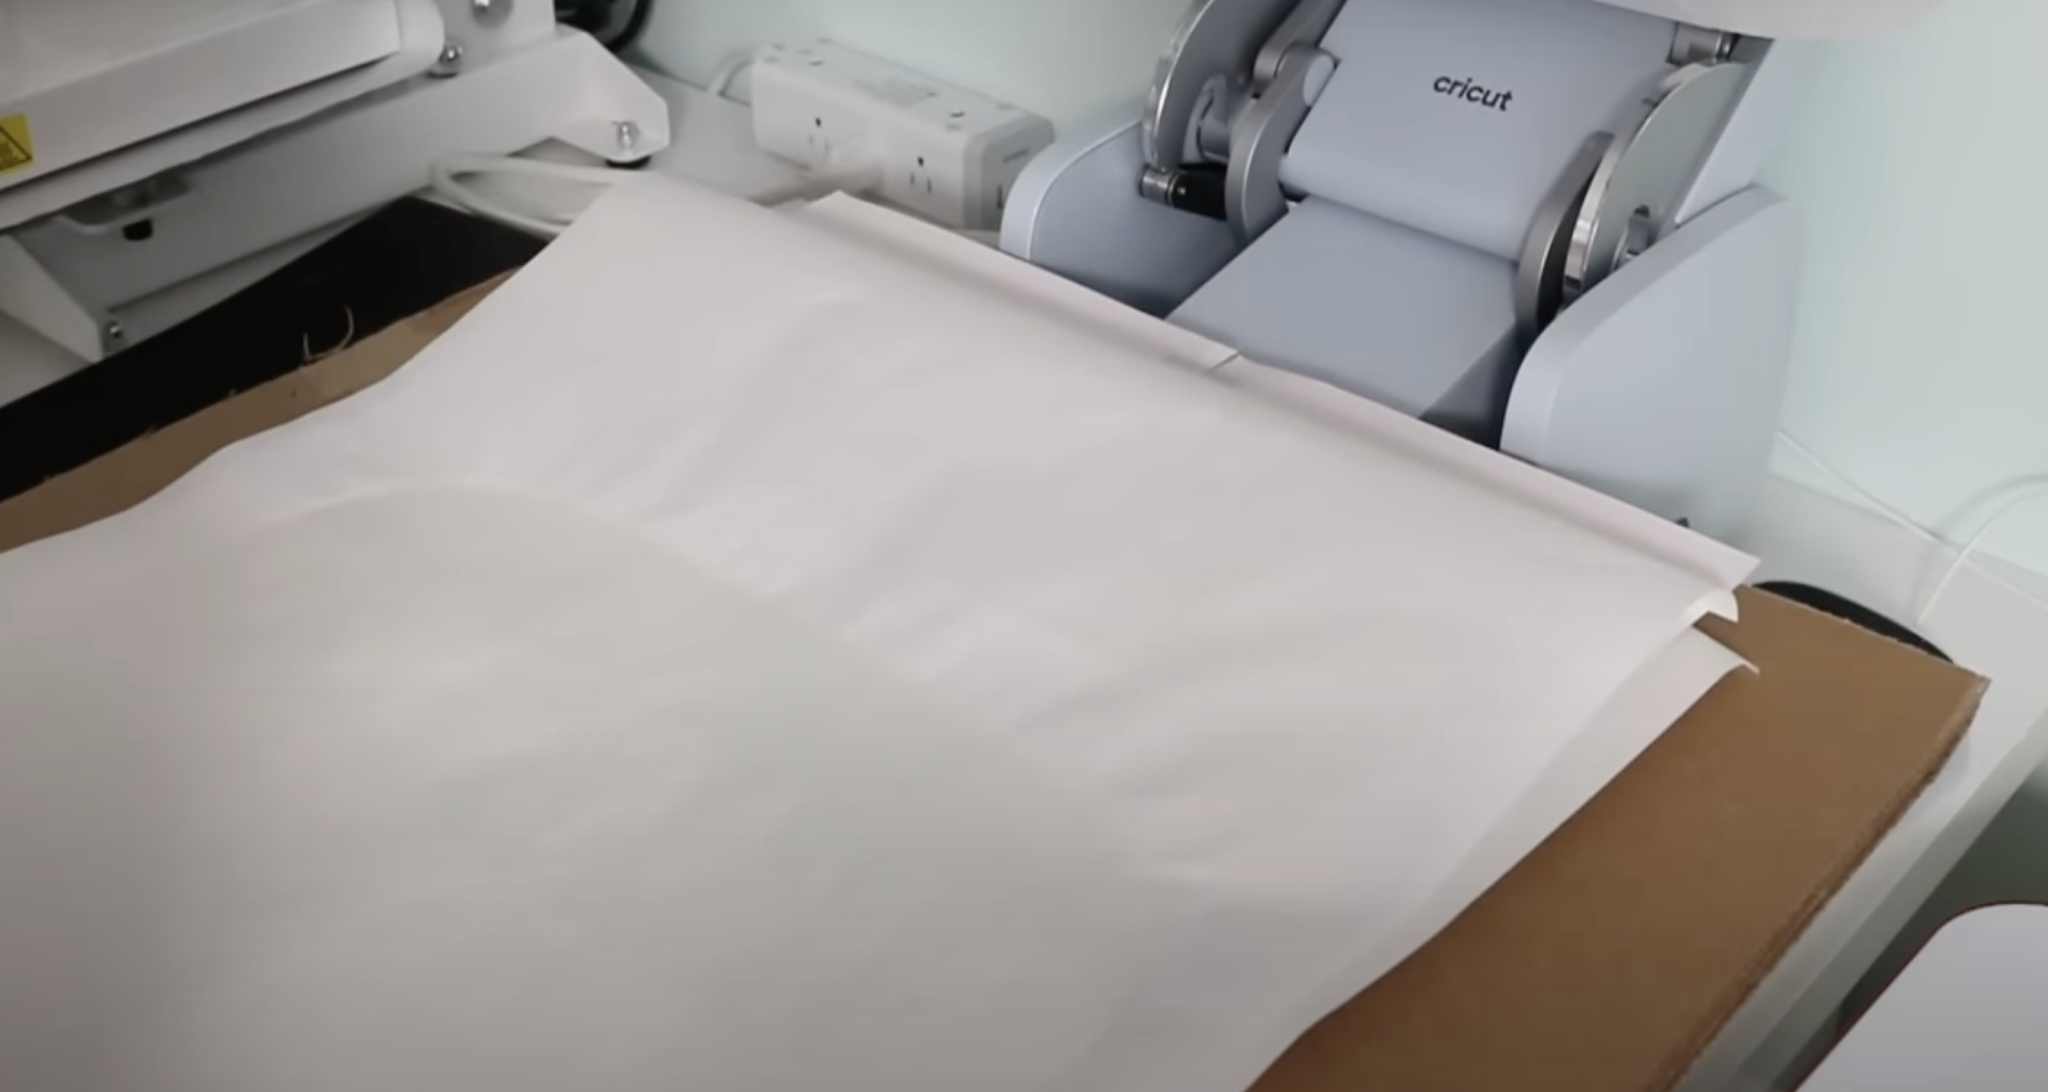
This is where that large cardboard comes in. I don't want to risk moving things around too much while the flag is still hot.
With the cardboard, I'm able to use that and rotate the whole pile without having to actually touch the flag or print.
Depending on your setup you may need to make some adjustments. I did have to slide my EasyPress mat up a little bit but I didn't need to touch the print, protective paper, or flag.
Large Sublimation Projects with a Small Printer Results
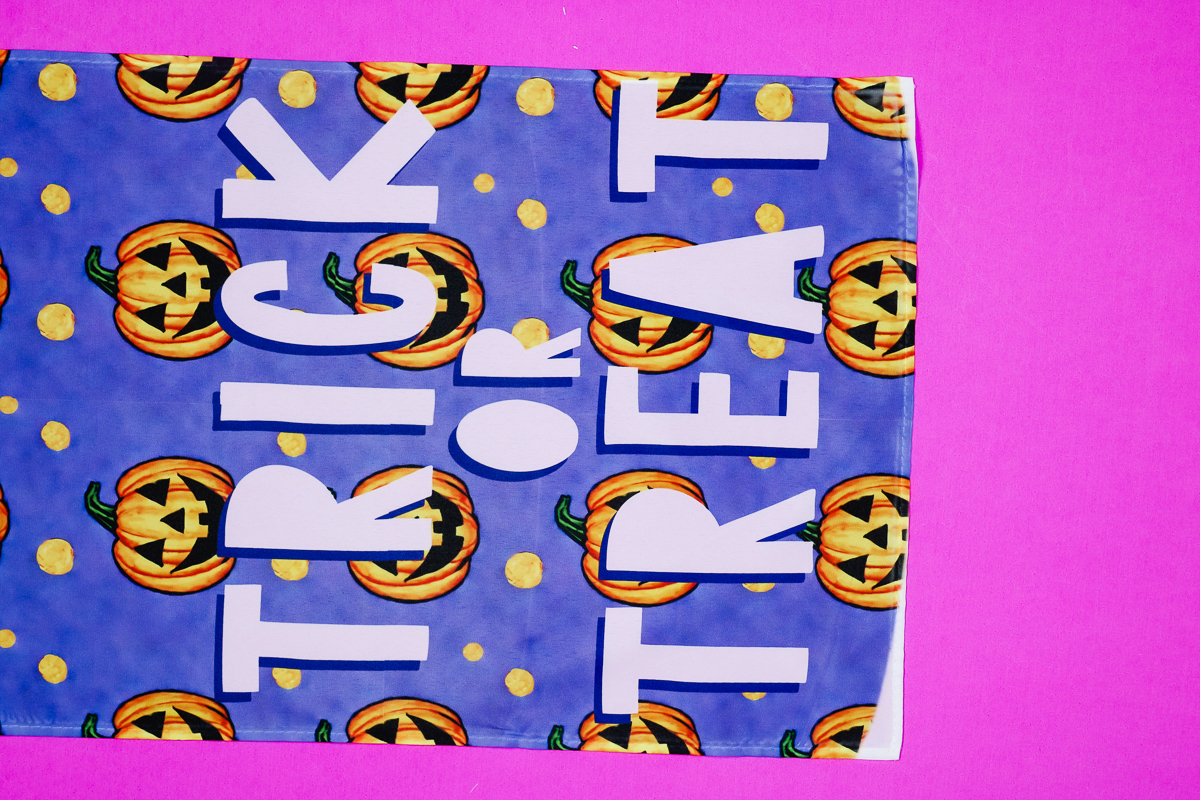
Now let's look at our finished garden flags. First up we're going to look at the flags with the trick-or-treat design.
In this first example, if you look from the top to the bottom running through the I and the E you can barely make out the middle seam of my sublimation print.
In the photo, I actually can't make out the horizontal seam but I can see a mark that runs from side to side cutting through the word OR.
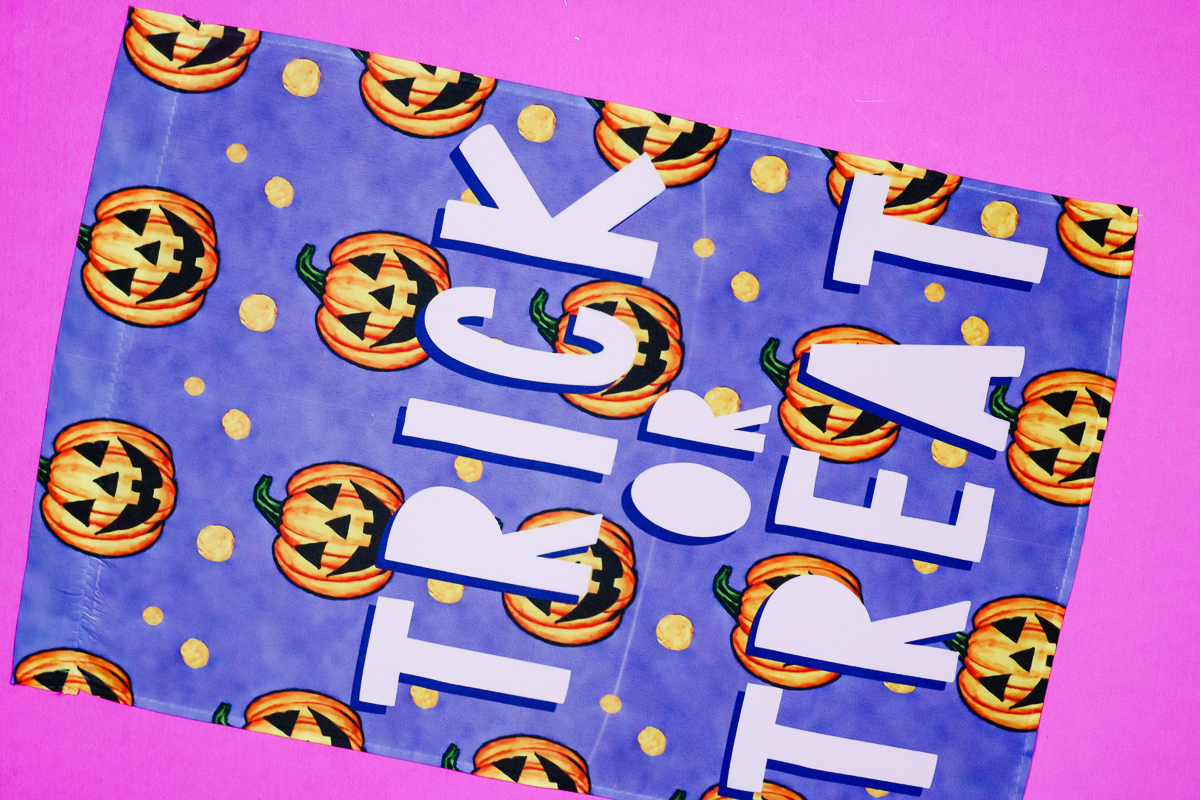
This line is actually from my Autopress. When you press something more than once, you can get a faded line along the edge during the second press.
I don't know of a way to avoid this other than to recommend using lighter-colored designs. This press mark is barely noticeable in my other print. It doesn't always happen but it is definitely more noticeable in darker colors.
In the next photo, you can see my first flag project. Here I did not get my seam lined up really well from top to bottom. There is a tiny white line that runs through the entire thing and you can still kind of see that press line.
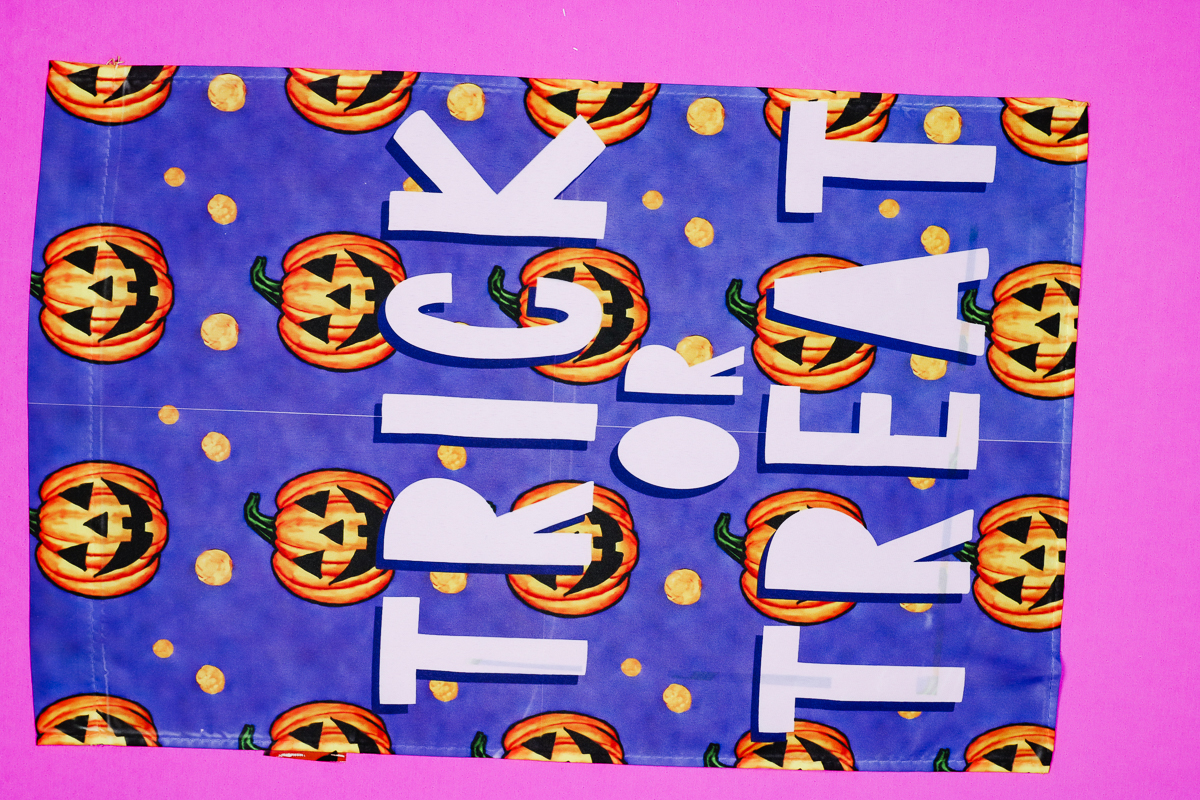
If you look closely you can also see discoloration on the whites of the letters. This is because, with this one, I did move the print instead of the cardboard. What ended up happening is that the ink that was on my protective paper ended up transferring to the flag.
Next, I wanted to show you another pressing mistake. Here you can see that I didn't get the corners of my flag into the press so they didn't sublimate at all which is unfortunate because the press line is not very noticeable in this print.
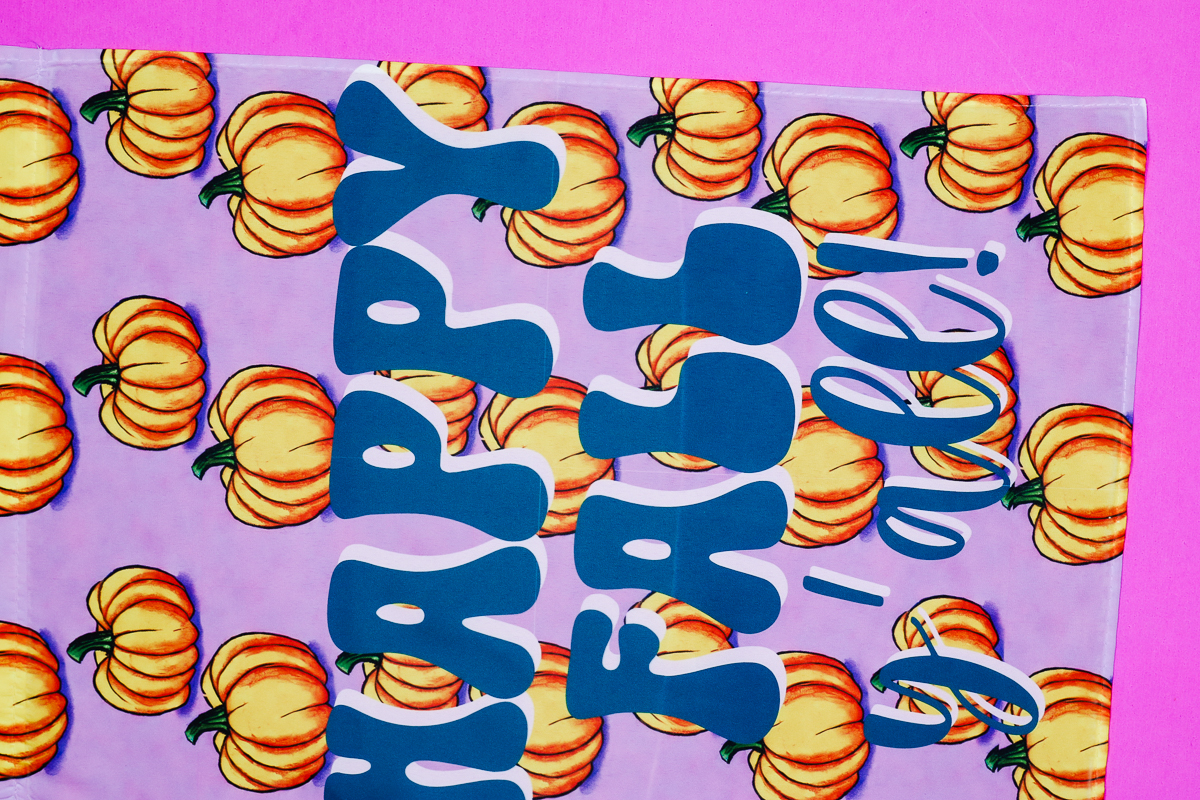
Light Print Sublimation Flag Results
This next flag is a great example of using lighter colors. You can see the press line through the letters in FALL but they can hardly be seen at all in the lighter purple and pumpkin colors.
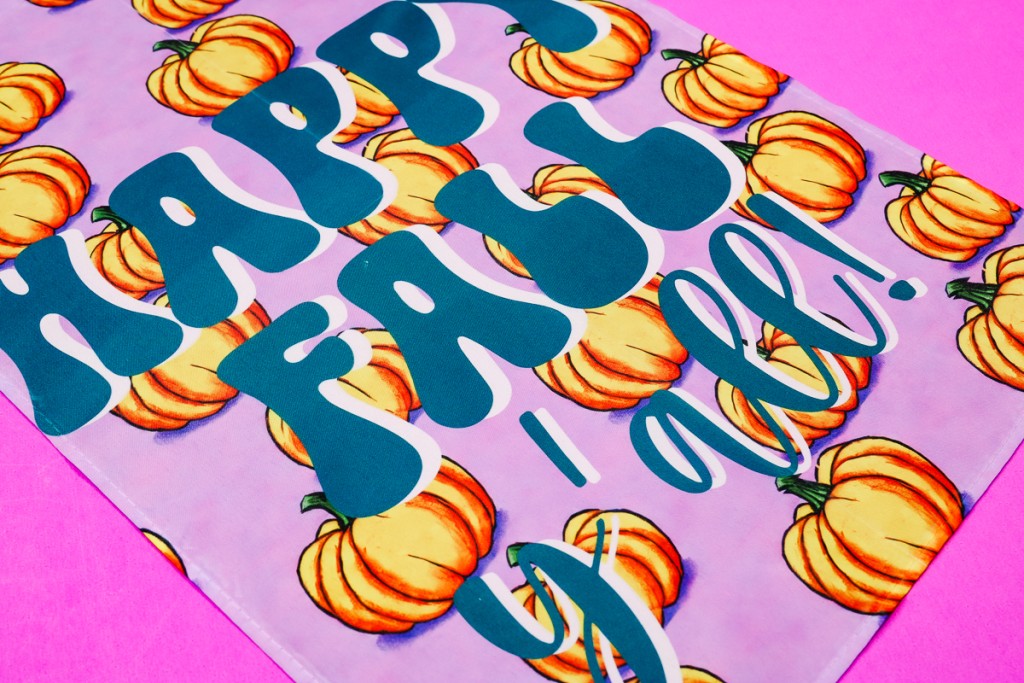
This next flag is a good example of how double pressing can fade your design. Here the bottom part of Happy and Fall ended up being pressed twice and there is a slight difference in the colors.
Final Thoughts on Large Sublimation Projects with a Small Printer
As you've seen, by taking my time and practicing I've gotten pretty good at making my seams hard to notice. I do still sometimes have seams that can be seen. Sometimes the images aren't lined up exactly, etc.
Do You Need a Large Format Printer?
I think if you want to create large sublimation projects like these garden flags to sell and you need to make multiple a day it would be best to invest in a large format sublimation printer.
You're going to get a much better finished product in less time with a lot less headache. Even with all the practice I've been doing over the last year I still have times when one design is lined up perfectly and the next time you can see the lines.
I have found there is just no way to get them perfect every time which could result in a lot of waste if you're trying to sell these items.
If you want to make a couple for yourself and already have a small sublimation printer, I think you can practice the steps I've shown and get something that will look great in the yard. Yes, up close you may be able to see a tiny line but hanging in the yard they're going to look great.
Use Light Colors
As I mentioned, the press marks are much less noticeable on lighter colors so I recommend using them whenever possible. A white background would be even better but I really wanted to show you what may happen if you're using colors.
Try Different Tutorials
Because making large sublimation projects with a small printer is a process that has many steps I highly recommend checking out a few different tutorials.
If my process doesn't work for you, definitely check out Jennifer Maker's tutorial that I shared above and maybe even a couple of others to see which process works best for you.
If you have any additional questions about how to make large sublimation projects with a small printer, leave those in the comments and I'll be happy to answer them for you!
