
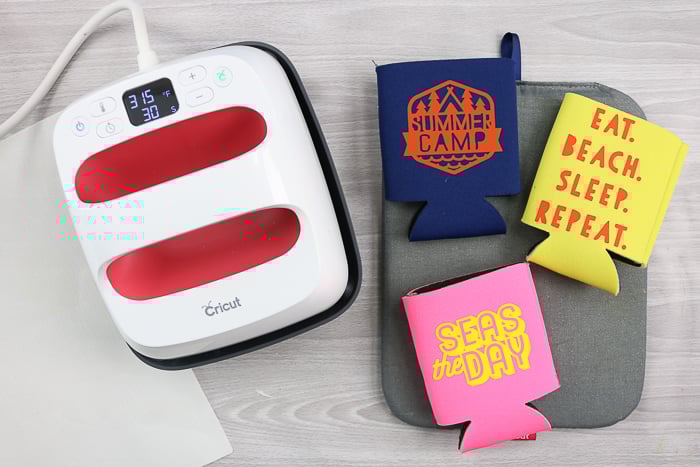
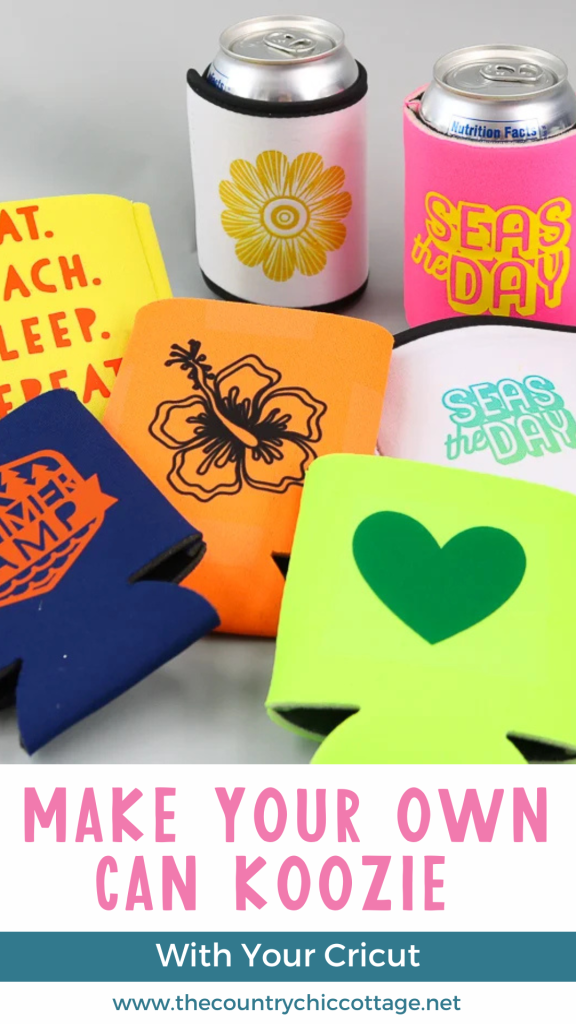
Did you know that you can create your own koozie using a Cricut machine and Heat Transfer Vinyl or Infusible Ink? It’s easy to make custom koozies right at home! Whether you’re looking to create party favors or special gifts for loved ones, you can design your own koozie in Cricut Design Space or choose from one of our pre-made designs below!
Perhaps you want to make party favors or even gifts for someone you love. You can design your own koozie right in Cricut Design Space or even use one of our designs below!
Video On How To Make Your Own Koozie
Want to watch me make a koozie? Everything covered in the post below is actually in a video that you can watch instead. Whether you want to use Heat Transfer Vinyl or Infusible Ink on your DIY koozie project, we have the instructions in the video below!
Can’t watch or missed some of the steps? No problem! Just keep reading. We are going to cover using Heat Transfer Vinyl first then you will find the instructions for using Cricut Infusible Ink on a can koozie after that.
Make Your Own Koozie With Heat Transfer Vinyl
Supplies Needed To Make A DIY Koozie With Heat Transfer Vinyl
- Can koozies (I am using these polyester koozies from here)
- Cricut machine (see which is my favorite here)
- Heat Transfer Vinyl (I am using Cricut Everyday Iron-on but you might want to use SportFlex if your koozies have a lot of stretch)
- Cricut cut file (get the one I used here)
- Weeding tools (optional)
- Cricut EasyPress (or an iron)
- EasyPress Mat (optional): You can use a firm heat-safe surface such as an ironing pad or folded towel.
- Teflon Protective Sheet
How to Make Your Own Koozie with Heat Transfer Vinyl
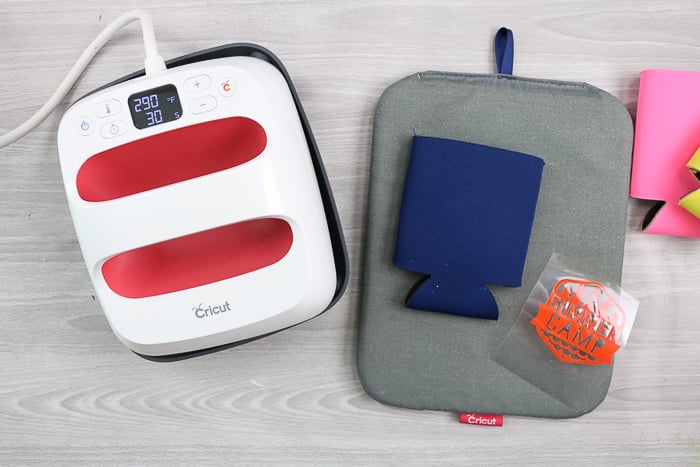
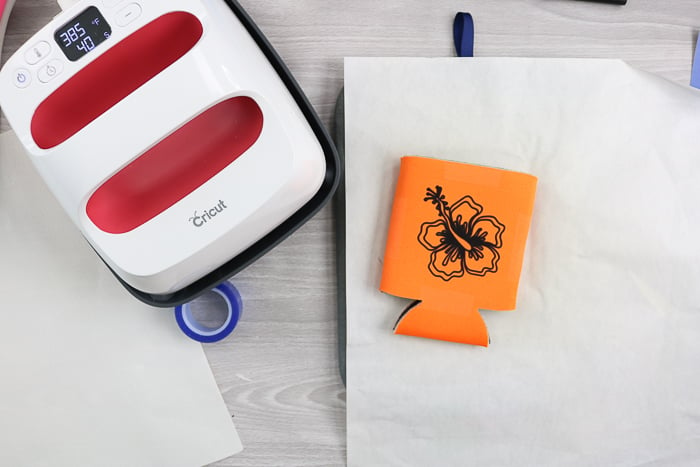
Step 1: Cut Your Design From Heat Transfer Vinyl
Start by cutting your design from the heat transfer vinyl of your choice using your Cricut machine. You will want to cut the design with the shiny side (carrier side) face down on your mat (adhesive side up). Be sure to mirror the design in Design Space before cutting.
Step 2: Weed Design
Once cut, you can weed the excess away from your design. Weeding tools make this easier but are optional. You only want to be left with exactly what you want to transfer to your can koozie.
Step 3: Set EasyPress To Correct Temperature
Use the Cricut heat guide to find the correct time and temperature for the type of HTV you are using. Then, set your EasyPress to these settings. NOTE: You can also use an iron for this step.
Step 4: Add Can Kooize To Mat
Add the can koozie to the EasyPress mat or a folded towel.
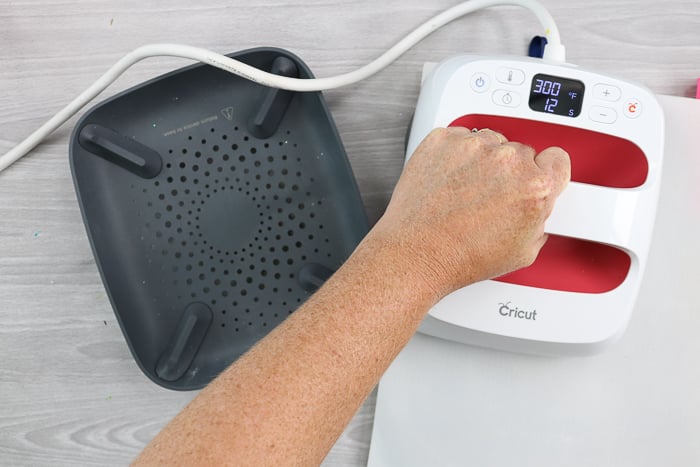
Step 5: Pre-Heat Can Kooize
Put the Teflon protective sheet on top and pre-heat your material for about 15 seconds. Then, remove the Teflon sheet and allow it to cool.
Step 6: Add HTV Design To Can Kooize
Then put your weeded HTV design on top. Cover with a Teflon protective sheet and press with the EasyPress or iron for the recommended amount of time.

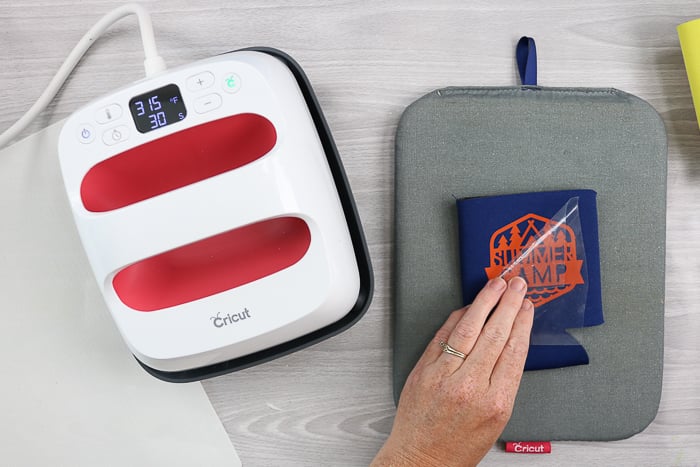
Step 7: Remove Carrier Sheet
Allow your DIY koozie to cool. Then peel back the liner from your design. Start at a corner and go slow so if the HTV is not stuck to your koozie you can return the liner and repeat the pressing process.
If it has adhered, completely remove the carrier sheet. Yay! You have successfully made a custom koozie using heat transfer vinyl!
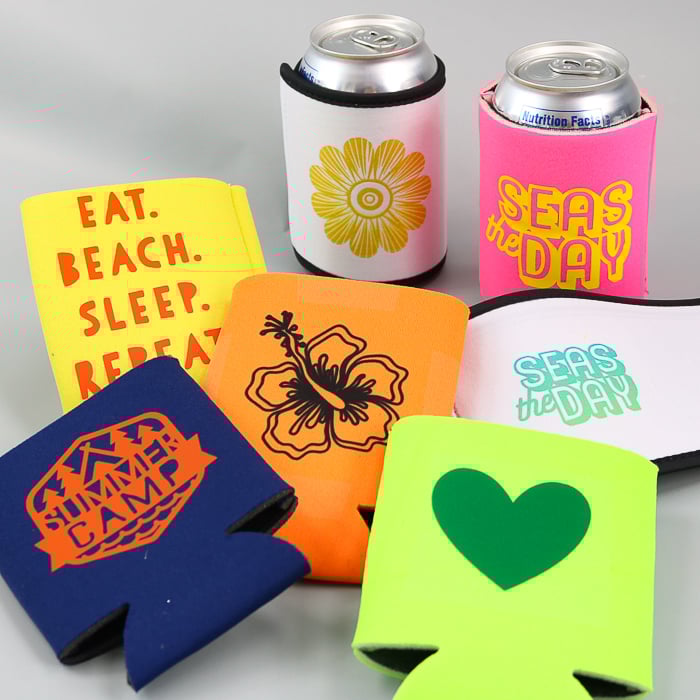
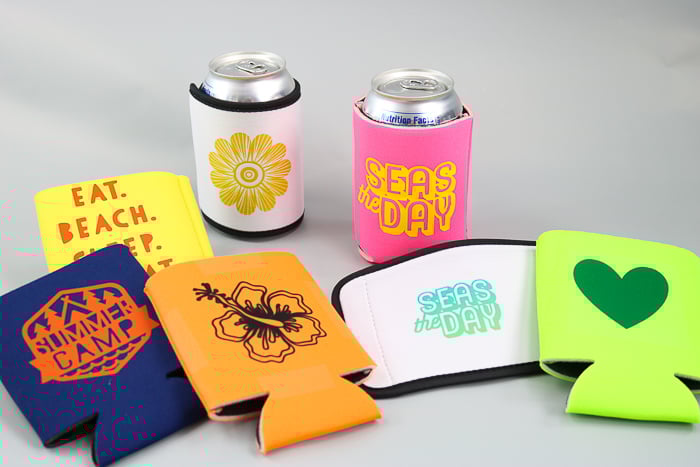
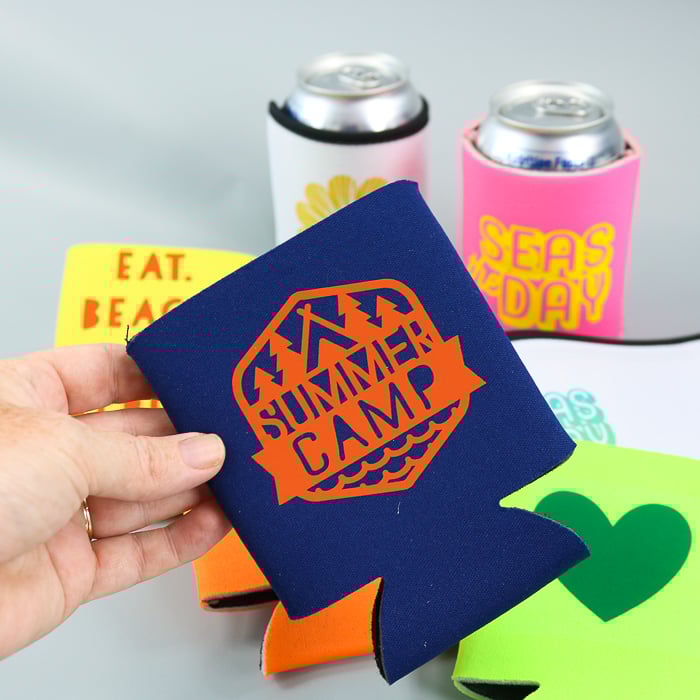
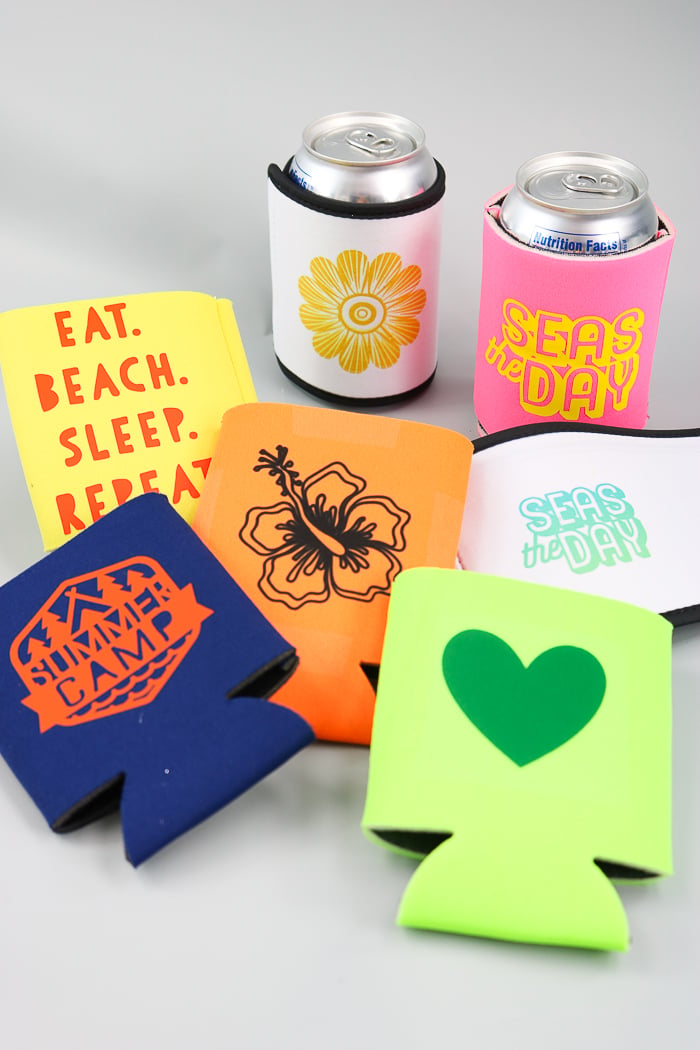
Now that you know how easy it is to make your own koozie with heat transfer vinyl, you can dream up a ton of designs! I actually made the three designs below while experimenting with heat transfer vinyl on custom koozies. I am sure you can design your own koozie and come up with some amazing projects as well.
But I couldn’t just stop here with heat transfer vinyl!
Read on to learn more about using Infusbile Ink for this project instead.
Make Your Own Koozie With Infusible Ink
First, I’ll show you how to use Cricut Infusible Ink sheets, and then we will also use the Infusible Ink Markers below!
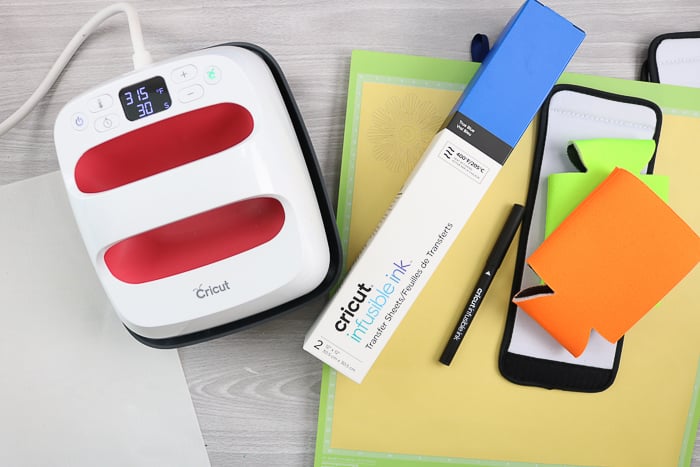
Supplies Needed To Make Personalized Koozies With Infusible Ink
- Can koozies (I am using these polyester koozies from here and also these sublimation blank koozies)
- Cricut machine (see which is my favorite here)
- Infusible Ink sheets and Infusible Ink markers (you can read more about using it here) (buy at Michaels in-store or online here)
- Cricut cut file (get the one I used here)
- Tweezers (optional)
- Cricut EasyPress (required for Infusible Ink)
- EasyPress Mat (required for Infusible Ink)
- White cardstock
- Butcher paper
- Lint roller
- Laser copy paper
- Heat resistant tape
How To Make Your Own Koozie With Cricut Infusible Ink Sheets
Step 1: Cut Out Your Design In Infusible Ink
Cut your design from an Infusible Ink sheet. Remember to cut liner side down on the mat and mirror your design before cutting. It is also better to remove the mat from the material, not the material from the mat. You can see more about cutting here.
Step 2: Weed Design
Then, you will want to weed your design. Bend the Infusible Ink sheet to crack it, then lift away excess with your fingers or tweezers. Do not use weeding tools. If using your fingers, make sure they’re dry and you’re not touching the ink too much. You can see more about the weeding process here.
Step 3: Set EasyPress To Correct Temperature
Check the Cricut Heat Guide for the correct time and temperature for your koozie and material.
Step 4: Add Cardstock To Mat
Add white cardstock larger than your Infusible Ink sheet to your EasyPress mat.
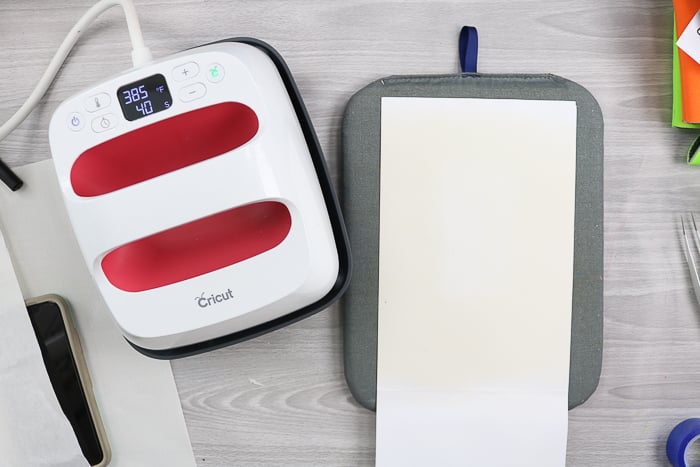
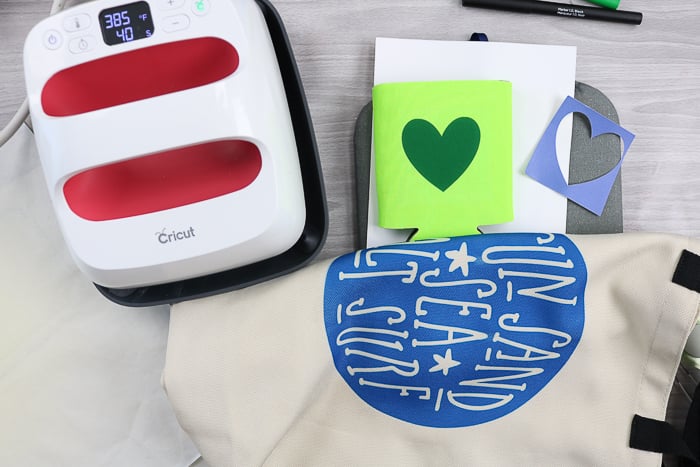
Step 5: Place Koozie On Top Of Cardstock
Put the koozie on top of the cardstock on the mat.
NOTE: A little note about what type of koozies will work with Infusible Ink. You will want something that is either labeled for sublimation or has a high polyester content. The Infusible Ink process is a chemical reaction, that is required in order for your finished custom koozies to be permanent designs.
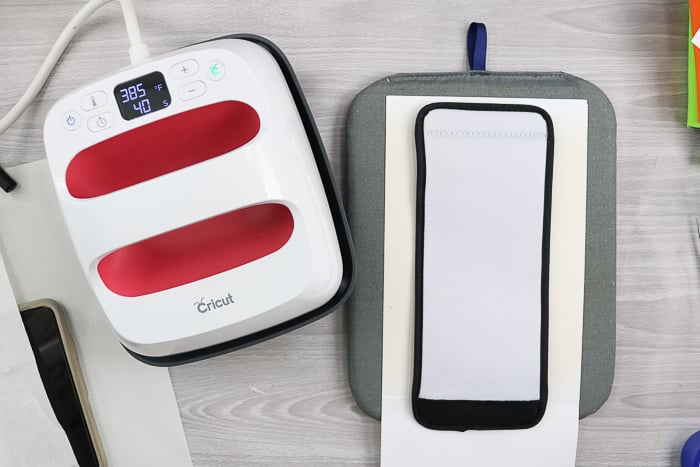
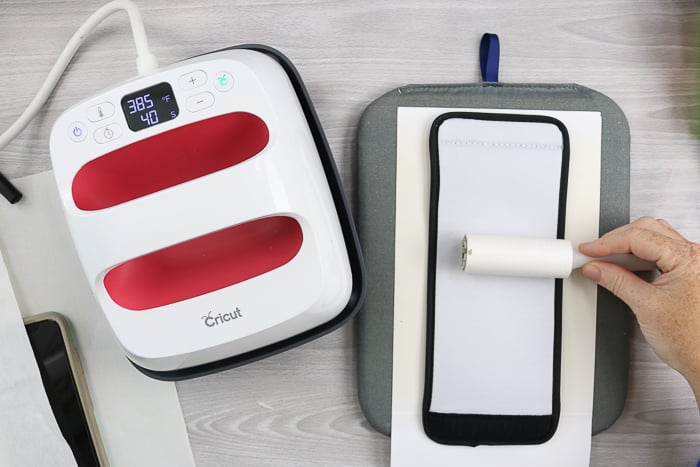
Step 6: Lint Roll Koozie
Be sure to use the lint roller over the surface, as any debris can affect your final project.
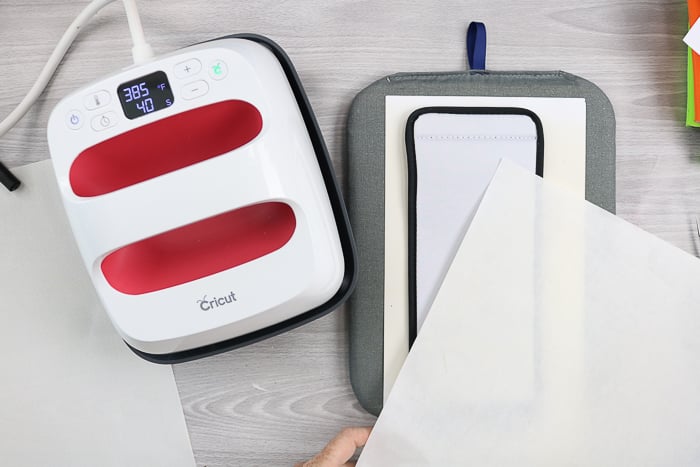
Step 7: Add Butcher Paper Over Koozie
Then, add butcher paper over the top of the koozie.
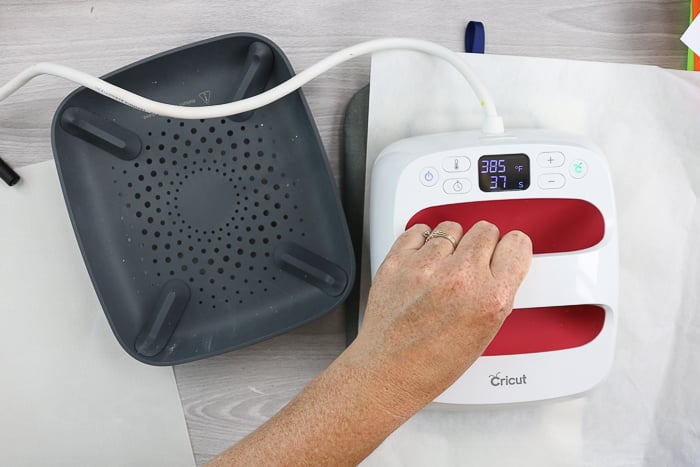
Step 8: Press Koozie For 15 Seconds
Press for about 15 seconds with the EasyPress to remove moisture.
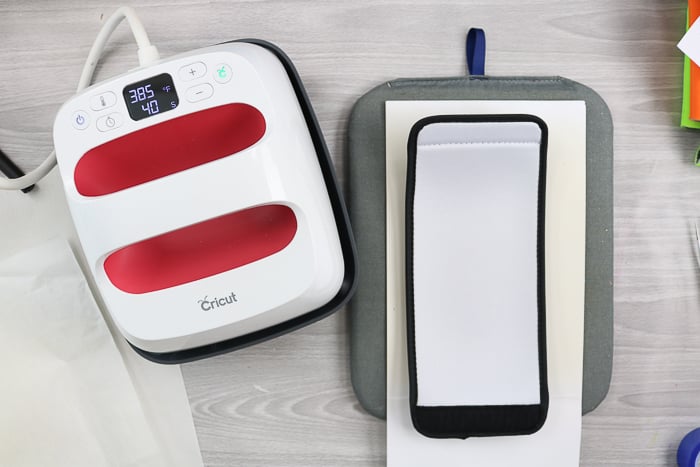
Step 9: Remove Butcher Paper
Remove the butcher paper and allow it to cool.
NOTE: These Velcro koozies can curl up while hot, but they will return to being flat once they are cool.
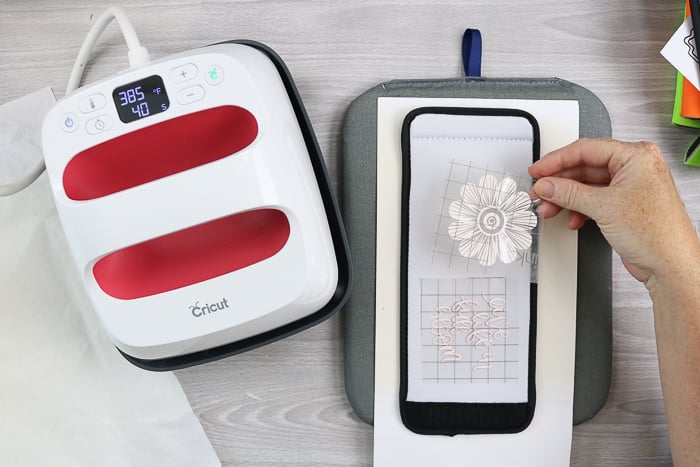
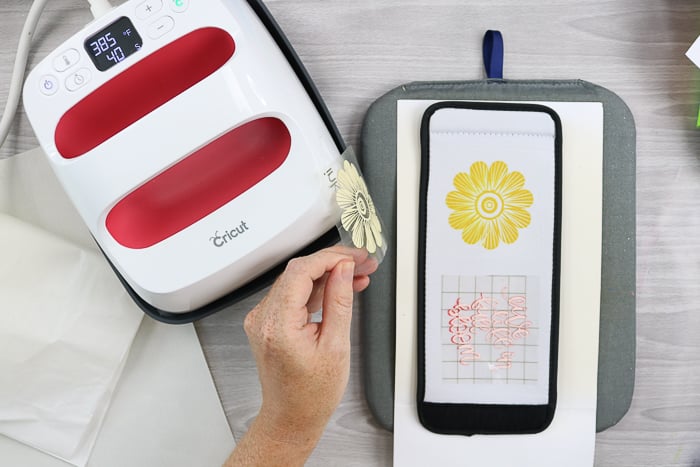
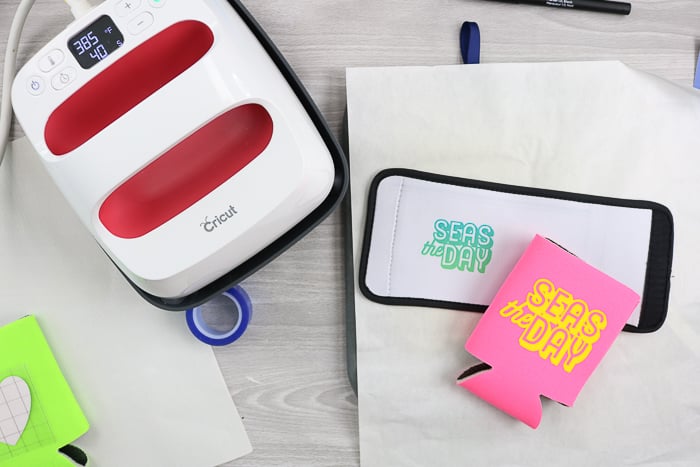
Step 10: Place Infusible Ink Design On Kooize
Once cool, add your weeded designs to your can koozie. I like these velcro versions because it is easy to put a design on the front and back.
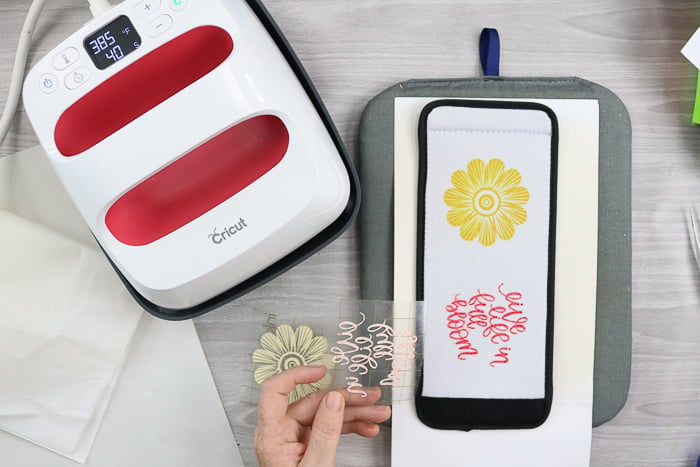
Step 11: Add Butcher Paper Over Top Of Design
Then, put the butcher paper back over the top.
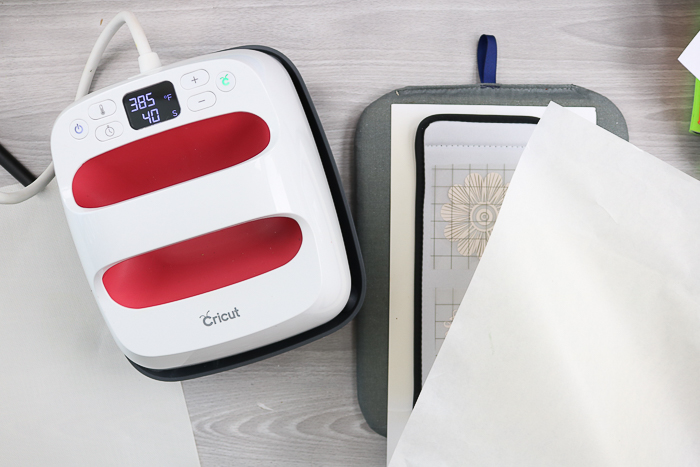
Step 12: Add Infusible Ink Design To Koozie
Press according to the Cricut Heat Guide. Be sure the EasyPress covers your entire design, as you will want to press just once.
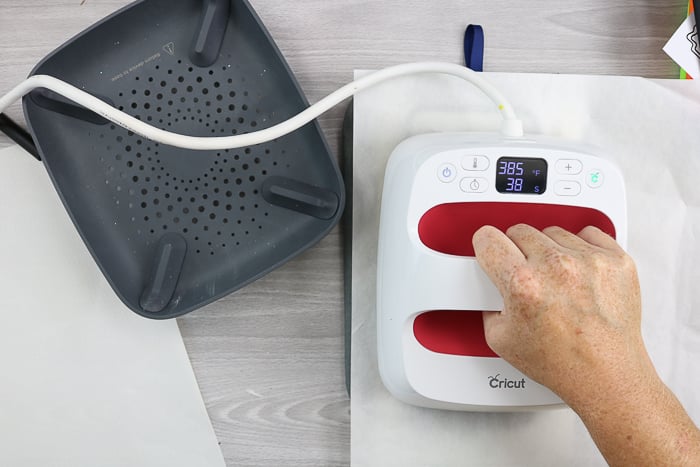
Step 13: Lift EasyPress
Be sure to lift the EasyPress straight up so as not to move the stack while hot. Allow it to cool completely, then remove the butcher paper.
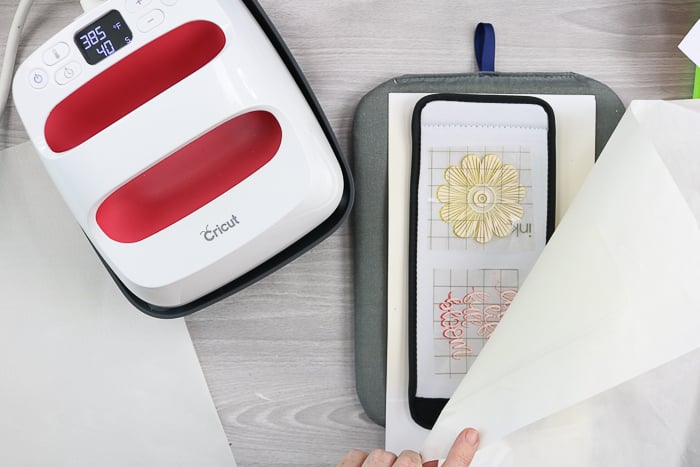
Step 14: Remove Backing Paper
Remove the backing paper, and you will see that your design is now on your DIY koozie!
Once the pressing is complete, your design will be permanent, and no further steps will be needed. Woohoo! You have just learned to make your own koozie with Infusible Ink!
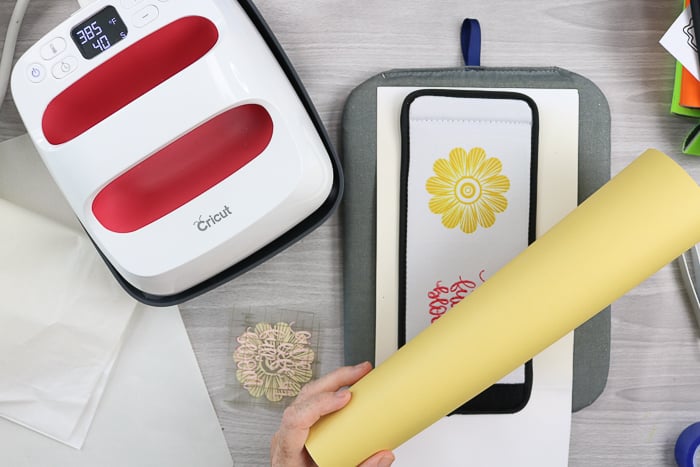
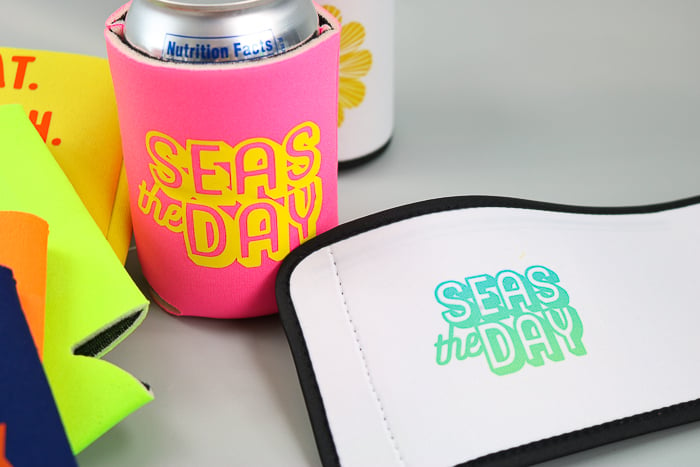
I did want you to note the color difference between the Infusible Ink sheets. You can see the yellow of the roll I cut my design from compared to the yellow of the completed flower.
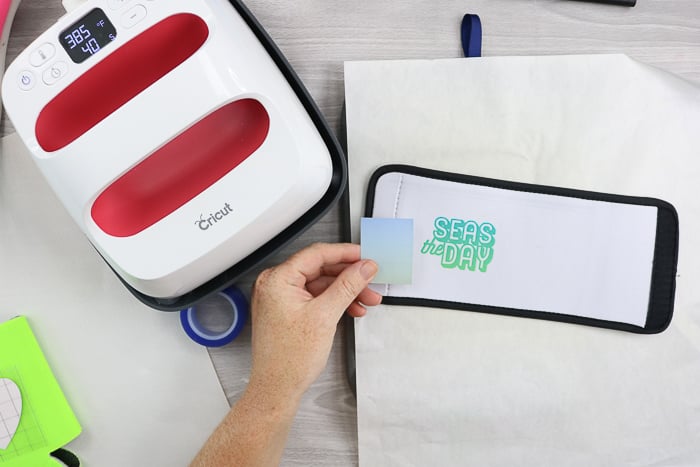
You can also see another example below with the ”Seas the Day”. Remember to look on the outside of the box of the Cricut Infusible Ink Sheets for the true color when designing your projects. The colors will really pop after pressing, so you really can’t look at the sheets before being pressed to determine the final color.
DIY Koozie Printing with Infusible Ink Markers and Pens
You can also use these same methods to make a DIY koozie using Infusible Ink markers and pens instead. Just draw your design mirrored onto copy paper rated for use in a laser printer. Then press it in a manner similar to the one above.
To protect your EasyPress from bleed-through, you will want to cover your mat with butcher paper and your koozie with white cardstock. You will also need heat-resistant tape to hold the design in place while pressing.
Have questions or want to see one pressed? Scroll up and watch the video!
Can You Use The Infusible Ink Sheets On Colored Blanks?
I get this question all the time, and the answer is yes, but there is a catch!
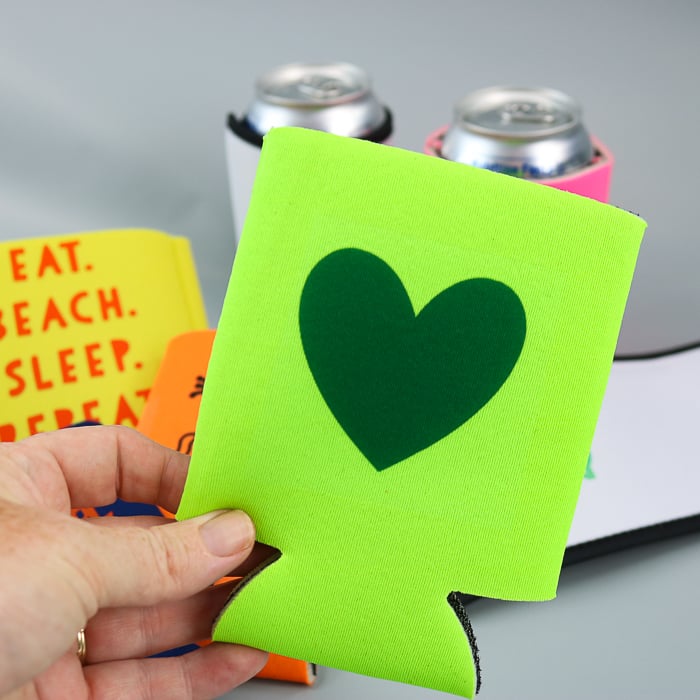
Infusible ink allows the color of your blank to come through the ink. So, for our example, we added a blue heart to a green koozie. The result is a dark green heart instead of a blue one. You can see the same blue sheet applied to an off-white blank below for comparison.
So, while you can apply the sheets to the colored can koozies, you cannot predict the final color once they are pressed.
Heat Transfer Vinyl Versus Cricut Infusible Ink
So, what is the difference? Why choose one over the other for your DIY koozie? If you want to make your own koozie with your Cricut, you should weigh your options. Here are a few things to consider:
- Heat Transfer Vinyl (HTV) can be felt on the surface even after it is pressed. So, if you want a more professional finish, Cricut Infusible Ink is the way to go.
- Cricut Infusible Ink is more expensive than HTV, so there is a cost factor to consider.
- If these are going to be used for a long time, HTV will tend to crack and wear. You will not get this same effect with Cricut Infusible Ink.
- Want to make a design on a colored can koozie? See our note above, as Infusible Ink might not be the best option for your design.
So, in my opinion, if you are making these for a quick party favor that won’t be used long, grab the heat transfer vinyl. Want to make professional-looking gifts that will last forever? Cricut Infusible Ink is the only way to go.
Either way, you can make your own DIY koozies right at home using your Cricut machine.
Design Your Own Koozie
The designs that I am showing are just the tip of the iceberg! Get creative and start making custom koozies of your very own with your Cricut machine. You can even use some of our free SVG files for your koozies! If you can imagine it, you can put it on a DIY koozie!
So, will you be making a few koozies of your very own? What do you think? Will you use heat transfer vinyl or Cricut Infusible Ink? You really can’t go wrong with either one.
Be wary that the Infusible Ink may change color when added to colored koozies. But the results may be fun, and definitely a surprise.
Be sure to consider custom koozies when planning your parties and other events. Everyone loves a good koozie, and now that you know they are easy to make, you will love them as well!
So, be sure to try making your own koozie with your Cricut. Both of these methods work with the Cricut Joy, Explore, or Maker series machines, so there really is no excuse not to try.
Grab your supplies and whip up some personalized koozies for any event or just for fun!
Tell us about it in the comments which method you are excited to try! Happy crafting y’all!
FAQs About How To Make Your Own Koozie
Here are a few common questions that I often see readers asking about making your own koozie. If you have a question, please check if I’ve already addressed it below. If you don’t see your question listed, please leave it in the comments!
Where Did You Buy Your Koozies?
I bought my polyester koozies from Amazon and my sublimation koozies from Coastal Business Supplies!
Are These Koozies Foam or Neoprene?
The koozies I used in today’s tutorials are neoprene and all polyester.
Can You Use Infusible Ink On Neoprene Koozies?
Yes, however, since all koozies are made differently, I would double-check the fabric’s composition. If you see that the fabric is polyester, then you can use Infused Ink on it.
Can You Use Infusible Ink And Do Designs On Both Sides Of The Koozie?
Yes, you can!
For today’s project, I only decorated one side of the koozie, but you could easily decorate both sides. To do so, repeat the steps on the other side of the koozie.
The Infusible Ink Left A Light-Colored Box Where My Transfer Paper Was (Surrounding My Design). How Can I Fix This?
I have seen this happen occasionally, so I understand the frustration!
To fix this issue, I recommend cutting the paper around the infusible ink as close to your design as possible. Then, cover with the paper and parchment as a double layer. It is most likely the material reacting to the heat.
5 More Drinkware Crafts
Did you love this tutorial on making your own koozie and want more drinkware crafts? Then check out the projects below!
- How to Make Full Wrap Sublimation Mugs
- Wine SVG: Free Files for Your Crafts
- DIY Coffee Mug Sleeve: Customize with Your Cricut
- How to Use a Tumbler Press for Tumblers and Mugs
- DIY Drink Pouches Using Cricut Color Changing Vinyl


Those sublimation blanks are so cool!
Thank you so much for this tutorial! I am new to Cricut and wanted to make my friend and her soon-to-be husband customer koozies for their wedding day. This was really helpful!
So glad it helped!
Do the Velcro koozies fit different size drinks? Like a slim can and a regular size can?
You would probably need to find different sizes for each.
This was an awesome tutorial. Thank you. I am following them to a T with a design with infusible ink markers. I am not even using my own pressure, just the weight of the press and am getting press marks where the paper is. I’ve tried foam inside and it didn’t help. Any recommendations? Thank you!
Koozies really tend to take the press lines. I usually make my paper around my image larger than the koozie so I don’t have to worry about it.