
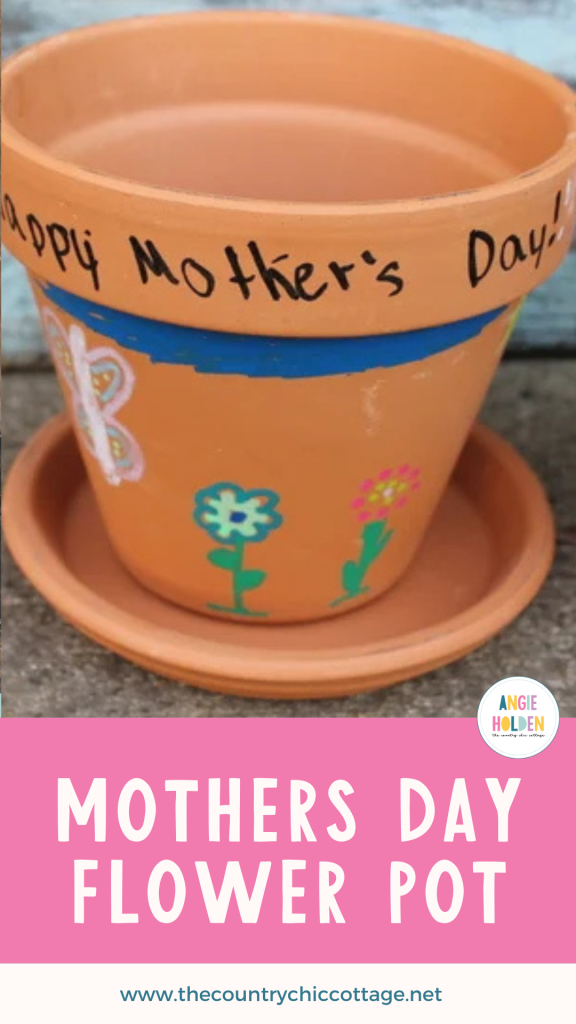
Here’s a fun DIY Mother’s Day gift idea for you today: A hand-painted Mother’s Day flower pot – the easy way! This Mother’s Day craft is super simple to make and has the added benefit of being mess-free! You can have some fun with the kids and make something for Grandma, or gather up the kids and force them to craft something for you. You gotta do what you gotta do right?
SIDE NOTE: Dear Mom, if you are reading my blog today, please turn away. Don’t scroll down. You will totally ruin the surprise!
Mother’s Day Gift Idea
When trying to think of a Mother’s Day gift idea, I wanted to do an activity that was inexpensive, easy for the kids, and low mess. Hand-painted flower pots came to mind, so I headed off to the store to buy a few supplies!
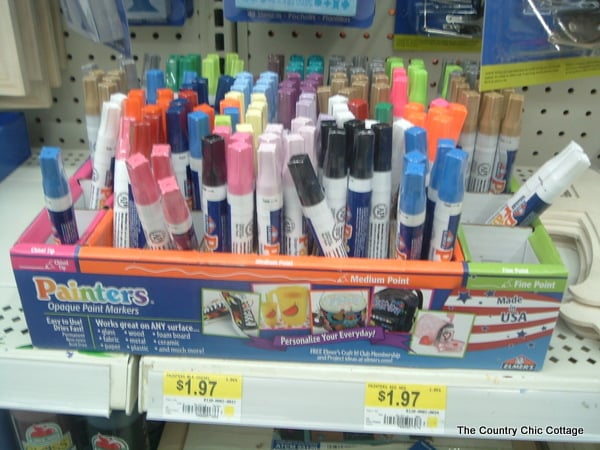
To make my hand-painted flower pots, I decided to use Elmer’s Painters Paint Markers (but you can use any paint pens that you like). I purchased mine at Walmart so they should be readily available. If you want to use the same ones as me, they are in the craft section, and you can buy them in packs of five or individually (as shown below).
I already had a pack of primary colors at home. If y’all missed it, I let my kids play with these paint markers when making our children’s canvas art project. So, if you don’t like the idea of the flower pots, turn your children loose on an art canvas instead!
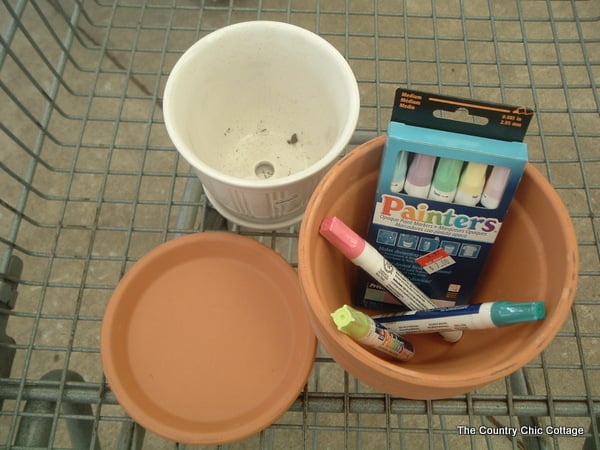
On this trip, I picked up a pastel pack, some other individual colors, and a few clay pots.
How To Make Mother’s Day Flower Pot
Once you have all your supplies, you are ready to make your own Mother’s Day flower pot! You will be shocked by just how easy it is to create!
Supplies Needed To Make Flower Pot
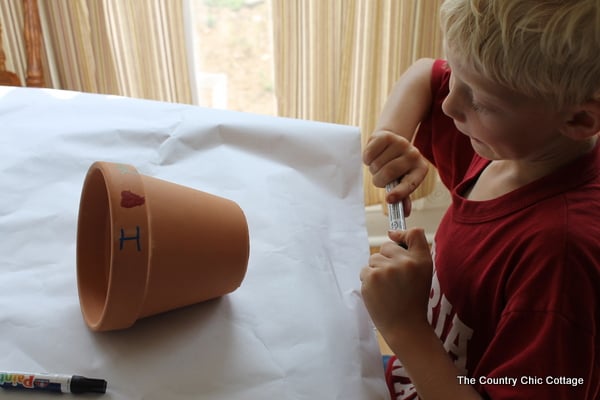
Step 1: Prime Markers
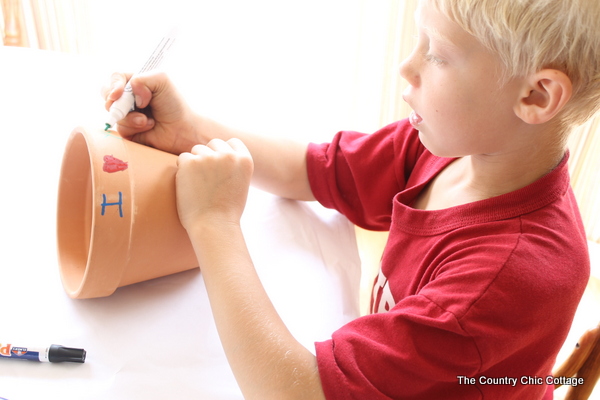
I got all of the markers started as per the package instructions. Simply shake well and press down until the paint starts to flow. After they were ready, I let the kids loose on a covered table.
Step 2: Decorate Flower Pots
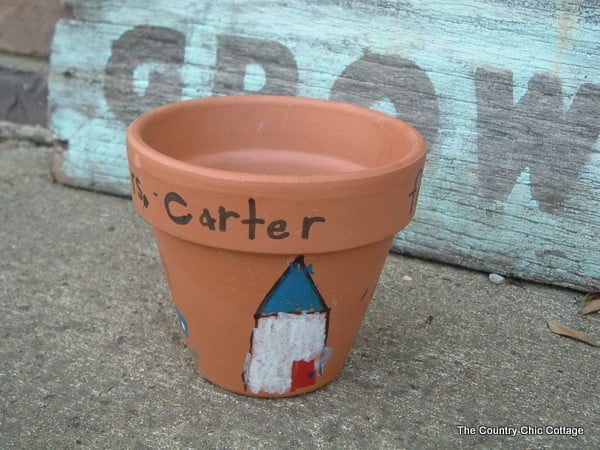
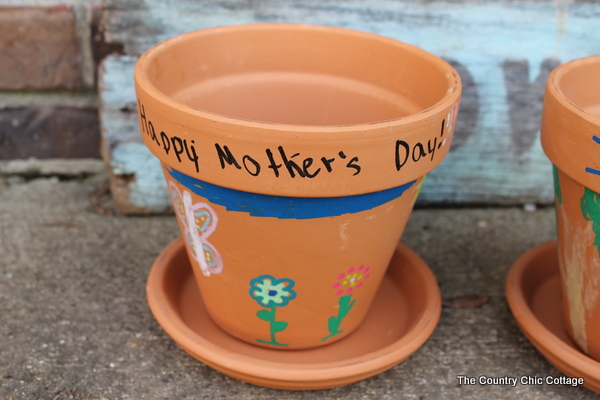
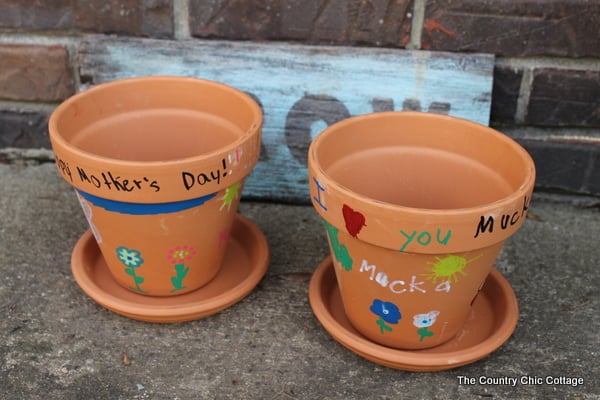
Each of the two little ones made a flower pot for Grandma. I let them draw and write whatever they wanted. No rules mean extra fun!
Using paint markers for a project like this is perfect for the budding young artist. This is because paint markers offer the control that a paintbrush does not, and they can easily get great results without frustration. Plus, they are virtually mess-free. I covered my table just in case but there was not any mess.
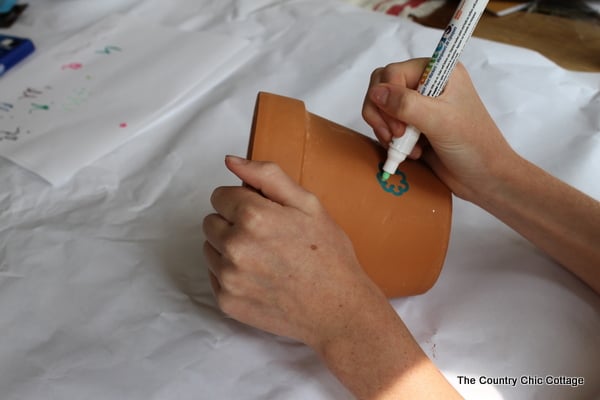
The results are oh-so-special and perfect to give as gifts this Mother’s Day!

Also, if y’all are wondering why my kids call my mom Mucka, that explanation would be a whole post in itself!

While we had everything out, I tackled some more projects as well just to demonstrate that there is so much you can do with this product. We made a flower pot for Teacher Appreciation Week. How special will this be for a teacher’s gift?
More Flower Pot Ideas
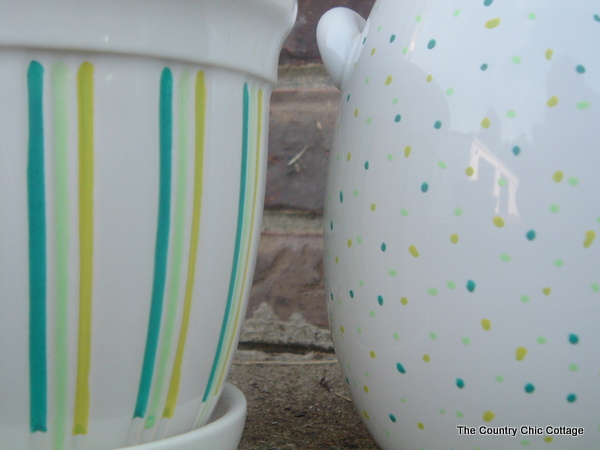
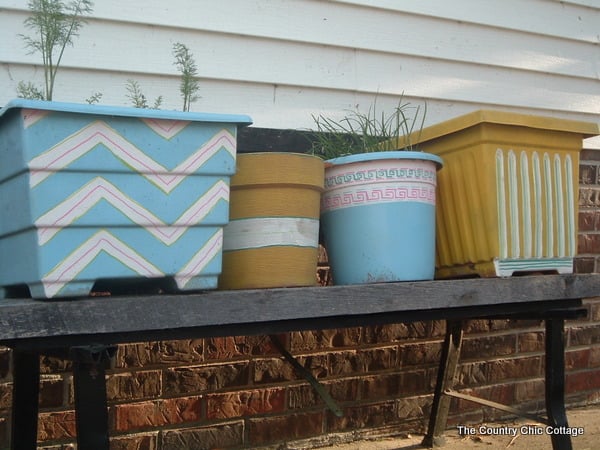
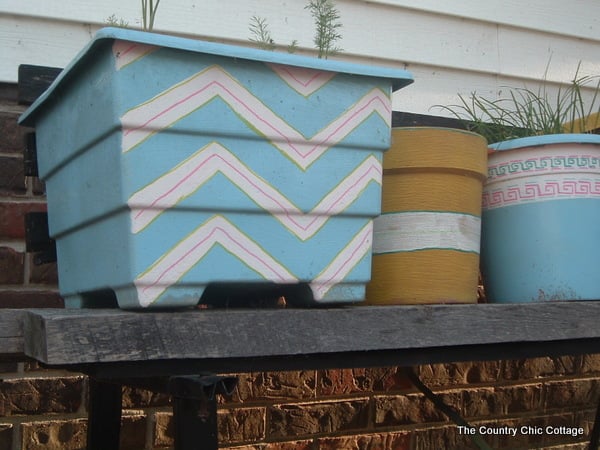
I couldn’t help but use the markers to make something for myself as well. I used a combo of three different colors for these pots – one in stripes and one in dots.
These two are ceramic whereas the kids were painting on terra cotta. Both surfaces worked very well. I would say grab some paint markers no matter the surface that you are working with.
After all that success, I even took my markers outside and worked on my herb garden a little bit. The pots are actually plastic.
After some quick paint marker touch-ups, the pots were looking so much better and I even planted some more seeds while I was out there. Can’t wait to start harvesting herbs…I will keep y’all posted!
Final Thoughts On Mother’s Day Flower Pot
What a great way to celebrate Mother’s Day! I think I will plant a flower in each one before gifting it to make it even more special.
But of course, hand-painted pots are special all on their own!

Yes, our trees have yellow trunks. I got reprimanded for not buying a brown paint marker. Let this be a lesson to y’all – buy more colors than you think you will need or your kids will let you know about it!
So are you making any Mother’s Day crafts? I want to see! Leave a comment below or tag me on Instagram to share your special hand-painted gifts!
Tips and Tricks for Mother’s Day Flower Pot
Now that you’ve seen this fun Mother’s Day flower pot, are you ready to make your own? Here are a few tips and tricks to ensure your project goes smoothly!
- Adjust The Flower Pot Size – I used a standard-size flower pot for this project, but you can use any size that you like for your Mother’s Day gift!
- Clean Your Flower Pots – Before you begin painting, you will want to lightly clean your flower pots just to make sure no dust or debris will interfere with the painting.
- Cover Your Work Surface – Since we are ”painting”, you don’t want to ruin your table. Due to that, you may want to cover up your work surface with some paper, a mat, or even a Dollar Tree tablecloth that you can throw away later.
- Skip The Real Plant – Even though we are decorating flower pots, that doesn’t mean that you have to give a real plant with the pot. Instead, you can fill this flower pot up with fake flowers or other small gifts. Then, the gift recipient can add their own choice of a real plant later.
5 More Mother’s Day Crafts
If you loved this Mother’s Day flower pot, here are some other Mother’s Day crafts that you won’t want to miss!


Thank you, Angie! Great post! I love the kids’ contributions!
I hope you’ll link up every week!
candace@cool2craft.com