These button jars, made from mason jars, are the perfect solution for organizing your button collections! This easy storage idea is an excellent way to keep all your crafting and sewing supplies in order. You can even use colored mason jars for an extra touch of fun!
If you are looking for more mason jar or organization crafts to do at home, I have plenty of projects for you!
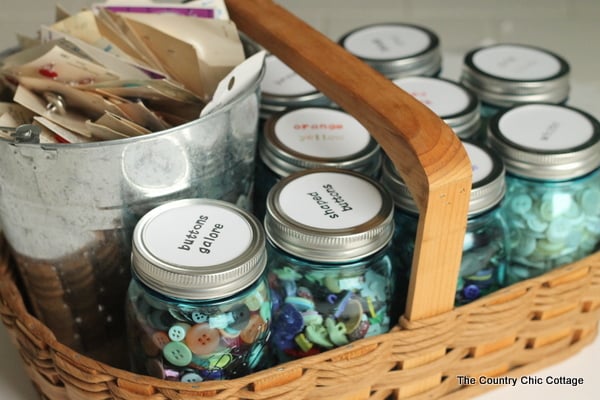
Button Organization
Learning to use bulk mason jars for all types of crafts is so much fun and cheap! Mason jars are great for many things around the house, including your colorful button collection.
When using mason jars for crafting, I like to use different colored mason jars like blue, orange, and even lilac. However, you can never go wrong with regular mason jars, especially when it comes to button storage!
The mason jar containers I am using today are so easy to makeover with materials you already have at home. So, if you are ready to add more organization to your life, you will love this button organizer craft! Be sure to add it to your list of DIY mason jar crafts!
Supplies Needed For Button Jars
- White Cardstock
- Buttons
- Stamps or Markers
- Cricut Machine (optional)
- Cricut Pens
- Hot Glue
- Container or Basket
How To Make Button Jars
Once the buttons were sorted by color, I was already much happier about my button “collection”. – Okay, I might just be a button hoarder. You be the judge!
Either way, this button organizer craft has changed my life! I can easily find all my favorite buttons when sewing or doing any other craft that calls for buttons!
Step 1: Organize Buttons
Organize your buttons in the best way for you, then transfer the buttons to the jars.
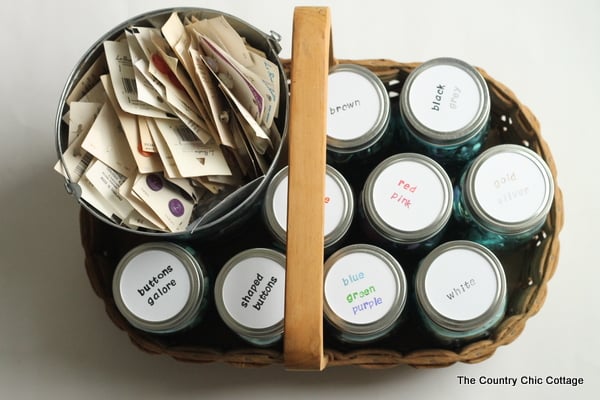
I started with a pile of buttons in a huge plastic tub. I could never find anything when looking. So I grabbed my jars and started sorting the buttons by color. I also have a ton of vintage buttons still on cards so I threw those in a large galvanized bucket.
Along with sorting by color, I also reserved a couple of the mason jars for my buttons from Buttons Galore and More because they are so special to me!
Step 2: Add Cardstock To Lids
You have a couple of options to label your jars. You can cut the cardstock with scissors in the same shapes as the mason jar lids and then stamp the cardstock with colored ink or use markers to label each button jar.
If you have a Cricut machine, you can let your machine both cut and write your labels! This will work with any Cricut machine, from the Cricut Joy to the Venture.
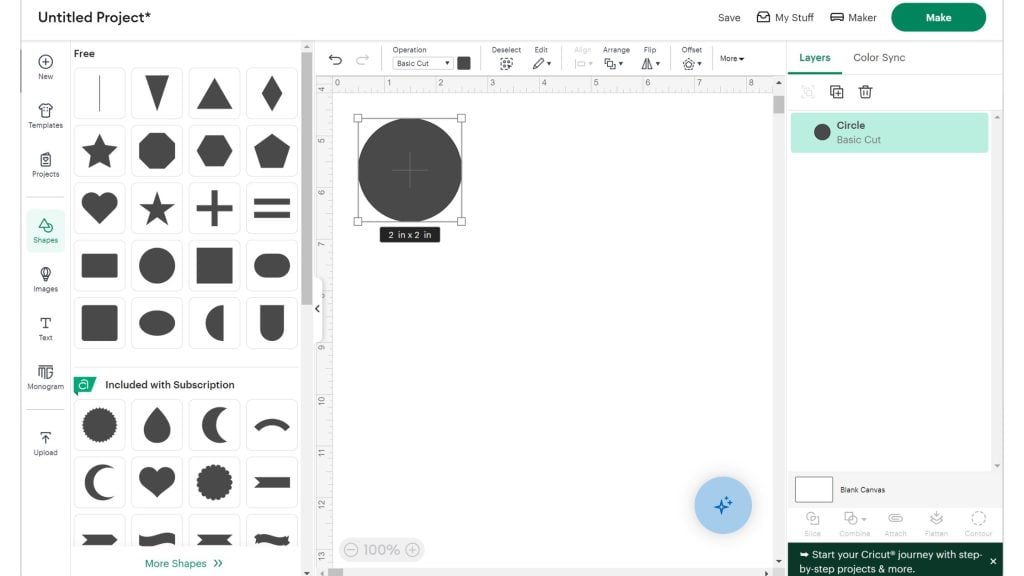
Start by adding a circle to your canvas and sizing it to the size of your jar lids. You can make as many as you need for your collection. Pro Tip: Save this project in Cricut Design Space so you can come back and make more labels as your collection grows.
While still in Cricut Design Space, add your text or images. To make the labels look hand-written, choose a writing or single-line font for your labels and use Cricut pens to write them out. Make sure you use the Attach feature to make sure each label cuts and writes correctly.
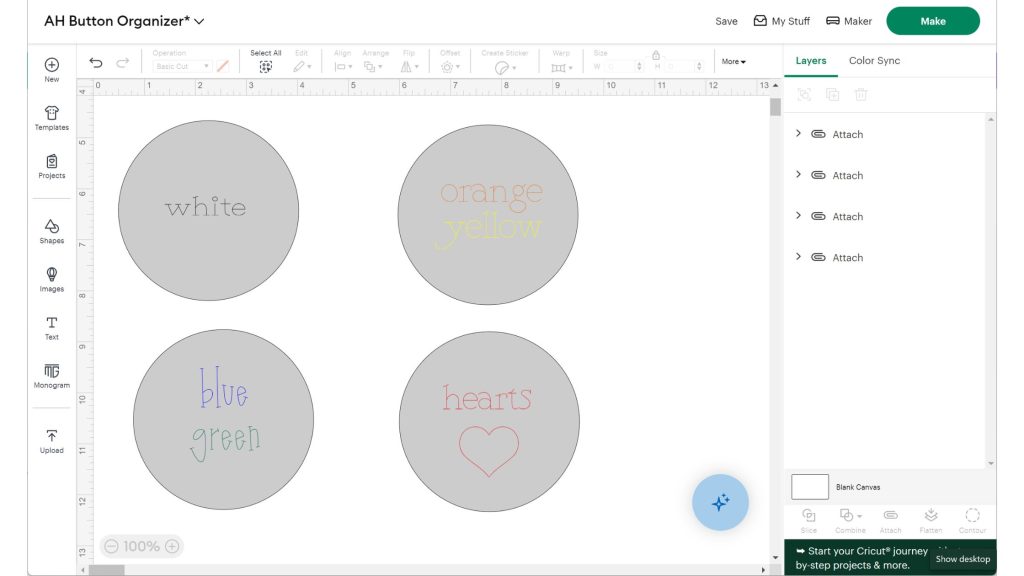
When you are ready to make your button organizer labels, Cricut Design Space will prompt you to change out your pens to get the look you want.
Once your labels are finished, glue the cardstock onto the lids and allow them to dry.
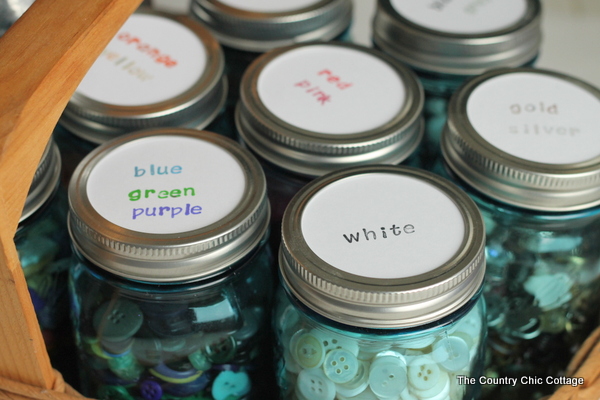
You can organize the buttons by color, style, age, etc. For my jars, I labeled each color of the lid with the matching color of the buttons in the jars to be able to easily identify the colors.
Step 3: Place Lids Onto Jars
Place the lids back on the jars and place them in a basket or container.
How To Use Button Jars
Use these button organizers for your sewing room to keep your buttons separated and neatly organized. Being able to find your materials makes a huge difference when you are crafting.
These button jars also make great gifts to relatives, friends, teachers, etc. Teachers can place these mason jars in their classrooms to keep their small objects and buttons tidy.
Don’t want to use these mason jars for buttons? You can use these containers for any small craft materials like yarn, glue sticks, ribbon, glitter, beads, and so much more!

Tips and Tricks for Button Jars
Now that you’ve seen these button jars, are you ready to make your own? Here are a few tips and tricks to ensure your project goes as smoothly as possible!
- Use White Cardstock – Thick white cardstock is great for these button storage containers because it holds up and is stronger than regular paper. Plus, you can use a wide variety of materials on the cardstock, like stamps, markers, stickers, vinyl, etc.
- Get Creative! – Get creative and decorate the mason jars with different colors, materials, and patterns. If you don’t want to use Cricut pens, try making stickers using Print Then Cut or vinyl to embellish your mason jars.
- Use The Glue You Have On Hand – I used hot glue for this project, but you can use another strong adhesive to hold the cardstock in place on the mason jar lids.
- Pick The Right Storage Container For You – A basket or similar container is the perfect vessel for storing these jars. This is because storing the button jars in a basket or container makes everything look more organized and neat! I went with a basket, but you can choose any size, color, or style of container that you like!
More Mason Jar Crafts
Do you love these button jars and want more mason jar crafts? Then check out the projects below!


Love this idea. I don’t want to use my “good” blue jars, will use my thrift store finds instead. Sure looks alot better than a mess I have. A few years ago I sorted all my buttons into plastic containers, store them in my iris carts which I labeled the drawers so I’d know what was in which drawer. It’s still ok but they’re not in sight. When I craft I like to see my “stuff” out so I can think as I see things, get inspiration. That’s just how I work, get things made. I love this idea, thanks for getting me started. Happy New Year
Hi, Your storage system looks great! Just a note…. if any of your vintage buttons are celluloid, they’ll corrode metal ones that are in the same jar. So store those alone. I’m an avid button collector. 🙂
Best,
Tanya