
Cutting boards can make quite a statement in your kitchen and on your counter as you prepare your food. Make your own custom paint cutting boards in any shade for a unique, fun practical piece that doubles as decor!
You’ve probably seen wood crafts made with staining wood or even with wood burning to basically etch designs into the wood (like these Wood Burned Coasters). Have you ever thought about painting wood items that you would use around the house?
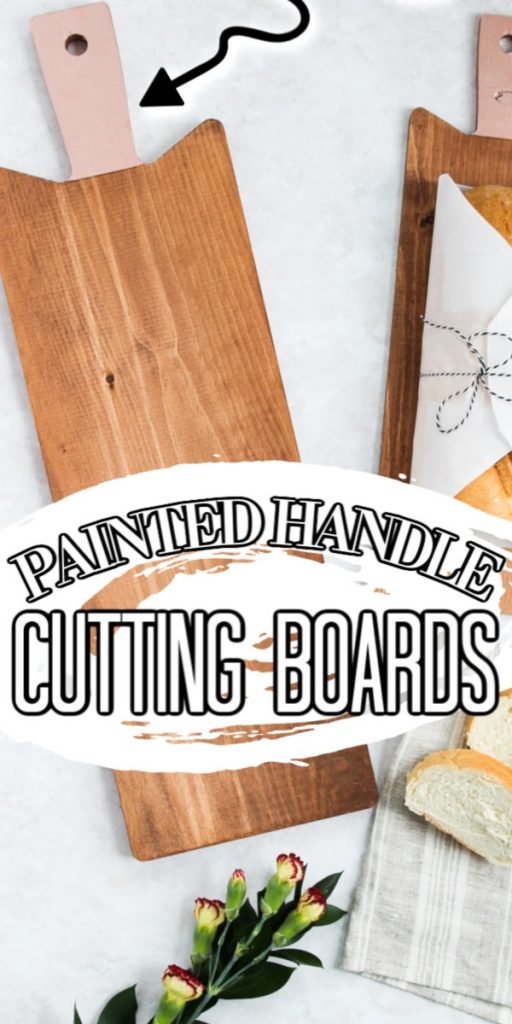
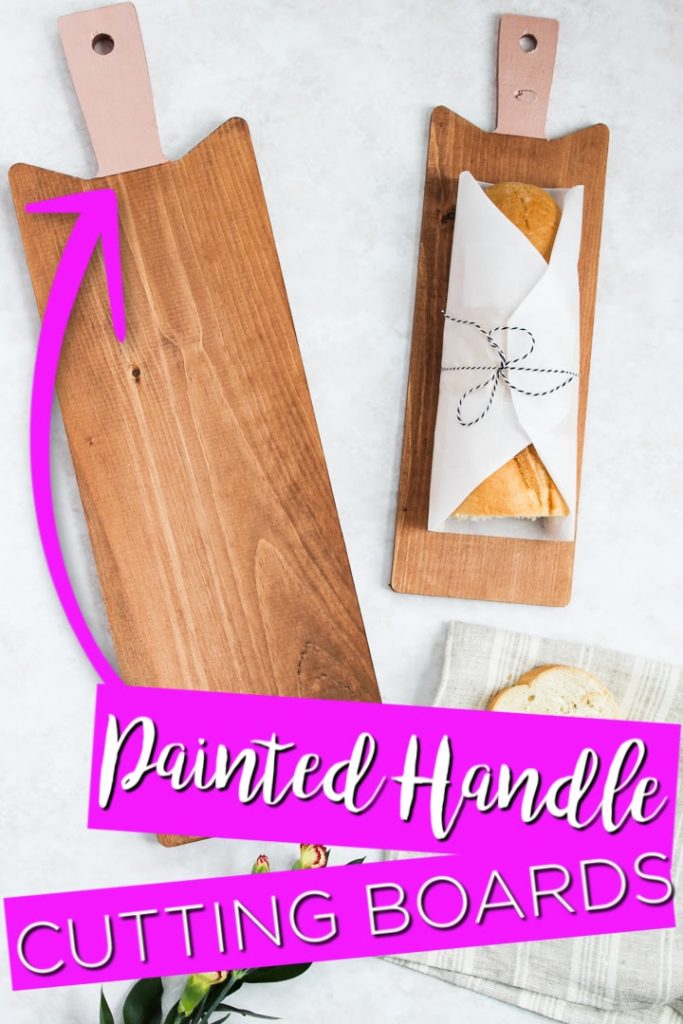
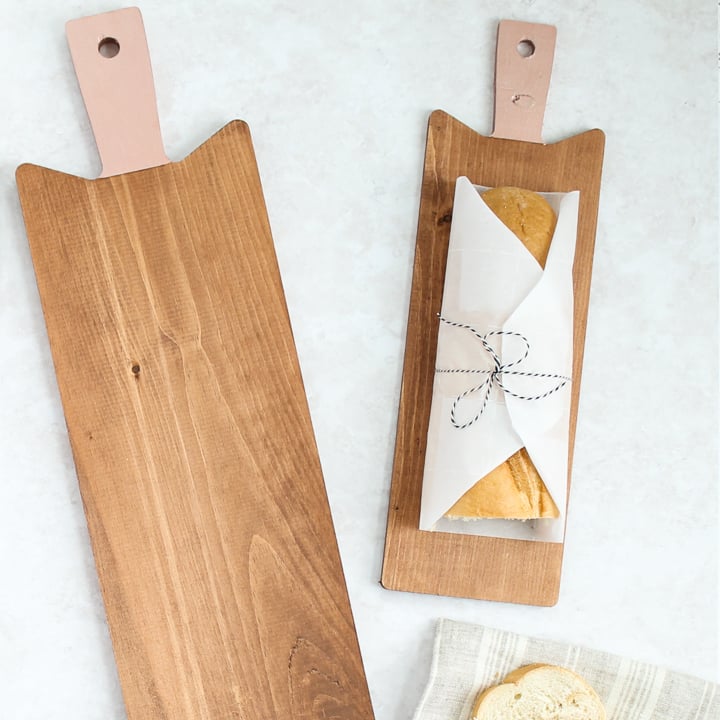
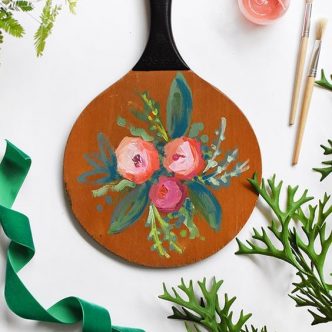
Today I’m sharing how to make custom DIY painted handle cutting boards. You can actually paint the handle of any cutting board to give it a little extra pizazz. Then as a bonus, after you paint them, they can double as great decor in your kitchen. Just make sure you pick colors that work in your space.
I love these rustic beauties in my farmhouse kitchen. They add exactly the touch I was going for, and you can easily make them too.
If you love making painted wood crafts, definitely check out my Painted Tulip Wreath, DIY Wood Puzzle, and DIY Picture Frame from Scrap Wood!
Choosing Food-Safe Paints and Stains
If you’re doing this painted cutting board project or another that involves painting items you may use in your kitchen, you’ll want to use food-safe paints and stains. Yes, there are food-safe options for making painted items you can use in your kitchen!
Stains
The “stains” will actually just seal the wood and not alter the color much. They are safe for use with food which is perfect for those who want to make or finish a raw wood cutting board. Some options include:
Paints
The best option I have for adding food-safe color is to dye your wood with food coloring. There are not many paints on the market that are marked as “food-safe”. The paint I used above is non-toxic but not rated as food-safe. I was ok with that since I was only painting the handle, which won’t ever touch food.
If you want to color your entire item, dye your wood with the food coloring then seal with one of the food-safe options above.
How To Make Custom Paint Cutting Boards
Now that you have your cutting boards, it’s time to paint those handles!
Be sure to start with cutting boards that are clean and dry. Also, you’ll want to use good-quality paint that works on wood. Now let’s jump in and make some painted handle cutting boards!
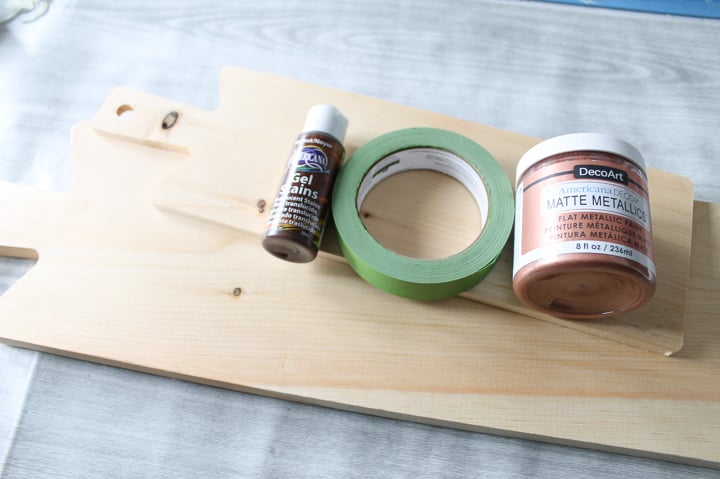
Supplies Needed To Make Custom Paint Cutting Boards
- Cutting boards or breadboards (look for one with a handle and a shape you like)
- Paint (I used the Americana Decor Matte Metallics but any paint you love will work.)
- Painter’s Tape (my favorite is Frog Tape)
- Stain (if your board is not finished)
- Paintbrushes
- Rag
NOTE: The cutting boards that I’m using are unfinished, but you can pick up a finished one and do the same project.
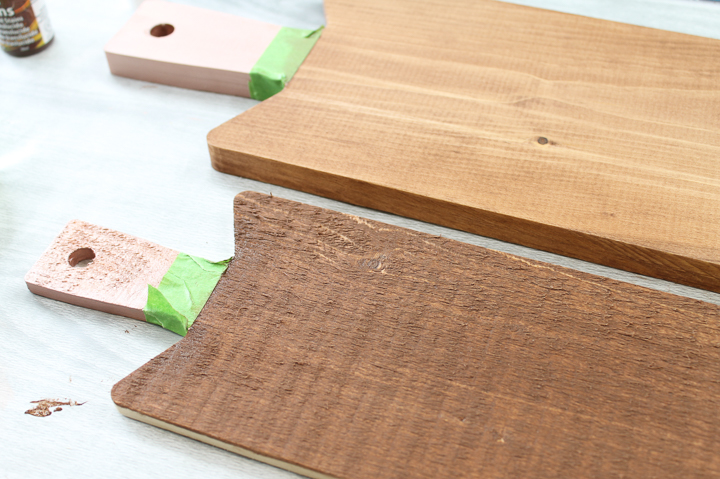
Step 1: Tape Off Handles
Mask off the handle area with painter’s tape. Remember that paint is not food-safe so you want to keep it limited to an area that will not touch food.
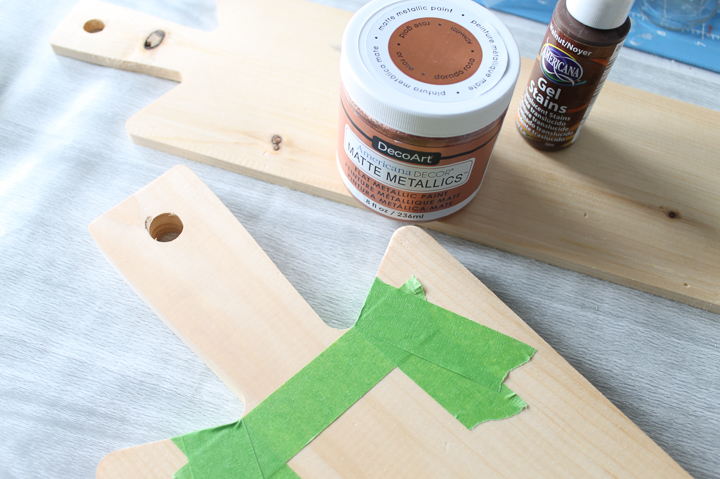
Step 2: Paint Handles
Begin painting the handle in the color you want. You may need to paint a few coats, depending on the paint you’re using.
If you paint more than one coat, allow the paint to dry thoroughly before adding another coat. Then repeat the same process until the handle looks the way you want it to.
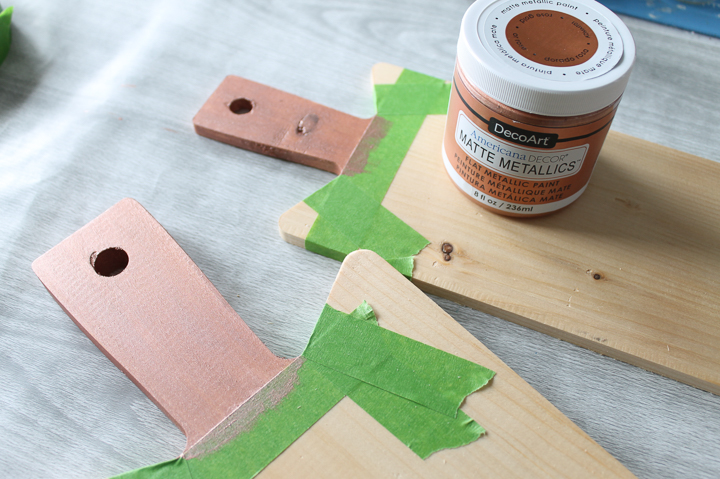
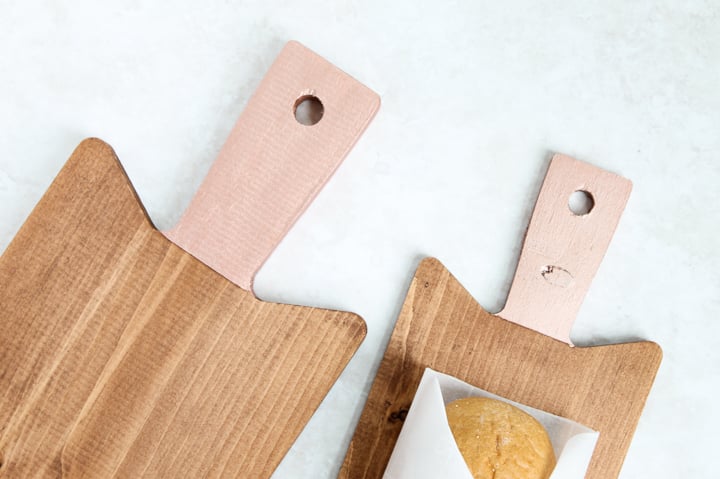
Step 3: Paint The Sides & Back Of The Handles
To ensure that your painted cutting board looks its best, don’t forget to paint the sides of the handle too! After you have finished painting the front (and sides), and the paint has dried, you can flip your cutting board over to paint the back.
Once all of your paint has dried, carefully remove the painter’s tape.
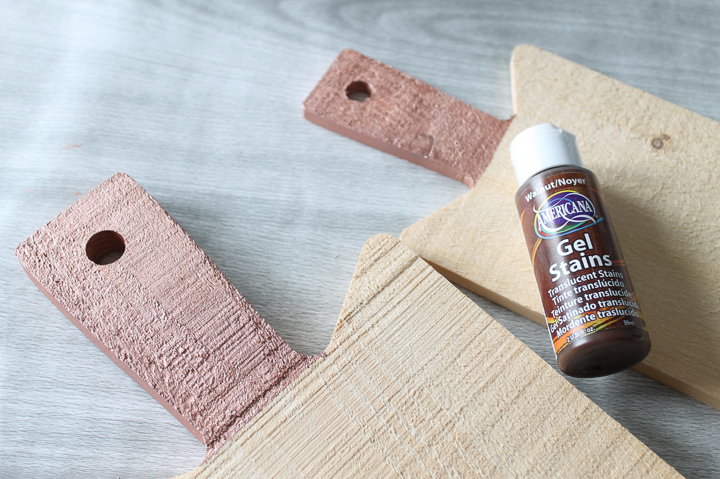
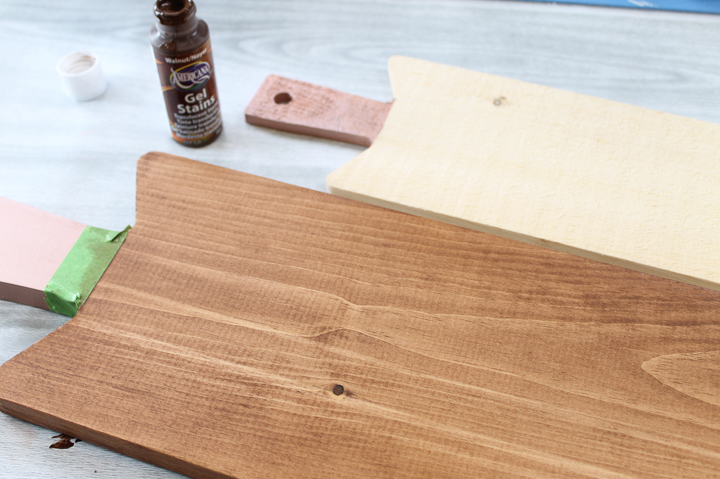
Step 4: Decide If You Want To Stain Your Boards (Optional)
The breadboards that I used for this project were unfinished, so I also needed to stain the boards themselves. You can skip this step if you are using a finished piece.
Please note that if you do stain your boards, they will not be food-safe.
Step 5: Stain Boards (Optional)
To stain, use painter’s tape on the painted handle.
Then brush on a coat of stain with a paintbrush, allow it to sit a few minutes, and wipe away all excess with a rag.
Make sure to stain all sides to get a more finished look.
Step 6: Allow Boards To Dry
Allow everything to dry completely. Once dry, they’re ready to display in your kitchen.
NOTE: I used products that made my boards good for display only.

Are you ready to make a painted cutting board for your home?
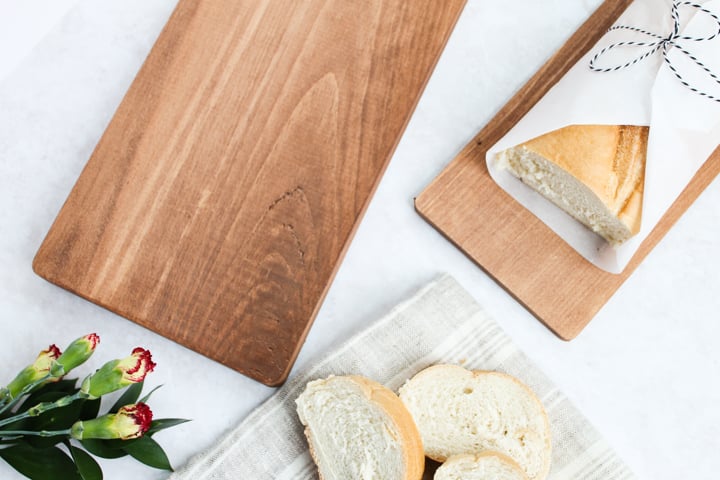
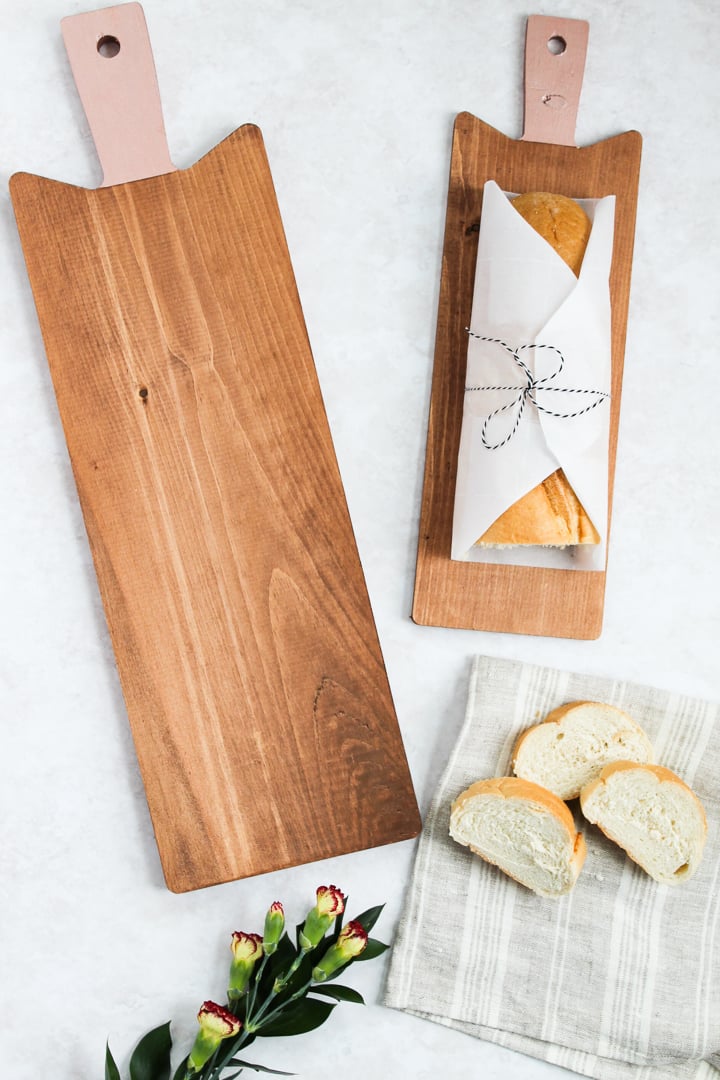
I have the two I made on display in my kitchen. As you can see, you can use them if the food is placed on some sort of barrier, like parchment paper.
I love the contrast of the metallic paint with the rustic wood of these breadboards. However, you can use any color that you love on this same painted cutting board project to customize it to your preferences!
After all, personalizing these paint cutting boards is what this project is all about. Enjoy!
FAQs About Paint Cutting Boards
Here are a couple of questions that I see readers ask about these paint cutting boards. If you have a question, please check to see if I’ve already answered it below. Don’t see it? Please leave it for me in the comments!
Where Can I Buy Unfinished Cutting Boards?
You can buy unfinished cutting boards online or even at your local craft store.
Should I Clean My Cutting Board Before I Paint/Stain It?
Yes! I would clean your cutting board on the front and back. Then, I would set it aside to dry, and once it’s completely dry to the touch you can paint/stain it.
Are These Cutting Boards Food Safe?
The ones that I made are not food-safe. However, depending on what type of ”paint” and ”stain” you use (see ”Choosing Food-Safe Paints and Stains” section above) you can make your cutting boards food-safe.
If These Cutting Boards Are Not Food Safe, How Can I Use Them For Food?
Even though these cutting boards are not food-safe you can still use them to display the food! The only thing you need to remember is that there has to be a barrier between the board and the food. Below are some examples of barriers you can use on the cutting board!
- Plates
- Cups
- Bowls
- Cupcake Liners
- Parchment Paper
5 More Wood Projects
If you love these paint cutting boards, I think you’ll love these wood projects too!
- Wood Quilt Square Knock Off
- DIY Round Wood Door Hanger with a Cricut Machine
- Rustic Love Sign from Barn Wood
- How to Make a Picture Frame from Scrap Wood
- 15 Minute Wood Door Mat (no sawing required!)
10 More Craft Ideas That Use Paint
After you have made our paint cutting boards, keep all your paints out, and make the projects below!


Great content and DIY tips for cutting boards that everyone can follow through.