Hello, I’m Amy from Mod Podge Rocks and I’m so excited to be here today. I’ve been blogging for almost 11 years over at MPR and as you can guess I’m addicted to crafts and DIY.
I love creating and writing, you could say I like to keep busy.
I’m really excited to teach you how to make hand painted towels with fabric paint. I’m going to use bright colors because that is what I like but you can customize these to fit your style and decor.
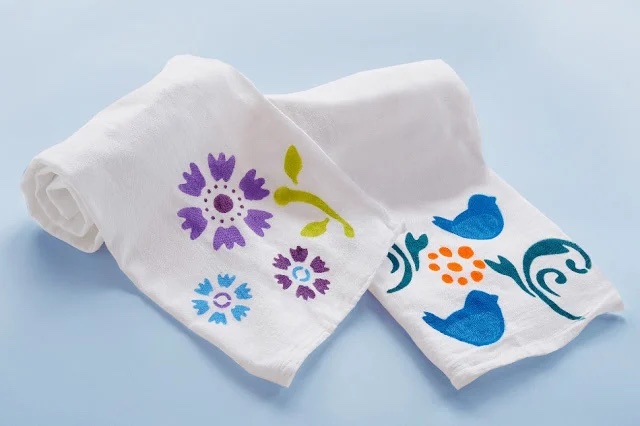
This post was originally posted in March 2012, it has been updated with current information.
How to Make Hand Painted Towels with Fabric Paint
I’m excited for spring. While I’ve been doing a little pre-spring cleaning I decided I wanted to freshen up my hand towel situation.
If you’ve never made your own painted towels you’re going to love how easy this project is.
Supplies Used for Painted Towels
- White Cotton Towels
- Fabric Paint
- Paper Stencils (or make your own)
- Cricut Machine
- Stencil Film
- Stencil Brushes
- Wax Paper
Preparing Towels for Painting
To begin we want to wash and dry all of our towels. Once they’re dry, iron them smooth, and then fold them so the portion you want to paint is facing up.
Use a piece of wax paper between the layers of fabric, this will prevent any paint from seeping through onto the other fabric.
Lay Out Your Design
Before you begin painting make sure you know how you want your design laid out. If you’re using premade stencils you’ll want to map out where exactly you want the designs located before you start painting.
If you’re using a Cricut machine to cut stencil film you can lay your design out in Design Space before cutting to make the painting process easier.
Apply Stencil to Towel
When it comes to applying your stencil to the towel you have a few options:
- If you’re using Cricut stencil film it has an adhesive back that will hold the stencil in place.
If you’re using a different type of stencil you can either –
- Hold the stencil in place with your hand while you paint.
or
- Use tape to tack the stencil in place.
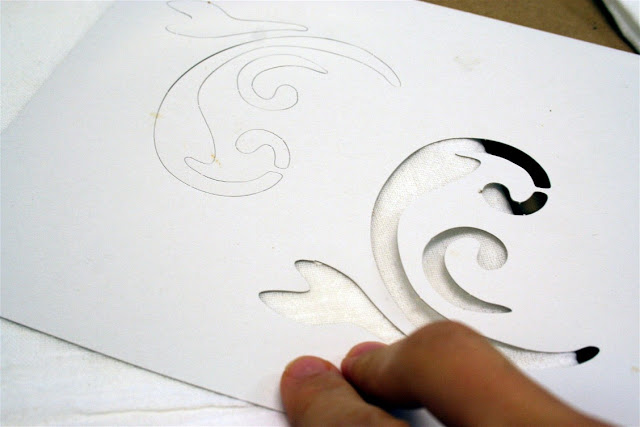
My preference is to hold the stencil in place with my hand. These towels don’t cause a lot of slipping, if you’re using a different kind of cloth and notice slipping I would tape it in place.
How to Paint Stencils
If you’ve never painted stencils before it’s important to note that the process is different than regular painting.
With stenciling, you’ll “dry brush” your painting. This means you dip your stencil brush into the paint and then remove most of it by tapping it onto your plate or a paper towel.
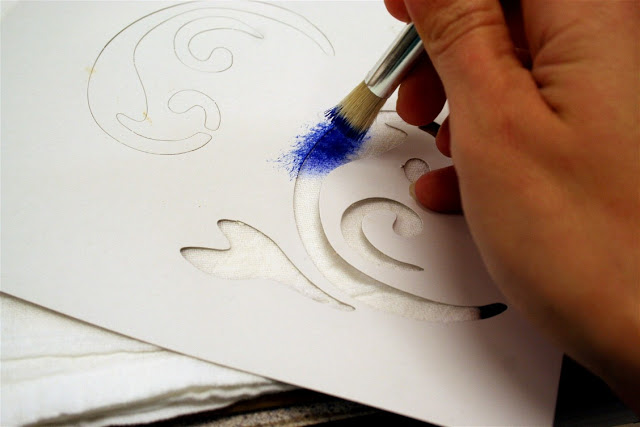
Once your brush is ready, dry brush a light layer of paint onto your fabric surface. Keep repeating until your shape is filled all the way in.
DO NOT put too much paint onto the brush or it will seep under your stencil and ruin your design and possibly your project.
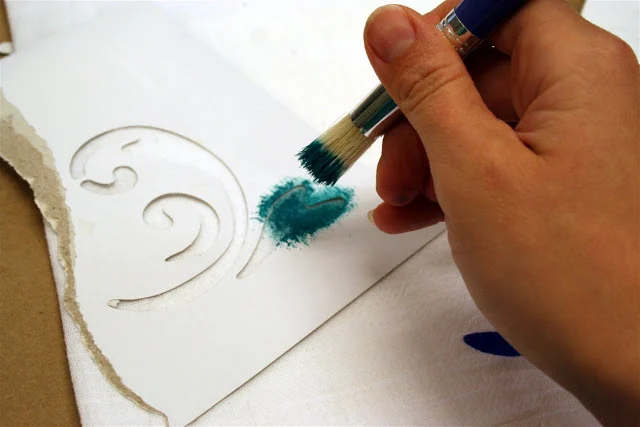
Painting Multiple Colors
If you’re painting multiple colors over the same area of your design you’ll need to allow the first paint color to dry completely.
This only comes into play if you’re layering the paint or the stencil over the top of other paint.
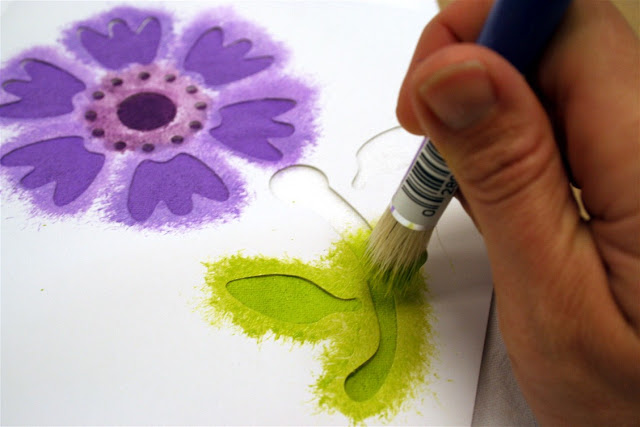
Wait 15-20 minutes for it to dry and then go back and place the stencil where needed and add the next paint color.
Keep going until your towels are completely painted with your stencil design, then allow them to dry.
Follow the finishing instructions listed on the bottle.
If you’re using a paper stencil you can wipe the paint off and save them to use again later. Stencil film may be able to be reused, it will depend on how you care for it.
Final Thoughts on Making Painted Towels
Painted towels are such an easy and fun project to make. These are perfect activities for bridal or baby showers.
Because stencils and colors can be customized to match any decor they can be used for so many different situations.
I hope you’ve enjoyed learning how to make painted stencils. A big thank you to Angie for having me here today. Have a great day!
Amy


Yay, thank you so much for the feature!! xo