
Homemade curtains have a reputation for being difficult to make, but that’s not true! Follow this simple tutorial to learn how to sew curtains the easy way!
How To Sew Curtains Tutorial
If you can sew a straight line, you can learn how to sew curtains. They really are that simple. I know curtains have a reputation for being really hard to make so that they look good, but, I’m happy to report (from experience) that’s not true!
Anytime I remodel a room, I make new curtains for the room. They add that important final touch that pulls the decor together into a cohesive design. Plus, since they’re simple and fun to make, why not?
Since I have already shown you how to sew a simple valance, now, I want to show you how to make some full-length drapes. Let’s learn how to sew curtains the easy way!
NOTE: If you want more homemade curtain inspiration, check out my Doily Curtains, Dip Dyed Curtains, and DIY Tie Dye Curtains. I even have a tutorial to make an Extra Long Shower Curtain.
Supplies Needed To Sew Curtains
- Fabric in the print of your choice
- Fabric lining
- Scissors
- Tape measure
- Sewing machine
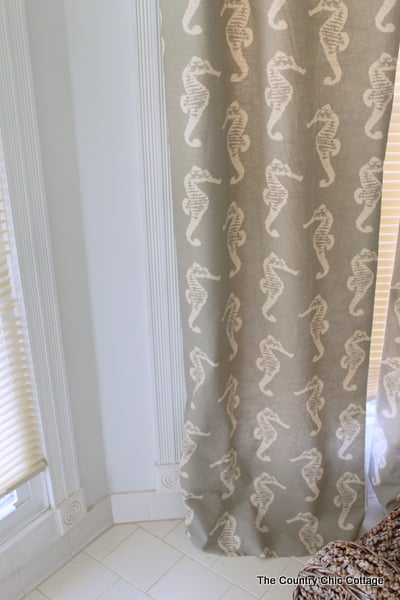
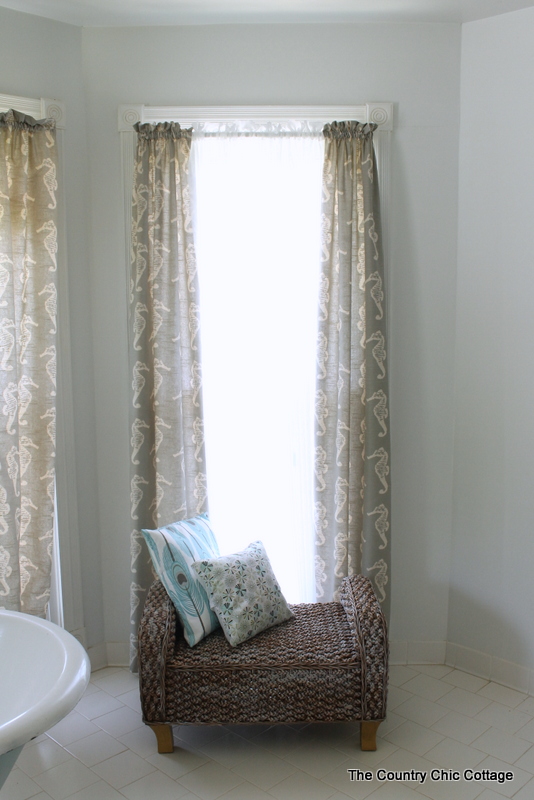
NOTE ABOUT THE FABRIC: The fabric for these curtains is a sea horse print in coastal gray from Online Fabric Store, and I just love the pattern! This fabric is 54 inches wide (please note this for future reference below).
Step 1: Measure The Height Of Your Window
Start by measuring the height of your window from where the curtain rod will be down to the floor. Add 5 inches to that measurement.
Step 2: Cut Your Fabric To Size
Cut your fabric to size. I laid mine out on the floor as that is the only surface I have that’s large enough to accommodate this project.
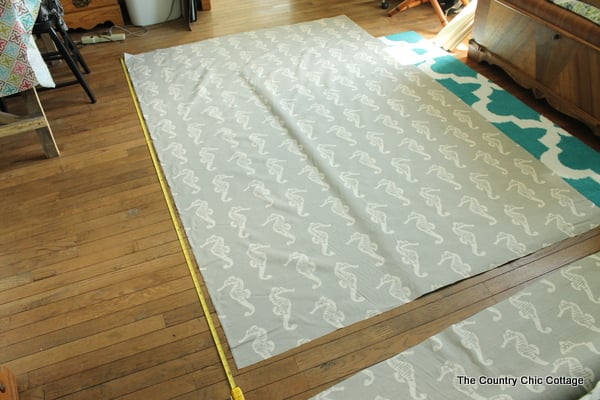
Step 3: Fold Fabric In Half & Cut Down The Center
Fold the fabric in half and cut down the center. You now have two 27-inch wide pieces of fabric. For this project, I left my selvage edges attached as they are hidden by my seams. You can remove it if you are worried about it.
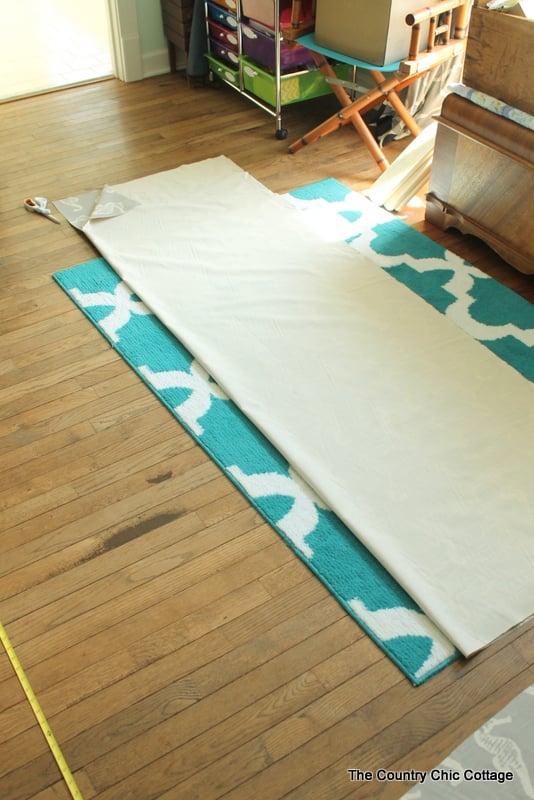
Step 4: Cut Lining For Curtains
I am lining these drapes because I love having a lined curtain on my windows. So, I used some drapery lining fabric that was 96 inches wide.
For the moment, I was able to just cut it to width. Then later, I will cut it to length. The lining needs to be as wide as our half sheets of fabric, which, in my case, was 27 inches.
TIP: Remember to measure your fabric before you do any cutting.
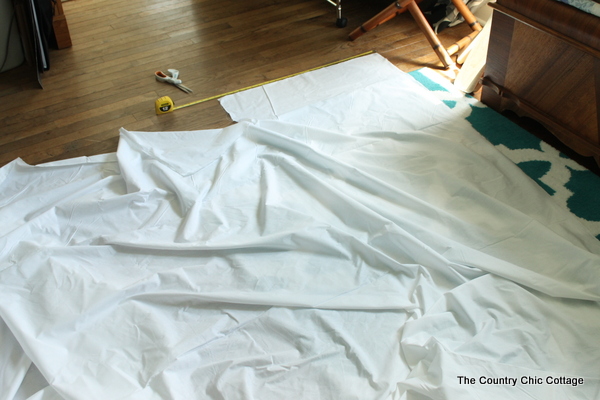
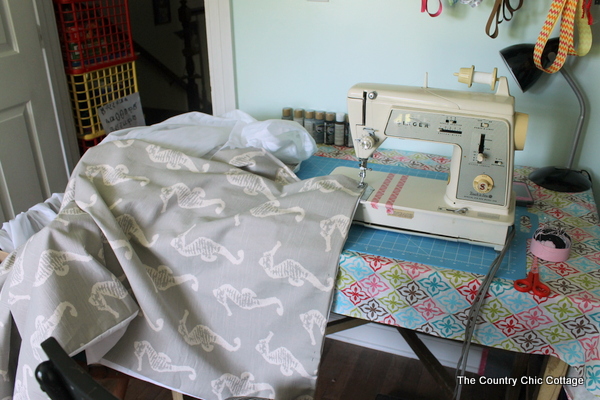
Step 5: Sew Curtains
Now it’s time to sew those straight lines.
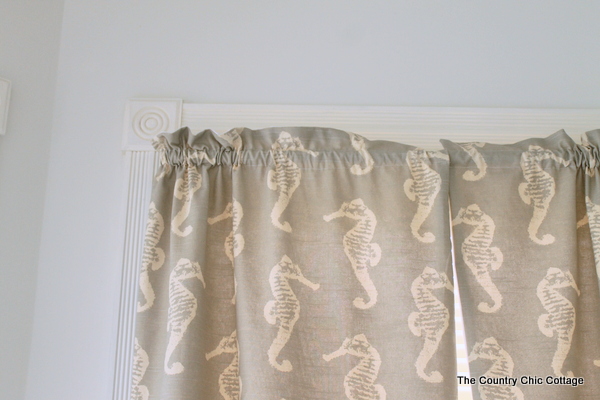
NOTE: This tutorial will give you about 1 1/2 inches at the top of the curtain rod as shown in the image below. If you don’t want this look, I will show you how to eliminate it.
Match the curtain fabric with the liner fabric, putting the right sides together. All of our seam allowances are 1/2 inch unless otherwise noted. Sew in the following order (infographic below):
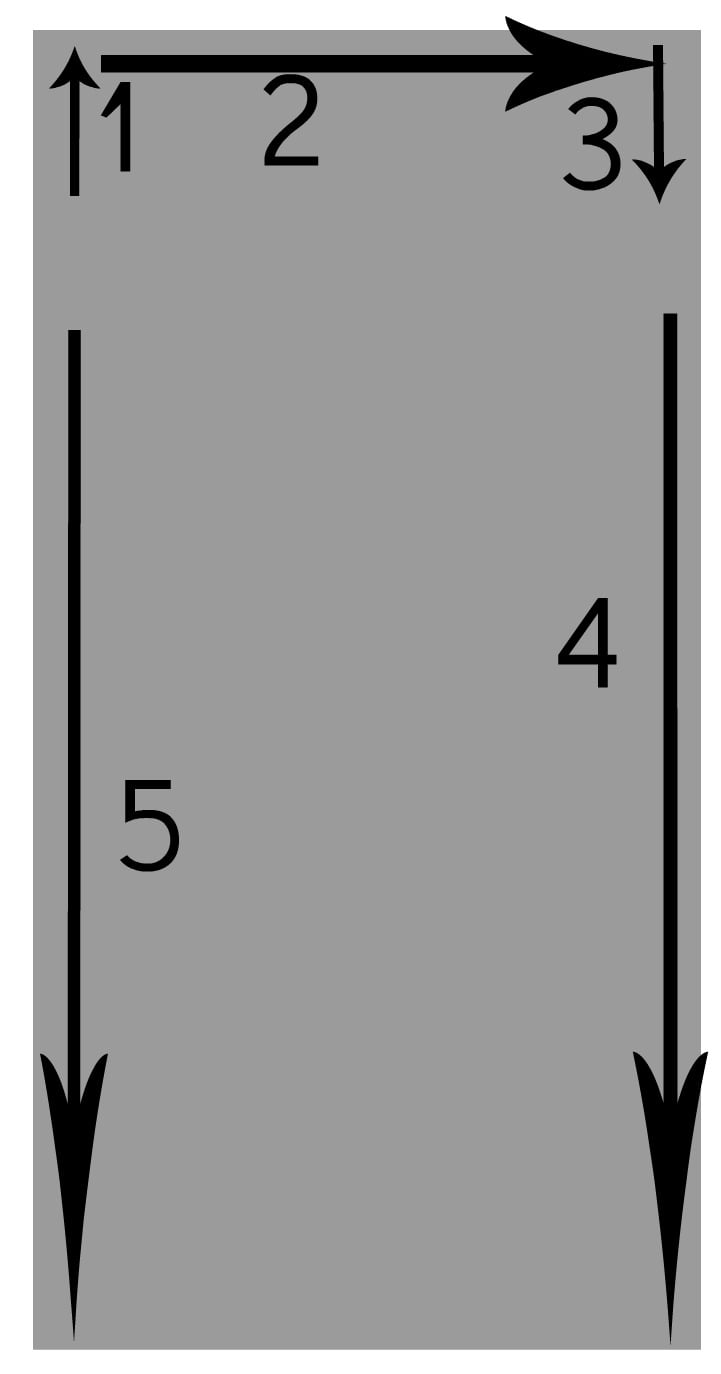
Start on one side 2 inches from the top and sew up to the top (skip this step if you DO NOT want extra material above your curtain rod).
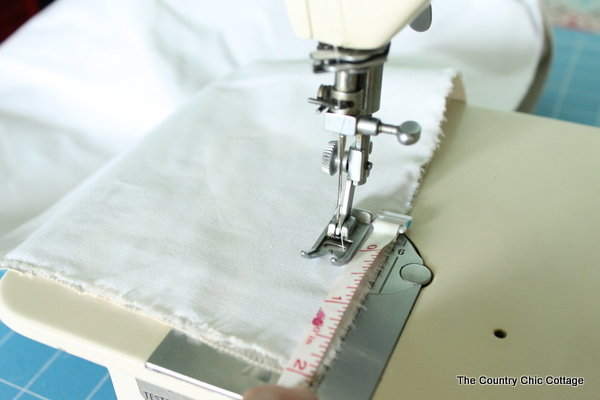
I used a measuring tape to get my needle in the correct place before beginning to sew.
Sew across the top.
Sew down the opposite side 2 inches (skip this step if you DO NOT want extra material above your curtain rod).
Skip down for a rod pocket. Mine was 1 1/2 inches but if your rod is larger you will have to skip a larger area. Sew all the way down the side stopping 2 – 4 inches from the bottom.
Repeat the previous step on the opposite side.
For steps 4 and 5, I used the same method with the measuring tape. Once again, customize this measurement to your particular curtain rod.
Step 6: Press Seams
Now turn the entire thing right side out. Press all of your seams well.
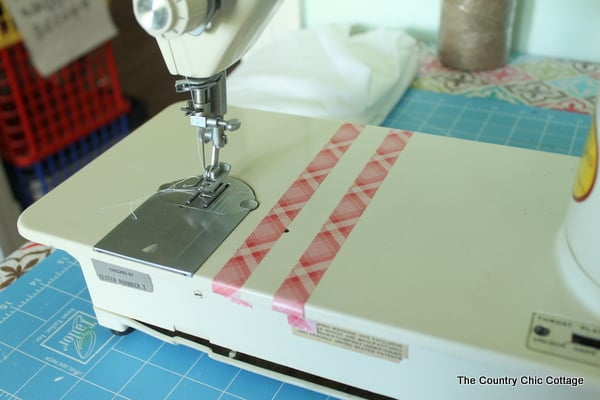
Step 7: Create Rod Pocket
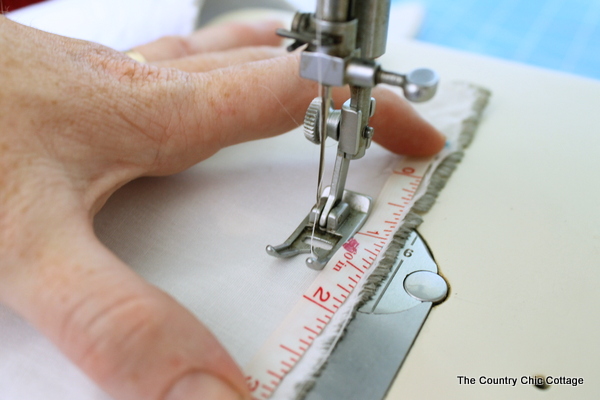
Next, we need to sew across to create a rod pocket. The easiest way to do this is to mark your sewing machine with tape at the appropriate distance. So for my curtain:
- The first measurement will be 2 inches minus the seam allowance of 1/2 inch so it is at 1 1/2 inches.
- The second measurement will be 1 1/2 inches from the above calculation plus the 1 1/2 inches we skipped down for steps 4 and 5 above.
Measure and place tape on your sewing machine as shown in the image below. Sew two lines all the way across the top of your curtain using these tape lines as your guide.
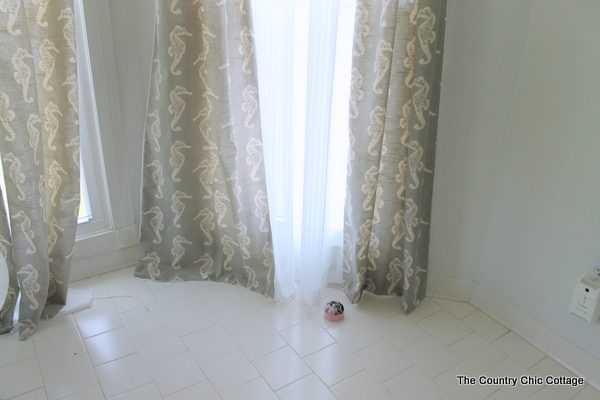
Step 8: Hang Up Curtains
You can now hang the curtain on the rod. But…Angie….the bottom is unfinished!? Yep, it is. Hang it up. You will thank me later.
Step 9: Trim The Length Of The Curtains
Now trim the lining to length (if you followed my instructions above it is longer than the curtain fabric). Then use pins to pin up to your own desired length.
Turn the fabric inside to do this so you will have a finished edge on the bottom (both front and back). For a bathroom, I want them just slightly above the floor. I have bad visions about curtains on the floor in a bathroom.
You can leave your curtains pooling on the floor or make them even shorter than mine. This is how these are custom to you.
Step 10: Take Down The Curtains & Sew The Bottom Closed
Then I literally take it down still on the rod and set up my sewing area to accommodate. A chair works wonders to support the bulk of the fabric and the rod. Sew as close to the bottom as you can (a 1/4 inch seam allowance works well).
Step 11: Hang Finished Curtains
Hang your finished curtains up and you are done. Sigh with relief – you just made curtains! Then realize you have four more sets to make. Sigh again.
NOTE: I bought the shears at the store and just hemmed them to length to make the curtains.
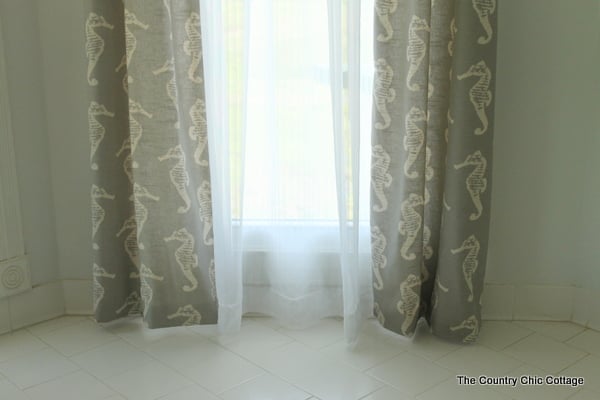
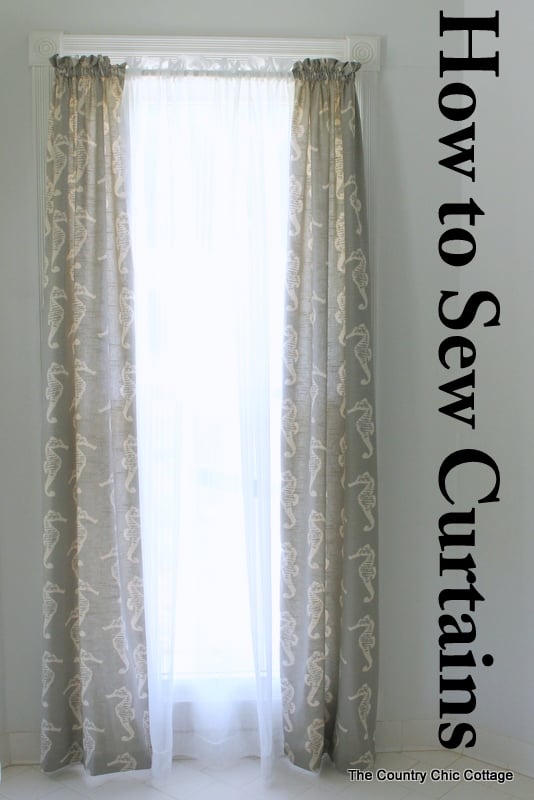
Didn’t they turn out well? I love the vibe they added to my upstairs bathroom after my remodel project!
I hope you love this tutorial and will try making curtains yourself! If you have believed that curtains are hard to make, I think you’ll be pleasantly surprised at how easy they actually are. For more projects in this room, be sure to read the painted wicker tutorial and how to paint a clawfoot tub!
FAQs About How To Sew Curtains
Here are a couple of questions that I see readers ask about how to sew curtains. Please check to see if I’ve already answered it below if you have a question. Don’t see it? Leave it for me in the comments!
Do I Need A Special Sewing Machine To Make These Curtains?
No! A regular sewing machine is perfect for this project.
Can I Use Any Kind Of Fabric To Make These Curtains?
Technically, yes. However, some fabrics are better to use than others because of how they drape. For example, cotton blends, polyester, and linen tend to drape better which is why they are great for making curtains.
Is It Cheaper To Sew My Own Curtains?
Most of the time, yes it is. If you choose a very expensive type of fabric, you could probably buy curtains for less money. However, the REAL benefit to making your own curtains is that they are completely custom to your space, decor, and personal preferences! Plus, making curtains is a great excuse to do some crafting!
Could I Make My Curtains A Different Length?
Yes! These curtains are completely customizable. You can make them any length you prefer. I wanted the long drapey look for this bathroom to accommodate the very tall windows, so I made these long.
7 More Remodeling Inspiration
Did you love learning how to sew curtains and are looking for more remodel inspirations? Then check out the ideas below!
- Rustic Bathroom Ideas for Your Home
- How We Transformed Our Tired Old Playroom Into A Gorgeous Craft Room Video Set
- Our Farm Kitchen Reveal
- Sweet and Modern Girls Room Makeover with DIY Scalloped Wall
- Farmhouse Kitchen Ideas: Inspiration for Your Home
- Laundry Room Organization with Cricut
- Painting Kitchen Cabinets: A How-To Guide


Great tutorial Angie! I’m about to embark on some curtain making so it was very timely, thanks!!!
Your curtains look fabulous and I love how easy your tutorial was to understand!
I love that fabric and the color!
Thanks for the tutorial! Easy to follow and the fabric is beautiful!
Debbie
Thanks for the tutorial! Easy to follow and the fabric is beautiful!
Debbie
make something new everyday I been wanting to learn