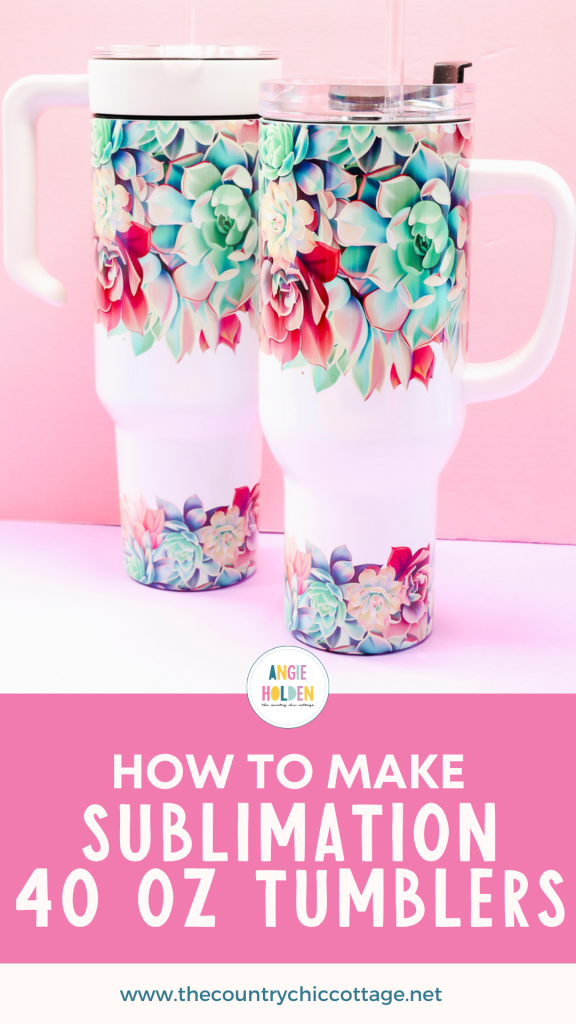
You see 40 oz tumblers are everywhere, but finding one that is perfectly made for you may be harder than you think. With all the different colors and varieties, it's fun to create something uniquely you. So I am going to show you how to customize two different types of 40 oz sublimation tumblers in this post.
With this tutorial, you'll never again confuse your tumbler with someone else's!
Are you trying to decide which sublimation printer is right for you? I've compared different sublimation printers to help you pick the perfect one for your craft room.
Customizing 40 oz tumblers with sublimation can be tricky. I'm sharing my best tips and tricks to help you get the best results the first time.
You can watch me make these custom tumblers by pressing play on the video below.
How to Customize Sublimation 40 oz Tumblers
For today's tutorial, I am going to show you two different 40 oz tumblers. One version is a traditional 40 oz tumbler from Johnson's Plastics Plus and the other is an innovative tumbler from MakerFlo.
We'll look closely at each of these tumblers and how they're different. Both of these tumblers are sublimation blanks so it just depends on which version you like best.
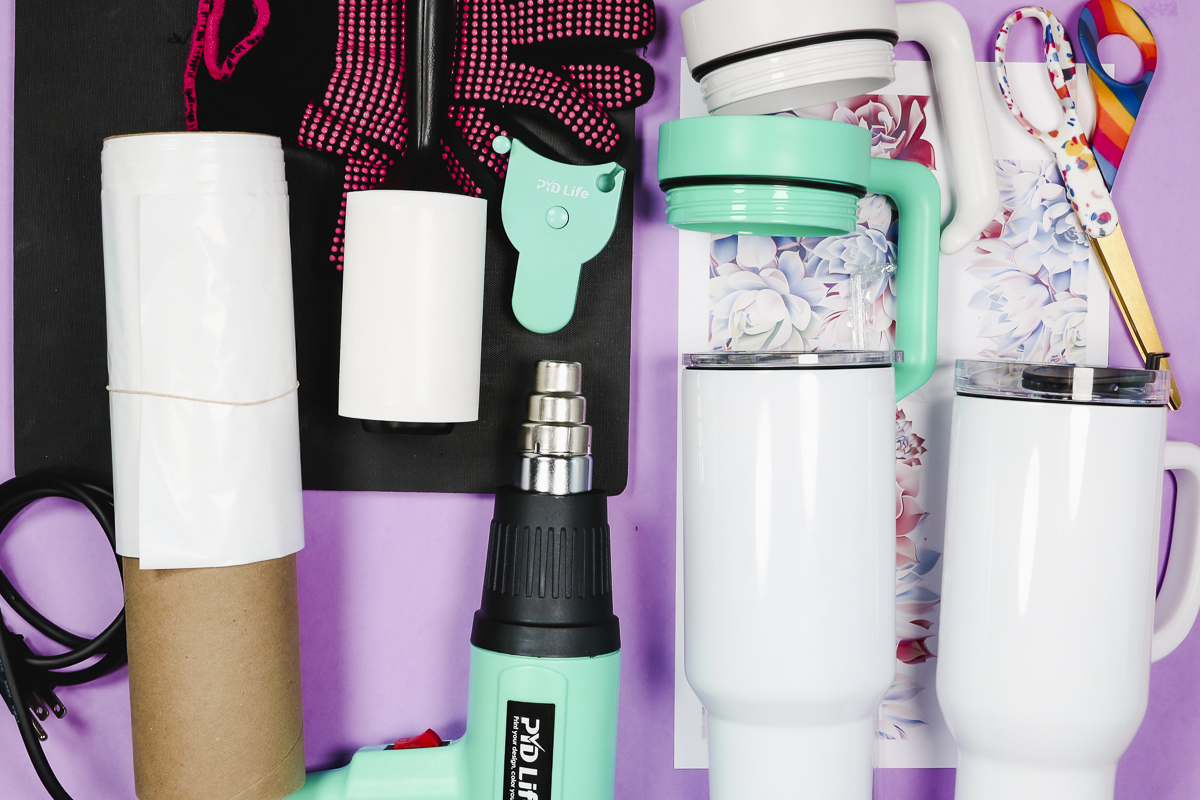
Supplies Used:
Blanks Used:
Other Supplies Used:
- Brother Sublimation Printer
- Sublimation Paper
- Lint Roller
- Heat Resistant Tape
- Heat Resistant Gloves
- Tape Dispenser
- Heat Resistant Mat
- Heat Gun
- Sublimation Oven
- Shrink Wrap
- Tape Measure
Sublimation 40 oz Tumbler Blank Comparison
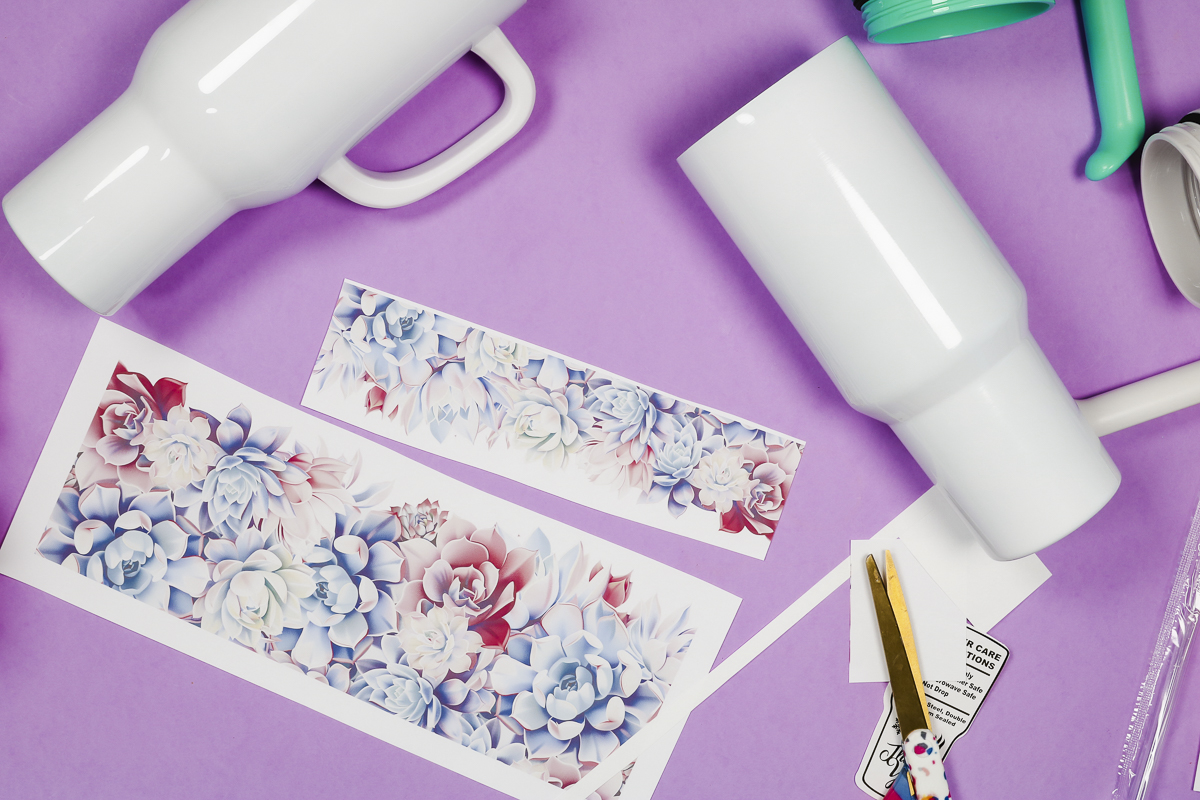
Now, let's look at the two different sublimation tumblers we're going to use today.
There are a lot of sublimation 40 oz tumblers on the market. You can use any of them for this process. Make sure you're using a sublimation blank so the sublimation ink actually bonds to the tumbler.
On the left in the photo below, we have a 40 oz tumbler from Johnson's Plastics Plus. This sublimation tumbler is similar to what you'll find on Amazon and in craft stores.
This style comes with a lid, straw, and a handle attached to the side.
In order to sublimate this type of tumbler, you have to remove the handle from the tumbler using a small screwdriver.
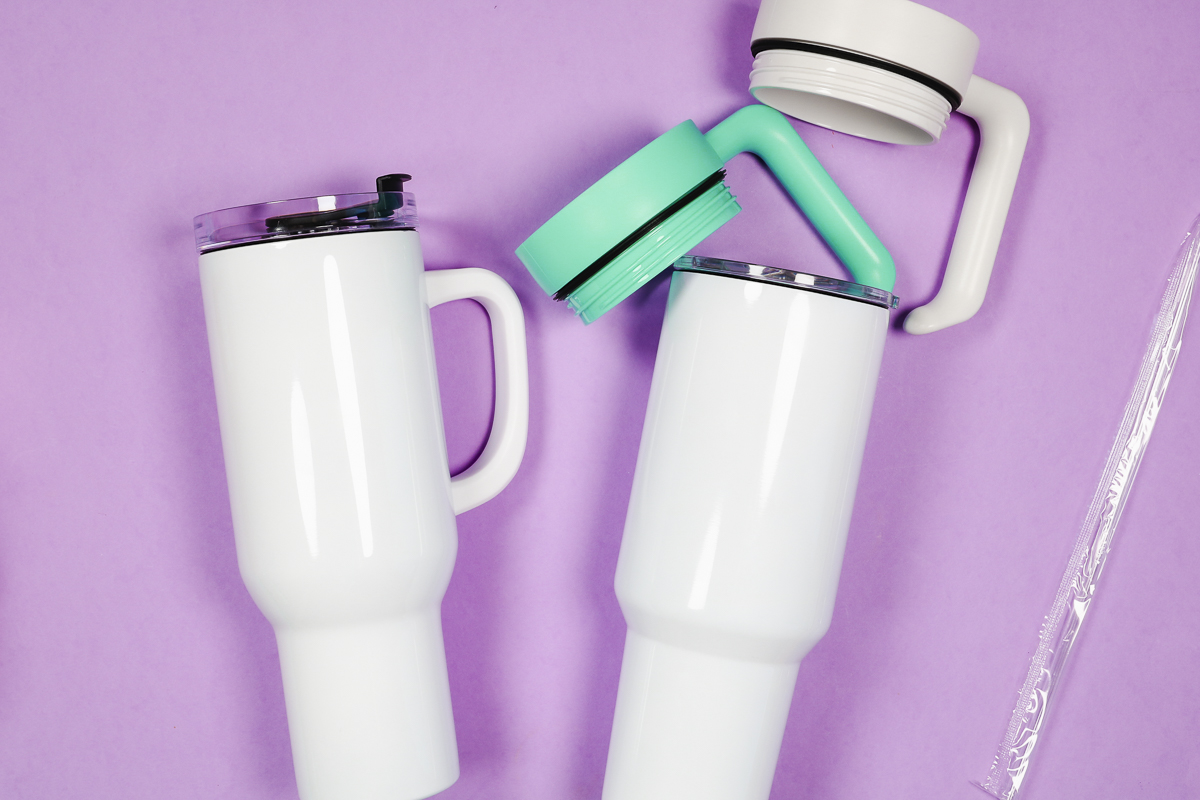
On the right is the 40 oz sublimation tumbler from MakerFlo. This tumbler is different than others I have seen on the market.
When you purchase the tumbler you'll see it does not have a handle. The tumbler has smooth sides and a clear lid.
You can use this sublimation tumbler as is if you want a tumbler without a handle. The innovation comes from the handle you purchase separately.
The handle comes in a variety of different colors and costs less than $2.00. To attach the handle, twist off the clear lid, twist the handle onto the tumbler, and then twist the clear lid onto the handle.
Step 1. Measure Tumbler
Before we create our design we need to measure the tumbler. I really like this tape measure that wraps around the tumbler. I feel like it helps me get an accurate measurement.
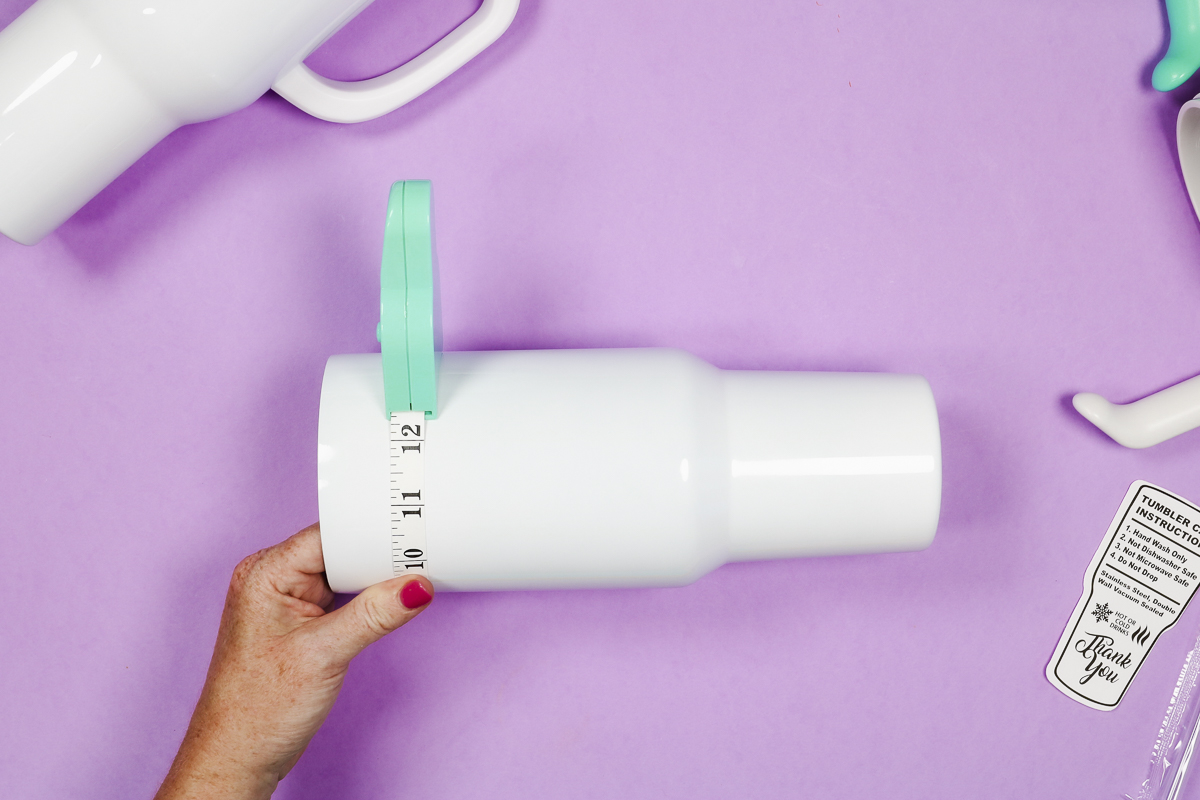
You'll want to measure each blank if you're using different tumblers and I recommend measuring in a few spaces. These tumblers can be slightly tapered.
I am adding a design around the top and the bottom of my tumbler so I measured both areas and I measured to decide how far down from the top and how far up from the bottom I want my design to go.
Can I Full Wrap a 40 oz Sublimation Tumbler?
Because of how these tumblers are made you cannot do a full wrap. I have tried multiple times and where the top tapers down to the bottom is too severe, I've never had success trying to do a full wrap and do not recommend it.
If you want to do a full wrap on a tumbler like this, I have a tutorial using a specialty paper that gets down into that curve pretty well. It is not perfect but it is a lot closer than sublimation and depending on the design you use it may work really well for you.
Step 2. Create a Sublimation Tumbler Design
I am using Canva to create my sublimation tumbler design.
- Open canva.com
- Click Create a Design
- Select Custom Size and make the size the same size as the sublimation paper you're using. Because of how large these tumblers are I need to use my 8.5 x 14 inch sublimation paper.
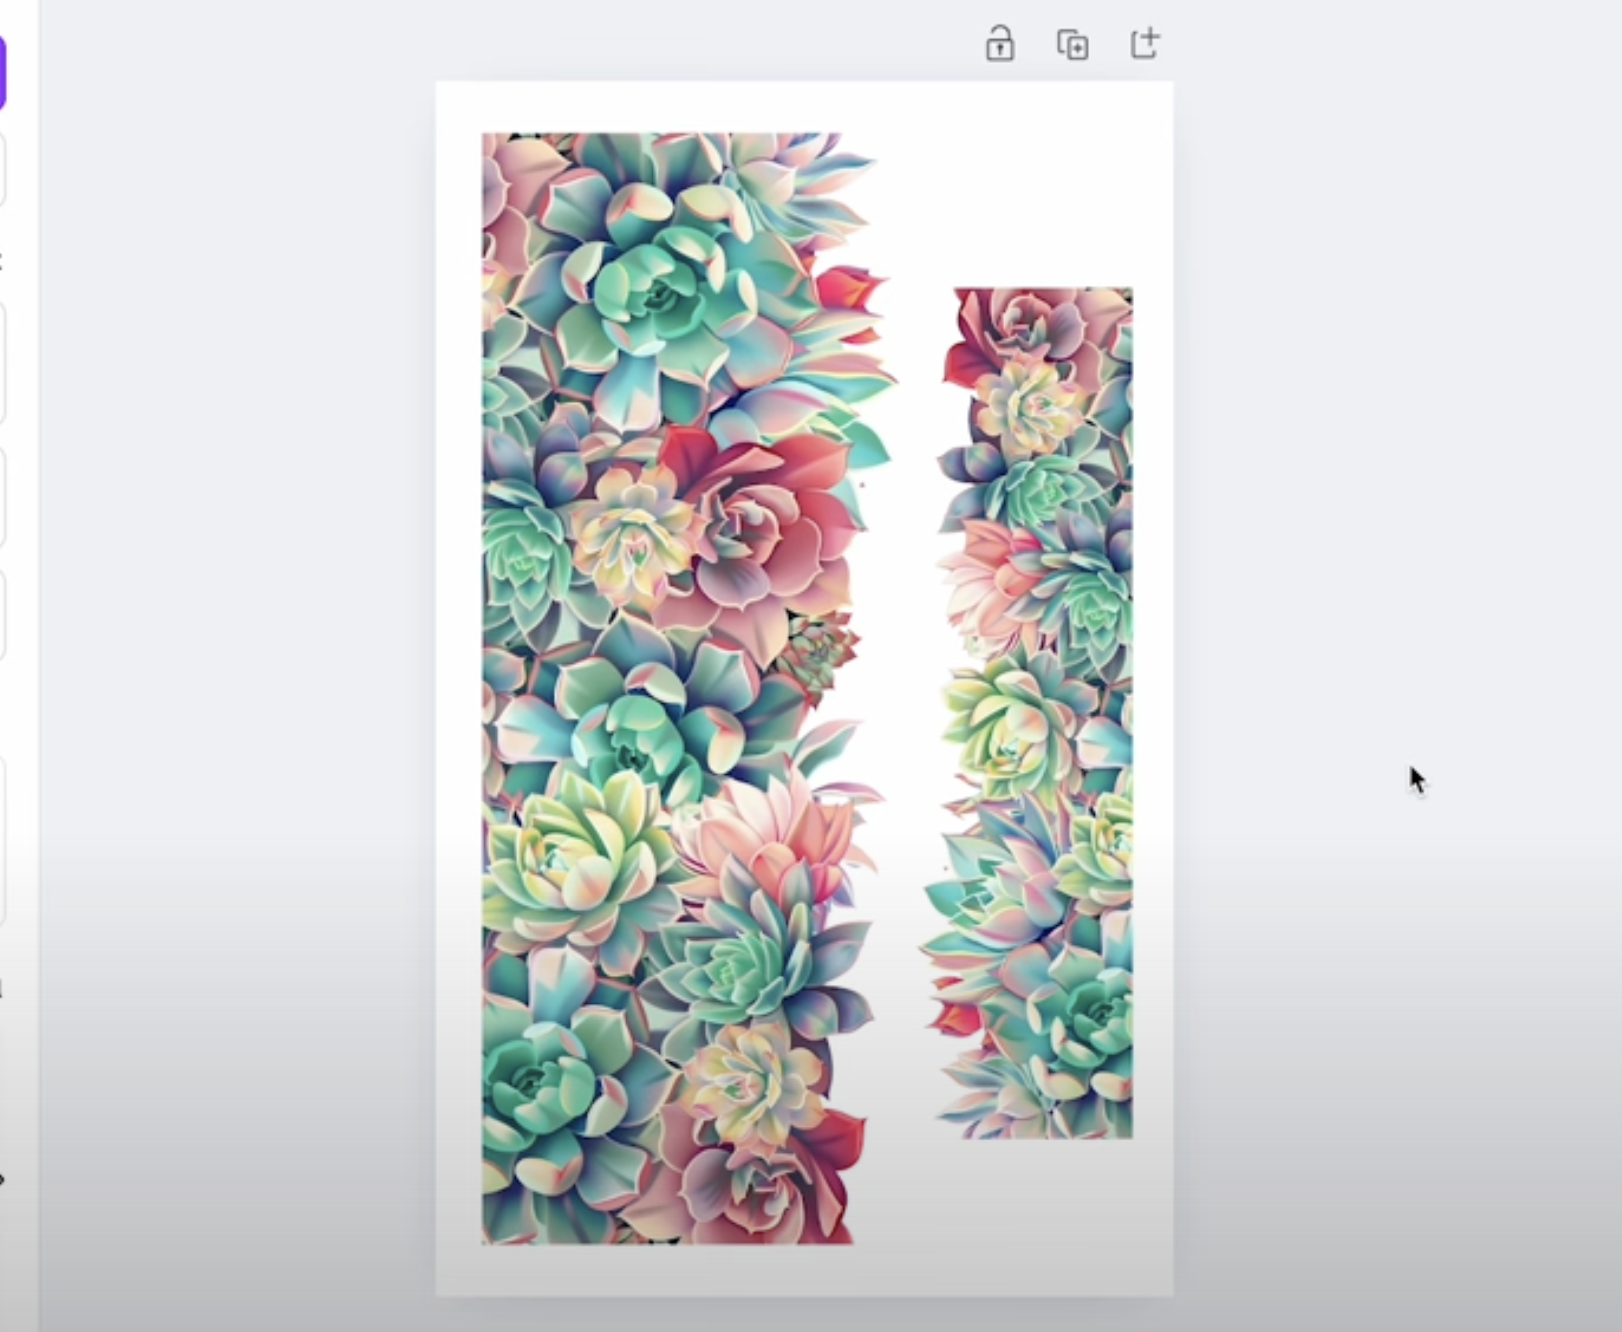
- Click Uploads and find the file you want to use on your computer. I am using this succulent design.
- Under Uploads click the design and add it to your canvas.
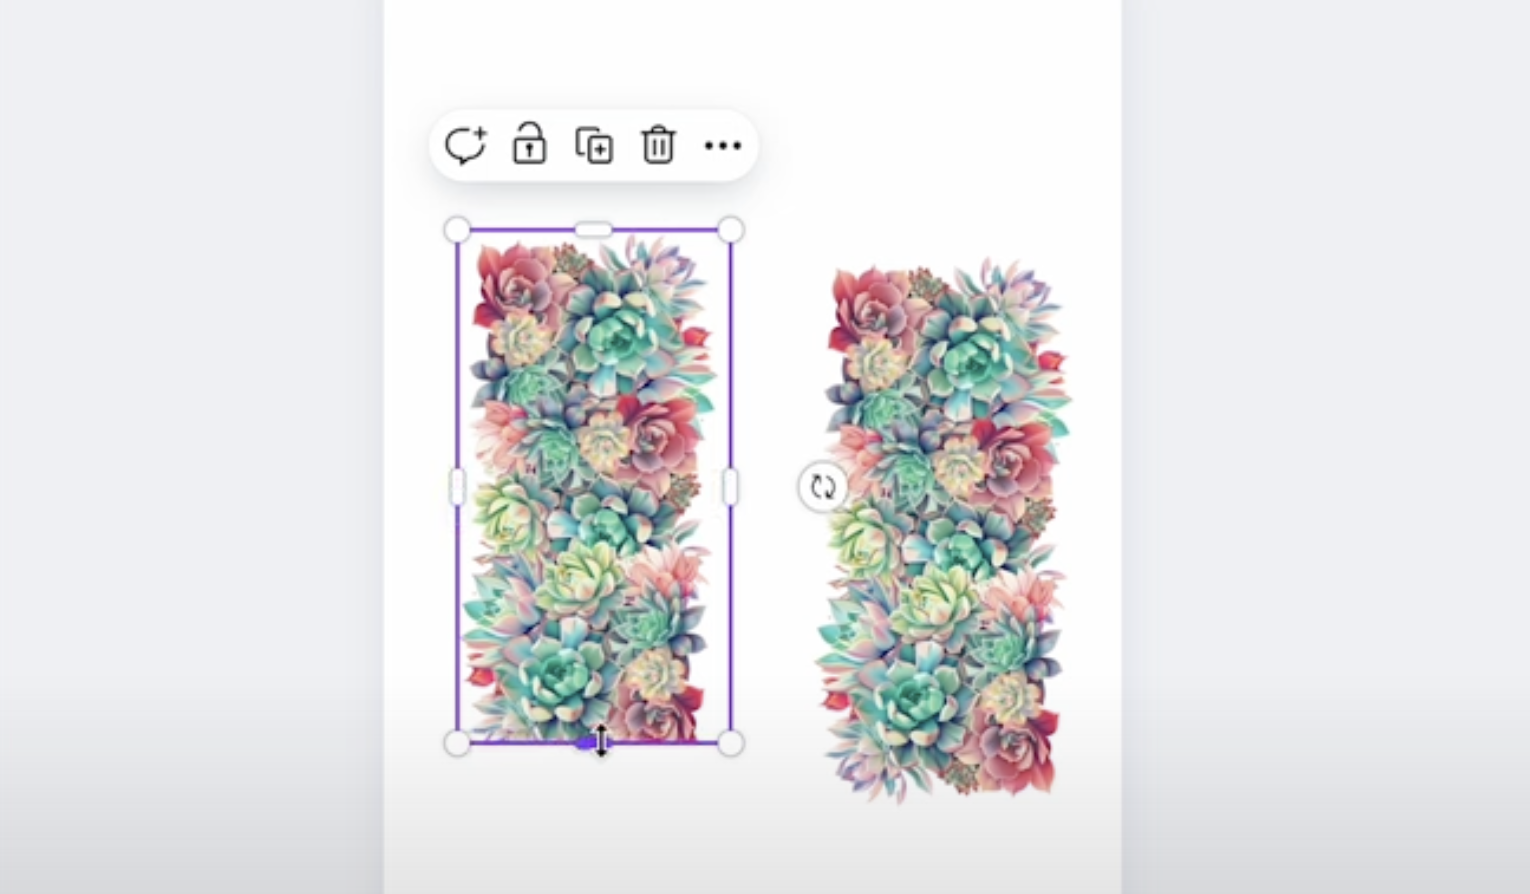
- Duplicate the design so you have one for the top and the bottom of your tumbler.
- Rotate the designs 90 degrees so you can resize them to fit around your tumbler.
- If there is any white space around your design, especially the short edges use the handles on the bounding box to trim off that white. I want my design to wrap around the entire tumbler without white space where the two ends meet.
- Click the design and then select Position to resize the design.
- Make sure the Ratio is locked and set the width to the size of your tumbler. My width is 12.8 inches. Setting the width to 12.8 inches makes the height 7.39 inches. That is too tall. Use the side handle to resize the height to just over 5 inches. My final measurement for the top design is 12.8 x 5.14 inches.
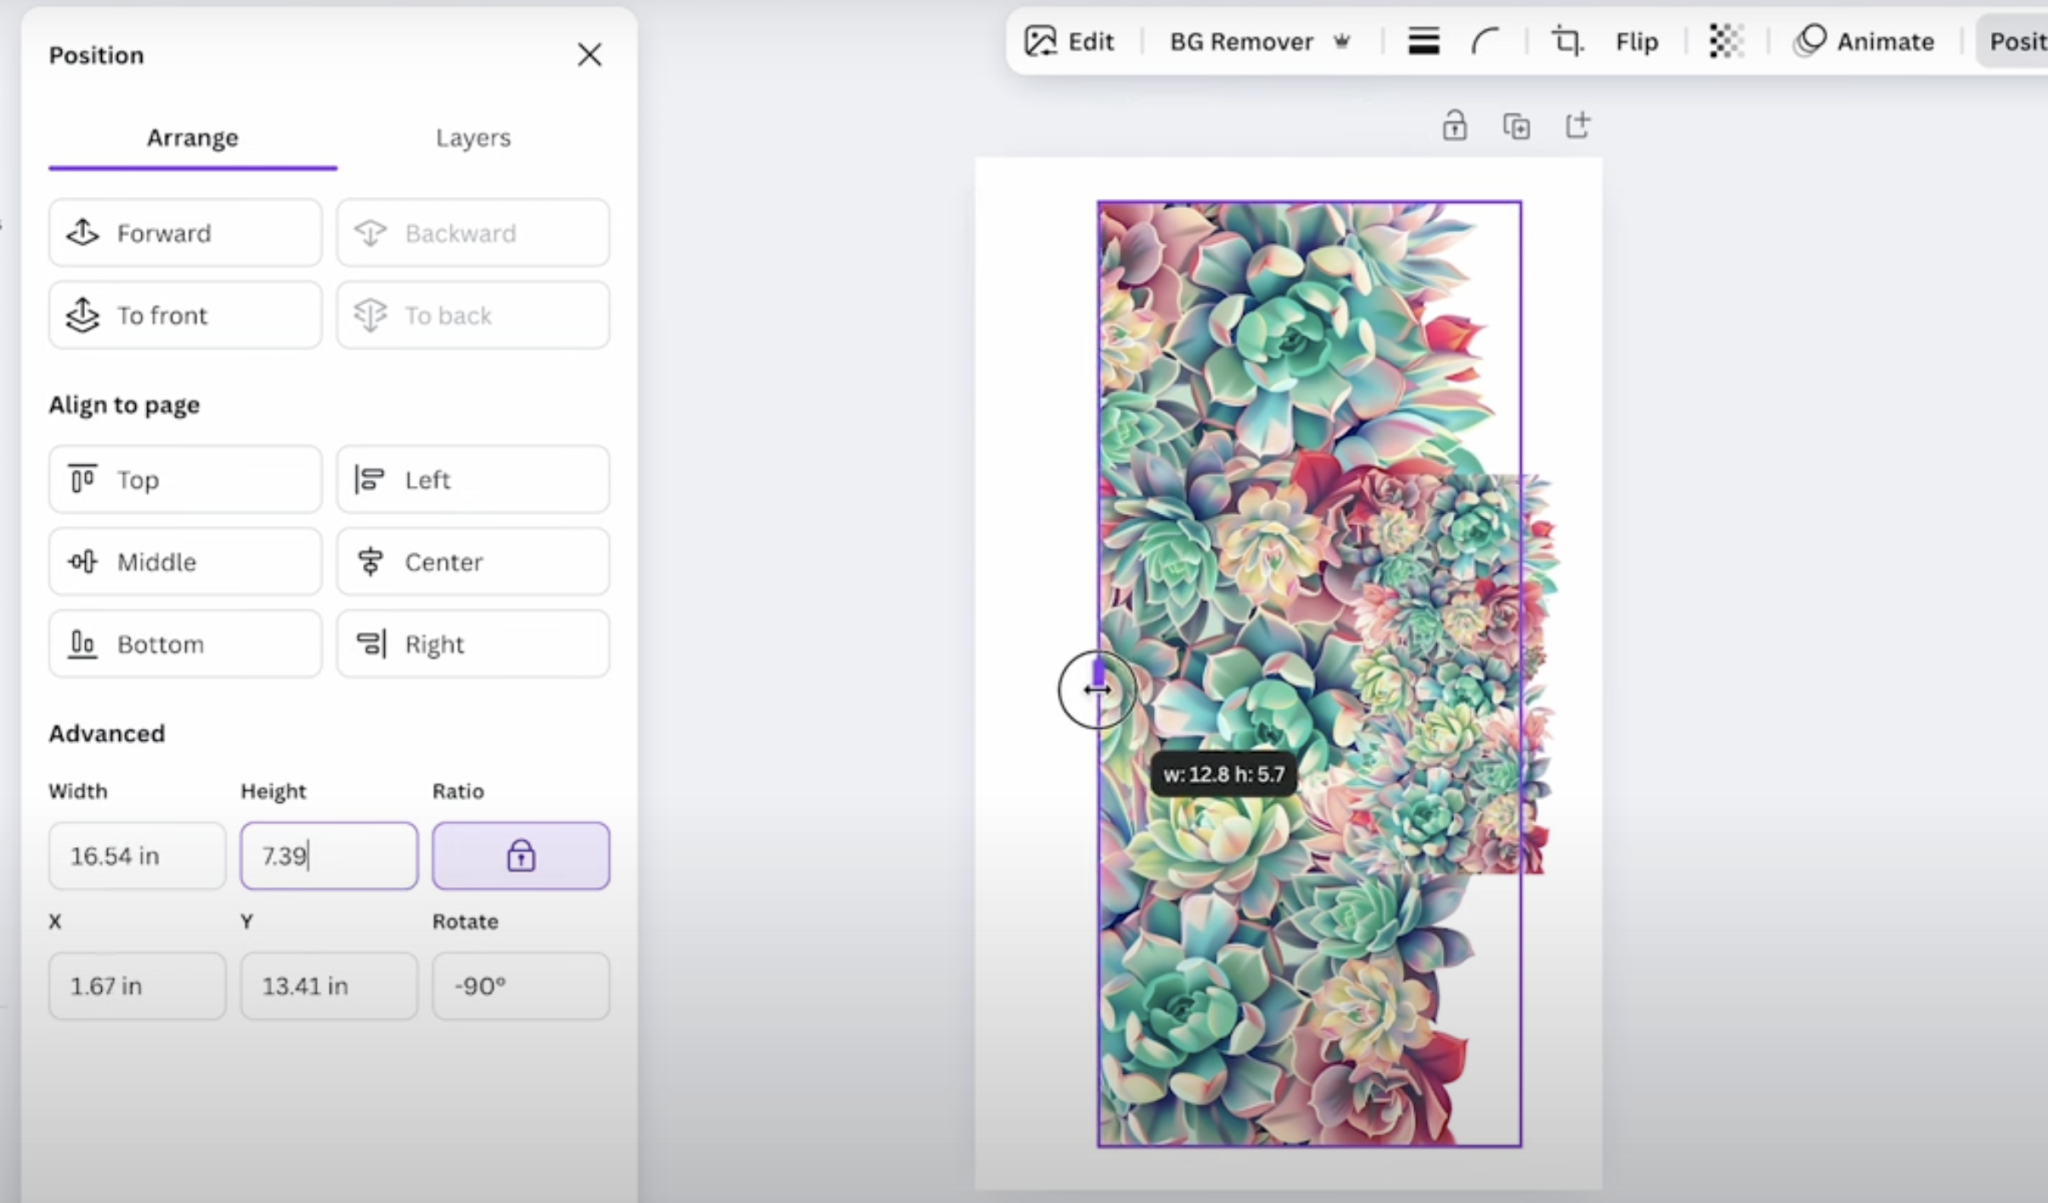
- Repeat this process for the bottom of the tumbler. My measurement is 9.8 by 2.5 inches.
- Move the designs on the canvas so they don't overlap and can easily be cut apart after printing.
Step 3. Print Sublimation Design
To print the design from Canva, we have to download the file. You cannot print directly from Canva.
I download it as a PDF for Print, choose CMYK, and download it to your computer.
Print the design onto sublimation paper with sublimation ink from a sublimation printer. You cannot do this with a regular printer and regular ink.
Step 4. Prepare Sublimation Tumbler
Now we're ready to prepare our sublimation tumblers.
Remove the Handle from the Tumbler (if using one with attached handle)
You cannot sublimate this type of tumbler with the handle attached. Use a screwdriver to remove the handle.
Getting the top screw out can be frustrating. Sometimes I have to try a couple of different Phillips screwdrivers to get one that will work.
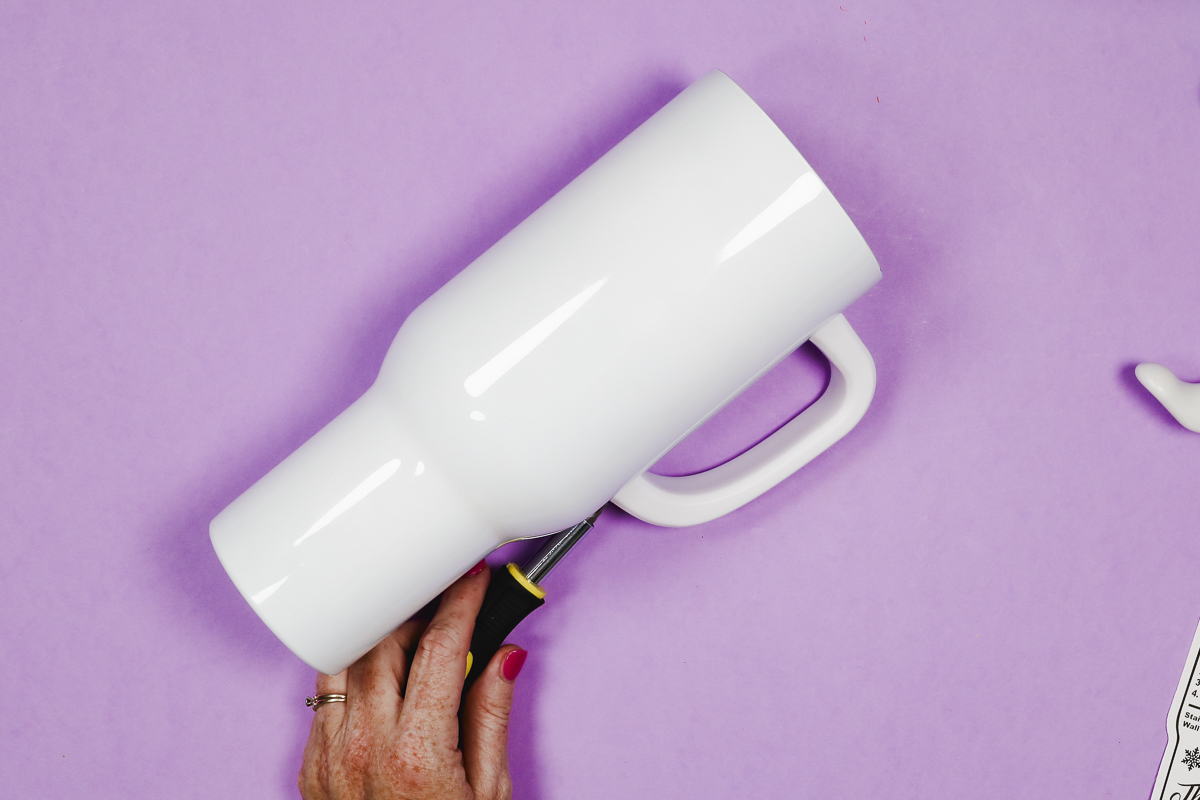
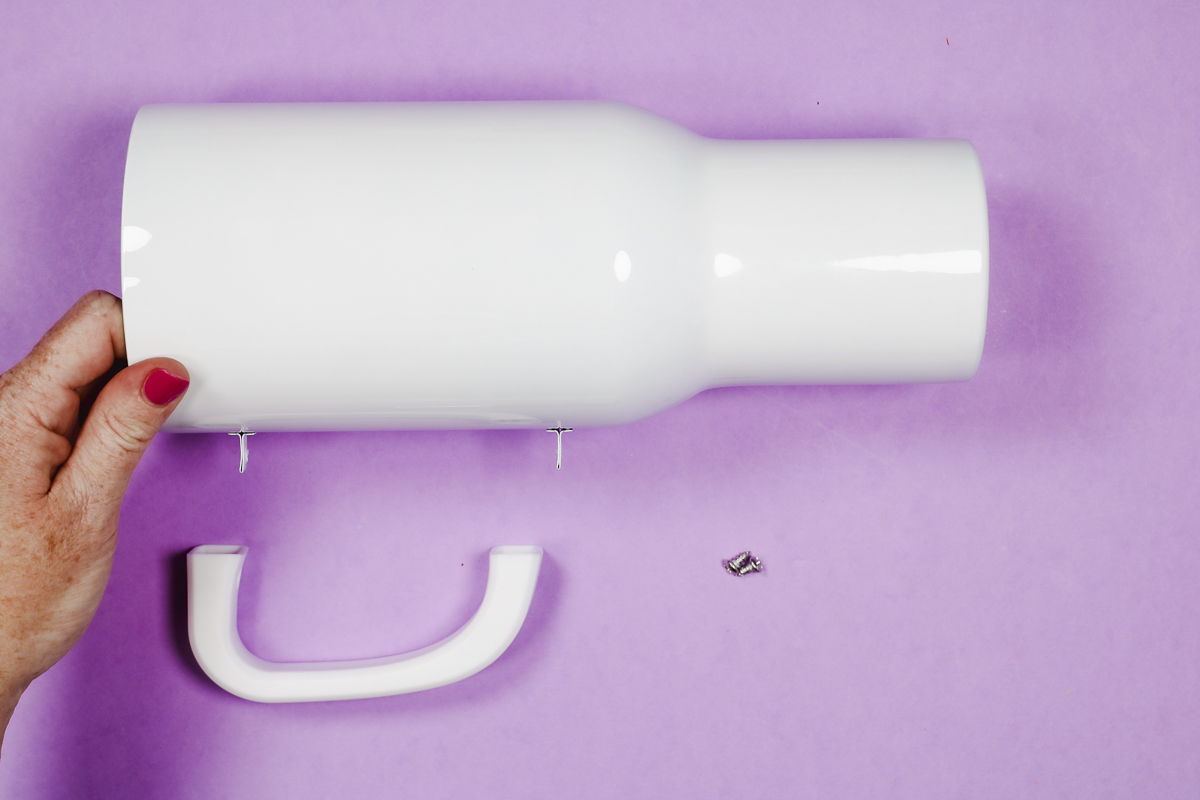
Be careful, you do not want to strip the screw. With the screws removed pull the handle off and you'll see the metal tabs. These do not come off.
Clean Tumbler
Regardless of which tumbler you're using you want to make sure it's clean. I am using a lint roller to remove any dust or other debris.
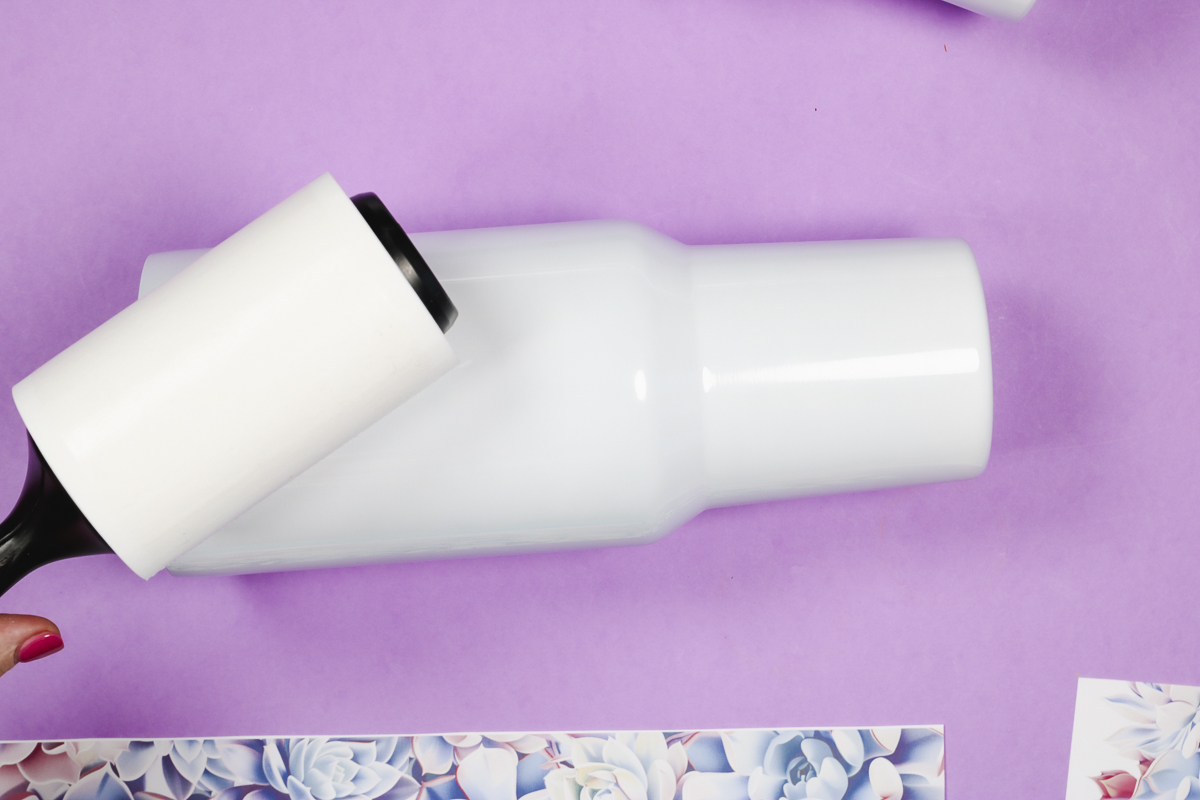
You can use a lint-free cloth and rubbing alcohol. Make sure the tumbler is completely dry before adding the design.
Step 5. Locate Design on Tumbler
Cut the two designs apart and it's up to you how much of the white area you want to remove. If you want to remove all the white to get a straight edge make sure you're using a paper trimmer.
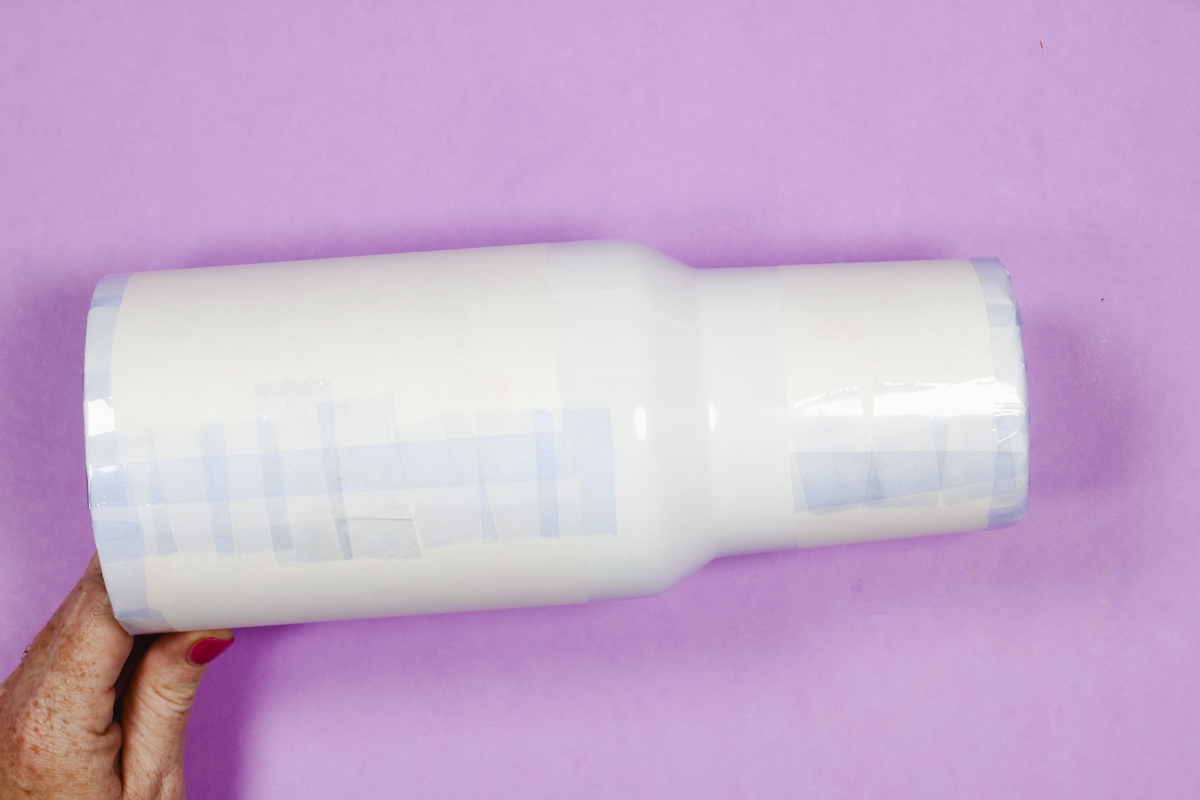
When wrapping the design we will have a slight overlap on the short edge. My tip for keeping the sublimation from bleeding through is to add a piece of heat-resistant tape to the back of one edge.
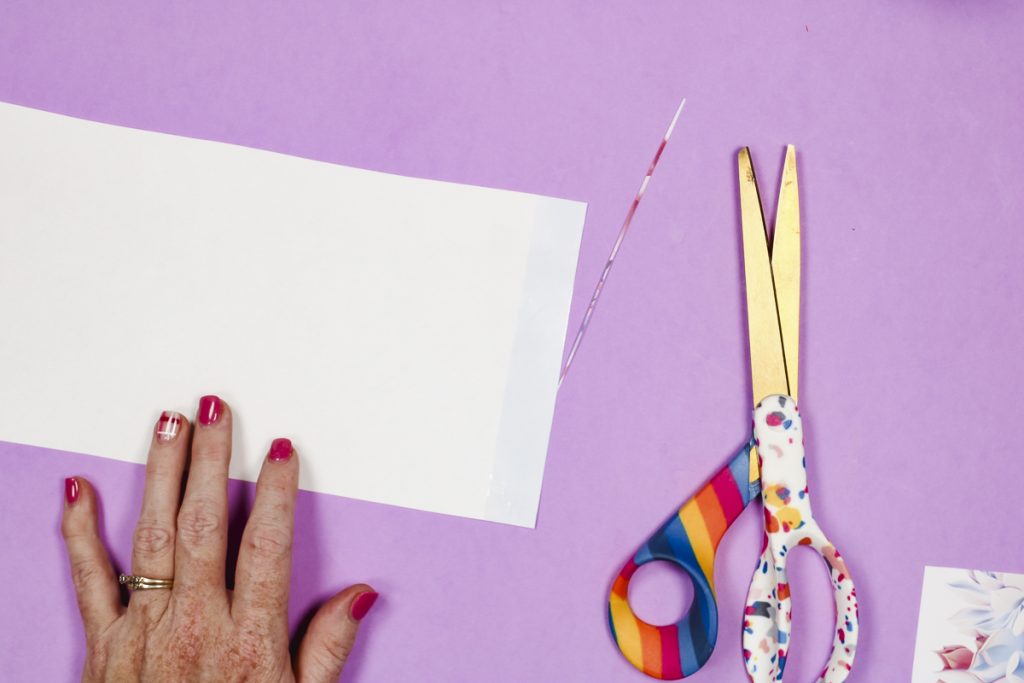
Trim away any excess tape and the very edge of the print to make sure the entire edge is covered by tape. When wrapping the print around the tumbler the side that is taped will lay down on the tumbler first.
Tumblers can be tapered, even just slightly. You may need to mess with the design to get it nice and tight.
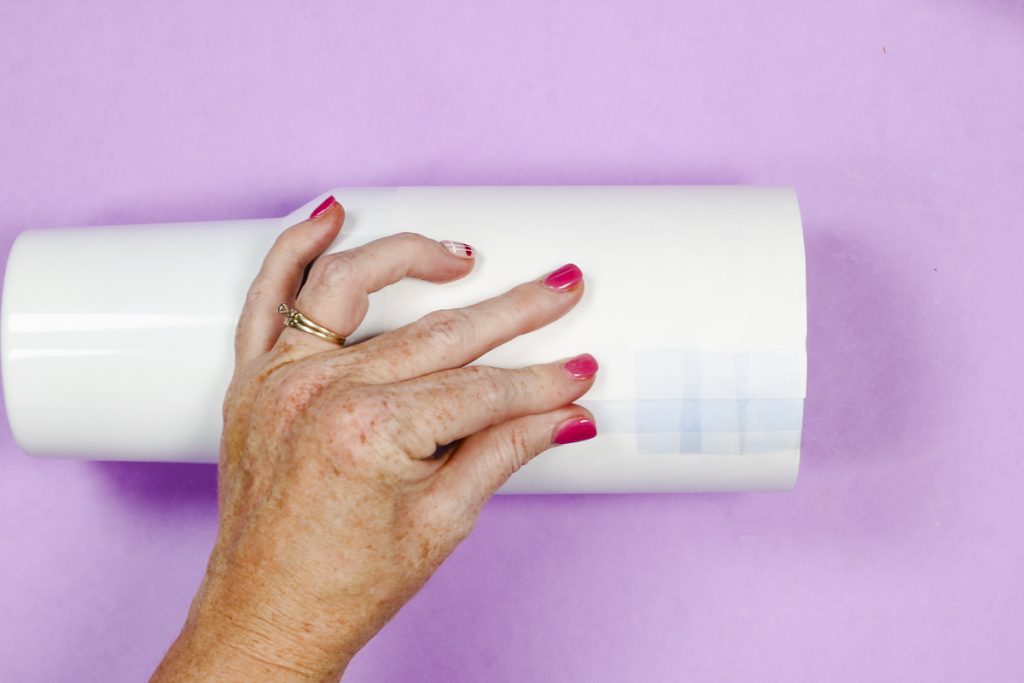
Start at the top of the tumbler and pull the paper tight. Place a piece of heat-resistant tape right at the top to hold it in place and continue to work your way down the seam.
Doing it this way allows you to pull each area tight in case your tumbler does taper a little.
If you have the tape tight you can choose whether to do the next part or not.
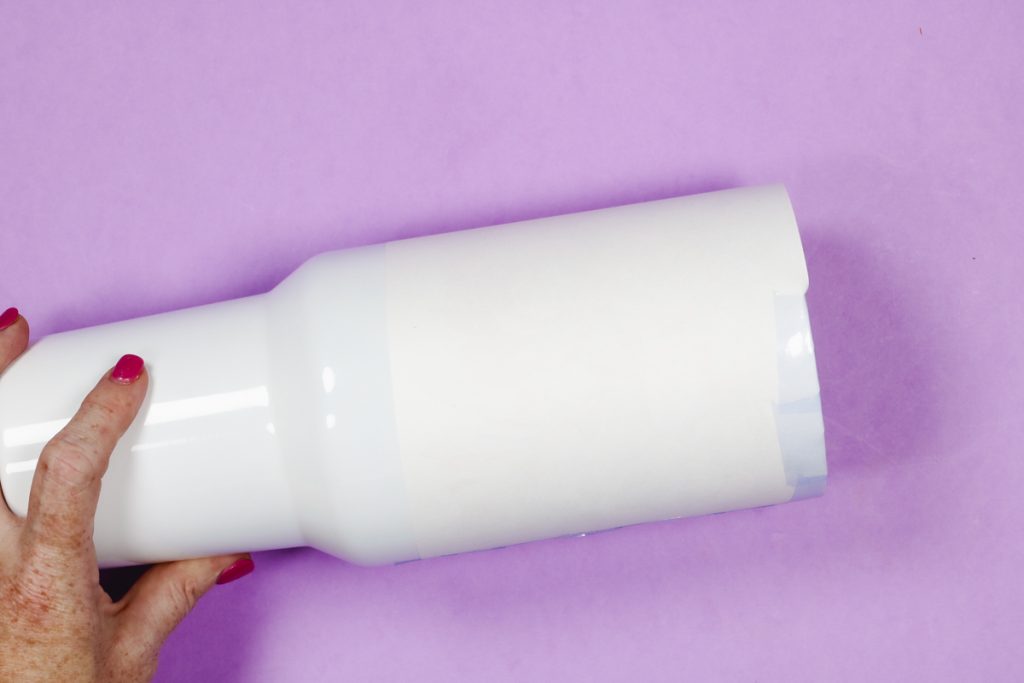
I like to tape the top of my design to the tumbler. Simply add a piece of tape onto the sublimation print and fold it over the lip of the tumbler.
Continue all the way around overlapping the tape slightly getting it as tight as you can.
Repeat the process for the bottom sublimation print and we're ready to move on to the next step.
How to Locate Sublimation Prints on Tumblers with Metal Tabs
The process for locating the sublimation print to a tumbler with metal tabs is the same except we have to work around those tabs.
The best way I've found is to use the area where the metal tabs are as the seam line and then cut a slit in the sublimation print to go on either side of the tab.
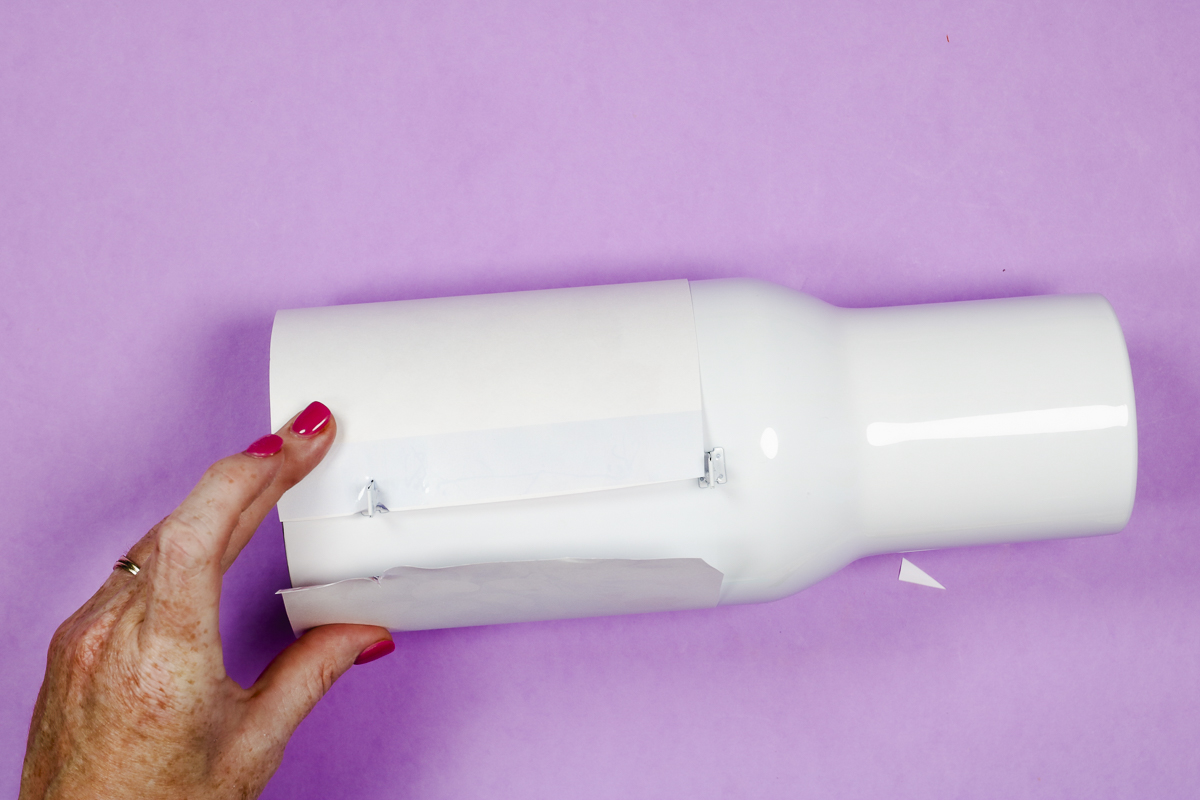
As you can see, for my design I only need to cut a slit for the top tab because my print sits right above the bottom tab.
Tape everything in place like we did the tumbler without the tabs and we're ready to add shrink wrap.
Step 6. Prepare Tumbler for Shrink Wrap
With everything taped into place, we want to make sure the tape is really secure. I use a scraper tool and rub it along all the print seams on both the top and the bottom of the tumbler.
After using the scraper tool I roll the tumbler across my table pressing down along the taped edge on both the top and the bottom of the sublimation tumbler.
Step 7. Add Shrink Wrap to Sublimation Tumblers
Next, we will add the shrink wrap. Because we're sublimating these tumblers in a sublimation oven the shrink wrap adds the pressure we need. If you have a tumbler press that fits this size tumbler, you can use that without the shrink wrap.
The shrink wrap I'm using today comes on a roll and you cut it so it's a little longer than the tumbler.
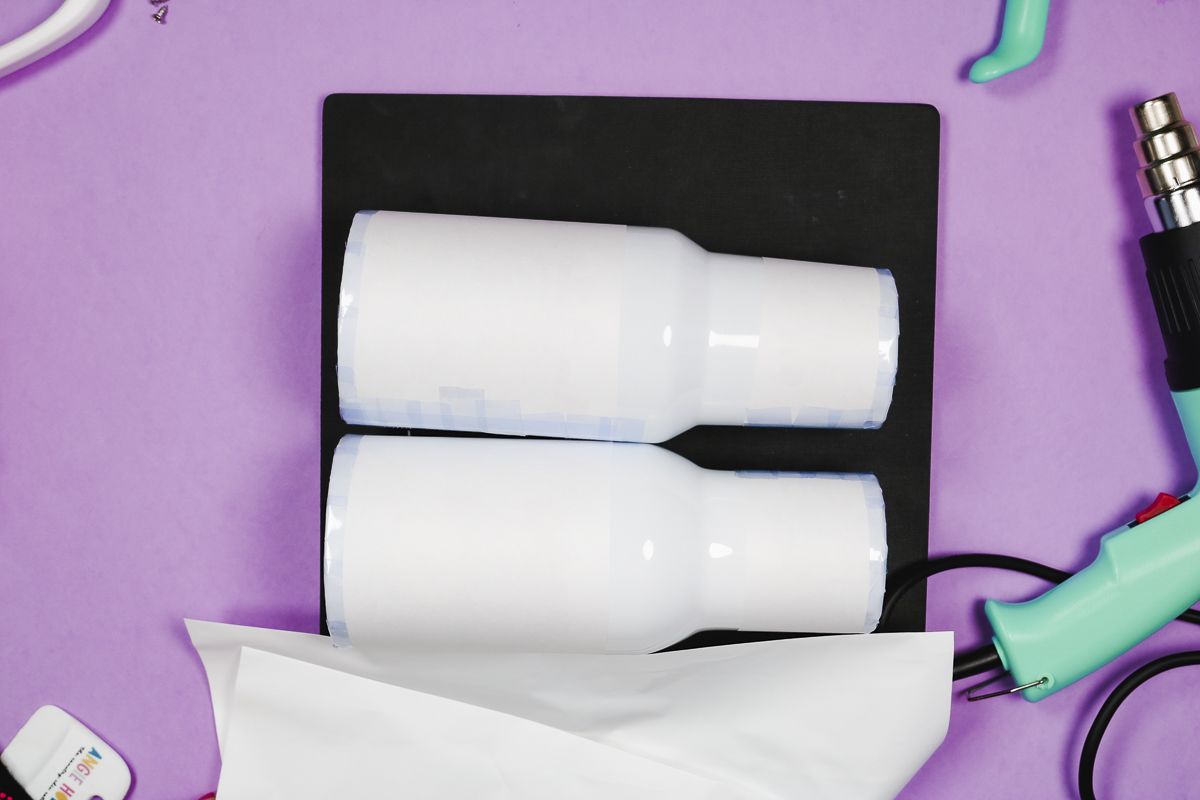
For the tumbler that doesn't have tabs, simply slide the tumbler into the shrink wrap so it's centered inside.
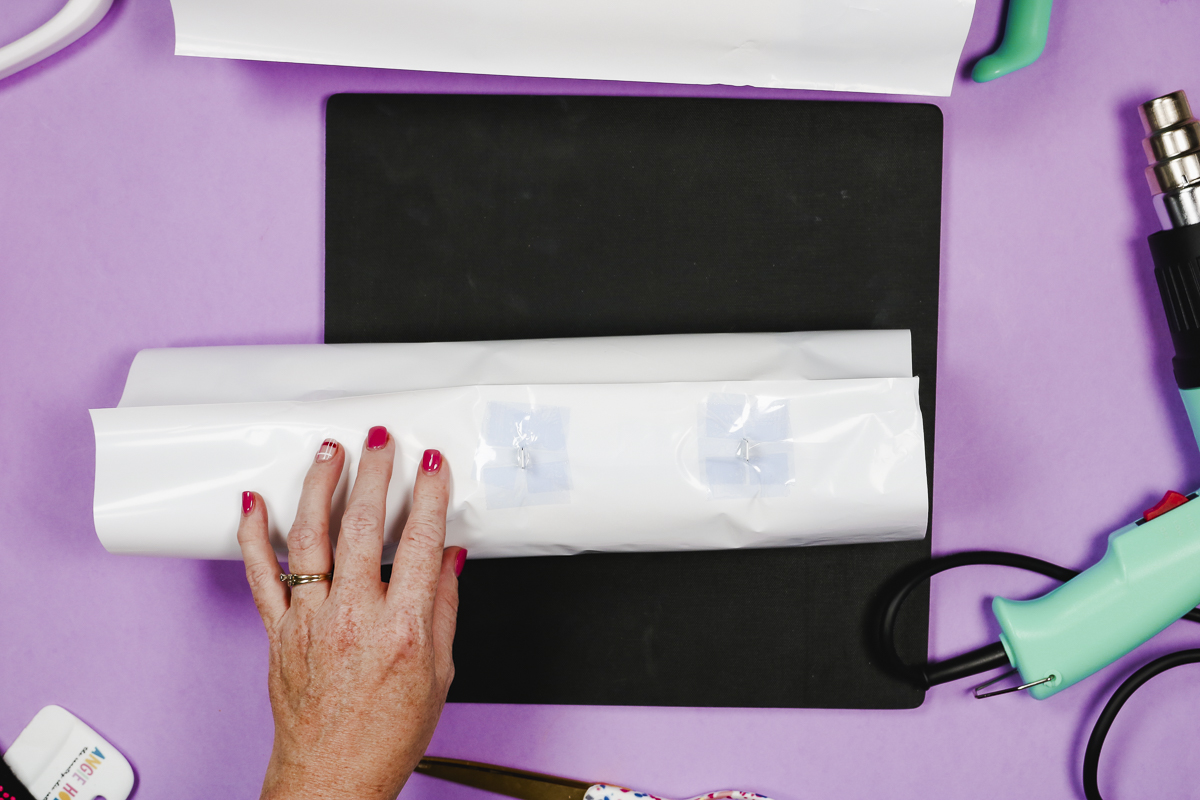
For the tumbler with the metal tabs, we need to take care so the tabs don't tear the shrink wrap.
You can fold the tabs down. I prefer not to do that unless it's absolutely necessary. My shrink wrap does fit over the tabs it is just a tighter fit.
Once the tumbler is inside, use scissors to cut a slit in the shrink wrap right over the metal tabs then work the tabs through the slit.
This process will give you the tightest fit.
Note – any time you cut shrink wrap the cut can expand during the heating process. To prevent this from happening use heat-resistant tape on all sides before applying any heat.
Step 8. Apply Heat to Shrink Wrap
With the sublimation tumblers inside the shrink wrap, preshrink the wrap with a heat gun before placing the items in the sublimation oven.
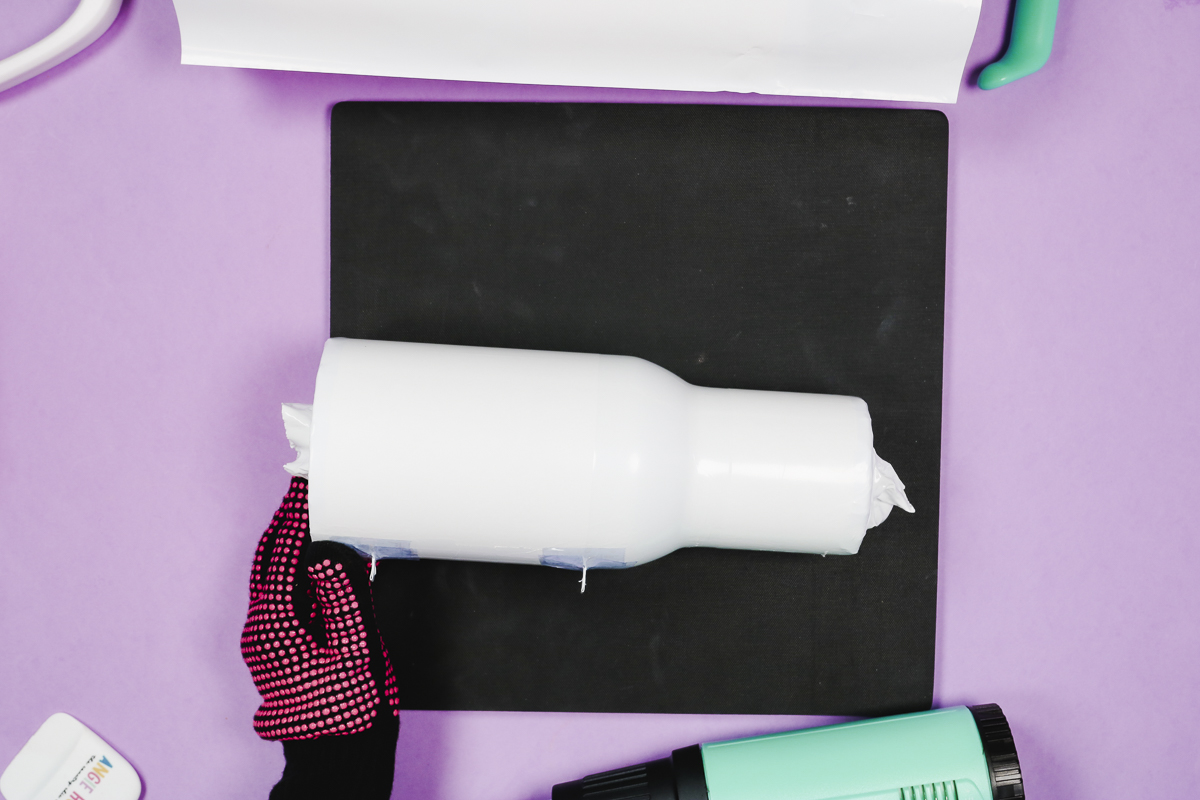
Don't hold the heat gun in one place for too long or it can burn through the shrink wrap.
I like to go back and forth over the whole thing until almost all of the wrinkles are out so I end up with a really tight wrap all the way around the tumbler.
Step 9. Sublimate Tumblers in Sublimation Oven
These tumblers have a recommended temperature of 375 degrees for six minutes. I did them one at a time in my small sublimation oven.

When the time is up, move the tumbler to a heat-resistant mat using heat-resistant gloves.
Step 10. Remove Shrink Wrap
Immediately remove the shrink wrap. The hotter the shrink wrap is the easier it will be to remove.
If you allow the shrink wrap to cool, you will be frustrated.
With the shrink wrap removed, remove the heat-resistant tape and sublimation paper.
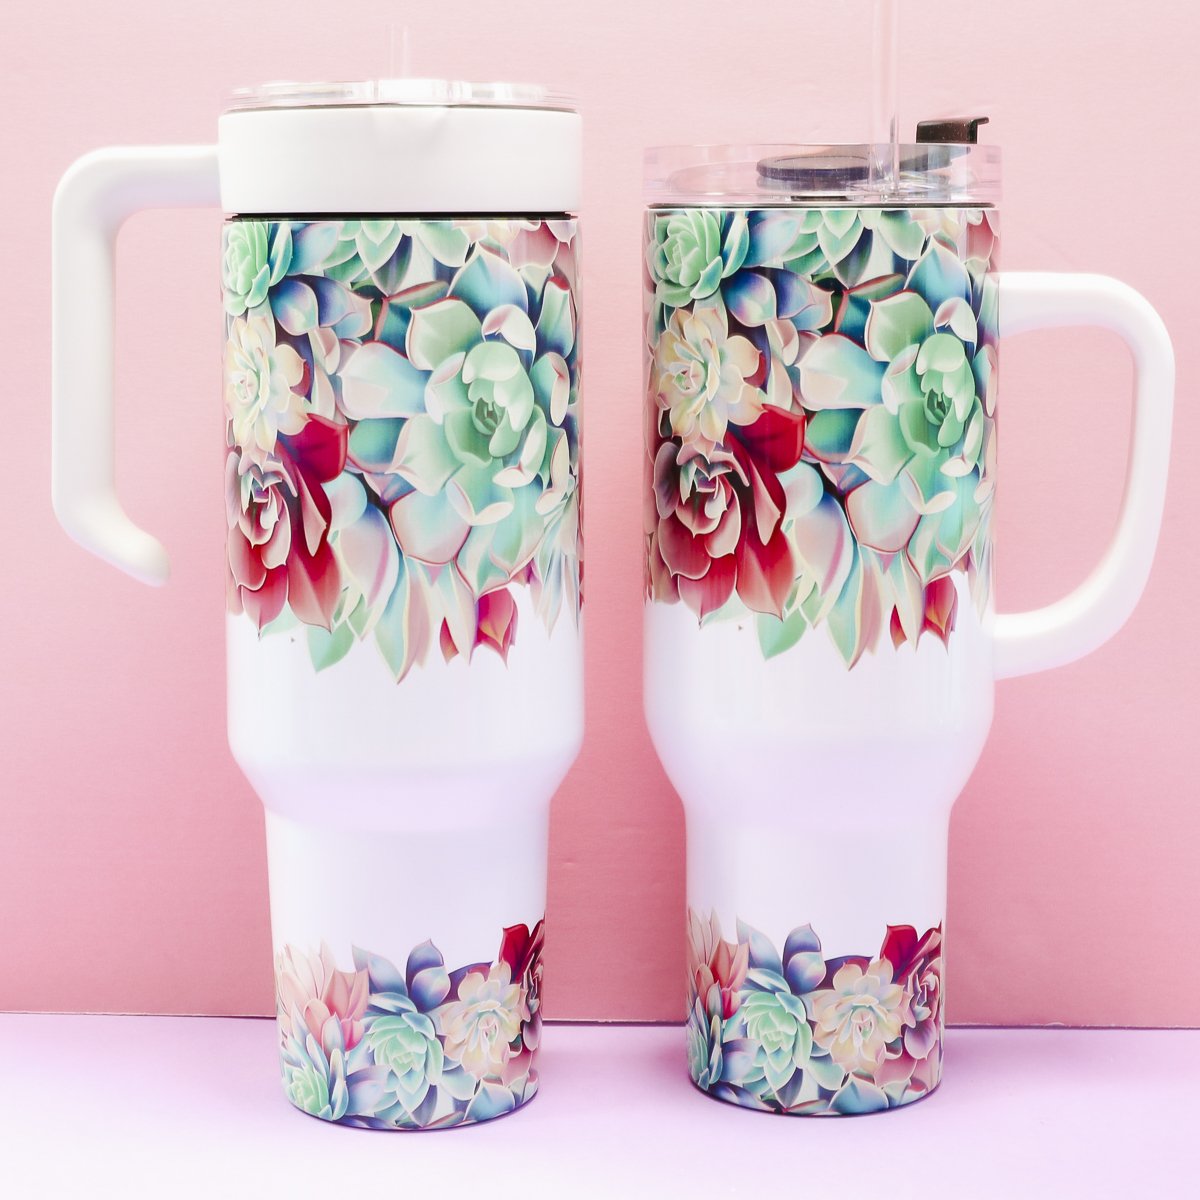
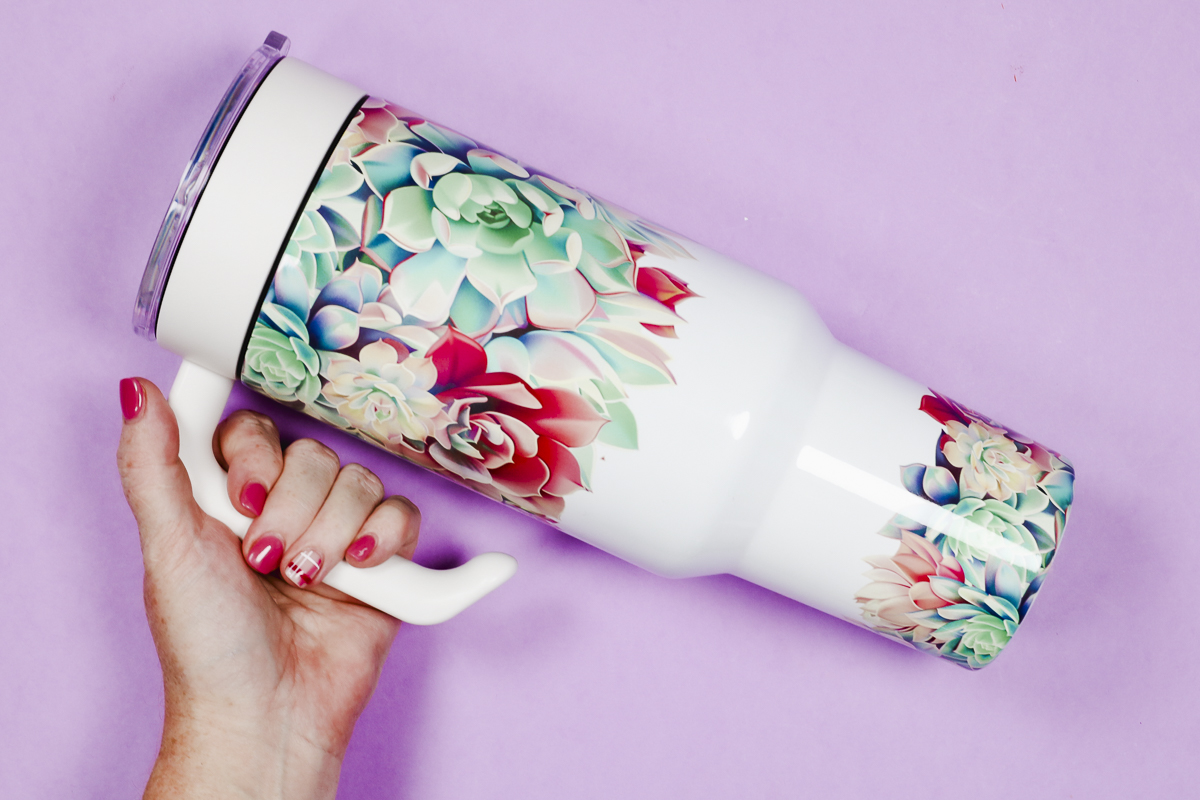
Step 11. Reveal Finished Tumblers
I love how both of these tumblers turned out.
Here is the tumbler that has the metal tabs. I replaced the handle and since the seam is behind the handle it's barely noticeable.
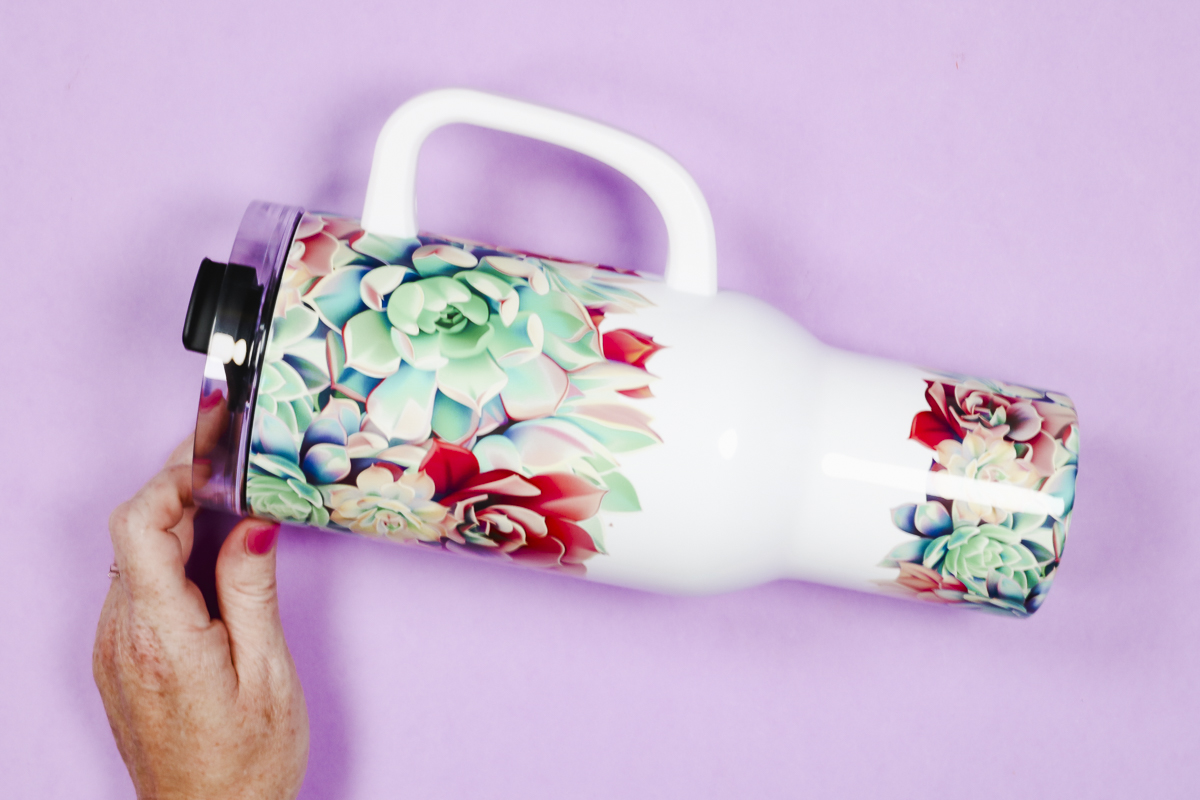
Here is the sublimation tumbler with the twist-on handle. This tumbler also turned out beautifully. I love that I can choose what color handle I want to use.
There are a lot of different color options so you can choose one that coordinates with your design.
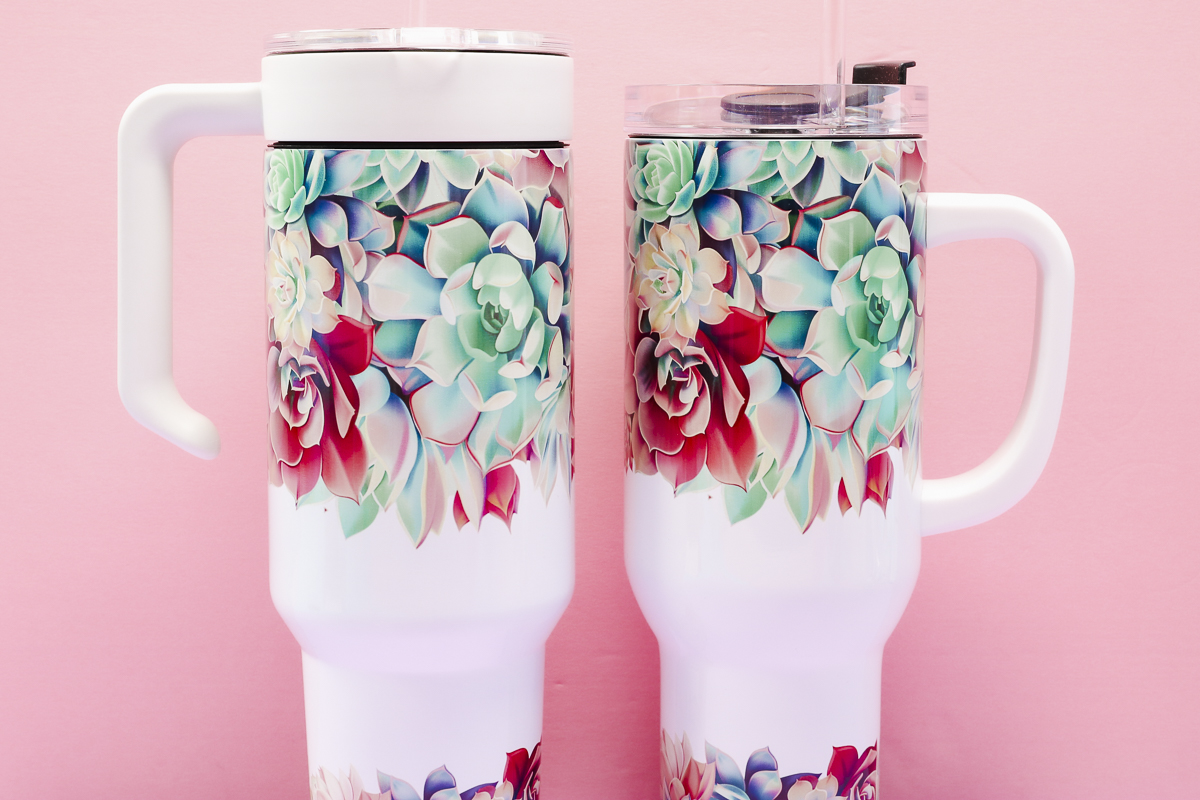
Which 40 oz Sublimation Tumblers Should You Choose?
Let's discuss the pros, cons, and differences between these 40 oz sublimation tumblers.
Both of these tumblers sublimated beautifully. You can't go wrong with either one of them.
Removing and attaching the handle is something I would consider a con. It can be tricky and it definitely takes additional time. If you're creating these for a business, that additional time may be a deterrent.
Both tumblers come with a box which is important if you want to resell them. The Johnson's Plastics Plus box is plain white which means it would need to be opened to see the design.
The MakerFlo box is windowed so you can see the design while it's still inside the box.
The MakerFlo tumbler also comes with a care tag. If you're selling or gifting the tumblers you can drop the care tag right inside the tumbler without any extra work.
You would need to create a care tag to add to the other tumbler option.
I really like how easily the twist handle tumbler came together, it's so easy and the handles are so inexpensive you could have a couple of different ones if you wanted to.
I hope I've answered any questions you have about 40 oz sublimation tumblers. If you have additional questions leave them in the comments and I'll be happy to answer them for you.