Are you ready to take your sublimation to the next level? Keep reading to learn all about sublimation on slate and why you should be doing it today! You will not believe how easy these projects are to make and you will love giving them as gifts to everyone on your list.
Are you new to sublimation? Find my sublimation for beginners post here.
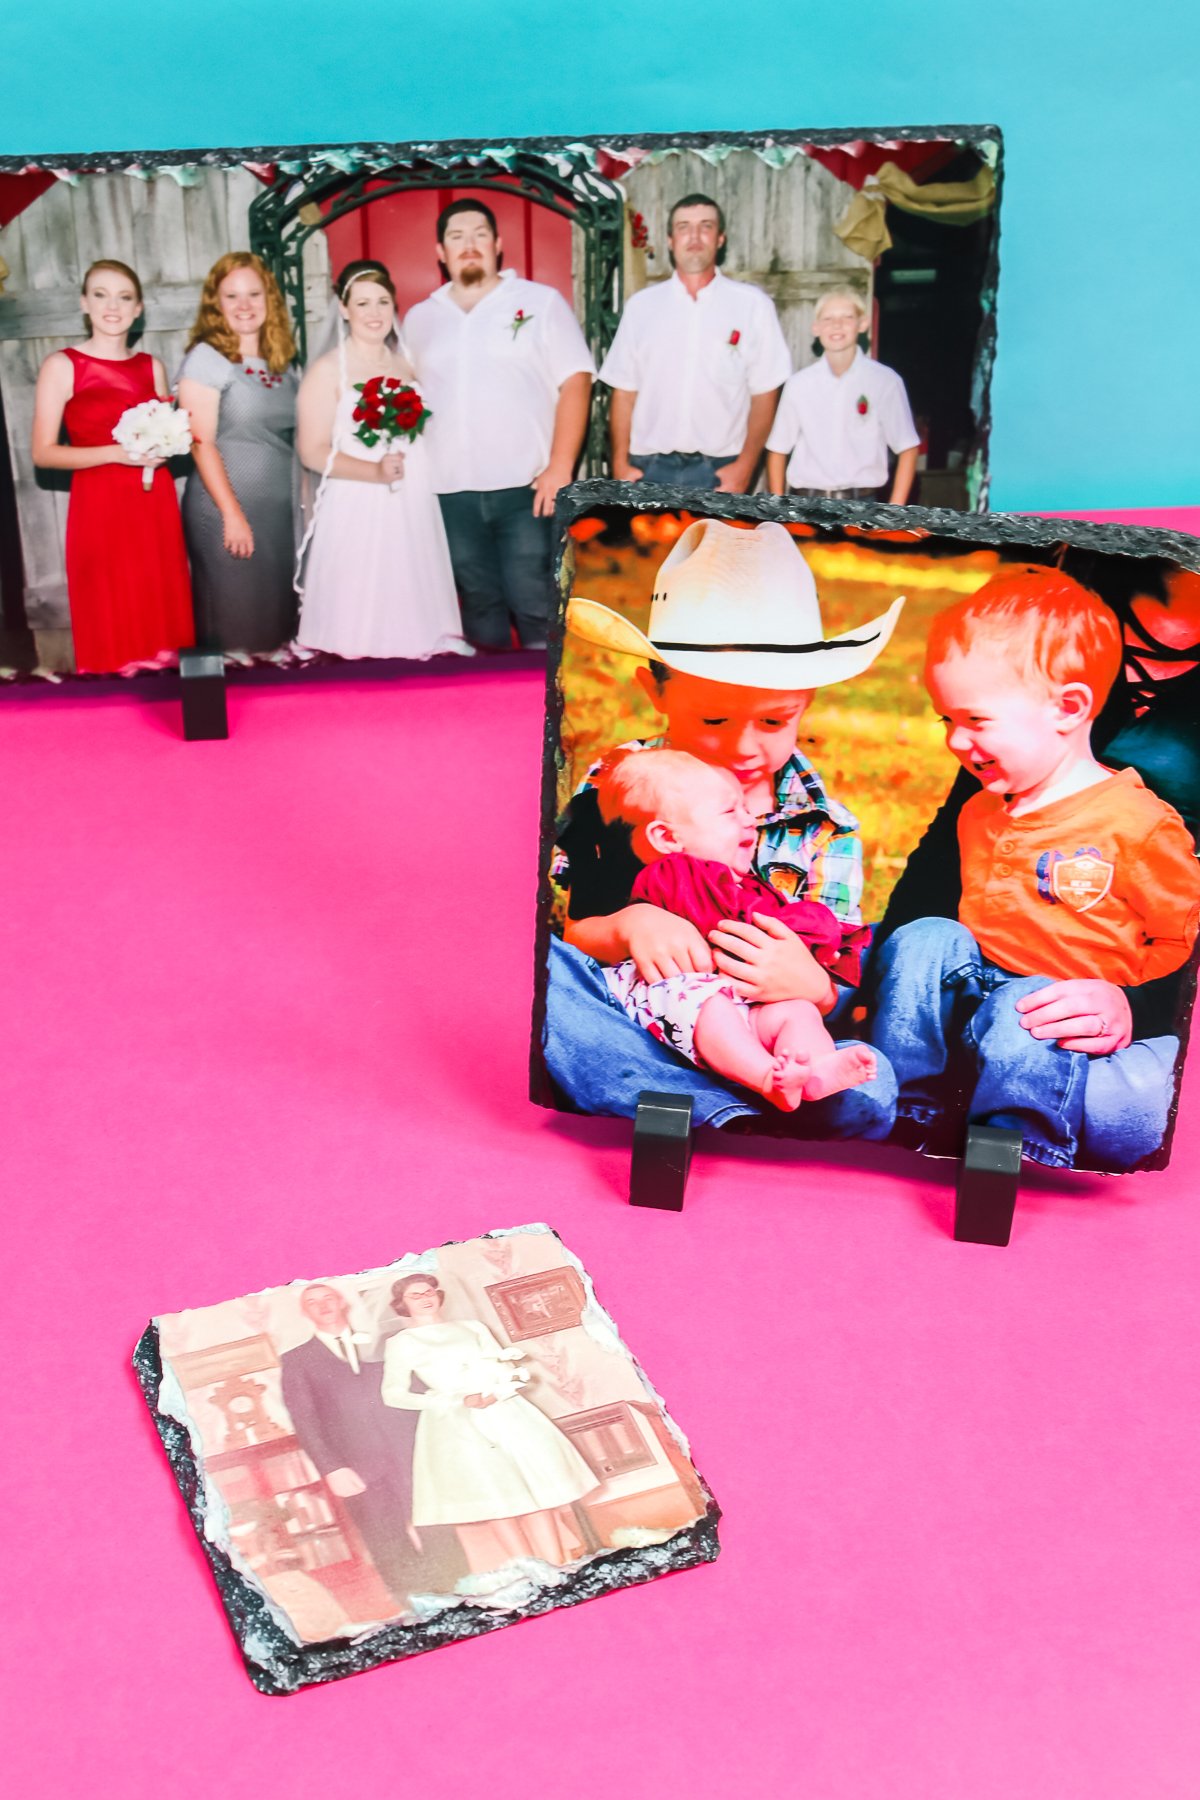
Sublimation on Slate
Slate sublimation blanks are some of my favorites to sublimate on. They're actually not that hard to do once you know my tips and tricks and they make amazing gift ideas. Sublimation on slate creates a very impressive project. Slate sublimation blanks come in a variety of sizes from small coasters to large objects that come with display stands to stand them up.
I think they're a great way to turn your photos into handmade gifts. You can watch me create these sublimation on slate projects, just press play on the video below:
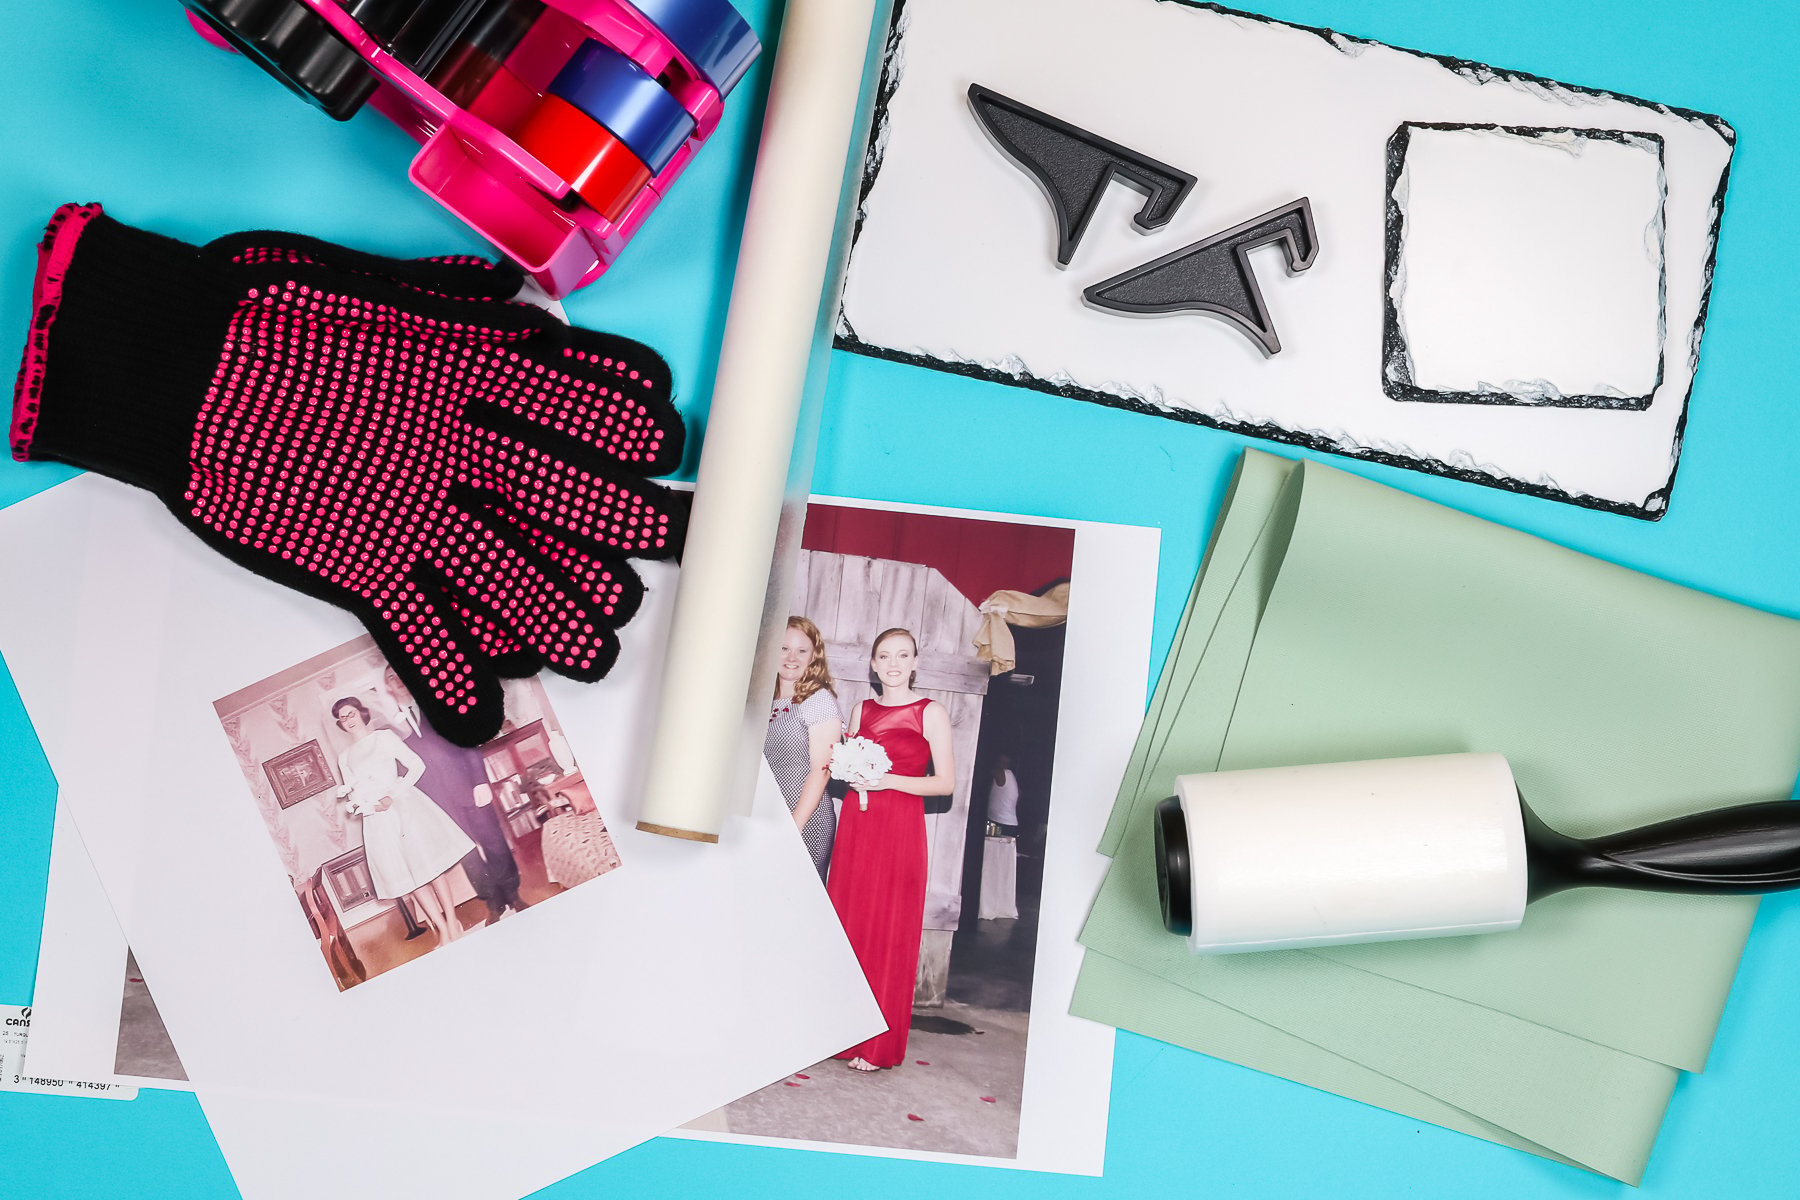
Supplies Needed to Sublimate on Slate
- Sublimation printer
- Sublimation ink
- Sublimation paper
- Heat press or AutoPress
- Lint Roller
- Heat Resistant Tape
- Tape Dispenser
- Artesprix Protective Paper
- Green pad
- Heat Resistant Mat
- Heat-resistant gloves
- Nomex Pad (if using AutoPress)
- Find a variety of slate sublimation blanks here
How to Sublimate on Slate
Before we begin our sublimation on slate project, there are some things you need to know.
The first is the press times are very long for sublimating on slate. I am using my Siser Heat Press and have also used my Cricut AutoPress. Both presses worked well. Because of the long pressing time, I would not recommend doing this with an EasyPress.
The small coaster-sized slate piece has a press time of four minutes and the larger one has a press time of nine minutes. They all require at least medium pressure which would be hard to do for the required time with an EasyPress.
Can you try it? Of course you can. Slate sublimation blanks however are not cheap. That's one of the reasons I put this tutorial together. I highly recommend reading through the whole process before attempting to make one yourself. If you want to experiment with a different process do so at your own risk.
How to Apply a Sublimation Print to Slate
The first thing we need to do for our sublimation on slate project is to clean our slate. All of these slate pieces are sublimation blanks. They have a poly coating that the sublimation bonds to, to create the finished product.
You need to clean your slate really well. I recommend using a lint roller and going over it multiple times to make sure you remove any dirt and dust from the surface.
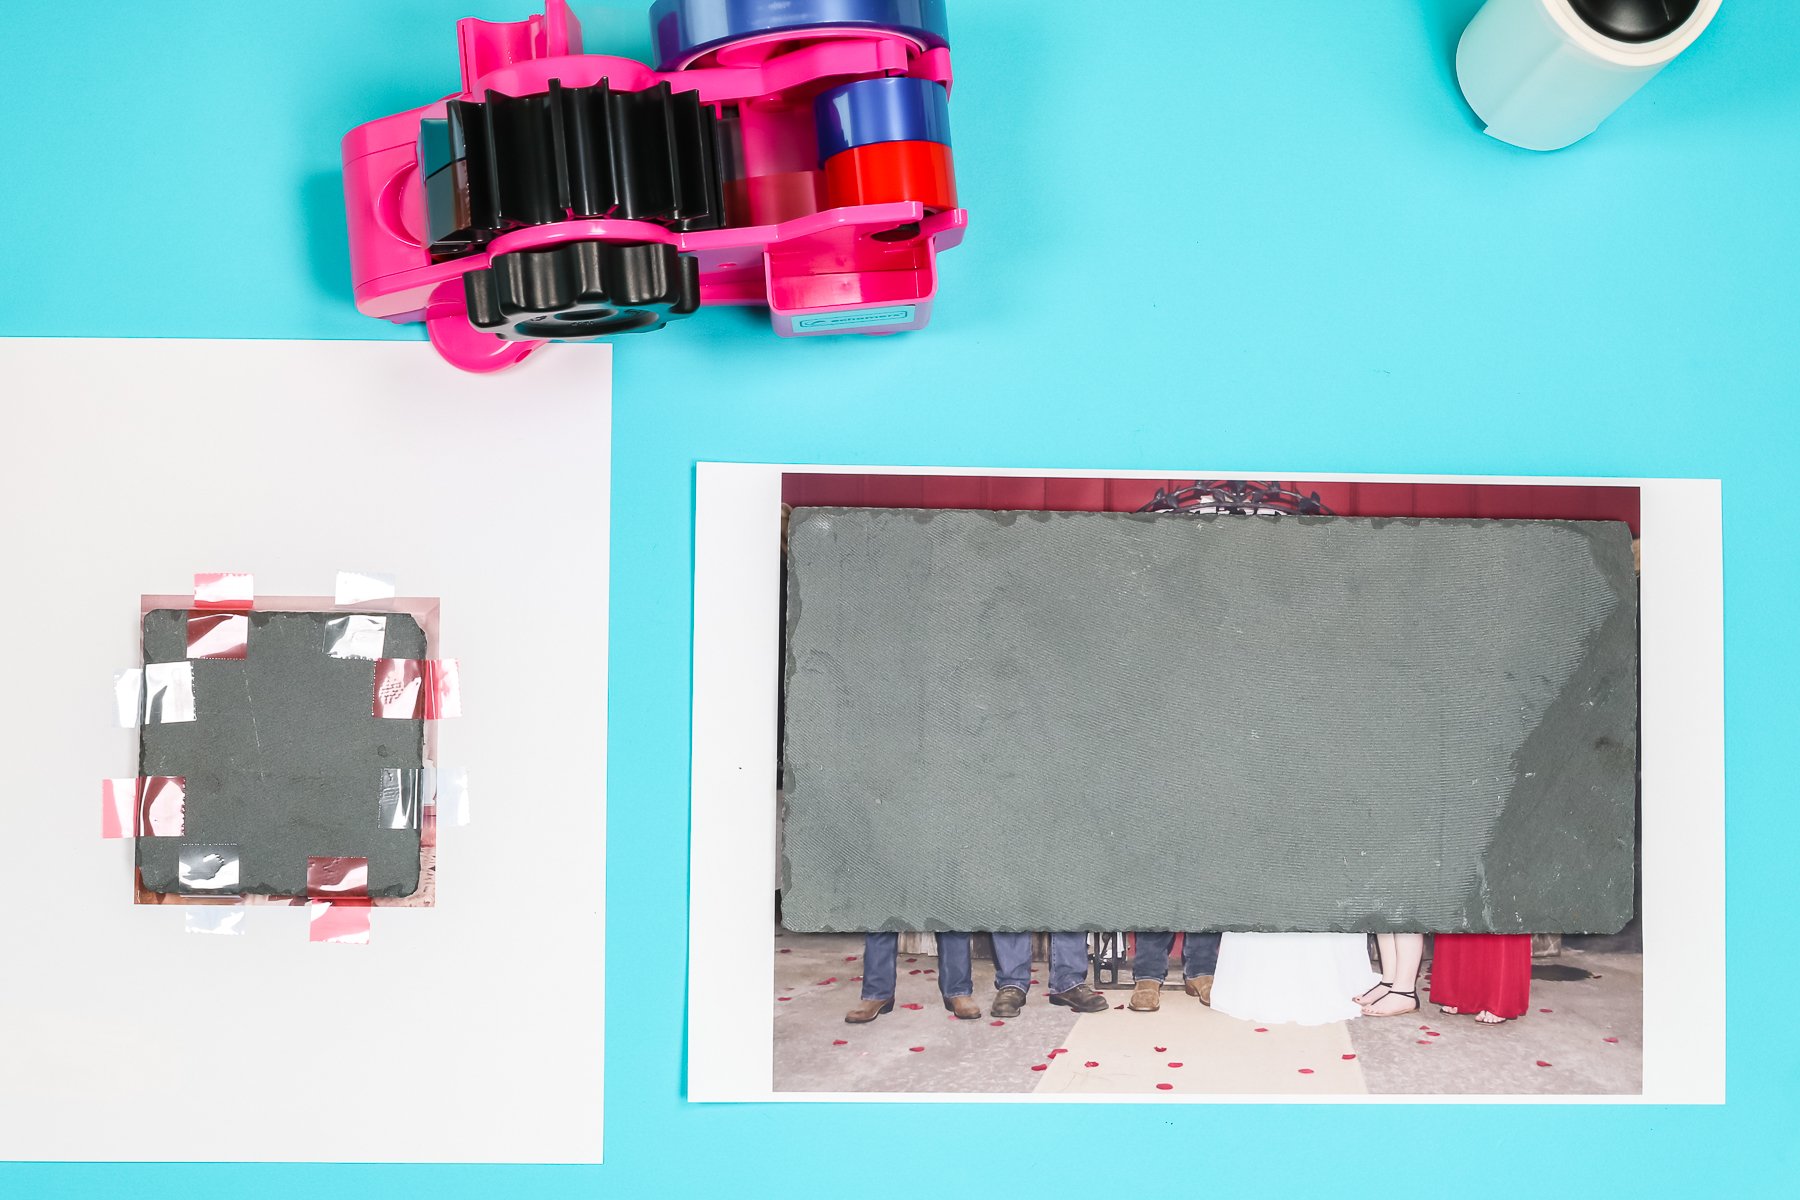
Because these slate pieces have some white areas all the way to the edge you want your sublimation print to be larger than your blank all the way around. Your print needs to be a sublimation print. That means you used a sublimation printer with sublimation ink to print onto a sublimation paper. Print your image larger than your blank and then use heat-resistant tape to adhere the print to the blank really well.
Pressing Sublimation on Slate
When pressing you want your project to be printed side up. I add my items in the following order.
- Protective paper
- Slate Sublimation Blank
- Sublimation print (taped to the blank)
- Protective Paper
- Green Pad
The green pad helps distribute the heat evenly on something like slate that might not be an even surface. Plus, if you've ever sublimated on slate before and had your paper stick to the slate surface, it's because you did not use a green pad. I highly recommend using the green pad and it needs to be a size that is larger than your blank, about one inch, all the way around your slate.
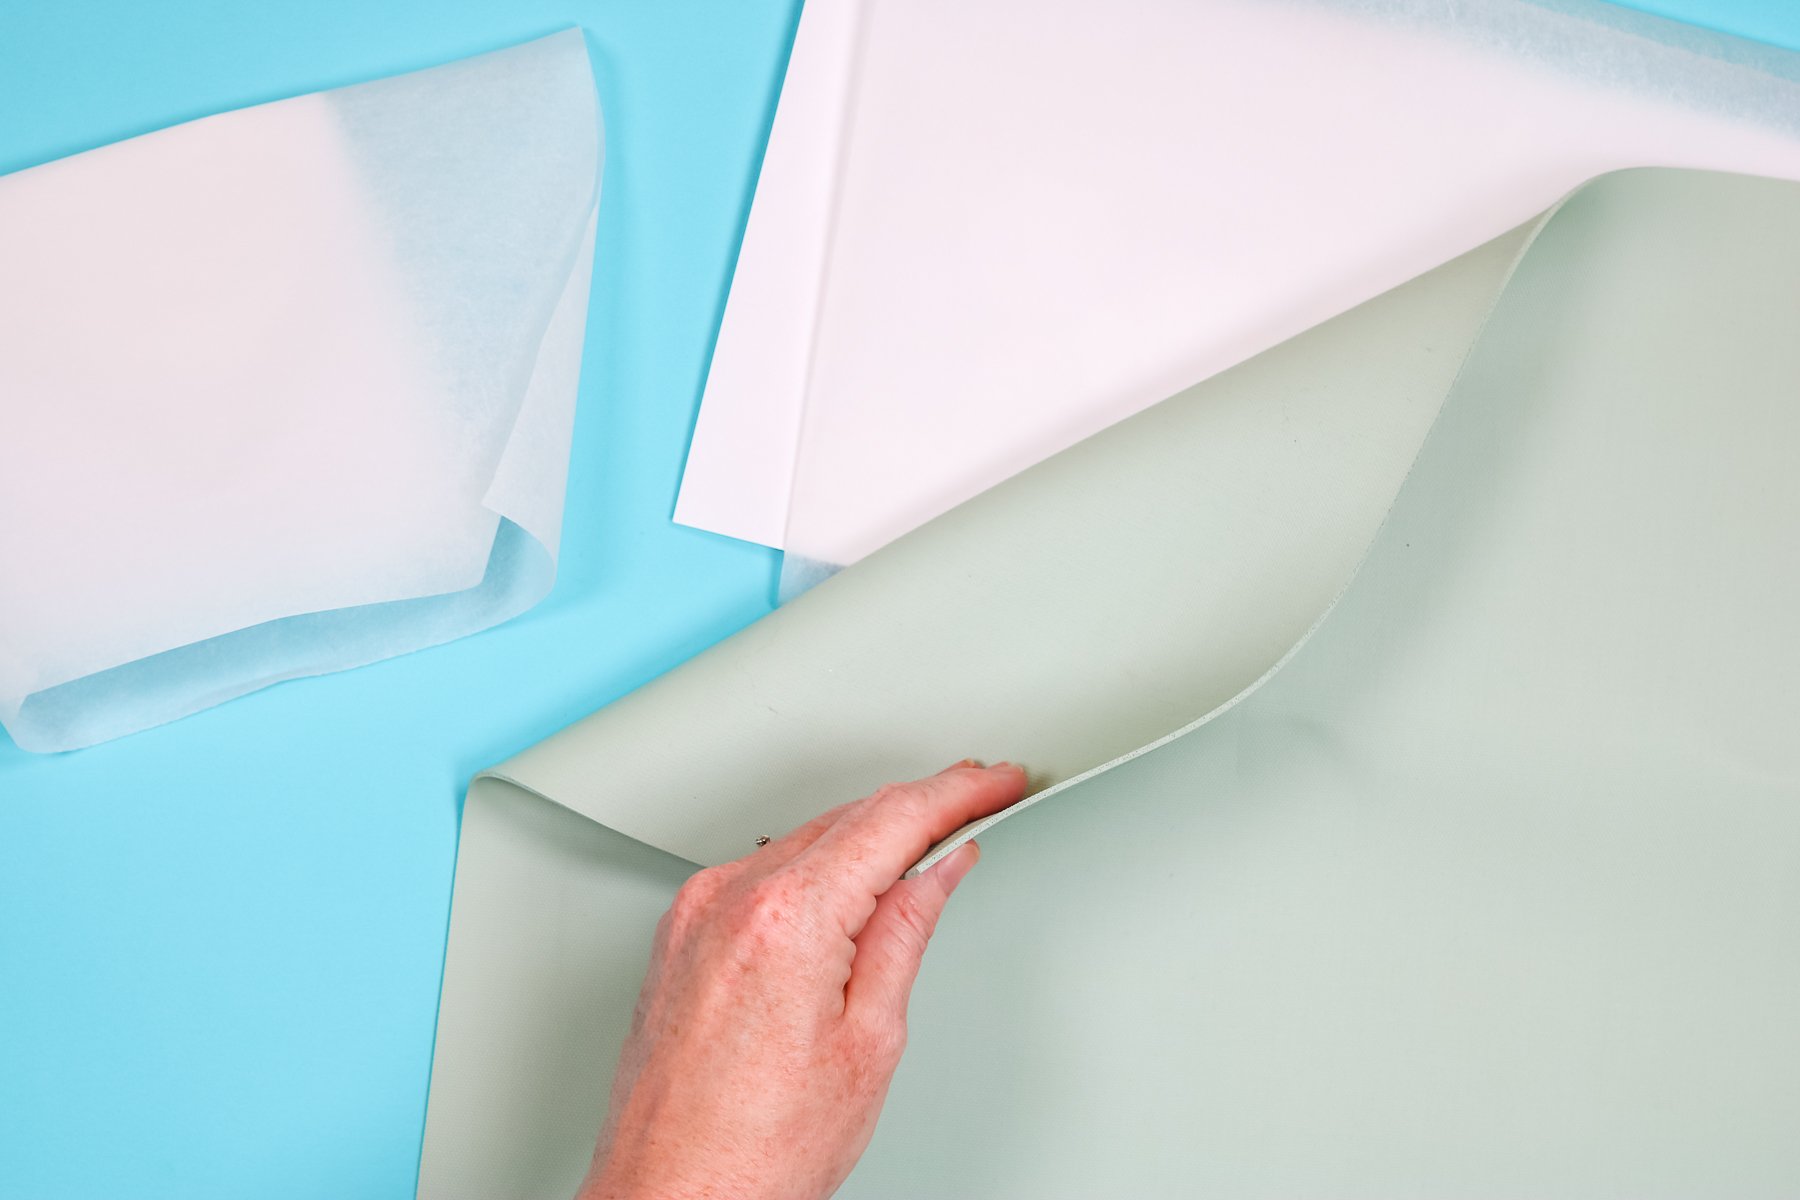
Now that I have everything loaded into the heat press I am going to press for the recommended time. Check the instructions for your slate. I am pressing this large one at 400 degrees for 9 minutes.
Removing Sublimation Print from Slate
When removing the slate from your heat press, you will want heat-resistant gloves. The slate is very hot after pressing. You will also want a heat-resistant mat to set it on.
You can allow your sublimation on slate project to cool before removing the paper or you can remove it while it's warm. Peel off all the paper and tape and you'll see your print on the slate!
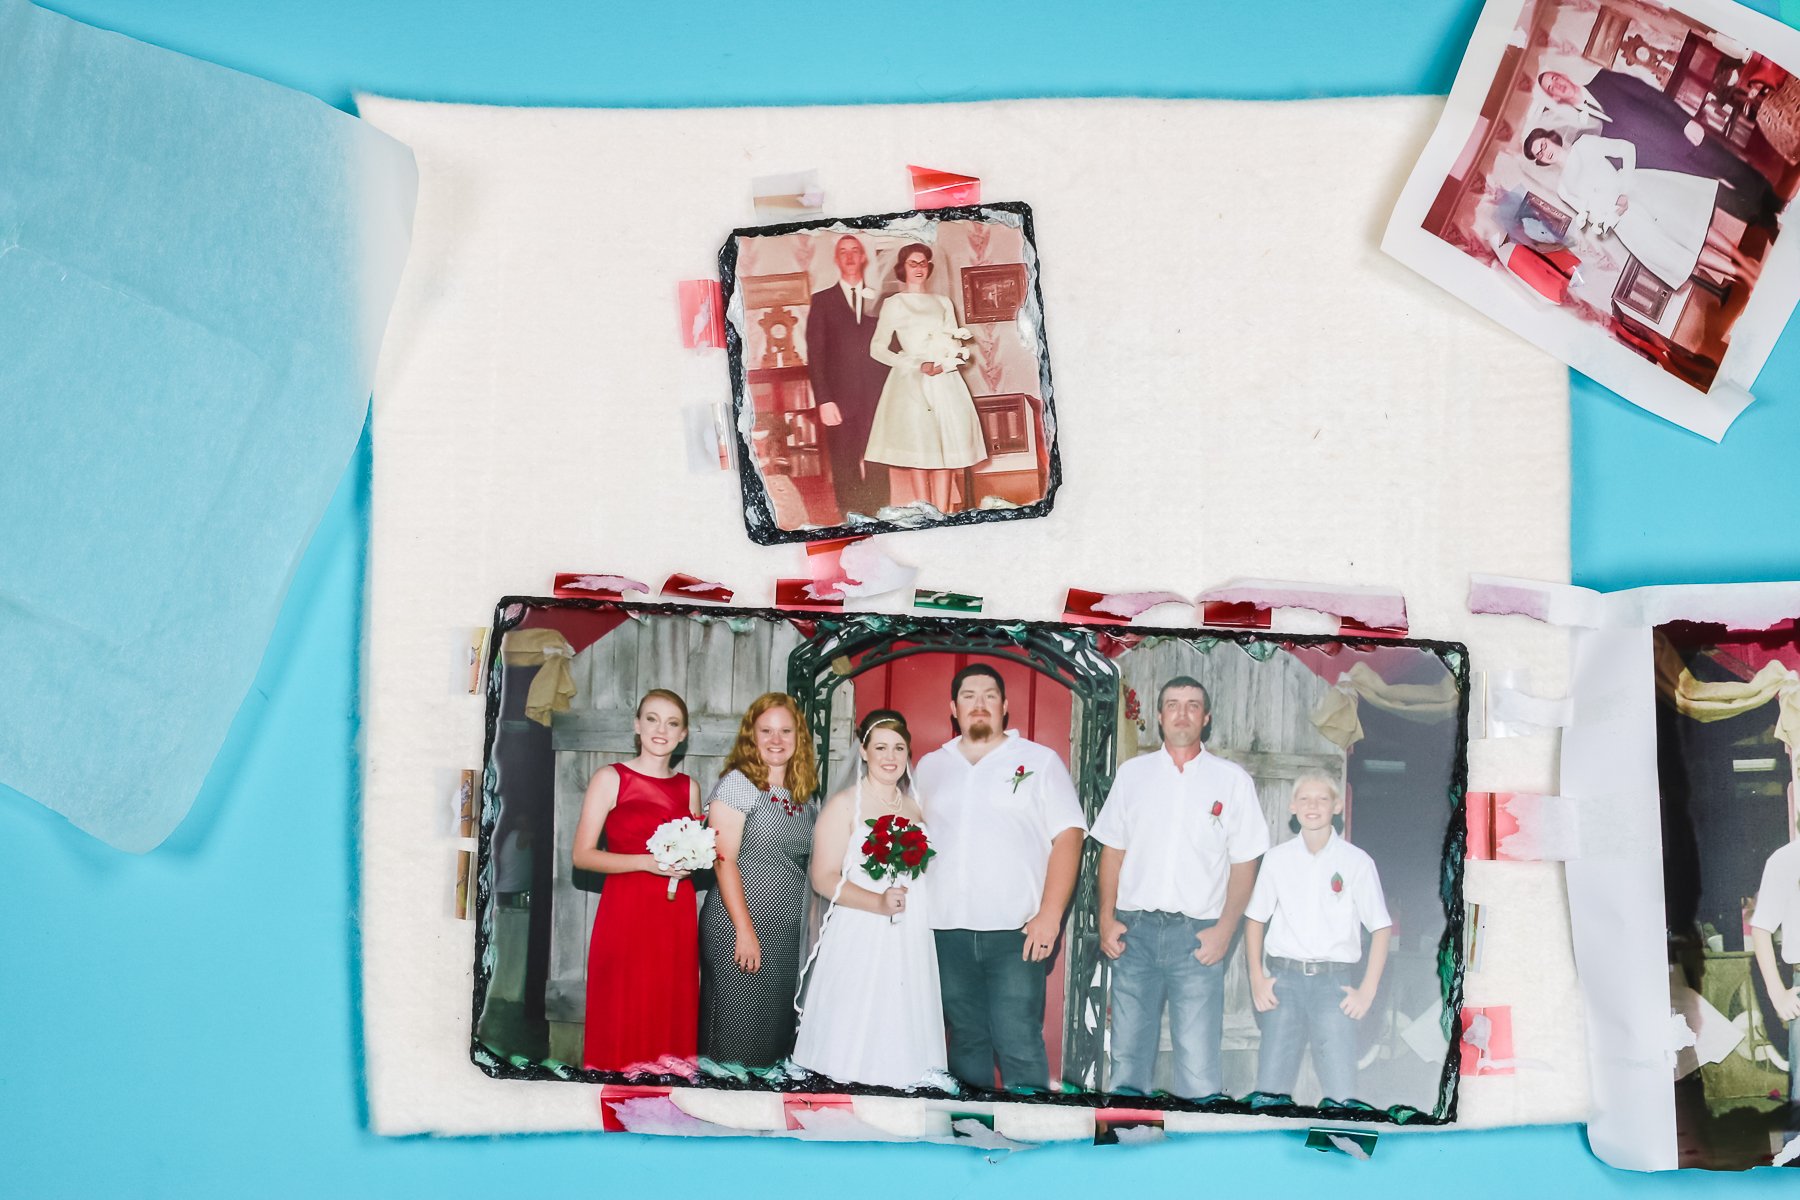
Up Close Look at Sublimation on Slate
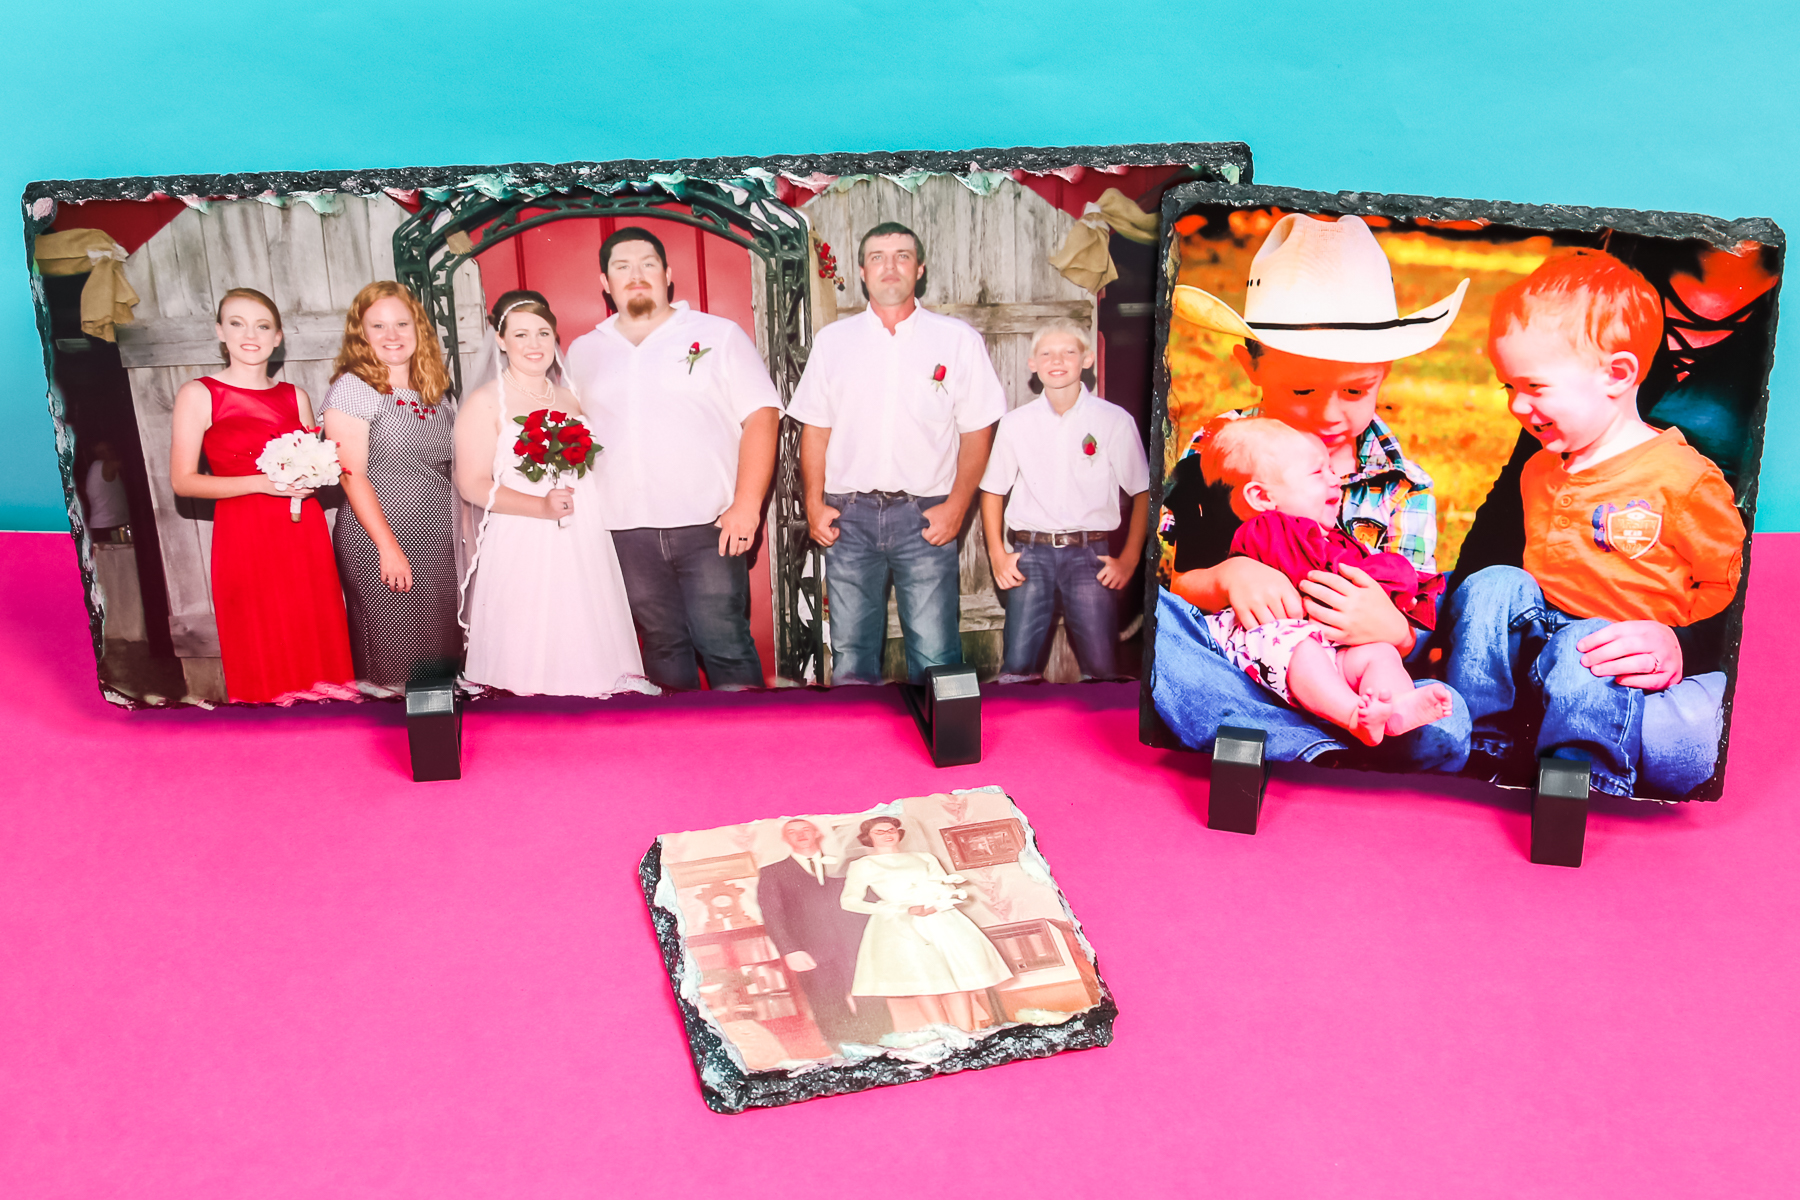
Let's take a closer look at the finished product. I did want you to know that sometimes around these jagged edges, it sublimates well, and other times it does not, so it may look a little shadowed around the edges. That's just the nature of the slate itself and is not a defect at all. So that is just the way it will look, once it's done sublimating.
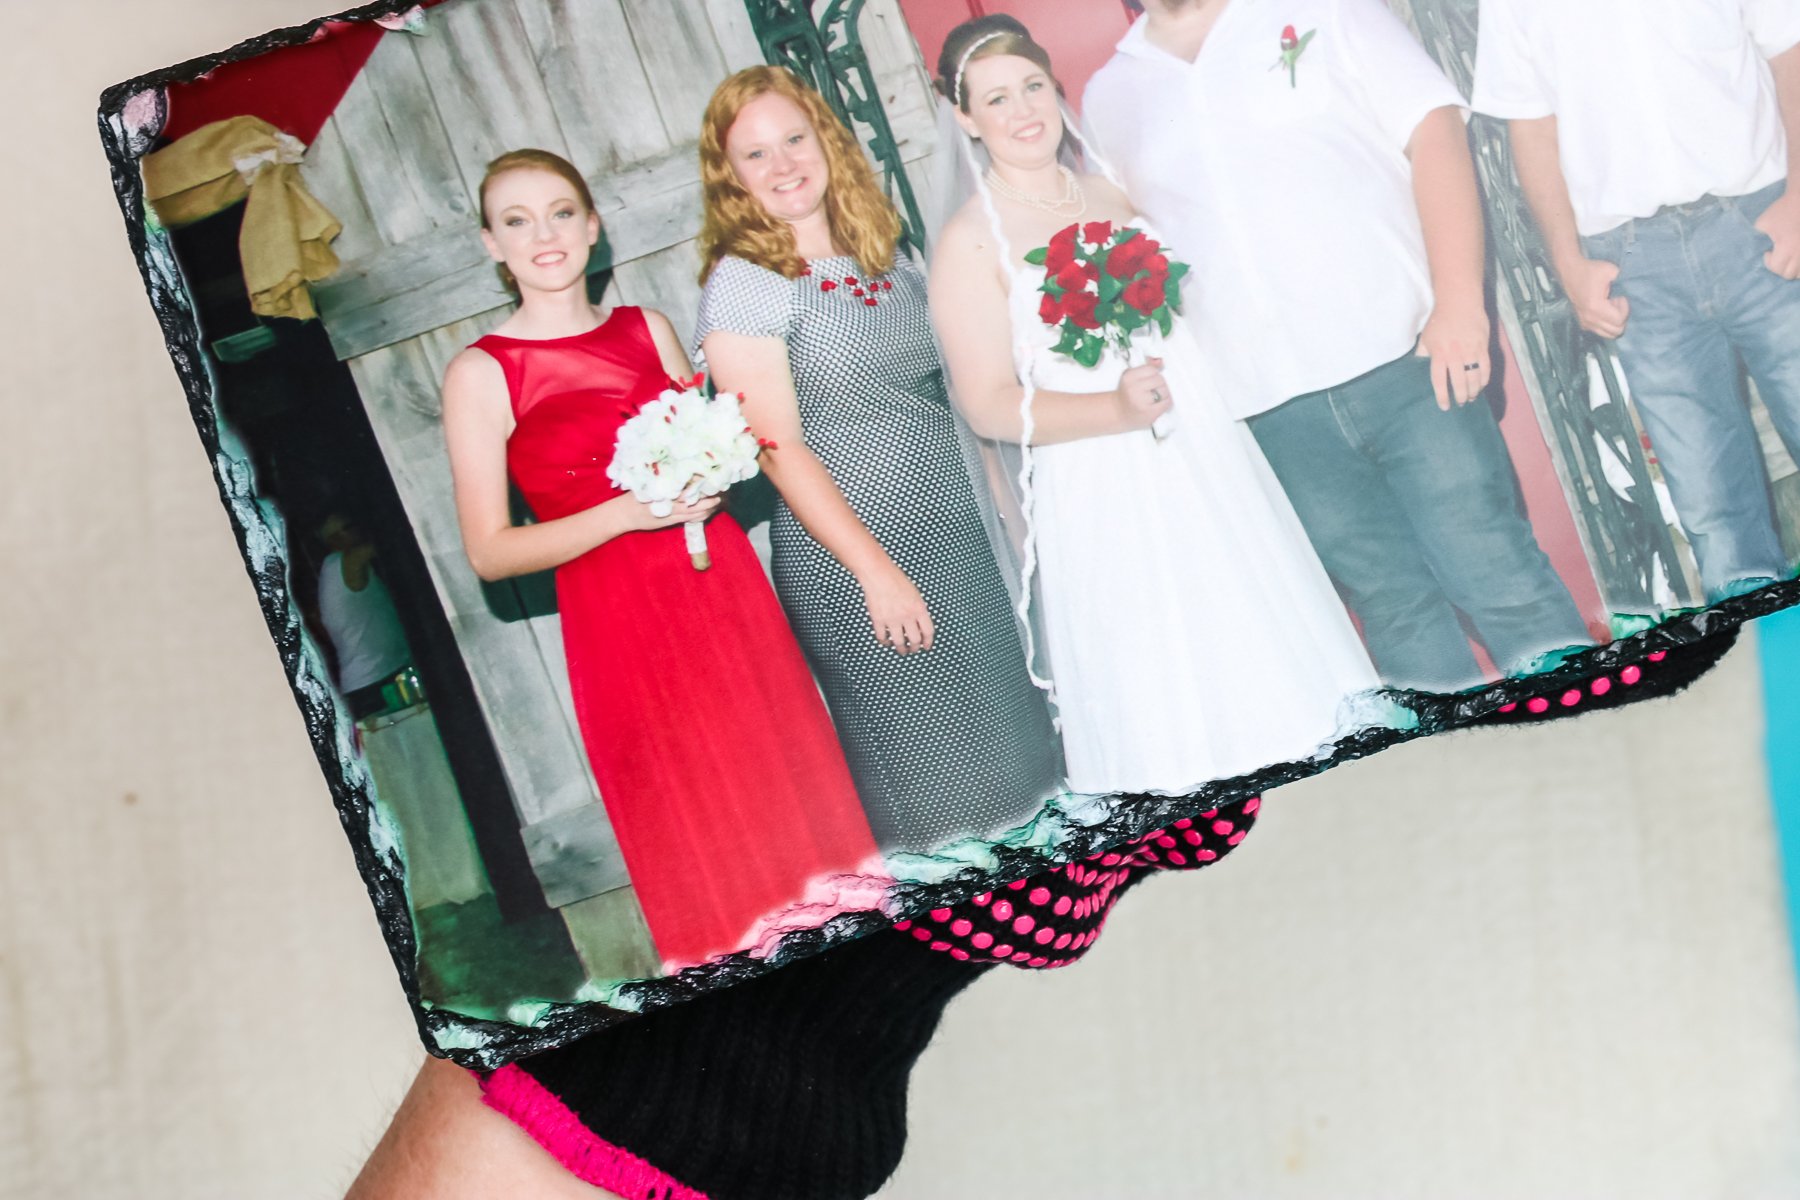
I did press the large one to the limit of my heat press, this is about as wide as that particular heat press would go. I have done these at my AutoPress as well and they worked fine, but because it was to the limit of the heat press, I feel like I did not get a good enough press just right along the edge. This is 11.7″ wide and my heat press is 12″. In the future, I would stay farther from the edge of the heat press.
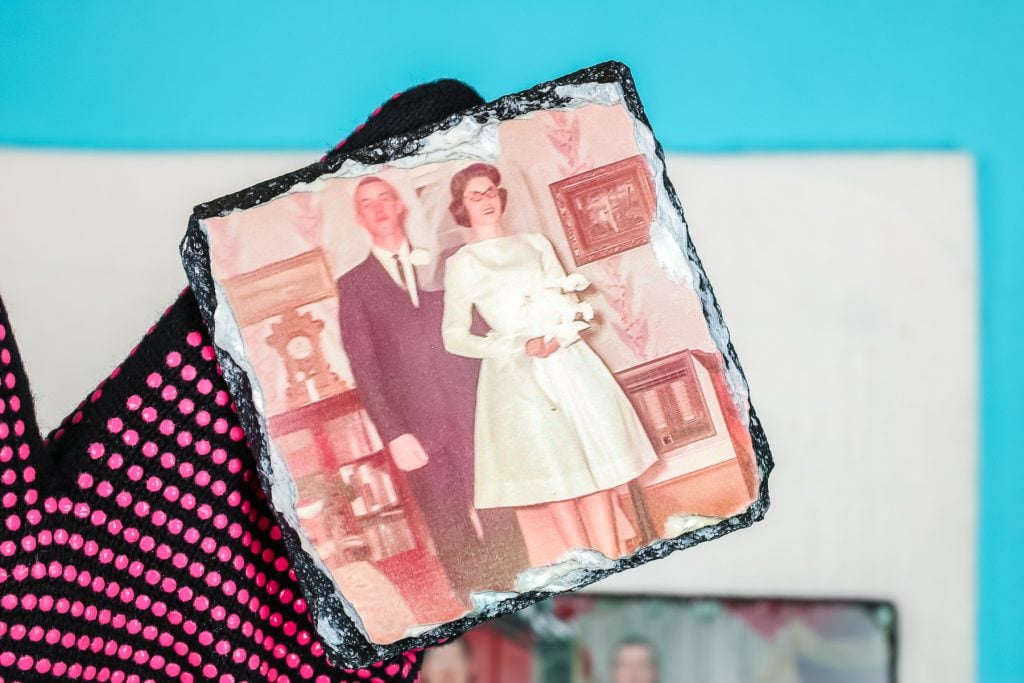
On this one above, you can see the white edges I was talking about before and it really just depends on the piece you're pressing as to how much of that white you will have.
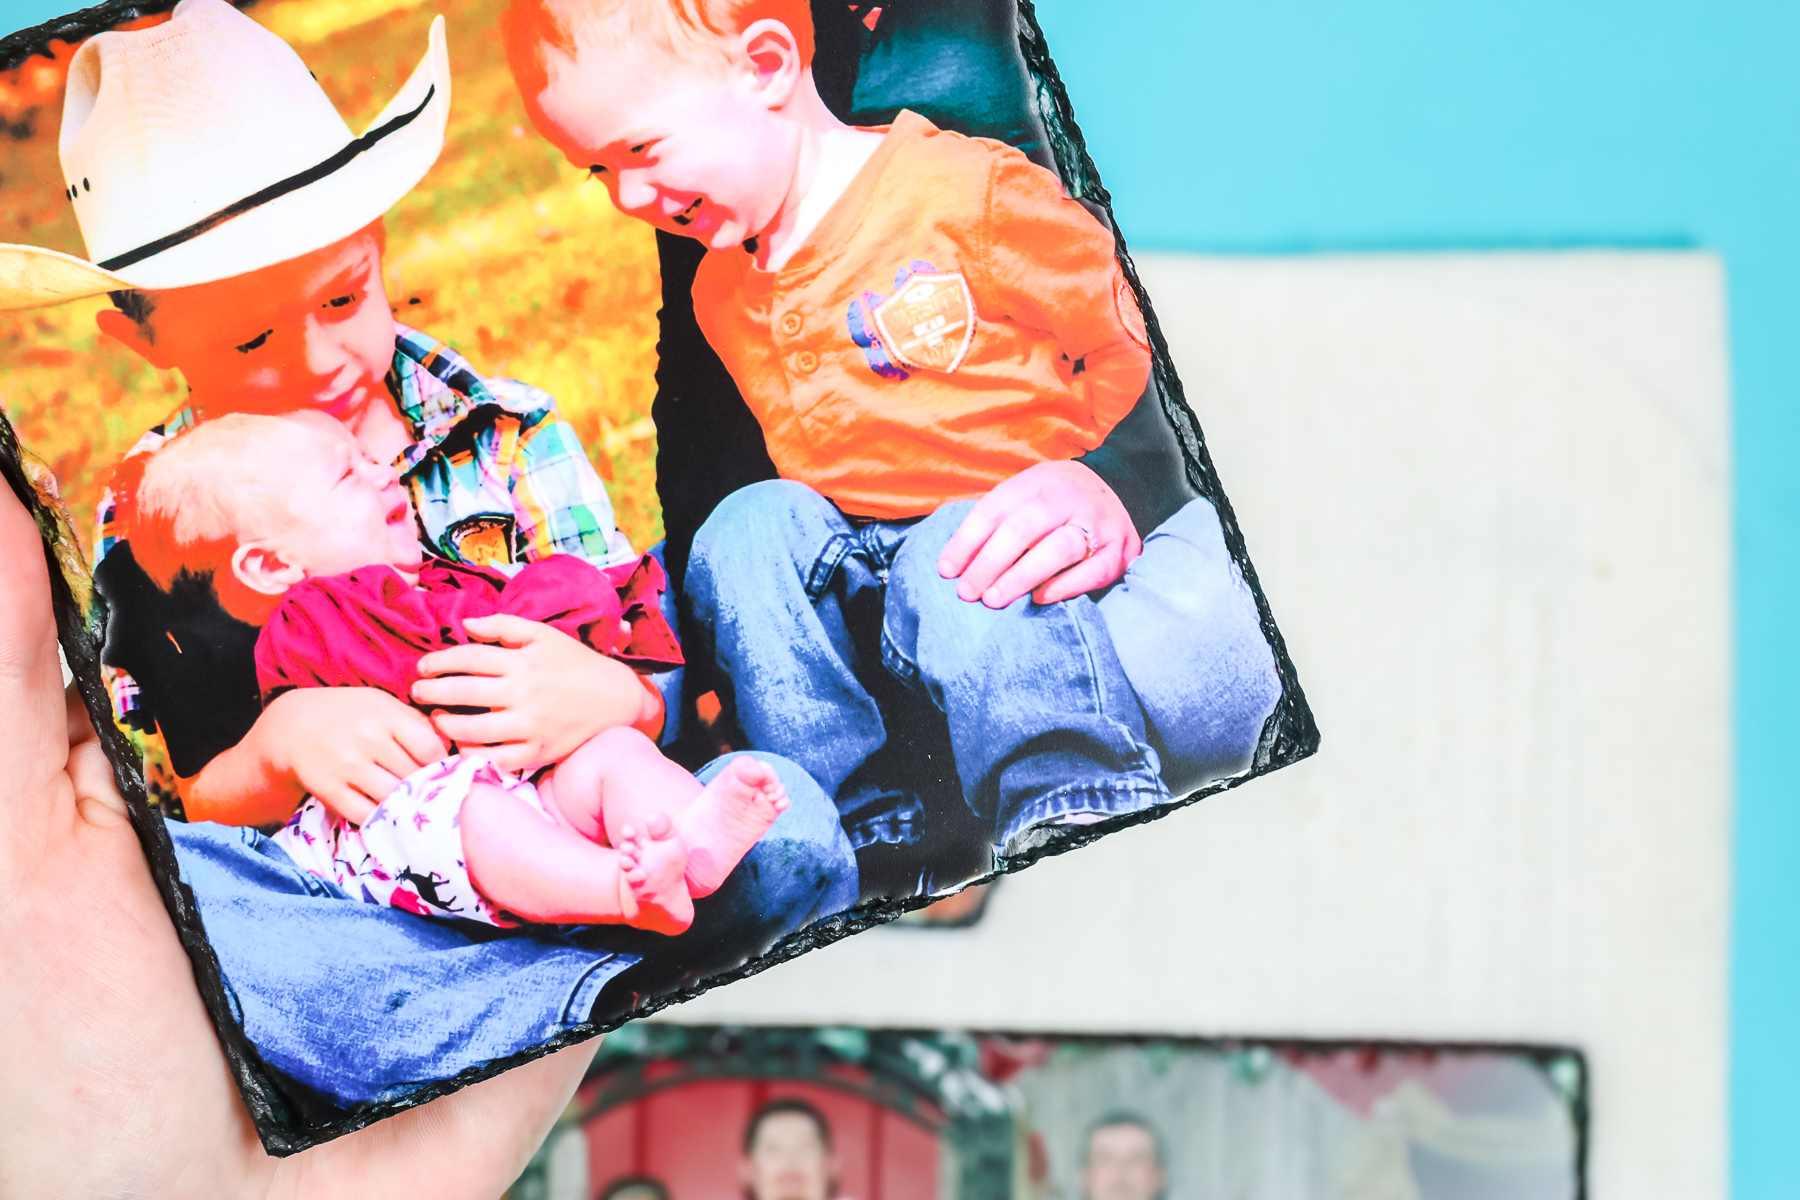
You can see on this one above, a lot of the white sublimated, and it actually looks a little bit better. Earlier I was talking about making your print oversized to accommodate around the edges, and this is why. You can see, right at the bottom right edge just a little bit of white shows. My print was too small or I got it just a little bit off, and there is a white line here at the bottom. Now it's just a little bit, but you can see it, so always make your print oversized for these to accommodate for like the rough, jagged edges.
Final Tips and Tricks for Sublimation on Slate
I really like how sublimation on slate looks. I think adding photos to the slate makes a beautiful finished project and they're perfect for home decor and gifts. The slate sublimation blanks are expensive. Make sure you read through any instructions that come with your blank to confirm time and temp settings.
Here is a wrap-up of my favorite tips and tricks for sublimation on slate:
- Make sure your print is oversized. You want it to hang off the edge all the way around.
- Make sure and use that green conductive pad. They are expensive but they can be used over and over again and are so helpful when using slate or even tile blanks that may be uneven. Make sure you always use a protective paper between your print and the green mat to protect it from any ink transfer.
- Follow all the tips and tricks that I list here. Make sure you follow the time and temp recommendations that come with your slate sublimation blank.
If you have any questions about sublimation on slate leave them in the comments. I'm happy to answer them. If you're new to sublimation sign up for my free sublimation class here. You can also join my sublimation Facebook group here.



“Thank you, I really appreciate you taking the time to express that.”
You’re welcome.
Hi ~ is your green pad 1/8” or 1/16”?
Thank you!
Kim
1/8 inch!
I have printed a few slates with no problems, but I’m having trouble with an image I’m working on right now. I’ve learned a few things watching your You-tube videos when I bought my cricut (thank you), so maybe you can help me with this!? My print is faded on the sides of the slate, I’m not sure if it’s just a bad quality photo or if it’s something else if there’s other things to try? I have tried to edit the photo to 300 dpi but still no luck. I have a silicon pad, and I taped the transfer paper all the way around really well. It’s not white like the image isn’t big enough, it’s faded. If you have any thoughts or ideas on possibilities I would really appreciate it! Thanks
I’m not 100% sure I understand the problem you’re having. Are you trying to sublimate white? If there is white in your image that portion will be the color of your slate. If you’re having problems with fading on the edges have you tested your image on something else? Is it possible you’re not getting enough pressure or heat to those portions of your slate piece?
Hi Angie,
I’m new to slate sublimation of photos onto slate. I’ve successfully sublimated on 6×6 and 5×11 slate pieces. I’m running into an issue when sublimating on 12×12 slate. I have a Fancier Studio heat press that I set at 415 F. for 630 seconds for the 12 x 12 slate. Most of the photo came out perfectly, but the one side sublimated with a “ripple” effect radiating from 3 inches in and extending to the edge, resulting in faded “waves” over the photo with a very light ghosted image beneath. I don’t know what’s causing this?
What size is your press? It’s possible the 12×12 piece is just too large to get even heat across the whole surface.
Love your video’s = thanks for all you do. Curious if anyone has found a use for messed up tiles? i have some from my learning curve process – can they be lightened the way tumblers can for reuse? open to any suggestions – hate to throw them away.
Thank you so much. I have not personally tried that yet but you could. Just make sure you protect your surfaces.
where can you get the green pad?
Hi, thanks for asking! The link to the green pad is right in the blog post 🙂
Really appreciate this site, have learned a lot.
Hoping you can help… First slate came out great, 2nd one, not so much. Had same image, press, time, etc. The best way to describe what has happened is it looks like there is a dirty film or something on part of the image (think washing a window at the gas station with that dirty squeegee water). You can only see it at certain light angles, but it is definitely there. Cleaning / washing doesn’t help… looks fine until the water dries and then it’s back.
I don’t know if it’s bad enough to redo it, but I definitely notice it. Just trying to understand cause for future (less pressure, time, heat, etc..)?
It sounds like maybe there was some moisture in the slate that is affecting your finished product. That’s really the only thing I can think of that may have caused this issue. I’m sorry that happened, I know how frustrating it can be!
appreciate the information, i keep getting white spots on my slates, what am i doing wrong?
It’s very likely moisture in the slate itself or you don’t have enough pressure. Sometimes it can be the quality of the sublimation blank.
Hey Angie – I have a question that may or may not be possible with slate. I have a stack of slate coasters I would like to sublimate onto, however, they are raw, no sublimation surface on them. Is there a way for me to turn them into sublimation blanks myself? If so, what products do I need? Thank you so much!!! BTW, I love your videos!
I have not found a good way to do this at home.
What do you use to align the print equally with the edges?
I make my prints oversized so they cover the entire surface.
Hello,
I have tried sublimation on slate several times and the colors never come out right (gray turning into orange). I have tried several different times, settings and pressure but nothing seems to work. Also in a lot of my sublimated slate the corners have a white ghosting effect. I thought it was because i didn’t have the right pressure so I added heat resistant tape, only to find tape marks on my finished project…
Can you tell me what I am doing wrong?
Are you using a silicone or green rubber mat to help conduct the heat correctly?
Hi Jenn. I have been asked to do an 8 x 8 slate for a lady. The graphic is a green logo on a white background. I have done many slates but none with a white background. My problem is without a colour on the background will it work with just the logo and no coloured background. She wants the white background to stay. Thanks
Sublimation printers do not print white. Anything that is white in the logo will be the color of your blank. If your slate has a white coating then everything white in your image will be white. I hope that helps!