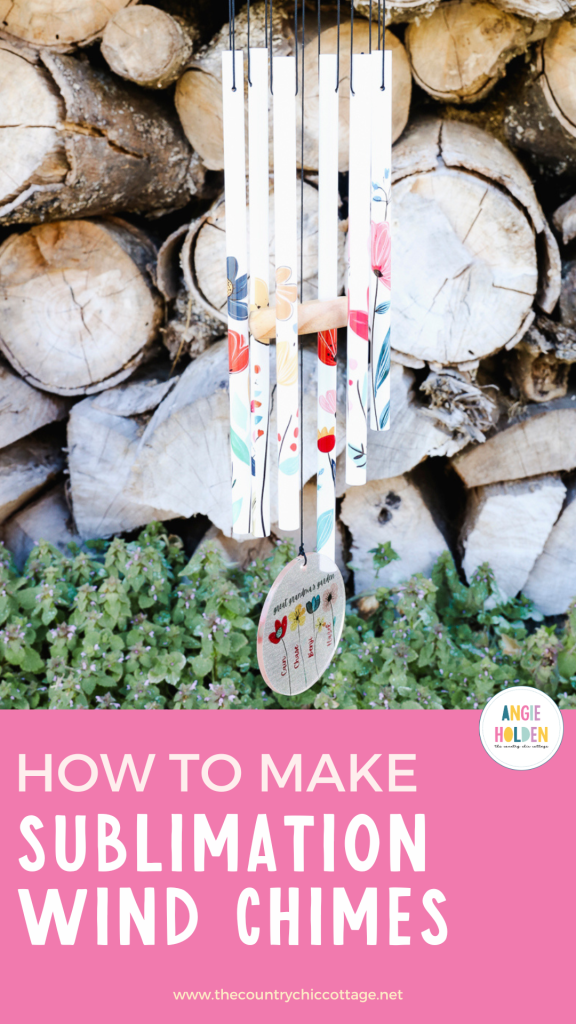
Are you ready to make custom sublimation wind chimes? This is such a unique gift, and it turned out perfectly. Trust me when I say that mom will love this sublimation gift idea!
If you’re new to sublimation, check out my Sublimation Beginner’s Guide to get started.
This project is not difficult, but it does have multiple steps, and these do require assembly. Take it one step at a time and you to can make personalized wind chimes for your home!
You may find it helpful to watch the video process by pressing play on the video below.
How to Make Sublimation Wind Chimes
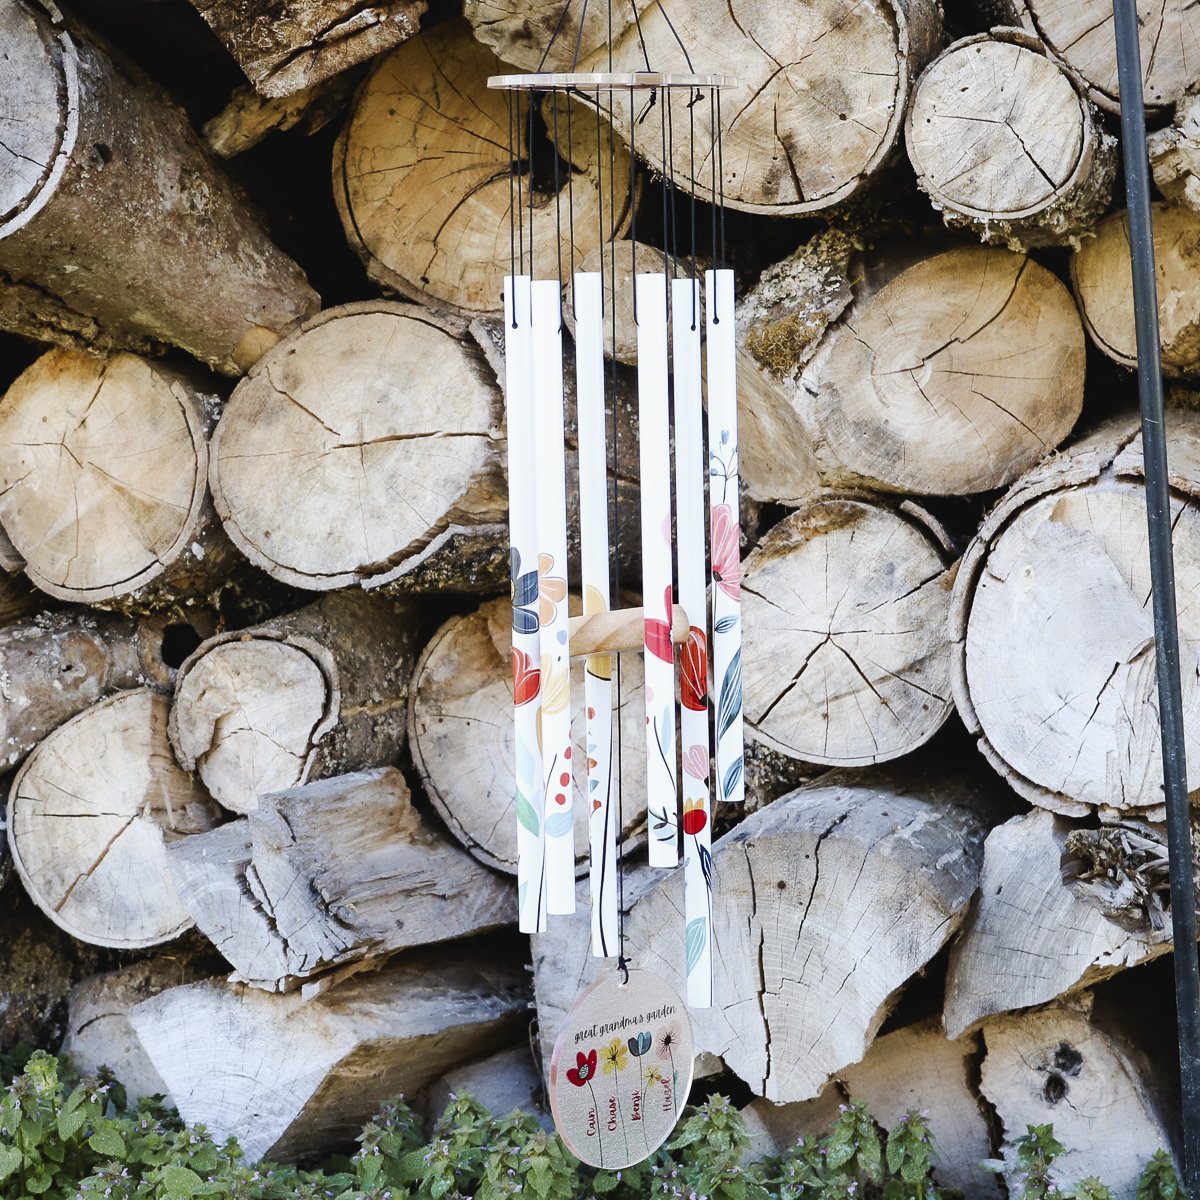
I am making my wind chimes with a flower garden theme for a great-grandma. You can use whatever designs you want with this project.
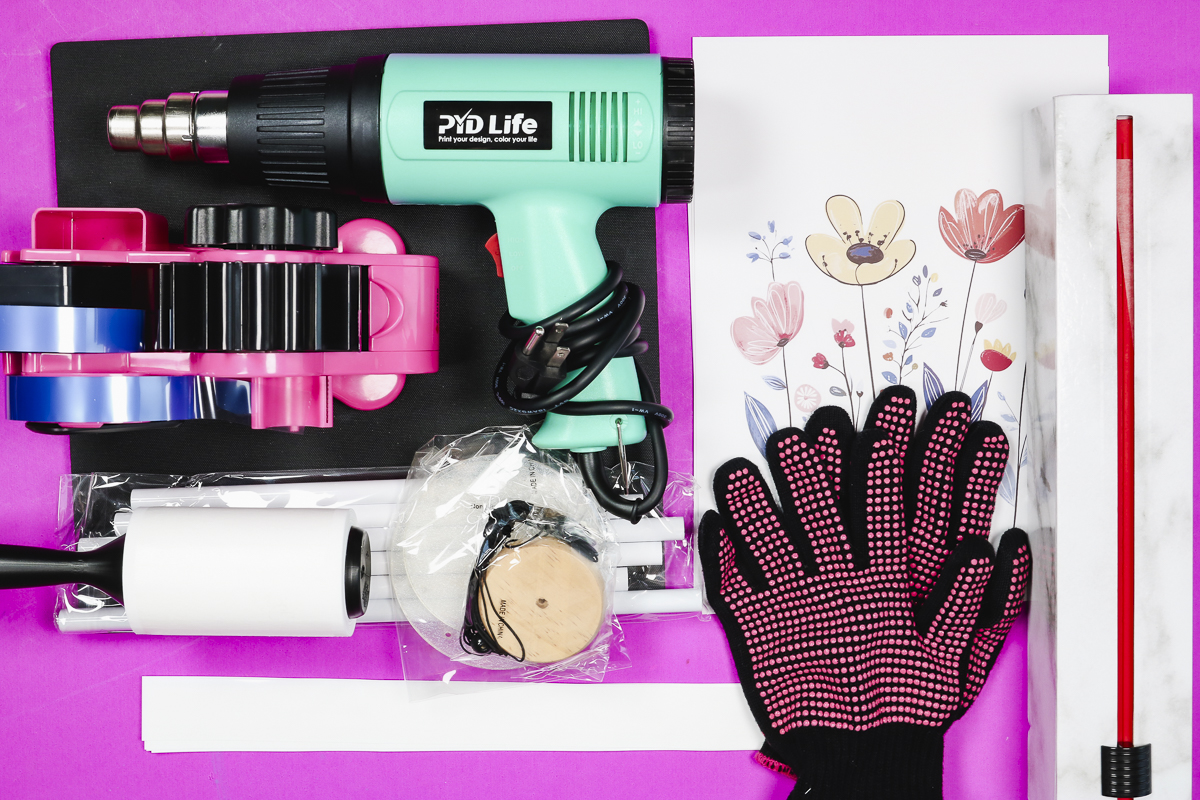
Supplies Used
- Free Floral Designs
- Sublimation Wind Chimes (NOTE: These wind chimes are a sublimation blank. You cannot just grab any set of wind chimes and sublimate them. They need to have a special coating on them that allows them to accept the sublimation ink.)
- Brother Sublimation Printer
- Sublimation Paper
- Lint Roller
- Heat Resistant Tape
- Heat-Resistant Gloves
- Heat Resistant Mat
- Sublimation Oven
- Paper Cutter
- EasyPress
- Heat Gun
- Protective Paper
NOTE: You need both a sublimation oven and some type of heat press to make this project. I was able to fit the tubes in my smaller sublimation oven, but you’ll want to check the length before you begin.
Step 1. Create Design in Canva
We will be sublimating multiple parts of these wind chimes. Each chime and the top and bottom circles will all be sublimated. First, let’s make the design for the discs.
I am using Canva to create my sublimation designs. First, I need a design for both of the flat discs and for each of the tube pieces.
I created a custom-sized canvas and set the size to match my sublimation paper. My paper is 8.5 x 11 inches.
Click Elements and add a circle to the canvas.
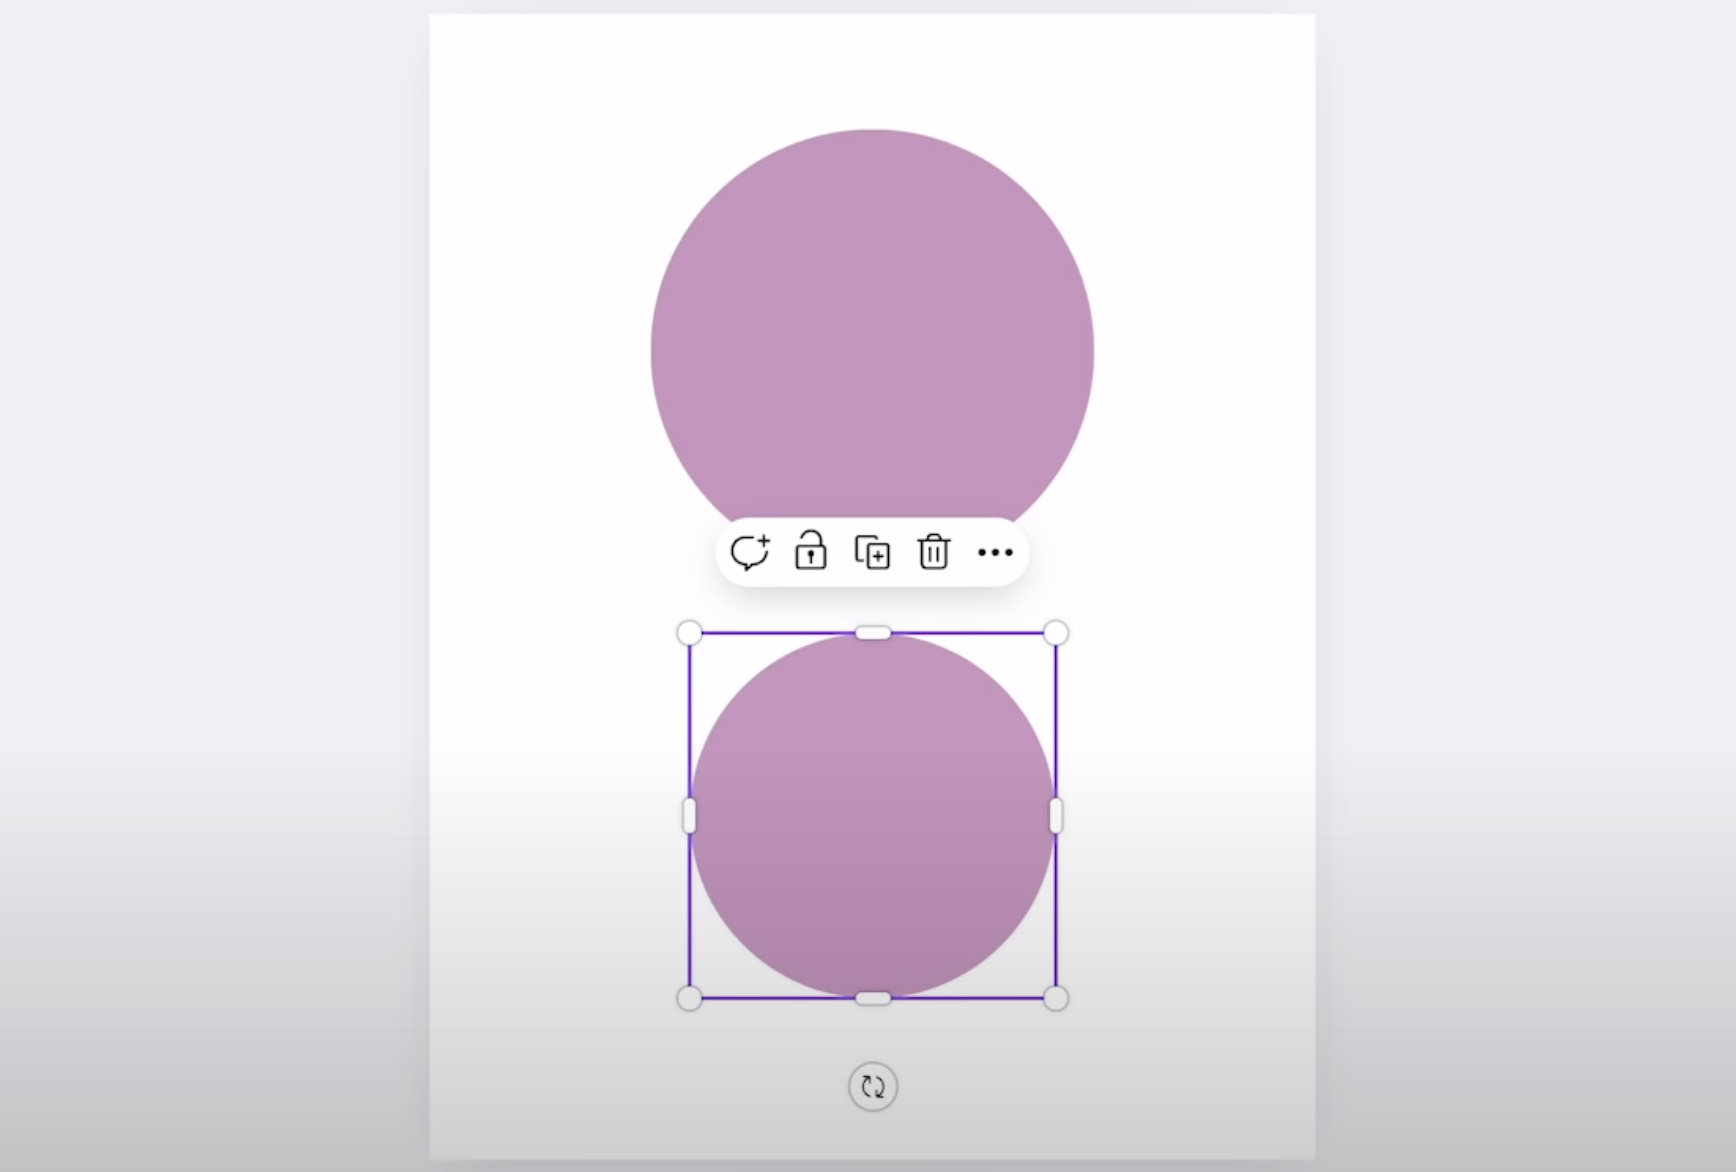
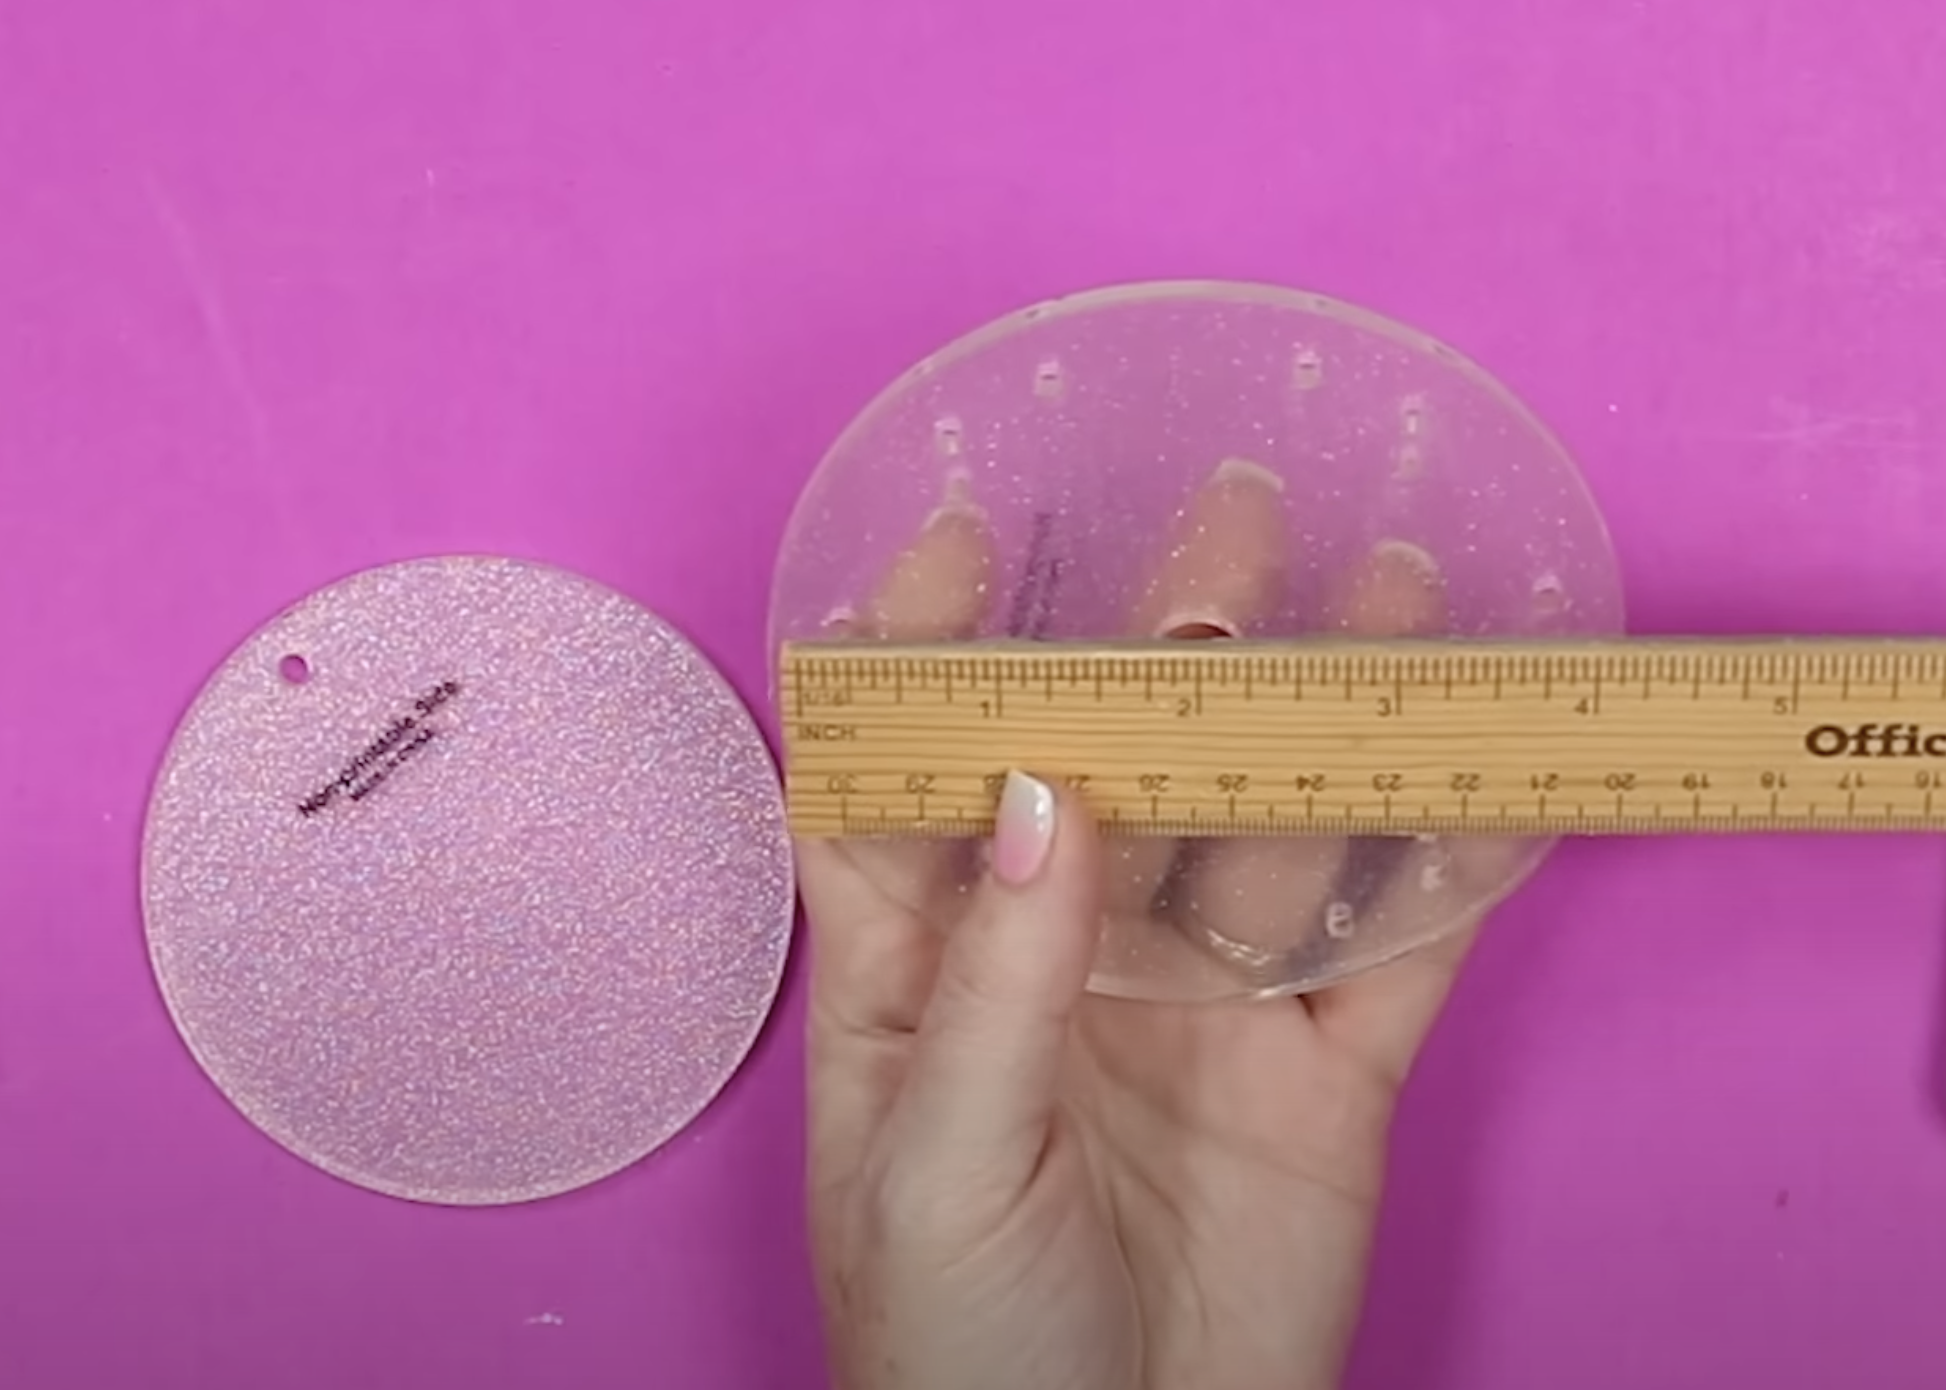
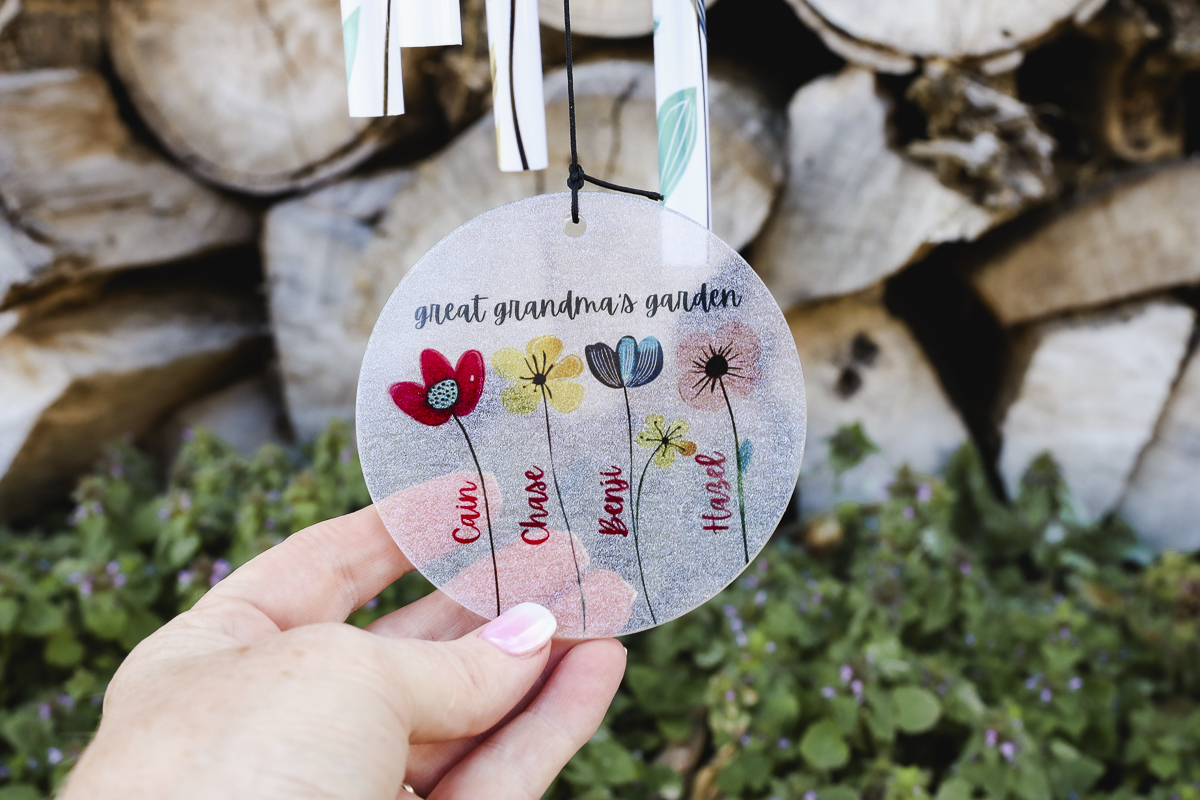
The larger disc is for the top of the wind chime, and the smaller disc is for the bottom. The bottom piece is the most important because it’s the one that will be seen when the wind chime is hanging.
Measure both discs. Mine are 4.25″ and 3.5″. I want my circles to be just a touch larger than the discs, so I set my sizes to 4.26″ and 3.51″.
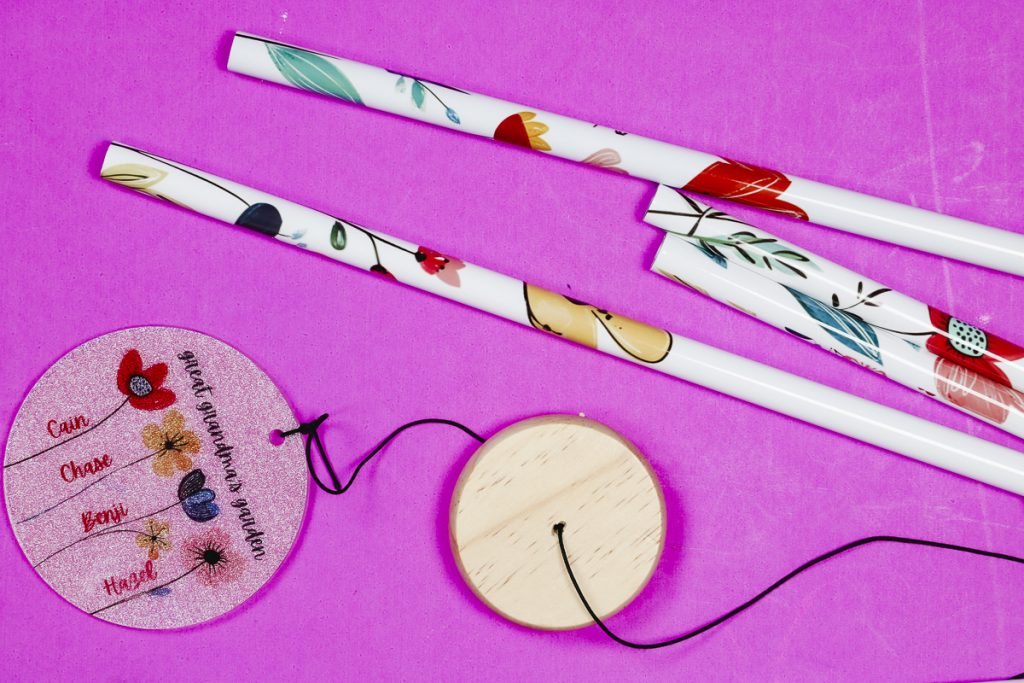
Step 2. Create Garden Disc with Names
I am using the free floral designs. Upload the floral designs into Canva and use them to create your images.
I am designing the smaller disc for a great-grandma’s garden. To do this, I want to add a flower for each of the grandchildren.
Choose however many flowers you need and resize them so they fit on the bottom circle.
Click Text and add a Text Box. I used the font Apricots and then typed out Great Grandma’s Garden and resized it to fit on the circle.
Next, I typed out the name of each grandchild and moved it to line up with the stem of a flower. You can rotate the name and change the color to match your designs.
As you can see in the photo below, I added a color to the circle of my design. You can do that if you want, or leave it white and leave the acrylic clear.

Remember, we made the design slightly larger than the blank. This means we want to make sure no text goes all the way to the edge, or it will be cut off.
It’s okay that the background color is larger; that will help ensure the whole disc is sublimated. I also want the flower stems to go all the way to the edge of the disc, so I have the stems extending off the circle.
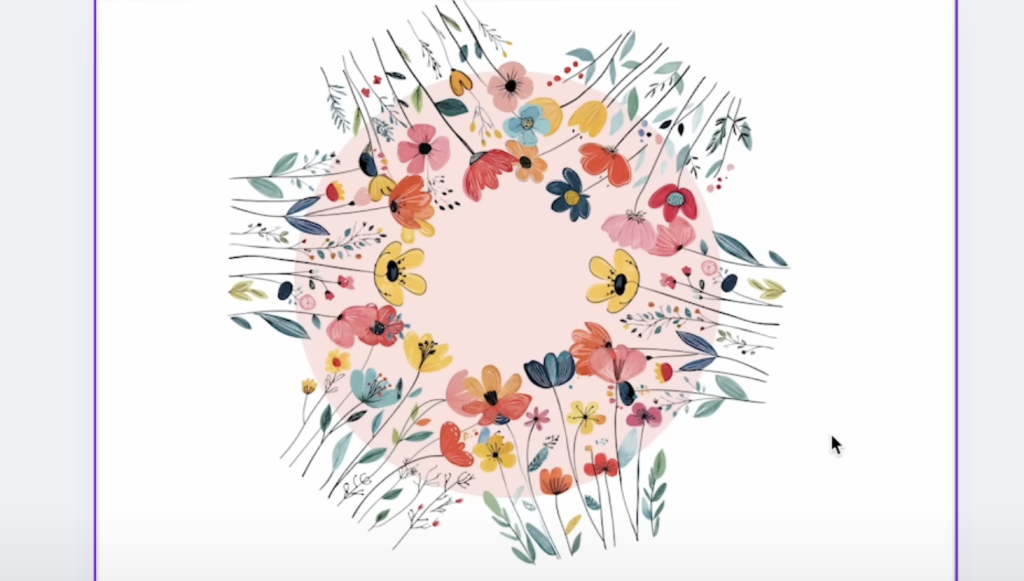
Step 3. Create Design for Top Disc
For the top disc, I used the floral design that had a group of flowers, and duplicated them to surround the circle.
I moved them around and resized them until I had them looking like I wanted.
Step 4. Create Wind Chime Tube Sublimation Design
For the wind chime tube pieces, I used the grouped floral designs and sized them as large as I could get them on my Canva canvas.
You could use any design for your wind chime tubes. I wanted to continue the garden theme, so I chose a variety of different floral designs to print.
Step 5. Print the Sublimation Designs
To print a design from Canva, you need to download the file.
Click Share and Download. I used the PDF for Print file type and CMYK for the Color Profile.
Make sure you’re using sublimation ink in a sublimation printer and printing on sublimation paper.
NOTE: I found that mirroring all of the prints when printing was the best option even the one that is on the acrylic disc.
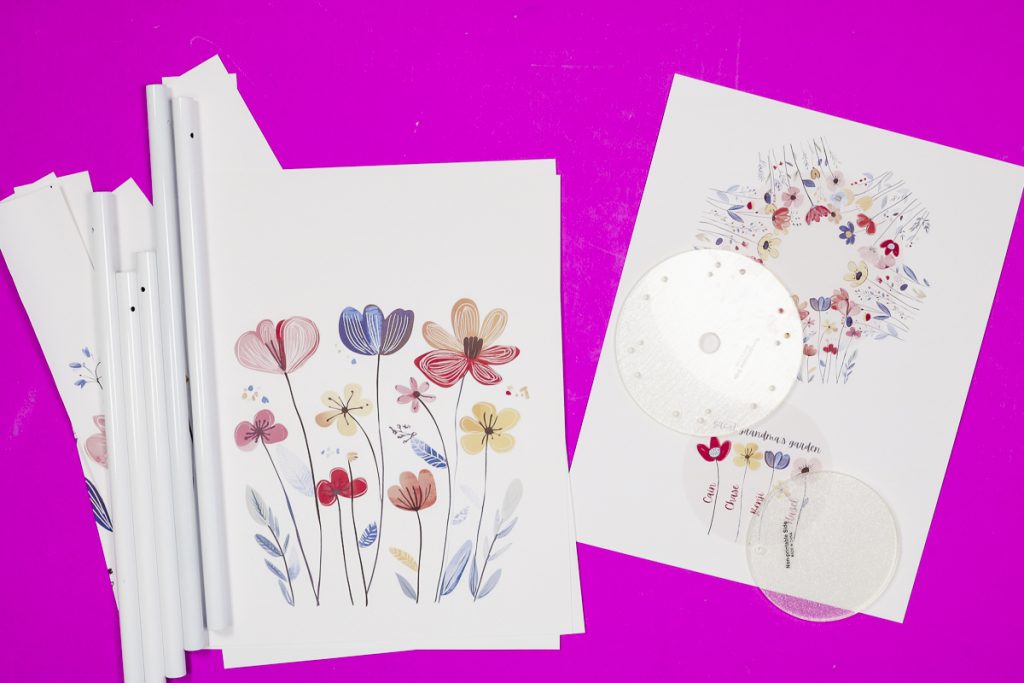
Step 6. Prepare Sublimation Prints to Apply to Wind Chime Pieces
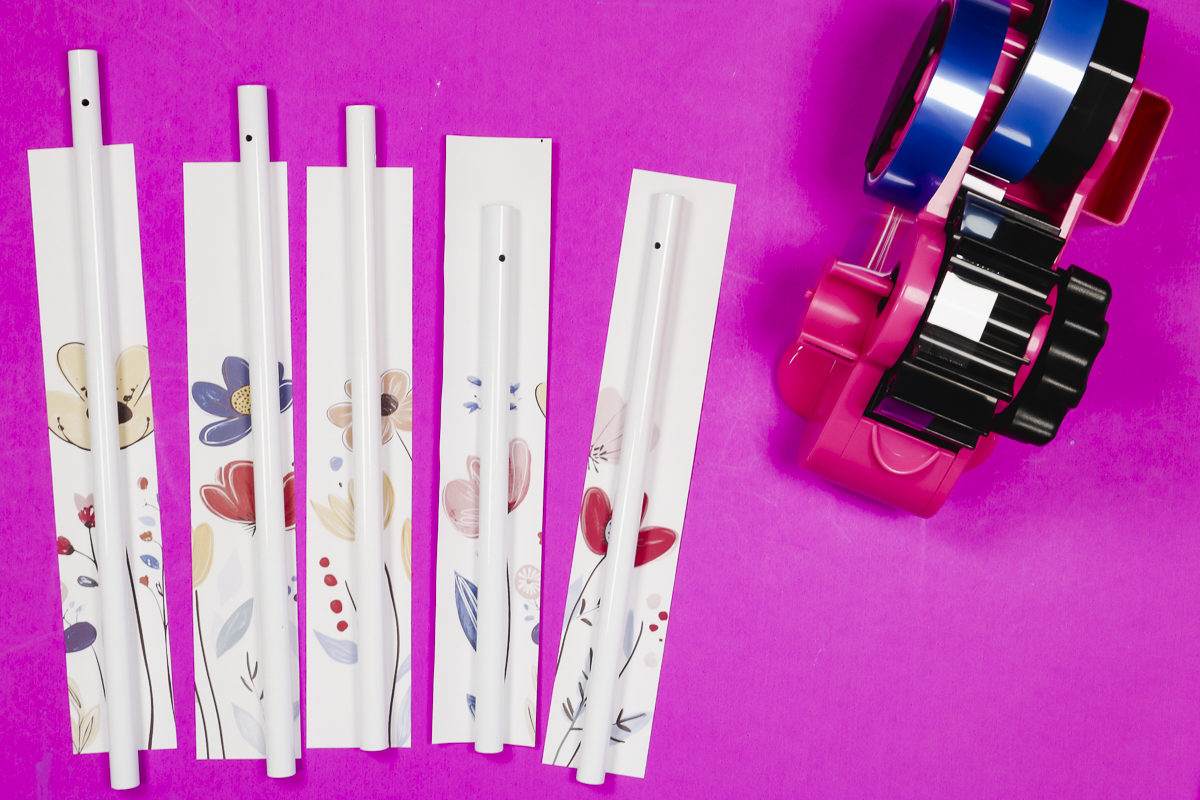
To prepare the prints for the wind chime tubes, I used a paper trimmer and cut strips 1 3/4 inches wide.
I printed out a lot of sheets with flowers so I could pick which flowers I wanted to add to each tube.
Trim away the excess white below the bottom of the flower stems.
To prep the prints for the discs, you just need to separate the two designs.
Step 7. Prepare Wind Chime for Sublimation
To prepare the wind chime pieces for sublimation, clean all the surfaces.
I used a lint roller and rolled it over the tube to remove any dust or other debris.
For the discs, there is a protective film on the sublimation side. If you remove that right before applying the sublimation print, you don’t need to clean the surface.
If you remove the protective layer earlier, use the lint roller to clean the surface.
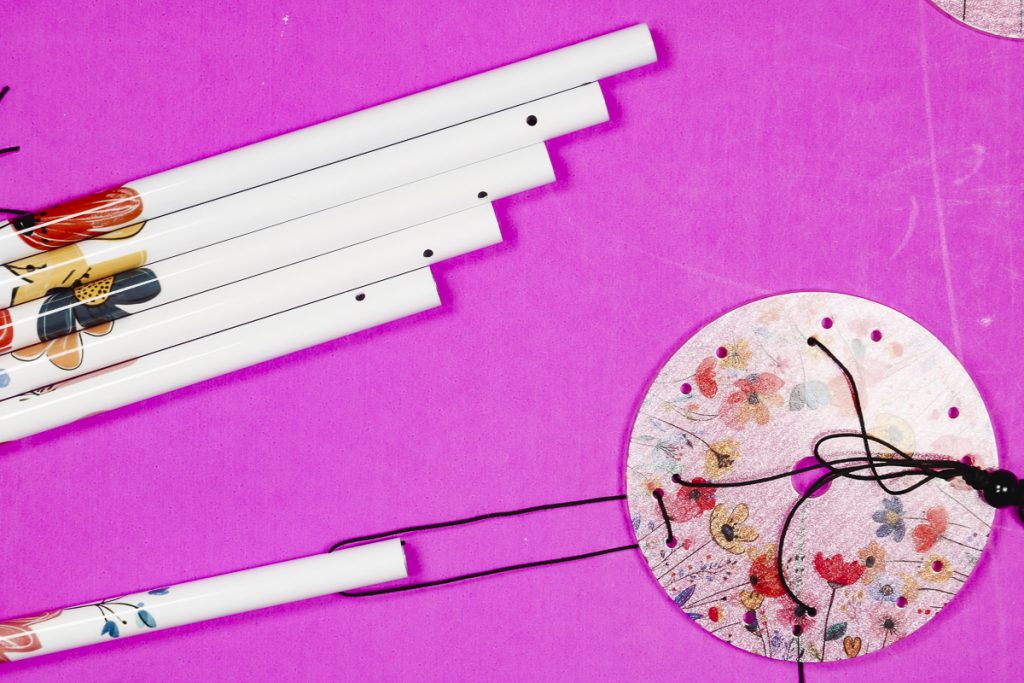
Step 8. Add Sublimation Print to Wind Chime Tubes
The first thing I’m going to do is decide which flower I want on each tube. The tubes are different lengths, so that impacted which flowers I chose for each one.
To begin, add a piece of heat-resistant tape to the back of the sublimation print along one long side.
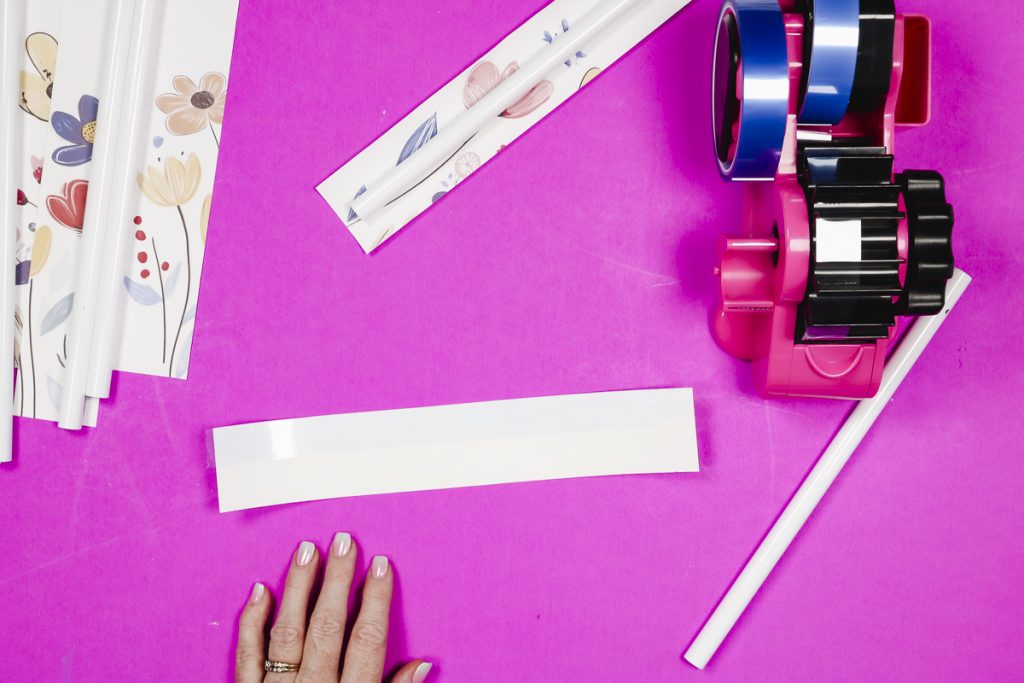
Trim away any excess tape.
Make sure the hole in the wind chime tube is facing the top, and line the bottom of the flower stem with the very bottom of the tube.
Place the wind chime tube on the sublimation print, making sure it is oriented correctly. Pull the sublimation paper tight around the tube.
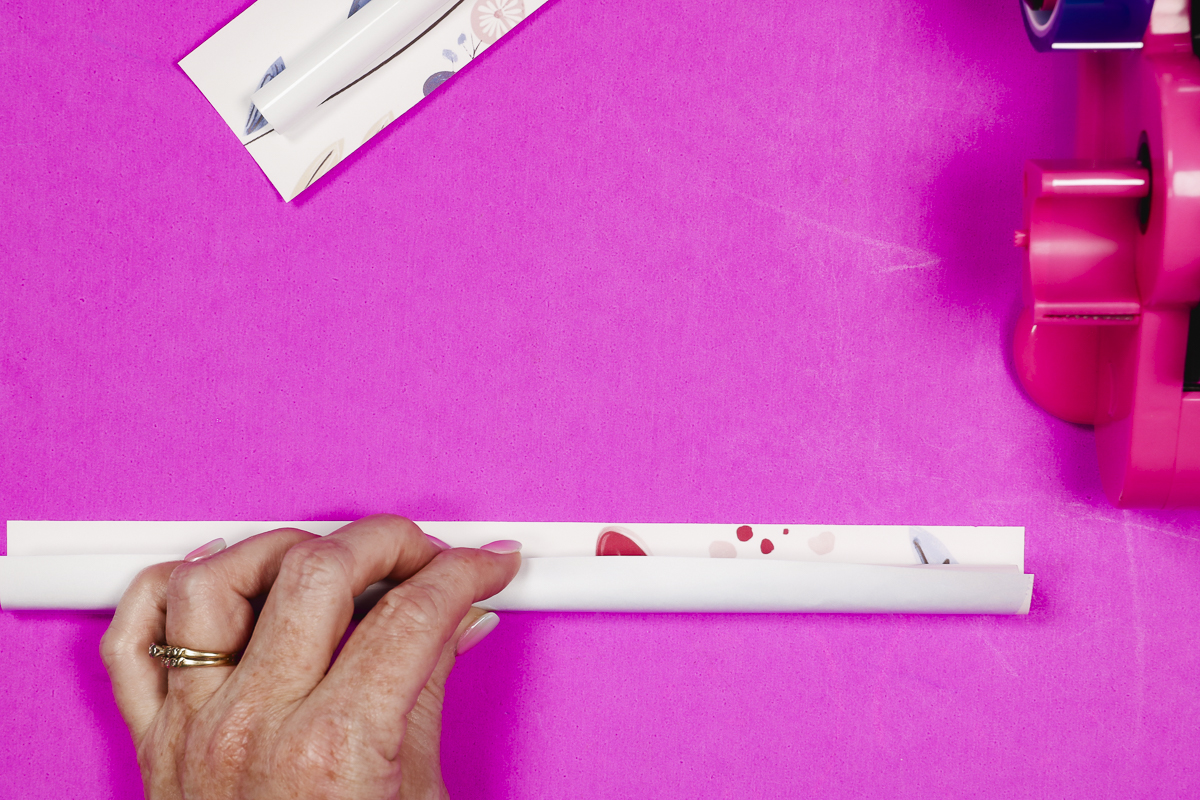
You want the side with the heat-resistant tape laid down first so the other side overlaps the tape.
Use heat-resistant tape to hold the sublimation print tight around the tube. I find it’s easiest to start in the middle and work to each end.
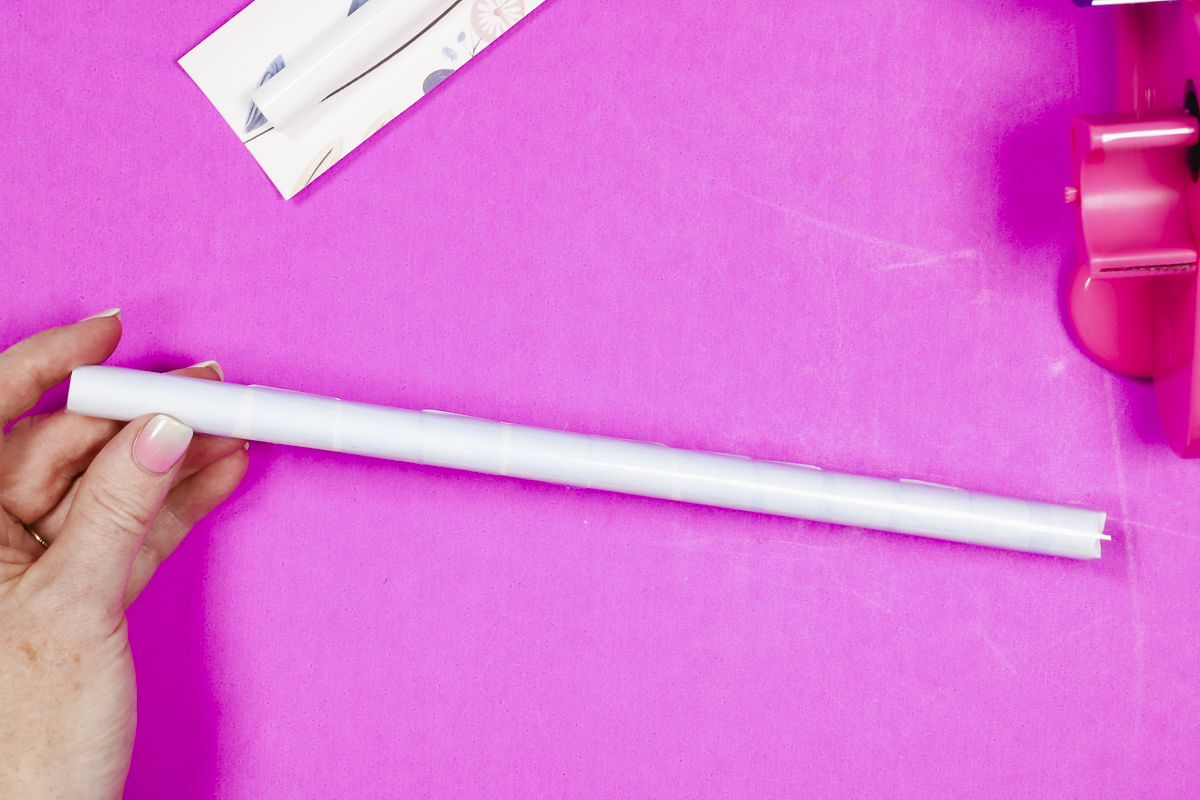
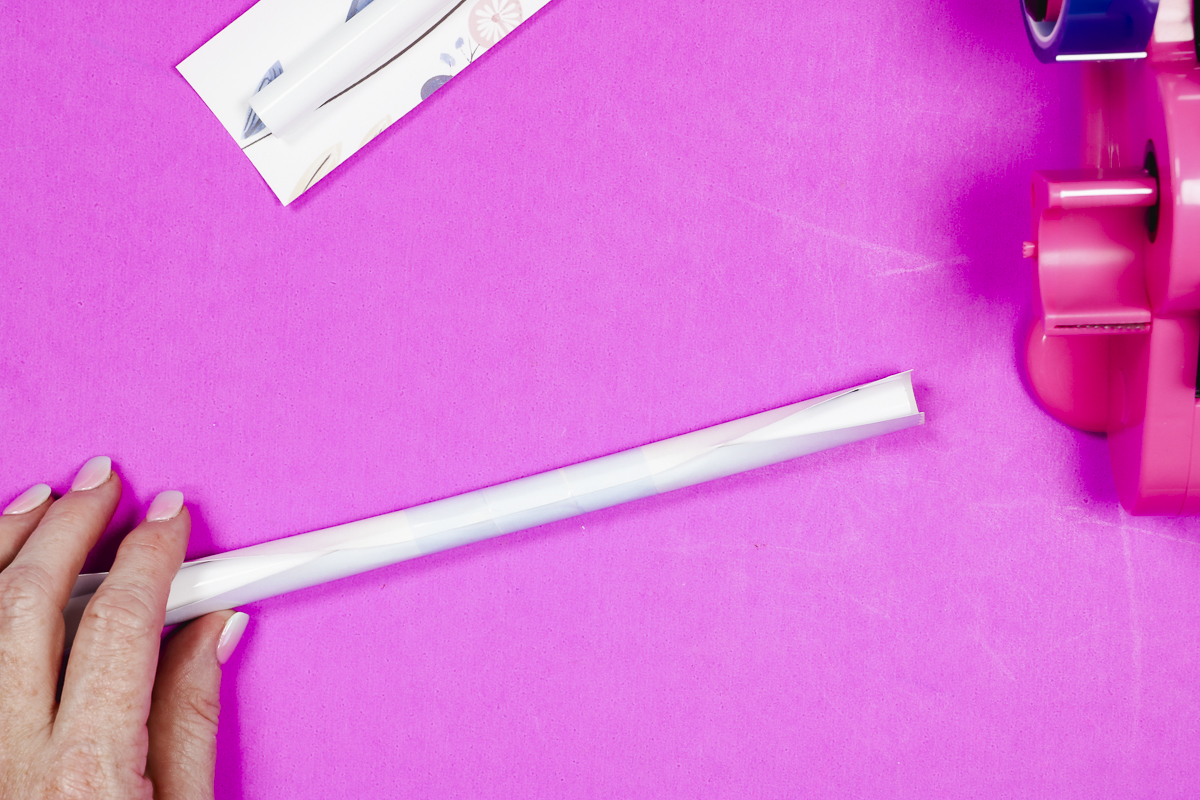
When the print is taped in place from end to end, we’re ready to add the shrink wrap.
Step 9. Add Shrink Wrap to Wind Chime Tube
This sublimation wind chime came with the shrink sleeves. These are all the same size, even though some of the tubes are shorter than the others.
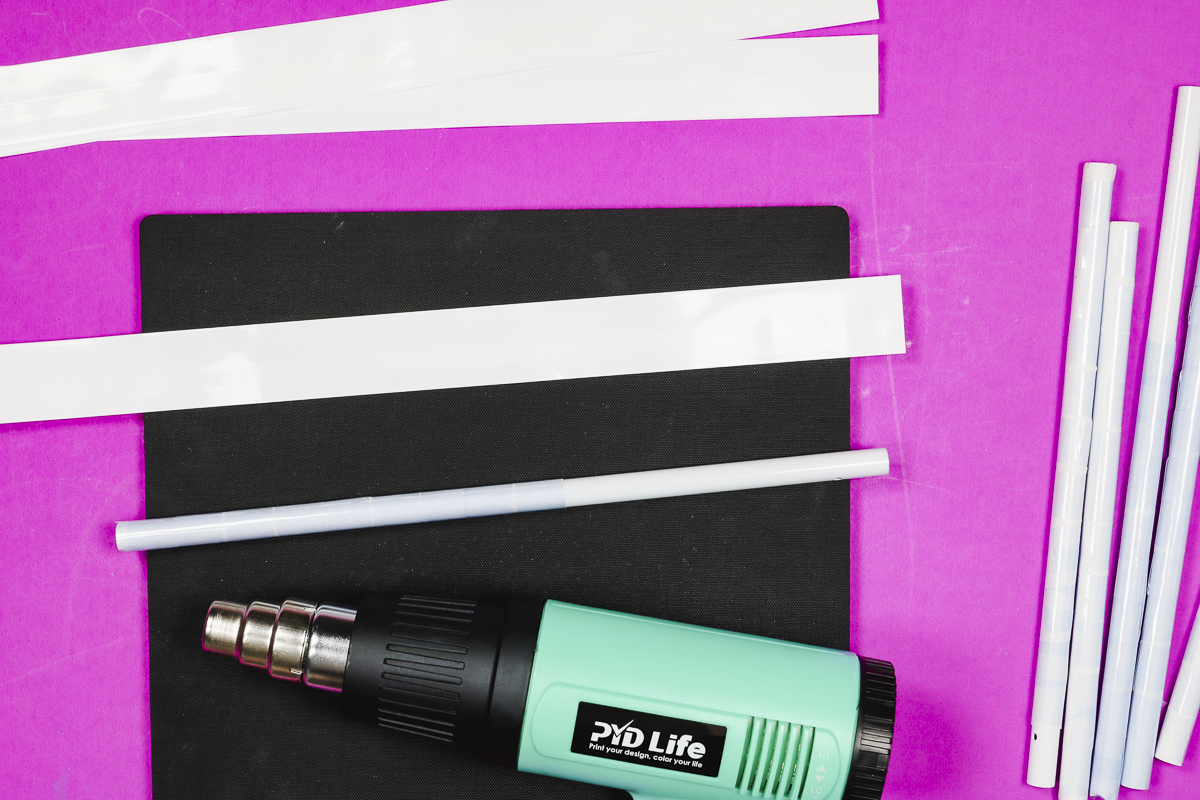
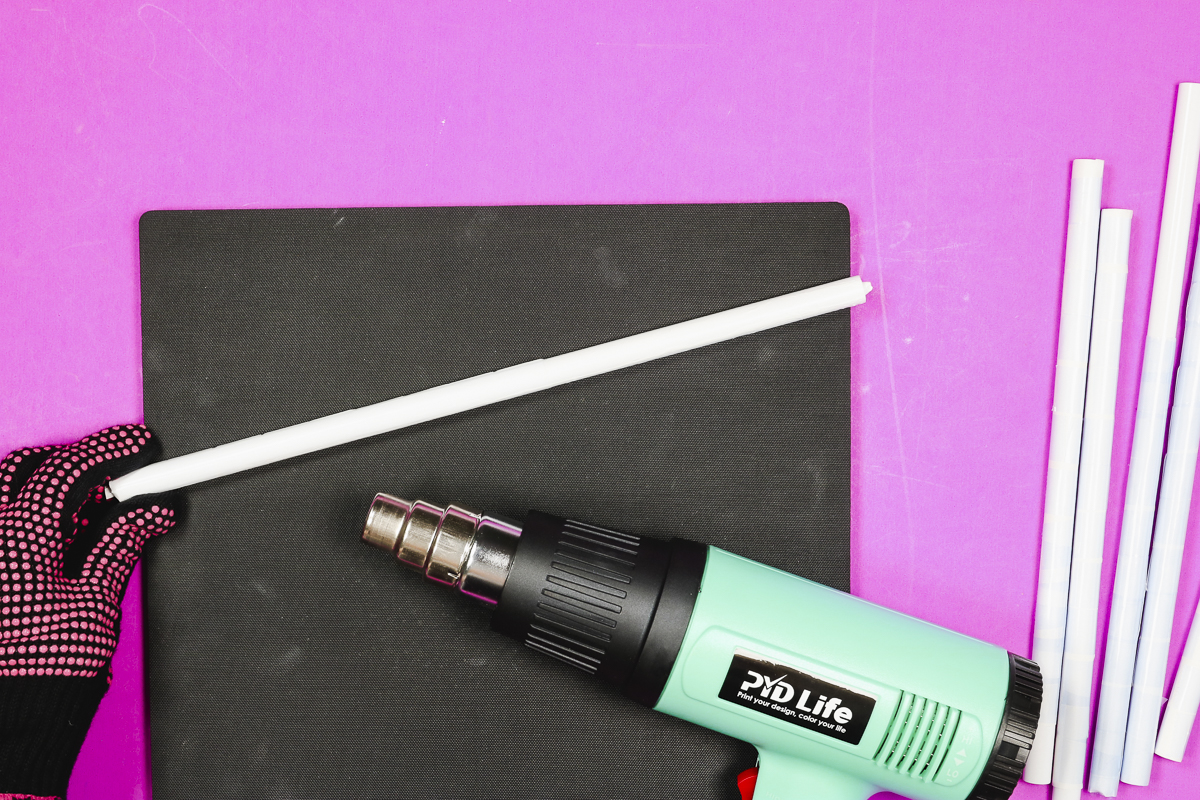
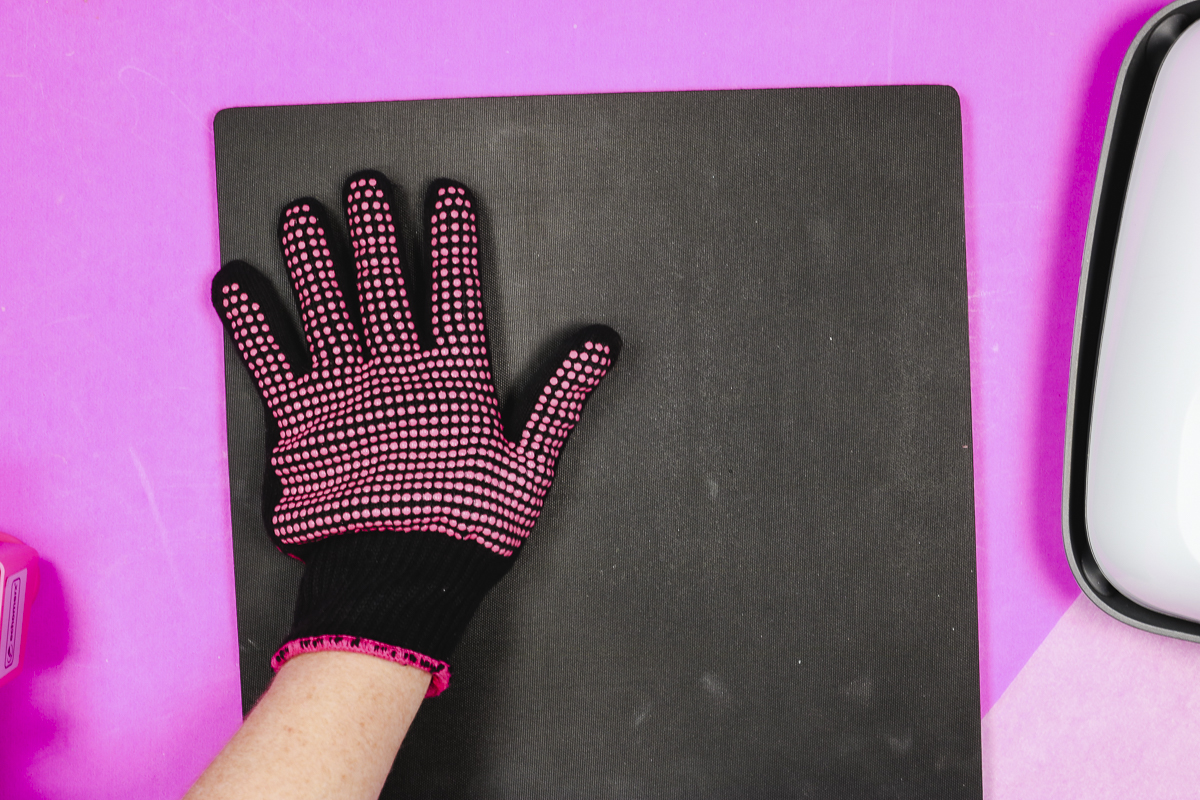
Slide the tube with the sublimation print in place inside the sleeve. Use a heat-resistant mat and heat-resistant gloves to protect your hands and surface from the heat gun.
Use a heat gun to shrink the sleeve around the tube, making sure to get out as many wrinkles as you can. Don’t hold the heat gun in one place for too long, it can burn a hole through the shrink sleeve.
Repeat this process for each of the wind chime tubes.
The long chime tubes barely fit in my small oven. So I trimmed off any excess shrink sleeve to ensure they would fit in the oven.
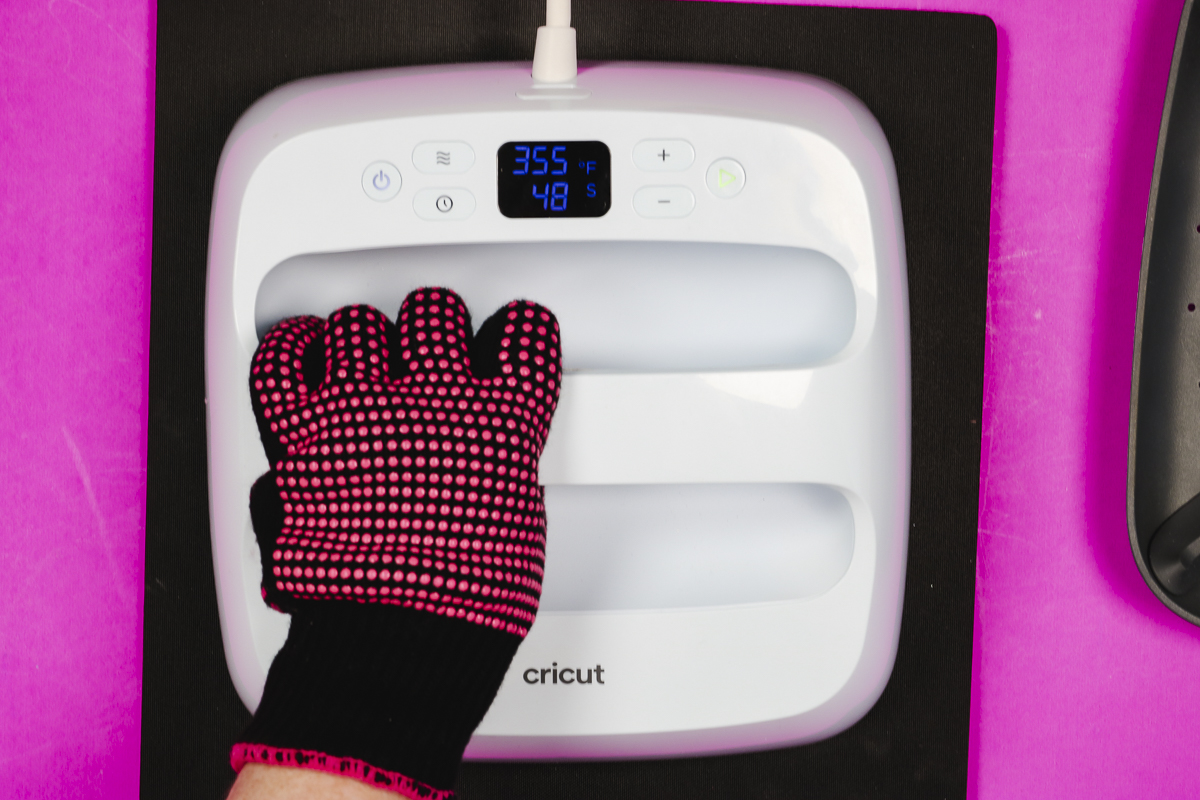
Step 10. Sublimate the Wind Chime Tubes
Preheat the sublimation oven to 355 degrees.
Place the tubes in the oven for 7 minutes. Depending on the size of your oven, you may be able to sublimate them all at once or have to do them in batches.
Step 11. Remove Shrink Wrap From Wind Chime Tubes
As soon as the time is up, using heat-resistant gloves, remove the tubes from the sublimation oven.
Immediately start removing the shrink wrap and sublimation print. This process becomes much more difficult as the shrink wrap cools.
The tubes that had sublimation paper from top to bottom were easier to remove the shrink wrap from. If you have 8 1/2 by 14-inch sublimation paper, I would use that to make it easier to remove from those longer tubes.
You can also use the sublimation pencil method I tried, where I didn’t use a shrink sleeve and only used heat-resistant tape.
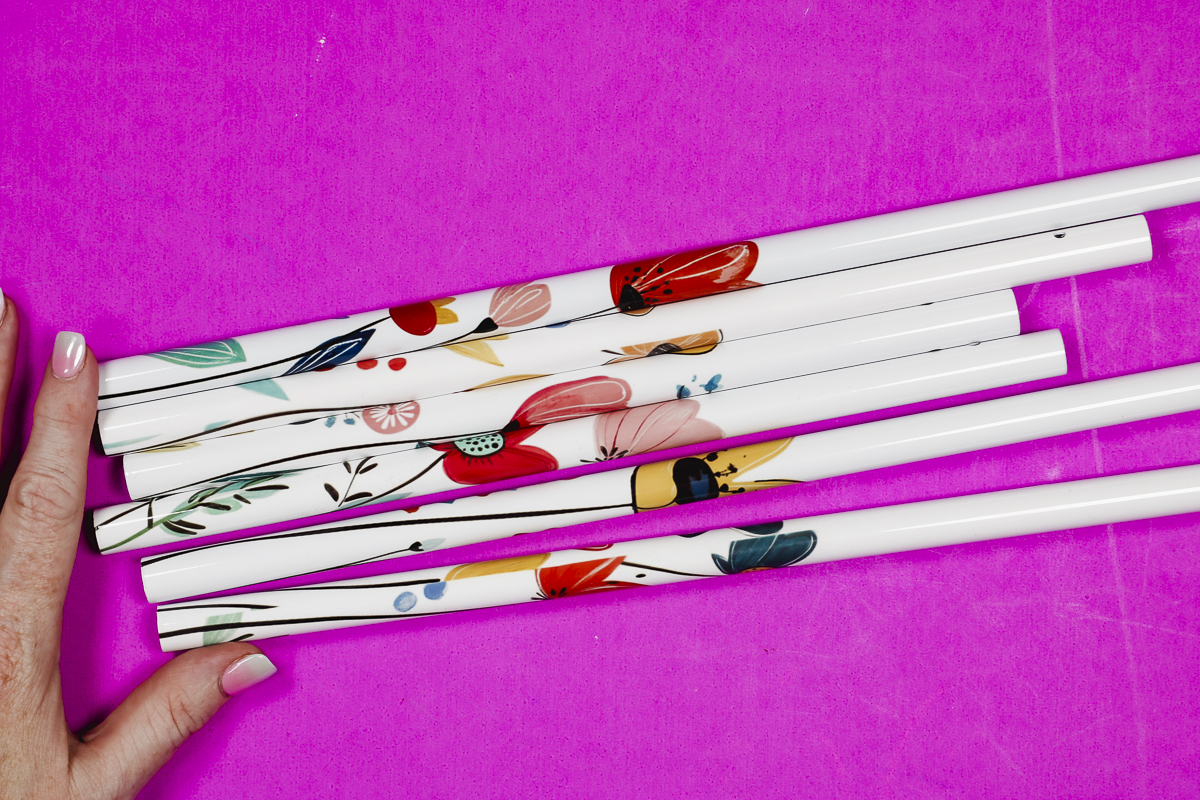
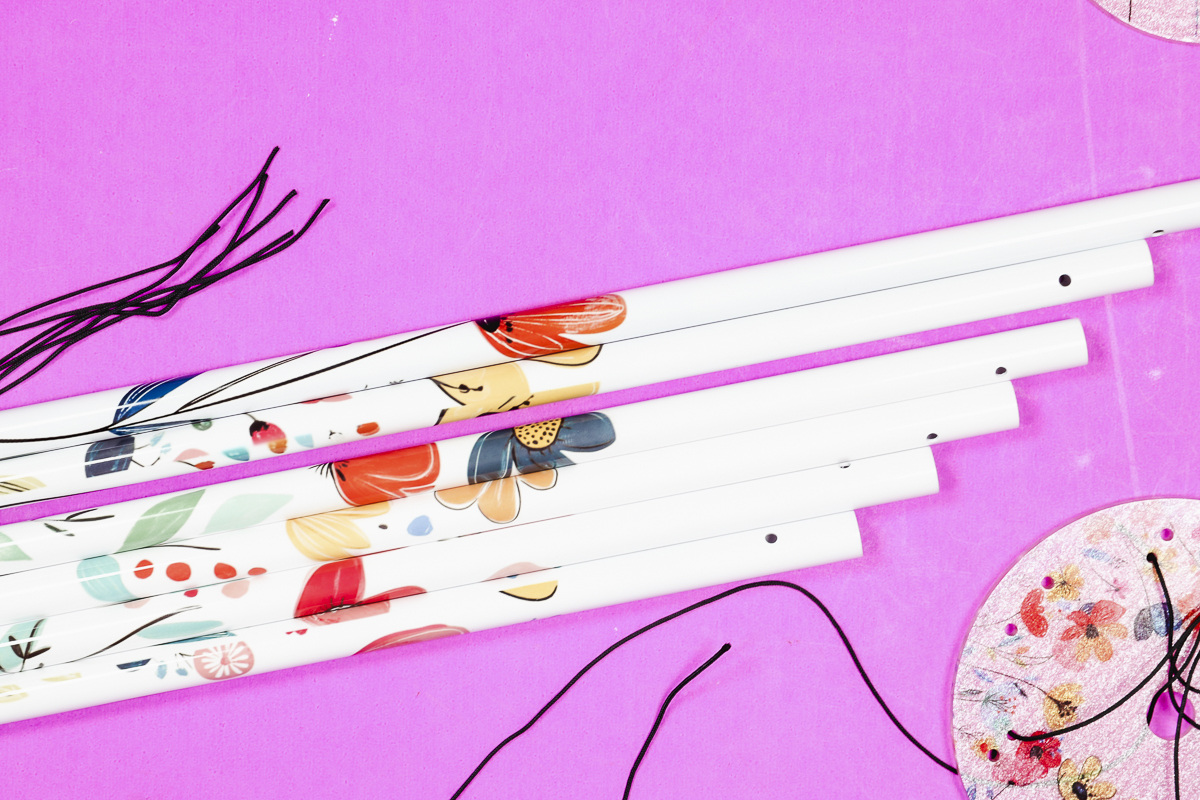
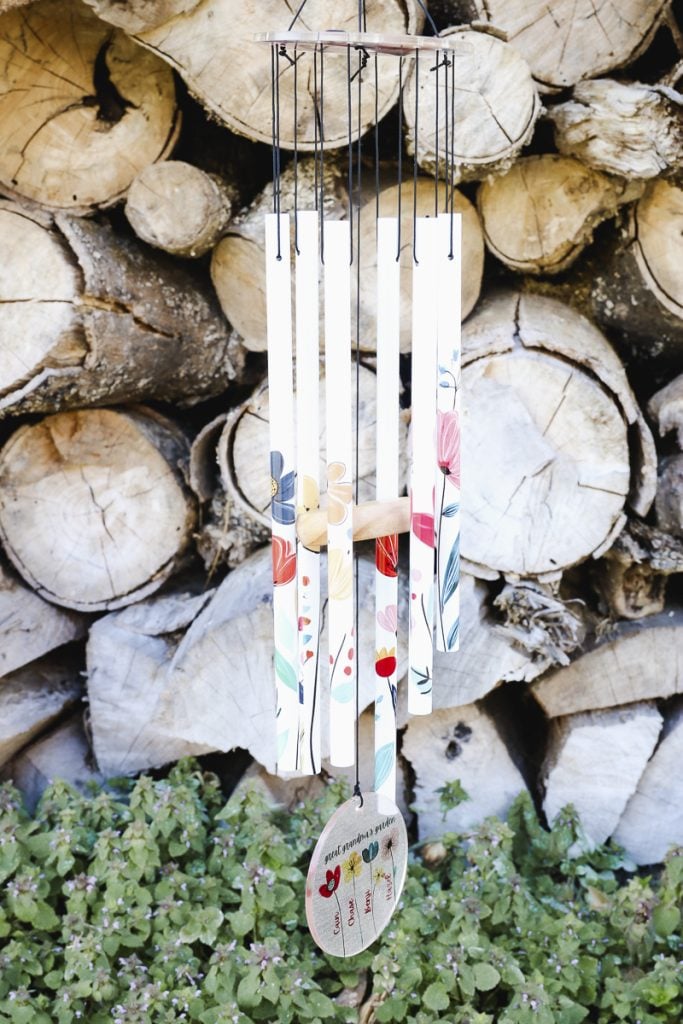
These wind chime tubes sublimated beautifully. I’m really happy with how they turned out.
Step 12. Add Sublimation Print to Disc Pieces
With the tubes finished, we can sublimate the acrylic disc pieces.
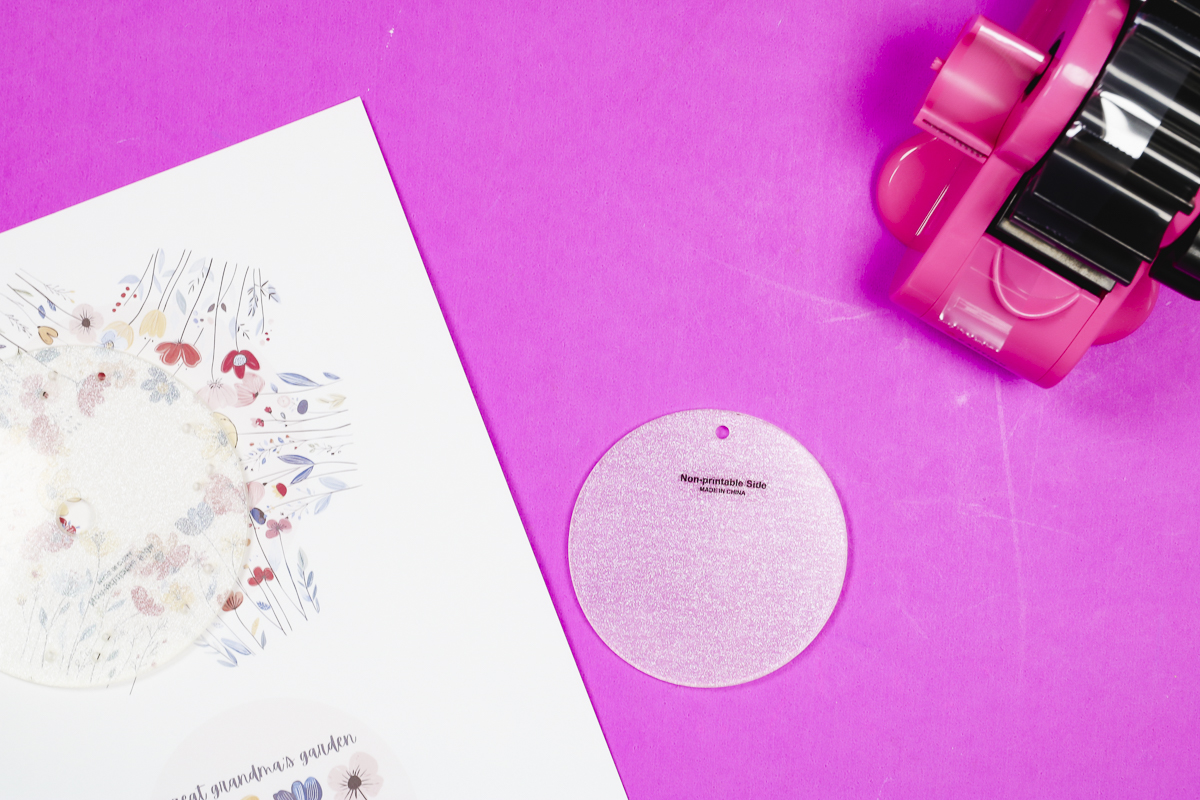
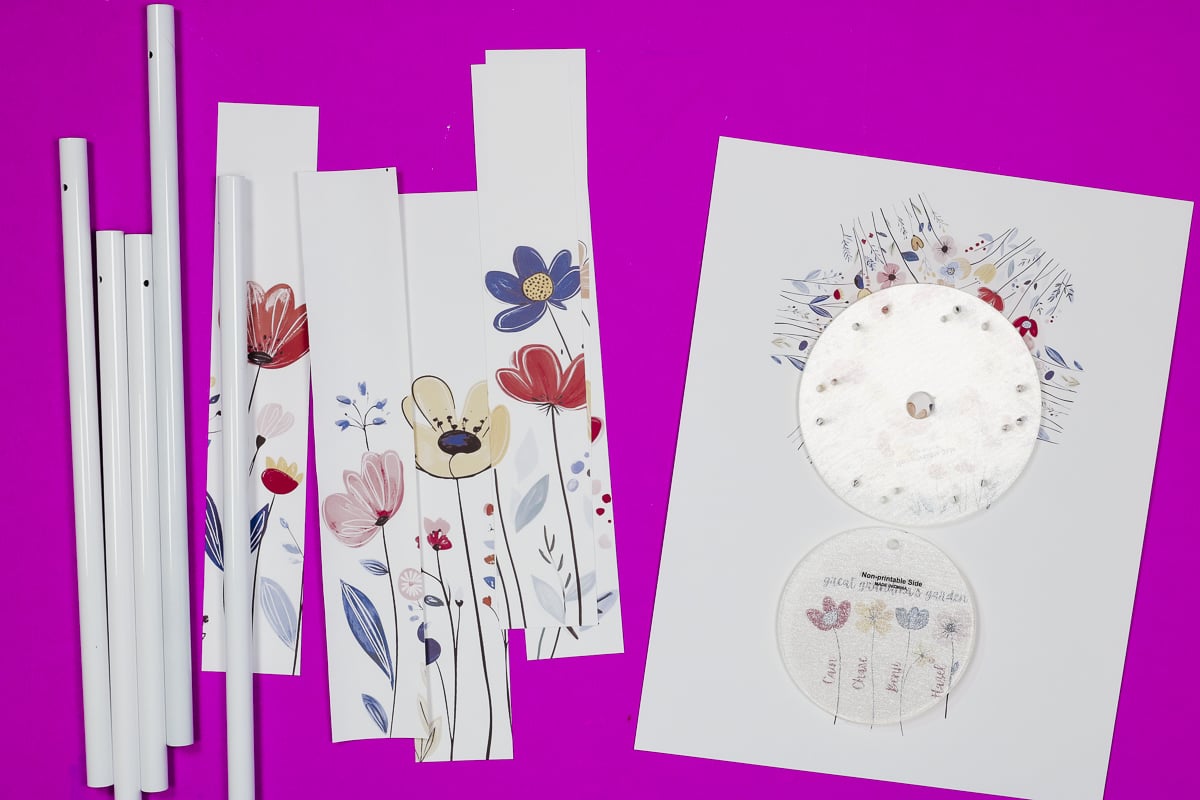
On each disc, you will see a sticker that says Non-printable Side. Remove the protective film from the other side of the discs.
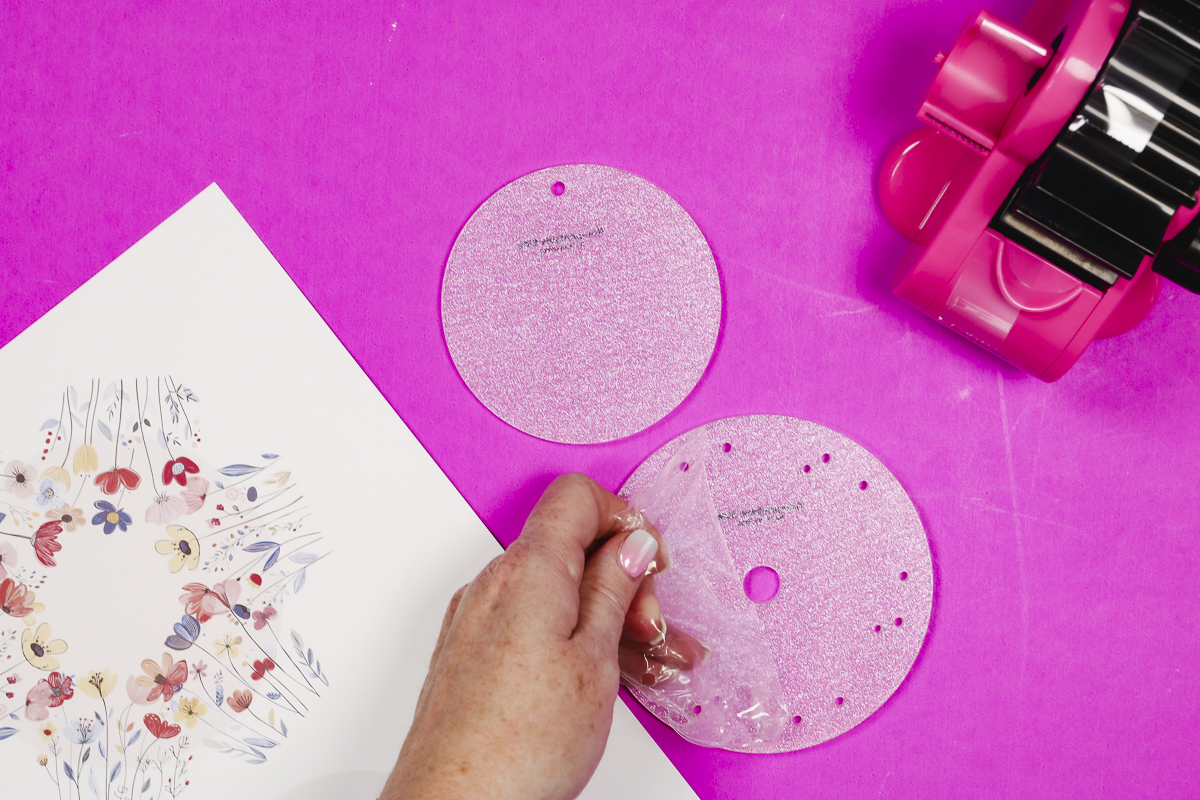
Locate the acrylic disc where you want it and secure it in place with heat-resistant tape.
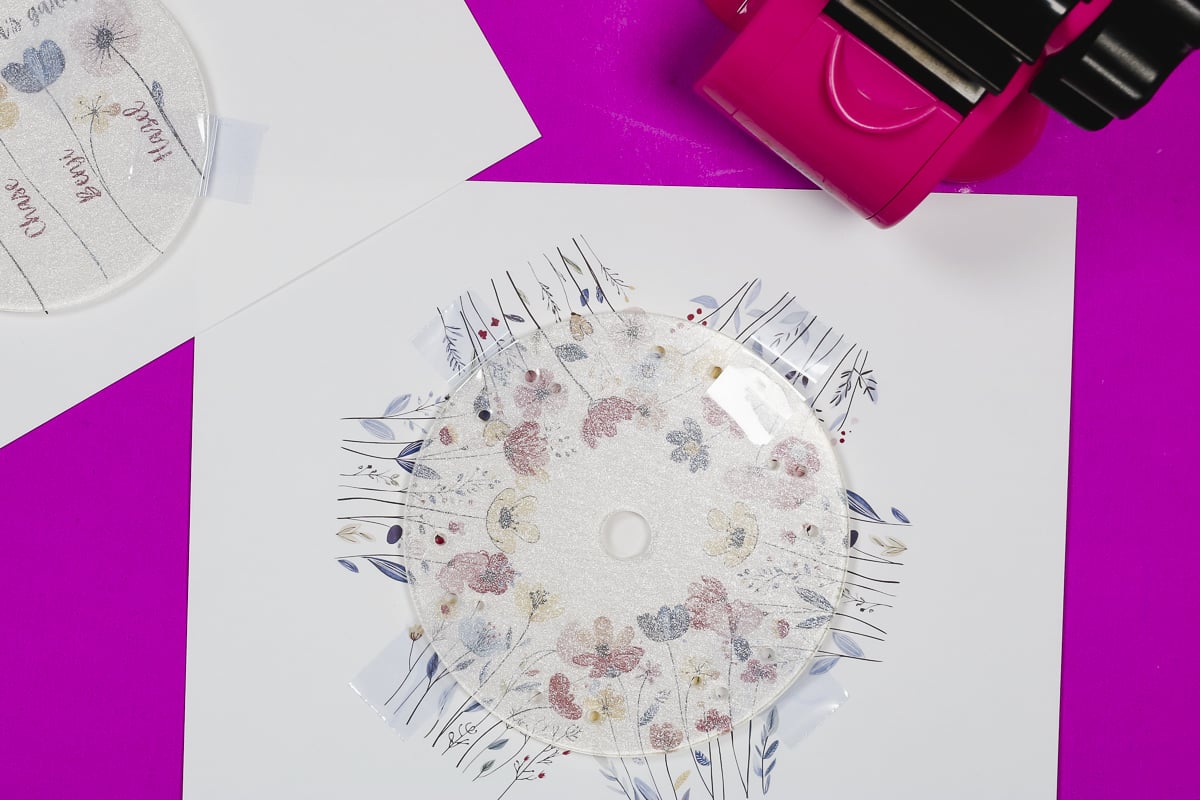
The larger acrylic disc doesn’t have a top or bottom, you just want it to be centered on the design.
For the smaller disc, make sure the hole is located at the top of the design.
Remove the sticker that says Non-printable Side so it doesn’t embed into the acrylic during the pressing process.
Step 13. Sublimate Acrylic Discs
For acrylic pieces, I like to use the firm heat-resistant mat. I am using my EasyPress for these pieces.
Heat the EasyPress to 355 degrees and set the time to 60 seconds.
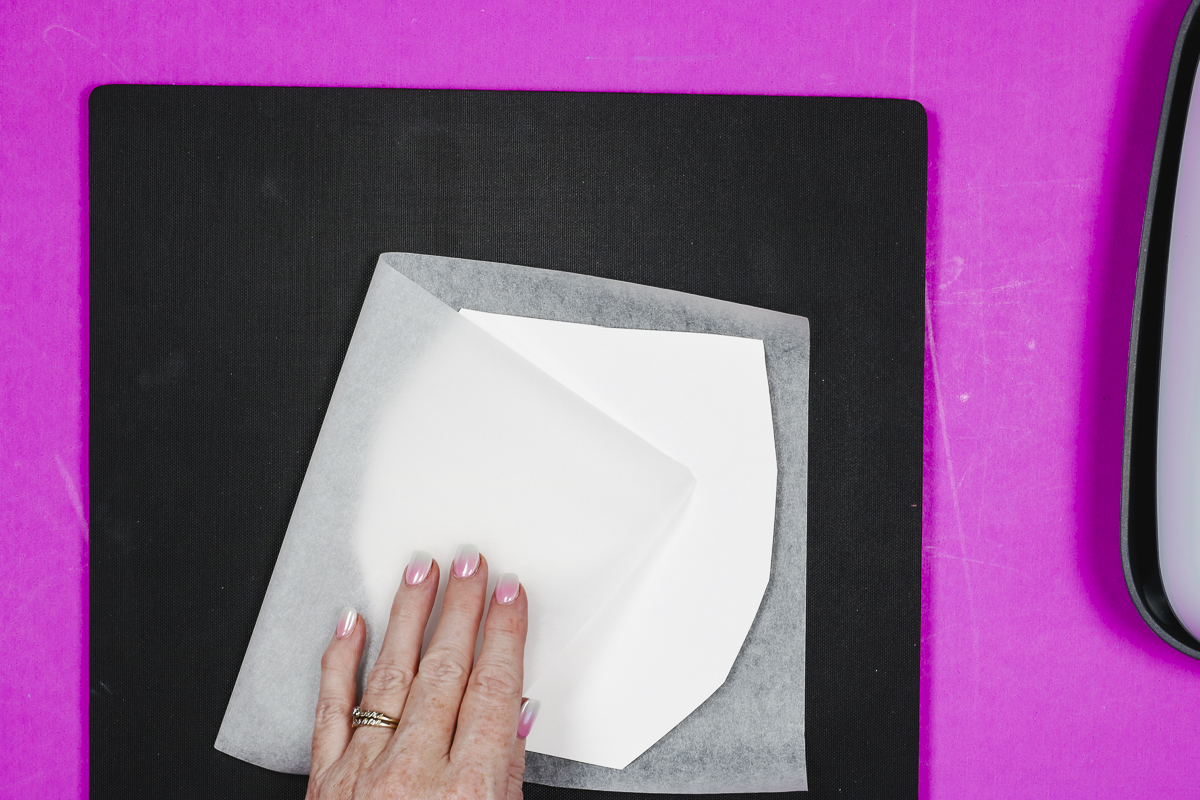
Place protective paper on the heat-resistant mat and add the acrylic disc print side up. Cover the design with protective paper to protect your heat source.
Press for 60 seconds with light to medium pressure. Remove the heat and flip the acrylic to see if it has sublimated correctly.
My sublimation was uneven, so I laid it back down and pressed longer with firmer pressure.
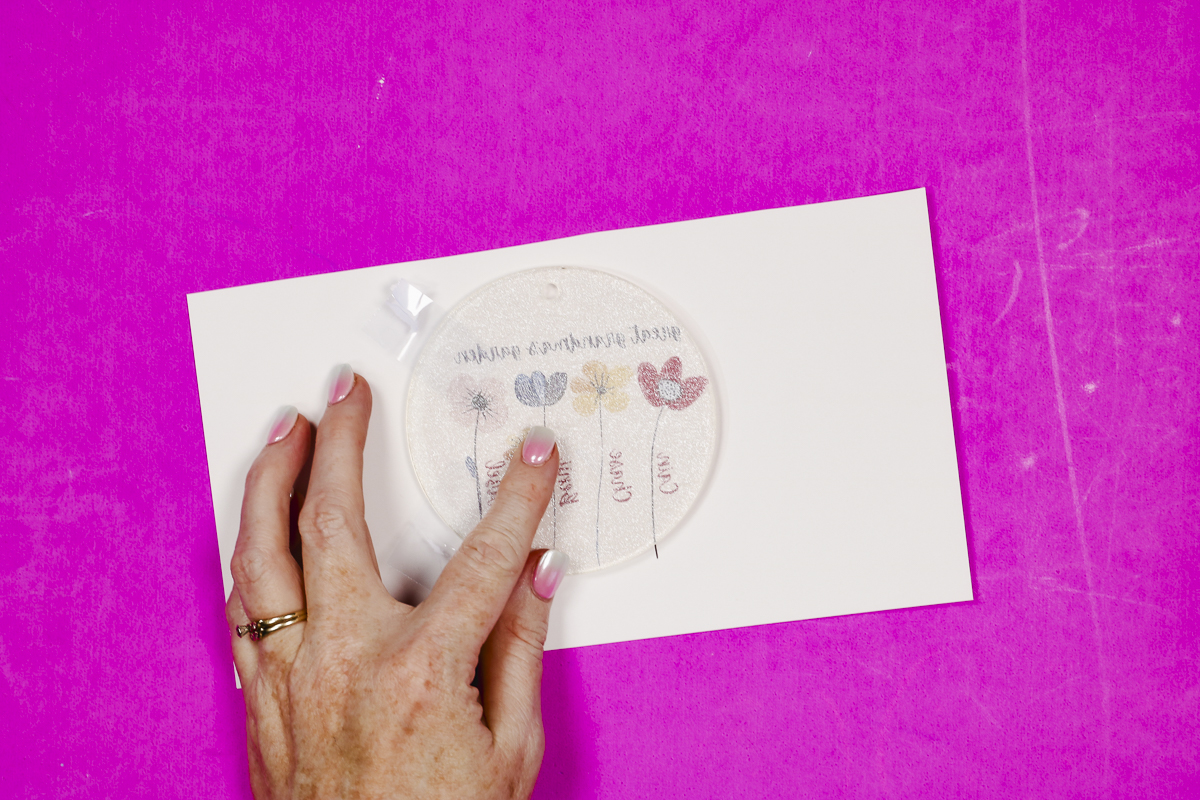
Clear acrylic is easy to sublimate because you can just look at it to see if it’s right. The heavier pressure and longer time helped, and now my sublimation looks amazing.
Hot acrylic can warp. To prevent that, I placed the disc under the heat-resistant mat and placed my hand on top so there was some weight keeping it flat while it cooled.
Once it is cool, you do not have to worry about it warping.
Step 14. Cut the Black Cord for Assembly
Now we’re ready to assemble the wind chimes.
The kit includes one long piece of black cord. This needs to be cut into the different pieces you need to assemble the wind chimes.
First, we need four pieces cut to 12 inches. These are for the top of the wind chime.
Next, cut six more 12-inch pieces. These pieces are for hanging the wind chime tubes.
Then you need to cut a piece that is 27 1/2 inches long to hang through the middle portion.
You will have some extra cording left for mistakes.

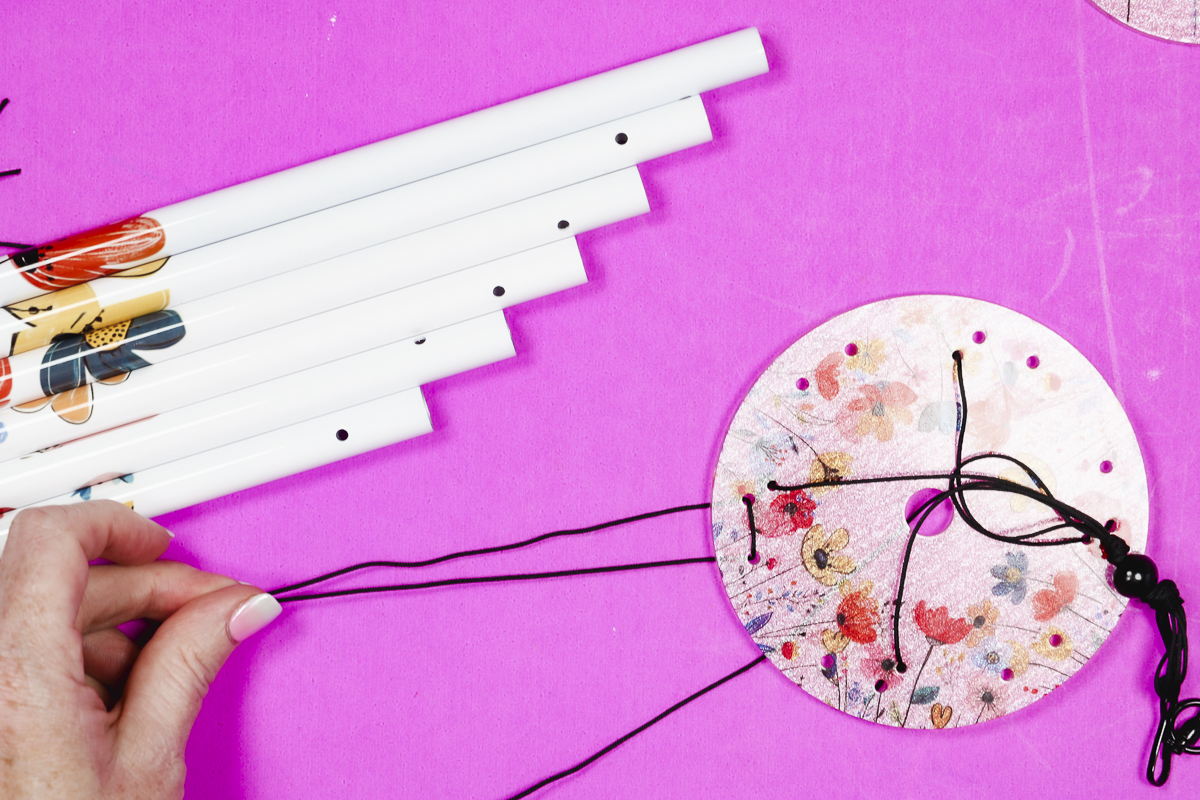
Step 15: String the Cords for the Top
String the four 12-inch pieces of cord and the 27 1/2 inch piece of cord through the hook, folding them all over a few inches.
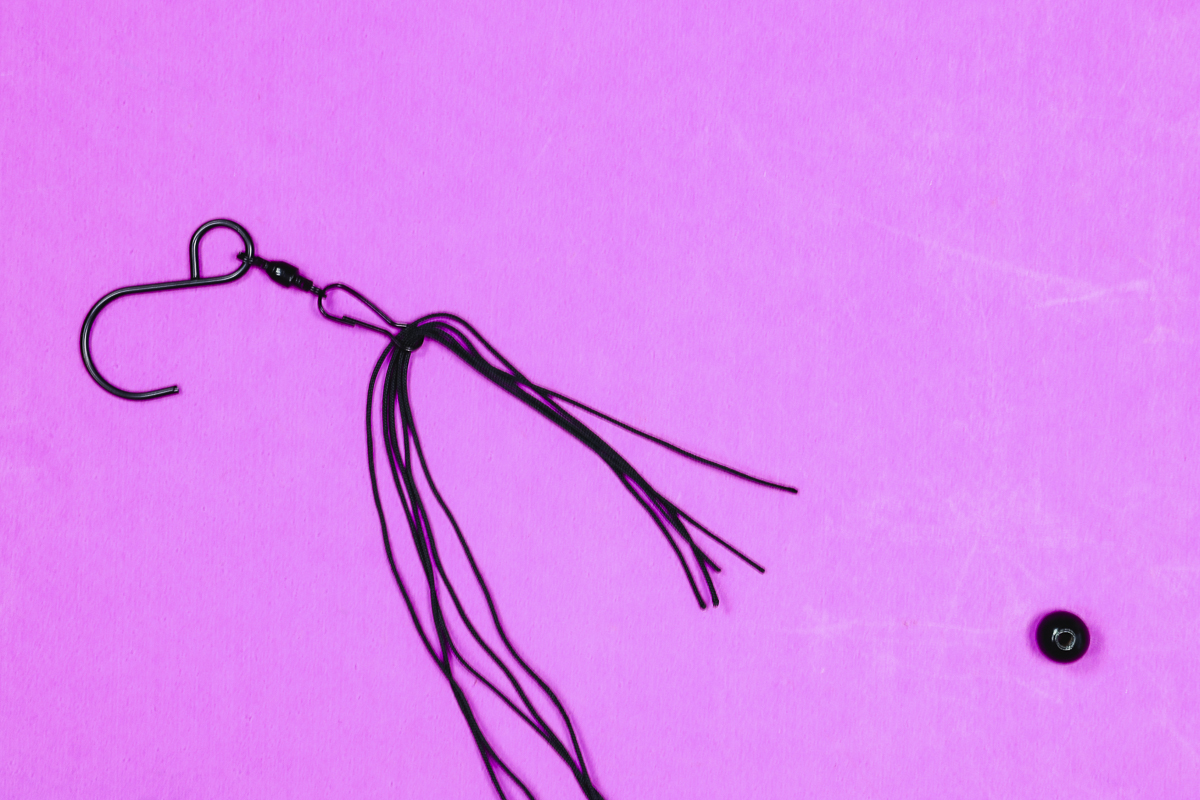
Tie one knot close to the hook, and then tie everything in another knot to keep the cord tied.
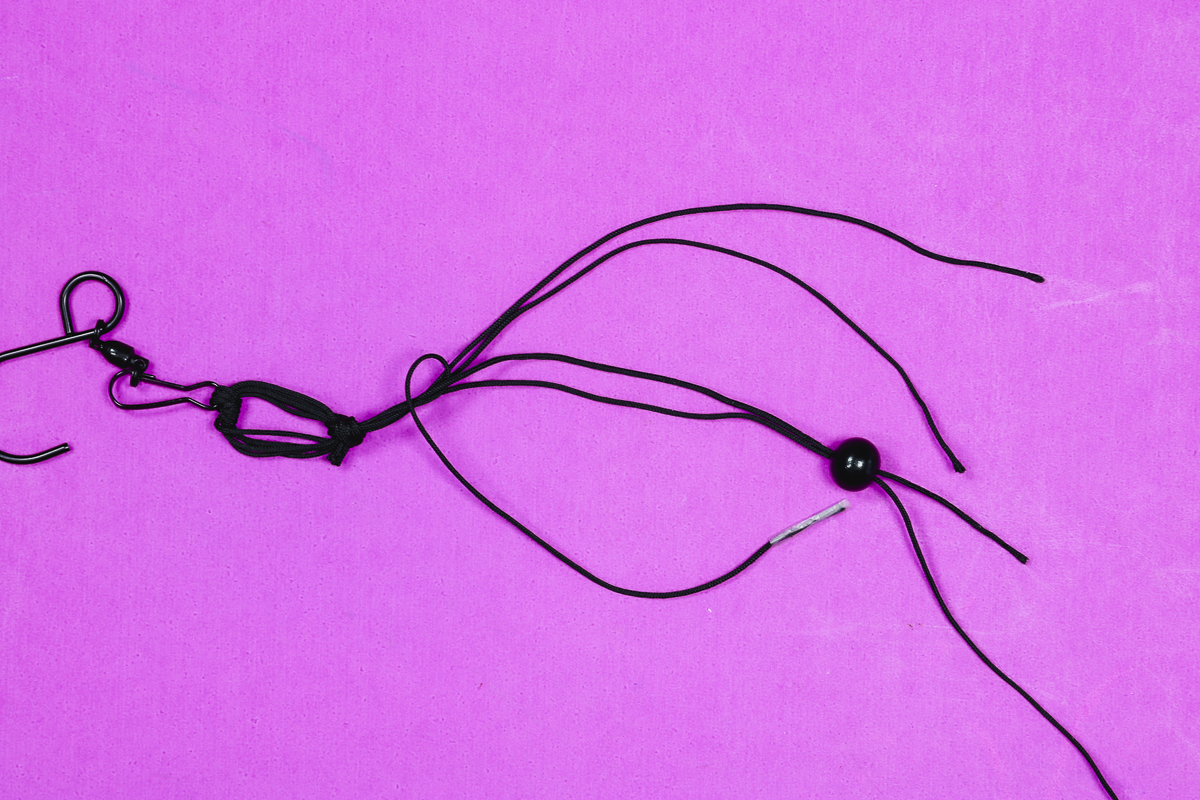
Thread the ends of the string through the bead. The only way I was able to do this was to wrap the end of the cord with a thin piece of tape and shove it through the hole.
Remove the tape from the end of the cord and repeat the process for all five pieces of cord.
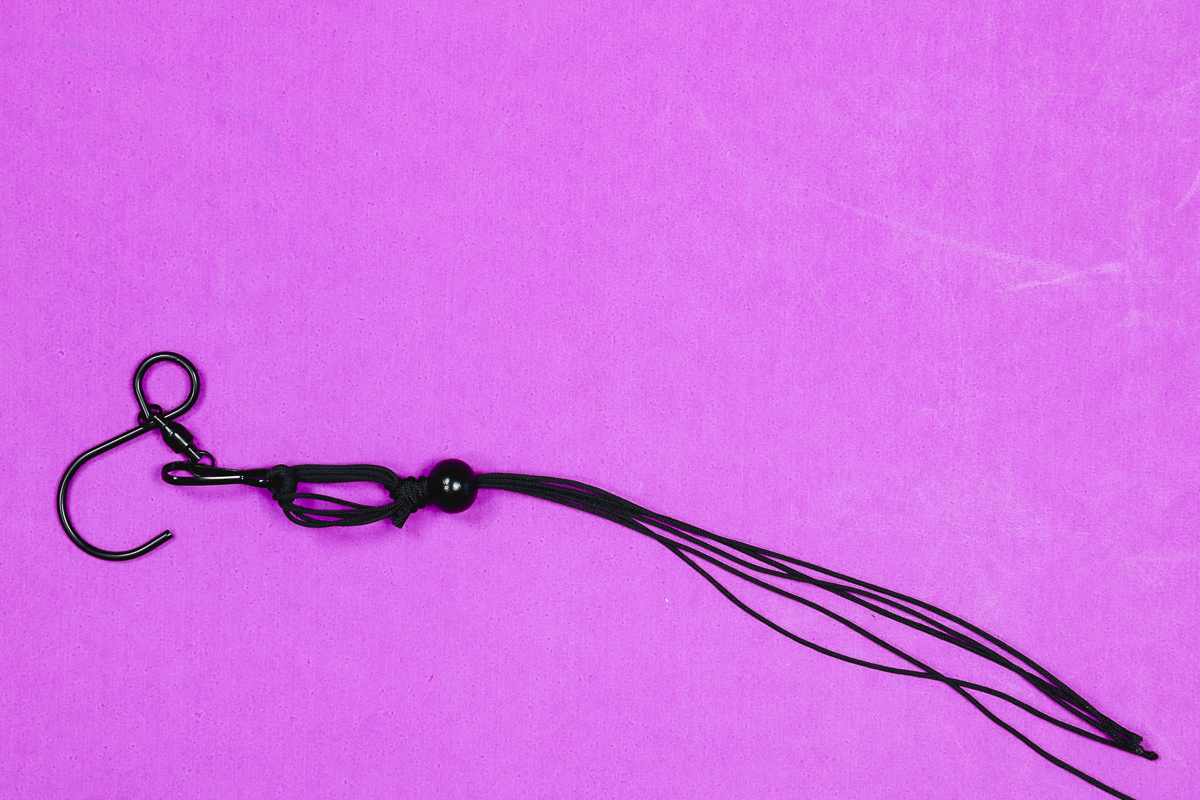
Push the bead all the way to the top knot and tie another knot below the bead. You want this all to be as tight as possible.
Step 16. Attach Large Sublimation Disc
Take the top large disc and locate it so the more vibrant side is facing the top.
String the longest piece of cord through the middle hole first. For now, let this piece hang loose.
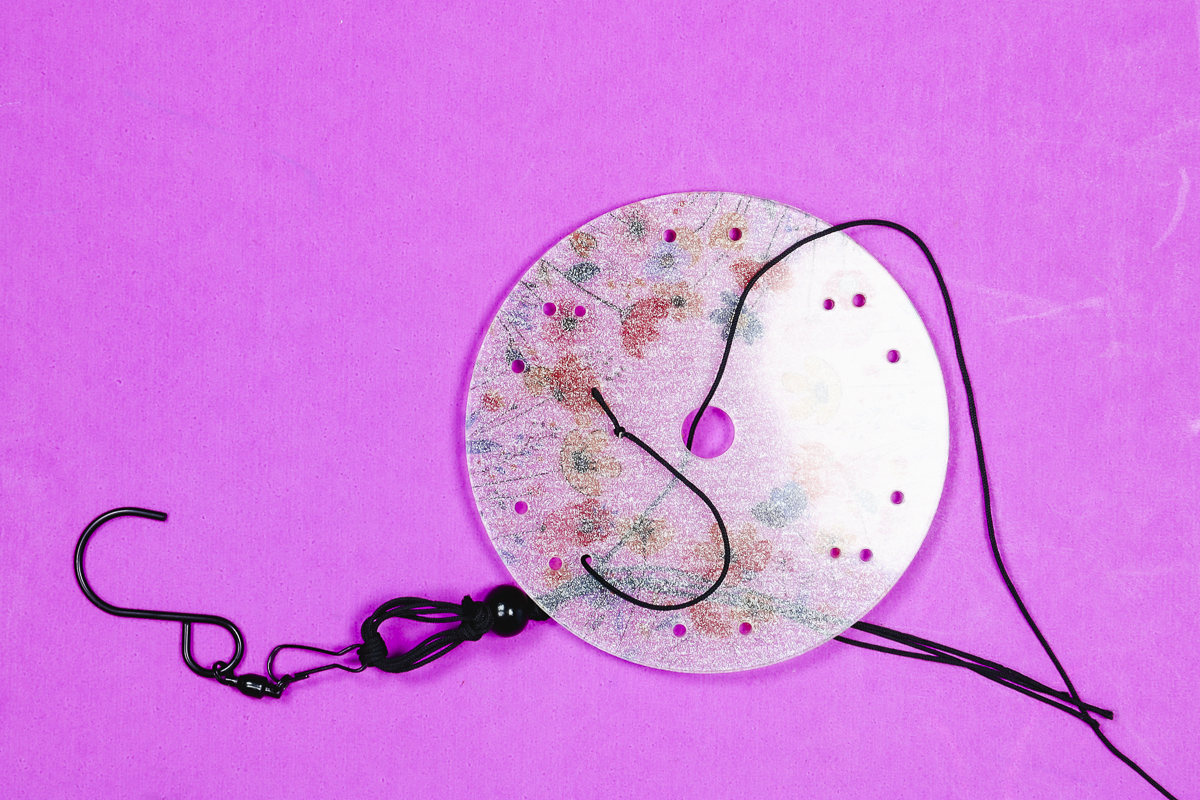
Next, you’ll see 4 holes closest to the center that are in a square.
String the 4 other cords through those holes and tie a knot as close to the end as possible.
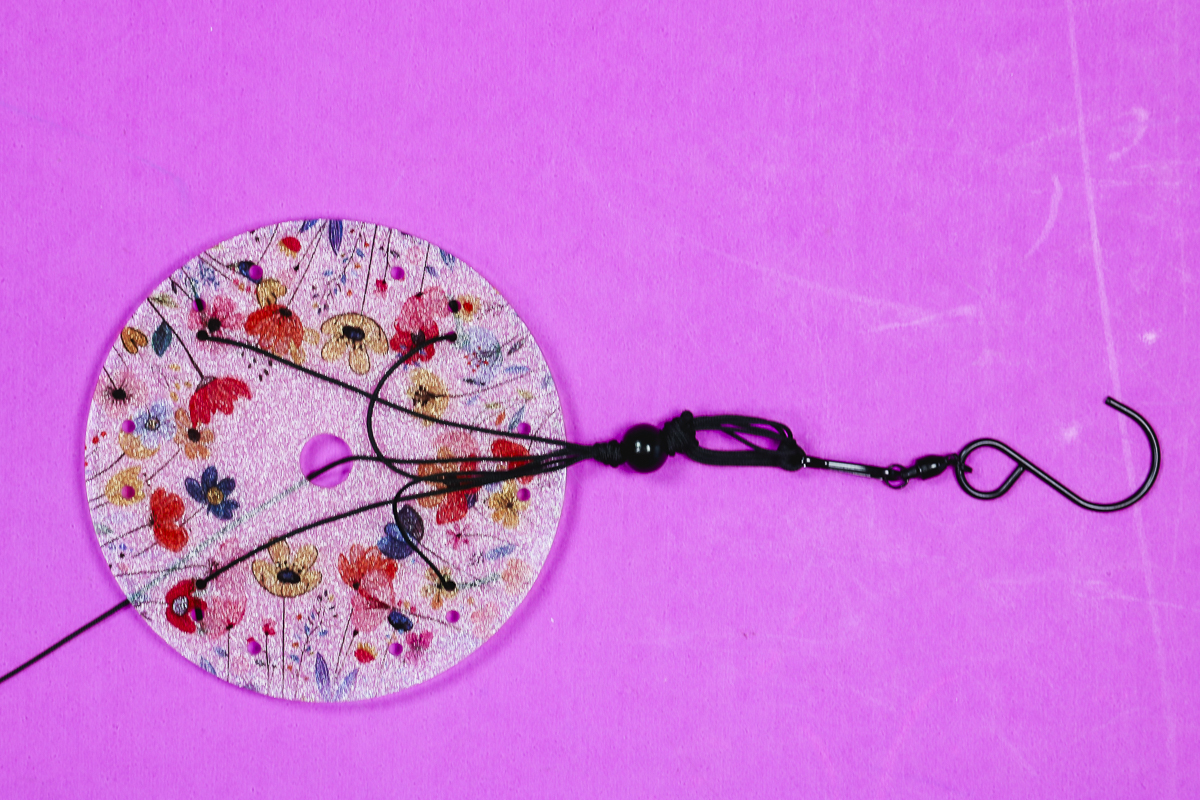
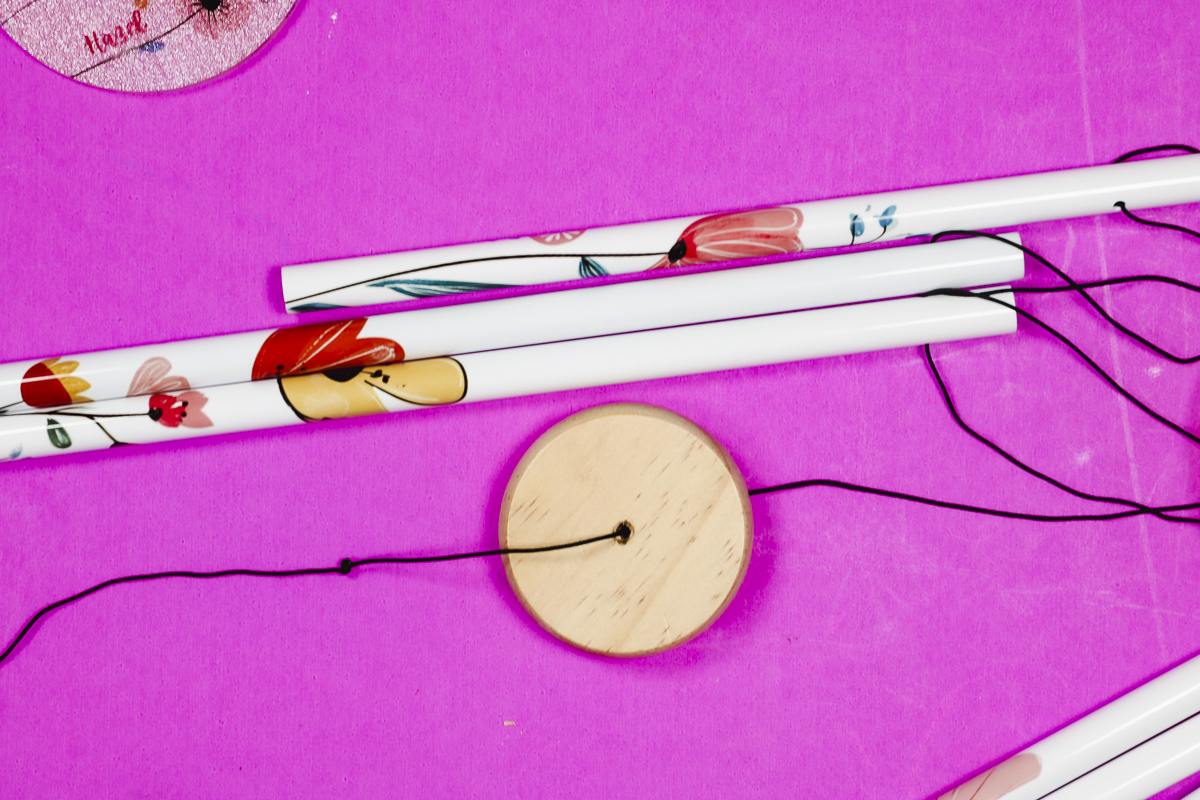
Step 17. Attach the Tubes to the Black Cord
Line the sublimated tubes up by size.
It doesn’t matter if you go from longest to shortest or shortest to longest; you just want to make sure they stay in order as you attach them around the top piece.
On the disc, you’ll see that the remaining holes are in pairs. String each end of a 12 inch cord through a hole and pull it all the way through.
Push each end of the cord through the holes on the top of the tube and push them toward the top.
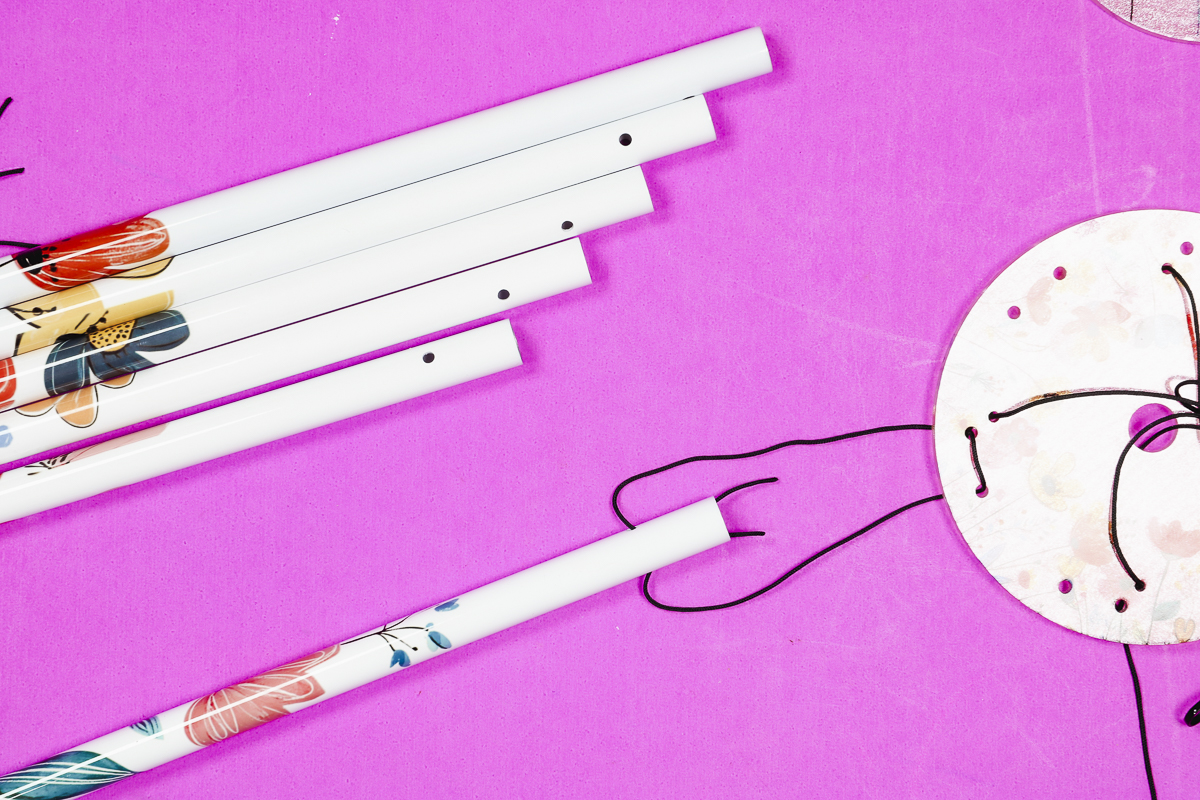
Tie the two ends in a knot close to the end of the string.
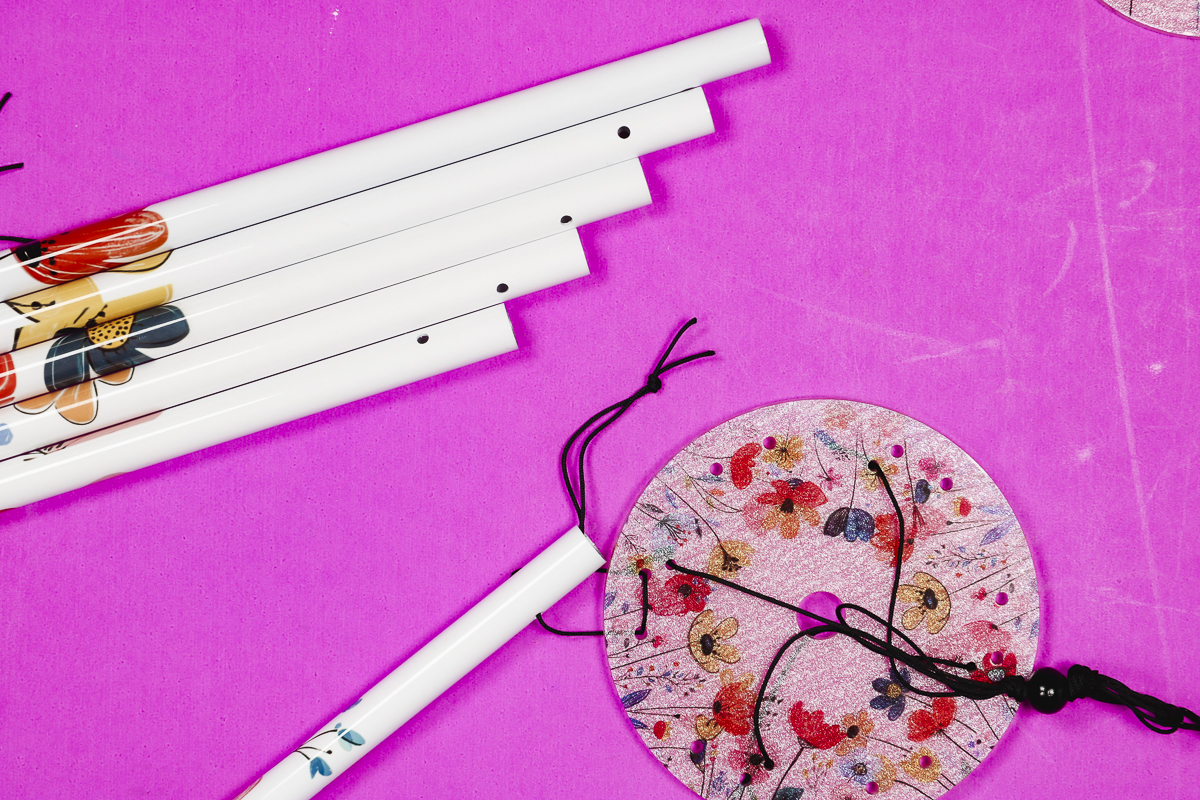
Pull the string tight so the knot hides inside the tube.
Repeat the process for each tube, tying the knot in the same place so they’re all the same length.
Remember to keep them in order so they look right when hanging.
Step 18. Attach Wood Disc
When all the chimes are attached, it’s time to add the wood disc.
Slide the wood disc onto the cord with the narrow hole on the top and the wider hole on the bottom. You want the wood disc to be about centered on the wind chimes.
I held the wind chime up from the top to get an idea of where I wanted the wood piece to be and held that spot with my fingers.
You can use a tape measure if you’d like, but this worked for me.
Tie the knot where you want the wood piece to sit. The knot will go up in the wood a little bit and be hidden.
Step 19. Attach the Bottom Acrylic Piece
The last step is to attach the bottom acrylic piece.
This step is simple, just string the cord through the hole and tie a knot to hold it in place.
And that is it! Your sublimation wind chimes are ready to hang! I’m really impressed with this whole project. The top acrylic piece looks so good.
I like having the sublimation side of the acrylic facing where people will see it. It’s more vibrant than the other side.
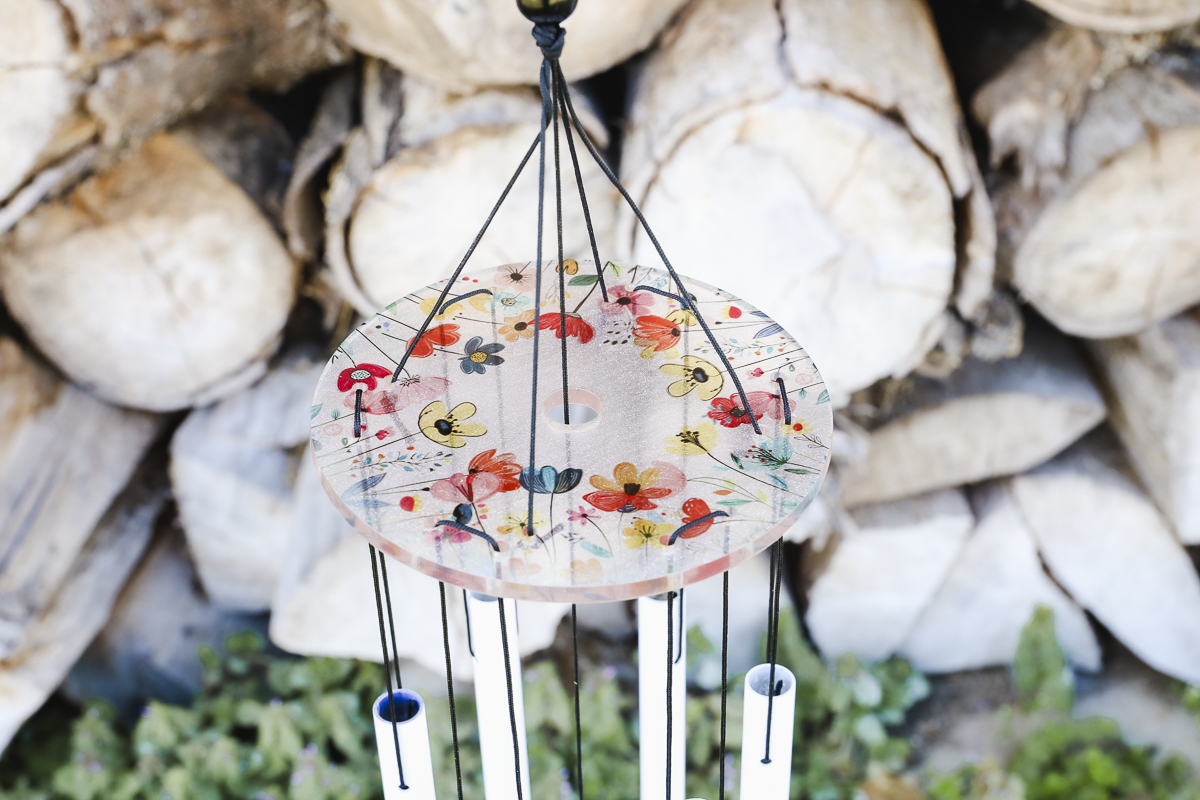
The tubes sublimated beautifully and easily.
The bottom acrylic piece also looks perfect. I love how well all the colors pop off the disc.
If you notice your wind chime isn’t hanging straight, you can make adjustments as needed. There is some extra string included. If you mess anything up, you can take it apart and make adjustments.
Optional: Finish Sublimation Wind Chimes
If you really want your wind chimes to last, there are a couple of things I recommend.
First, I would use a quality glue like E6000 and add a little to each of the knots so they stay tied. Do this after you make sure everything is the right length.
Next, I would protect the sublimation from the sun. If you’re going to hang it in direct sunlight or in a high-heat area, use a UV-resistant spray. This will give you extra UV protection and help the designs last longer.
Will You Make These Sublimation Wind Chimes?
I love how my sublimation wind chimes turned out. They look so good and were pretty easy to sublimate.
The sound of these is lovely, and I’m really impressed with the quality of these wind chimes.
I do think, for the acrylic discs, the recommended time is not quite right. My pressing time ended up being about 40 seconds longer, and with that extra time and firm pressure, the design transferred perfectly.
I do recommend mirroring your design so you can read everything correctly on the sublimation side. The glittery acrylic is hard to see through if you don’t mirror the design.
Assembling these wind chimes is a process, but it wasn’t too difficult. Just follow the steps and take your time.
These wind chimes make a beautiful, unique gift, and I recommend making yourself a set too. You won’t regret it.
I hope I’ve answered any questions you have about making sublimation wind chimes. If you have any additional questions, leave them in the comments, and I’ll be happy to answer them for you.