If you’ve ever struggled to create seamless sublimation tumblers, today is your lucky day. I’m going to teach you how to sublimate tumblers with no seams.
I’ve made many tumblers over the years. Creating a seamless tumbler was something I struggled with so I was determined to learn the best way to create seamless sublimation tumblers.
If you’re new to sublimation, my Sublimation Beginner’s Guide will help you get started on the right foot.
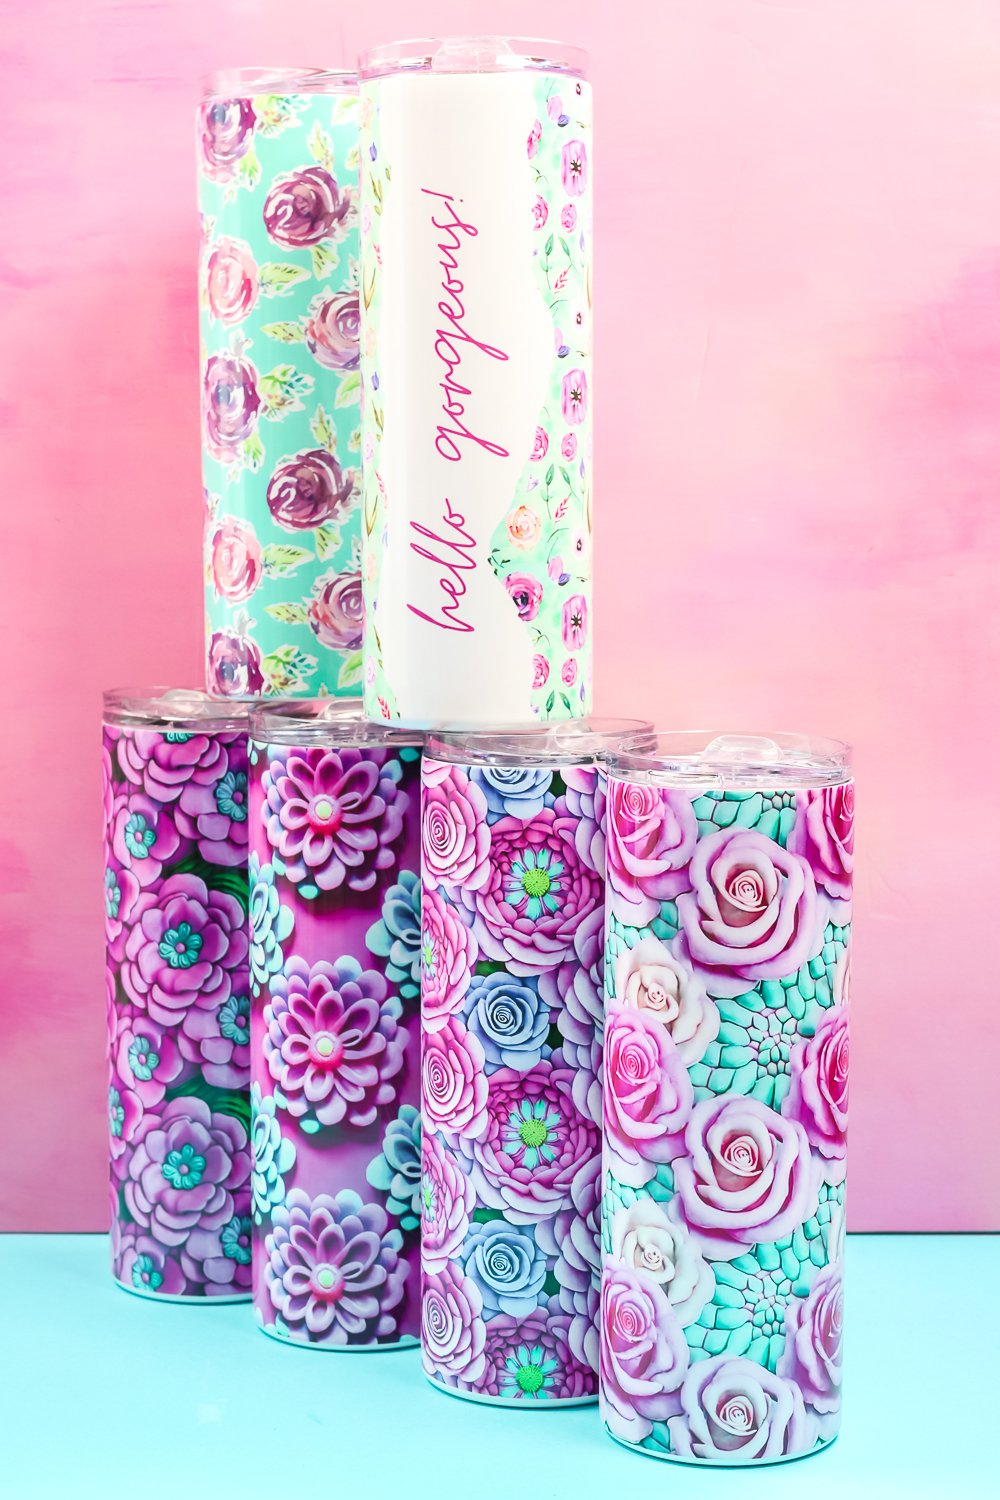
Sublimation Tumblers with No Seams
You can watch me go through the whole process of creating a sublimation tumbler with no seams by pressing play on the video below. You’ll learn all my tips and tricks for using full-wrap sublimation designs and how to create a full-wrap look with designs that aren’t seamless.
I’ll be using 20-ounce tumblers from PYD Life and a tumbler press for today’s projects.
Supplies Needed
- Free 3D Patterns
- Free Floral Patterns
- Free Canva Template (You can use the free Canva template with a free Canva account. If you want to upgrade your account, you can do that here.)
- Sublimation Printer
- Sublimation Ink
- Sublimation Paper
- Tumblers
- Tumbler Press
- Lint Roller
- Heat Resistant Tape
- Stretchy Heat Resistant Tape
- Protective Paper
- Heat Resistant Gloves
- Tape Dispenser
- Heat Resistant Mat
- Tape Measures
- Pinch Holders
- Scraper
- Weeding Hook
- Cutting Mat
- Rotary Cutter
- Clear Ruler
NOTE: I am using a sublimation print which is sublimation ink printed onto sublimation paper from a sublimation printer.
I am also using my tumbler press today. If you’re using a sublimation oven, you’ll need additional supplies like sublimation shrink wrap as well as a heat gun.
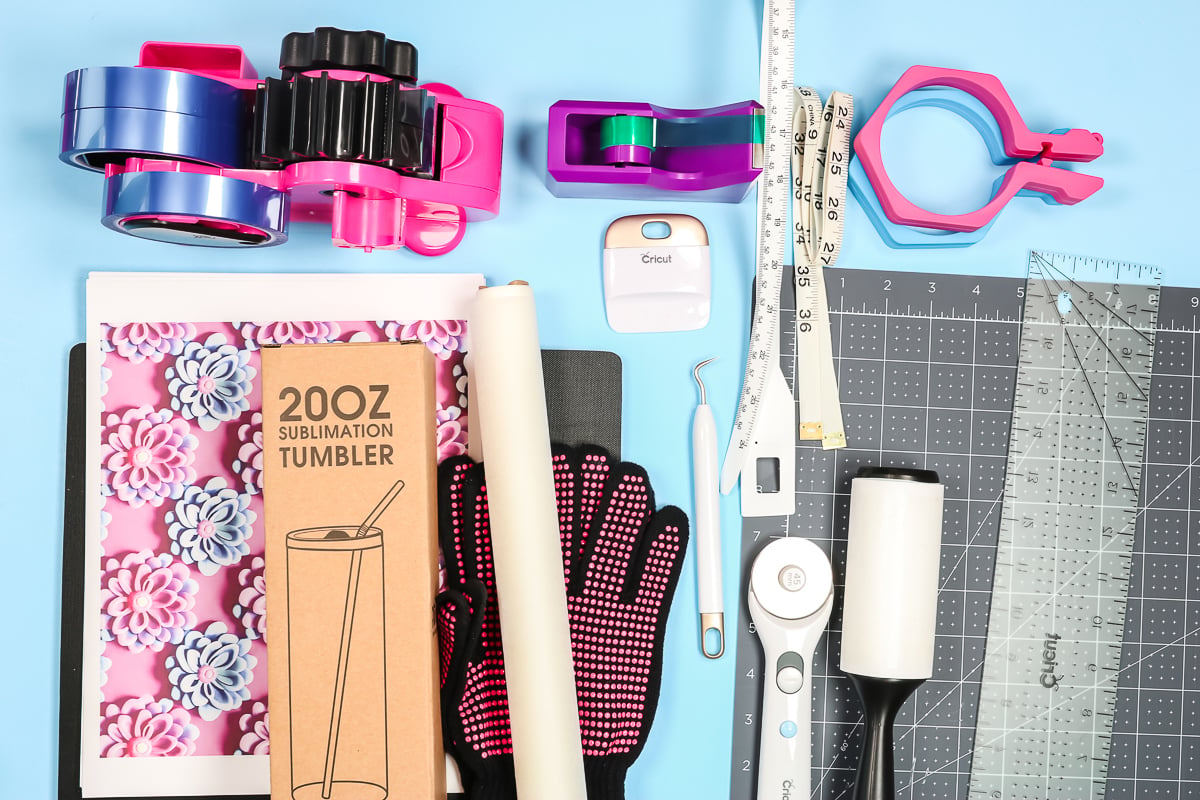
How to Sublimate Tumblers without Seams
To make sublimation tumblers with no seams, you need a pattern that continues all the way around the tumbler and then matches up along the seam. The free patterns here do work for that type of tumbler. If you aren’t using that type of pattern, I’m sharing tips and tricks for using other designs below.
Today I am only using the 20-ounce skinny tumbler. I am working on a future tutorial that includes tapered tumblers like the Stanley tumblers but I wanted to start simple today. Since this tumbler is straight, getting it right will help boost your confidence before we try something more difficult.
How to Measure Sublimation Tumblers
Because we need our sublimation print to be exactly the same size as our tumbler we need to measure the tumbler all the way around and the length. On Amazon, PYD Life has dimensions for what they recommend. Different brands and sources can be different sizes so you always want to check the size before you begin.
While the PYD Life measurements may work with other brands, I always recommend double-checking before you begin.
Measuring the Width of Sublimation Tumblers
Because tumblers may not be the same size it’s important to get the measurement right. This specific brand does have a template on Amazon, but I still like to measure first.
To check the measurement around the diameter of the tumbler, there is a cool tape measure that I like to use.
It has a portion that you slide the end of the tape measure through and then you just pull it tight. By holding the white part and then pulling the tail tight you can get an accurate measurement of the tumbler.
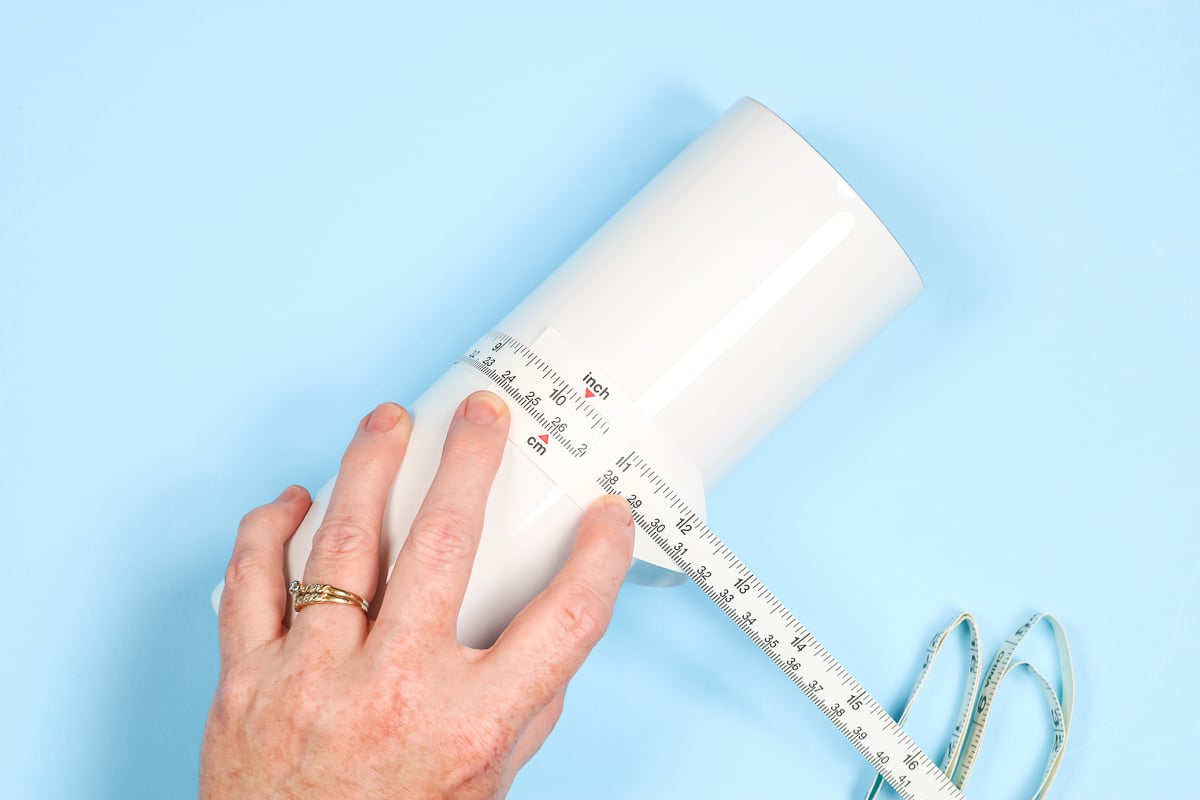
The other thing I like about this tape measure is I can easily move it up and down the tumbler. If I think my tumblers might be slightly tapered, I can test that theory by moving it up and down and measuring in several different spots to make sure I have the circumference exactly right.
The measurement given by PYD Life is 9.3 inches and I feel that is fairly accurate. So I’m going to use it for the circumference of my tumbler.
Measuring the Height of Sublimation Tumblers
Now we need to measure the height of the tumbler. I like to use a flexible tape measure, something you would use for sewing.
Place the tape measure on the open end lining up the zero with the rim of the tumbler. Pull the tape measure tight, keep it straight, and measure the height of your tumbler.
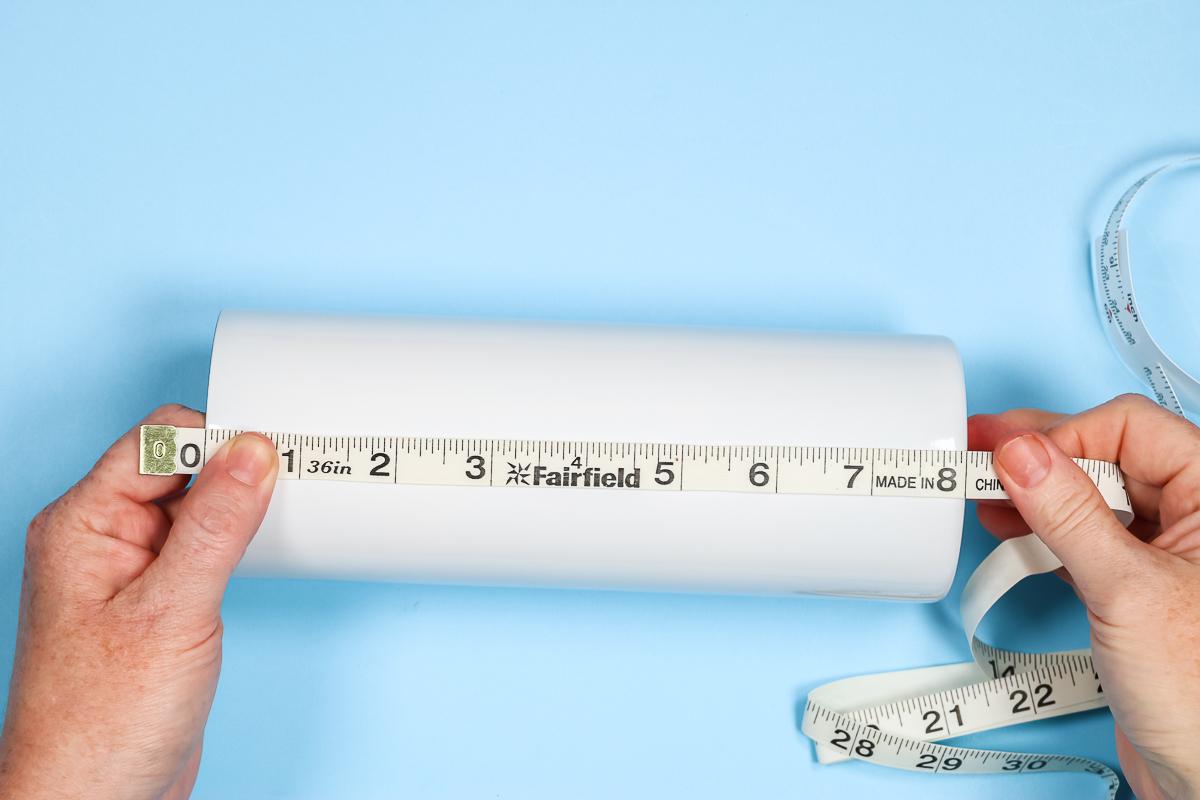
PYD Life lists this as 7.9 inches, and I feel that that is accurate. You can measure in several places to make sure that the tumbler itself is uniform. Just make sure you’re holding the tape measure tightly and not at an angle.
Now we have the height and circumference of the tumbler. Since we want to make sublimation tumblers with no seams we need our pattern to be the same size as the tumbler. This will allow your pattern to match up when you wrap it around the tumbler.
Note – if you need to resize your design at all it may mess up the seamless look. Be careful when resizing these sublimation prints or any that you might purchase from Etsy.
How to Print on a Sawgrass Printer
I’m going to print my design with my Sawgrass printer. Click Open Local File then find the file on your computer. Choose the stainless-steel tumbler setting. Now all I have to do is make sure Preserve Layout From Designer is on and confirm everything looks right in the Print Preview.
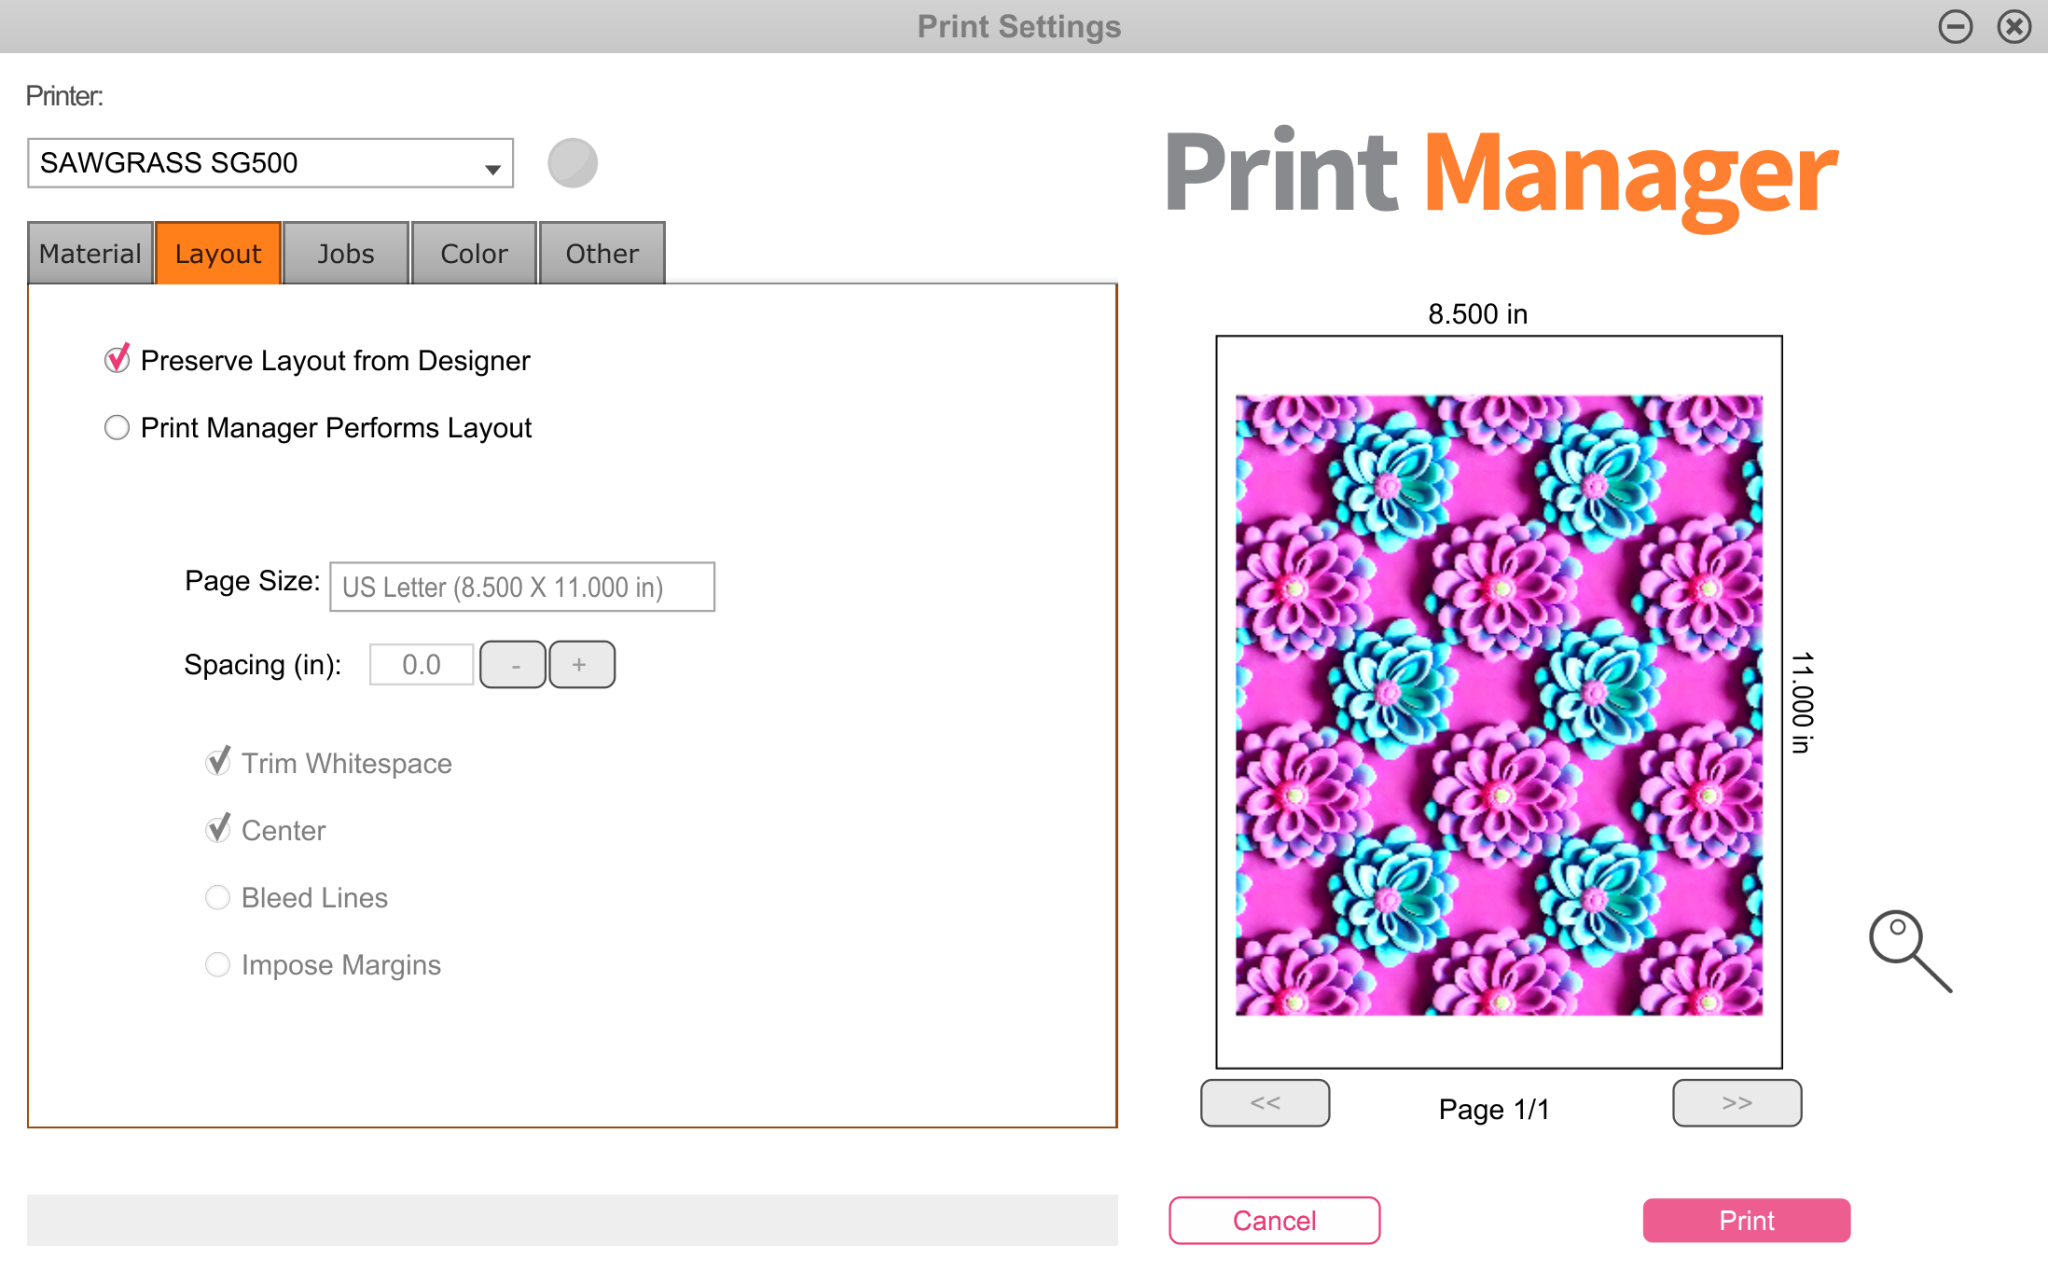
I am printing on 8.5″ x 11″ paper. In the print preview, I can see that my design is smaller than the paper which means it’s going to print at the correct size. All that’s left to do is to hit Print on my Sawgrass printer.
How to Print on an Epson EcoTank
Open up the file in any program you usually print from. I find it very simple to print the PDF version of this file on my Epson EcoTank, that way it retains the sizes. For sublimation tumblers with no seams, we need the print to print at the exact size we created it.
Then I just hit Print, make sure all my settings are correct, and make sure there’s nothing checked that would resize this print. See below where I have it set to print “actual size”.
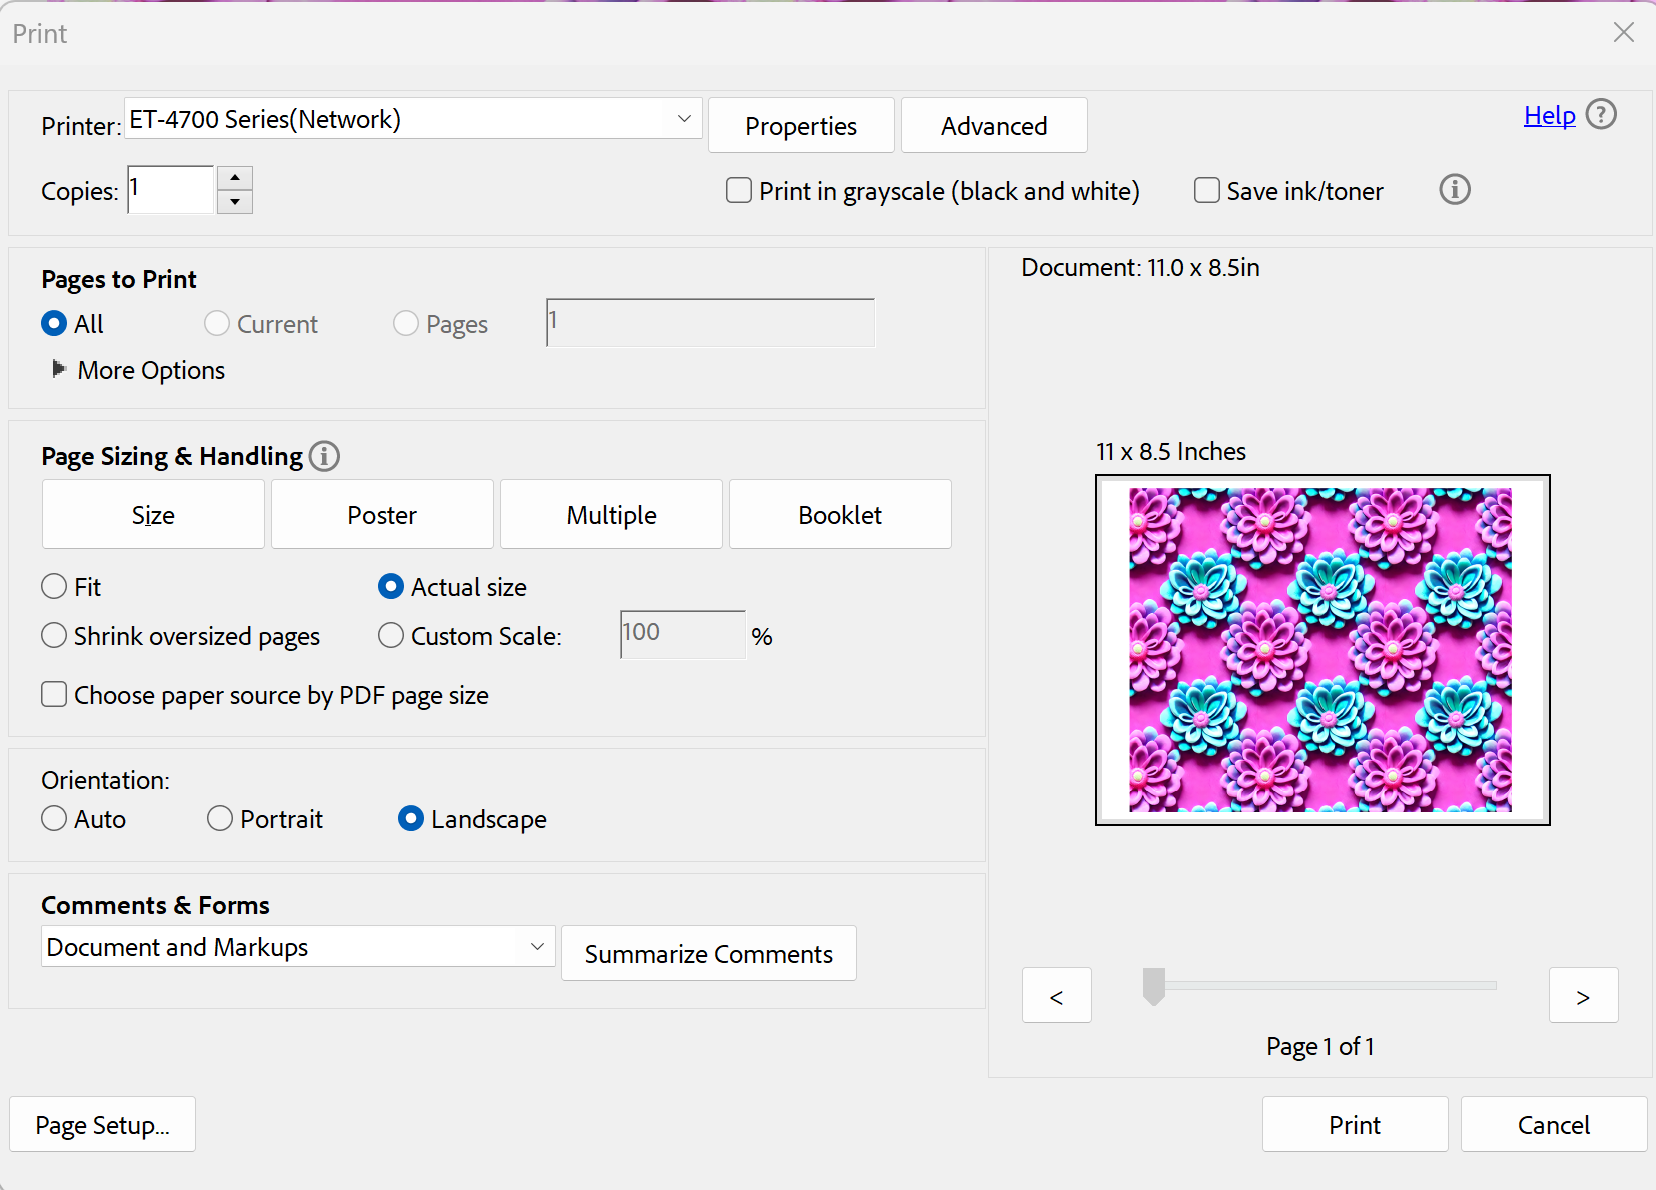
Note – I did not print out of Cricut Design Space. To my knowledge, Cricut Design Space will not print a full wrap tumbler even with the newer larger sizes because you still need the corners for the registration marks.
Trim Sublimation Print
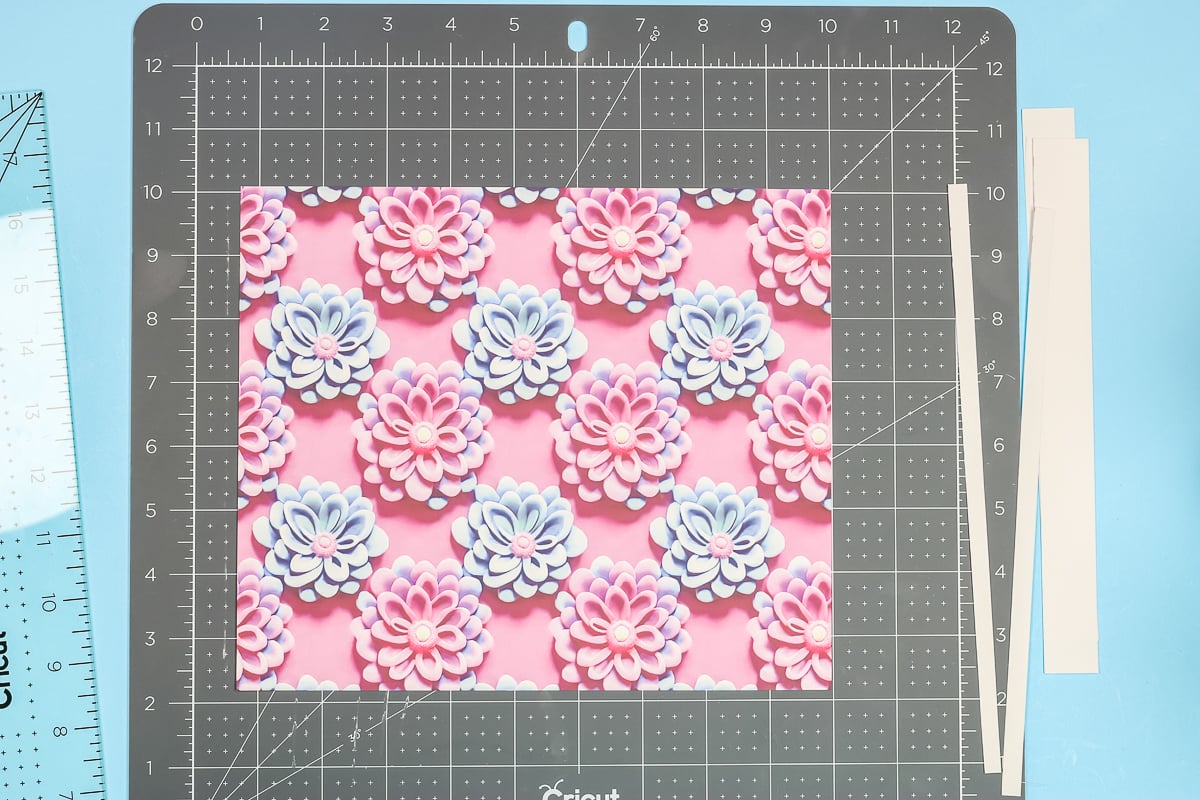
Now that we have the image printed we want to trim all of the excess white paper from the print. Because I want all of the white removed I like to use a rotary cutter and a clear acrylic ruler.
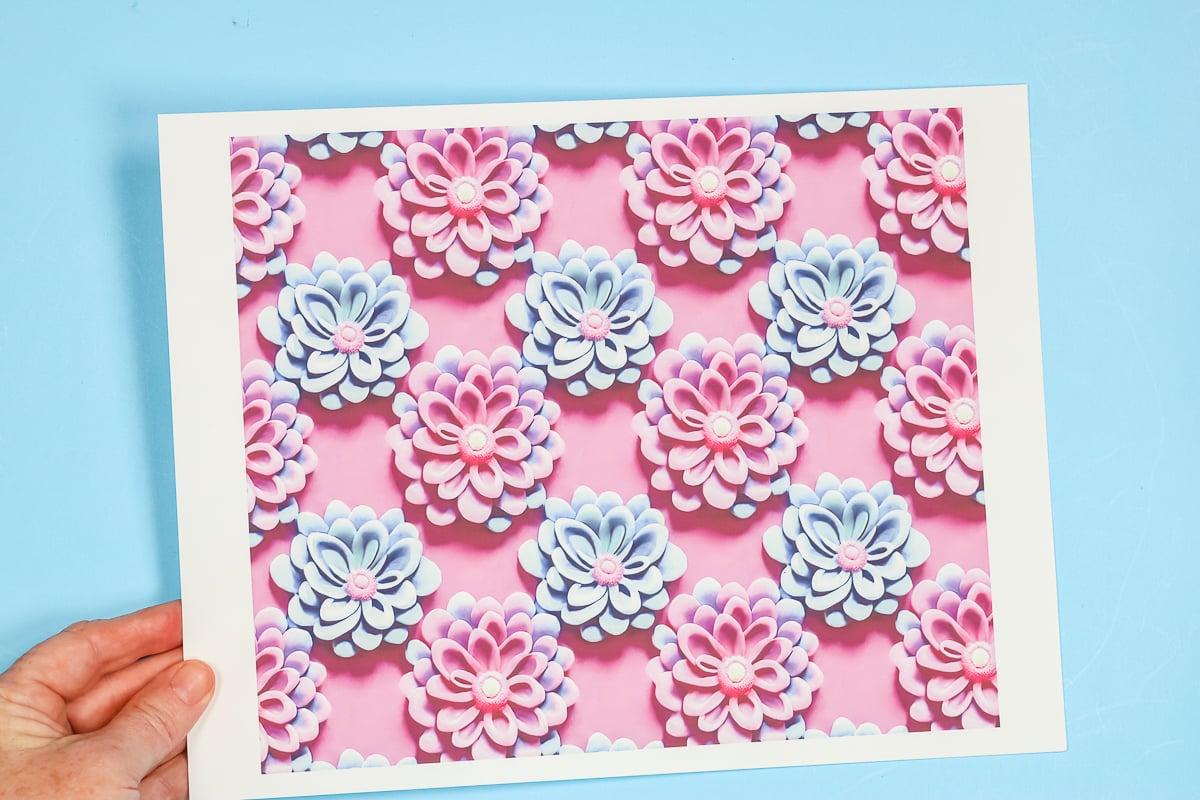
Place the sublimation print on a self-healing mat and then line the acrylic ruler up on the edge and trim off the white with a rotary cutter.
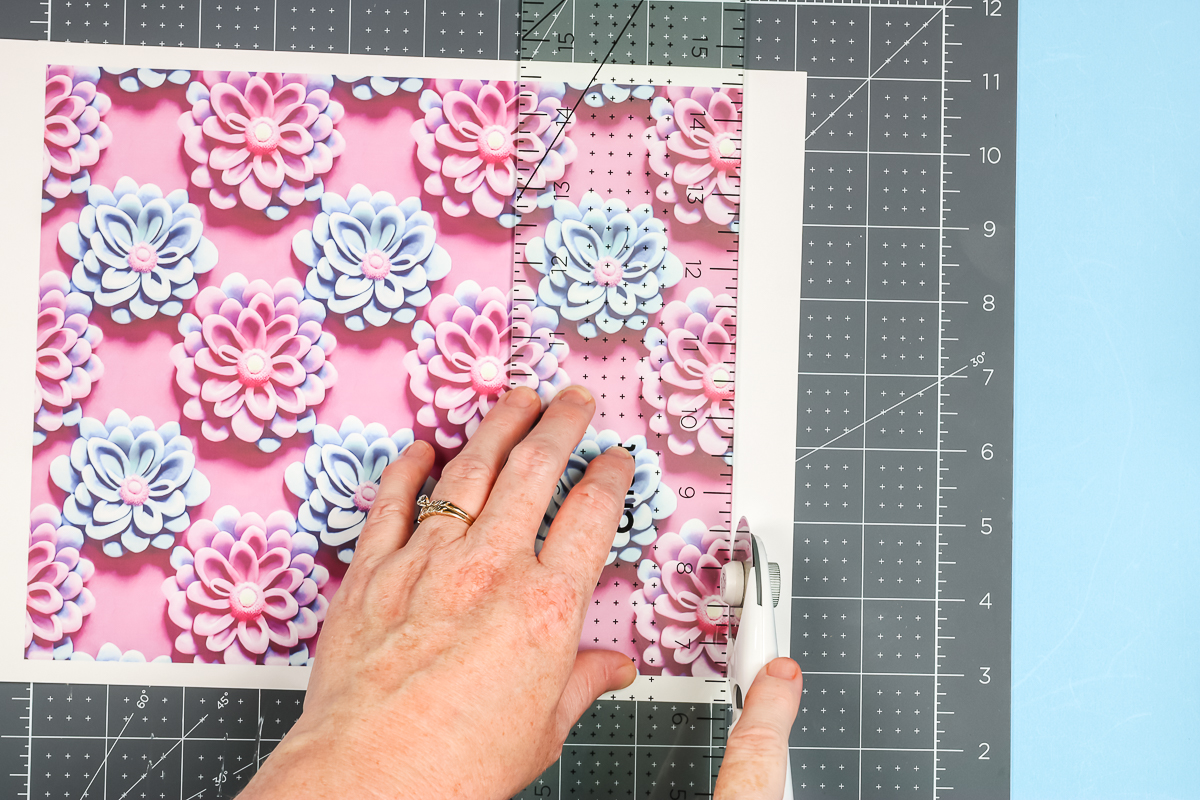
Take your time and line up the ruler so you can cut off all the white and none of the print. We really need the full print to make sure we have beautiful tumblers with no seams.
How to Wrap a Tumbler for a Seamless Design
To wrap our sublimation tumbler so it has no seam line, we need to begin by preparing the tumbler. Clean the tumbler before adding the sublimation print. I like to use a lint roller to remove any dust and debris.
You can also use rubbing alcohol and a lint-free cloth, just make sure the tumbler is completely dry before adding the sublimation print.
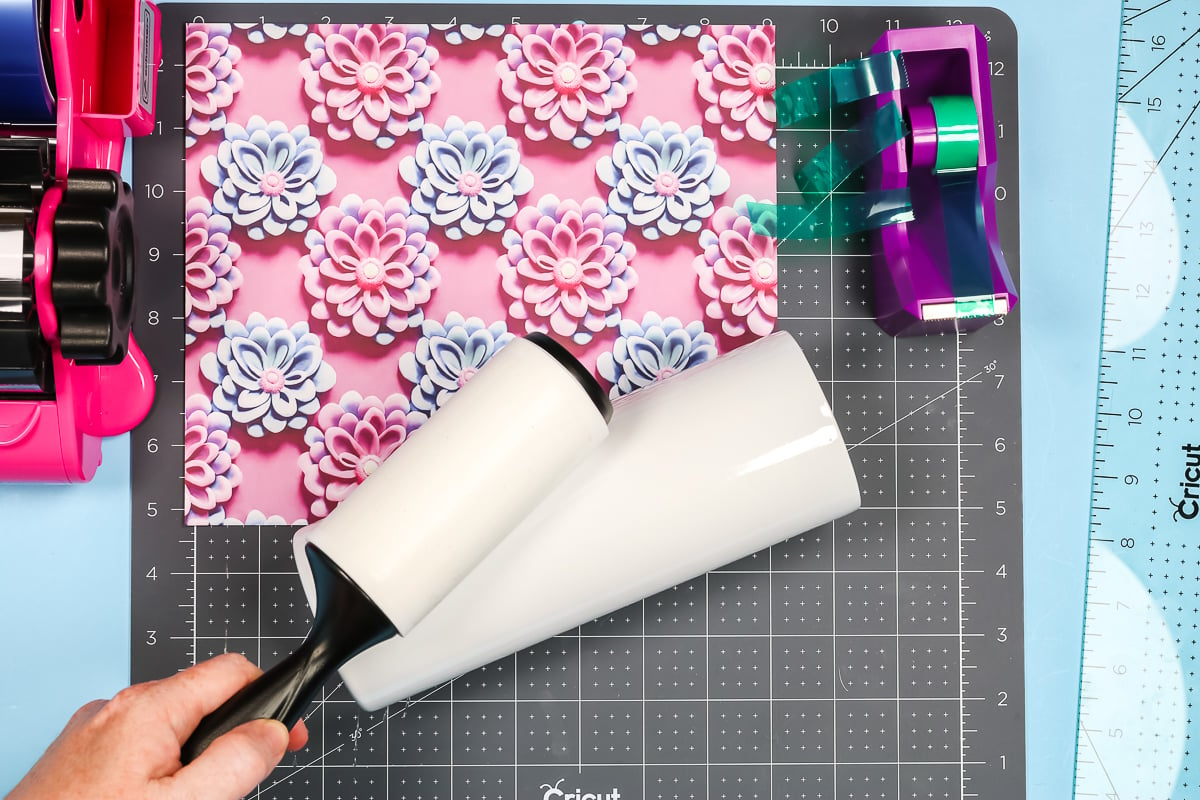
To line up the print with the top edge of the tumbler, I place the tumbler top down on a flat surface. Then put the sublimation print with the top down on the surface as well. As long as the paper is touching the surface all the way around, it should stay straight.
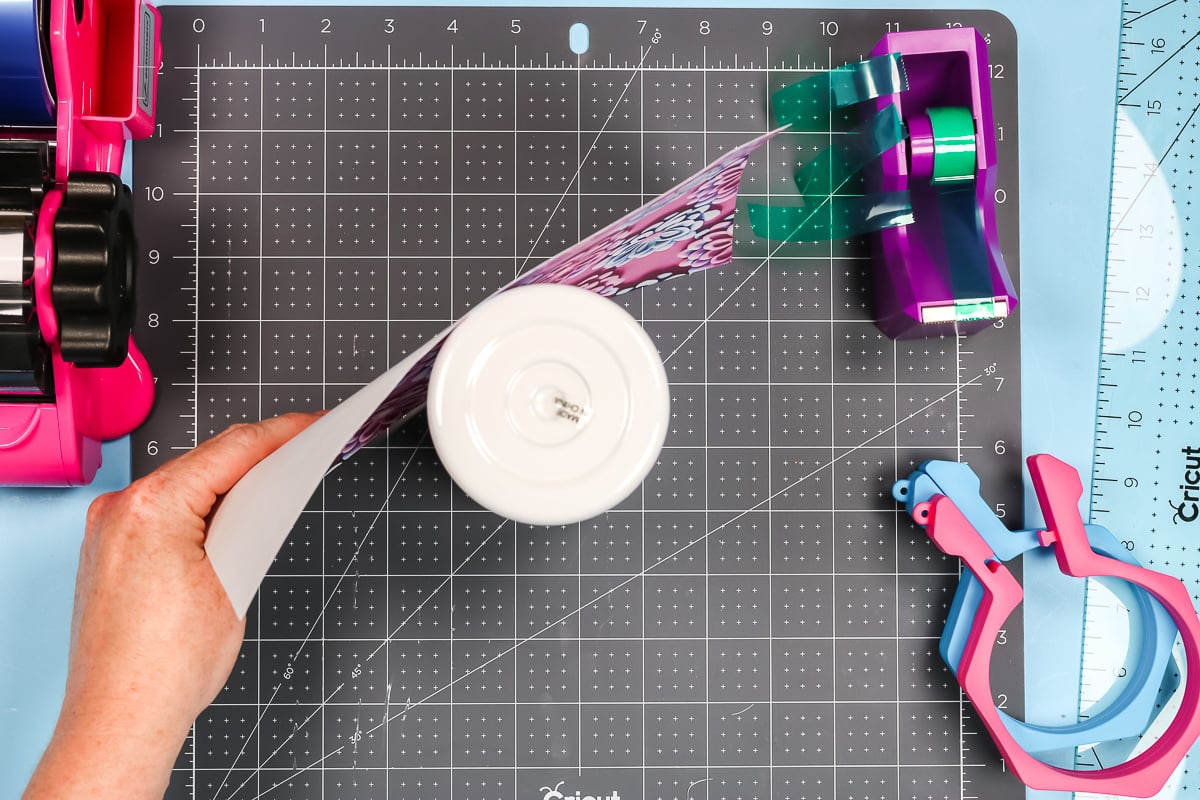
If your sublimation print is directional, double-check that you’re placing it in the right direction. You want to make sure that the print is correct when the tumbler is finished.
Lining up the center seam is the critical part. I found these clamps really helpful. They’re almost like having an extra set of hands.
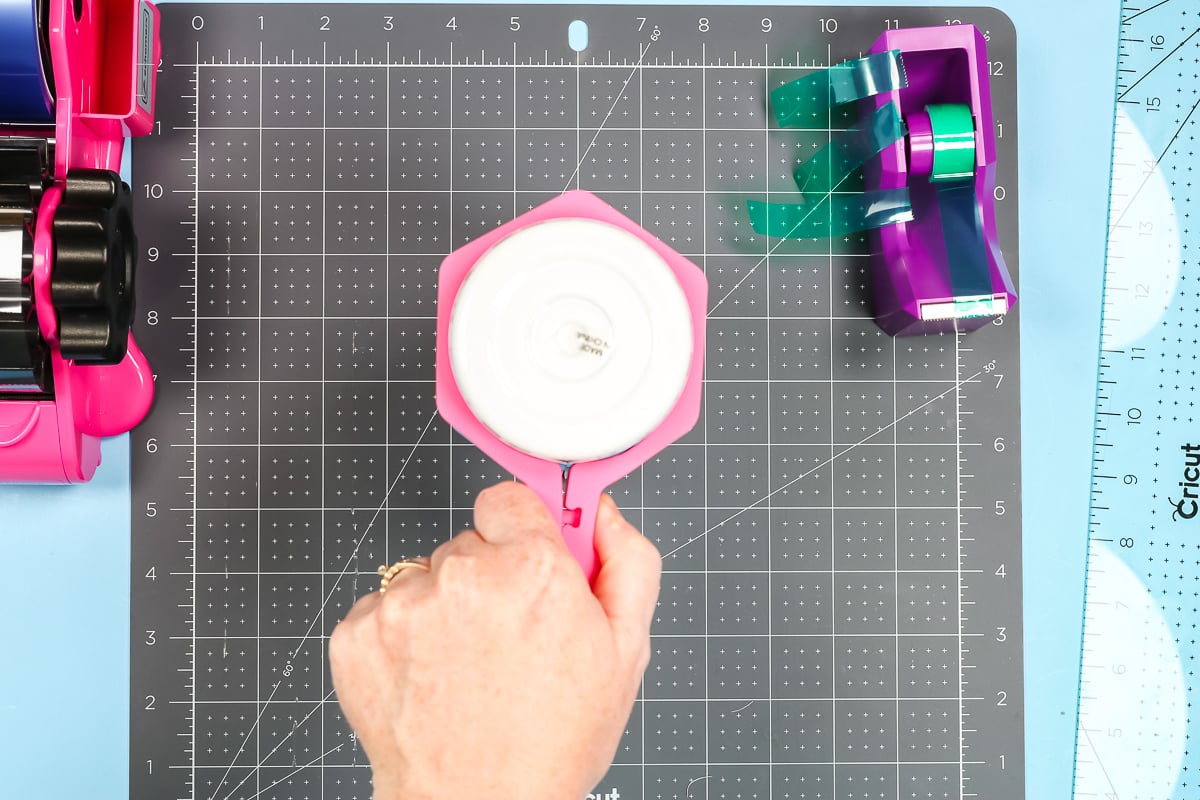
Smooth the print around the tumbler and then add a clamp toward the bottom to hold it in place. Close the clamp so the seam is where it opens. The clamp locks into place so the print won’t go anywhere.
Move up the tumbler and add another clamp toward the middle. Once the clamps are locked into place, you can lay the tumbler on its side. The great thing about these clamps is that they have flat spots so the tumbler doesn’t roll as you’re taping the seam.
How to Tape Tumblers for No Seams
This step is the most important step so take your time. I am using heat-resistant tape that has some stretch to it. You can use the stretchiest brand you have. For me, that was the Artesprix heat-resistant tape. I like to use 3-inch strips.
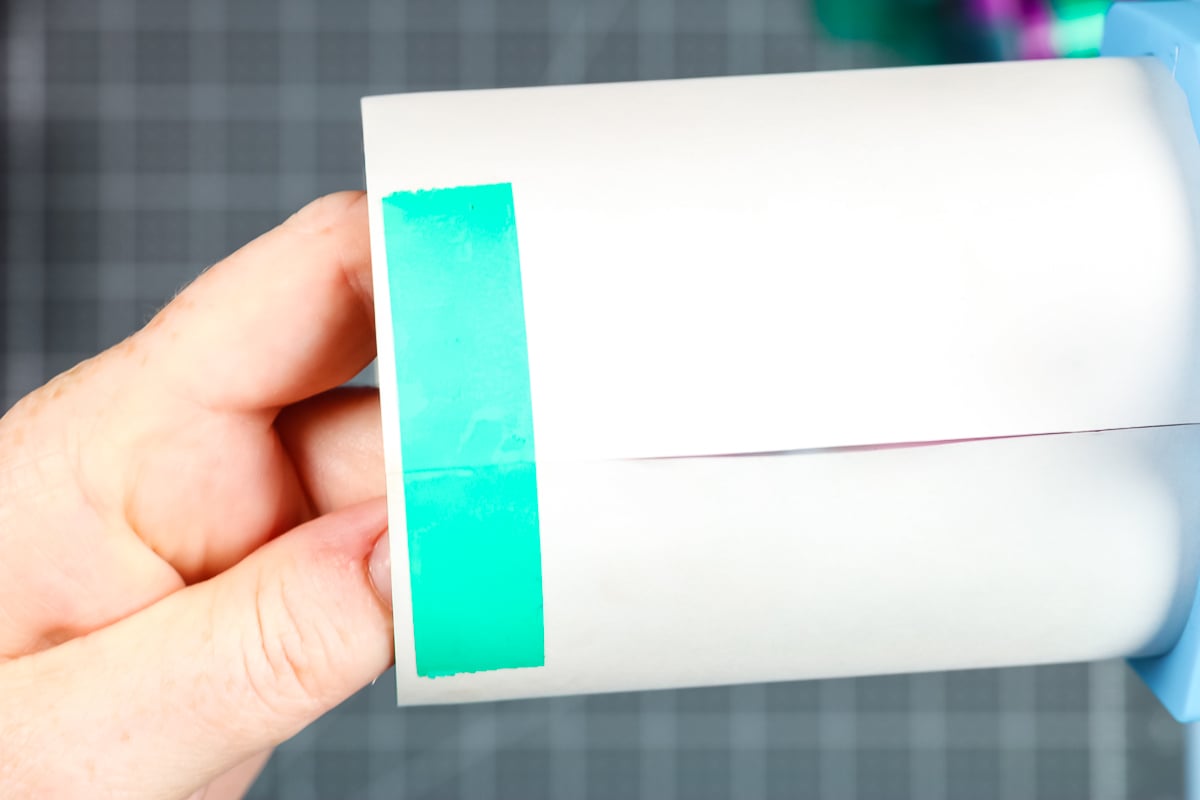
Make sure that the print is all the way to the top and that the sublimation print lines up with itself on both the top and bottom exactly.
You do not want the sublimation print to be crooked at all. You need to make sure it’s meeting up at the top and bottom or it will mess up your entire print.
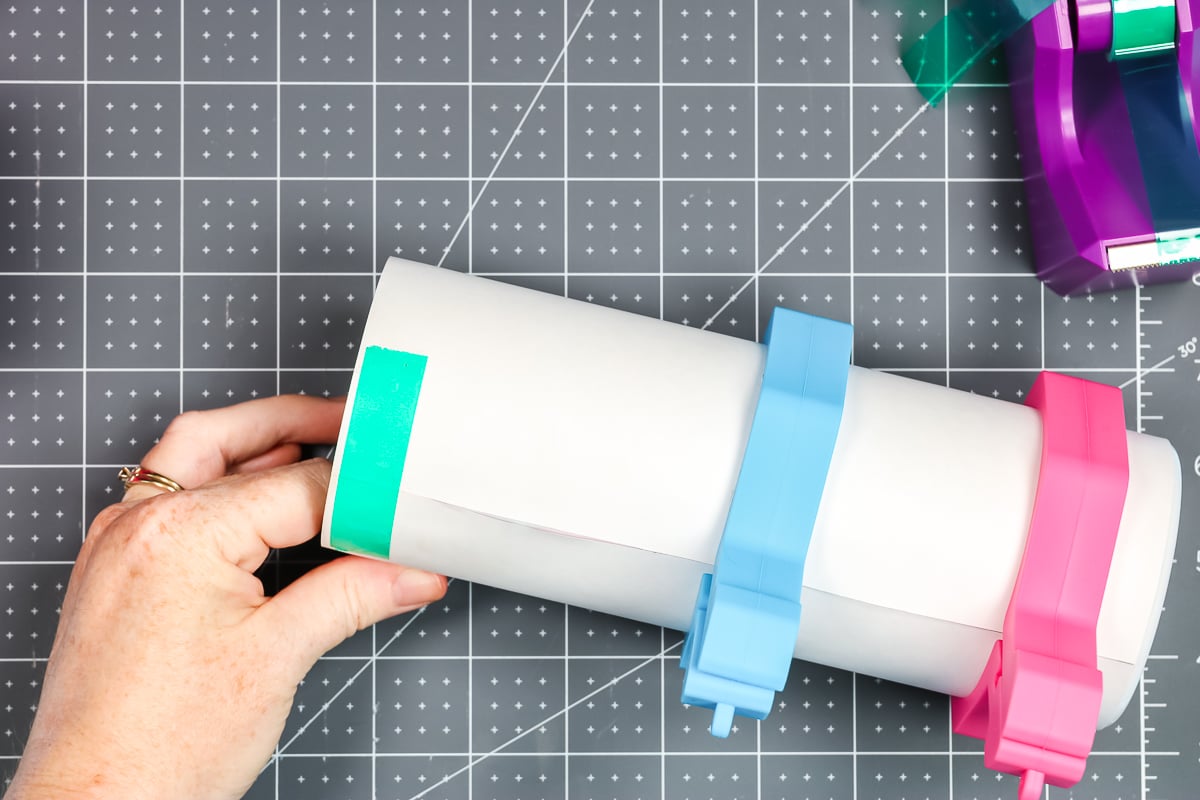
Because we’re using a seamless design we want everything to line up exactly. I’m going to take the time to line everything up perfectly because this is the point where we can still adjust the print as needed.
Note – I tried using just the clamps to hold the print in place and I ended up with a gap in my print. I like to use the clamps and my hands to pull everything together.
When to Use Stretchy Heat Tape
This is where the stretchy heat-resistant tape comes in. I like the Artisprix tape for this.
I’m starting at the top of my tumbler at the opposite end of the clamps and I’m squeezing the sublimation print so the seam is completely closed up.
Add the tape to one side of the print so it’s like a flap and then pull the tape while smoothing the other side of the print toward the tape. You want the seam to be lined up without an overlap or gap at all.
If, in the process of taping the seam your print gets crooked, gently lift the tape and straighten out the print again.
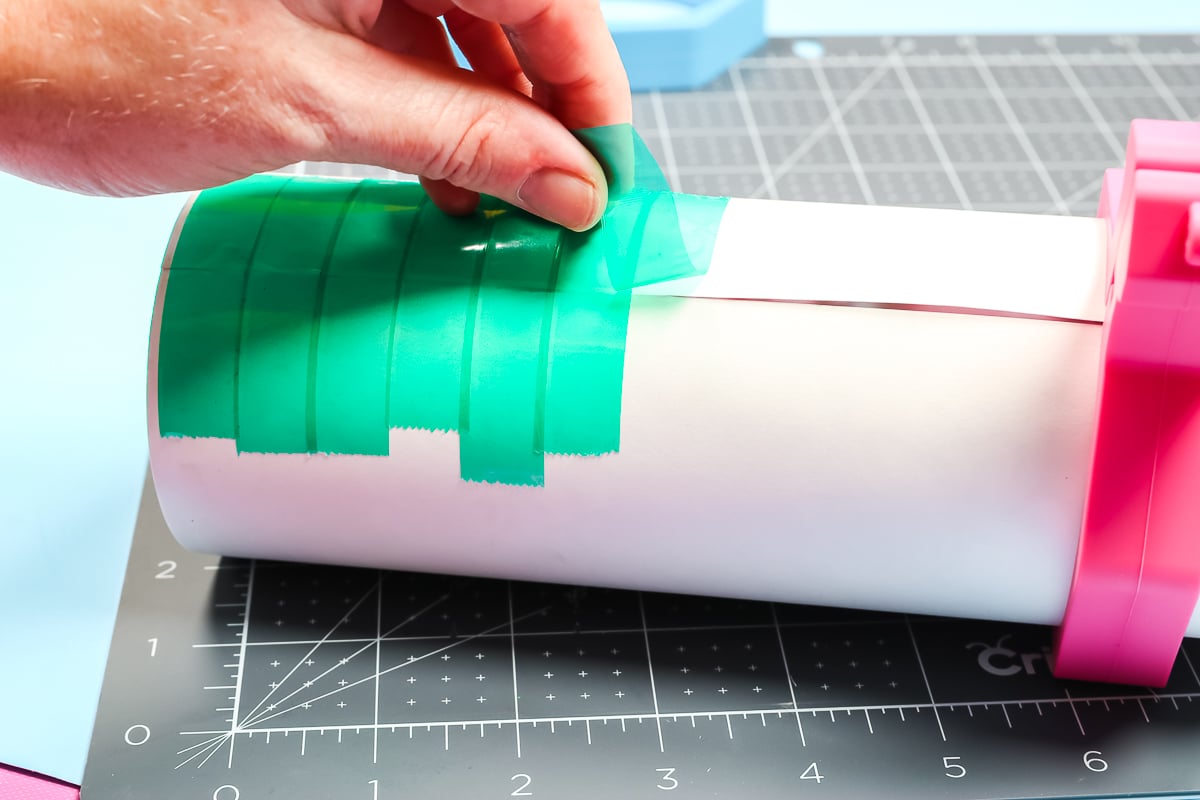
Repeat the same process down the entire tumbler. I like to overlap the tape just slightly.
Add the tape to one side, pull the sublimation print with your hand on the other side, and pull the other side of the sublimation print with the tape, stretching it as you go.
As you reach the clamps, you can remove them because your sublimation print will be taped into place.
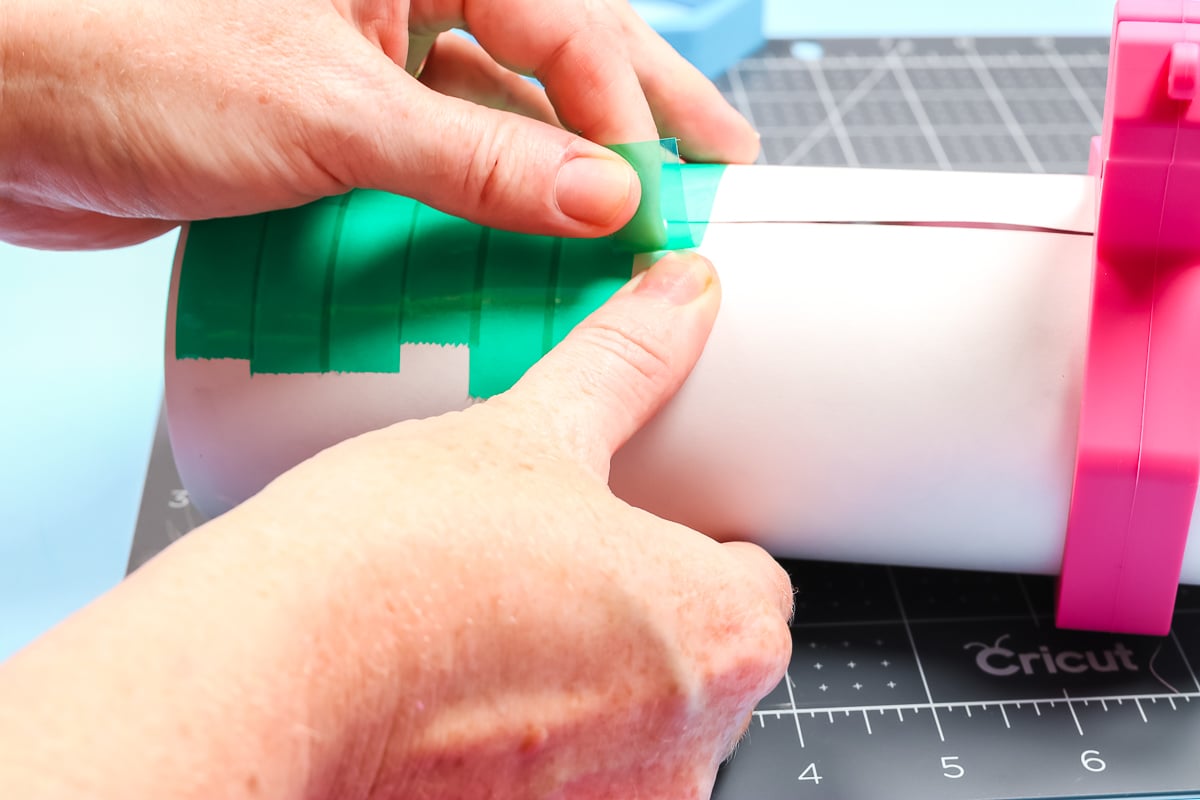
You need to be mindful that the sublimation print is meeting at the bottom exactly. You do not want it to move or get crooked.
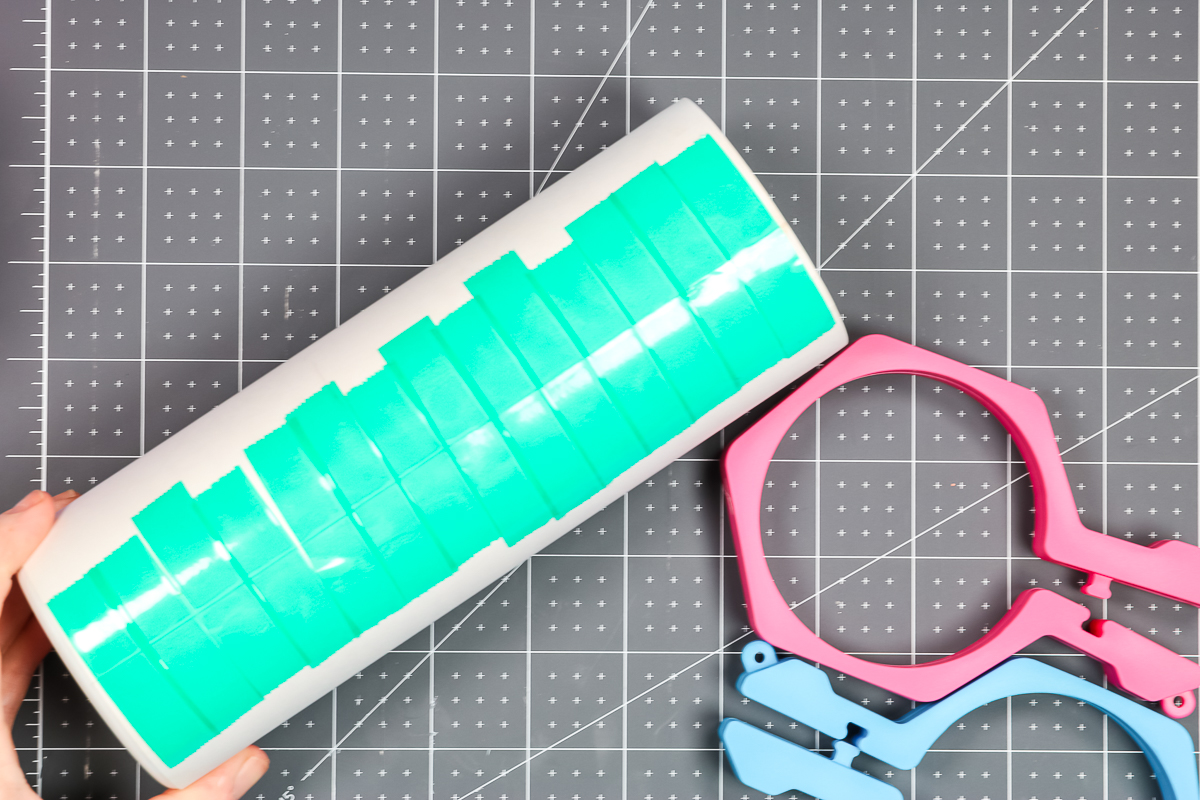
Use a Scraper Along the Seam
When you’re done taping all the way down the tumbler it’s time to burnish the seam. You can use a scraper, an old gift card, or even your fingernail to rub down both sides of the seam. You want that seam to kind of disappear as much as possible.
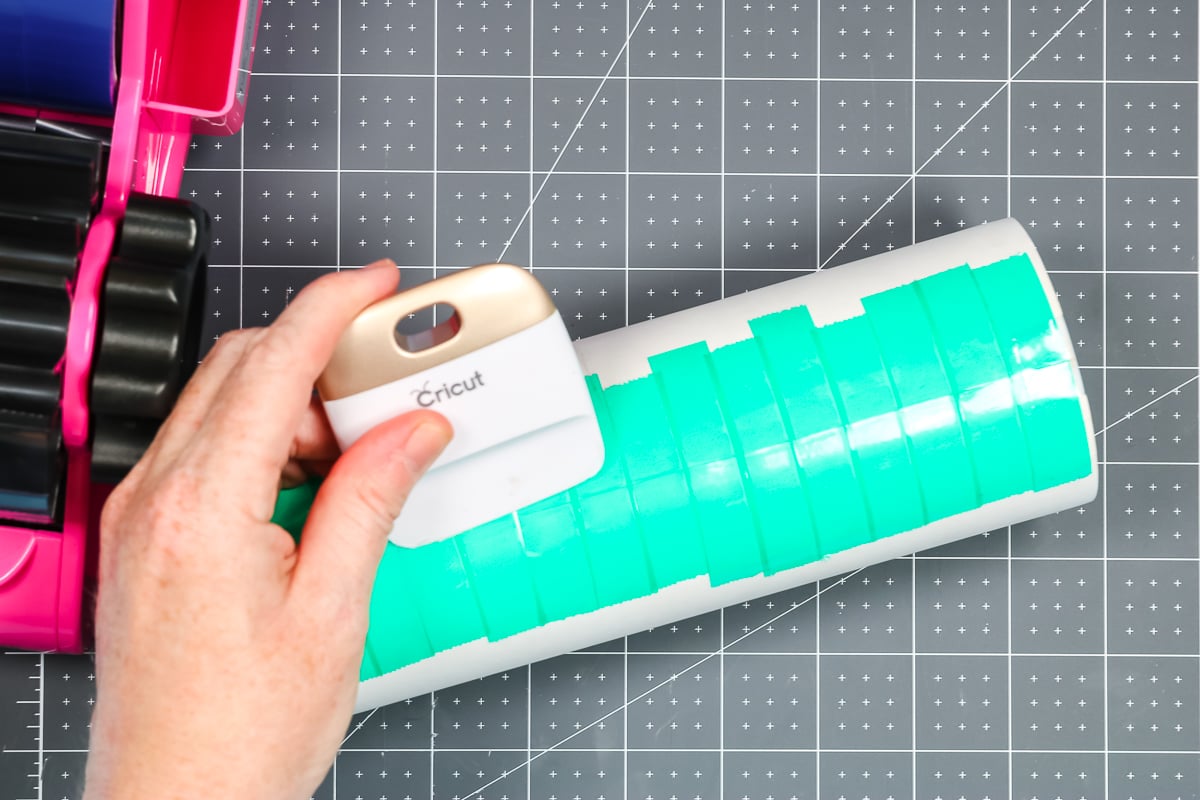
We want the tape to be down really, really well. I like to just go over all of the tape with this scraper and make sure it’s down really well holding everything tight on the tumbler.
How to Tape the Top and Bottom of the Sublimation Tumbler
Now that we have the seam taped down we can use regular heat-resistant tape. I like the Cricut brand.
The first thing I’m going to do is put a piece of tape on the seam along the top edge of the sublimation print. Place it vertically then fold it over the tumbler edge. Repeat this process on the bottom.
We’re going to put a piece of sublimation tape on the vertical piece that we just added, and we’re going to press it from one end to the other.
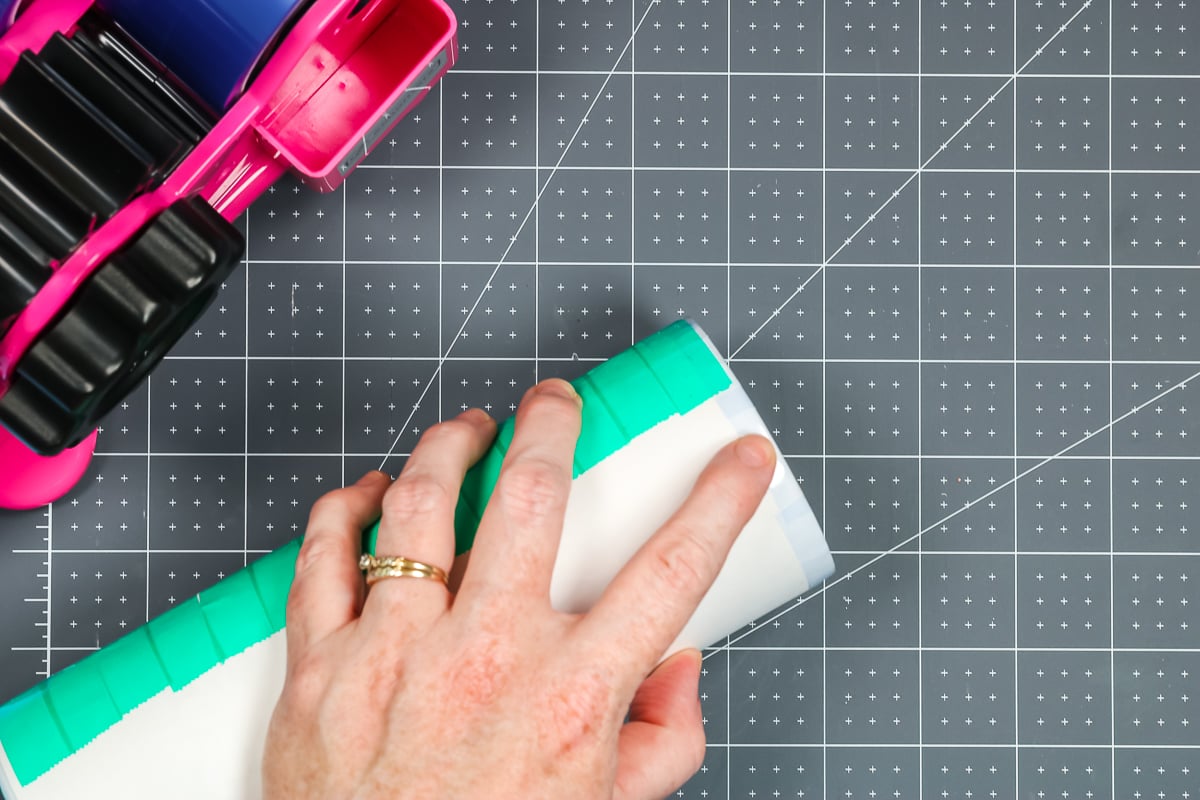
Then we’re going to smooth it over the lip of the tumbler into the inside and repeat that all the way around the tumbler.
I like to overlap them slightly pressing from one side to the other and then smoothing into the inside of the tumbler. I like to keep these pieces of tape shorter. It helps hold it a little bit tighter because you’re able to control the tape more easily.
If you don’t get the print tight enough, you’ll end up with extra sublimation print as you work your way around. If you end up with a gap, that means your print is loose and the seam is likely not going to be perfect. You’ll have to decide if you want to remove the print to save the tumbler or if you want to proceed.
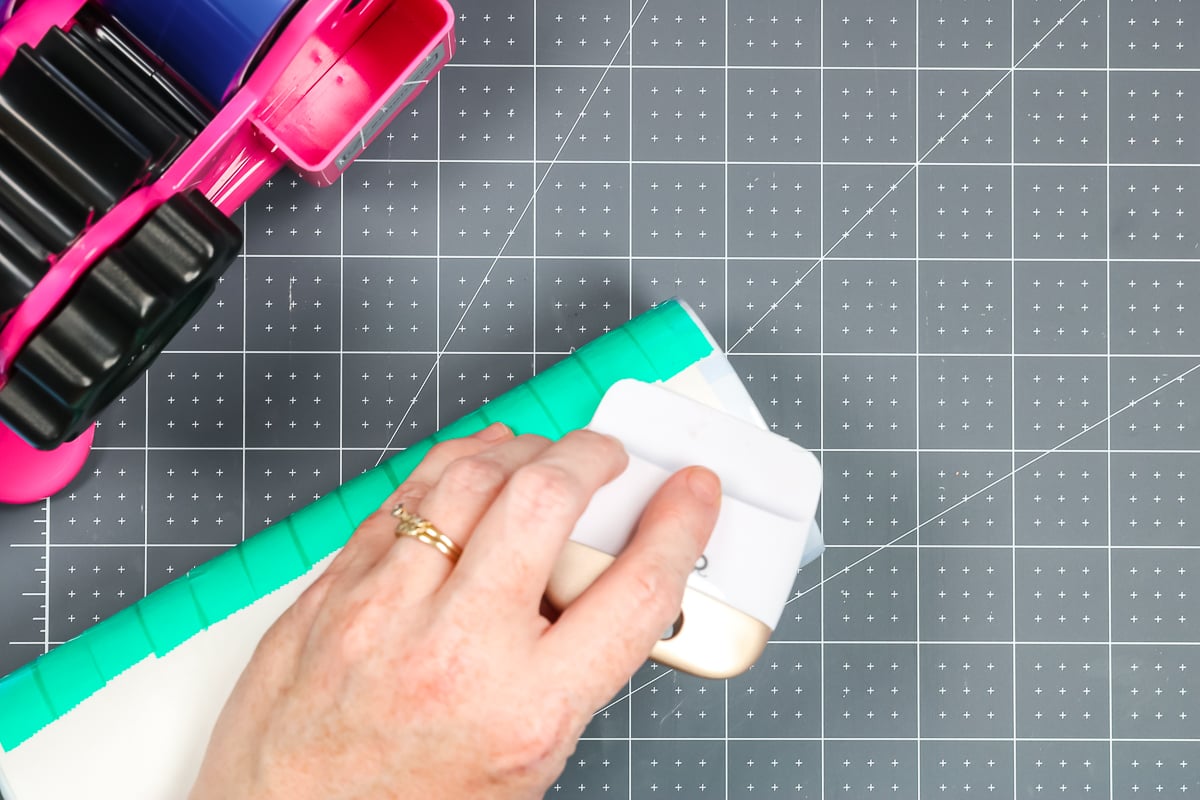
With the tape all the way around the top you want to press it down really well, including inside. I like to go over it with a scraper and even rub it on the mat to make sure the edges are really tight.
Once you’re happy with the top, repeat that entire process on the bottom. The tumbler is ready when both ends are taped and everything is tight.
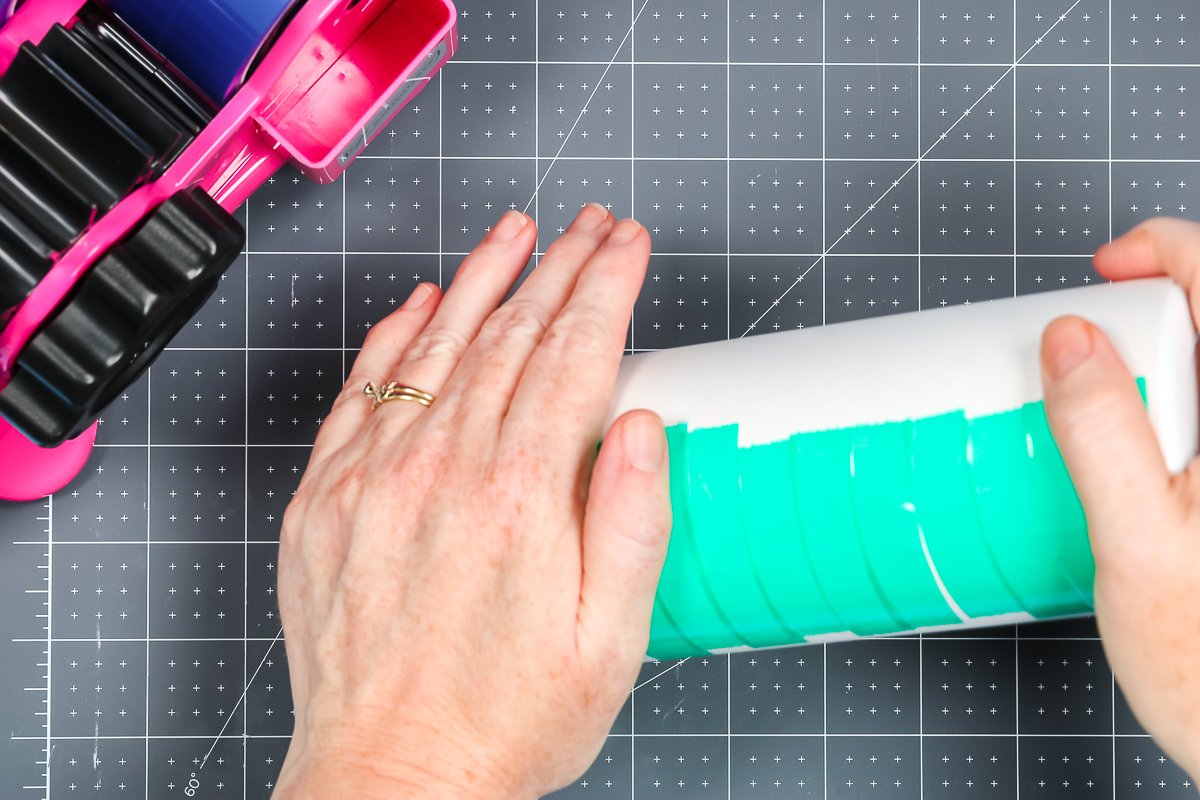
Roll both ends on a firm surface pressing the tumbler down. This will ensure that the tape is really tight and that you do not get any ghosting.
Preparing Seamless Tumblers for the Tumbler Press
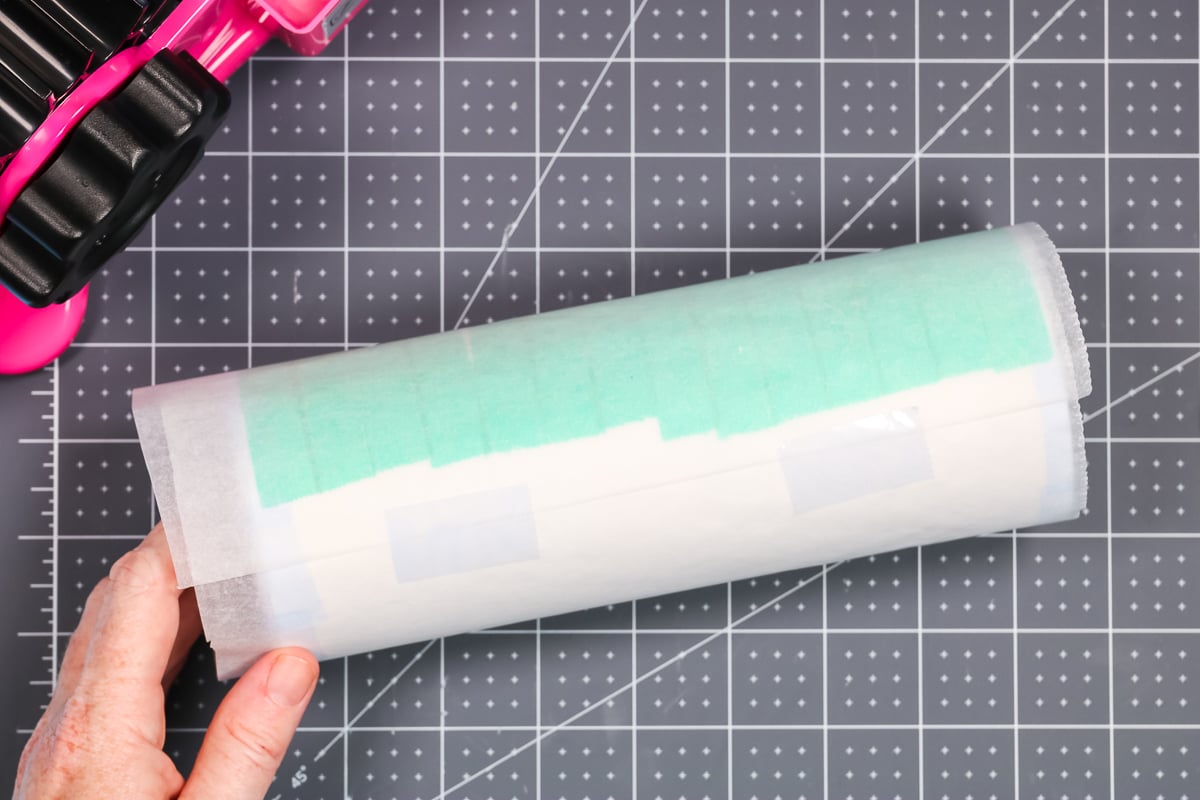
I like to protect my press by adding a sheet of protective paper around the sublimation print. Add a couple of pieces of tape to hold the protective paper in place.
This is to protect the tumbler press from any sublimation ink that might leak out. I don’t expect it to but it’s better to be safe than sorry. I do reuse the protective paper and the tape holding it for multiple tumblers. If there’s no ink on it or yellowing, I just carefully remove it once it’s done and reuse it if possible.
Add Seamless Tumbler to Tumbler Press
Today I am using my PYD Tumbler Press. I have it heated to 356 degrees and the time set for 50 seconds. I have my tumbler press set to the right pressure, I recommend you do that before you heat the tumbler press up.
NOTE: My time and temperature came from the manufacturer. Make sure you check the time and temperature for the blank you are using. If you are using a sublimation oven, your time and temperature will be significantly different.
I like to put the seam of the print to one side of the tumbler press so it’s not on the open part of the press. This way, the seam will be pressed twice.
When you first add the tumbler into the press and close it, the temperature reading will drop. That is okay and expected. You can wait a couple of additional seconds once it beeps before turning it.
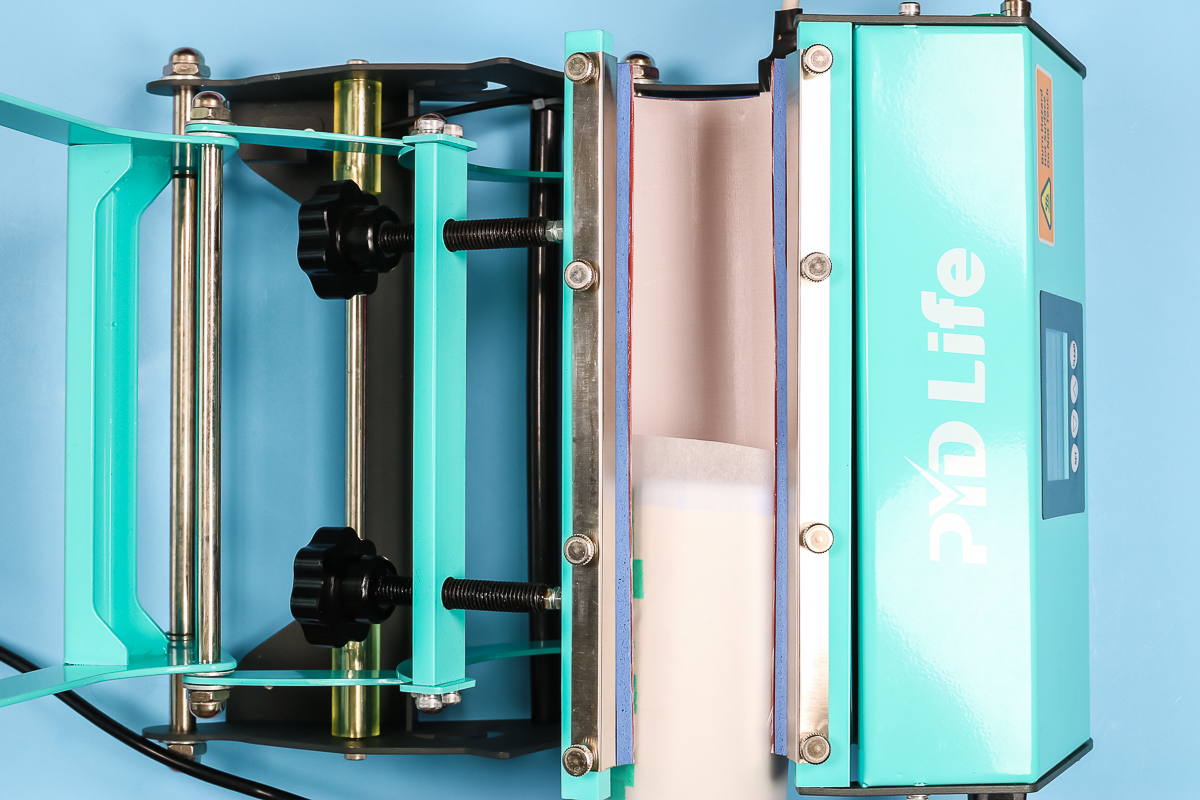
After the tumbler press beeps, open the press and rotate the tumbler so the seam is on the other side of the press, and then close it again. Allow the tumbler to press for the full time again and then remove the tumbler from the tumbler press.
When you pull the tumbler out of either an oven or the press, you should be able to see your print through the paper. That gives you an indication that it’s sublimated well.
Remove Protective Paper and Sublimation Print from Tumbler
You will want a heat-resistant mat to put the tumbler on while it’s hot. You’ll also need heat-resistant gloves because the tumbler will be hot.
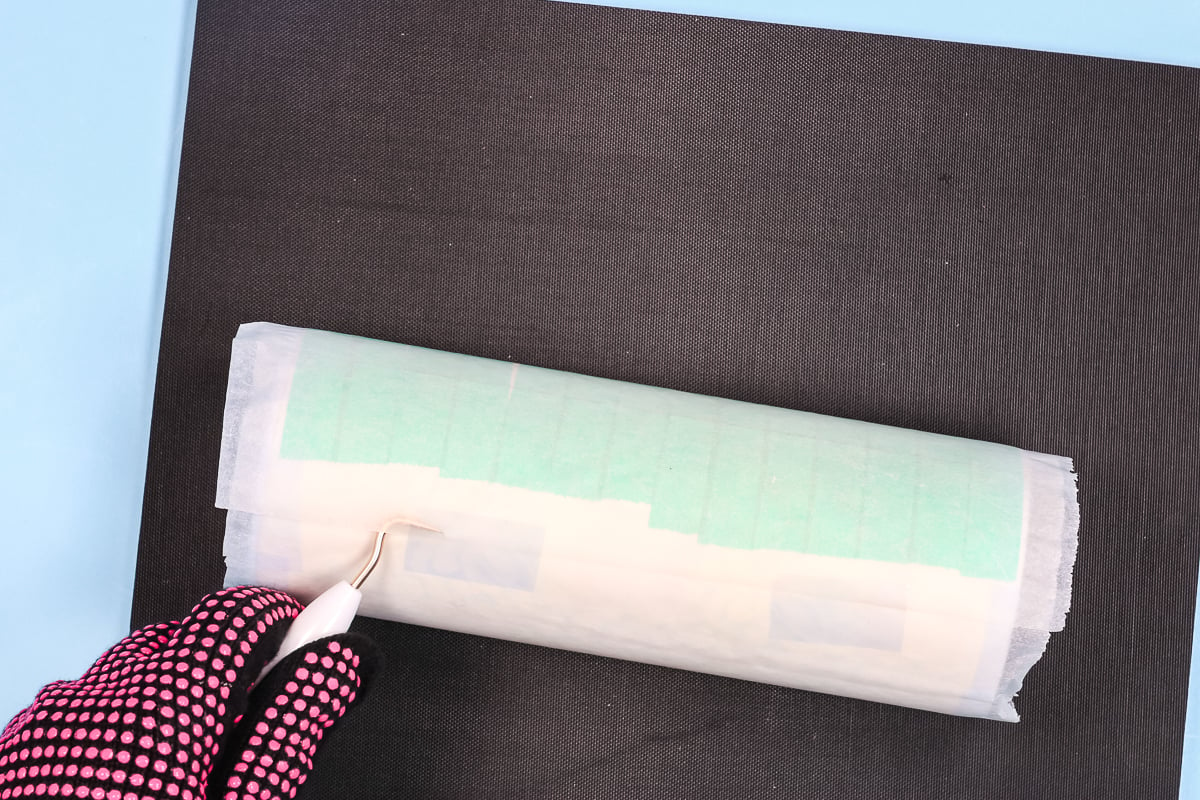
I like to remove the protective paper and sublimation print while it is still hot.
If you have a weeding hook, this is when I like to use it. Work the end of the weeding hook under the edge of the parchment paper and tape and peel it off. You do want to be gentle while doing this so you can reuse the paper and tape when possible.
I have found that the tape is easier to remove when it’s hot. Start at the top and the tape should peel off as one long layer since we overlapped it. If you can’t get it started, you can use the weeding hook again. As long as you just touch the paper, it won’t scratch the tumbler.
Continue to remove all of the tape and the sublimation print. When you’re done removing the tape and sublimation print you have a beautiful finished seamless sublimation tumbler!
Note – if you have any paper that has stuck to the tumbler itself you can run the tumbler under water to remove it.
Close-up of Different Seams
Let’s take a look at some of the seams I was able to get with this method. This first tumbler is when I tried to use those clamps by themselves. I didn’t pull the sublimation print at all, and it got crooked.
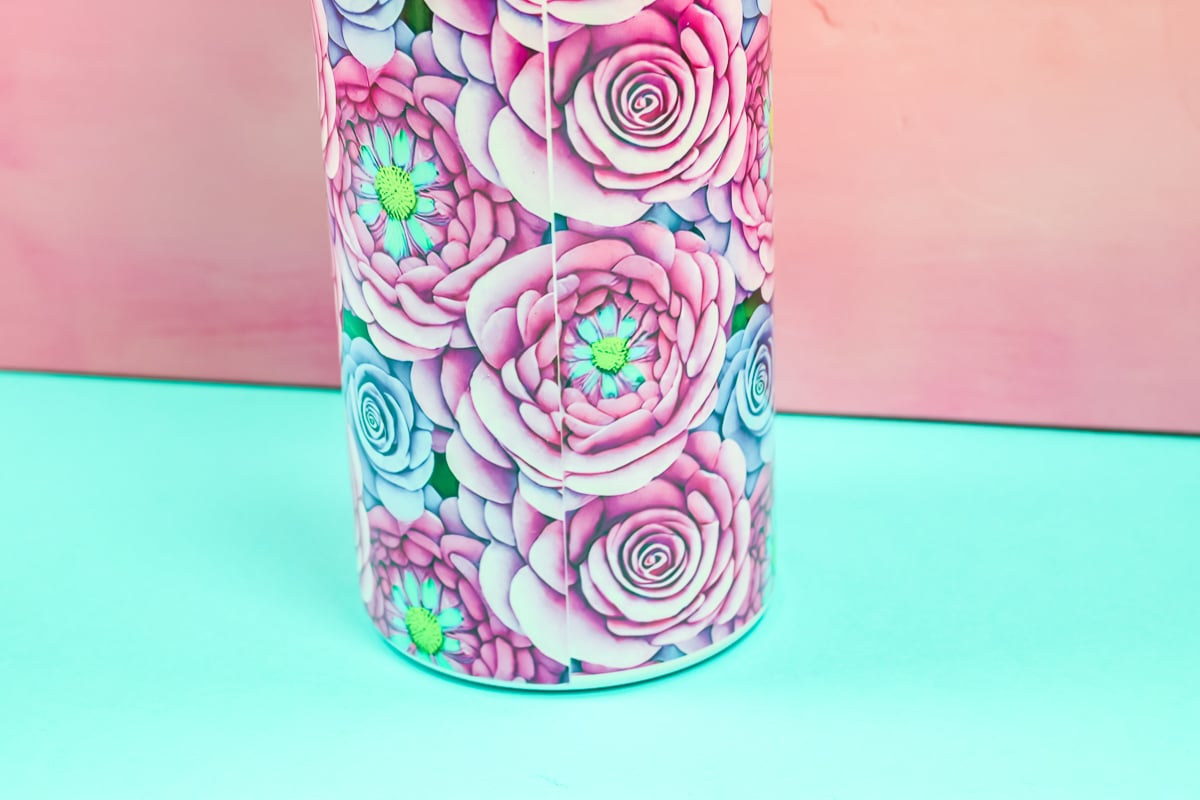
This is what happens when your print gets crooked. It’s not lining up at the bottom and at the top the gap is very wide.
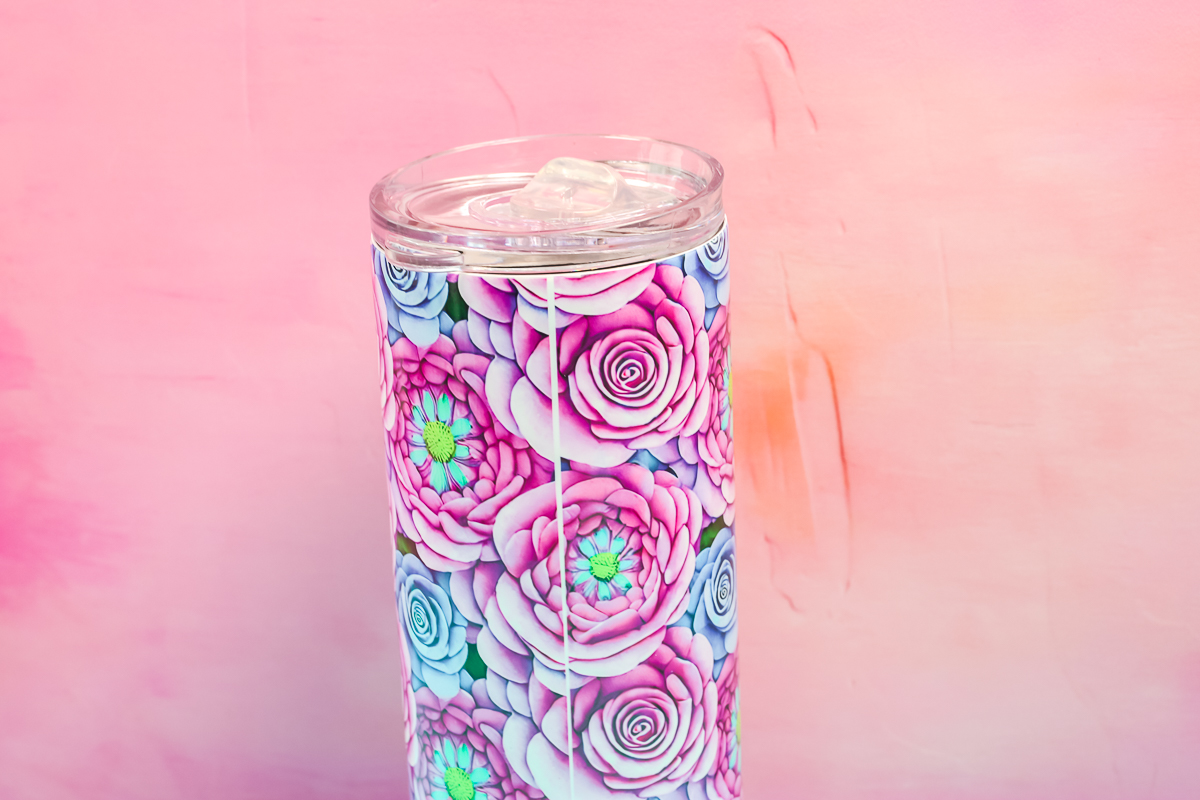
For the next one, I used the clamps and my hands but used shorter pieces of tape and didn’t pull the pieces together as aggressively as I did in the seamless option. It is better, but I could still see a line. I don’t want a line at all so I’m going to keep trying.
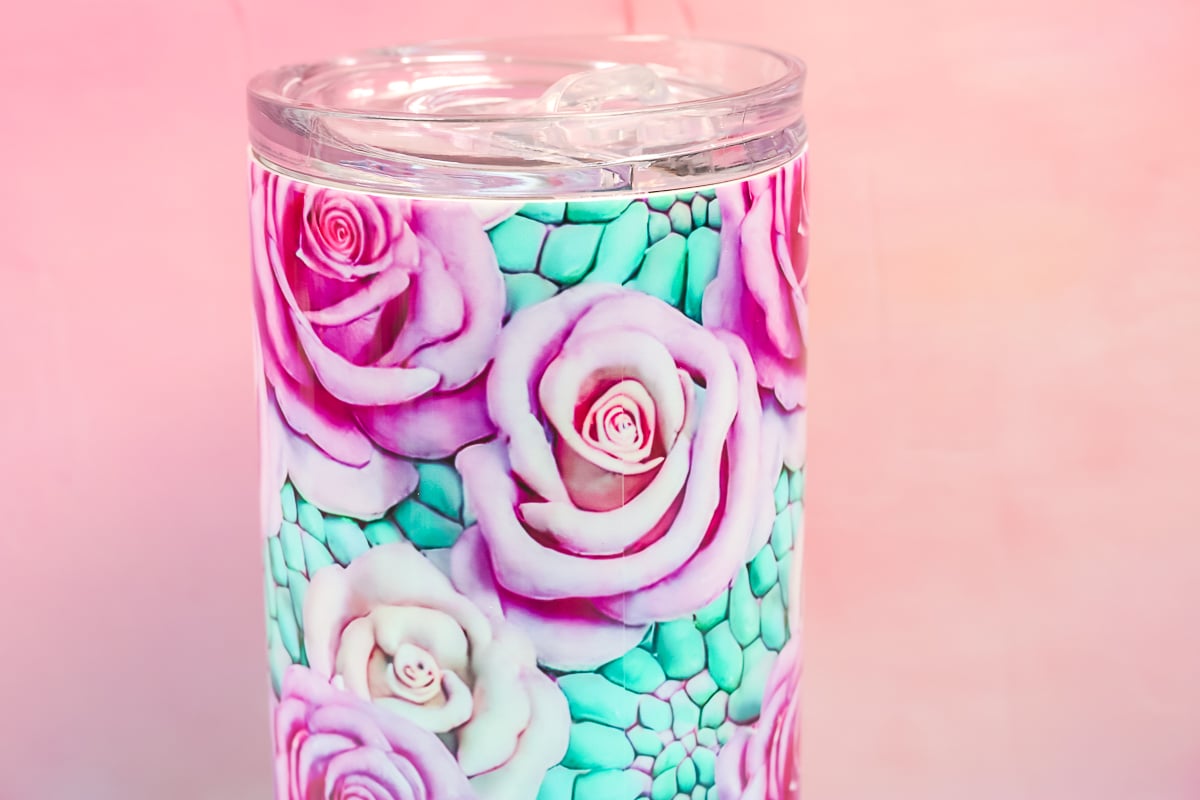
With the next tumbler, I got really close. You can barely see the seam at all.
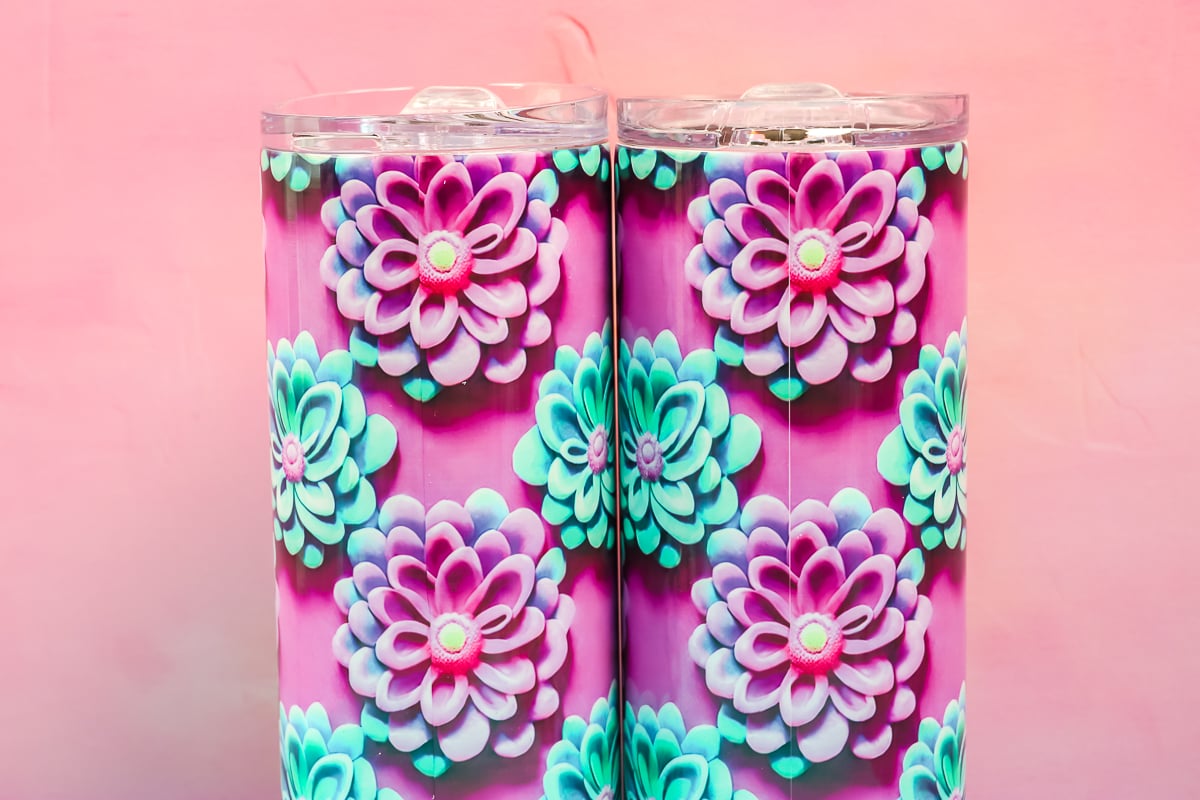
Finally, I moved on to the method I’m currently using, and I had huge success.
With this tumbler in particular, it’s hard for me to find the seam. I have to really look and really kind of zoom in here to find the seam at all. So, for me, this was definitely the clear winner.
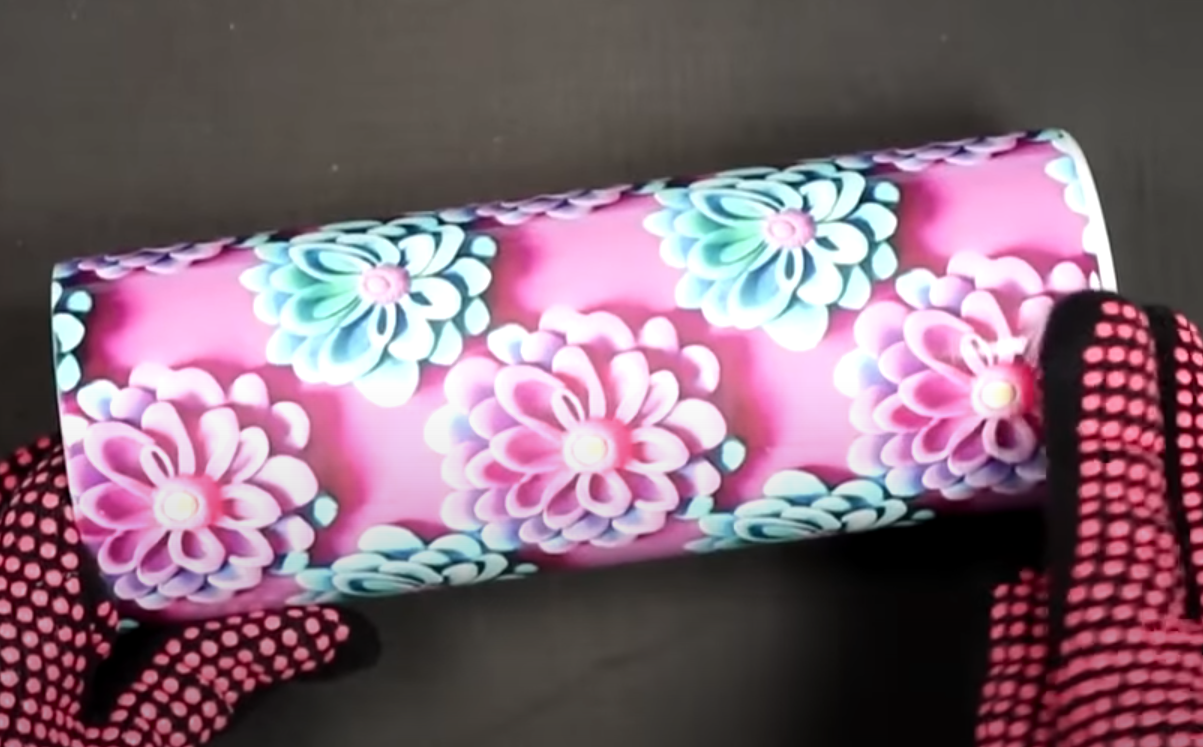
Now that you know the right way to make a sublimation tumbler with no seams you can make as many tumblers as you want. This is the best method I have found to get a tumbler with no seams.
How to Minimize Seams on a Tumbler
If you’re still struggling with seams or don’t want to use a seamless design, let’s look at other sublimation tumbler tips and tricks. If you have a pattern that is not seamless and you still want a full wrap design, you can print it and just wrap it around the tumbler.
Because the design isn’t made to line up seamlessly, you’ll definitely see the seam like the tumbler below.
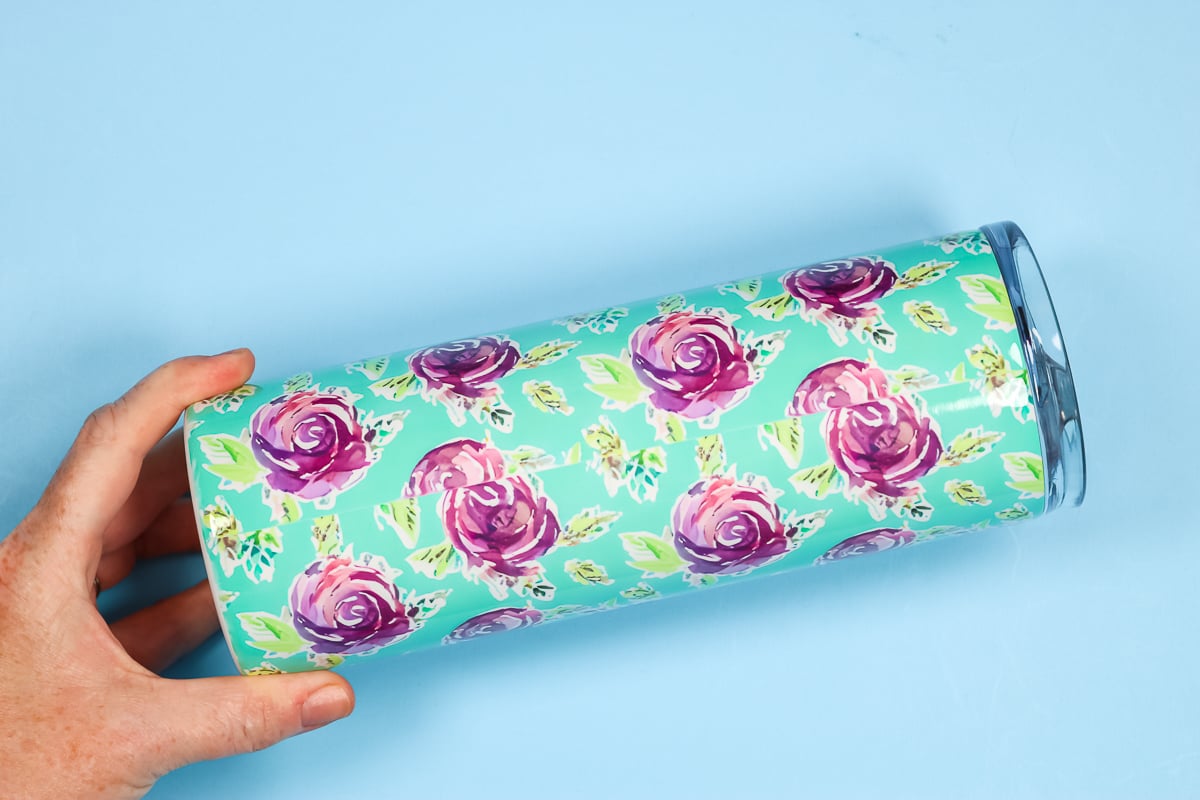
This is one of the easiest full-wrap tumblers to make. Make sure your sublimation print is large enough to wrap around the sublimation tumbler and using heat-resistant tape, tape it into place.
When you’re using a full wrap like this you do need to be careful where the sublimation print overlaps. The seam can get very dark when the ink from the second layer seeps through the first layer. This can make the seam more noticeable. If you’re having a problem with that, I have a hack that can help.
How to Prevent Darker Seams
I am using a full-sized sheet of sublimation paper. I didn’t even measure my tumbler, I just printed a full sheet and then used my tumbler to determine how big the print should be.
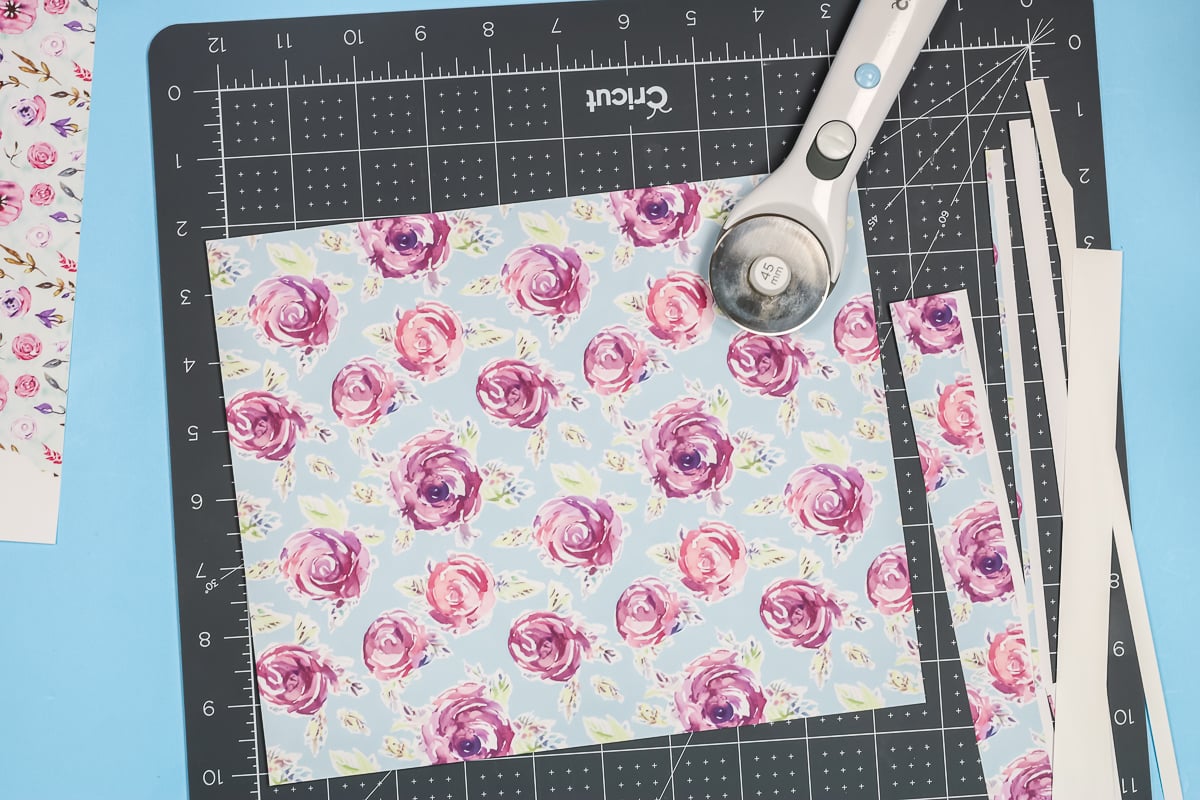
Trim the sublimation print so it has about a quarter of an inch of extra length to make sure it wraps all the way around the tumbler.
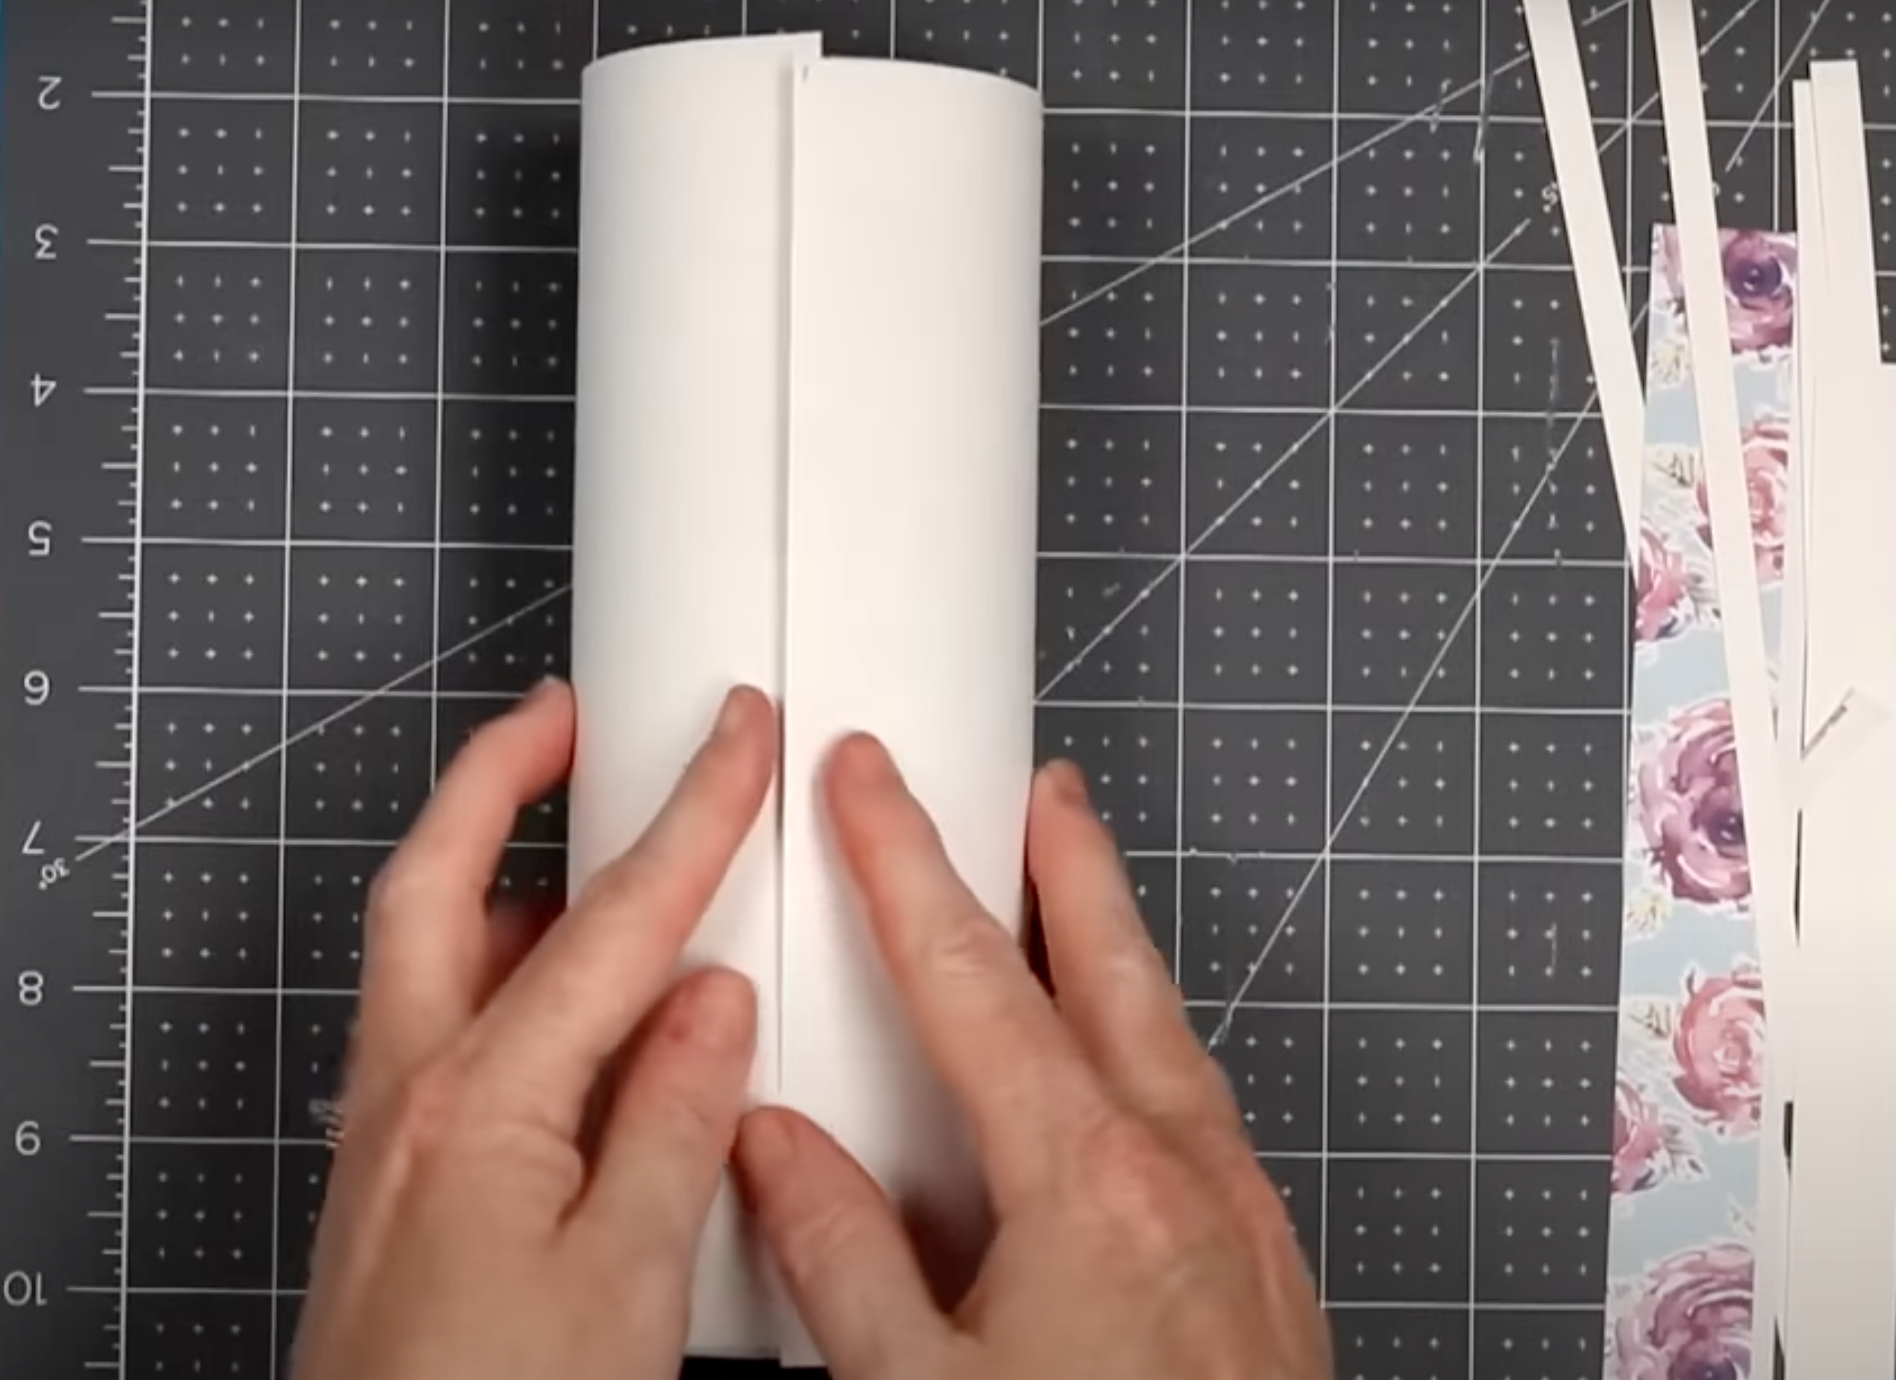
To prevent the overlap from making the seam dark, flip the sublimation print over and then add a long piece of heat-resistant tape to the back of the print.
I like to make sure the piece of tape is longer than the short end of the sublimation print so it covers the entire length. I want to line the tape up exactly with the edge of the sublimation print and add tape all the way down.
Use the scraper to burnish the tape down well. If the tape isn’t exactly on the edge, use your paper trimmer or rotary cutter to trim off any excess.
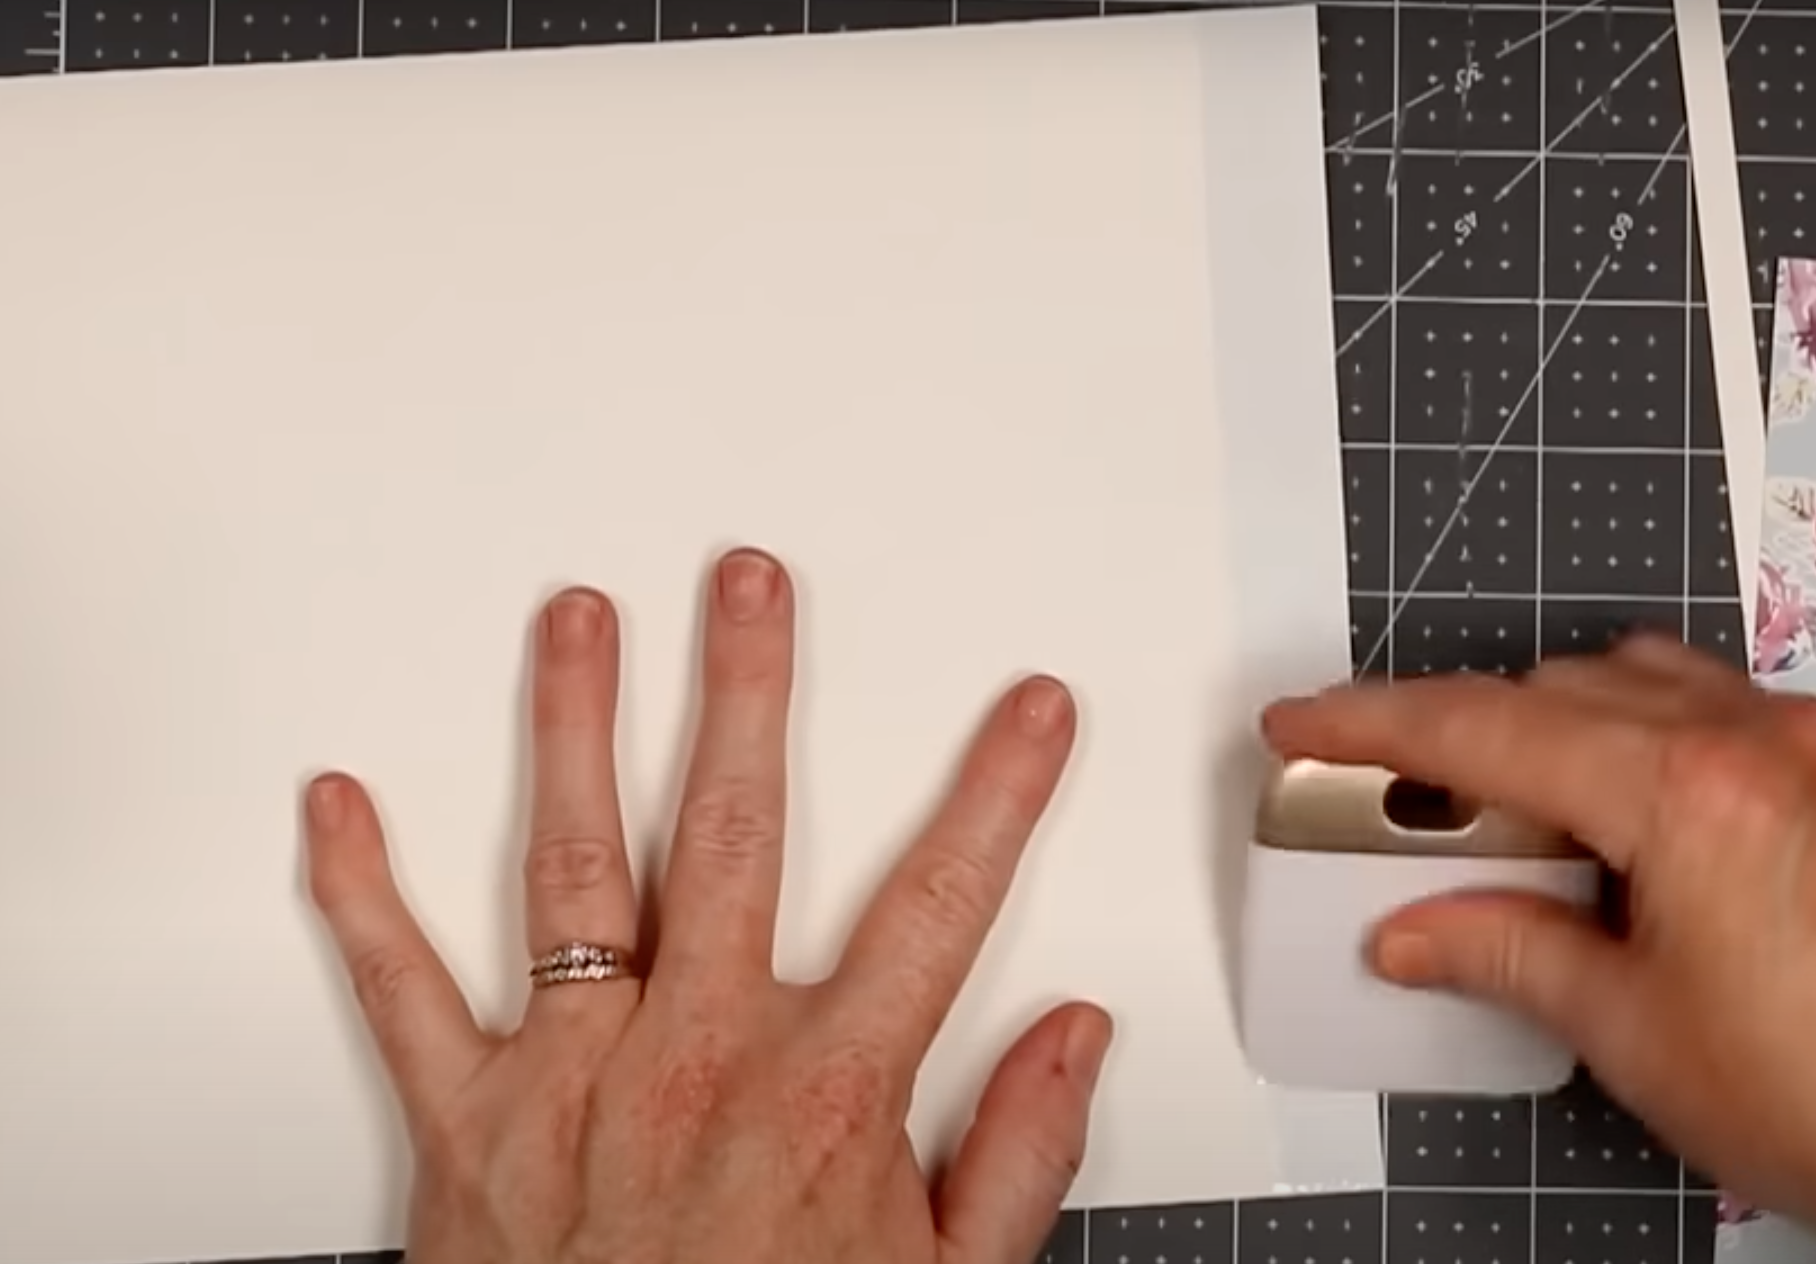
Now I have a straight edge that has tape on the back. What this does is prevents any extra sublimation ink from bleeding through the overlapped area. This will keep the seam from being darker than the rest of the sublimation print.
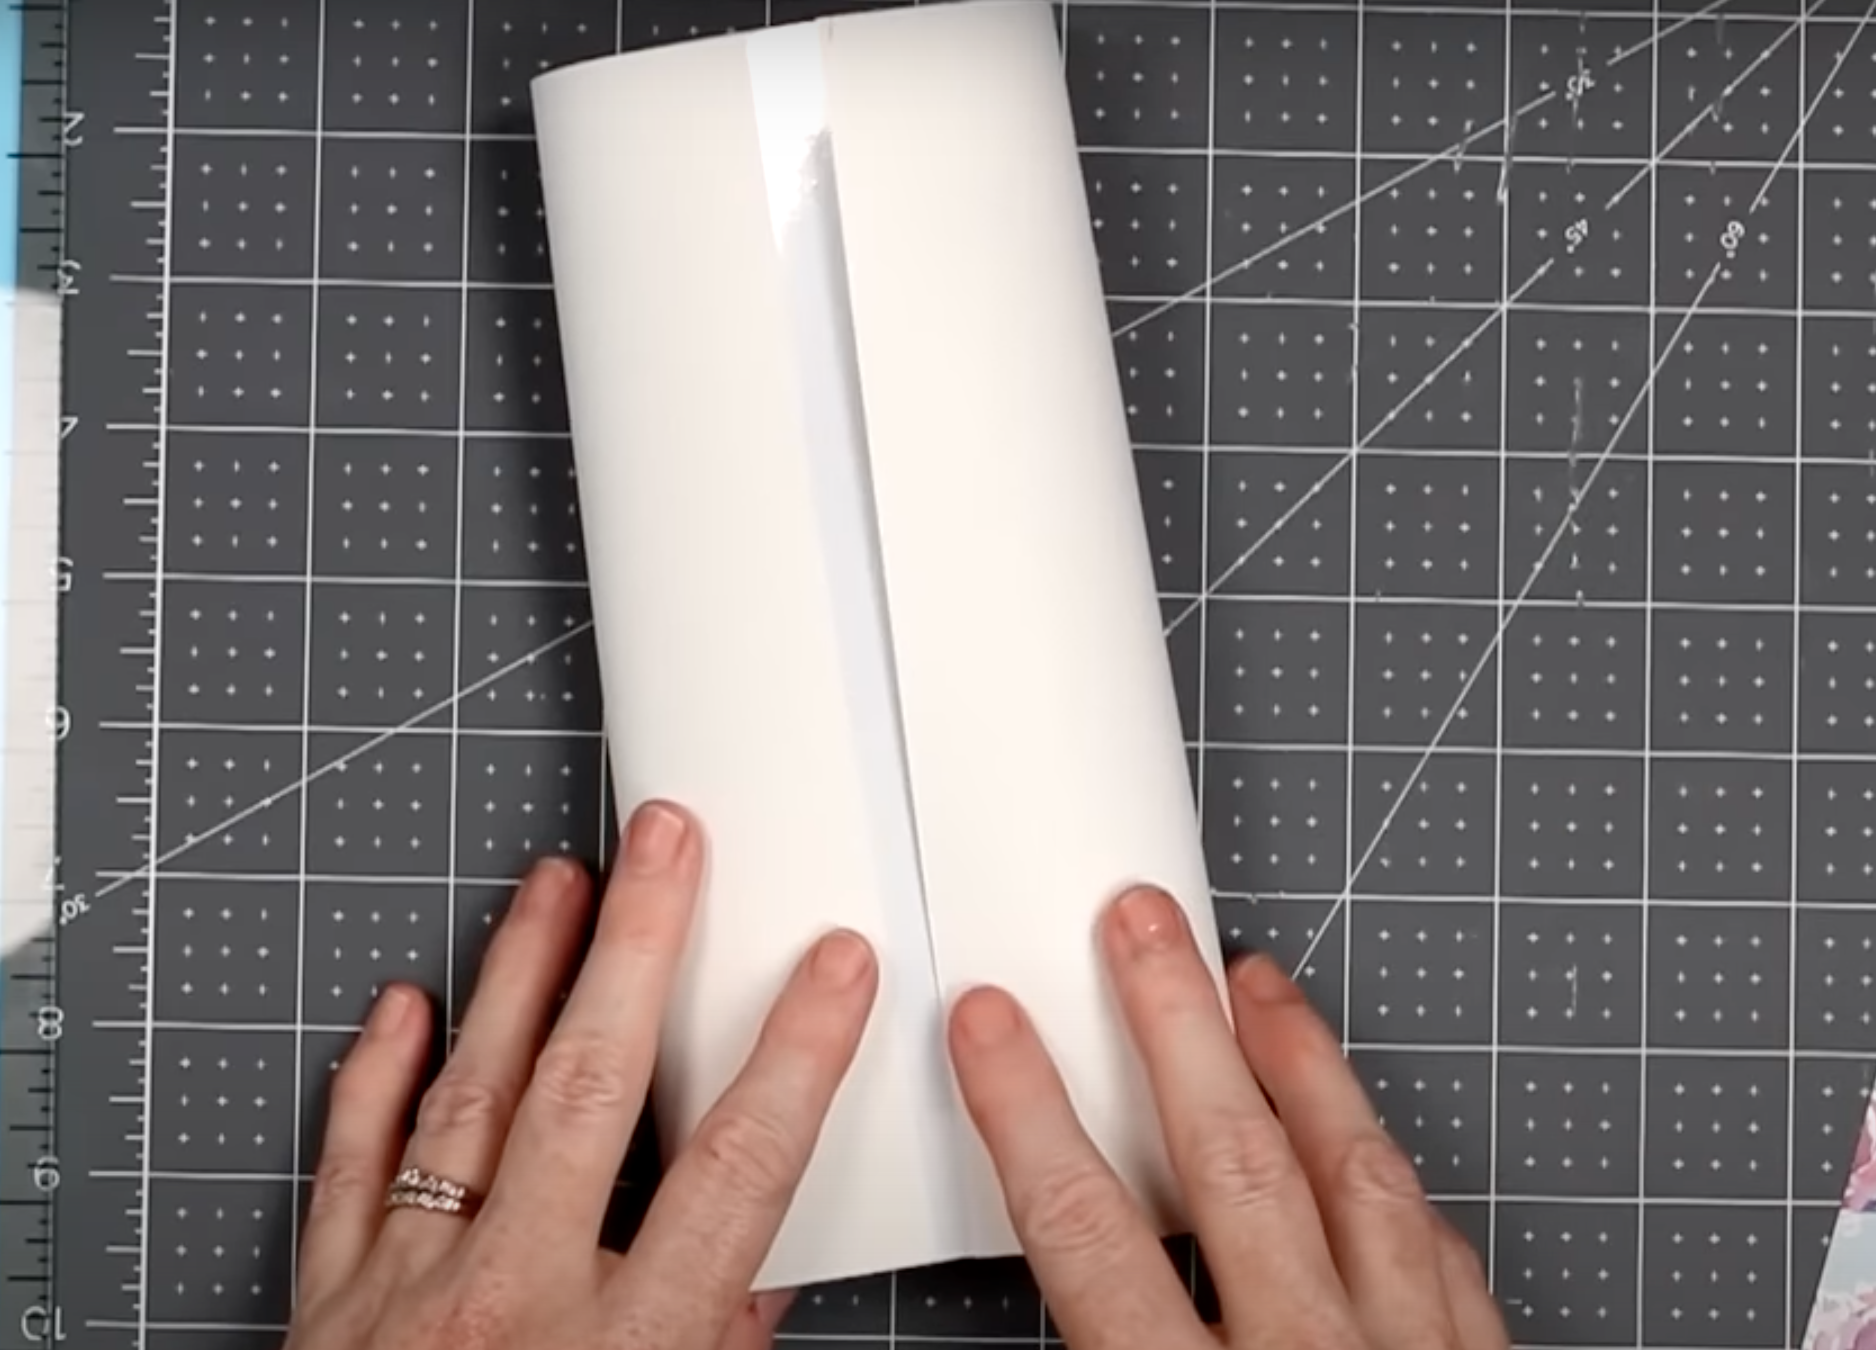
You can see that where the paper overlaps there is tape. Because the heat-resistant tape acts as a barrier, you need to make sure that portion is against the tumbler and the other side overlaps it.
The rest of the process is the same as the seamless tumbler. You don’t need to use as much tape but you want to make sure the whole seam is taped down and the top and bottom are taped securely to prevent any ghosting.
You can use the clamps if you find them helpful. I don’t find them useful unless I’m doing the seamless design.
How to Create a Full Wrap Without a Seamless Design
If you want to make a full wrap tumbler without a seam and without having to match up the edges of the paper exactly, I have another option for you. Using the free Canva template I shared in the supply list you can create a full wrap template without having to worry about seam lines.
How to Use Canva to Create Seamless Sublimation Prints
To create your seamless sublimation tumbler print, click on the template and it will prompt you to make a copy that you can customize as you want.
Make sure whatever pattern you want to use is uploaded into your Canva and then you can drag and drop it into the template area that looks like a cloud.
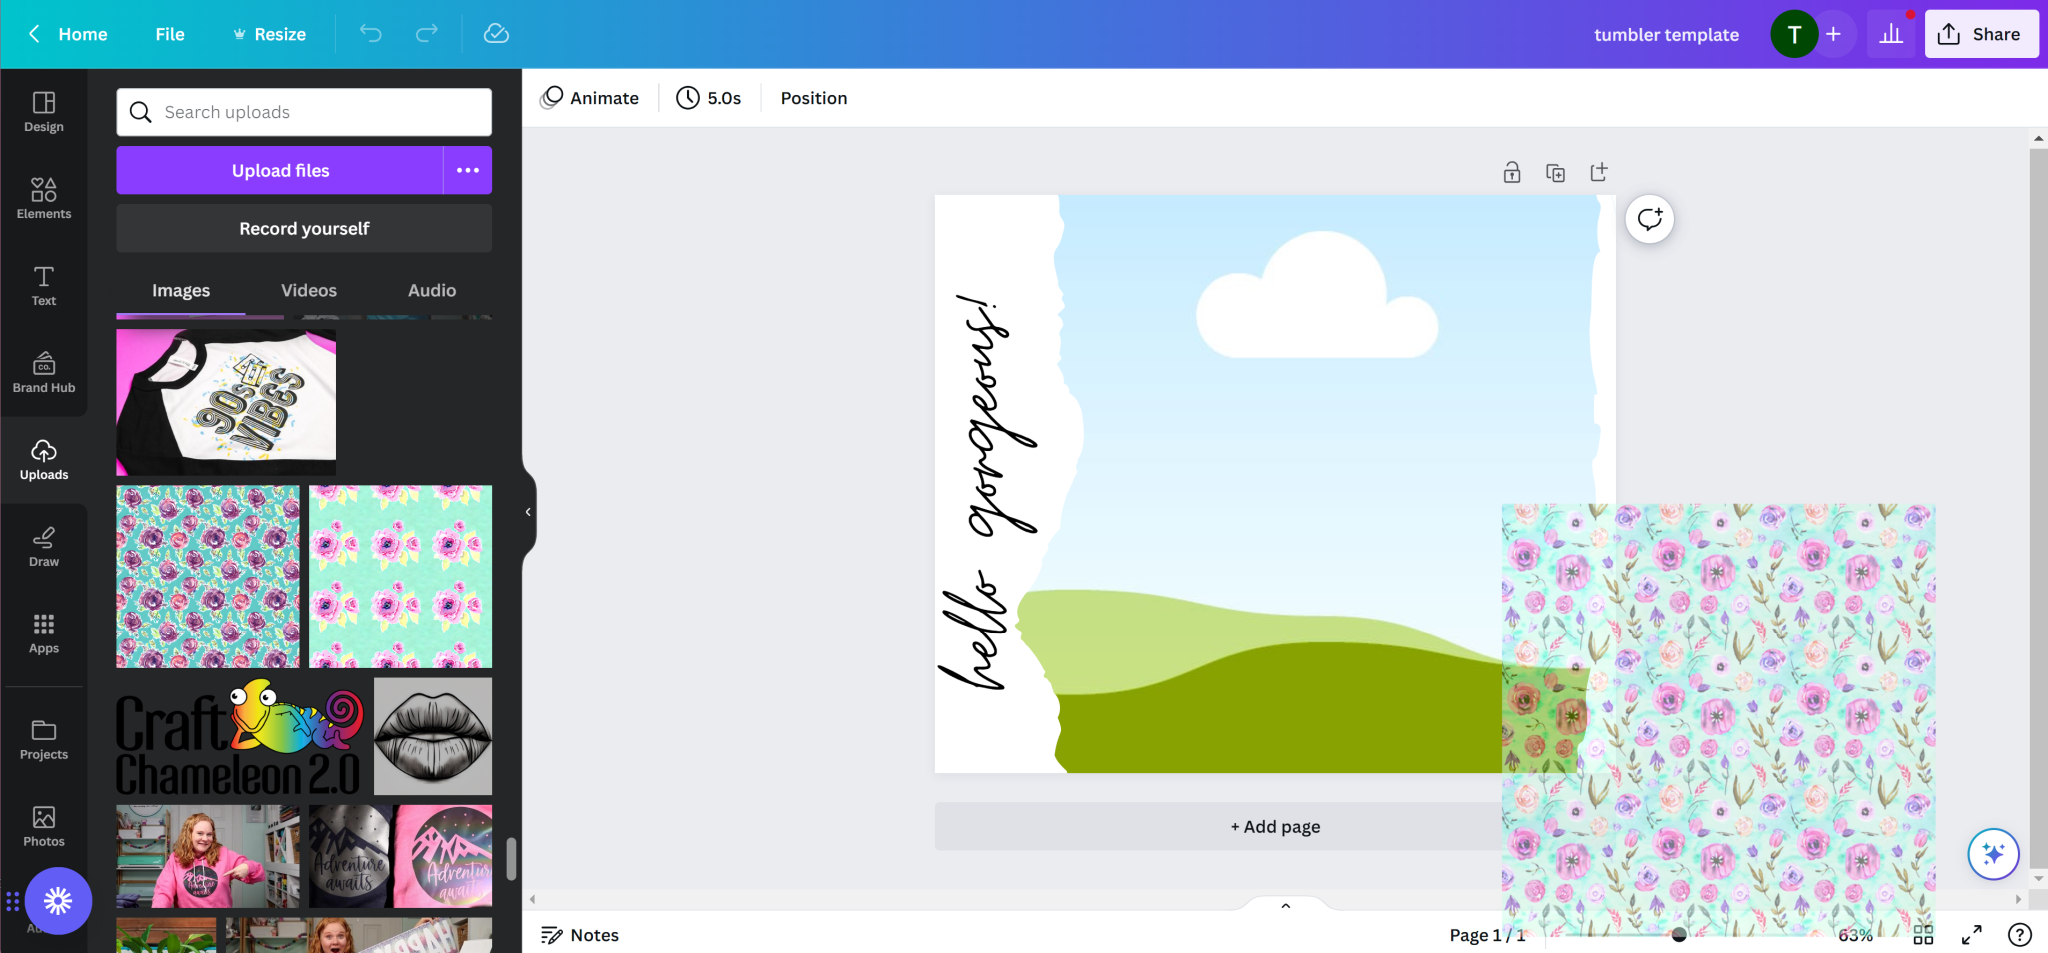
You can use any design you like. You’ll notice I’ve added ripped edges to both sides of the pattern area. The ripped edges will give you a cool look on your tumbler without having a seam.
The words down the side can also be customized. You can change the words, font, size, even the color if you want.
Once you have everything set up the way you want, download and then print it out on your subimation printer just as you normally would.
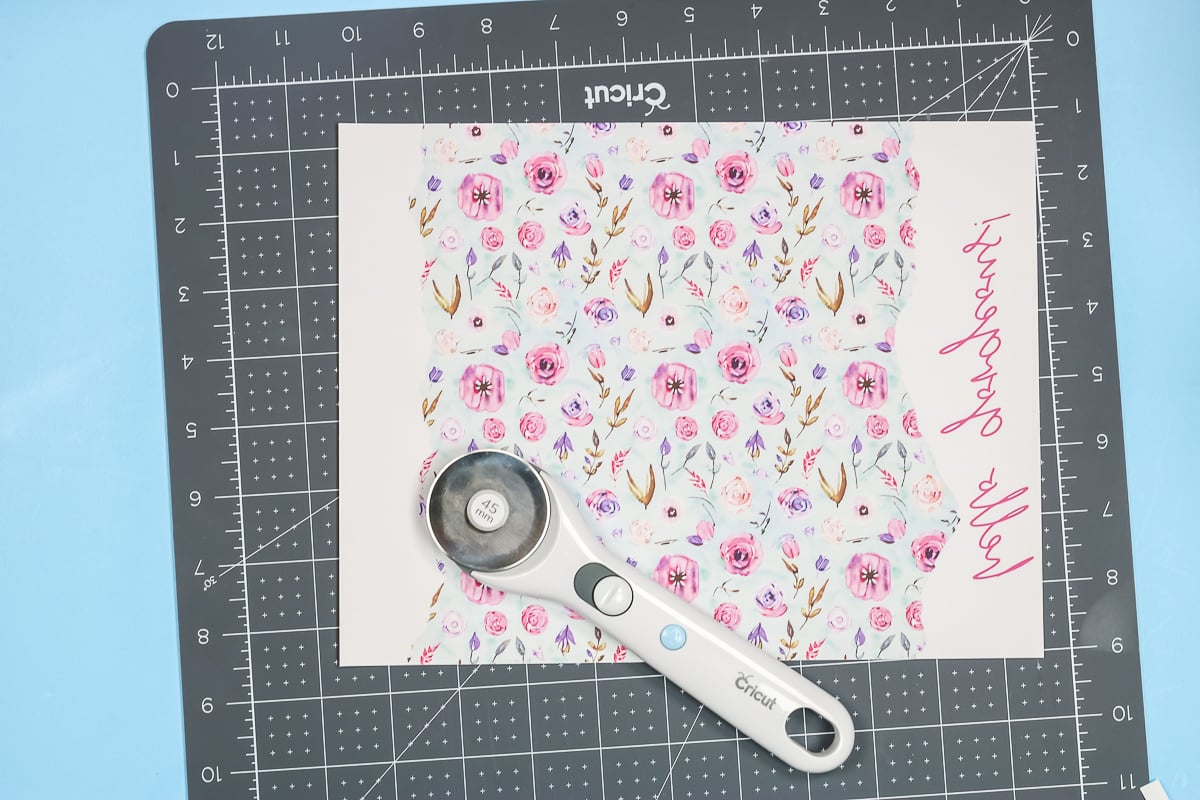
Preparing Sublimation Print
Once you have the image printed you will need to trim it. I trimmed both the top and bottom right where the sublimation ended because it’s the exact size for the PYD Life Tumblers.
To get the width the right size, I trimmed the white as close as I could to the top of the text. You don’t need to worry about trimming the other white end, that can just overlap over the top.
Applying Sublimation Print to Tumbler
You do need to make sure that the text is against the tumbler. If you tape the other end down first, your image will be messed up. The taping process is similar but you can just add small pieces of tape vertically. No need to worry about stretching the tape and closing the seam.
Make sure everything is tight while taping both the seam and ends.
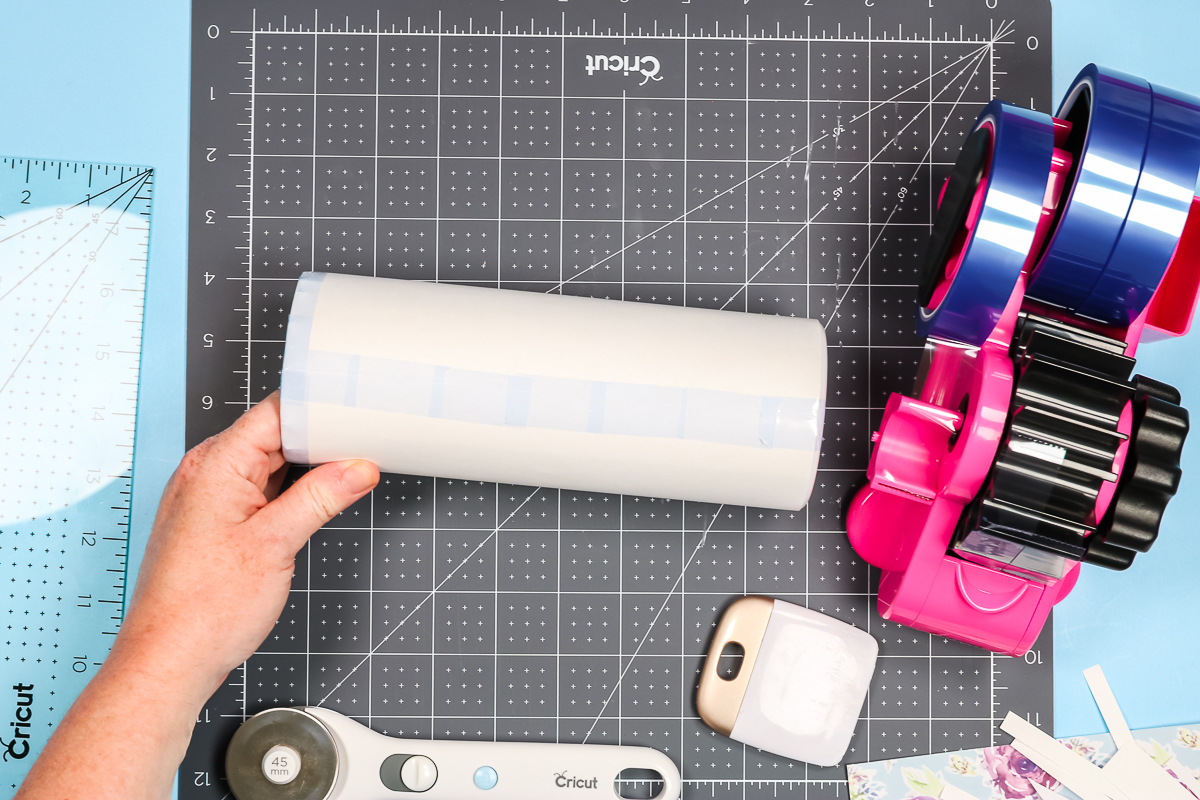
You want to burnish the tape down really well. I like to roll the ends on a firm surface to make sure the print is tight everywhere to prevent any ghosting or fading.
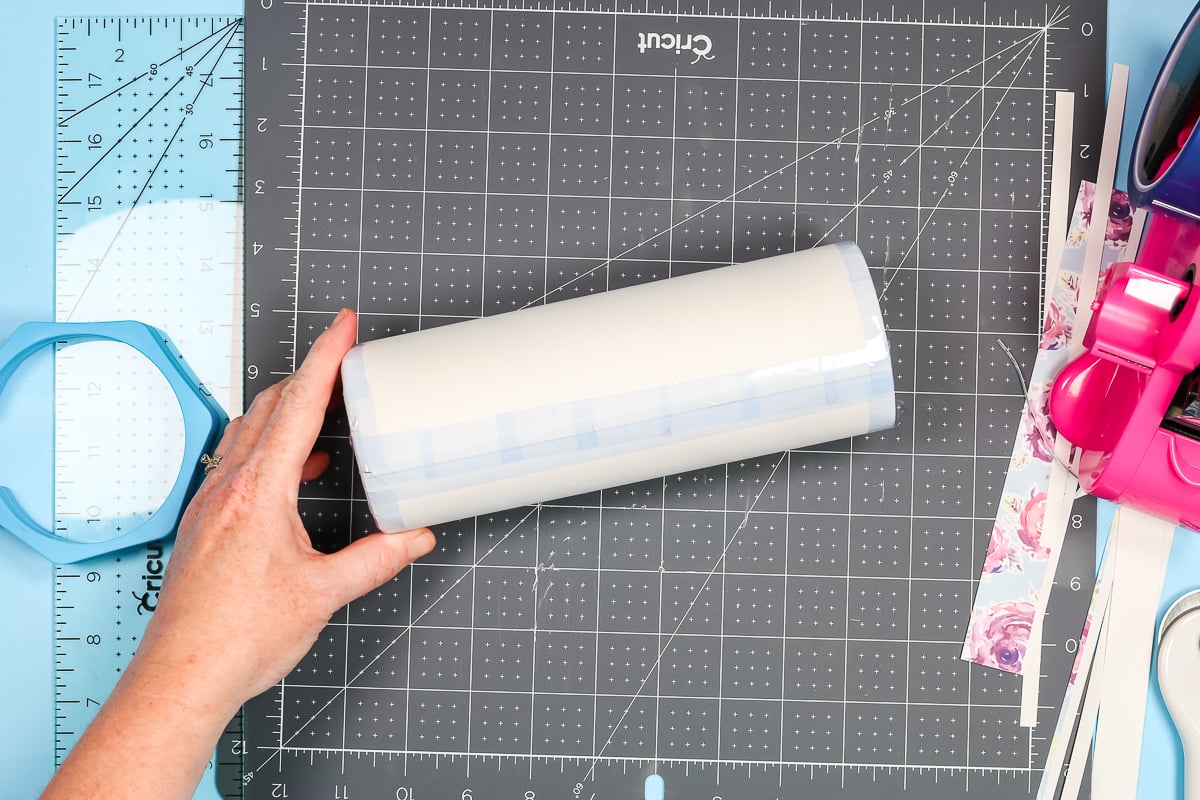
The pressing process is the same as other sublimation tumblers. Make sure you place the tumbler in the tumbler press with the seam facing the side.
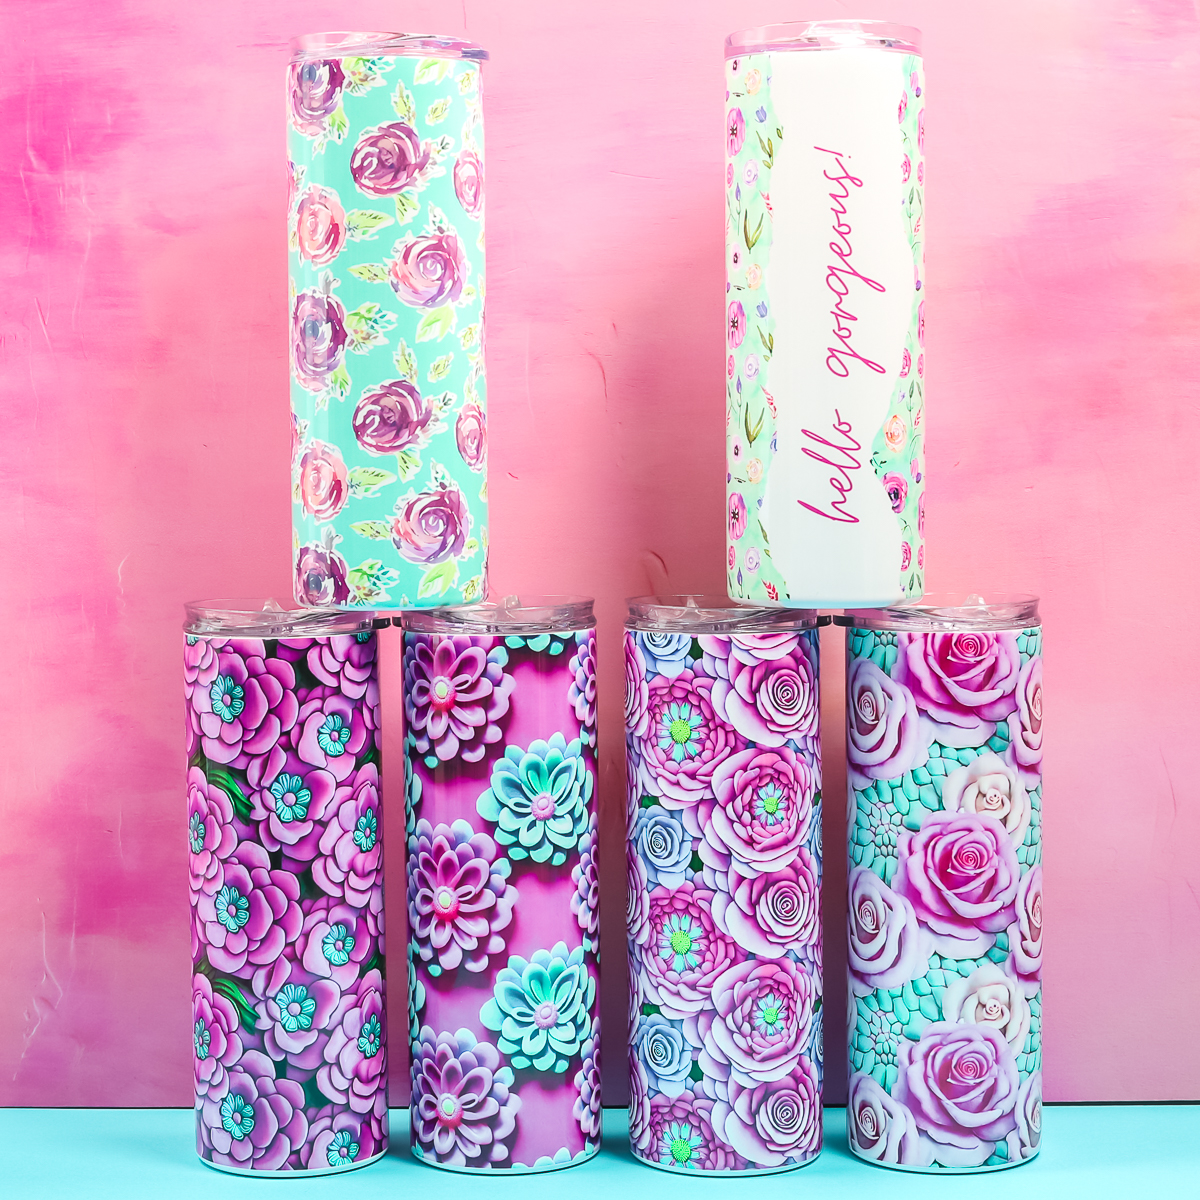
Here is the tumbler with the ripped-edge design. You can see it looks amazing and we didn’t have to stress about the seam. It almost looks seamless, right?
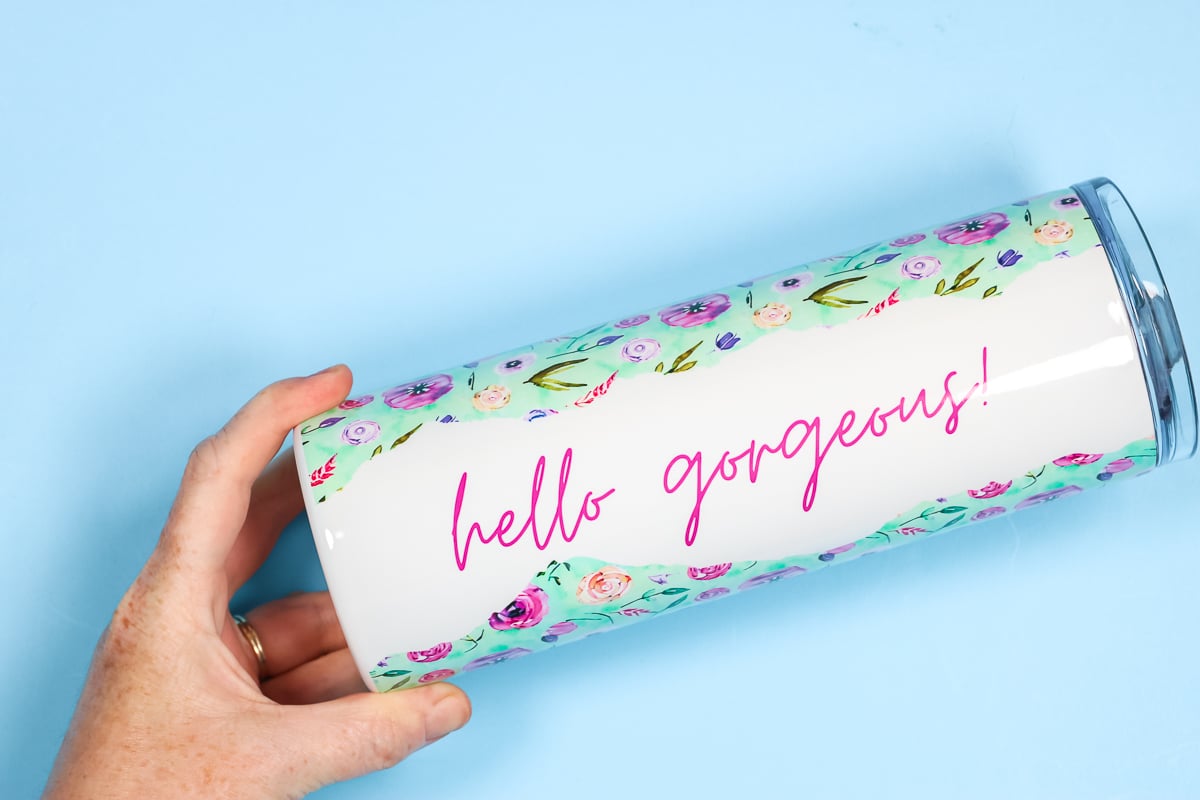
I really like the ripped-edge look. If you don’t like that look, you could do the same thing with a straight edge, scalloped edge, zigzag edge, or whatever you want. As long as it looks intentional, it’ll be perfect.
I like the open area with the text white so I don’t have to worry about the seam at all. You could choose a band of a different color if you want.
Final Thoughts on How to Sublimate Tumblers with No Seams
Now that you know how to sublimate tumblers with no seams, all that’s left to do is decide which one you’re going to make first. If you’ve never made a sublimation tumbler before, you may want to start with one of the options that require less work.
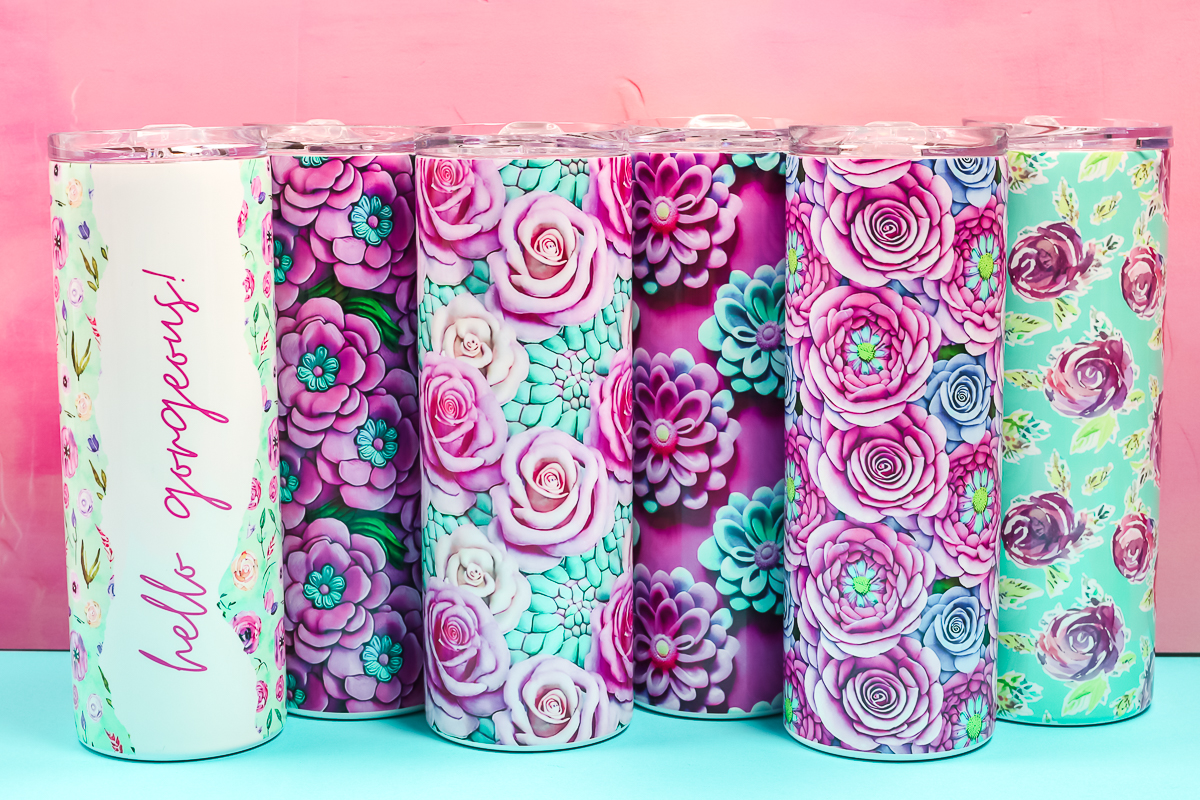
These are my favorite ways to make 20-ounce skinny tumblers with no seams. I’ve gotten the best results following these steps. The design you choose to use will determine what type of tumbler you’re able to make. If you follow my tips and tricks, you’ll be making tumblers with no seams as close to perfect as possible.
I hope I’ve answered all of the questions you have about making tumblers with no seams. If you have any additional questions, leave them in the comments and I’ll be happy to answer them for you.
5 More Sublimation Crafts
Do you love these tumblers with no seams, and are looking for more sublimation crafts? Then check out the projects below!
- How to Make a Custom Sublimation Stanley Name Plate
- How to Make Sublimation Coasters the Right Way
- How to Use Hydro Sublimation Sheets on Tapered Tumblers
- How to Make Full Wrap Sublimation Mugs
- The Best Way to Make Sublimation Water Bottles


Hey Angie! This was a great video. I unfortunately have an issue with imprints of the overlapping tape down the seam in my design. I don’t think I can attach a picture in the comments. Just wondering if you have ever encountered this?
Here are things I think might have been a factor and I’m wondering what your thoughts are.
1. I didn’t use stretchy tape, just regular heat safe tape.
2. I used a glow in the dark tumbler
3 Could my heat press be too tight?
4. I did have little remnants of paper stuck to my tumbler after pressing, especially down the seam…
Any thoughts are appreciated, thank you!
Please email us at Angie@thecountrychiccottage.net so we can receive photos and help you troubleshoot this.