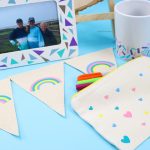
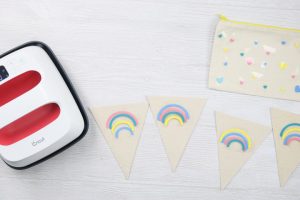
Heart Zipper Pouch and Rainbow Banner
Use those scrap pieces to cut as many shapes as possible with our ideas for nesting your Cricut cuts.
Equipment
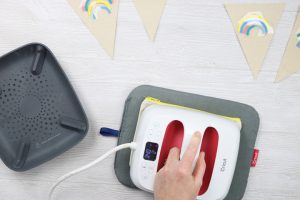
- Cricut EasyPress
- Hot Glue and a Glue Gun
What You Will Need
- Cricut Iron-on various scrap pieces
- Banner flags
- Zipper pouch
- Cut file info below
- Twine
Instructions
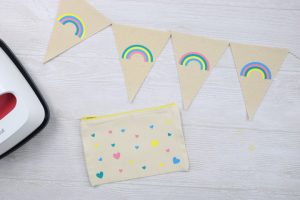
- My top things to cut from small scraps are rainbows and then various shapes like hearts, circles, hexagons, and more. All of these easily nest in Cricut Design Space and you can cut them while you are cutting your project. Then just throw the random shapes in a zip topped bag to use however you want. Rainbows are great because they nest well and you can do non-traditional colors as well. For instance, in the pieces shown, I was able to nest four various rainbows and 5 hearts on each tiny scrap piece.
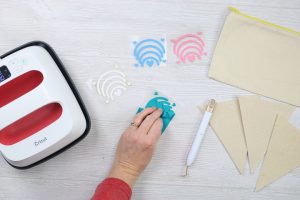
- You can find the cut file in my Cricut Design Space profile and scrolling to "Cricut Ideas Using Scraps". You will need to move the pieces once you hit "make it" to nest the way I have shown. If you didn't know, you can move the pieces on the mat before cutting. You can also use SnapMat for locating cuts when working with multiple scrap pieces. Be sure to mirror your cut and place the shiny side down on the mat for iron-on. Then weed away all excess material.
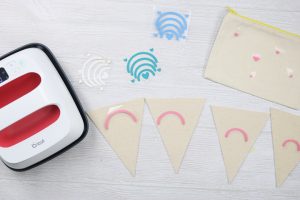
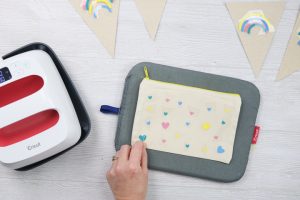
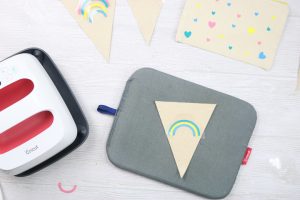
- Then cut the carrier sheet so you have individual pieces and place them on your projects. I am randomly adding the hearts to the pouch. For the rainbows, I made each of them in a different order to optimize my material as I was dealing with small scraps.
- You can then start pressing your designs. I did the zipper pouch with the hearts first. Be sure to look up the time and temperature for the iron-on you are using on the Cricut Heat Guide. Then you can follow our guide here for the application.
- Once you press and allow to cool, remove the carrier sheets from each heart to complete your zipper pouch.
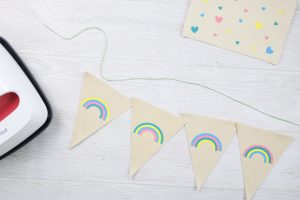
- The rainbow is a bit more complicated as the various colors touch. You will need to press each one separately. I find that starting with the largest is the best.
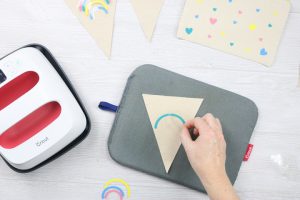
- Just press each of the layers from the front for the recommended time, allow to cool and remove the carrier sheet. Add the next layer and cover BOTH layers with carrier sheets before repeating the pressing process. You want to repeat this for all of the rainbow layers. Once you have them all in place, remove all of the carrier sheets and turn over to press from the back.
- Repeat the same process for as many flags as you want in your banner.
- Turn over the flags and attach each to twine using a bit of hot glue at the top.
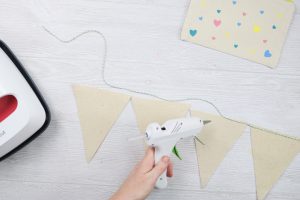
- Then your banner is complete and ready for your home's decor.