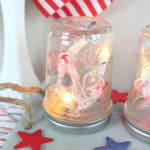
Patriotic Mason Jar Centerpiece
Make this mason jar centerpieces with lights for your next gathering. It will add the perfect ambiance and soft lighting for your get together!
What You Will Need
- String Lights in red, white, and blue
- Mason jars half pint size
- Thin wood stars
- Wood tabletop sign
- Krylon ColorMaster cherry red, pewter gray
- Krylon Shimmer Metallic Spray Paint blue
- Krazy Glue craft gel
- Table saw
- Drill
- Drill bit
- Hammer and nails
- Rope or twine
- Ruler
- Pencil
Instructions
- Take the tabletop sign and make it more “tray” like. I measured and marked halfway through the leg. Run the leg through the saw to cut it in half so you have 2 legs.
- Add the second leg to the other side of the wood sign to create a tray using a hammer and nails.
- Measure and mark for handle holes on both ends.
- Drill holes for the rope on each end to create handles.
- Place the mason jar bands on the wood sign to visually space them out until they are centered. Mark the approximate middle of each one with a pencil.
- Use a large drill bit and a sanding tool to make large holes where each mark sits.
- Paint the entire tray with the Pewter Gray paint. After it dries completely, add the twine handles by knotting the twine on the bottom of the tray.
- Attach the bands of the mason jar lids around each hole with Krazy Glue.
- Paint your stars with your red and blue paints while you're waiting for your gray paint to dry. Once they're dry, use Krazy Glue to add them to your tray.
- Screw your mason jars into the jar bands.
- Flip the project over and shove the fairy lights into the jars, dividing them evenly between the jars. Your project is complete!
- Flip the completed project over and plug in your lights to enjoy your new centerpiece.